🎭 The Harold Fry LX Practicals & Atmos Bible
Theatre Royal Haymarket
Welcome to the Harold Fry LX Practicals & Atmos Bible.
This documentation is designed as a central reference for all lighting practicals, atmospherics, and systems used on the production at the Theatre Royal Haymarket. It is intended for use by the LX department, touring crew, cover technicians, and anyone needing quick access to technical information during the run.
If you are veiwing this as a PDF a live interactive version can be found at hfdocs.cyranolx.com/
📖 Purpose of This Bible
This site provides:
- 🔦 Detailed breakdowns of all practicals (wired & wireless)
- 🌫️ Full documentation of atmospherics systems (haze & smoke)
- ⚡ Information on power, control, and patching
- 🛠️ Maintenance and troubleshooting guidance
- 📸 Visual references including wiring, positioning, and setup
The goal is to ensure:
- Consistency across the run
- Easy handovers between crew
- Quick troubleshooting during shows
- Clear understanding of system layout
🎭 About the Production
The Unlikely Pilgrimage of Harold Fry is a stage adaptation of the novel by Rachel Joyce.
The production blends naturalistic storytelling with subtle technical elements, including practical lighting fixtures and atmospheric effects, to support the emotional journey of the piece.
Venue: Theatre Royal Haymarket
Location: London, West End
👥 Creative & Technical Team
- Lighting Designer (LD): Paulie Constable
- Associate Lighting Designer: Hector Murray
- Lead Production Electrician: Rich Mence
- Head of Lighting & Video: Gulika Nagpal
- Deputy Head of Lighting & Video: Yigit Ince
- Lighting & Video Assistant: Suzie Harrison
(Update these as needed — worth keeping accurate for handovers and future reference.)
🧭 How to Use This Site
🔎 Finding Information
- Use the sidebar navigation to browse by system:
- Practicals → Wired / Wireless
- Atmospherics → Haze / Smoke
- Use search (top right) to quickly locate specific items
🔦 Practicals Pages Include:
- Overview
- Channels & Addressing
- Power & Control
- Wiring (with diagram, Power Flow, DMX)
- Images (Key Views tabs + collapsible gallery)
- Usage
- Troubleshooting
🌫️ Atmospherics Pages Include:
- Machine type and location
- Channels & Addressing
- Fluid type and maintenance
- Safety considerations
- Troubleshooting
⚠️ Important Notes
Warning
Always follow venue safety procedures and isolate power before working on any practical.
Tip
If something is unclear or incorrect, update this documentation — it is intended to be a living document.
🧾 Structure Overview
- 🔦 Practicals Bible → All practical fixtures
- 🌫️ Atmospherics Bible → All haze & smoke systems
- ⚡ LX System → Power on/off, rig plan, and infrastructure WIP
- 🎥 Video → Power on/off, issues, and notes WIP
🚀 Final Note
This system works best when it is: - Kept up to date - Used daily - Shared across the team
If something changes on the show — contact (a.yigit.ince@gmail.com).
Site built & maintained by Yigit Ince
Practicals
🔦 The Practicals Bible
Harold Fry has a selection of wired and wirless LX practicals. The following pages will cover all of the required information about each practical.
All Practicals:
Wired
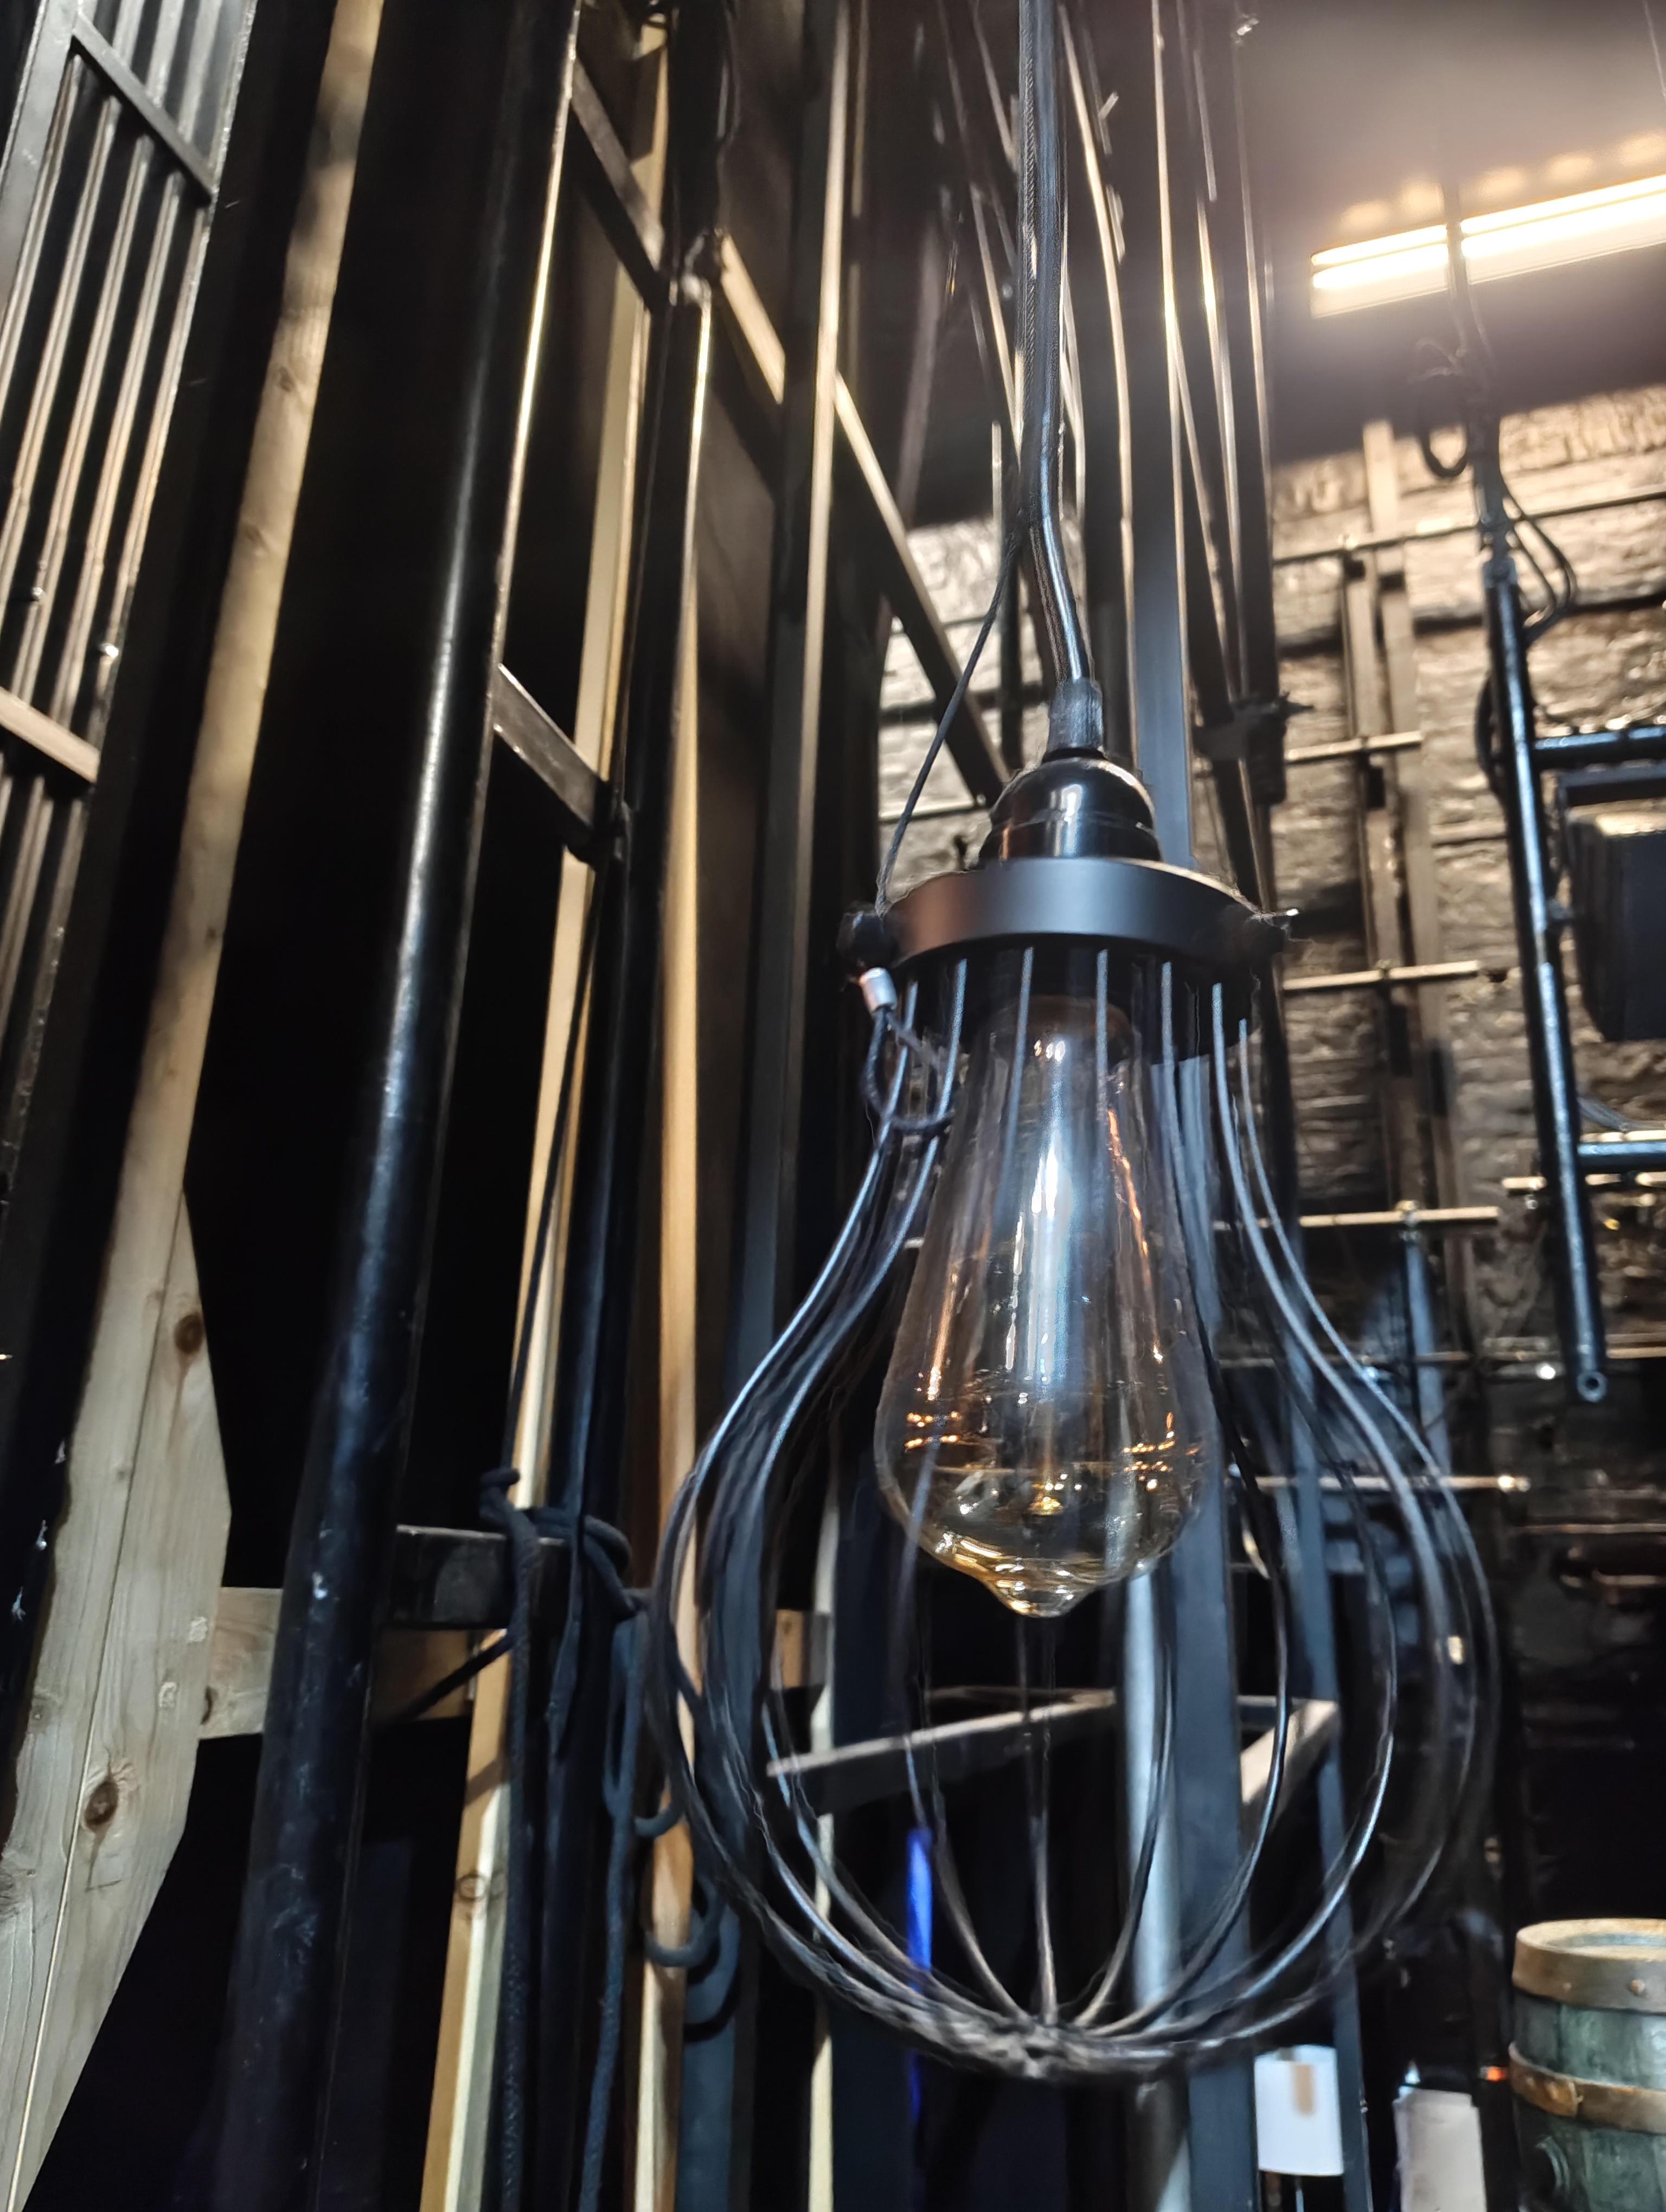
Hanging Lightbulbs (Squirrel Cage Bulbs)
Overview
There are a total of 13 hanging light bulbs in squirrel cages. 5 of these are on a US flybar which live-flies throughout the show. The remaining 8 are at various heights above the SR/SL bay entrances.
Channels & Addressing
- Channels: 721–735
- Fixture Type: Dimmer
- Universe/Address: 1/106–121
- Addresses by channel:
- Ch 721: 1/112
- Ch 722: 1/113
- Ch 723: 1/114
- Ch 724: 1/115
- Ch 725: 1/116
- Ch 726: 1/117
- Ch 727: 1/118
- Ch 728: 1/119
- Ch 729: 1/120
- Ch 730: 1/121
- Ch 731: 1/110
- Ch 732: 1/109
- Ch 733: 1/108
- Ch 734: 1/107
- Ch 735: 1/106
- Parameters: Intensity only (single channel dimmer)
Power & Control
| Power Source | House Dimmer |
| Cable Type | 15 amp TRS (Soccapex + breakout box for the US bar) |
Images
Key Views
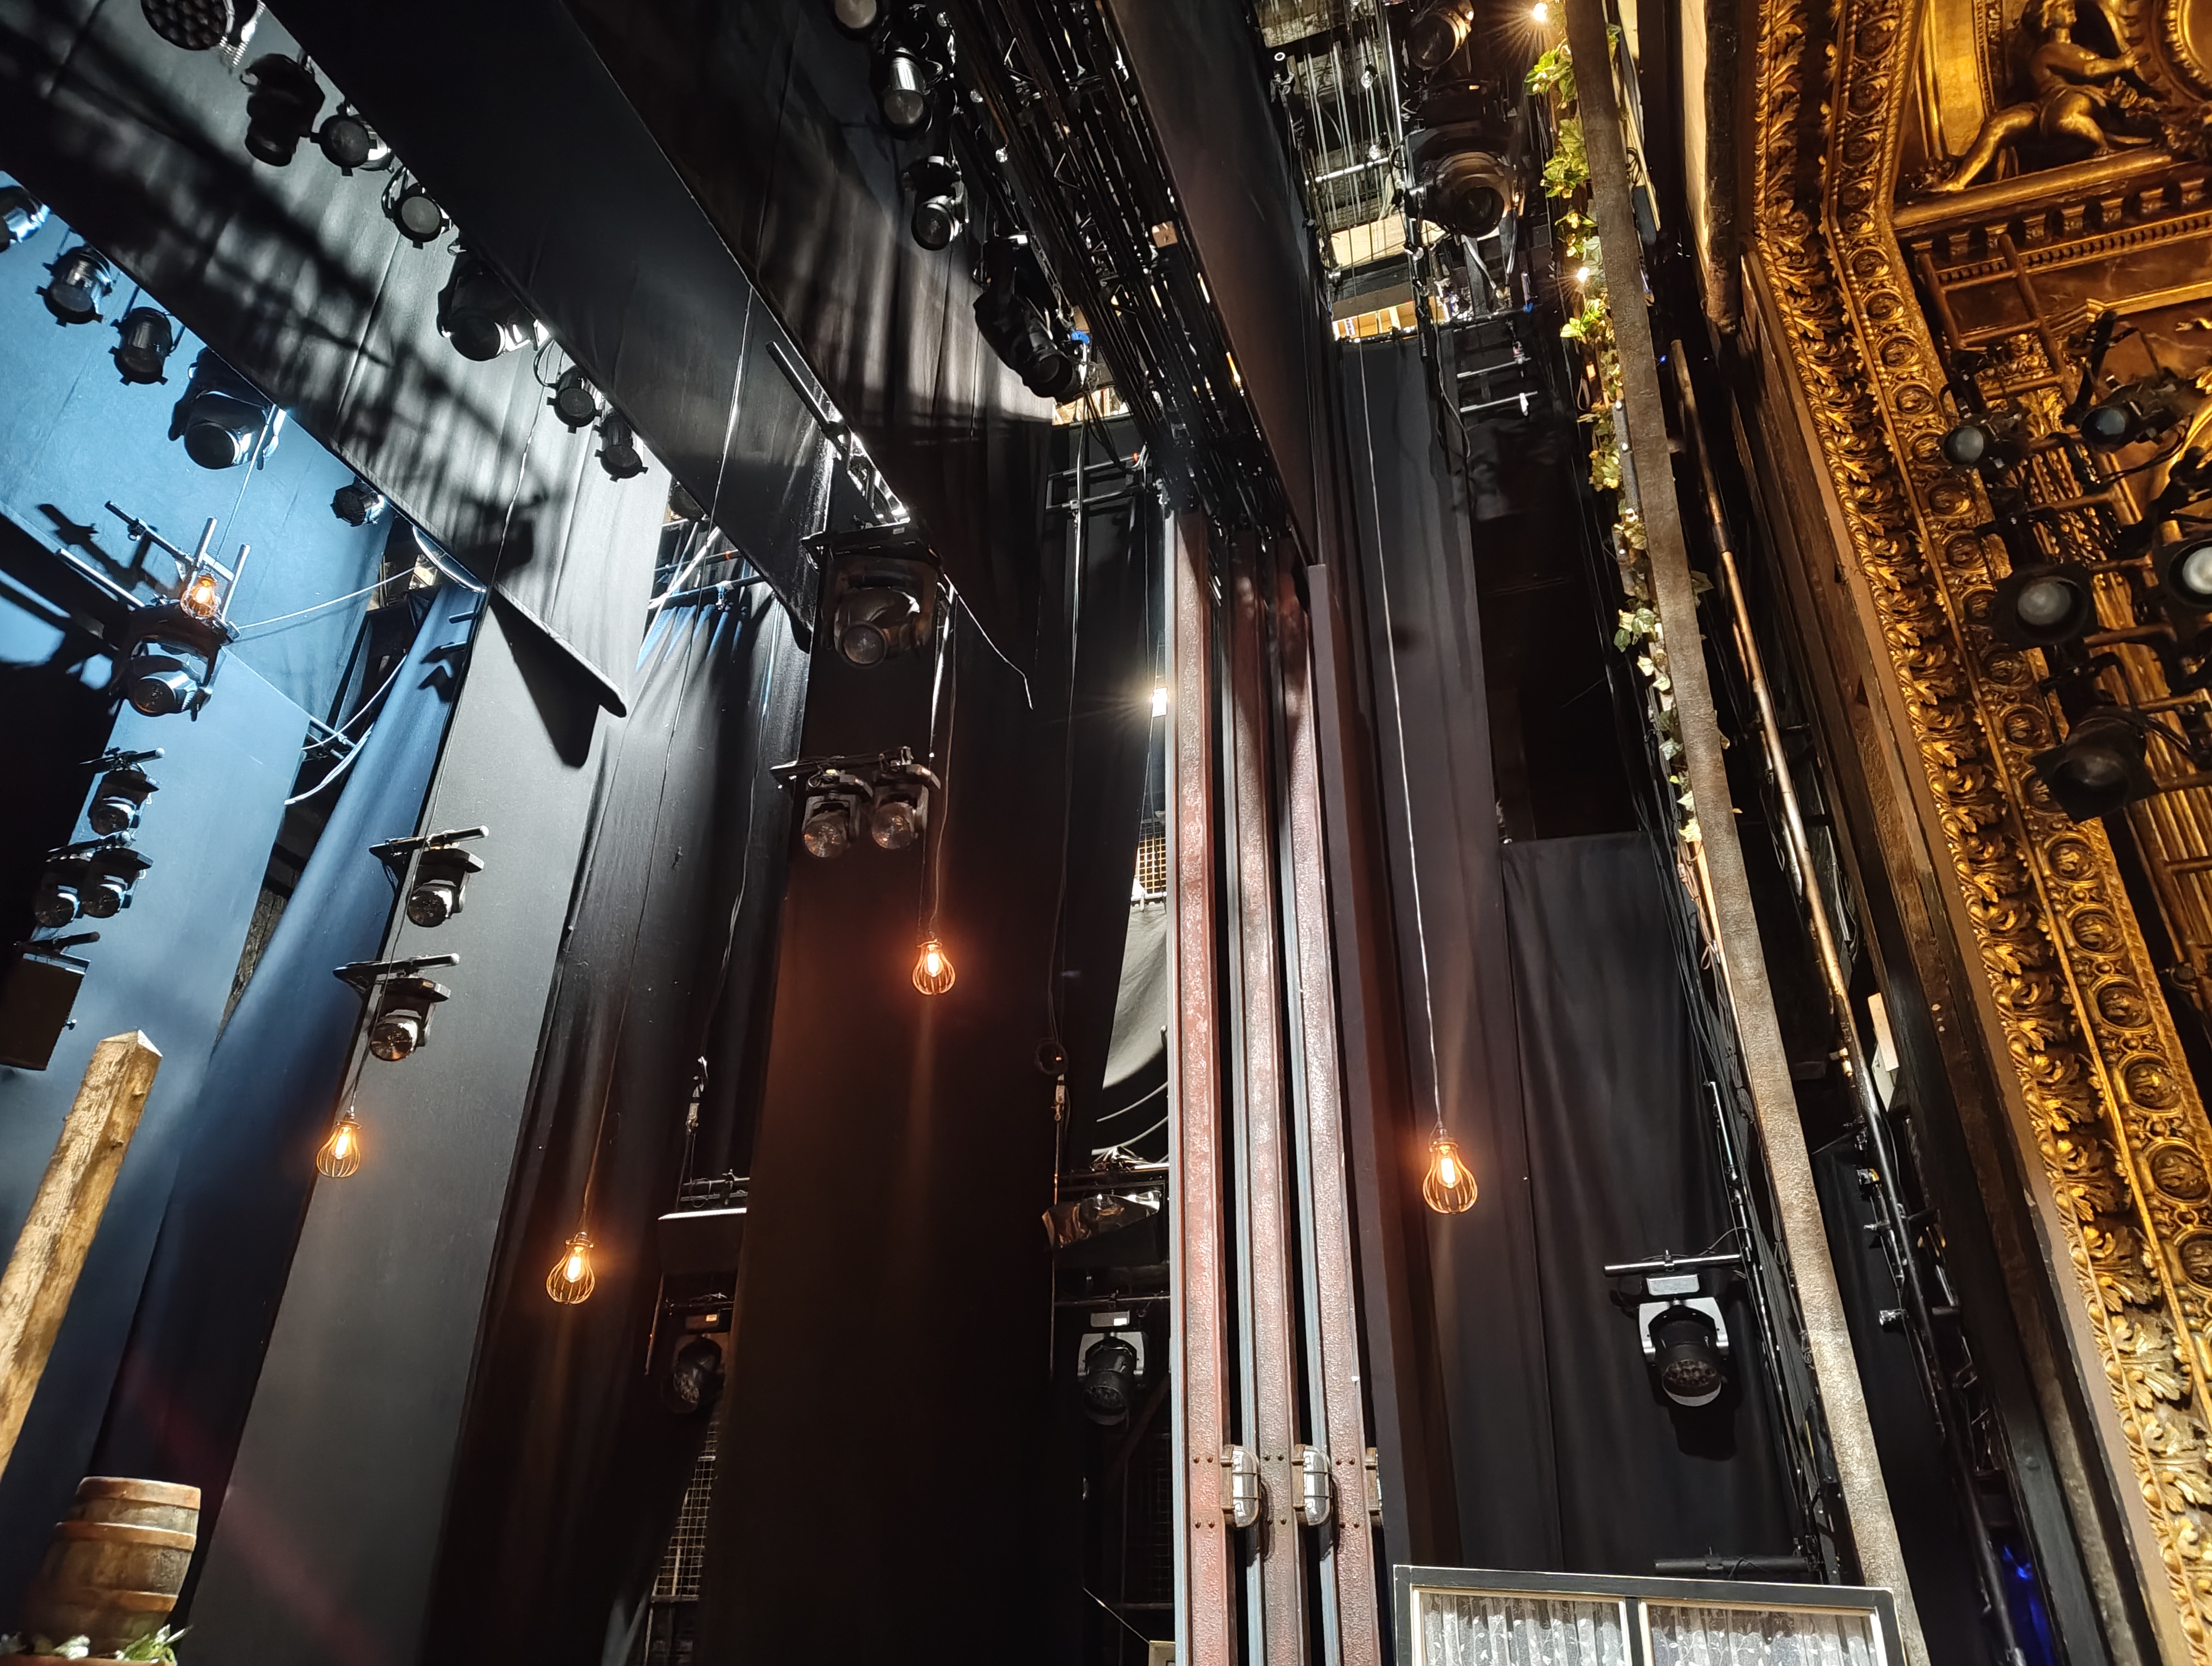
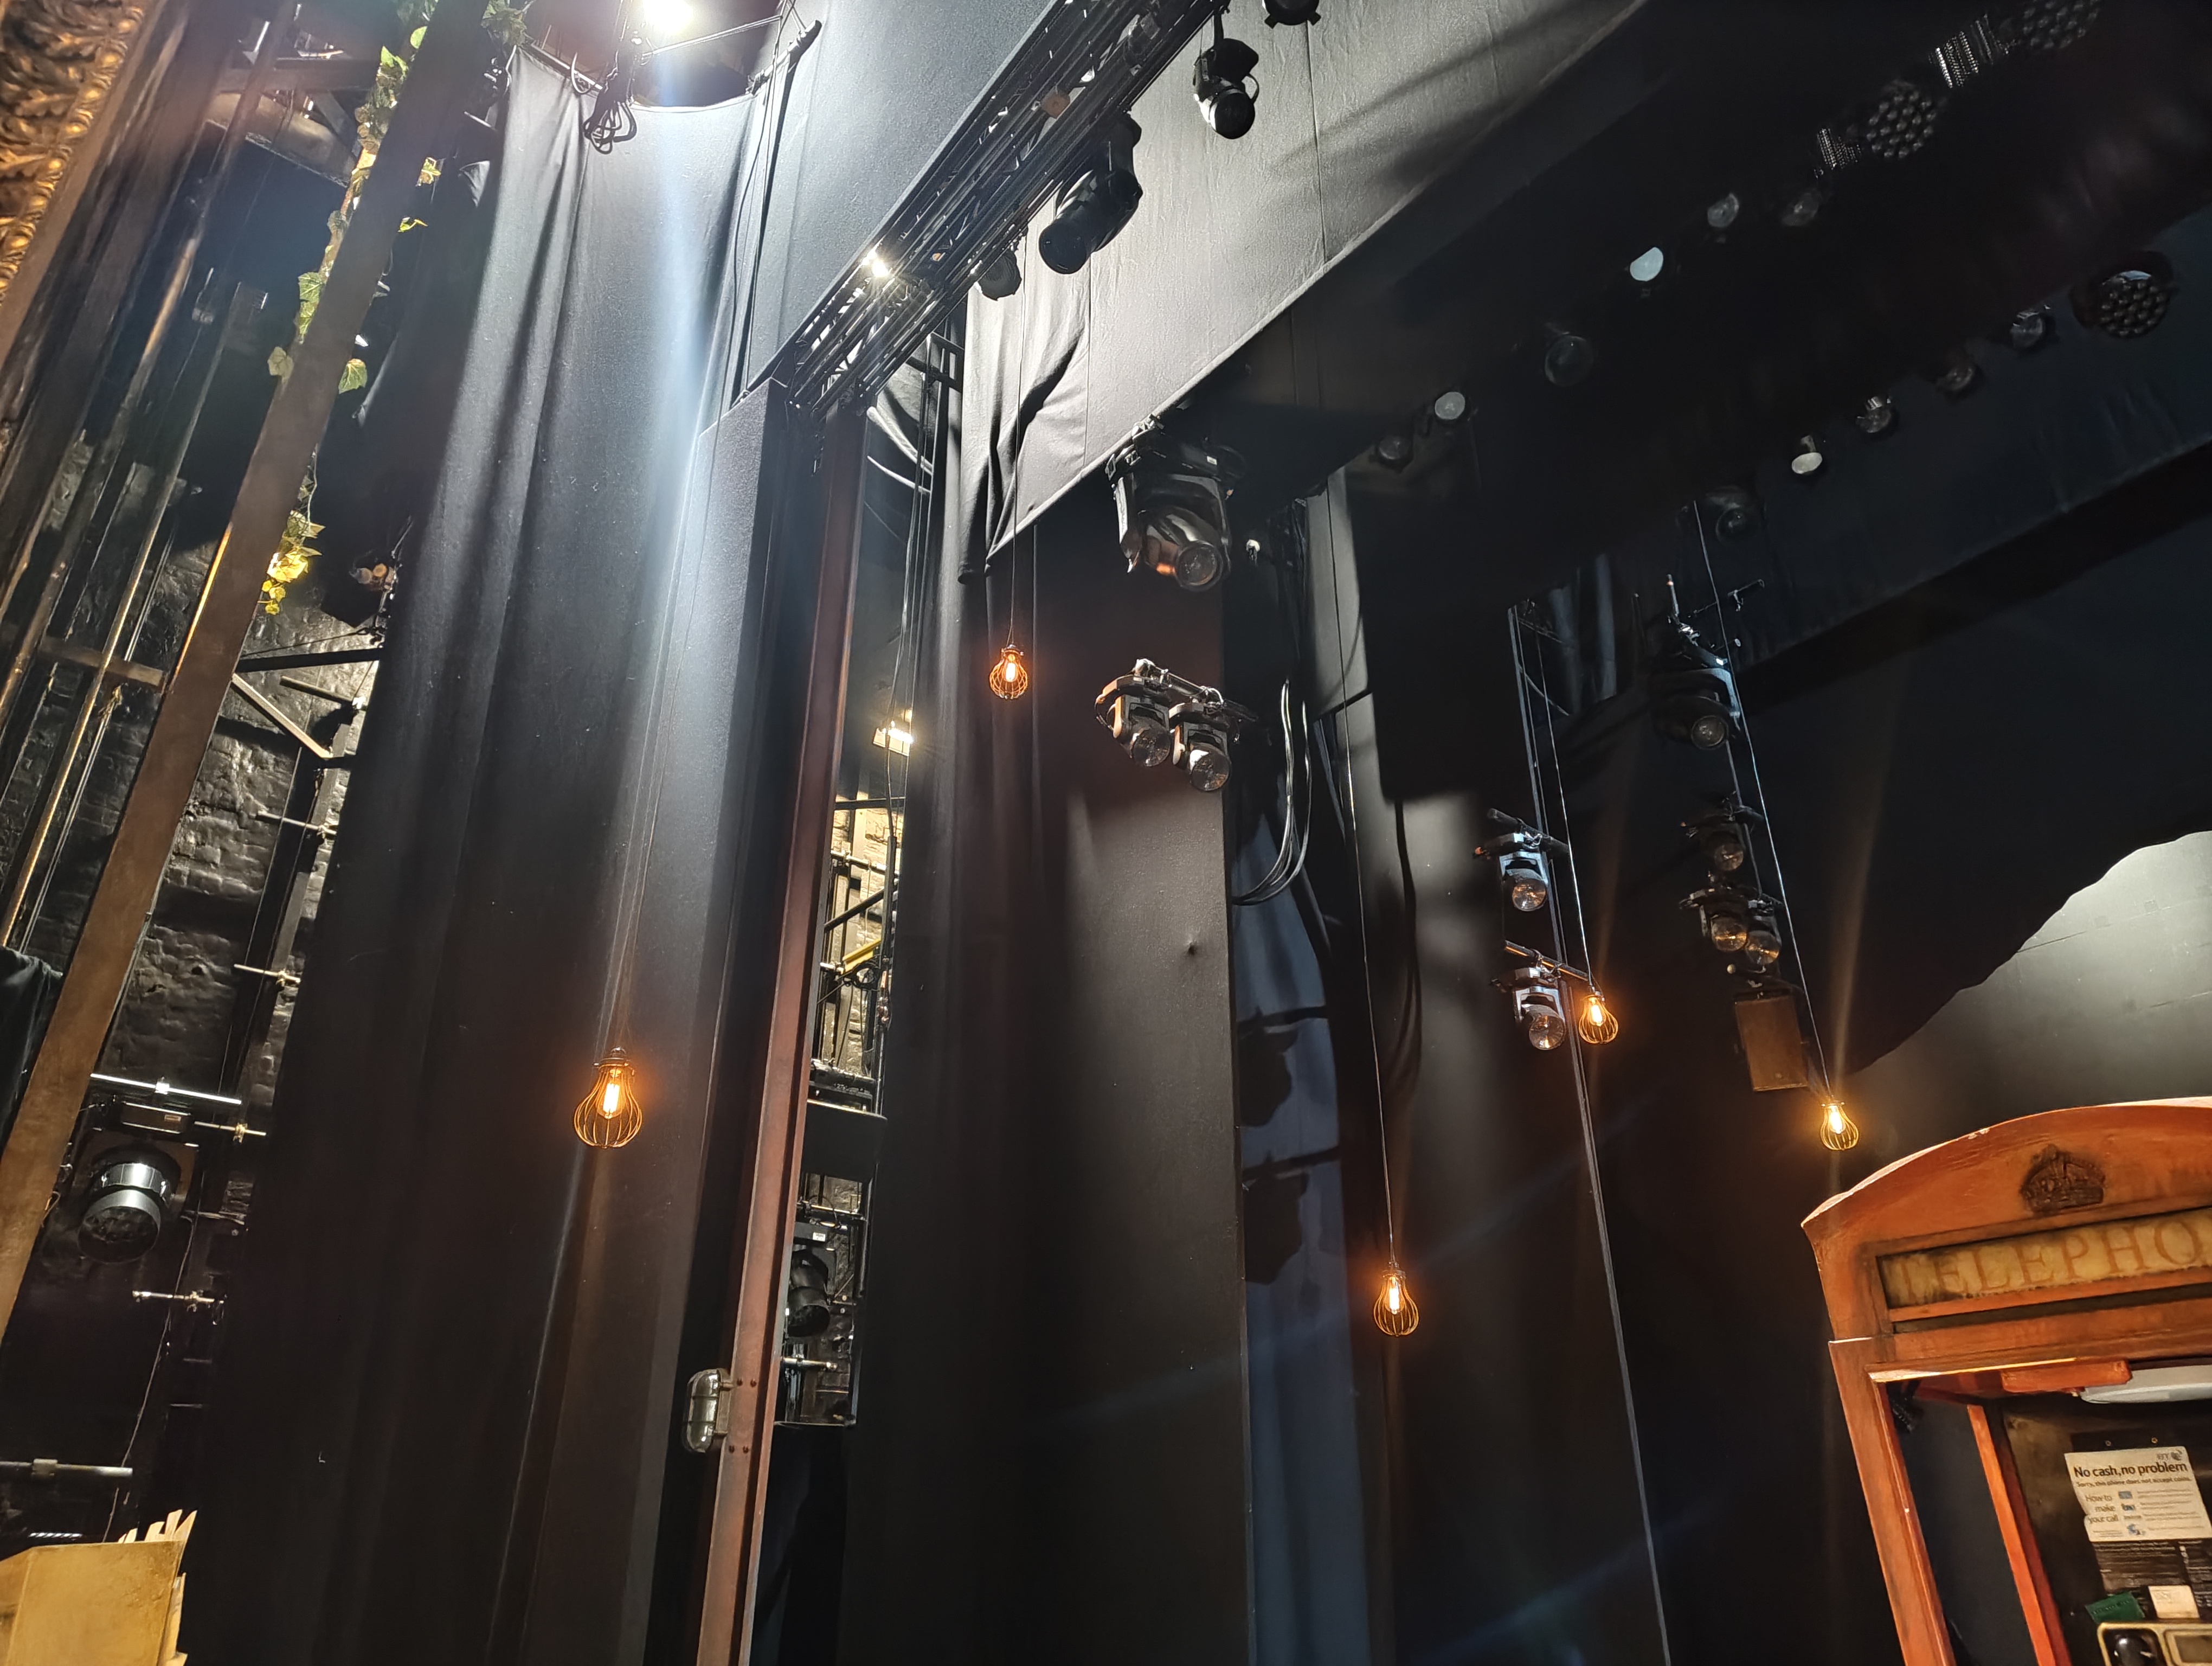
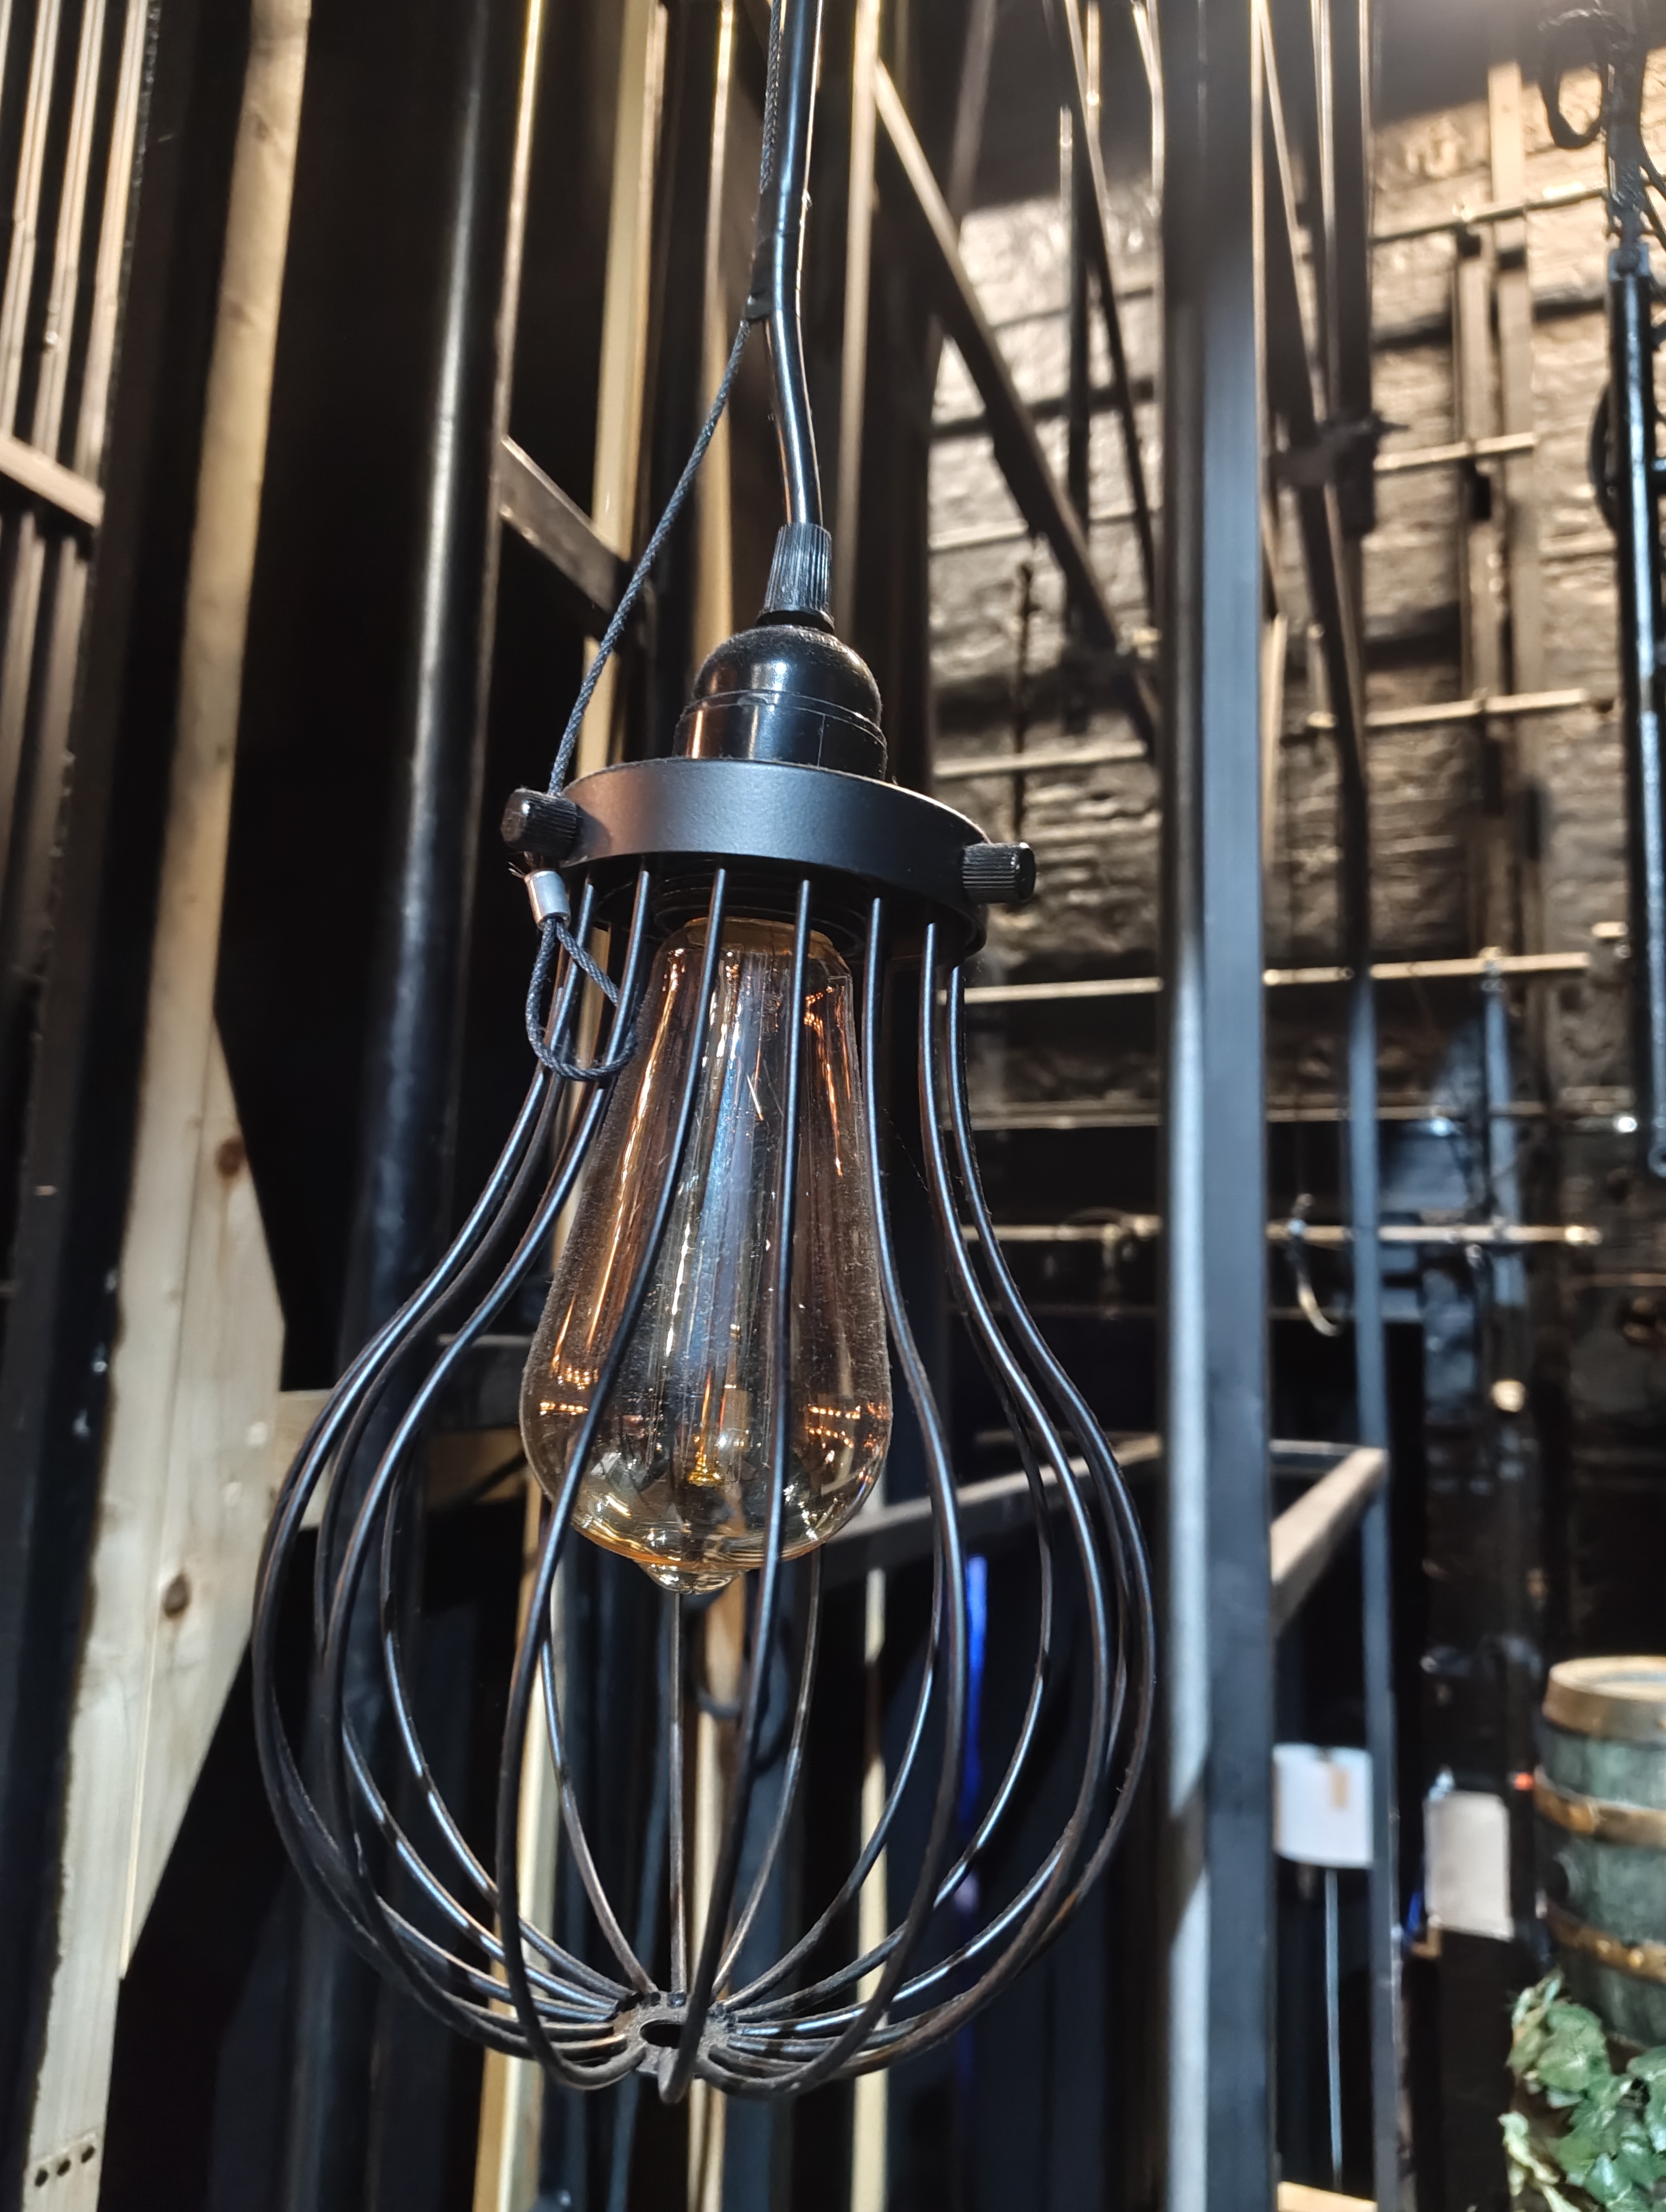
All Reference Photos (click to expand)
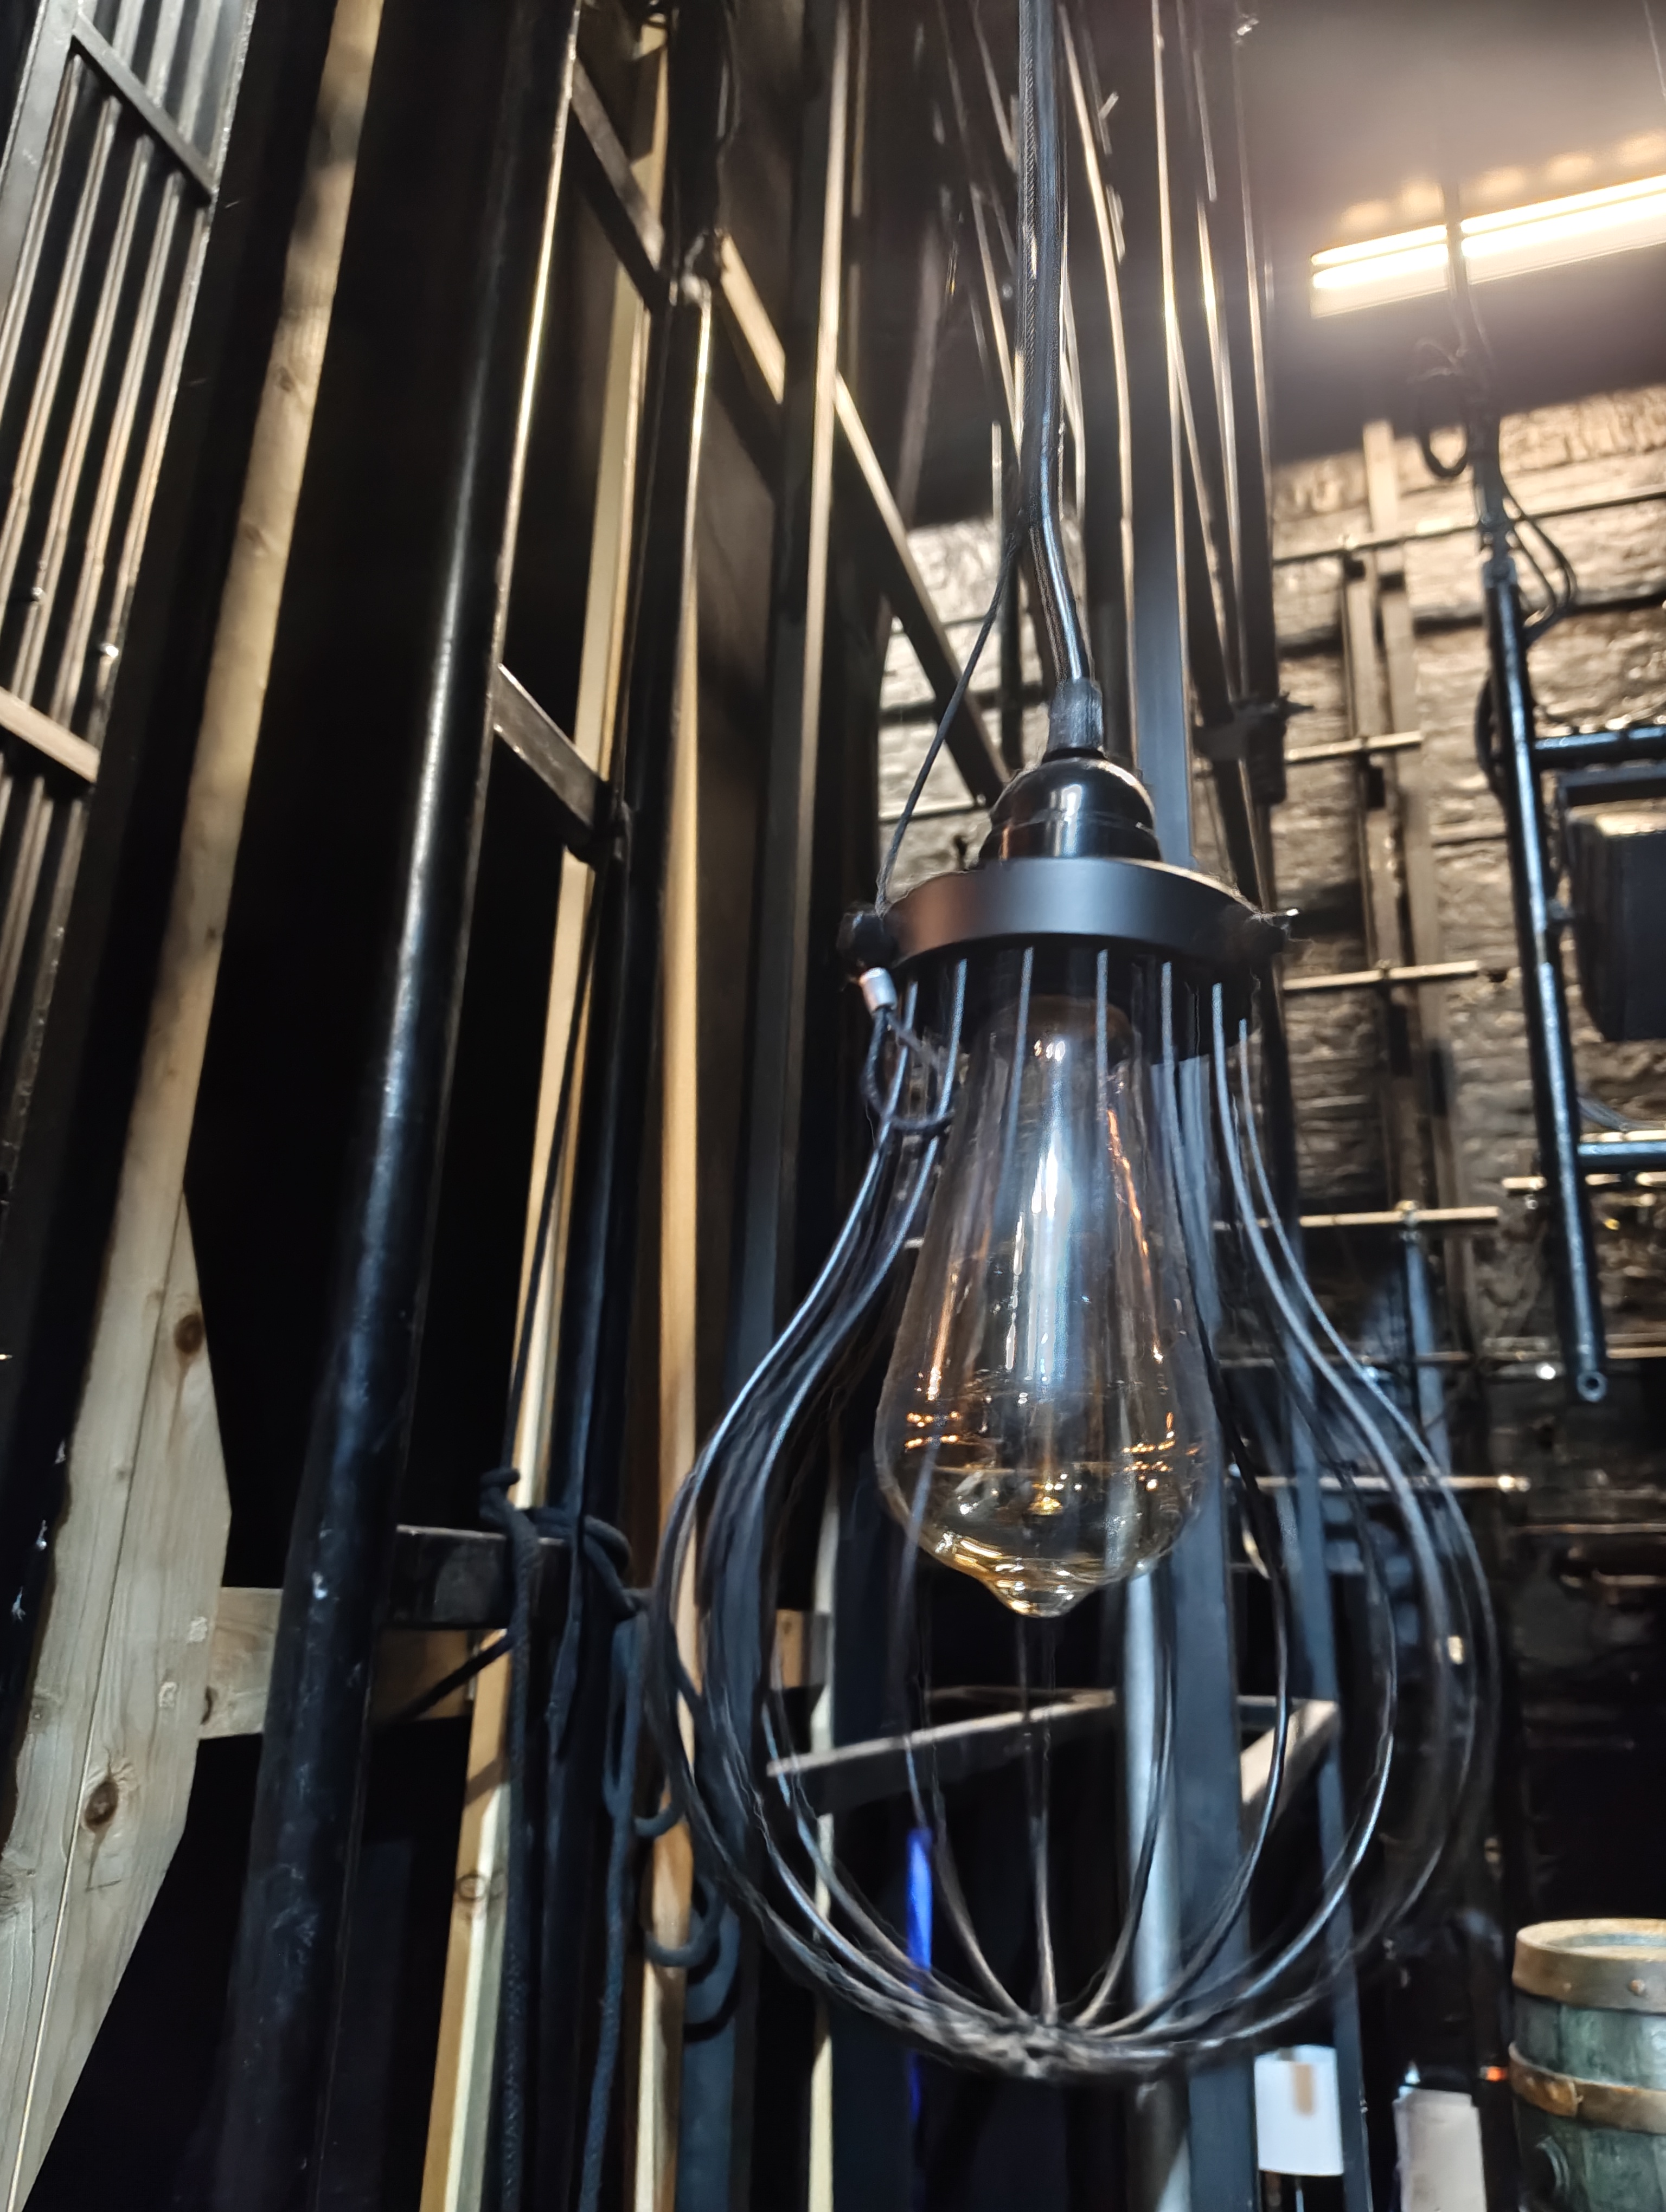
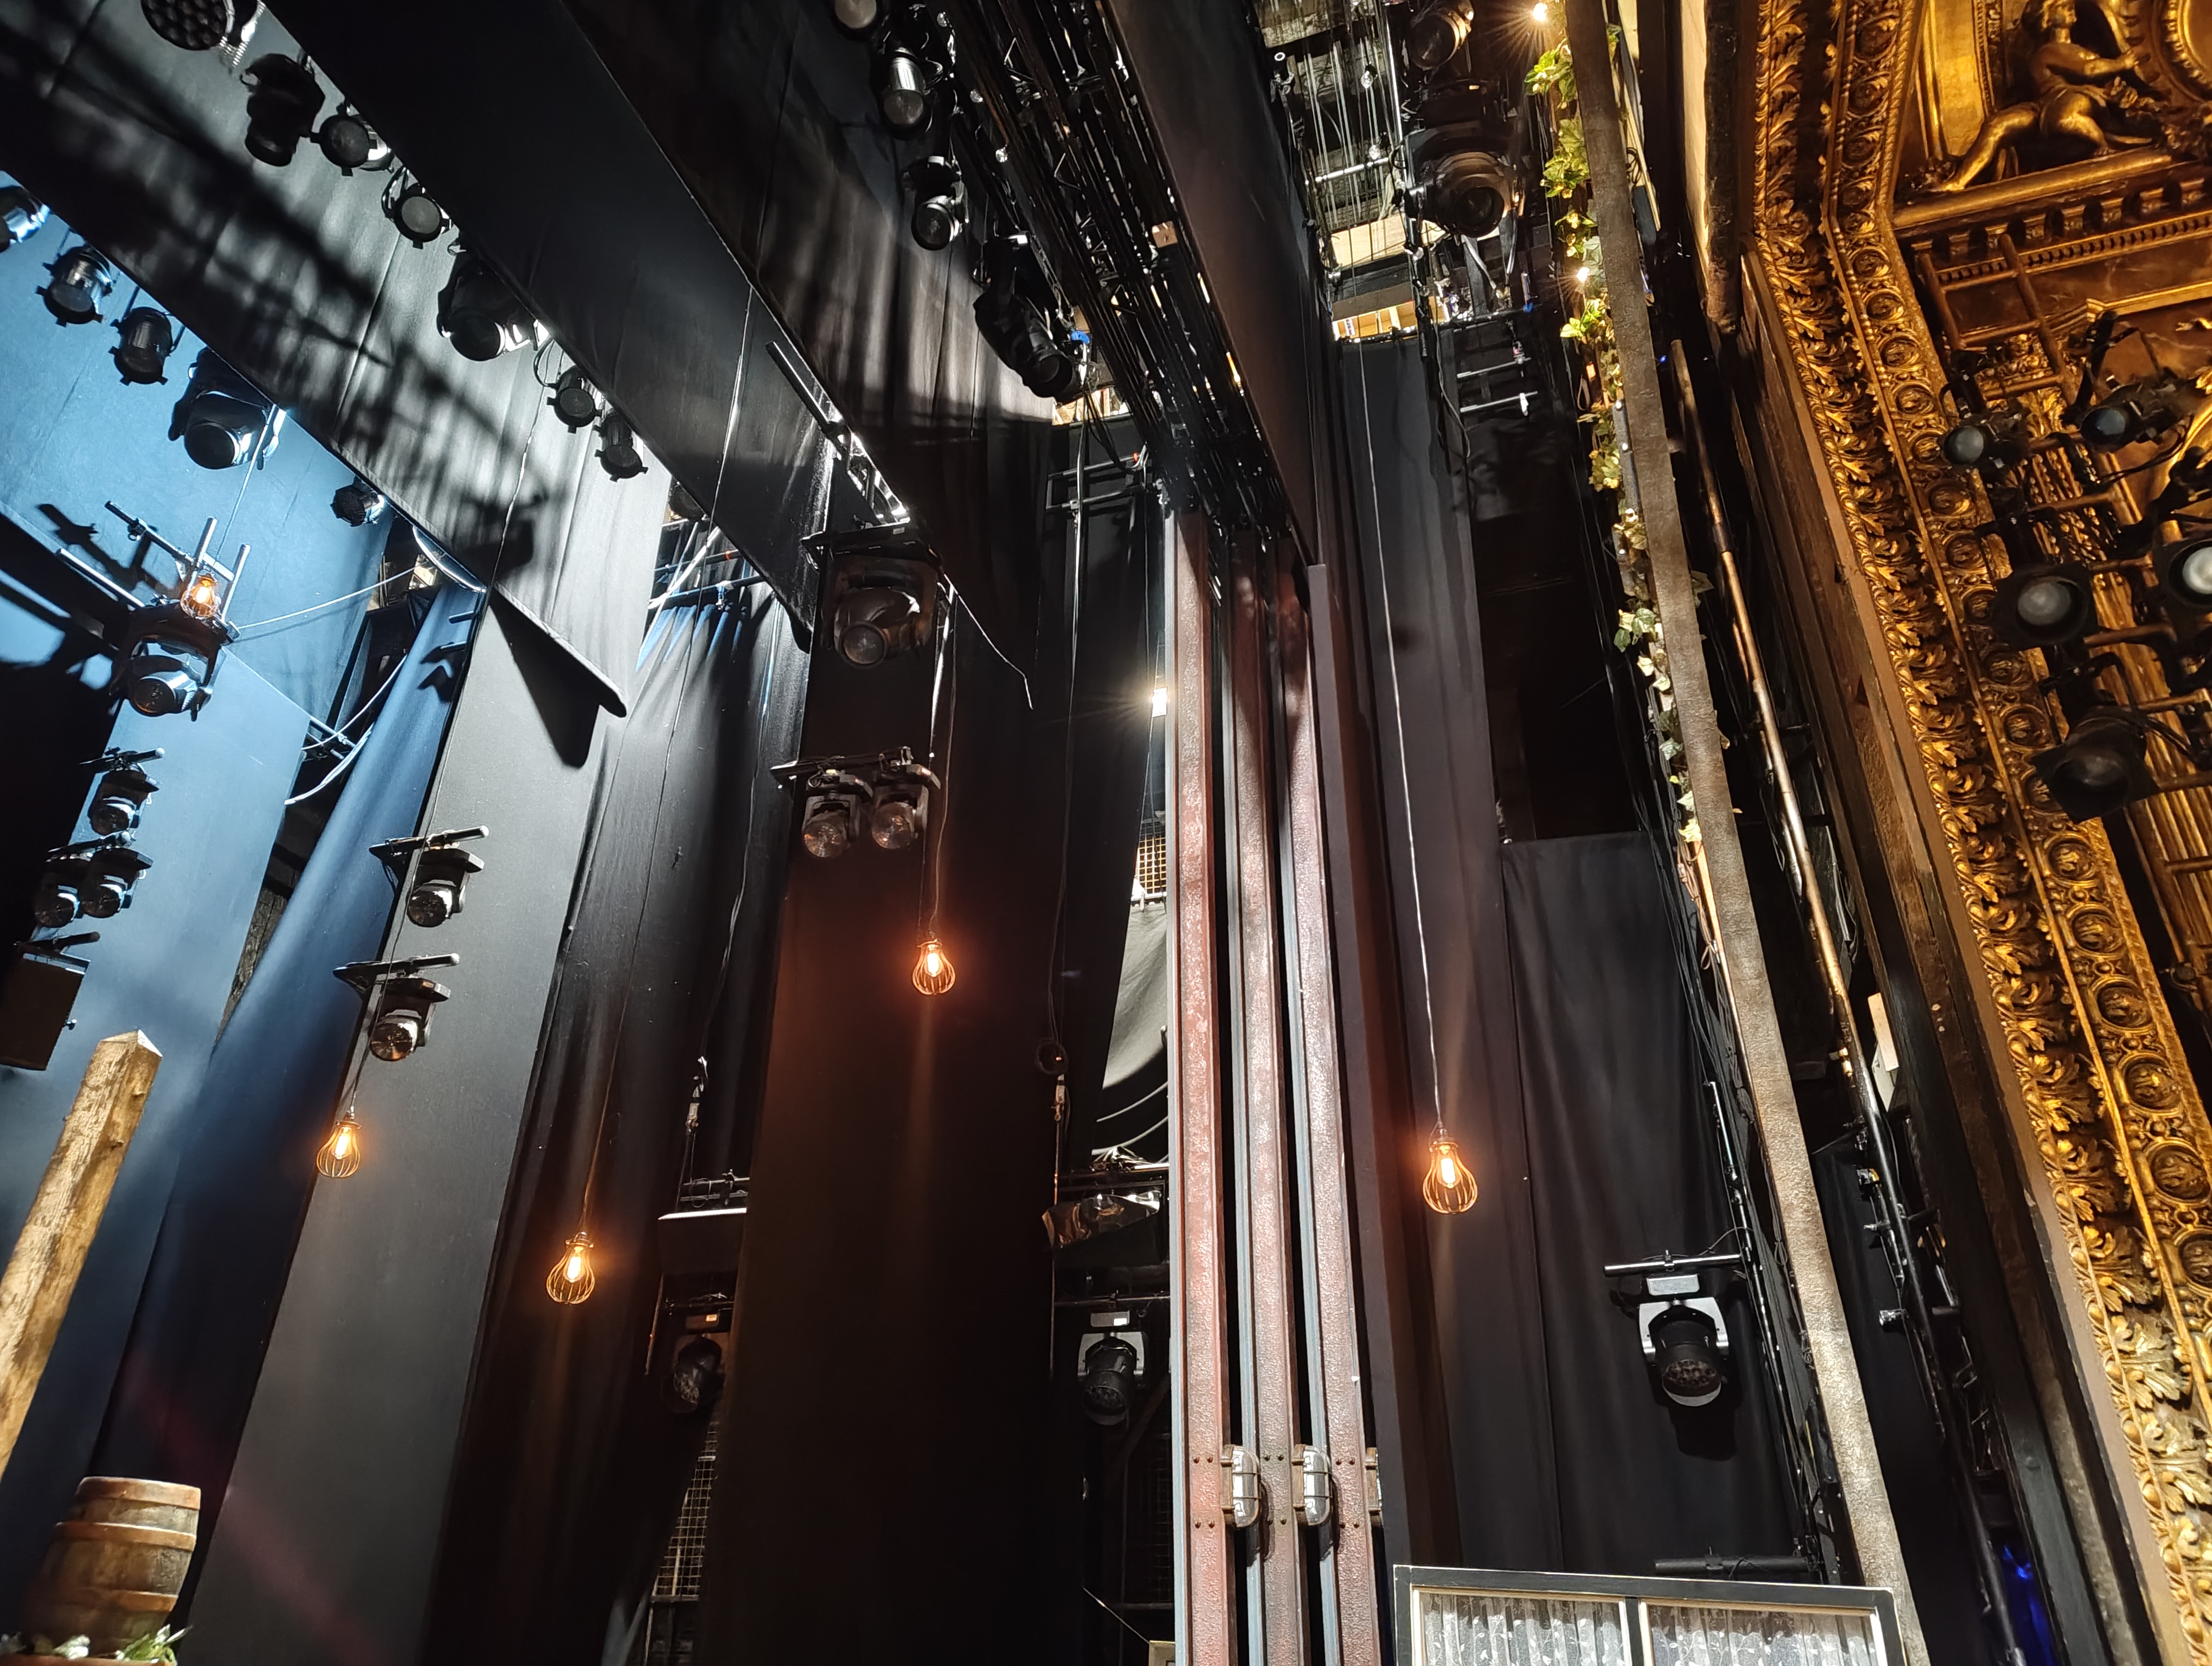
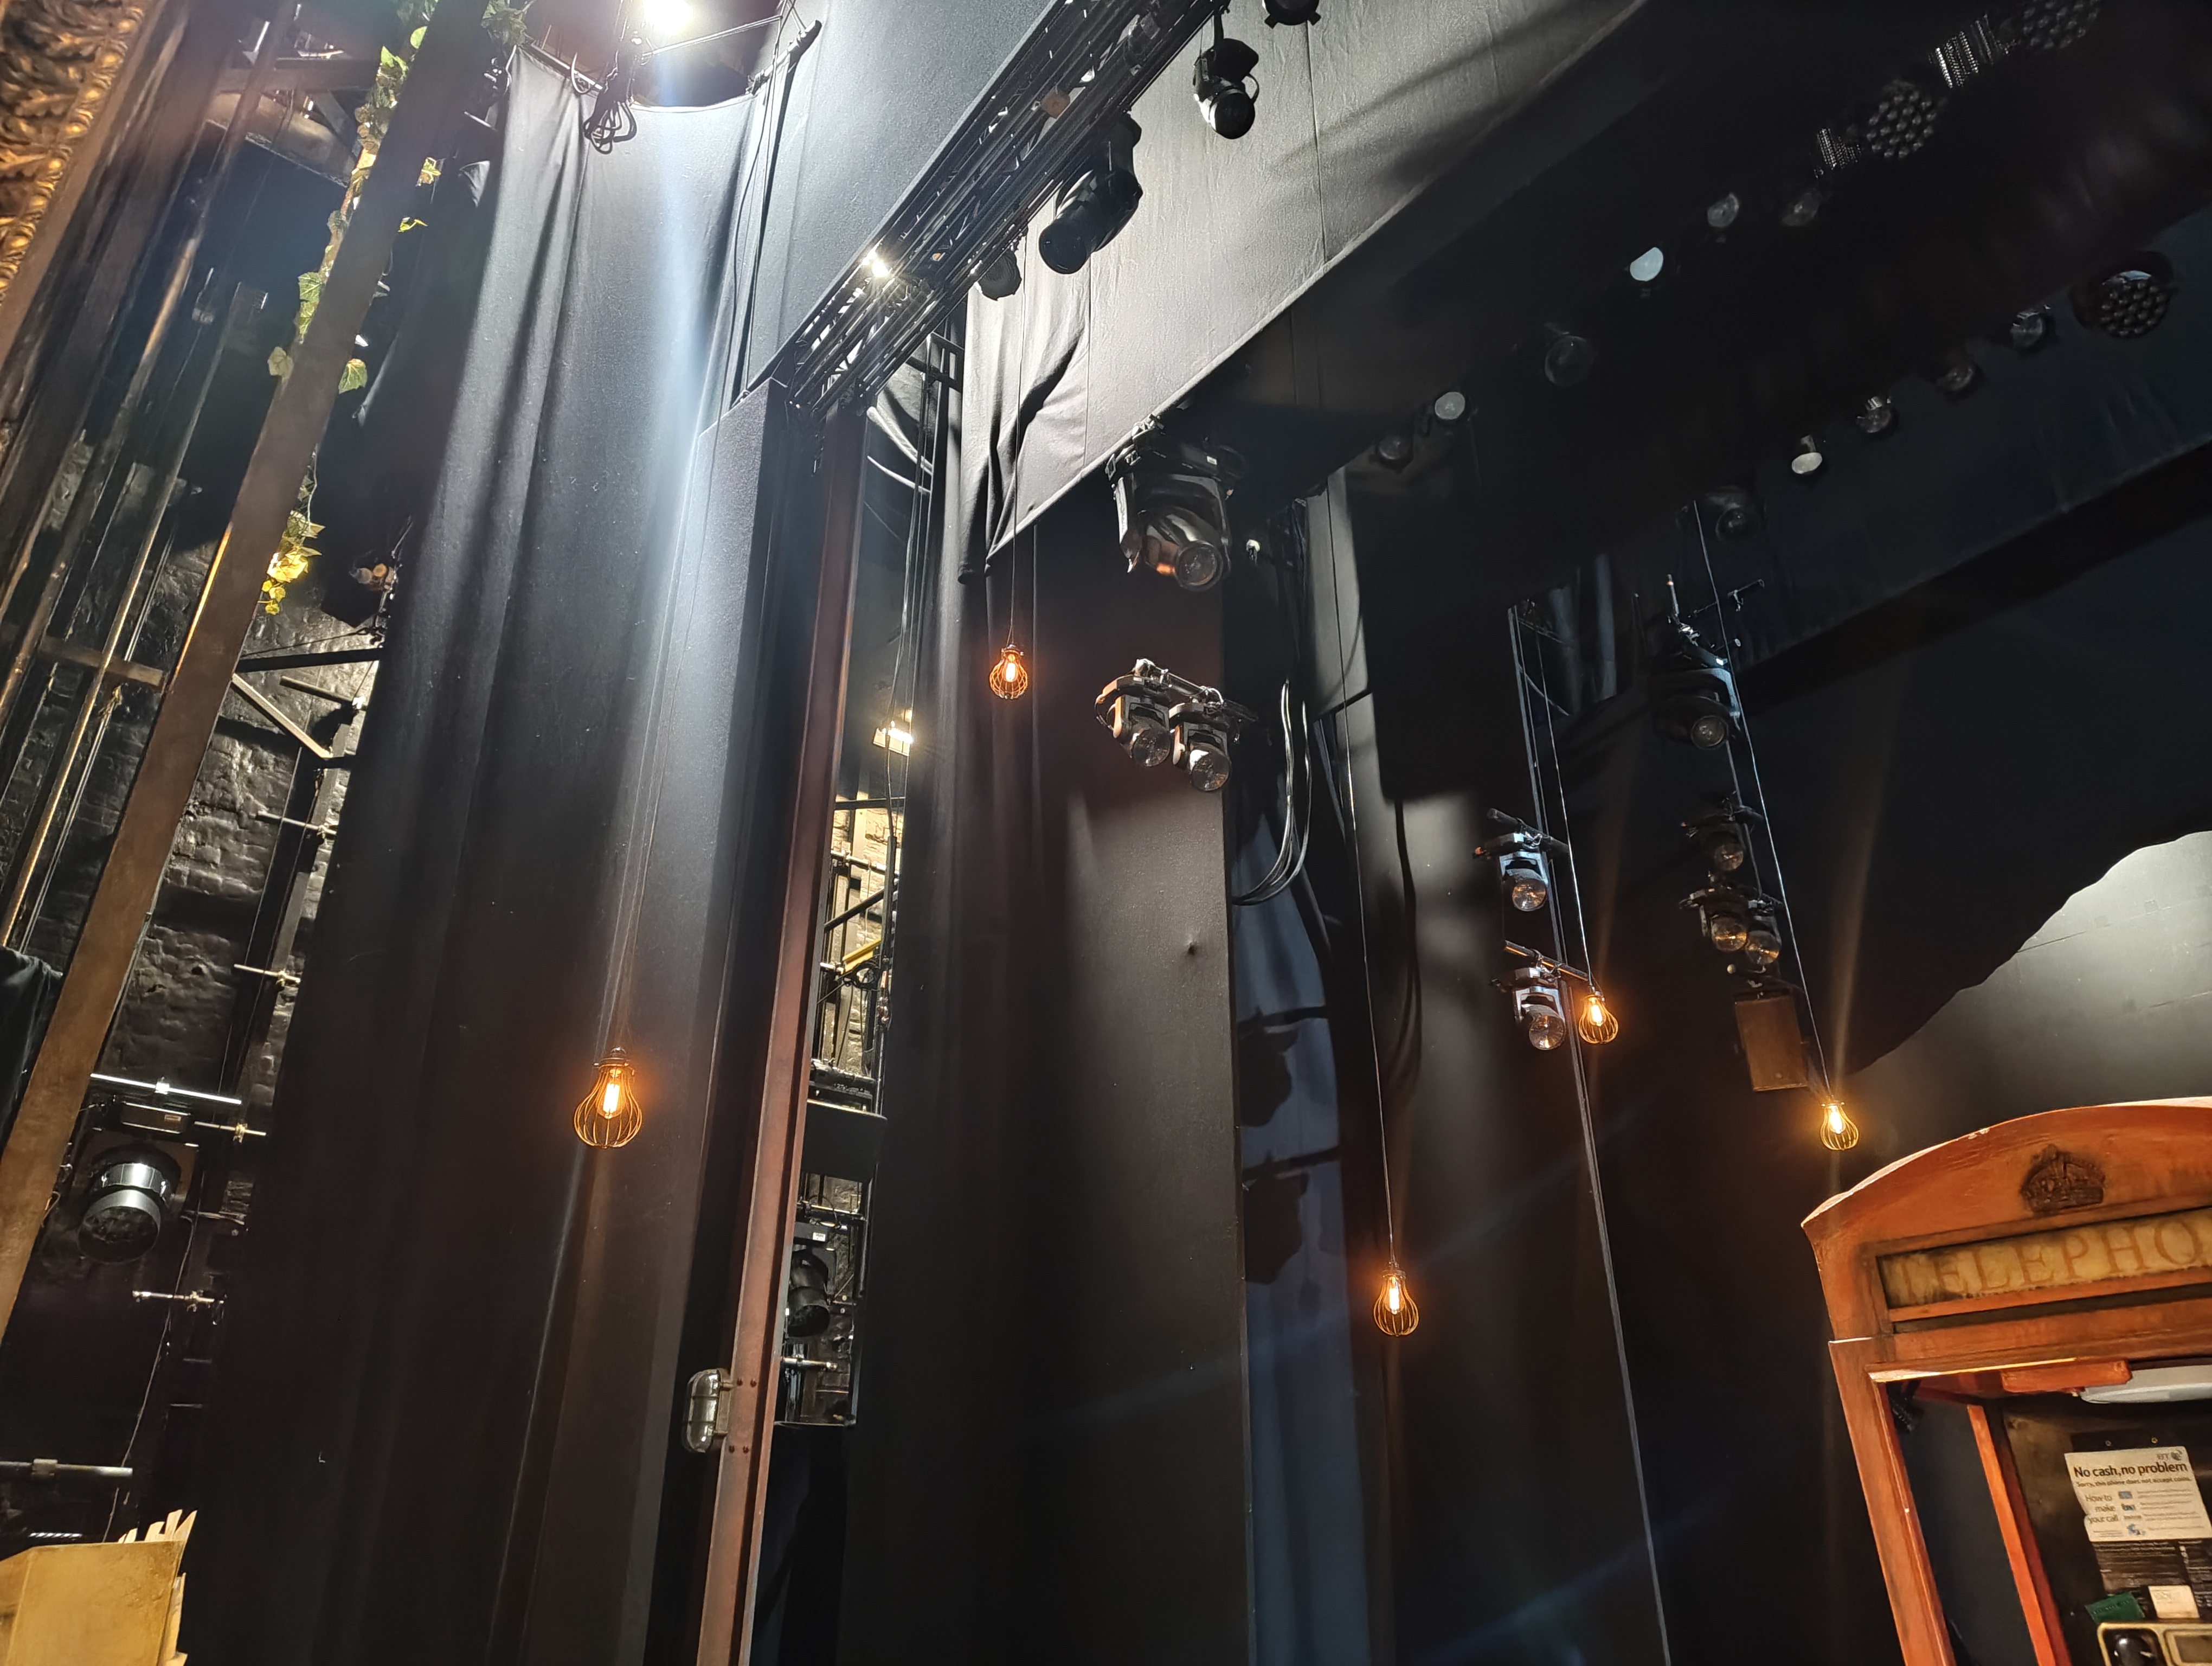
Usage
Used throughout the show as a twinkle/stars effect.
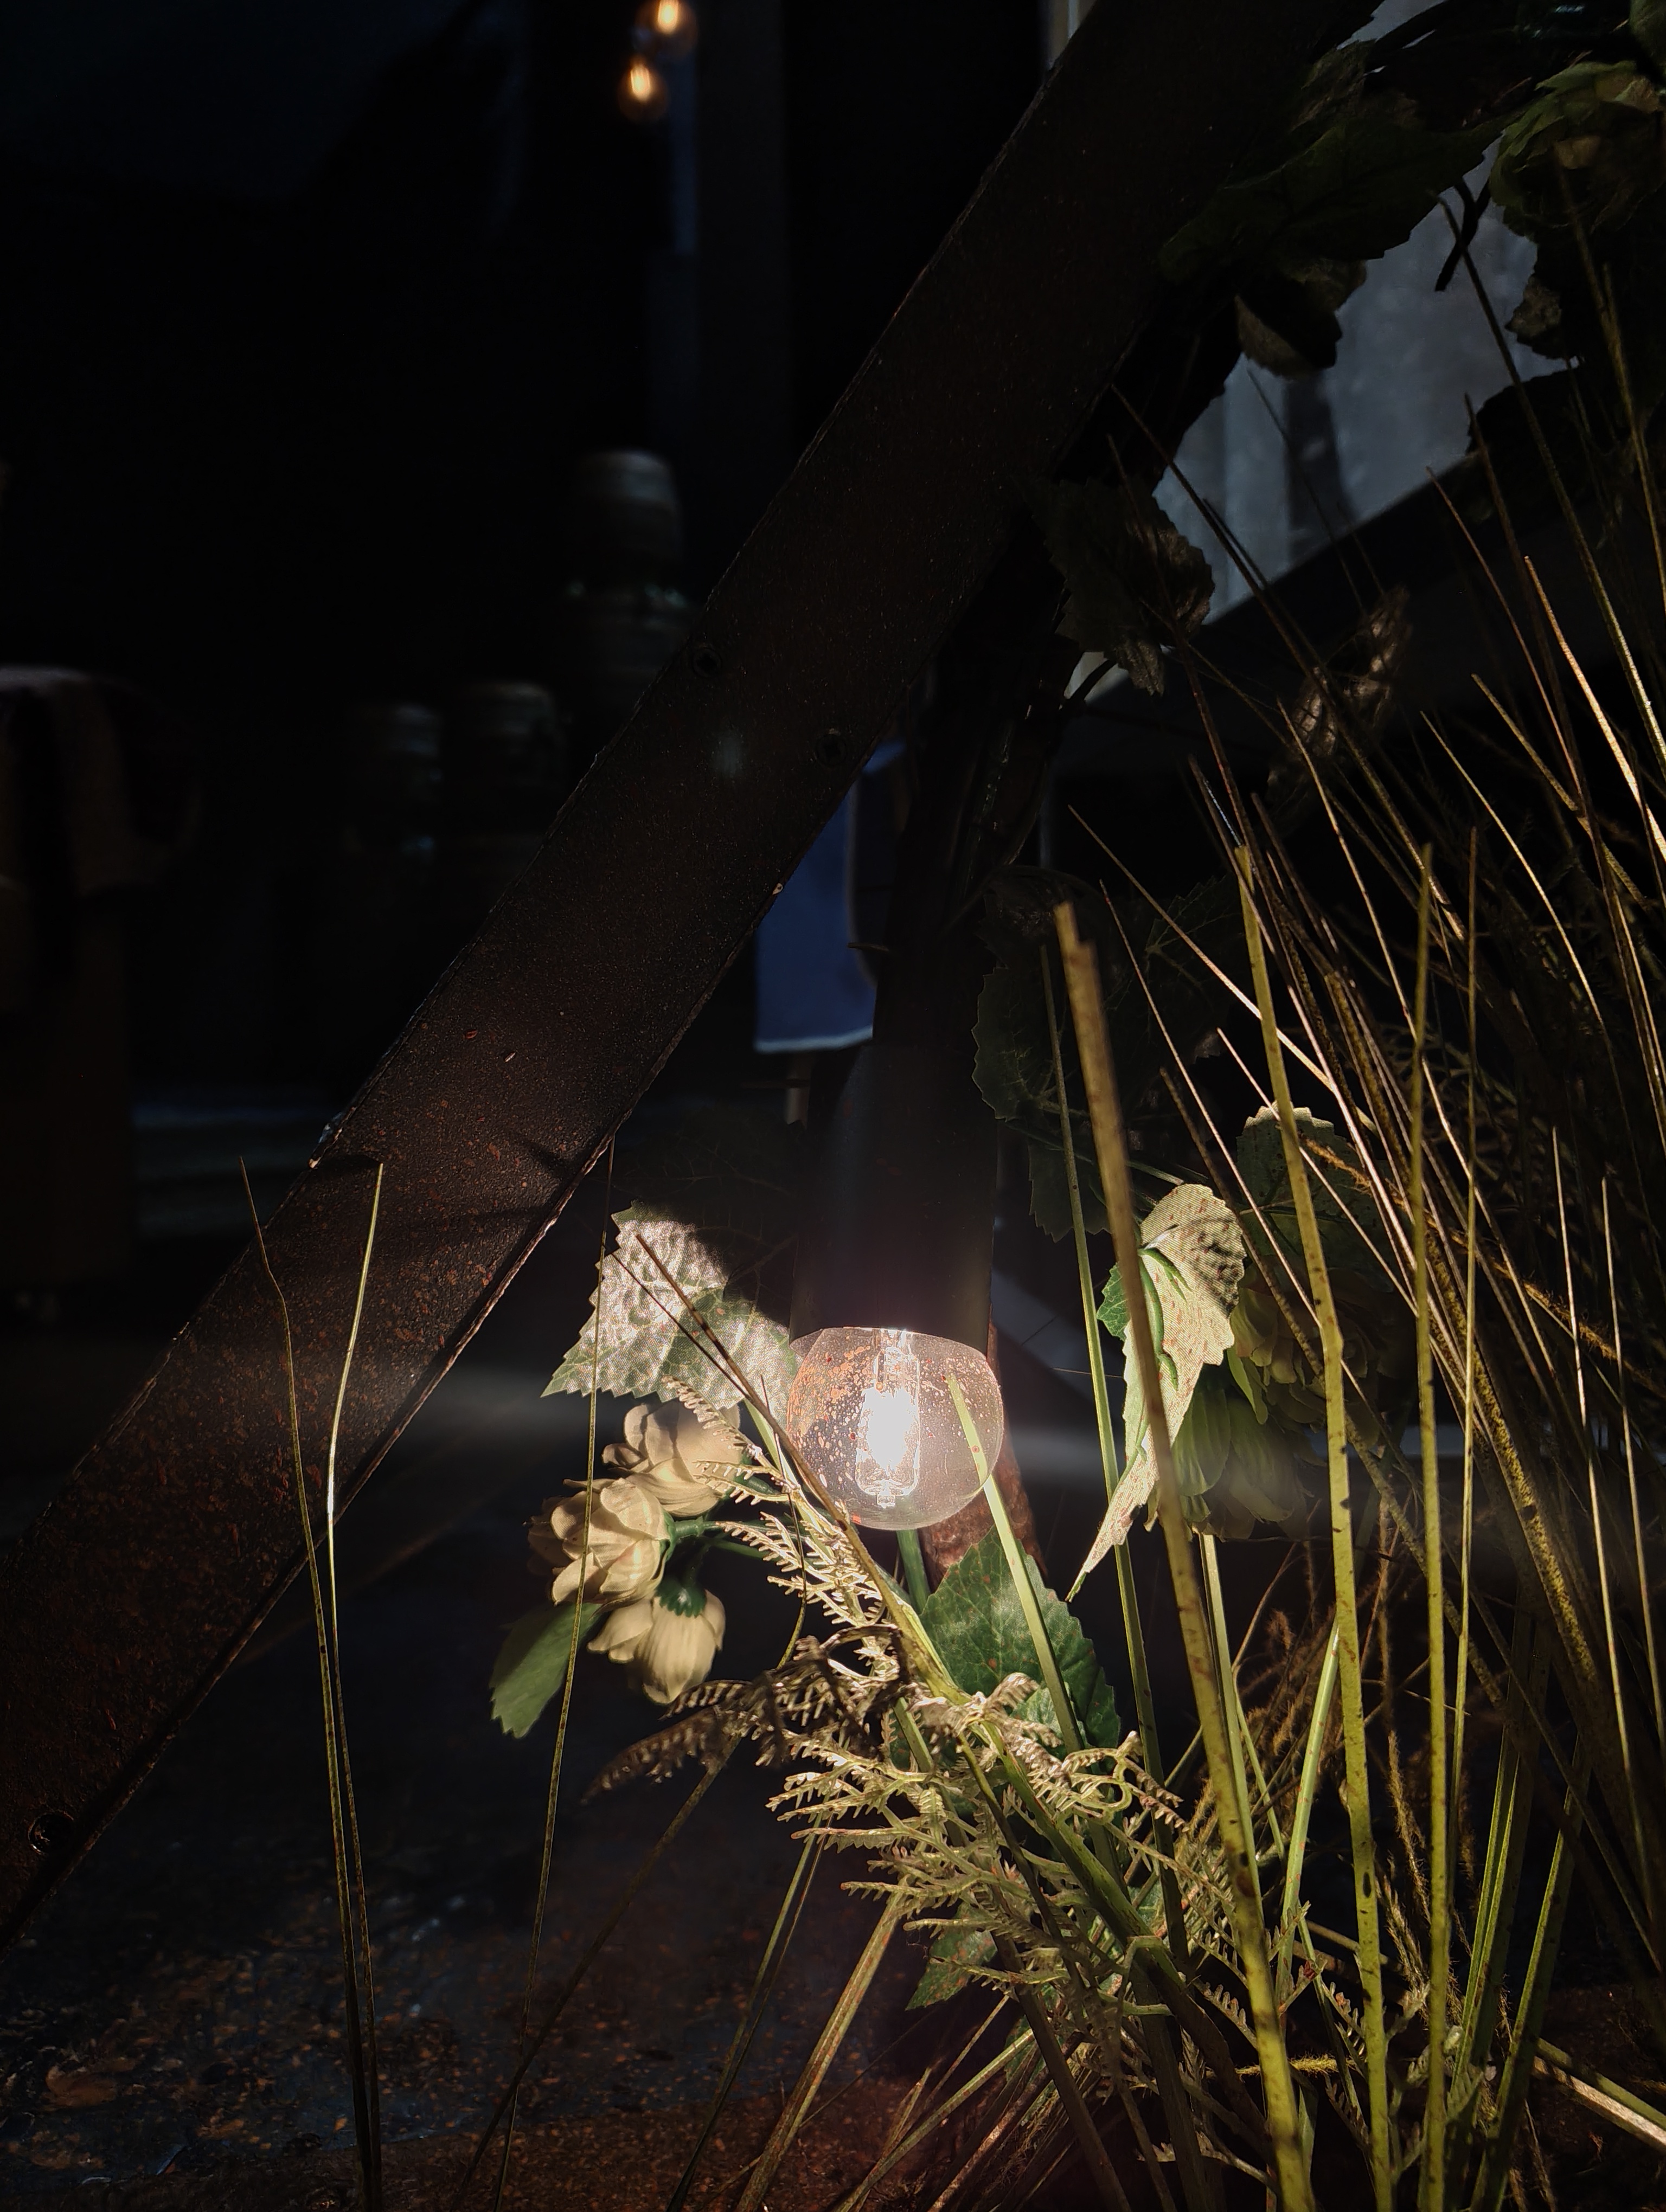
Pros Lightbulbs (Barrel Festoons)
Overview
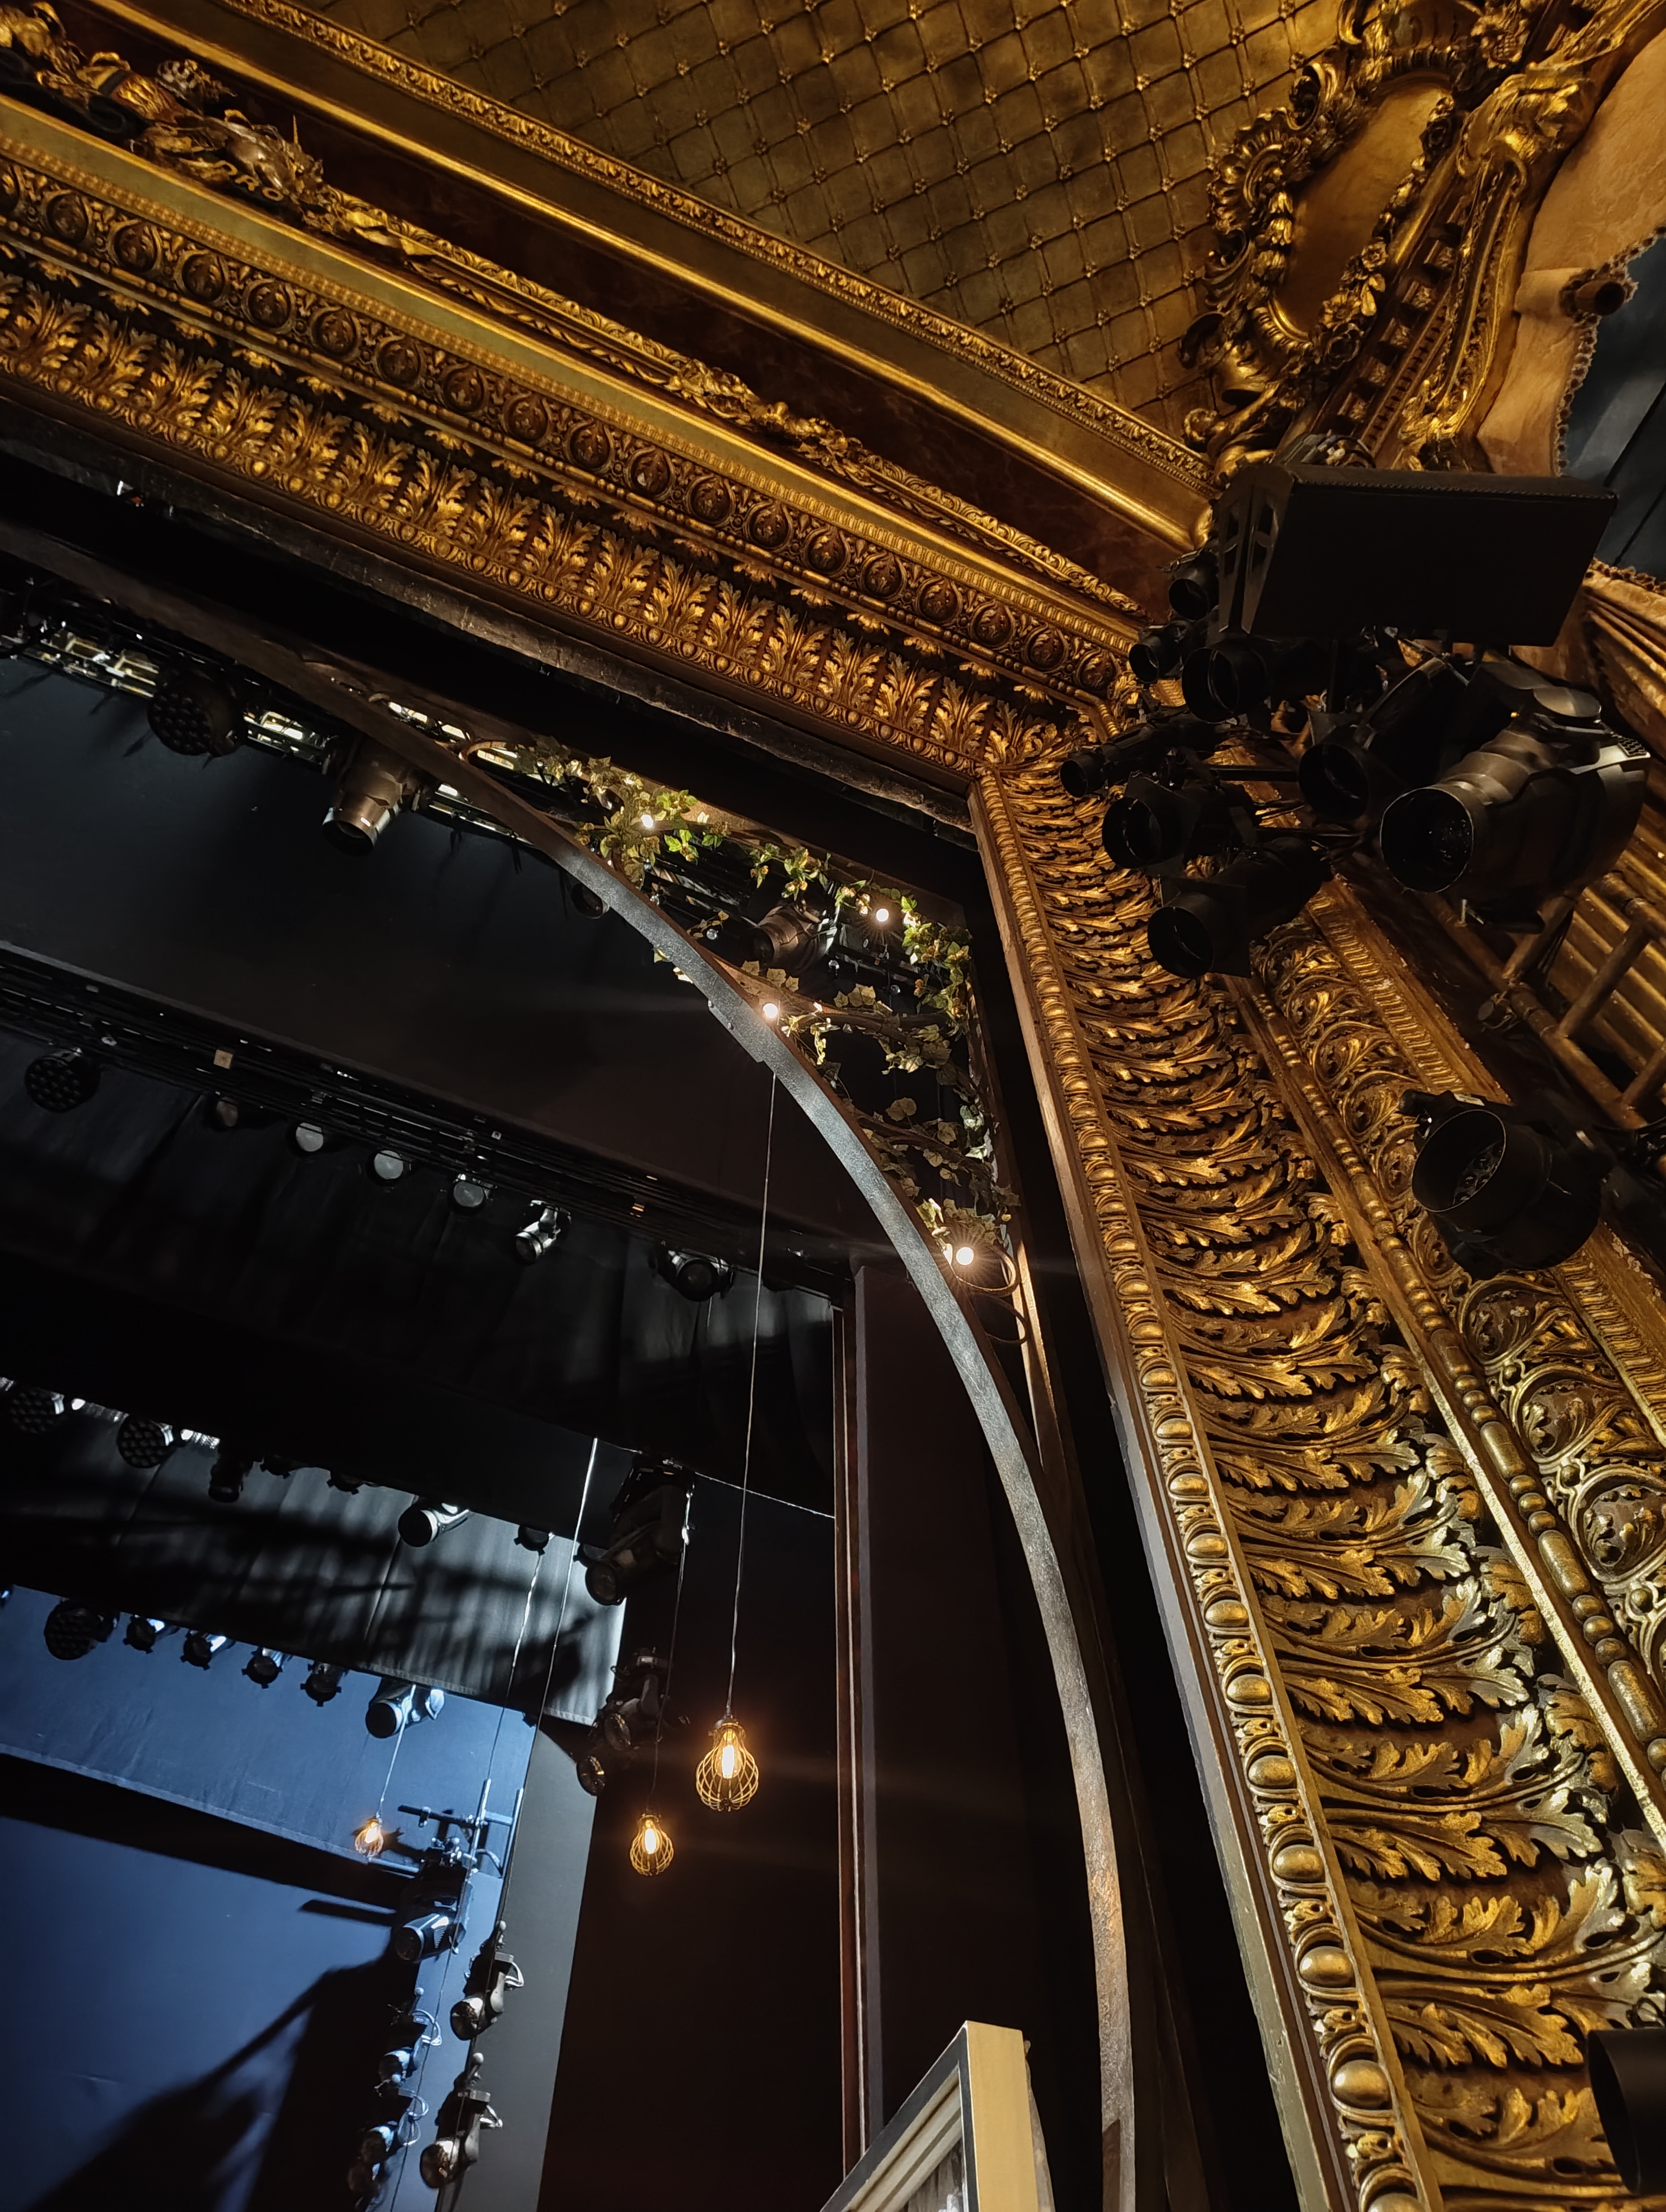
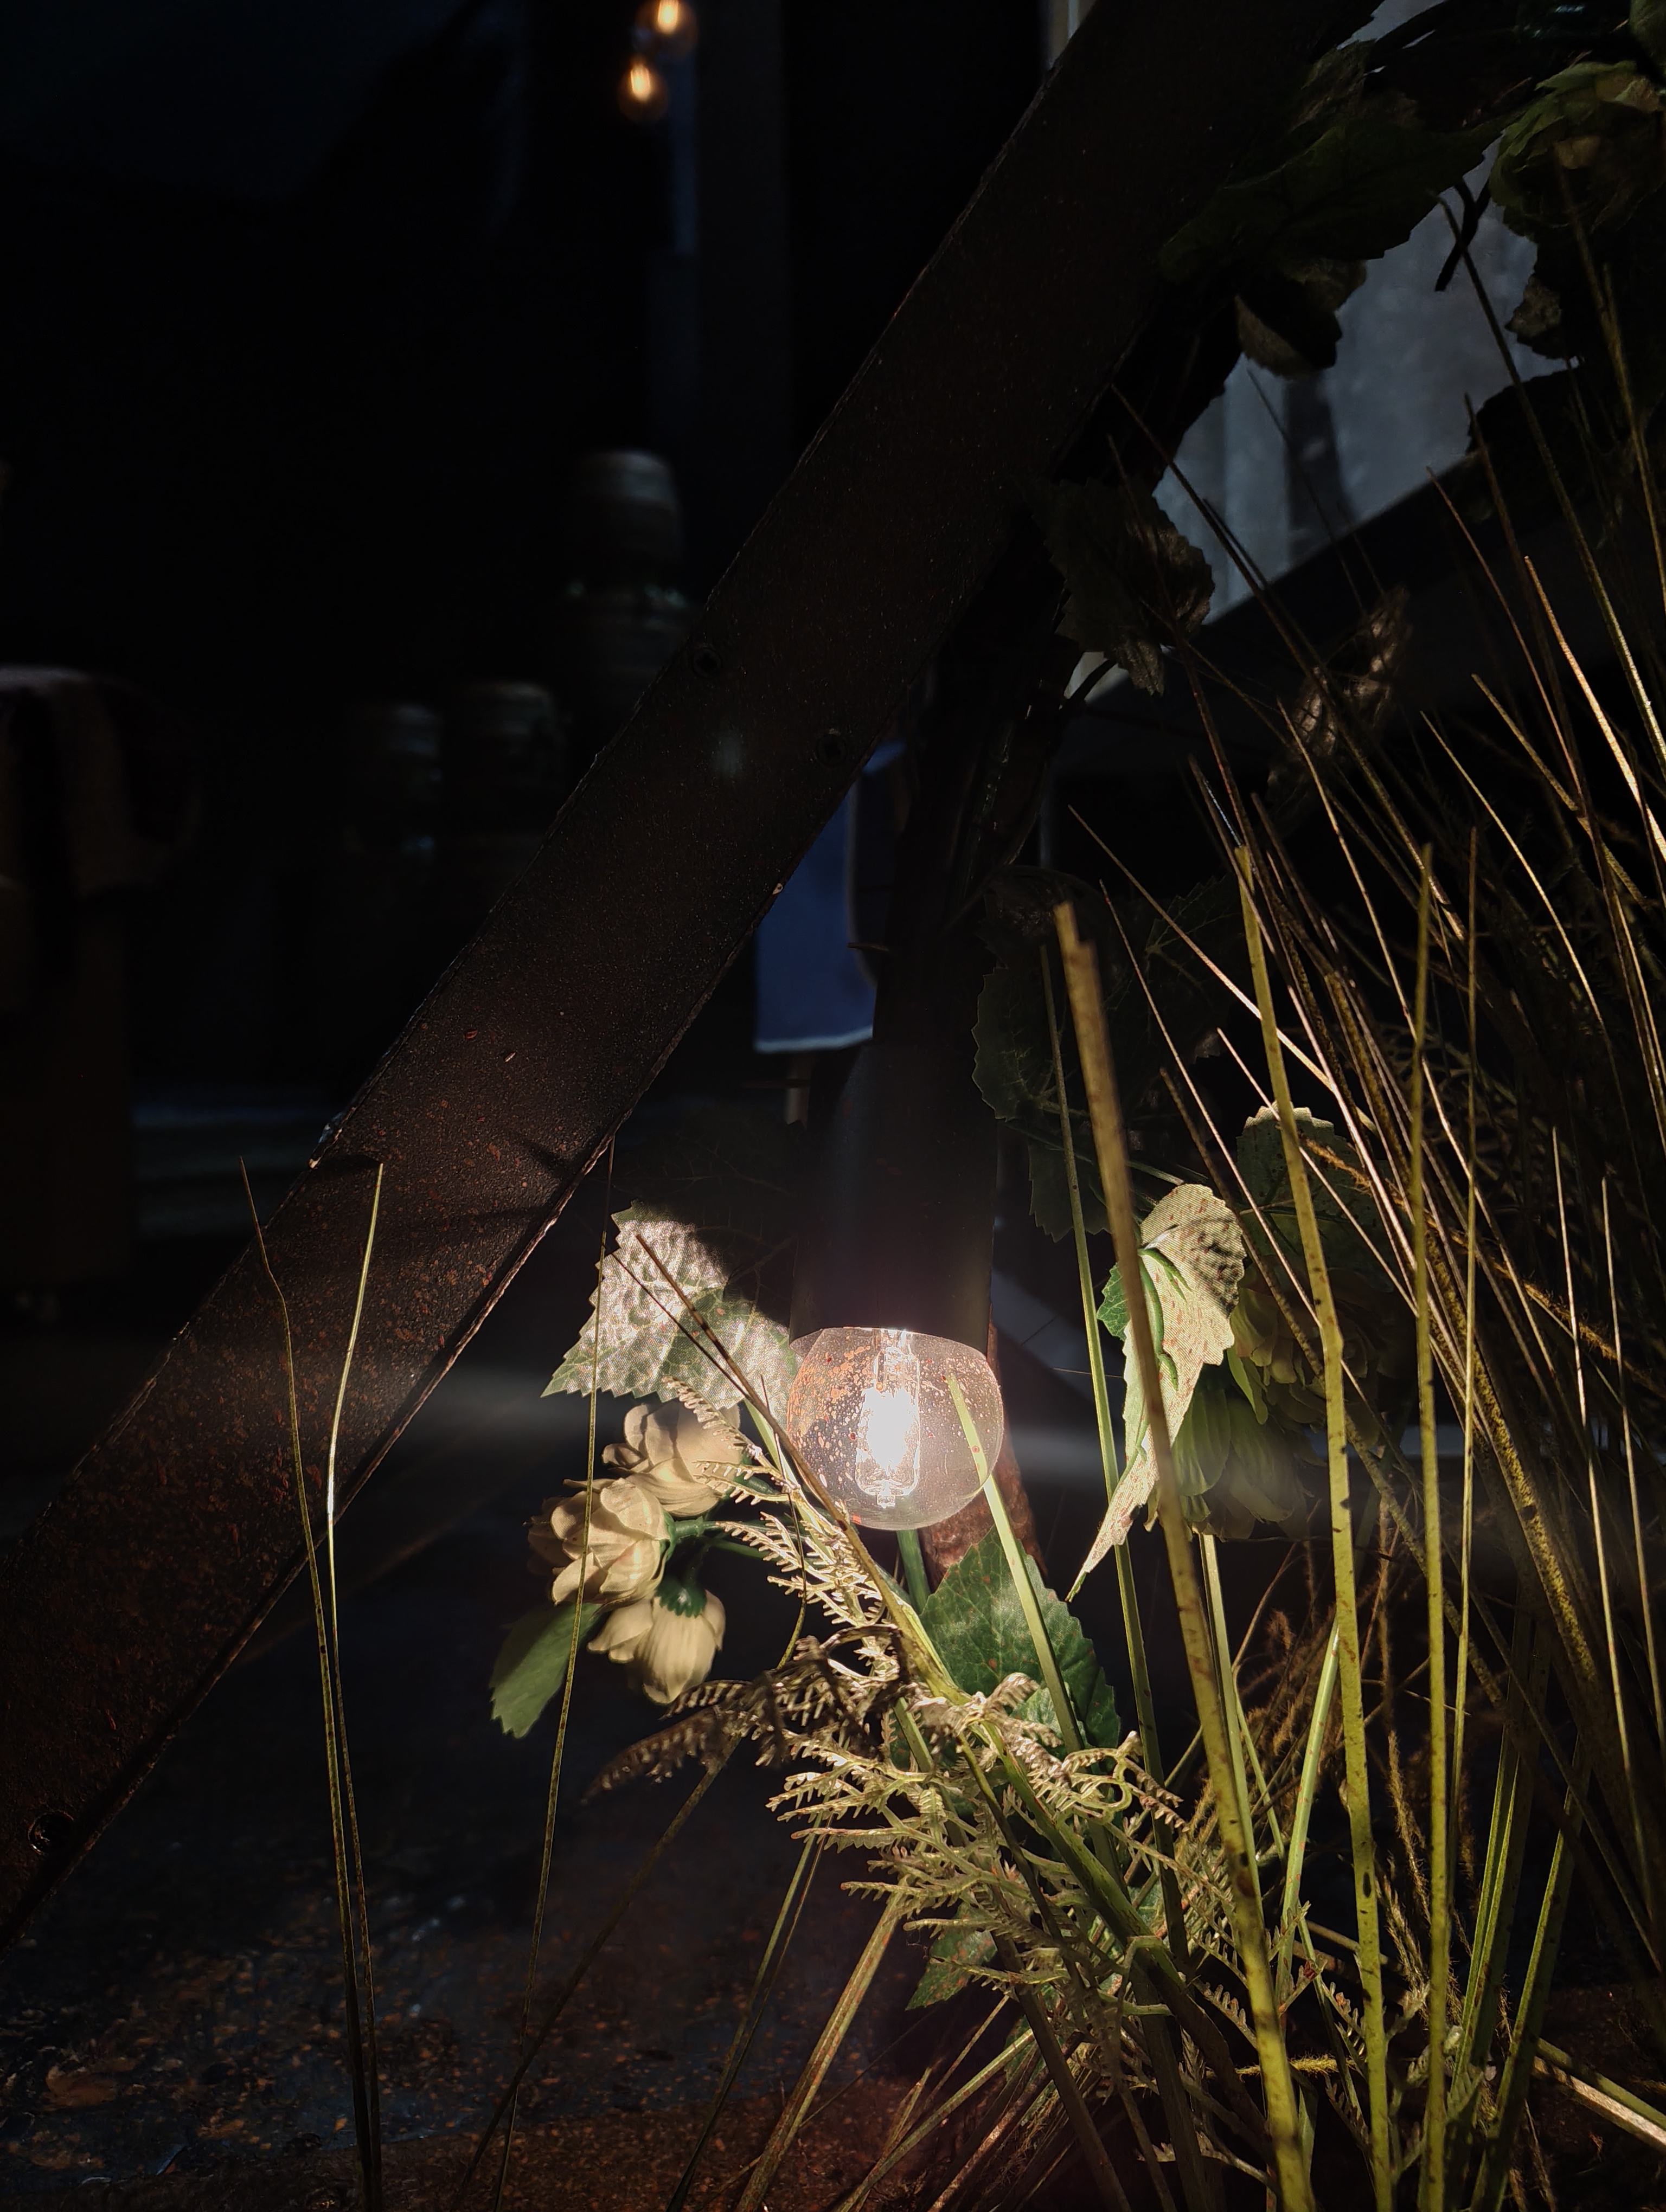
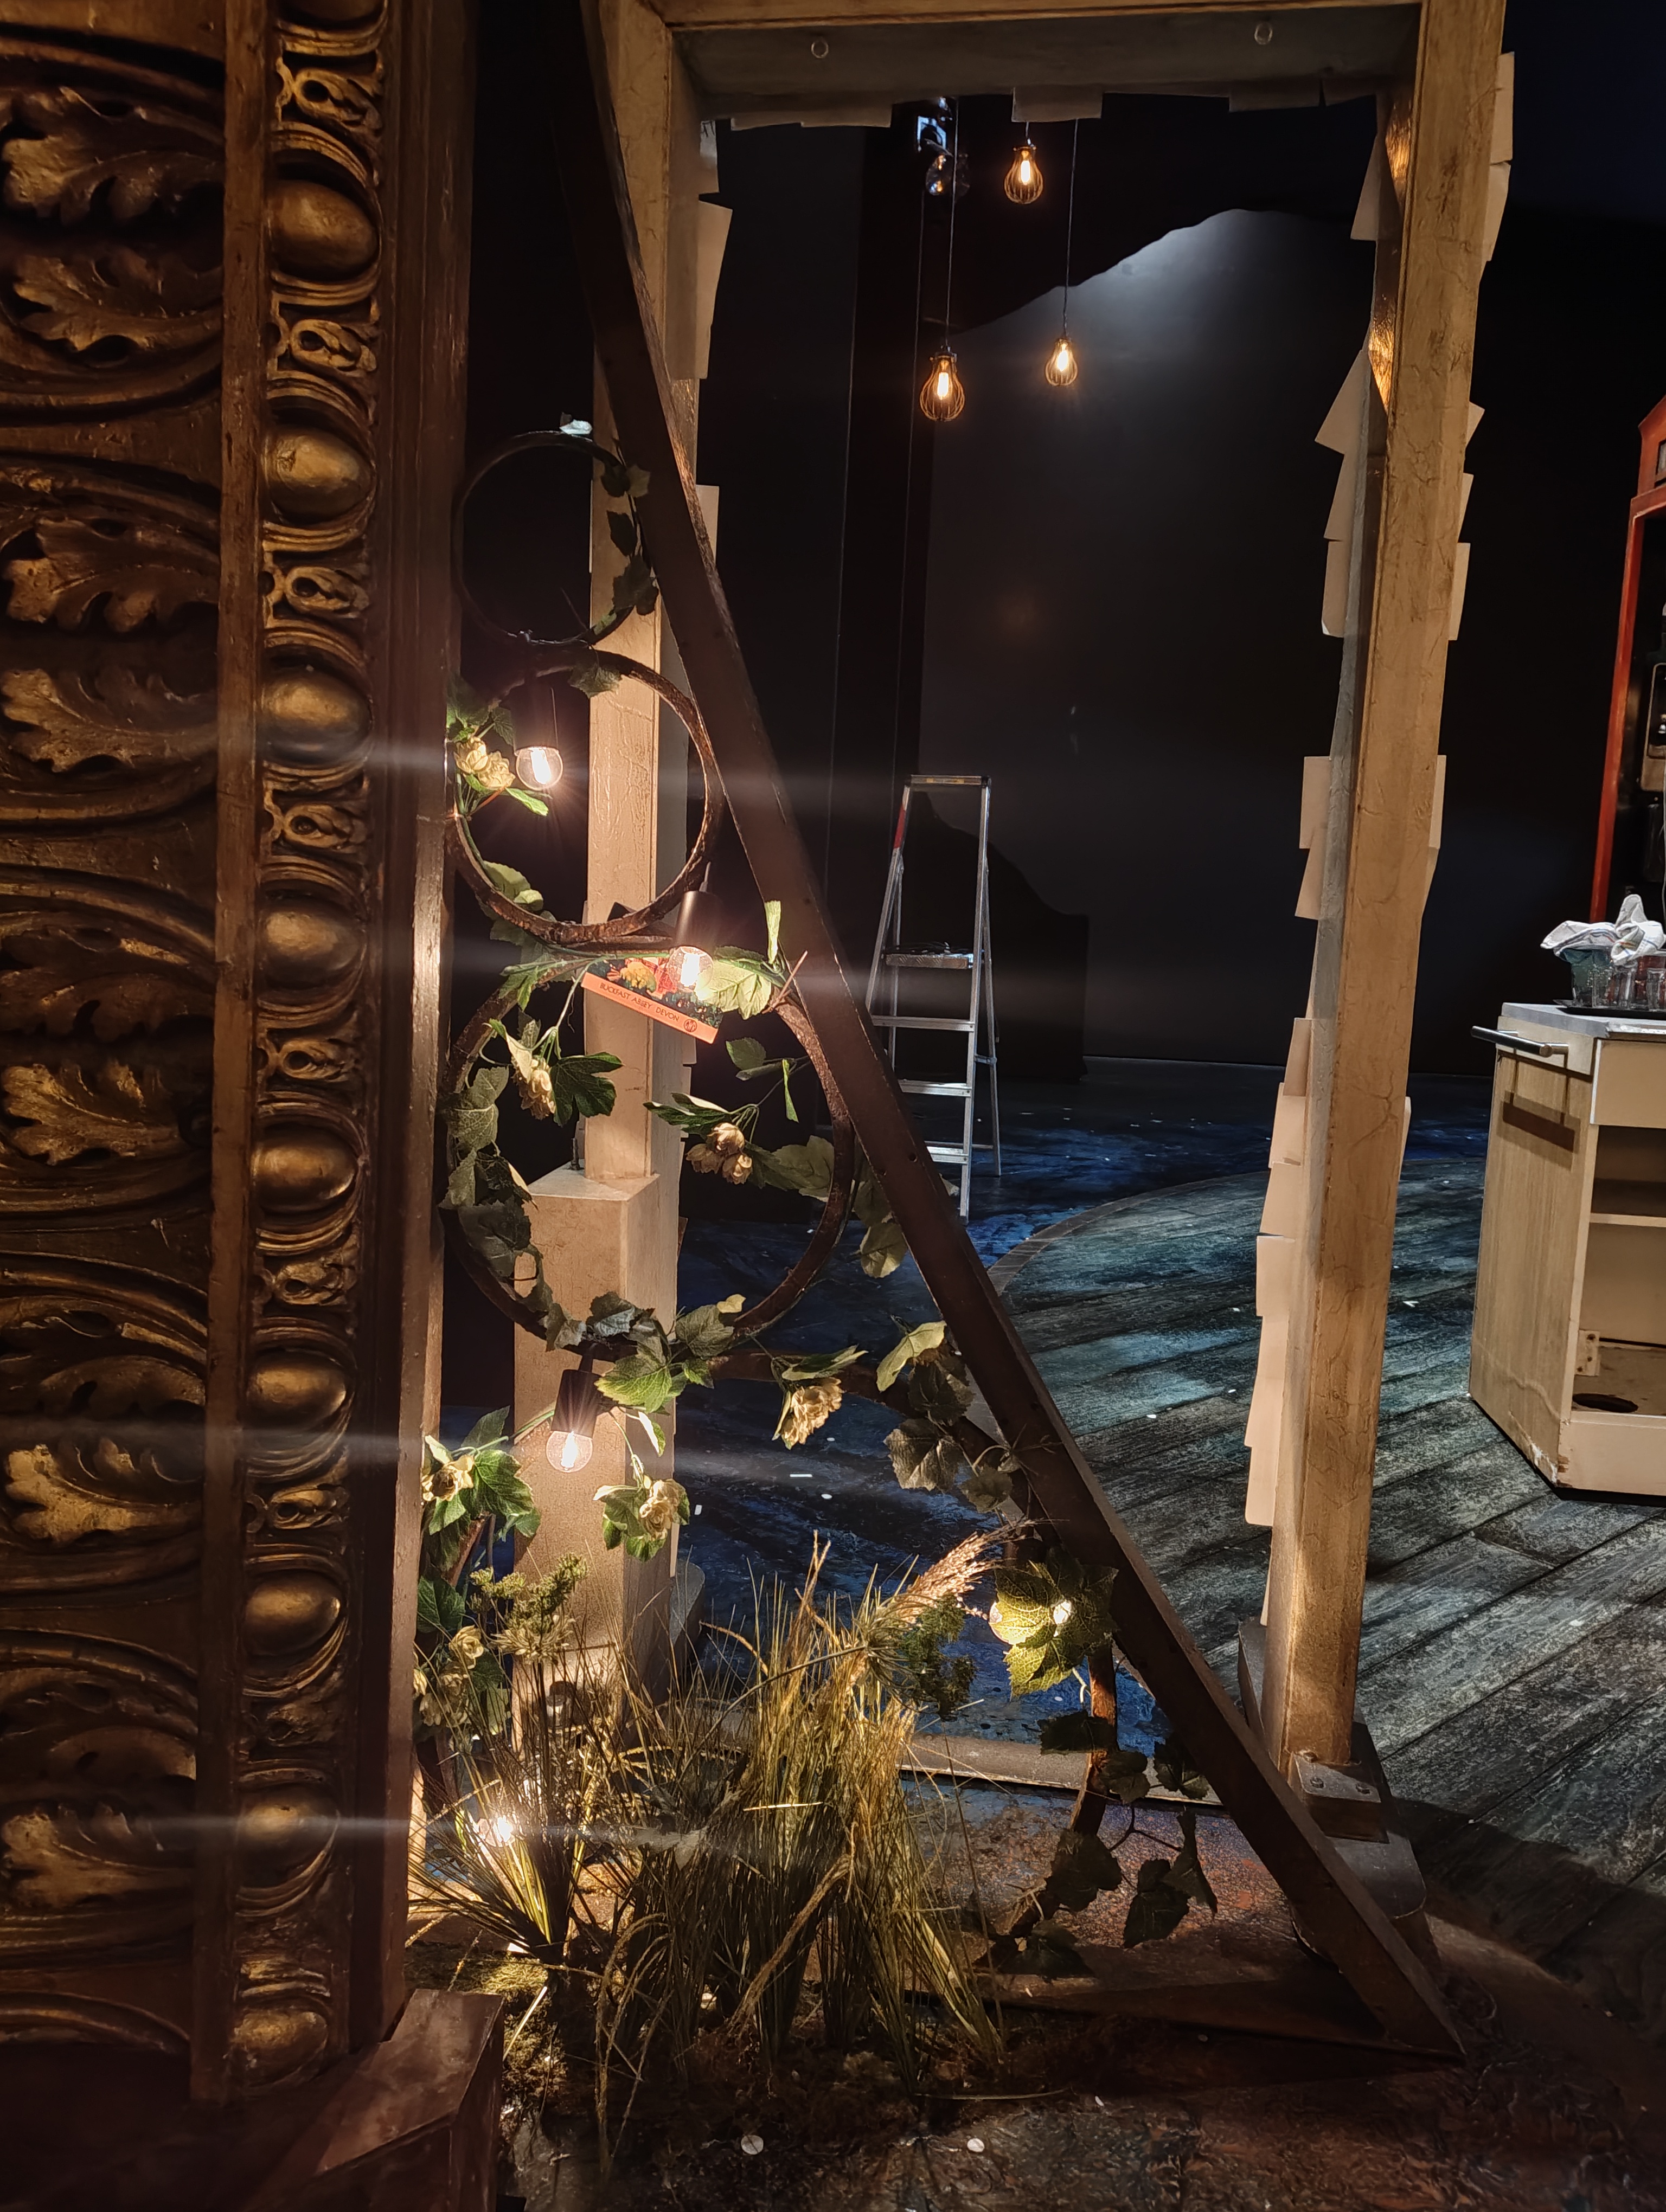
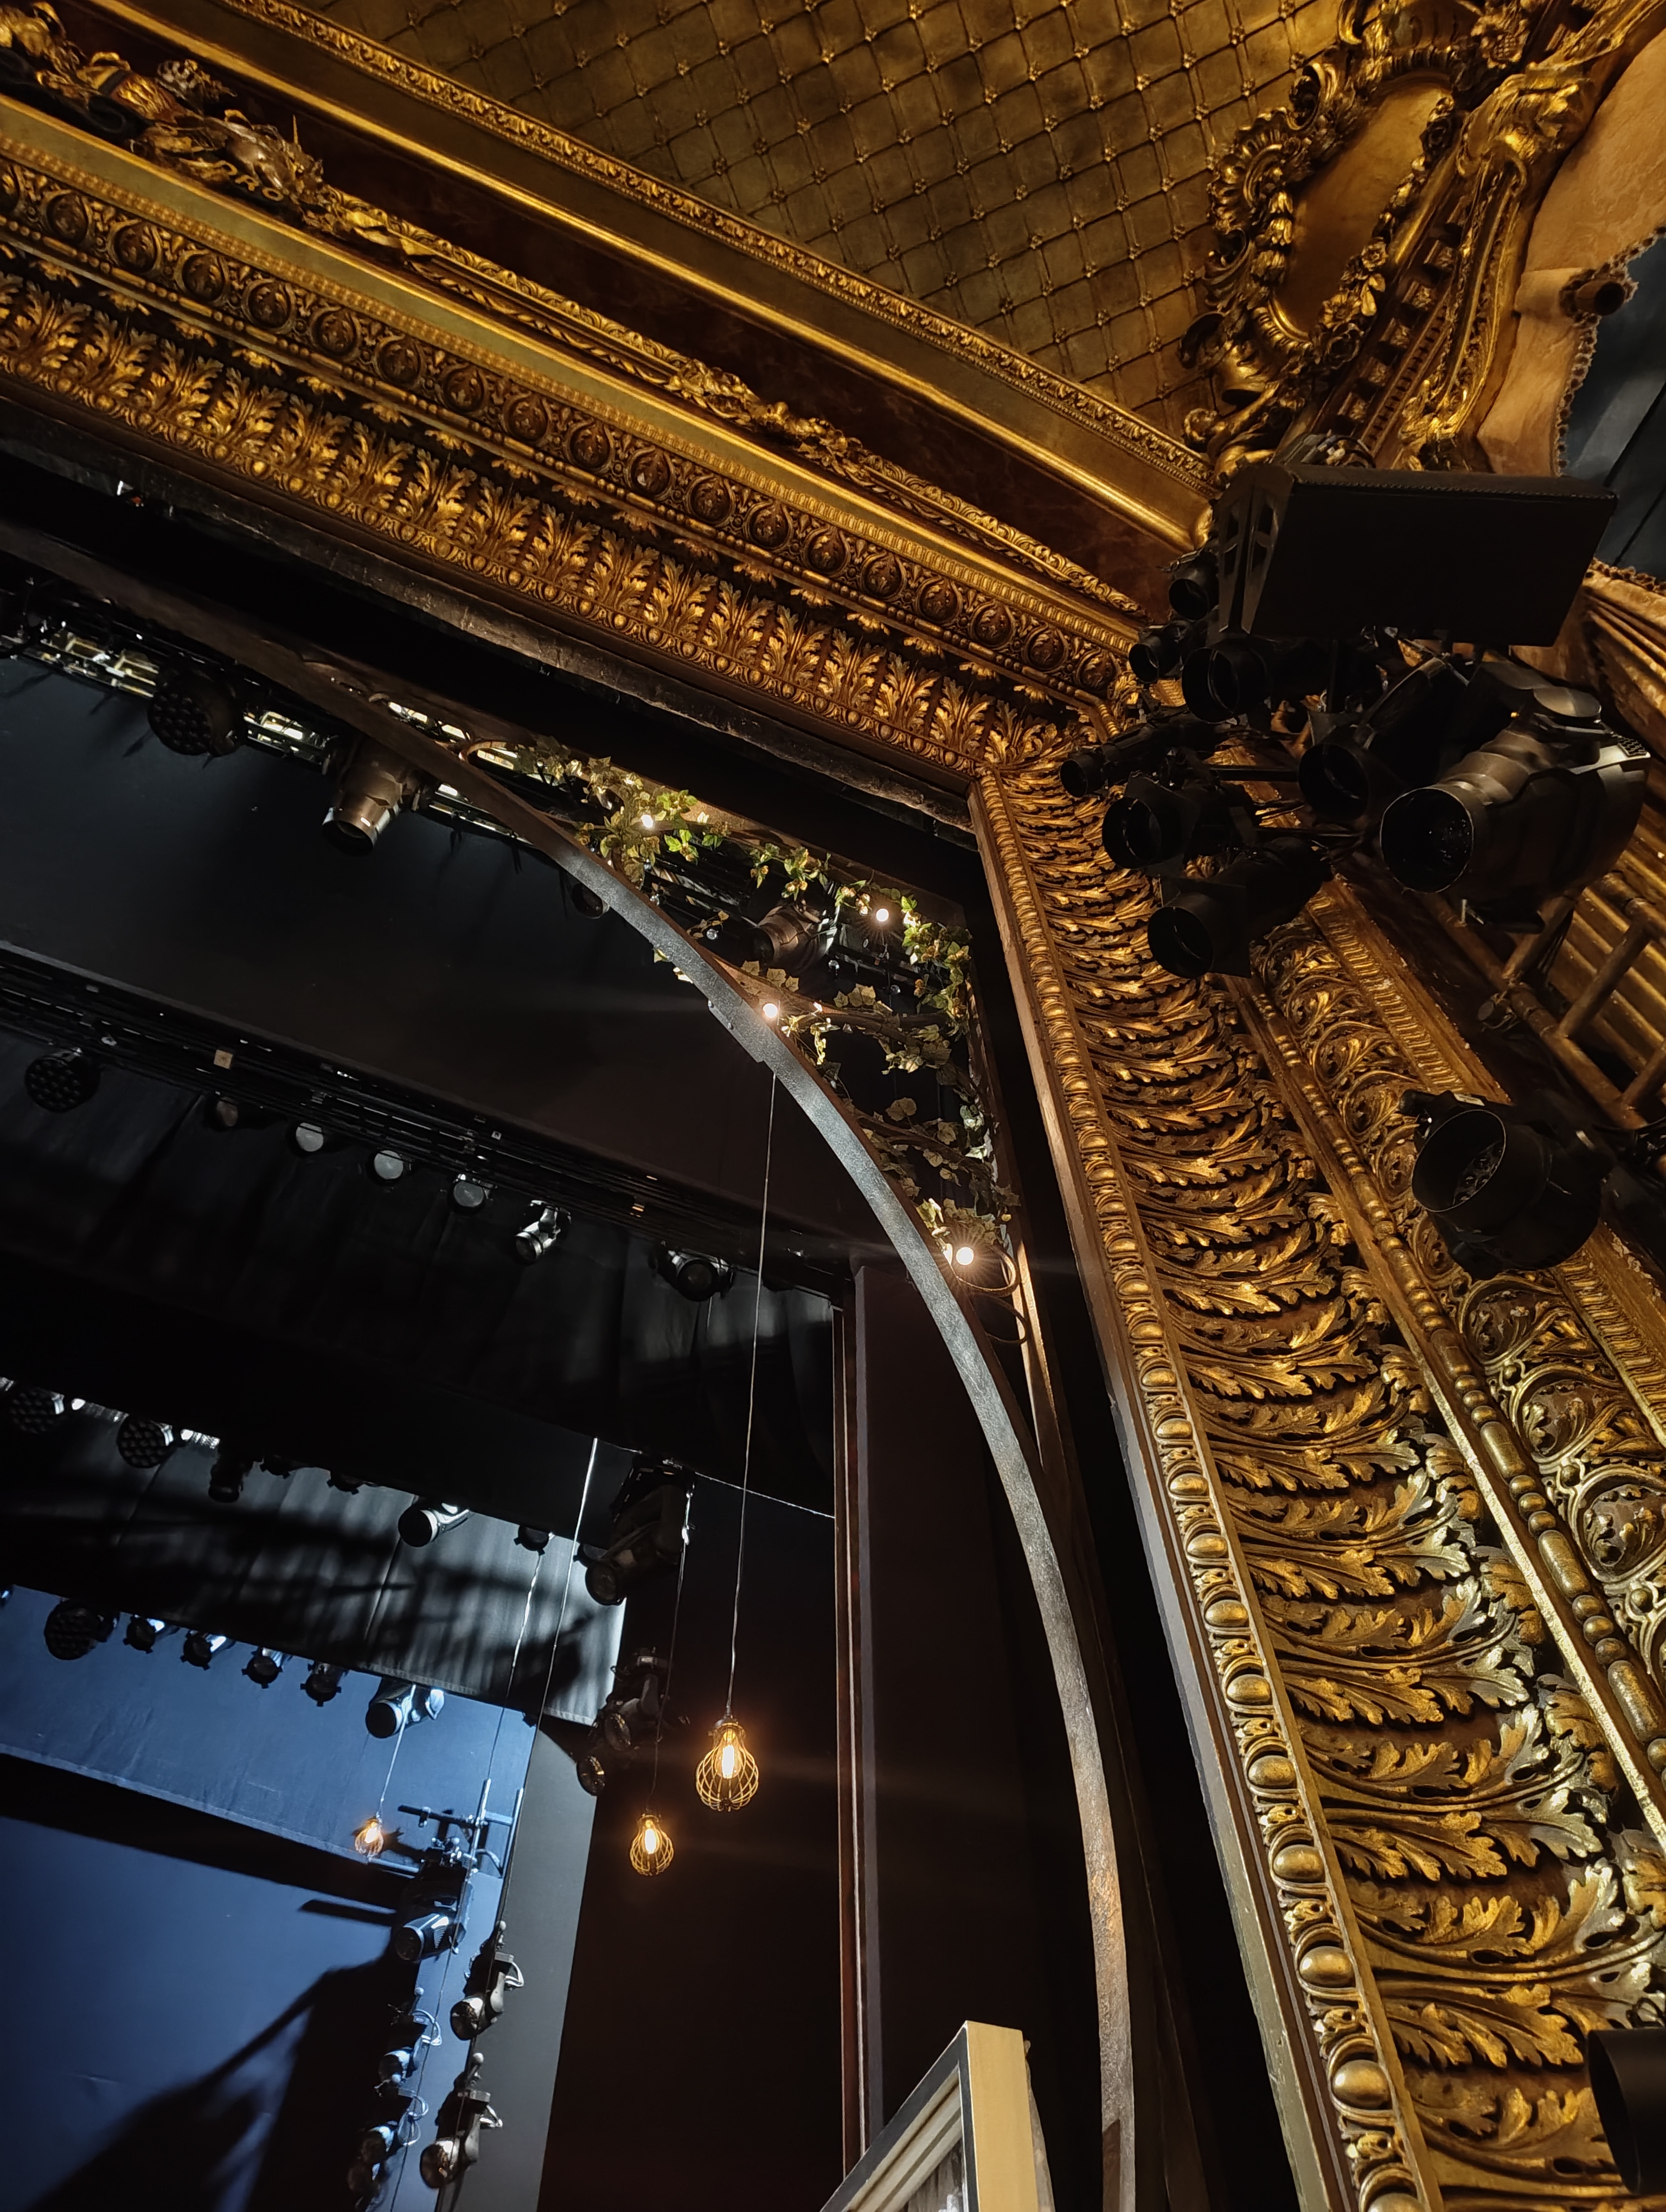
There are a total of 13 hanging light bulbs on the 4 corners of the pros ring. These are the barrel festoons — decorative bulbs that frame the proscenium arch.
Channels & Addressing
- Channels: 851–854
- Fixture Type: Dimmer
- Addresses:
- Ch 851: 1/191
- Ch 852: 1/176
- Ch 853: 1/77
- Ch 854: 1/71
- Parameters: Intensity only (single channel dimmer)
Power & Control
| Power Source | House Dimmer |
| Cable Type | 15 amp TRS (Soccapex + breakout box) |
Images
Key Views
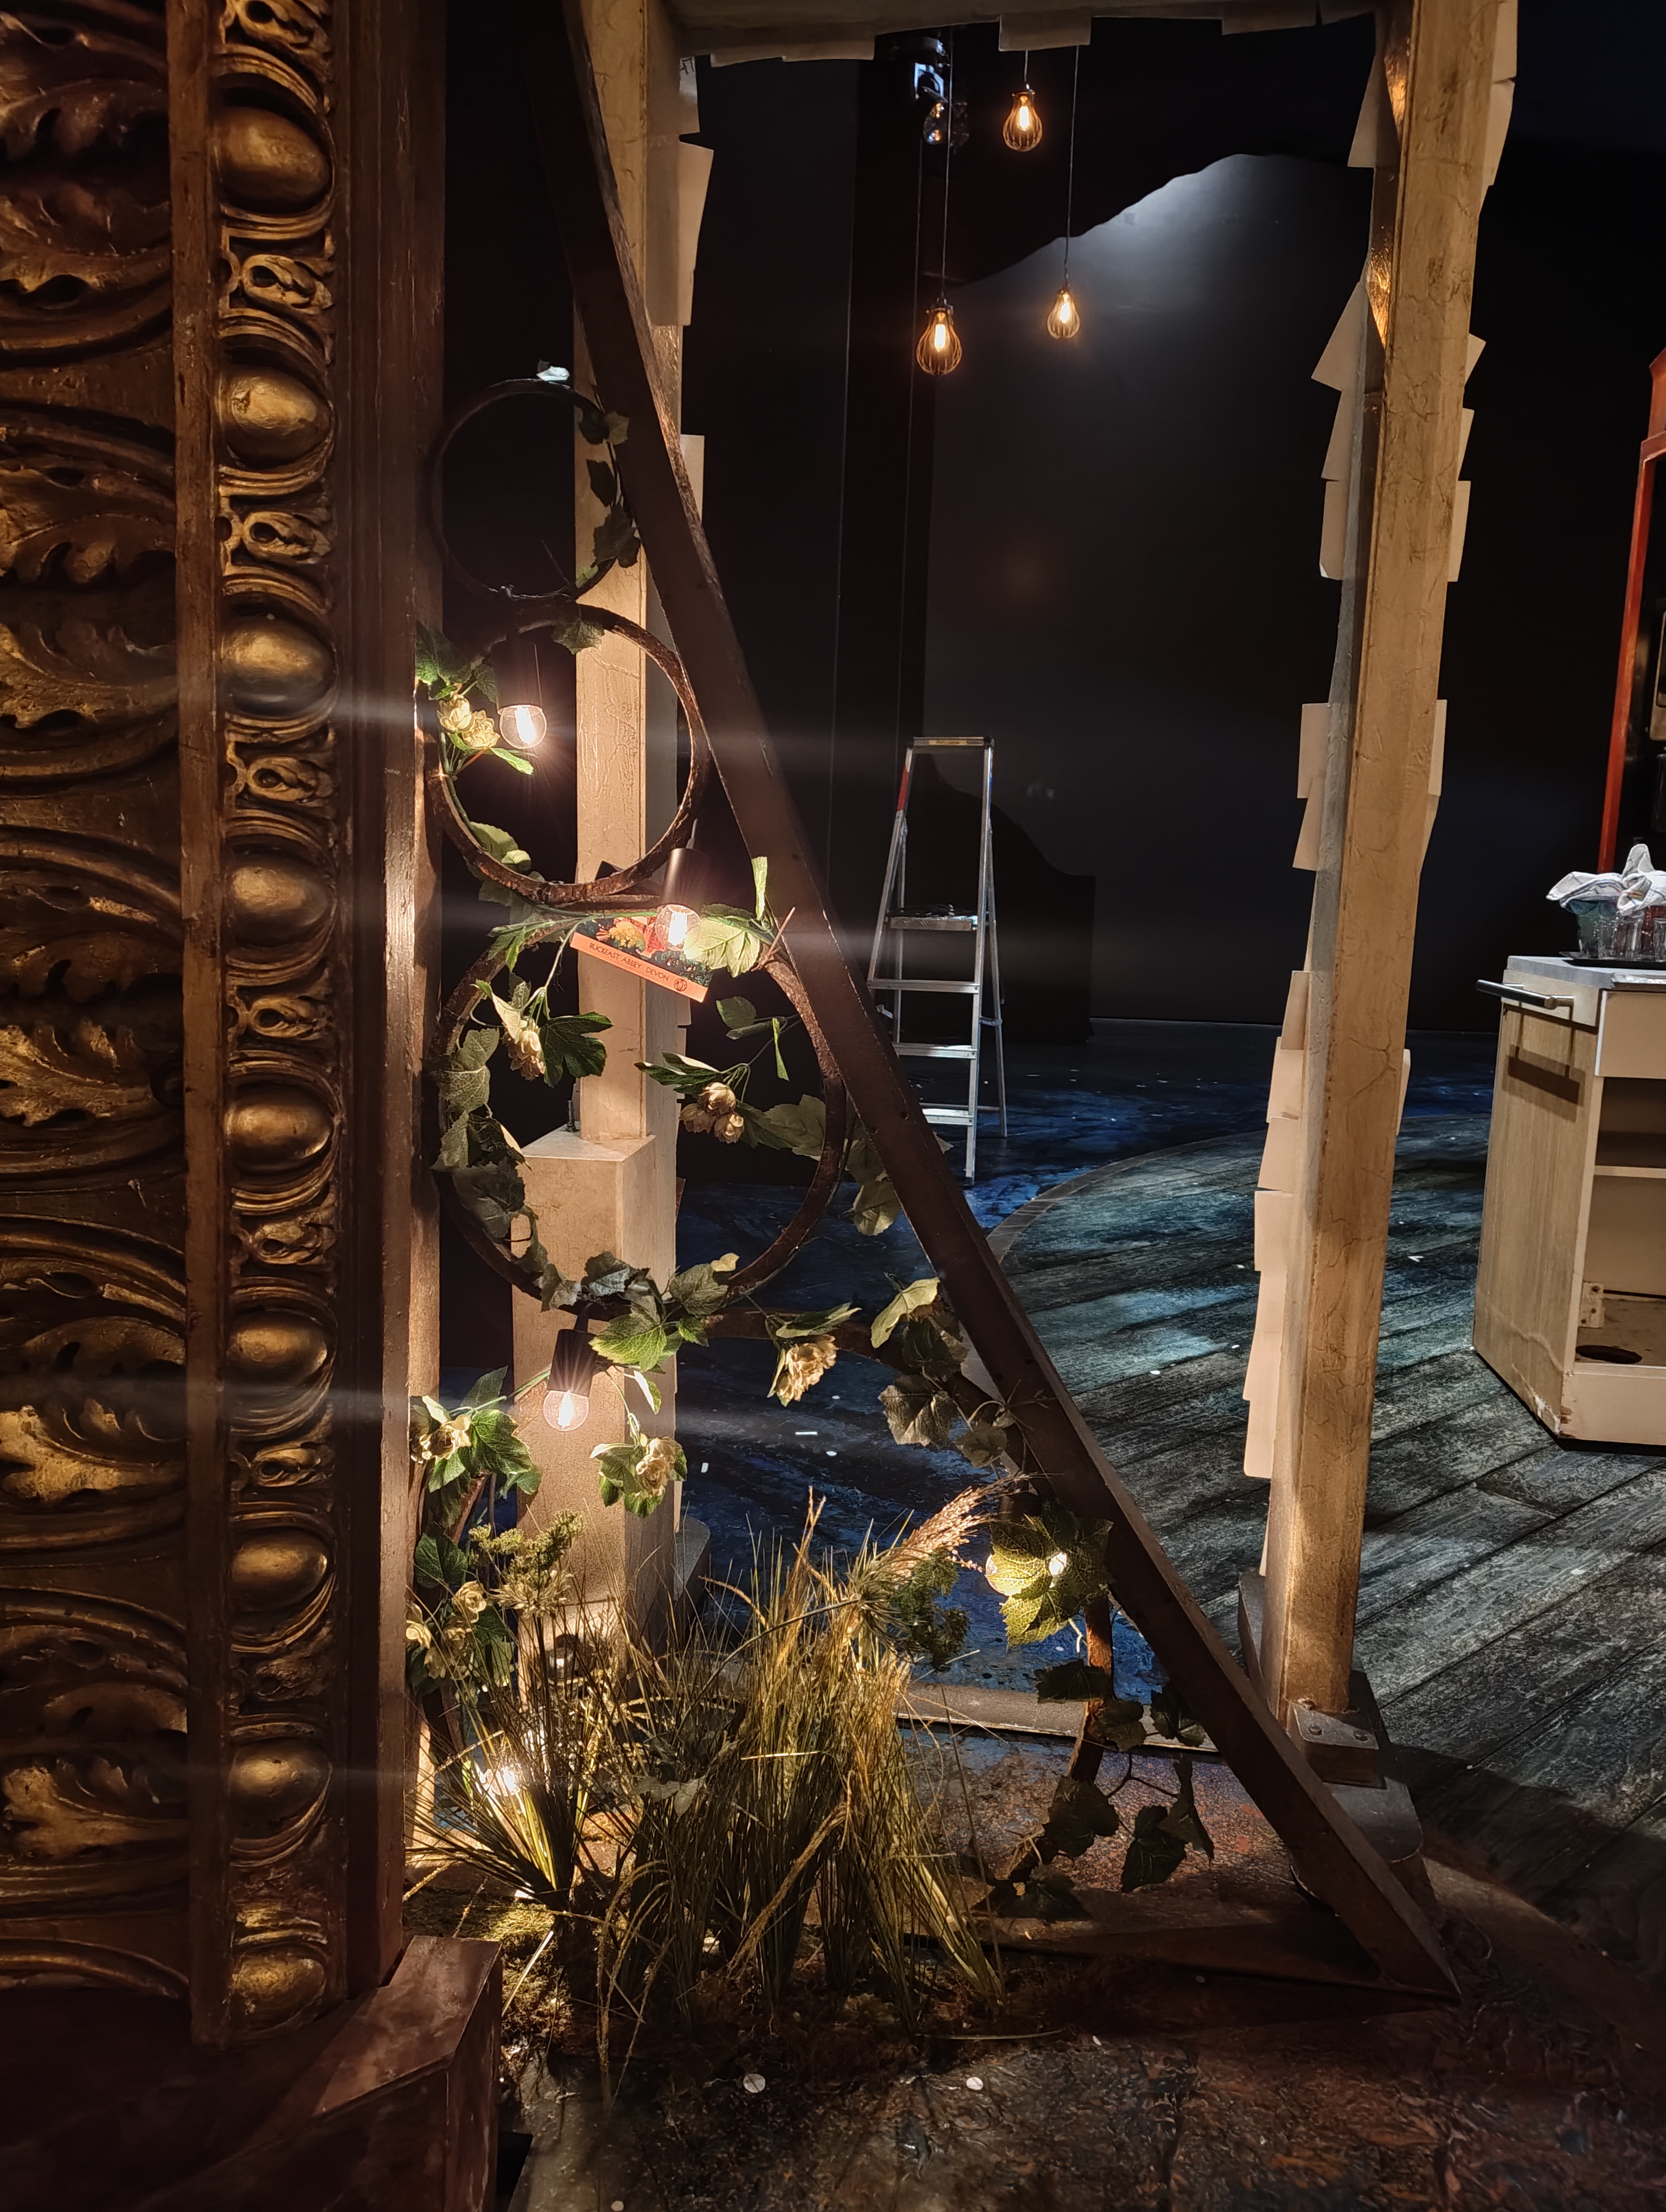
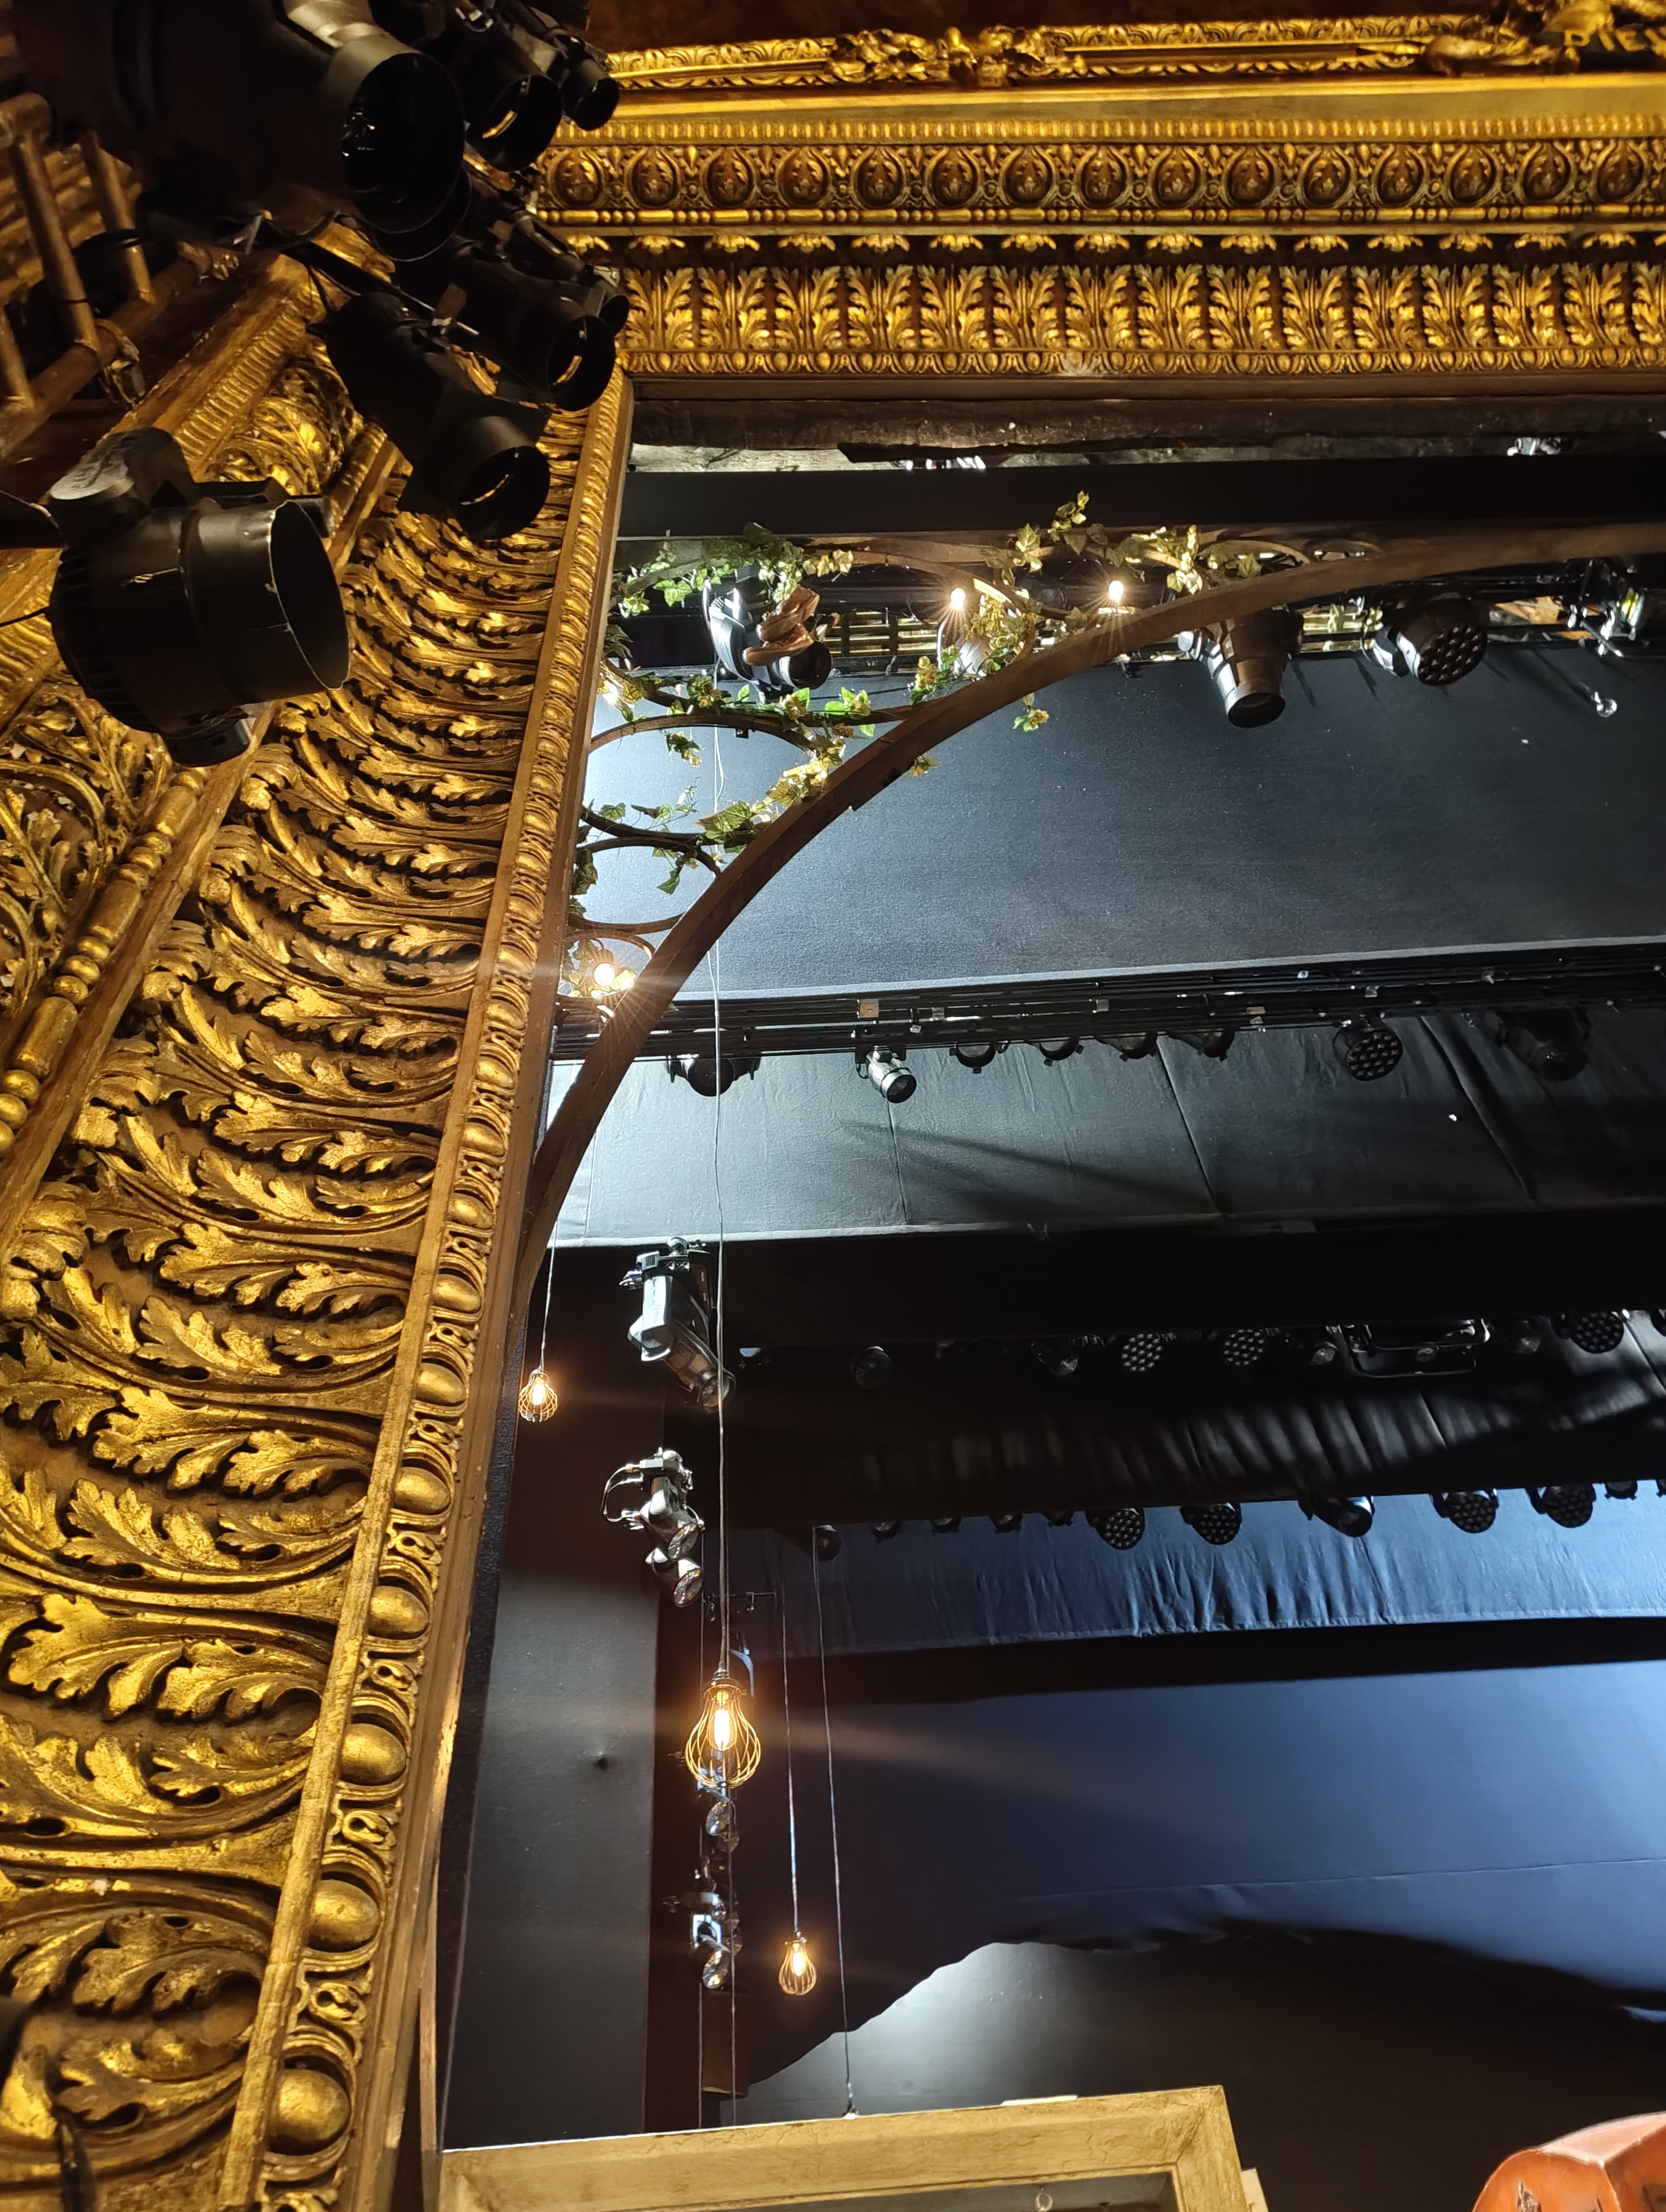
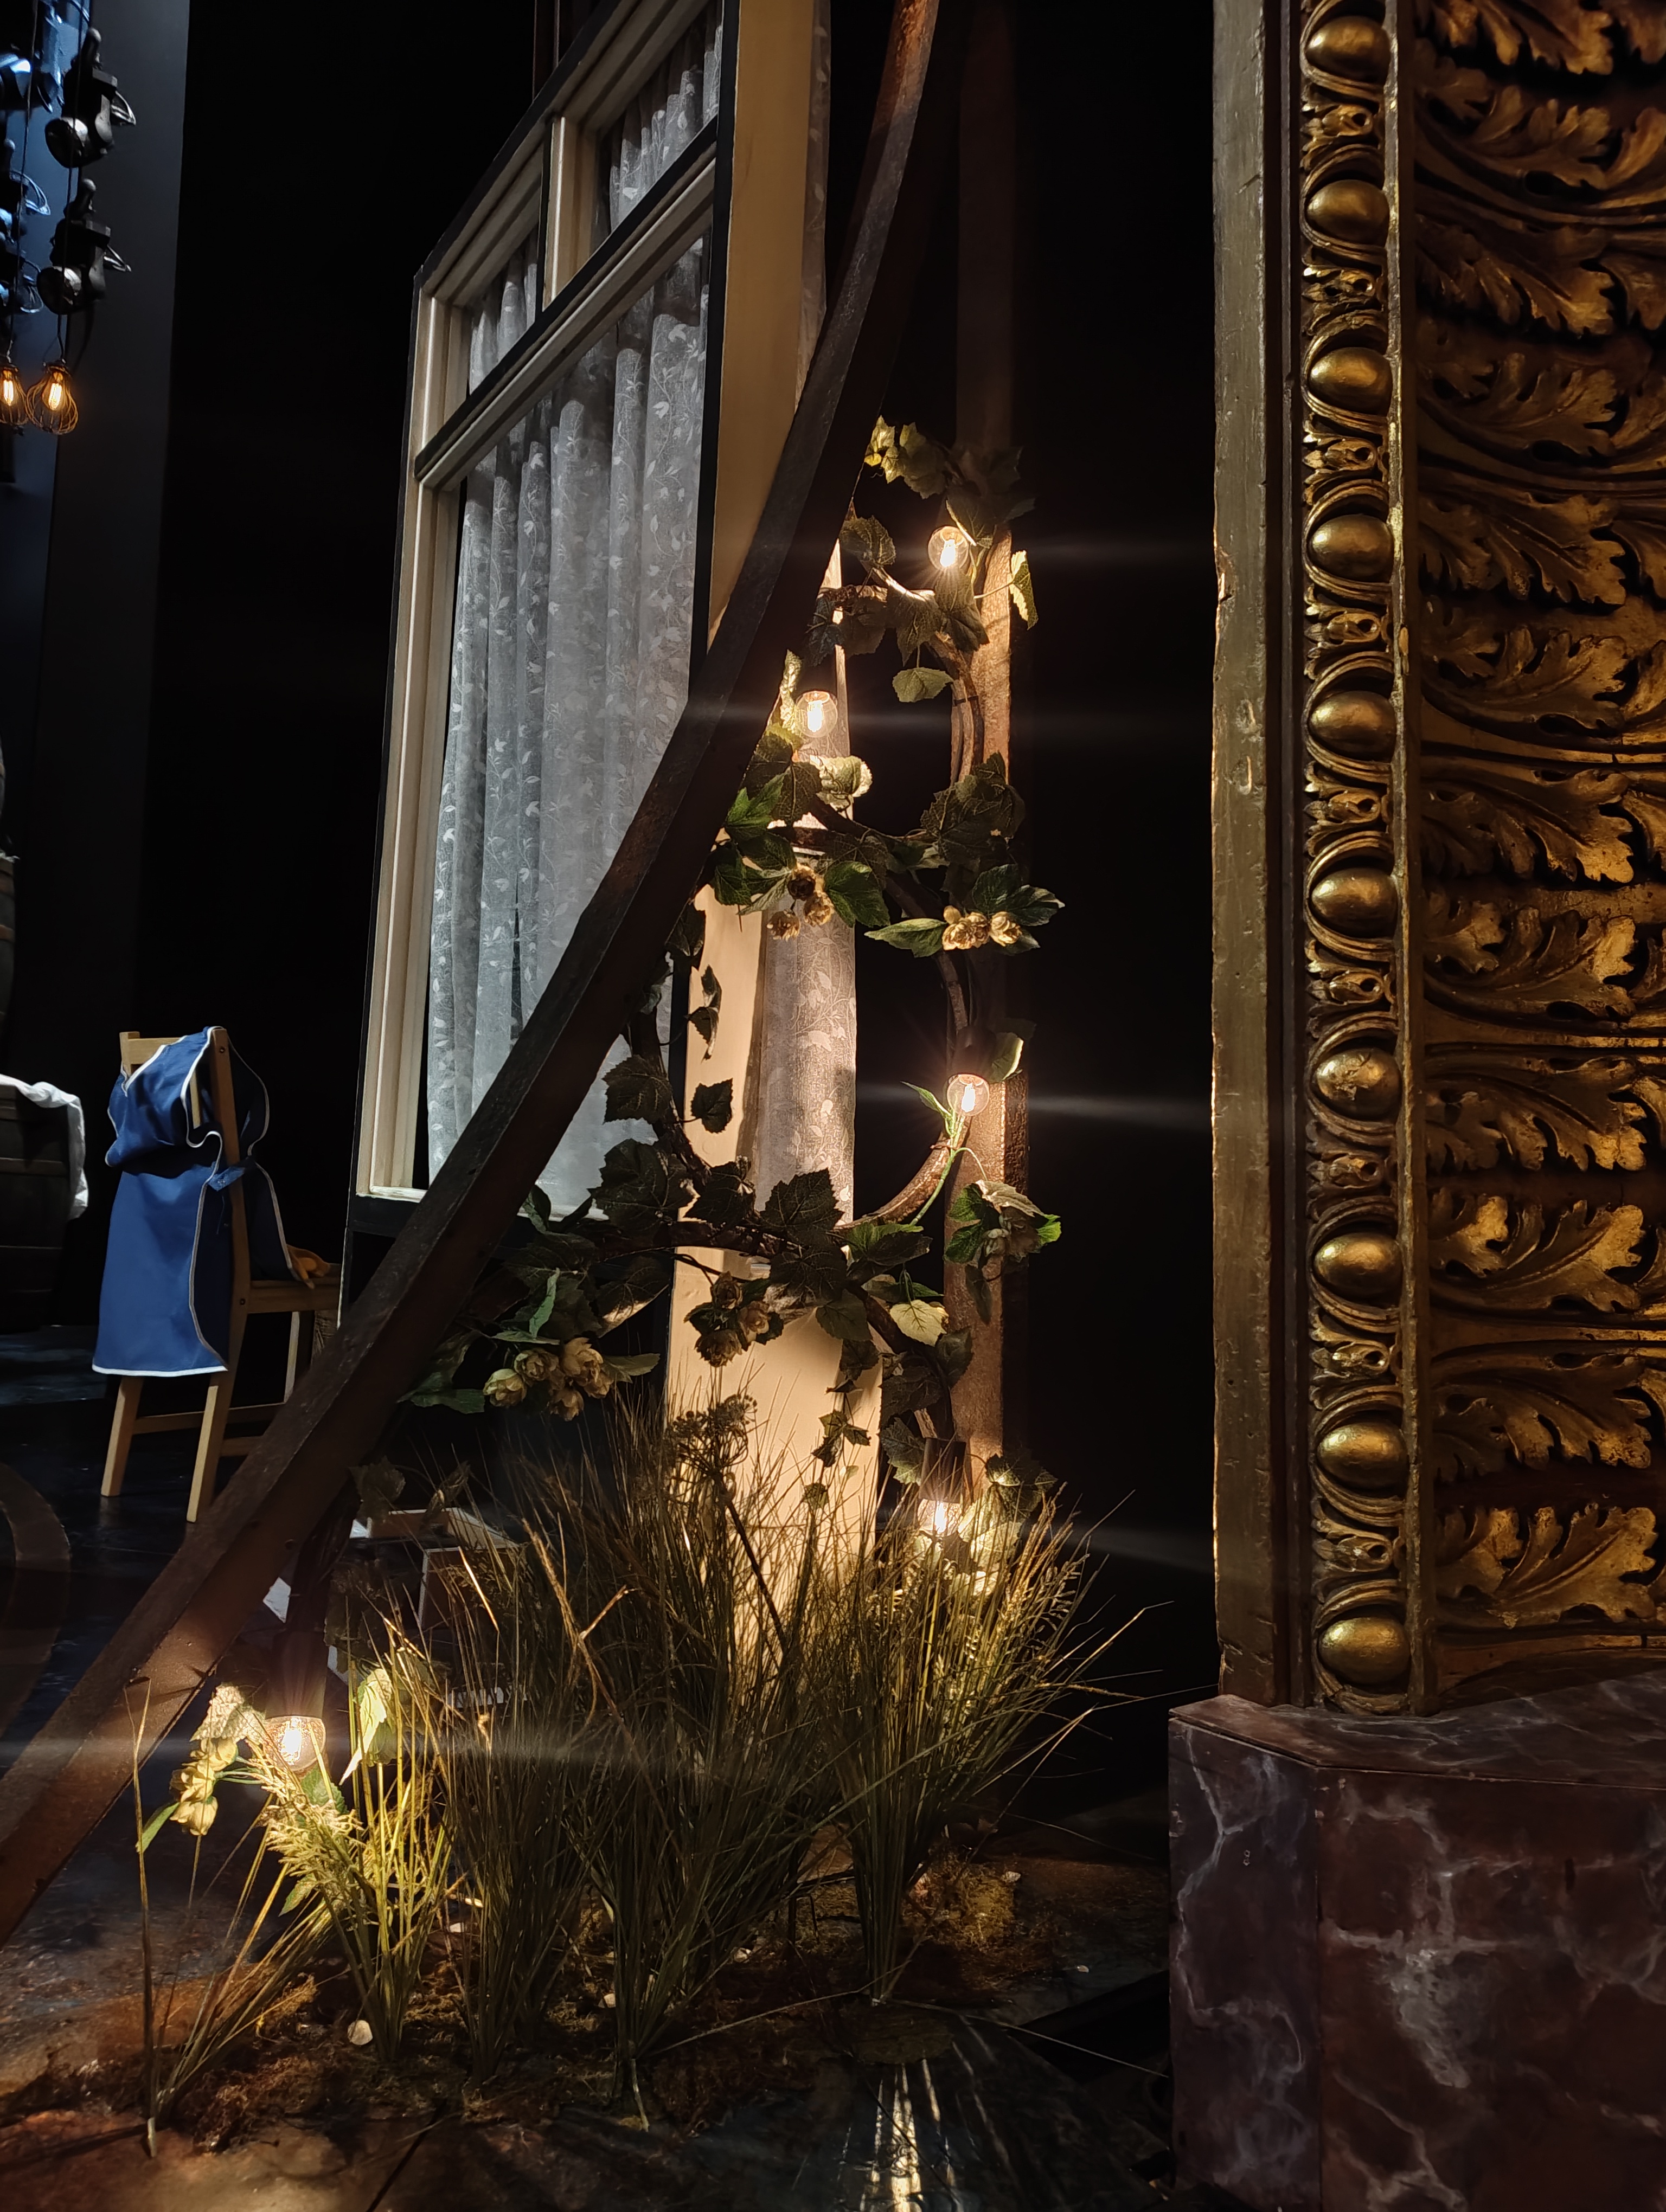
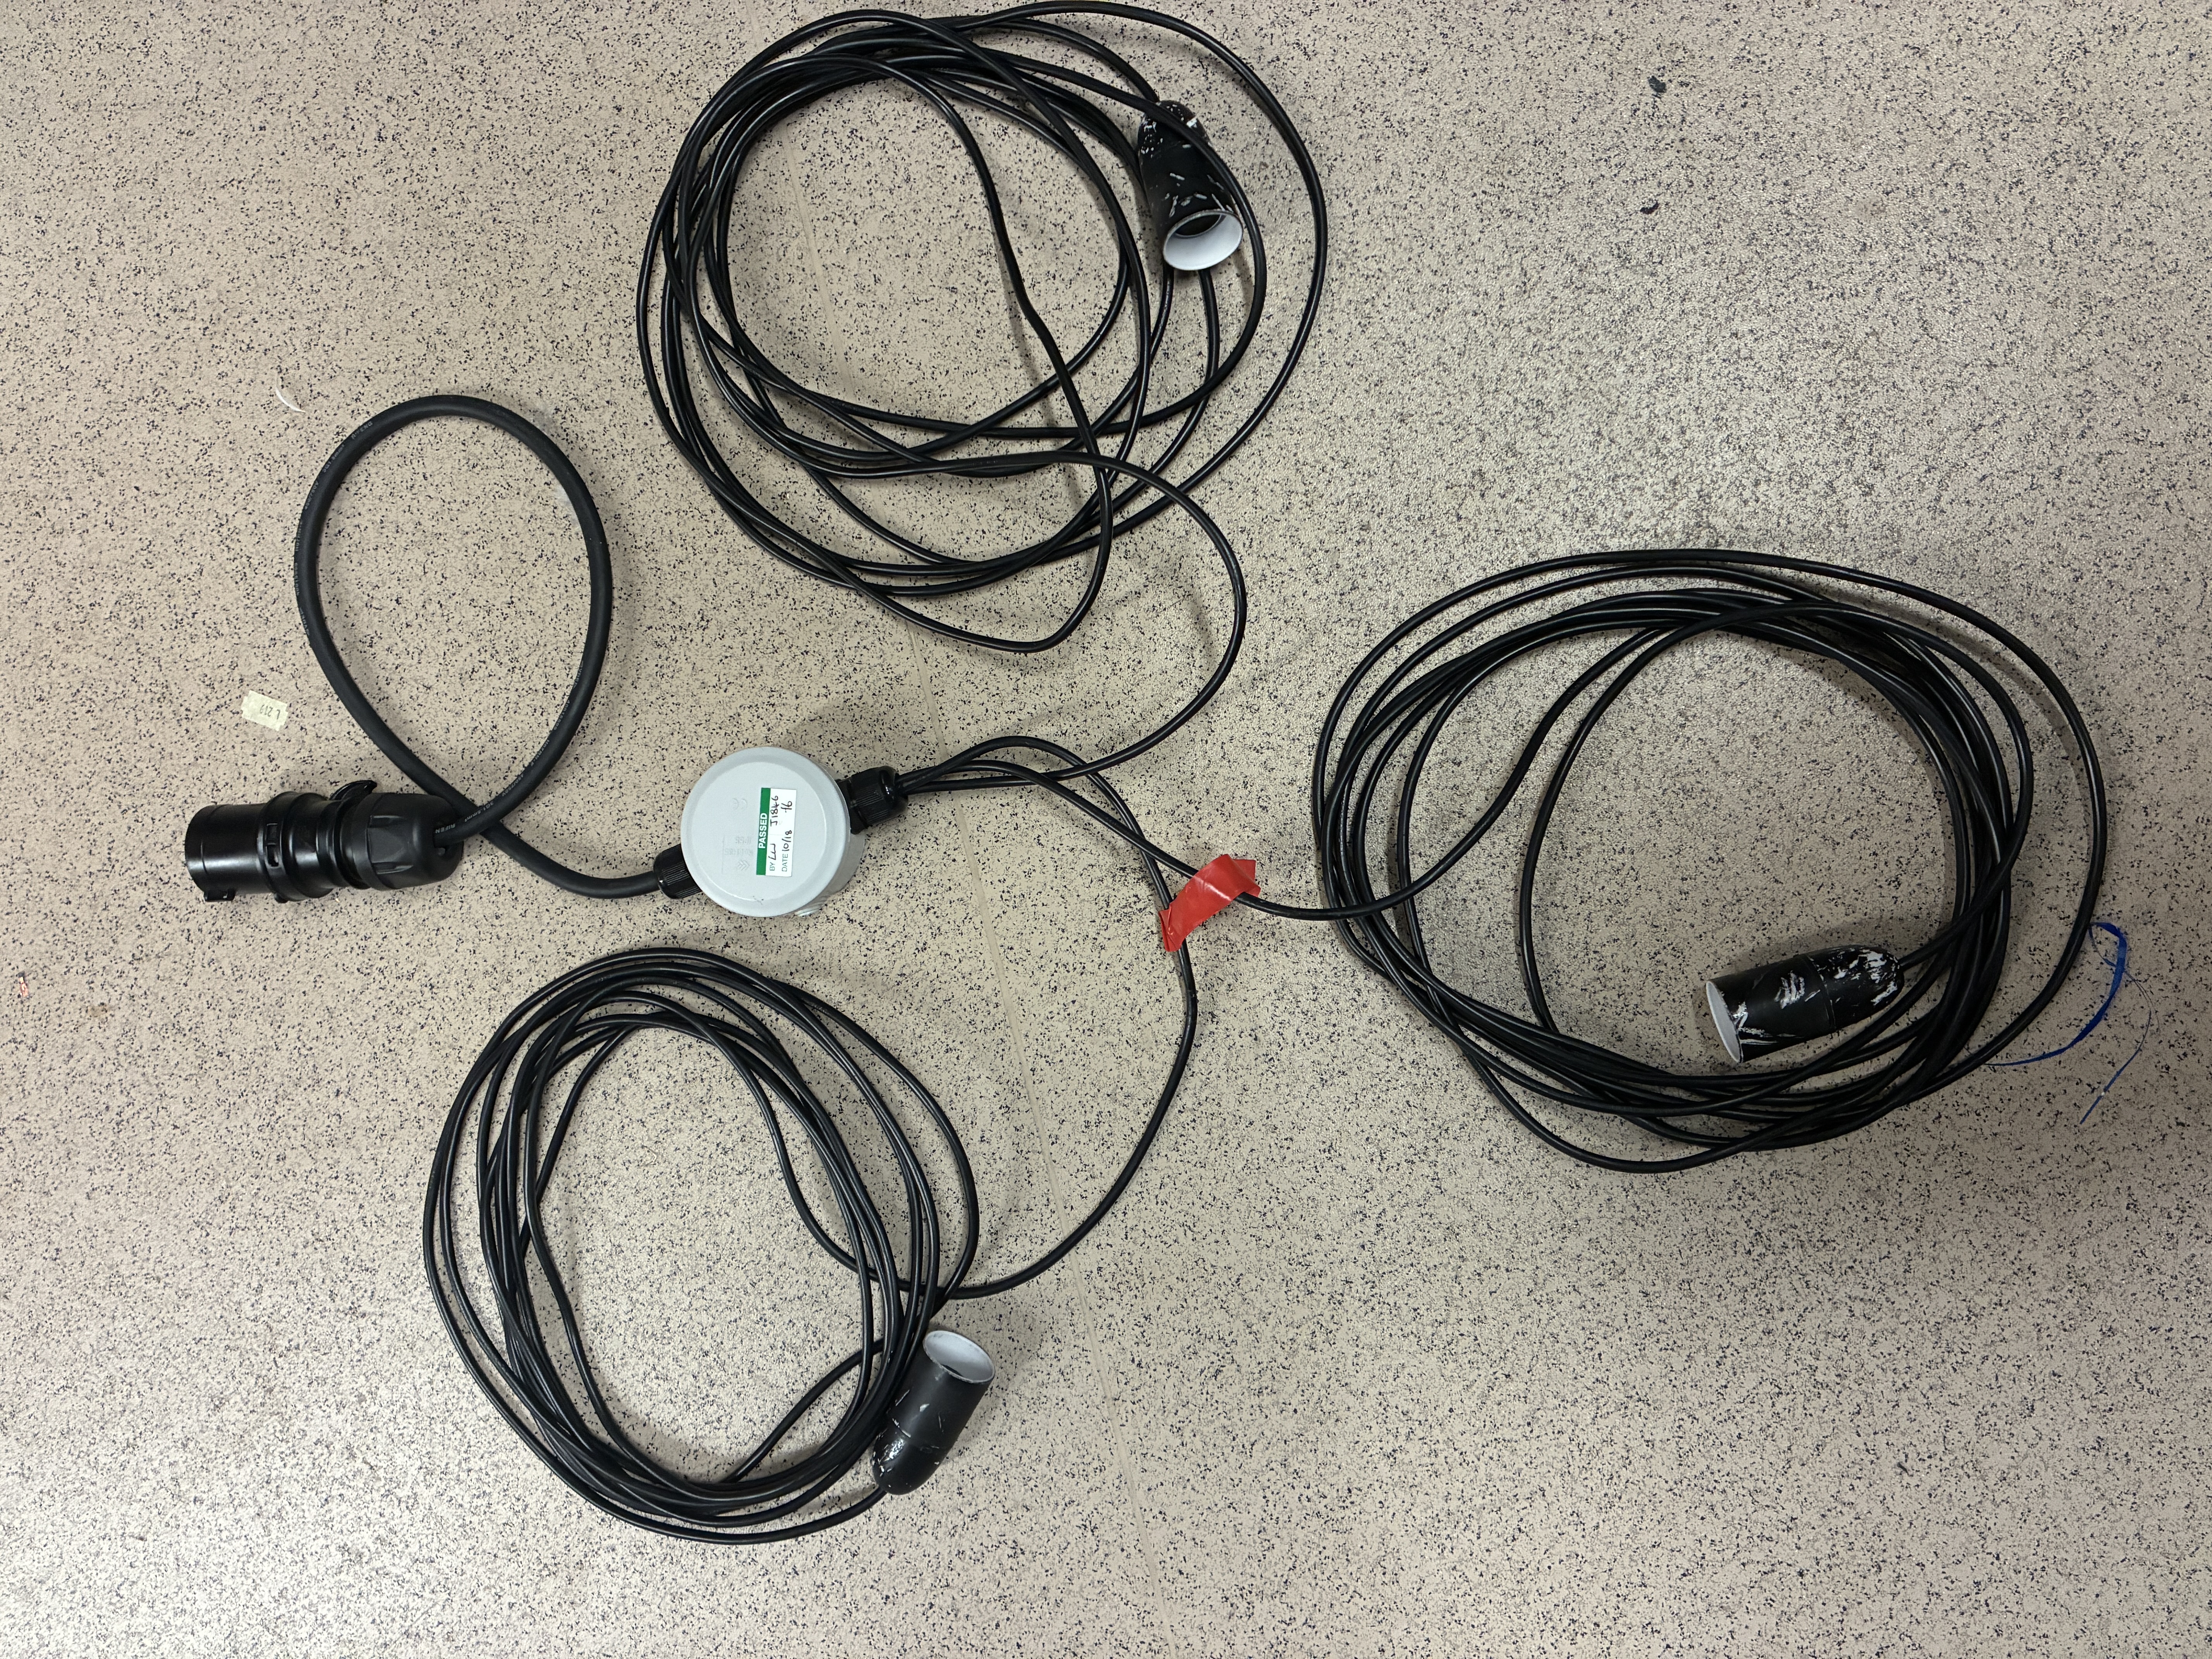
All Reference Photos (click to expand)
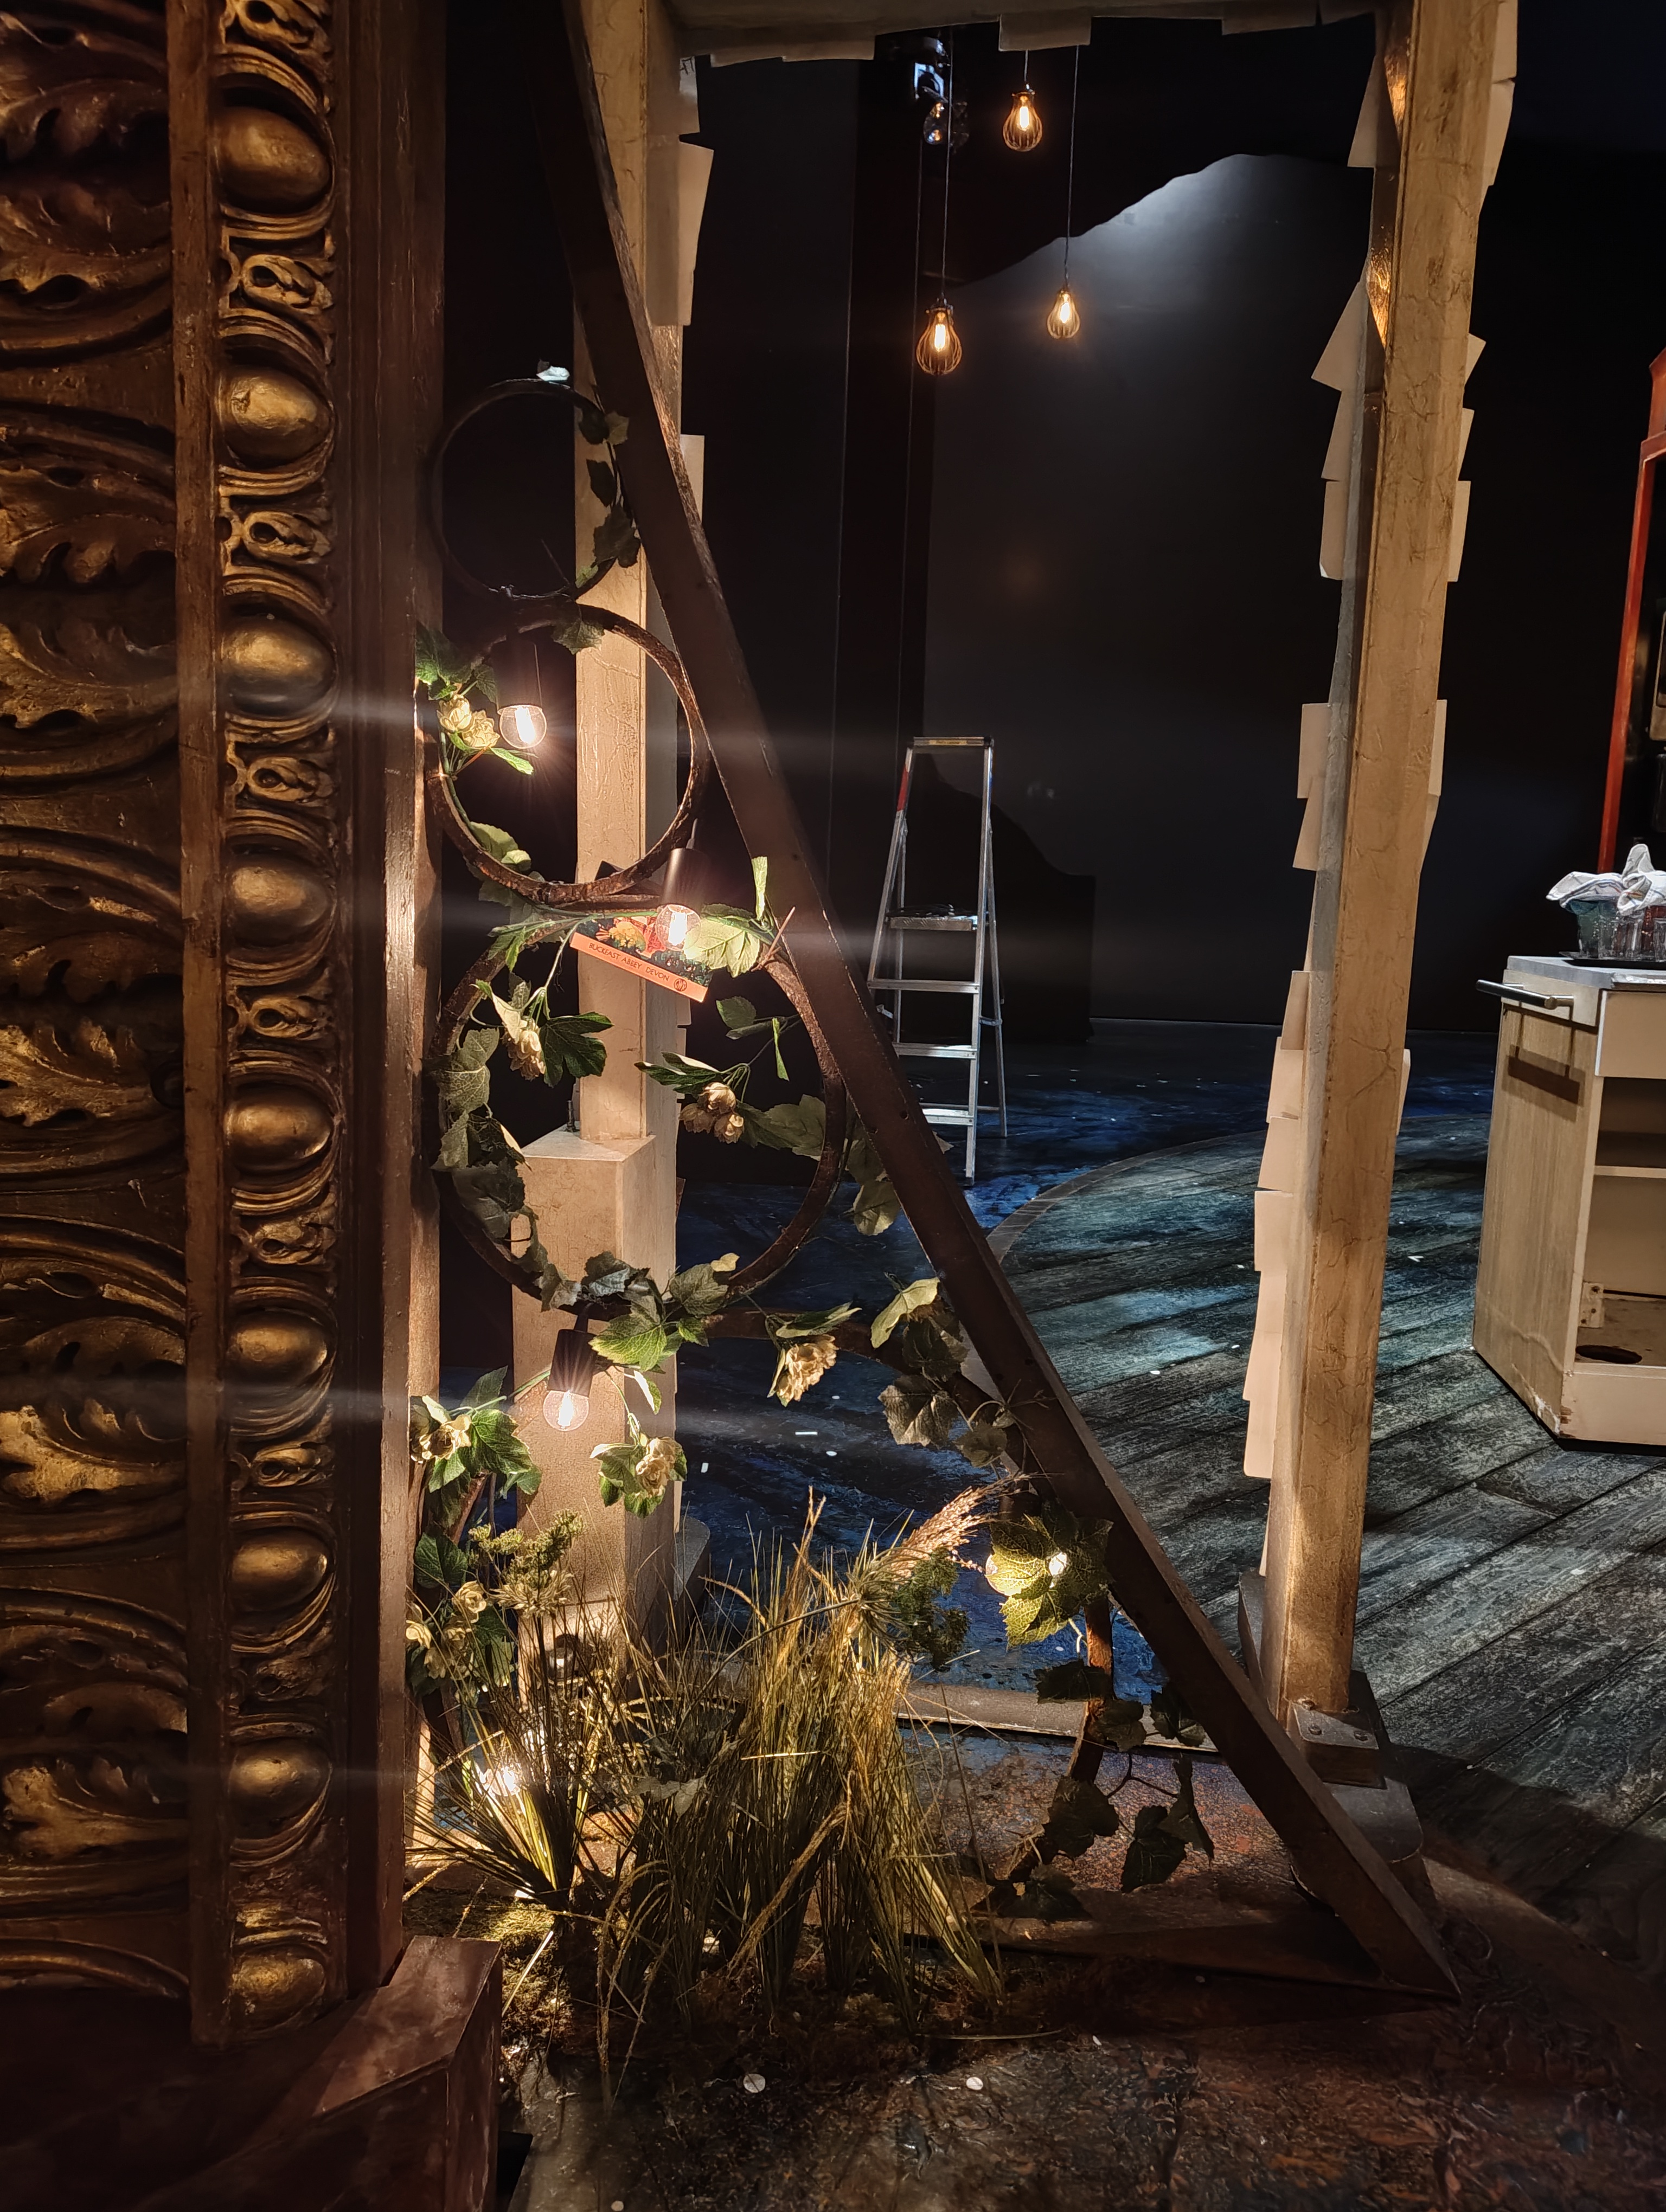
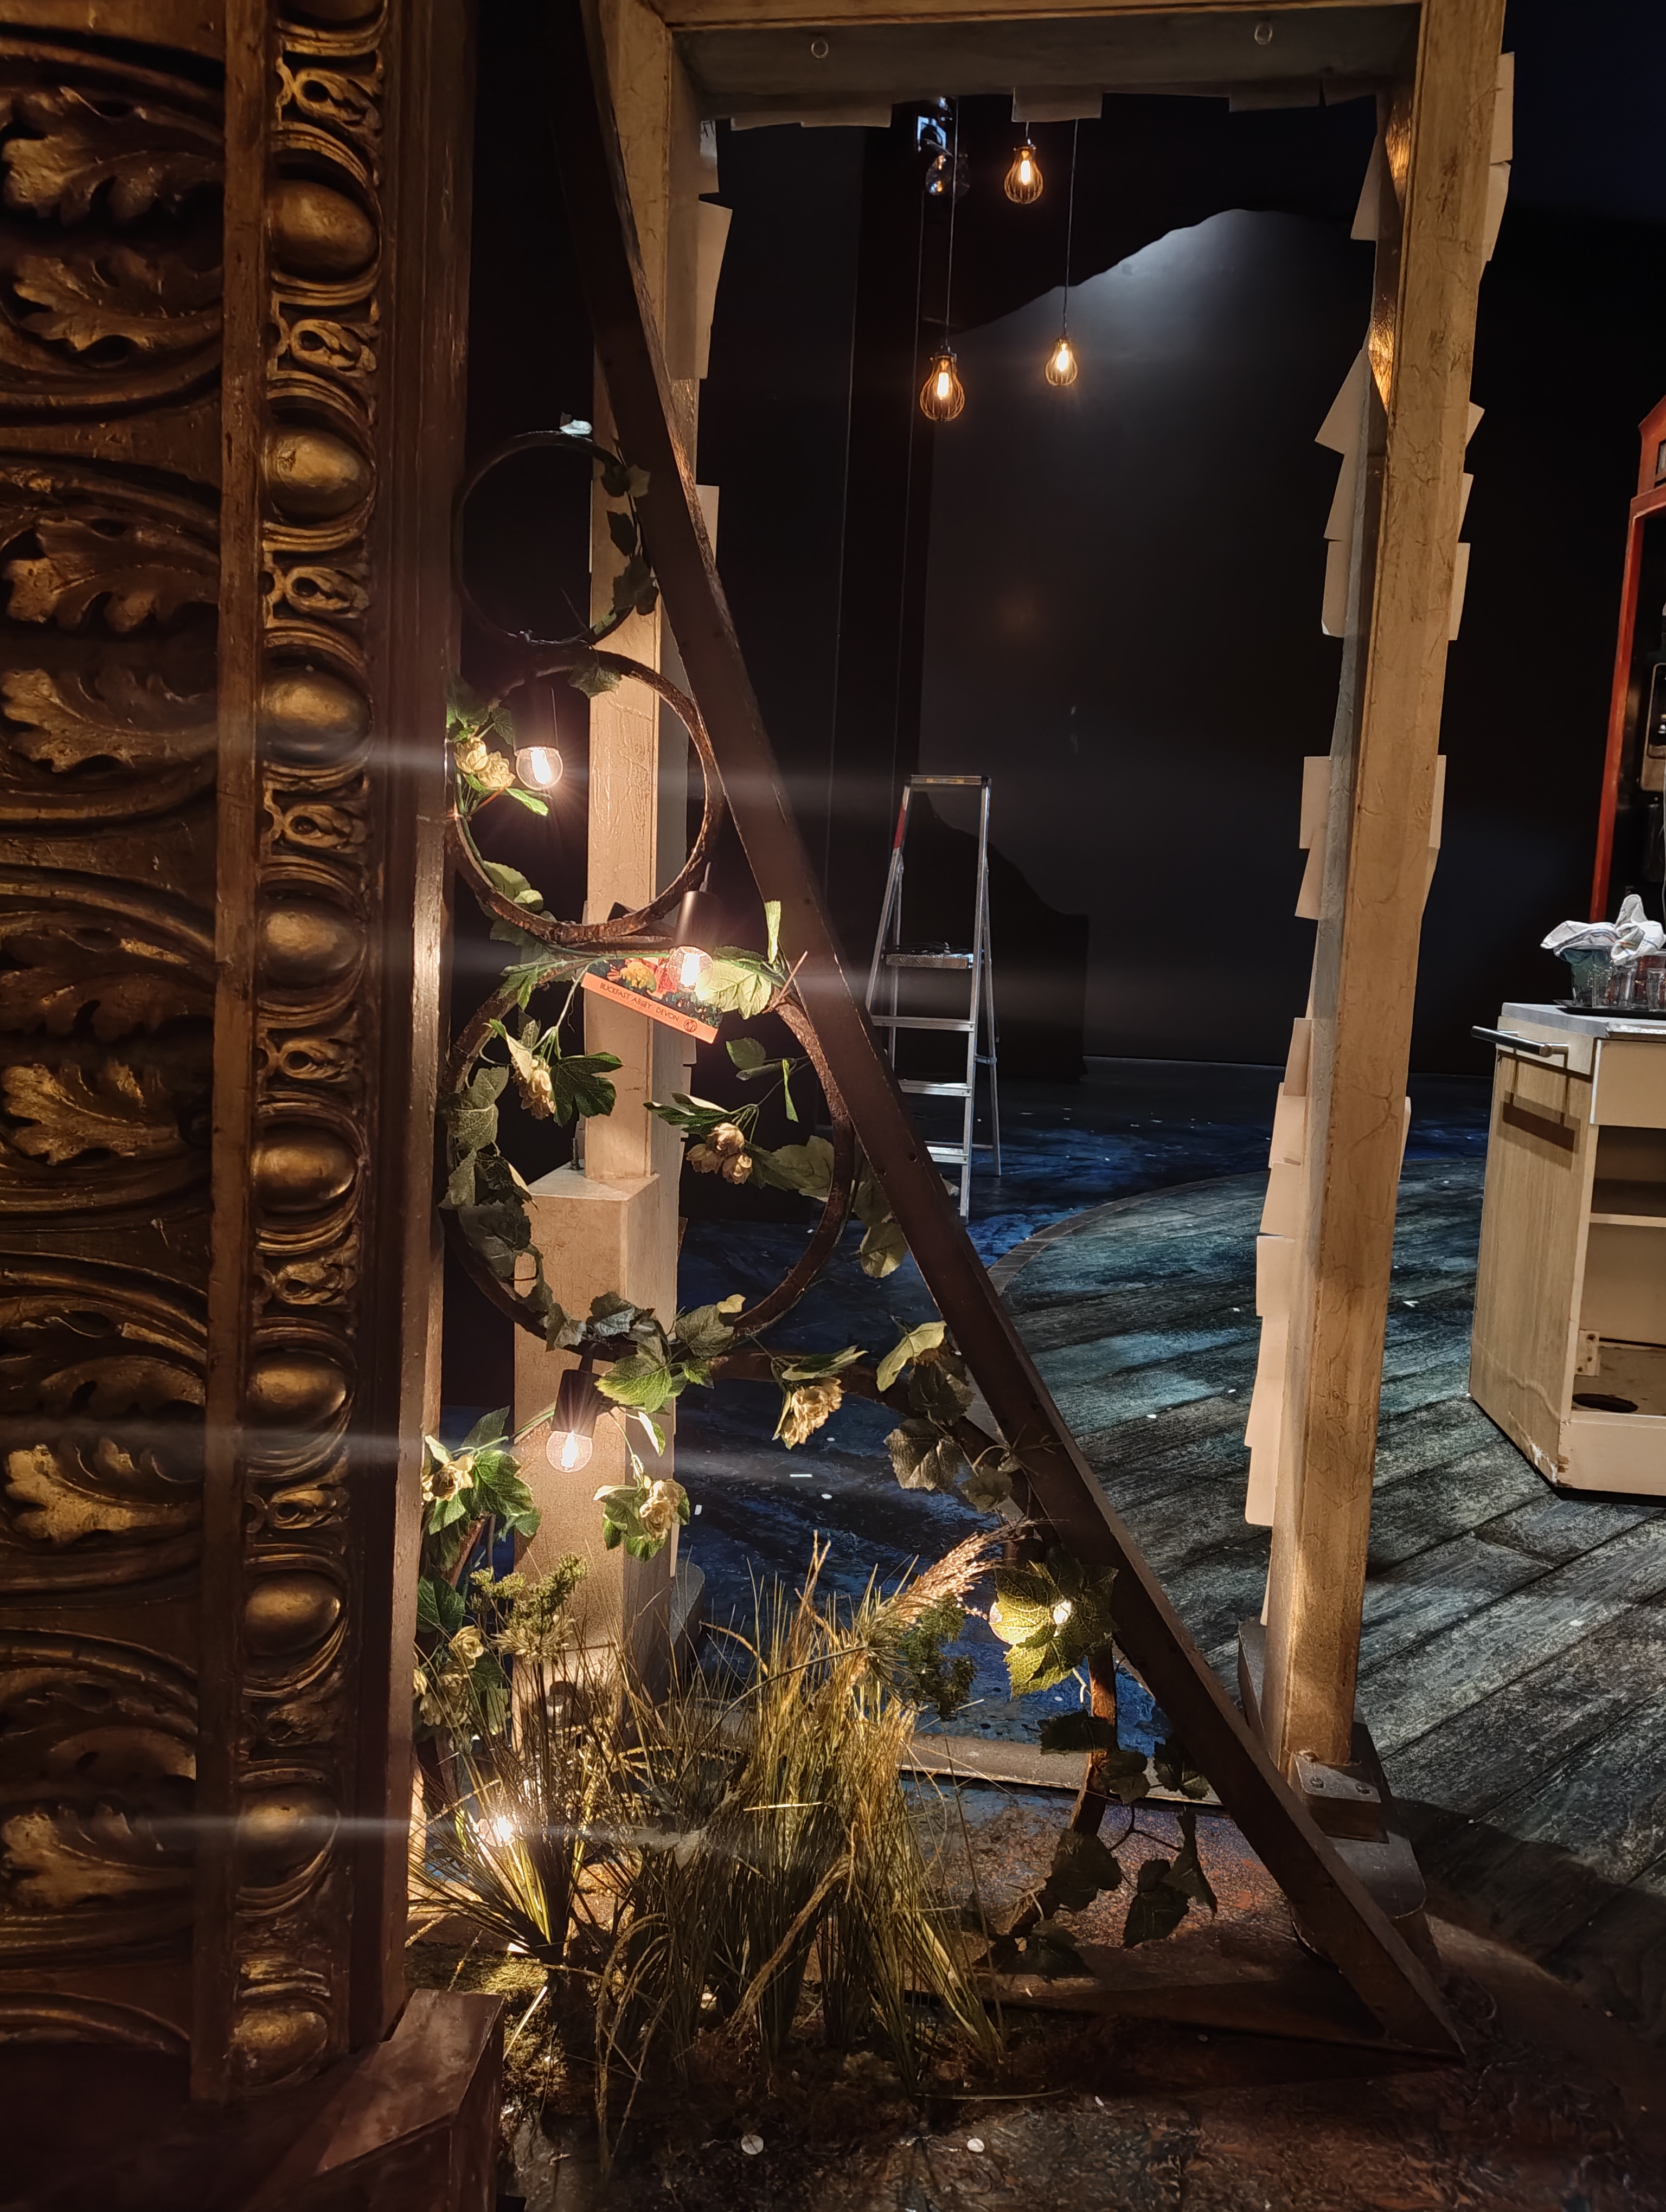
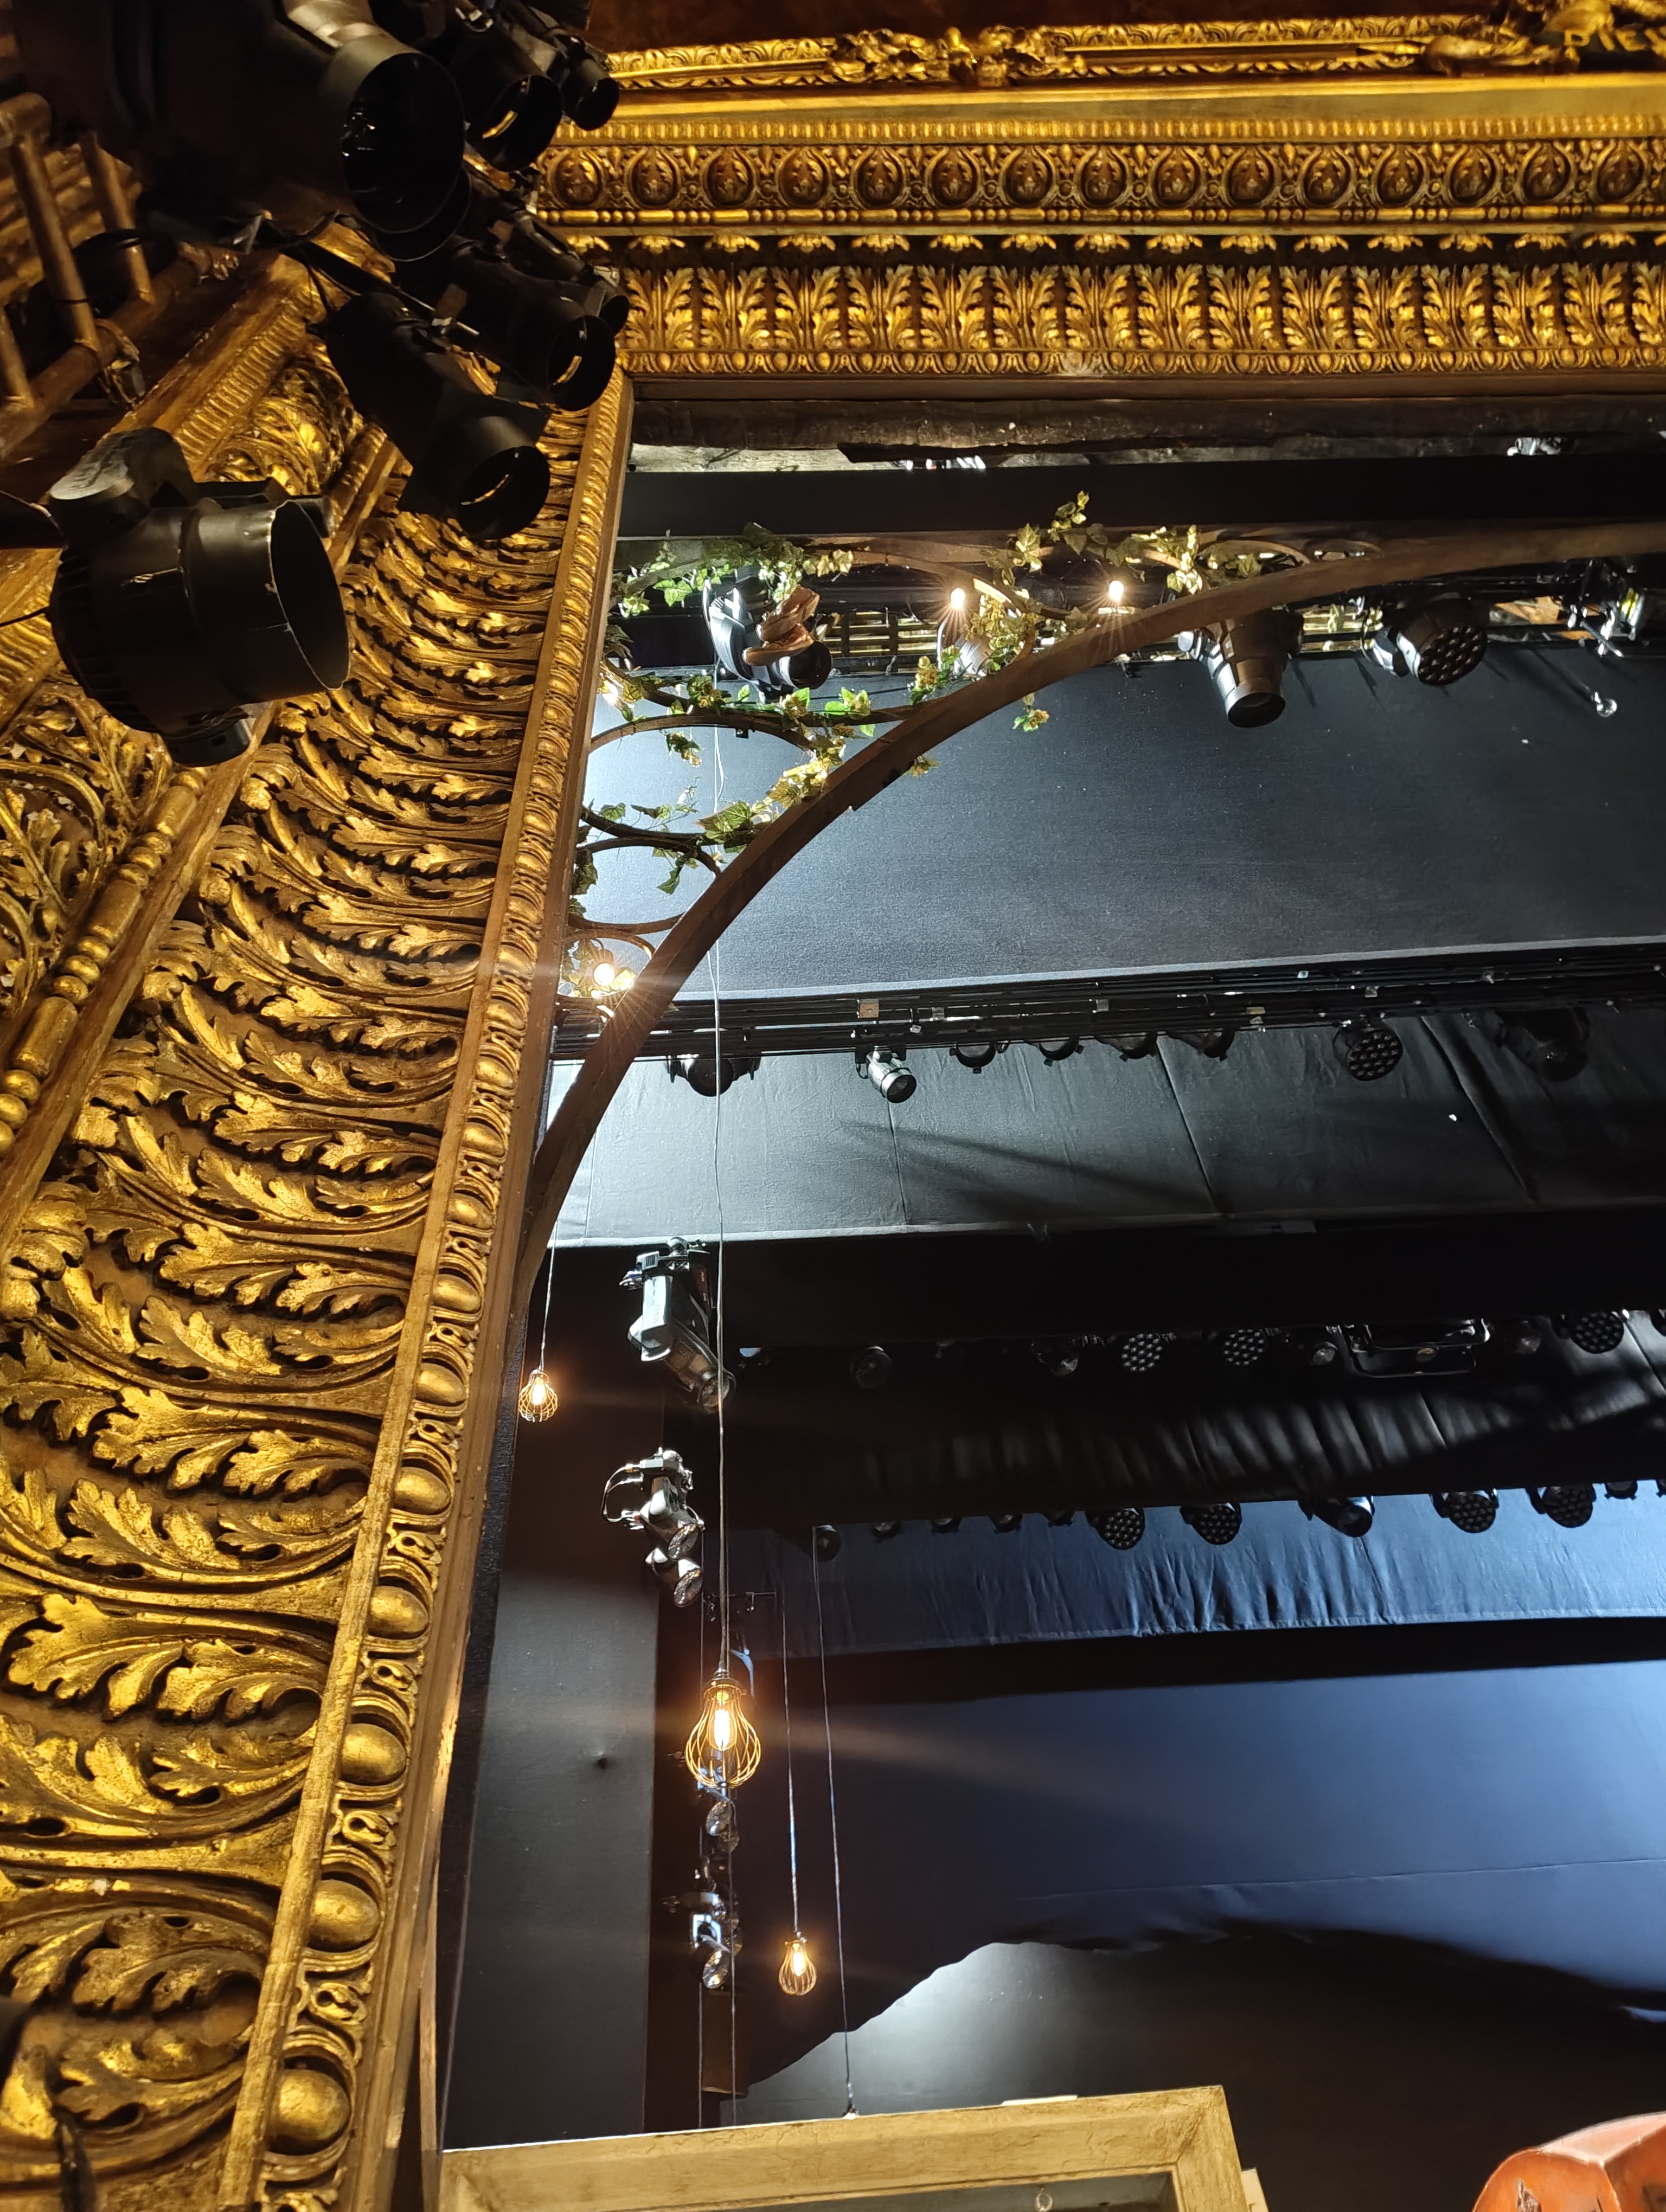
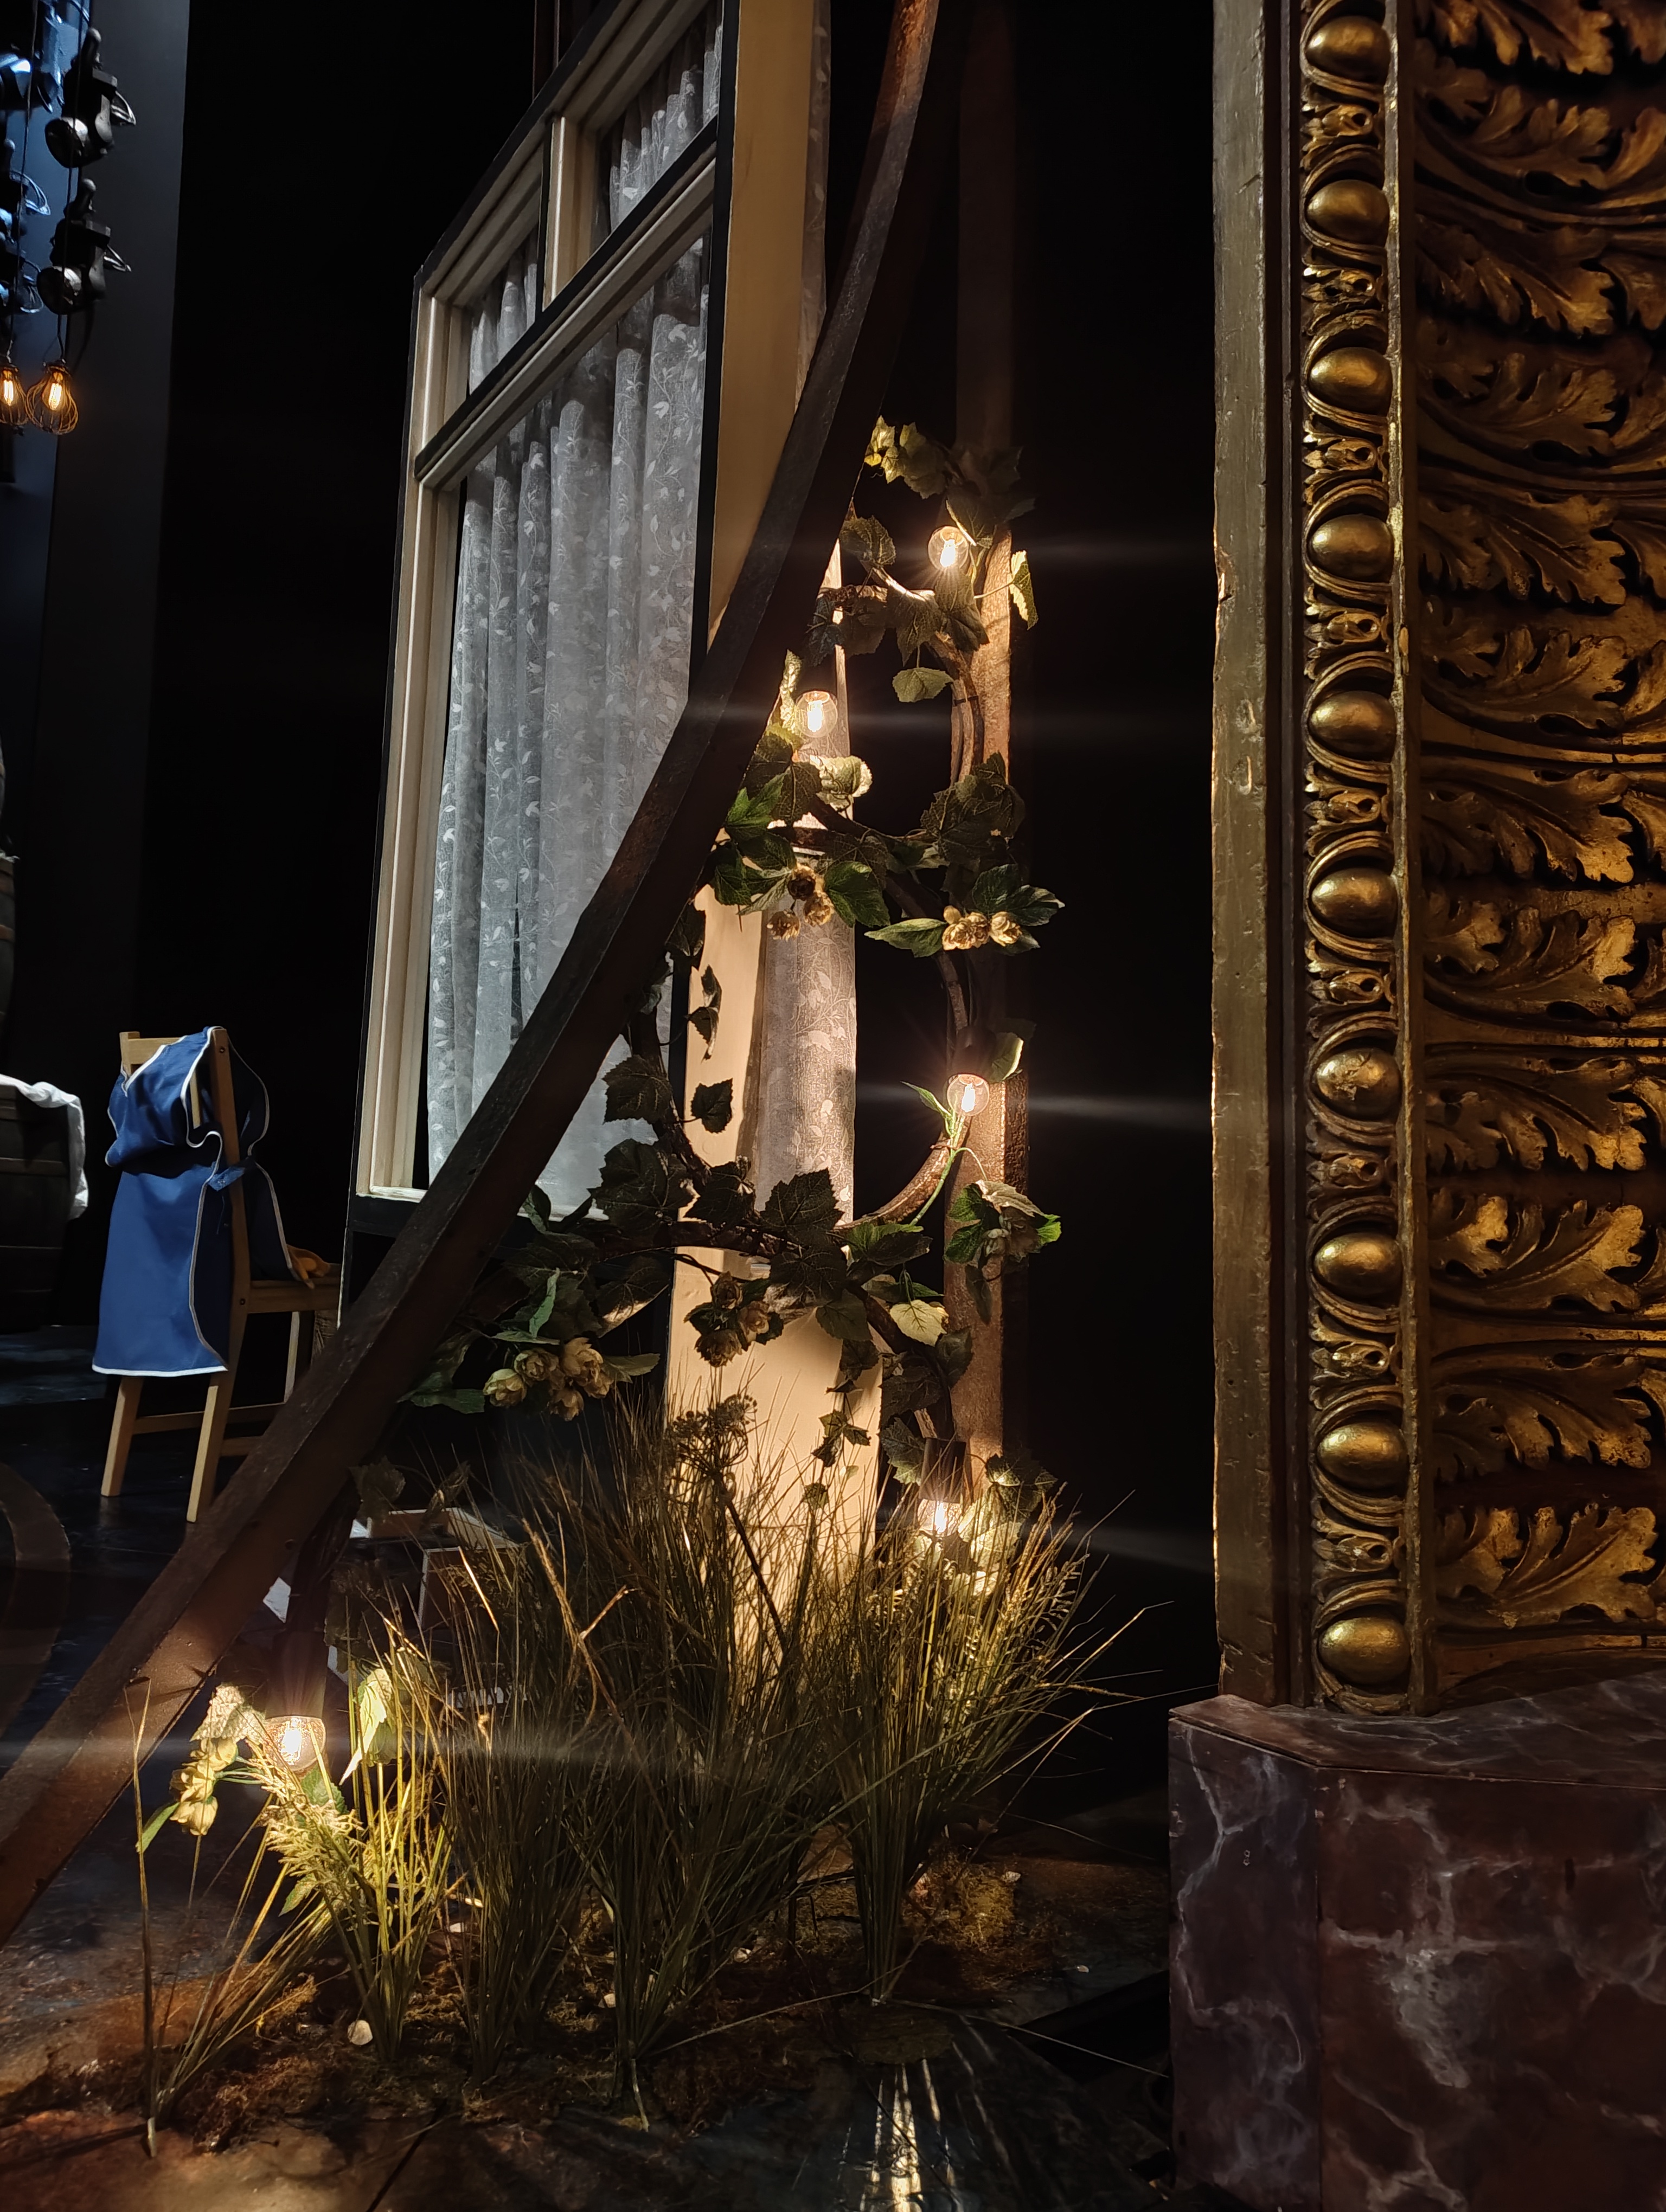
Usage
Used throughout the show as a twinkle/stars effect.
Flown Lamp
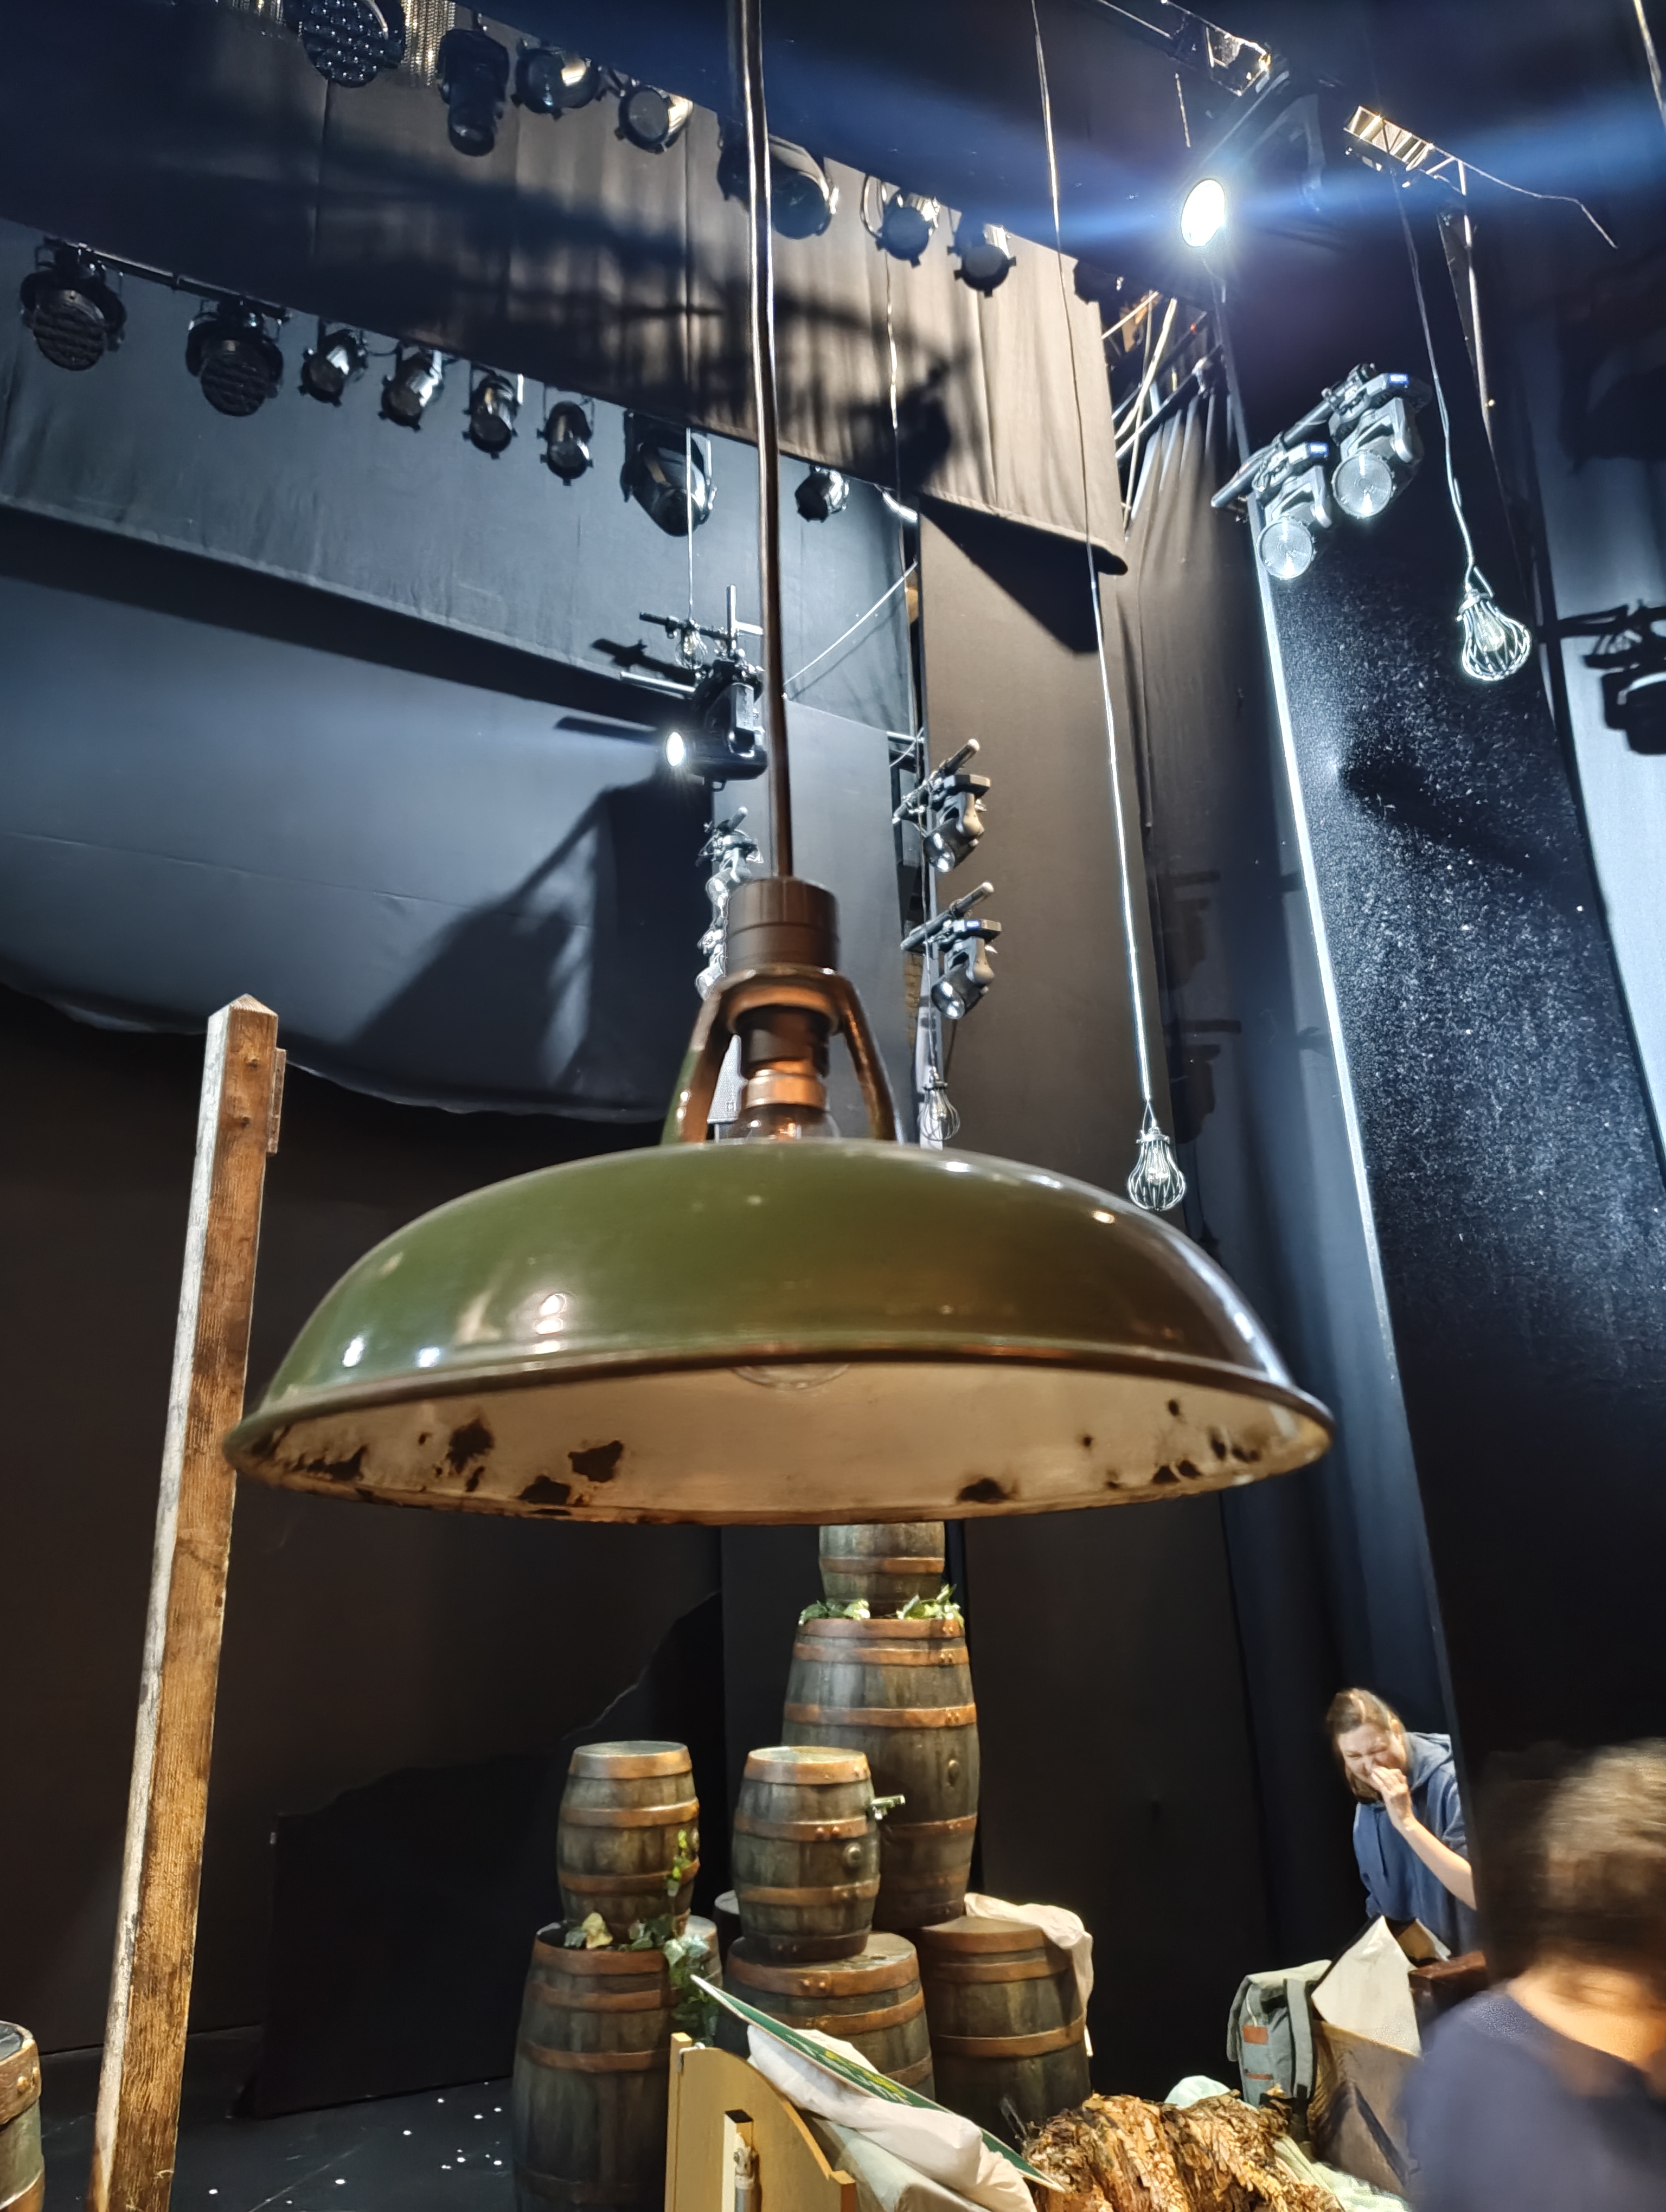
Overview
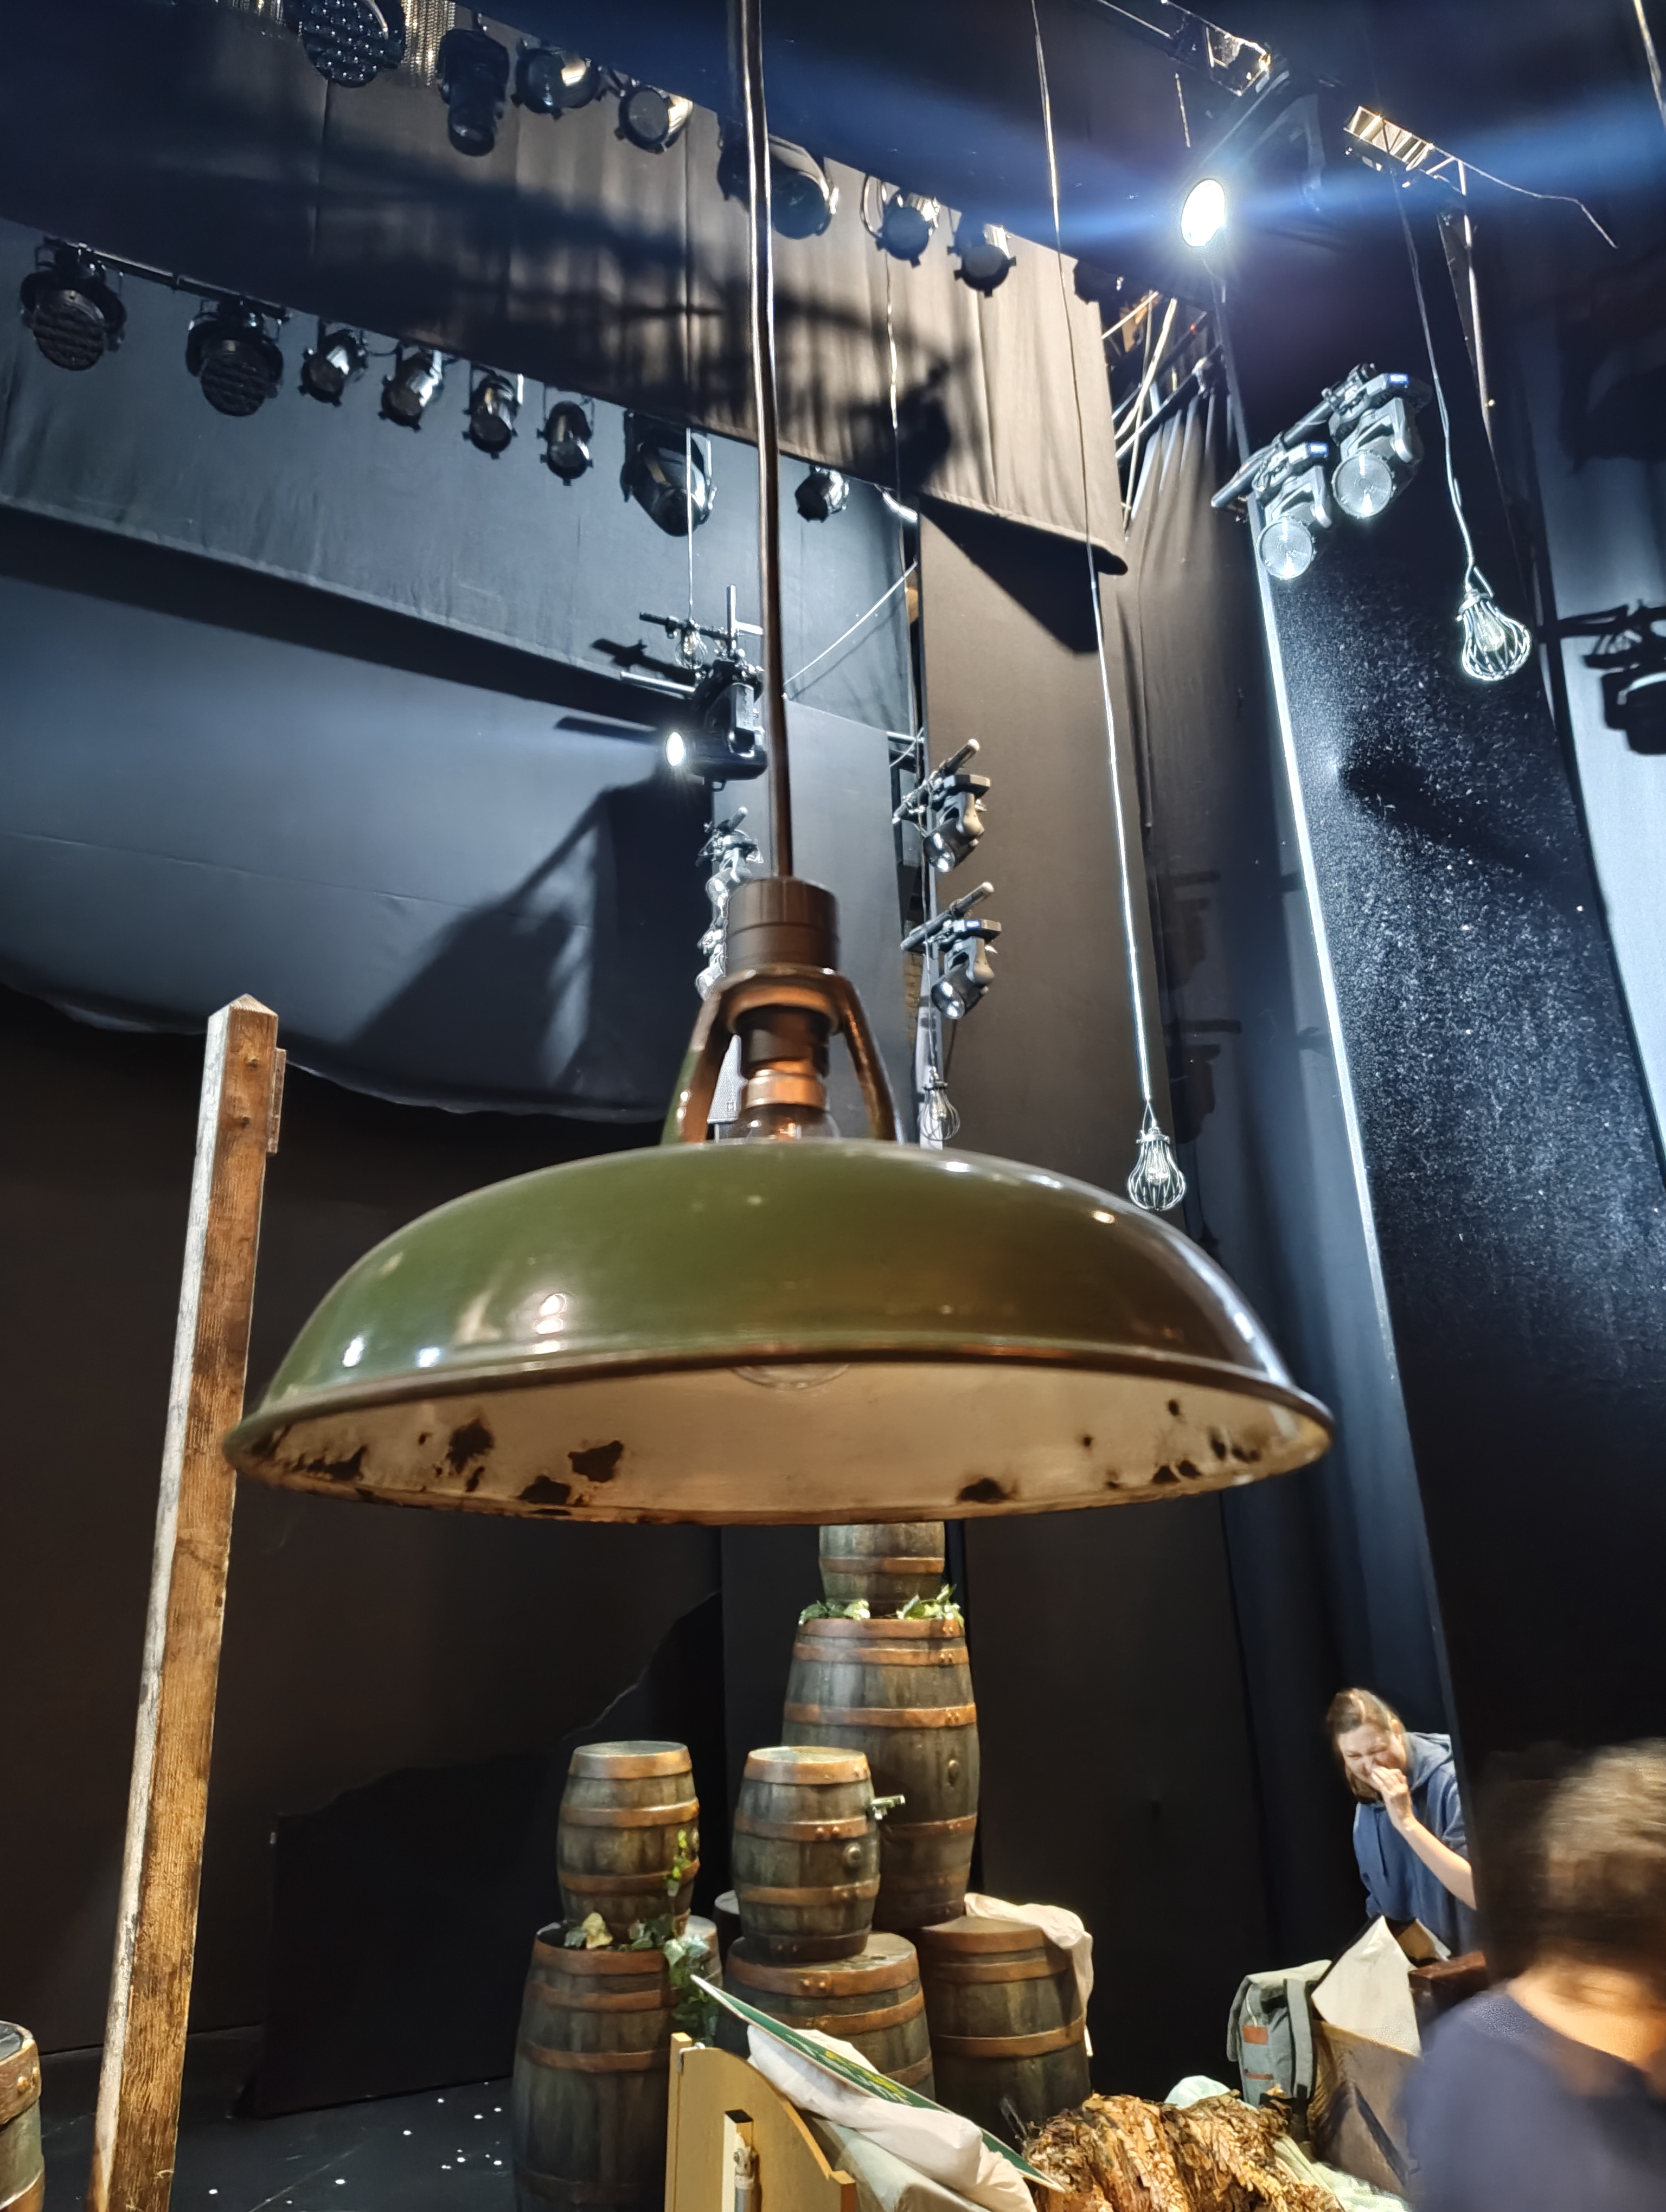
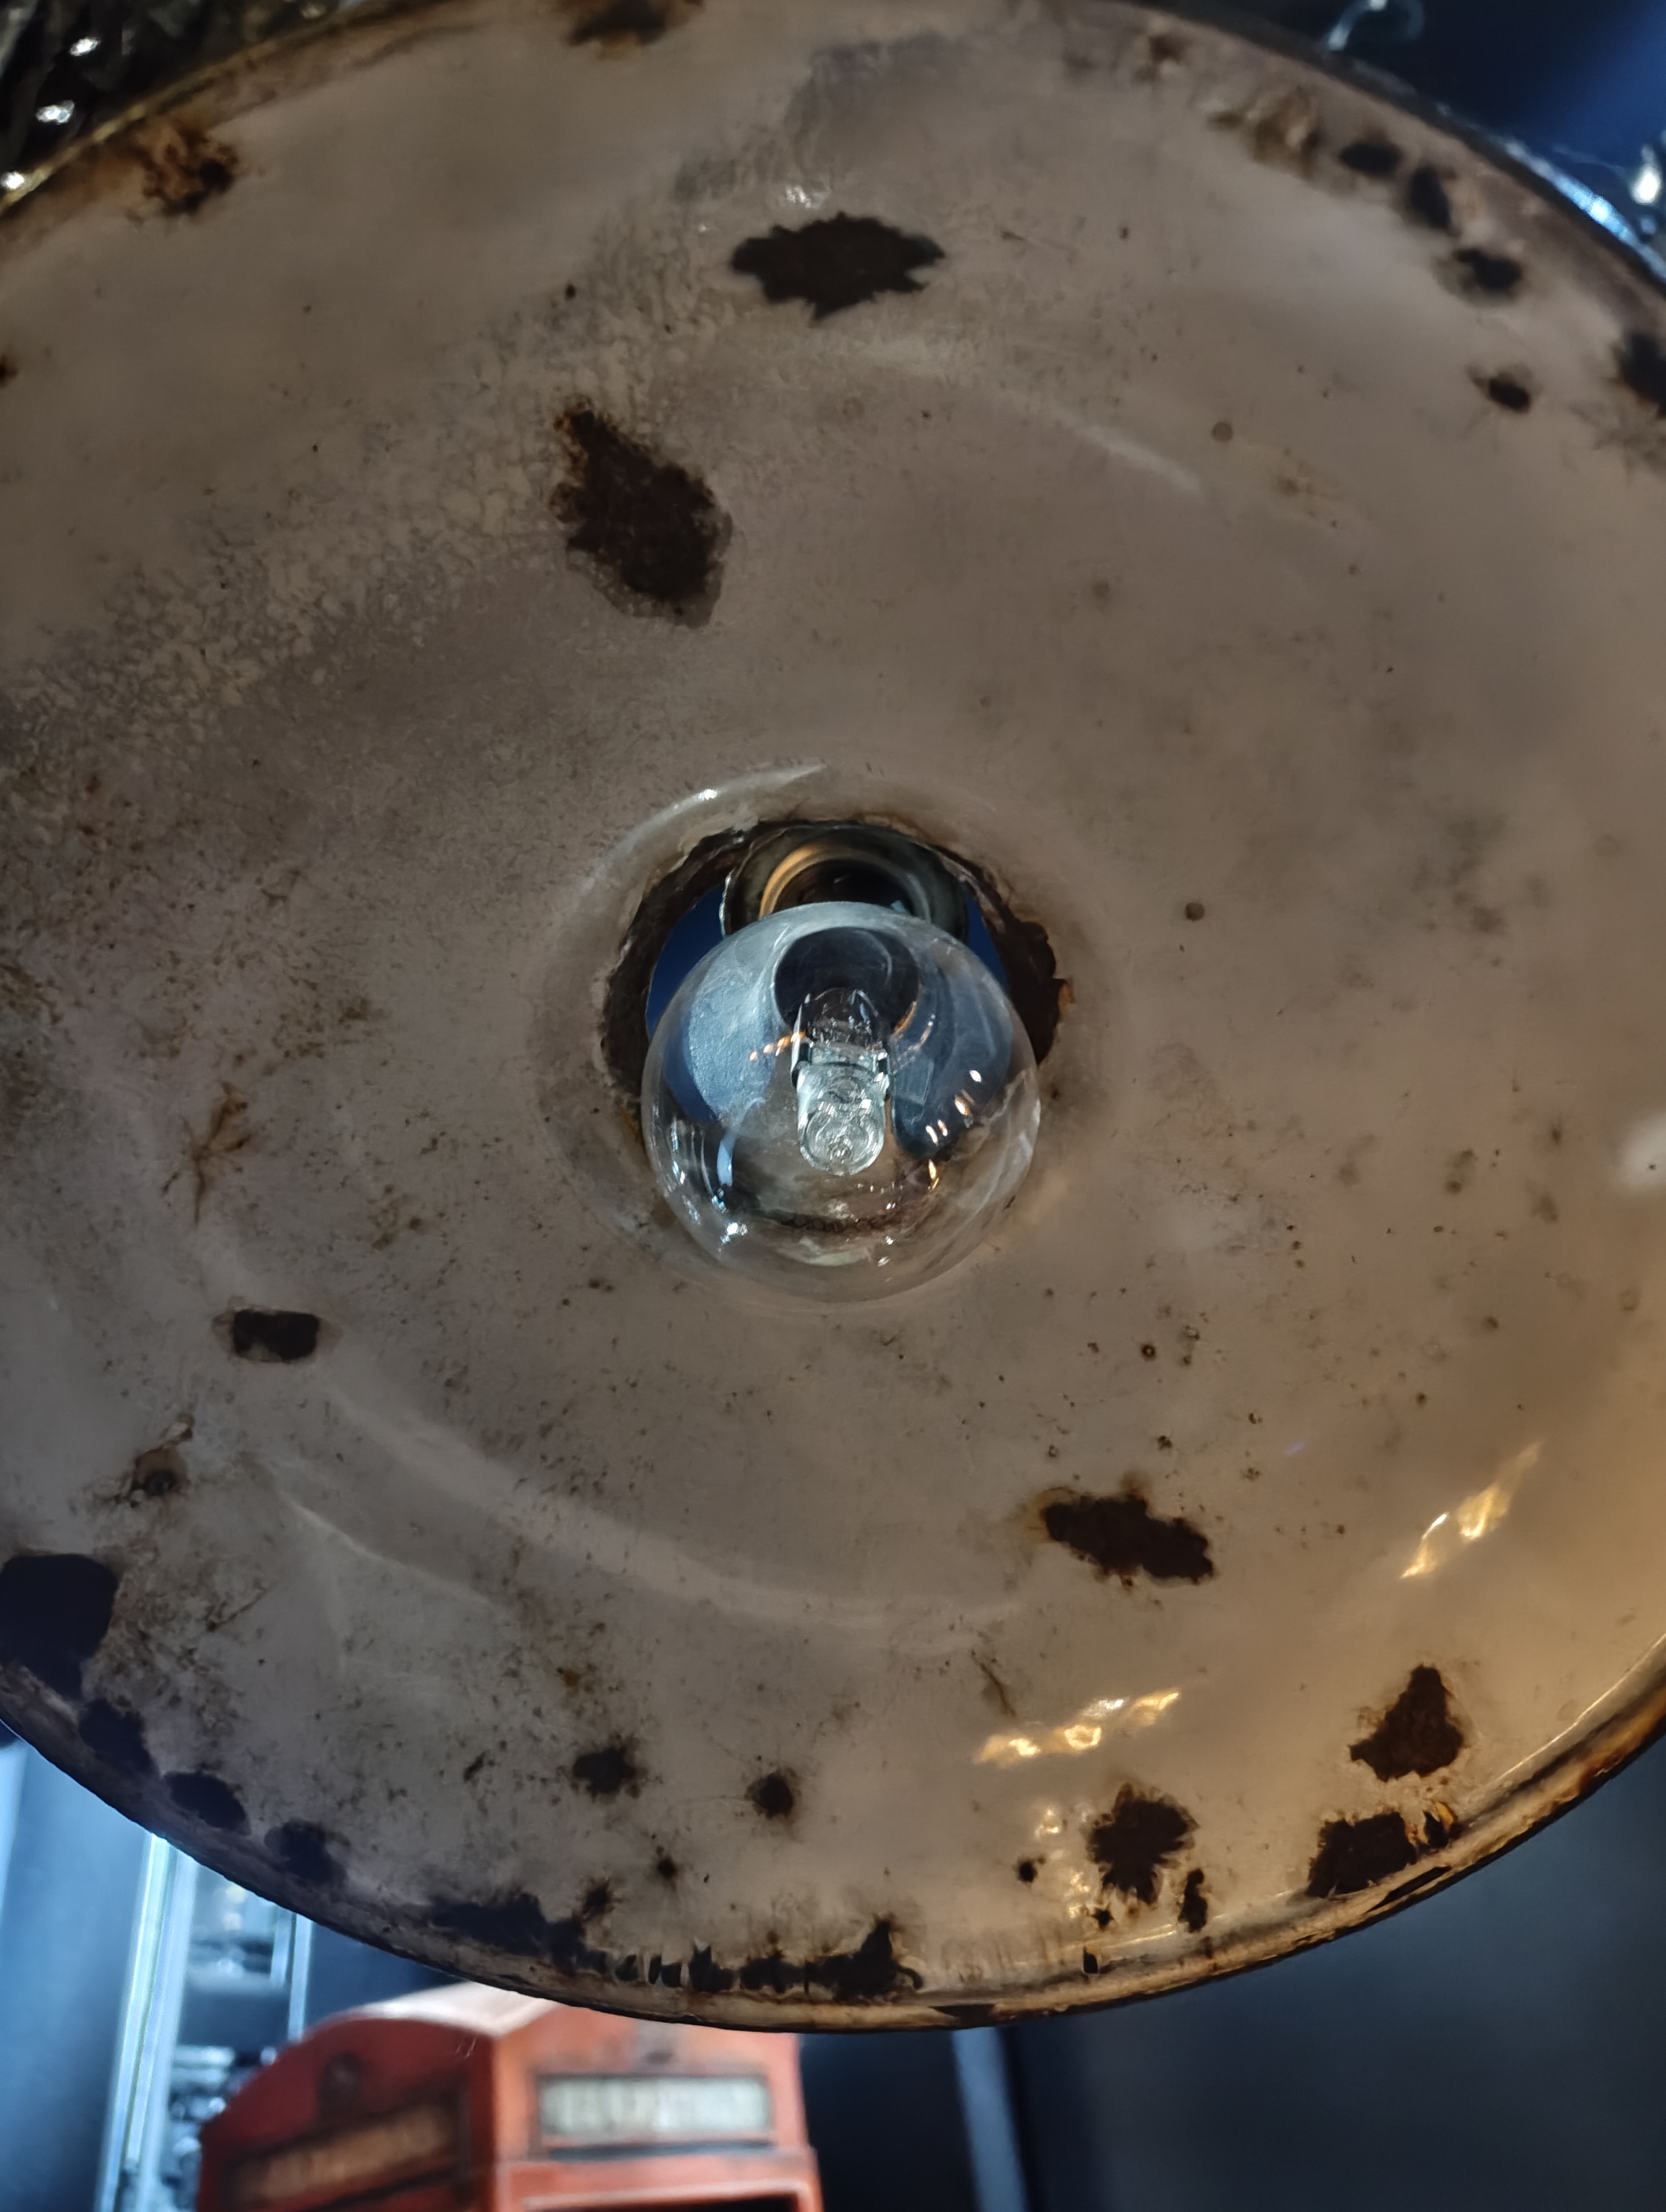
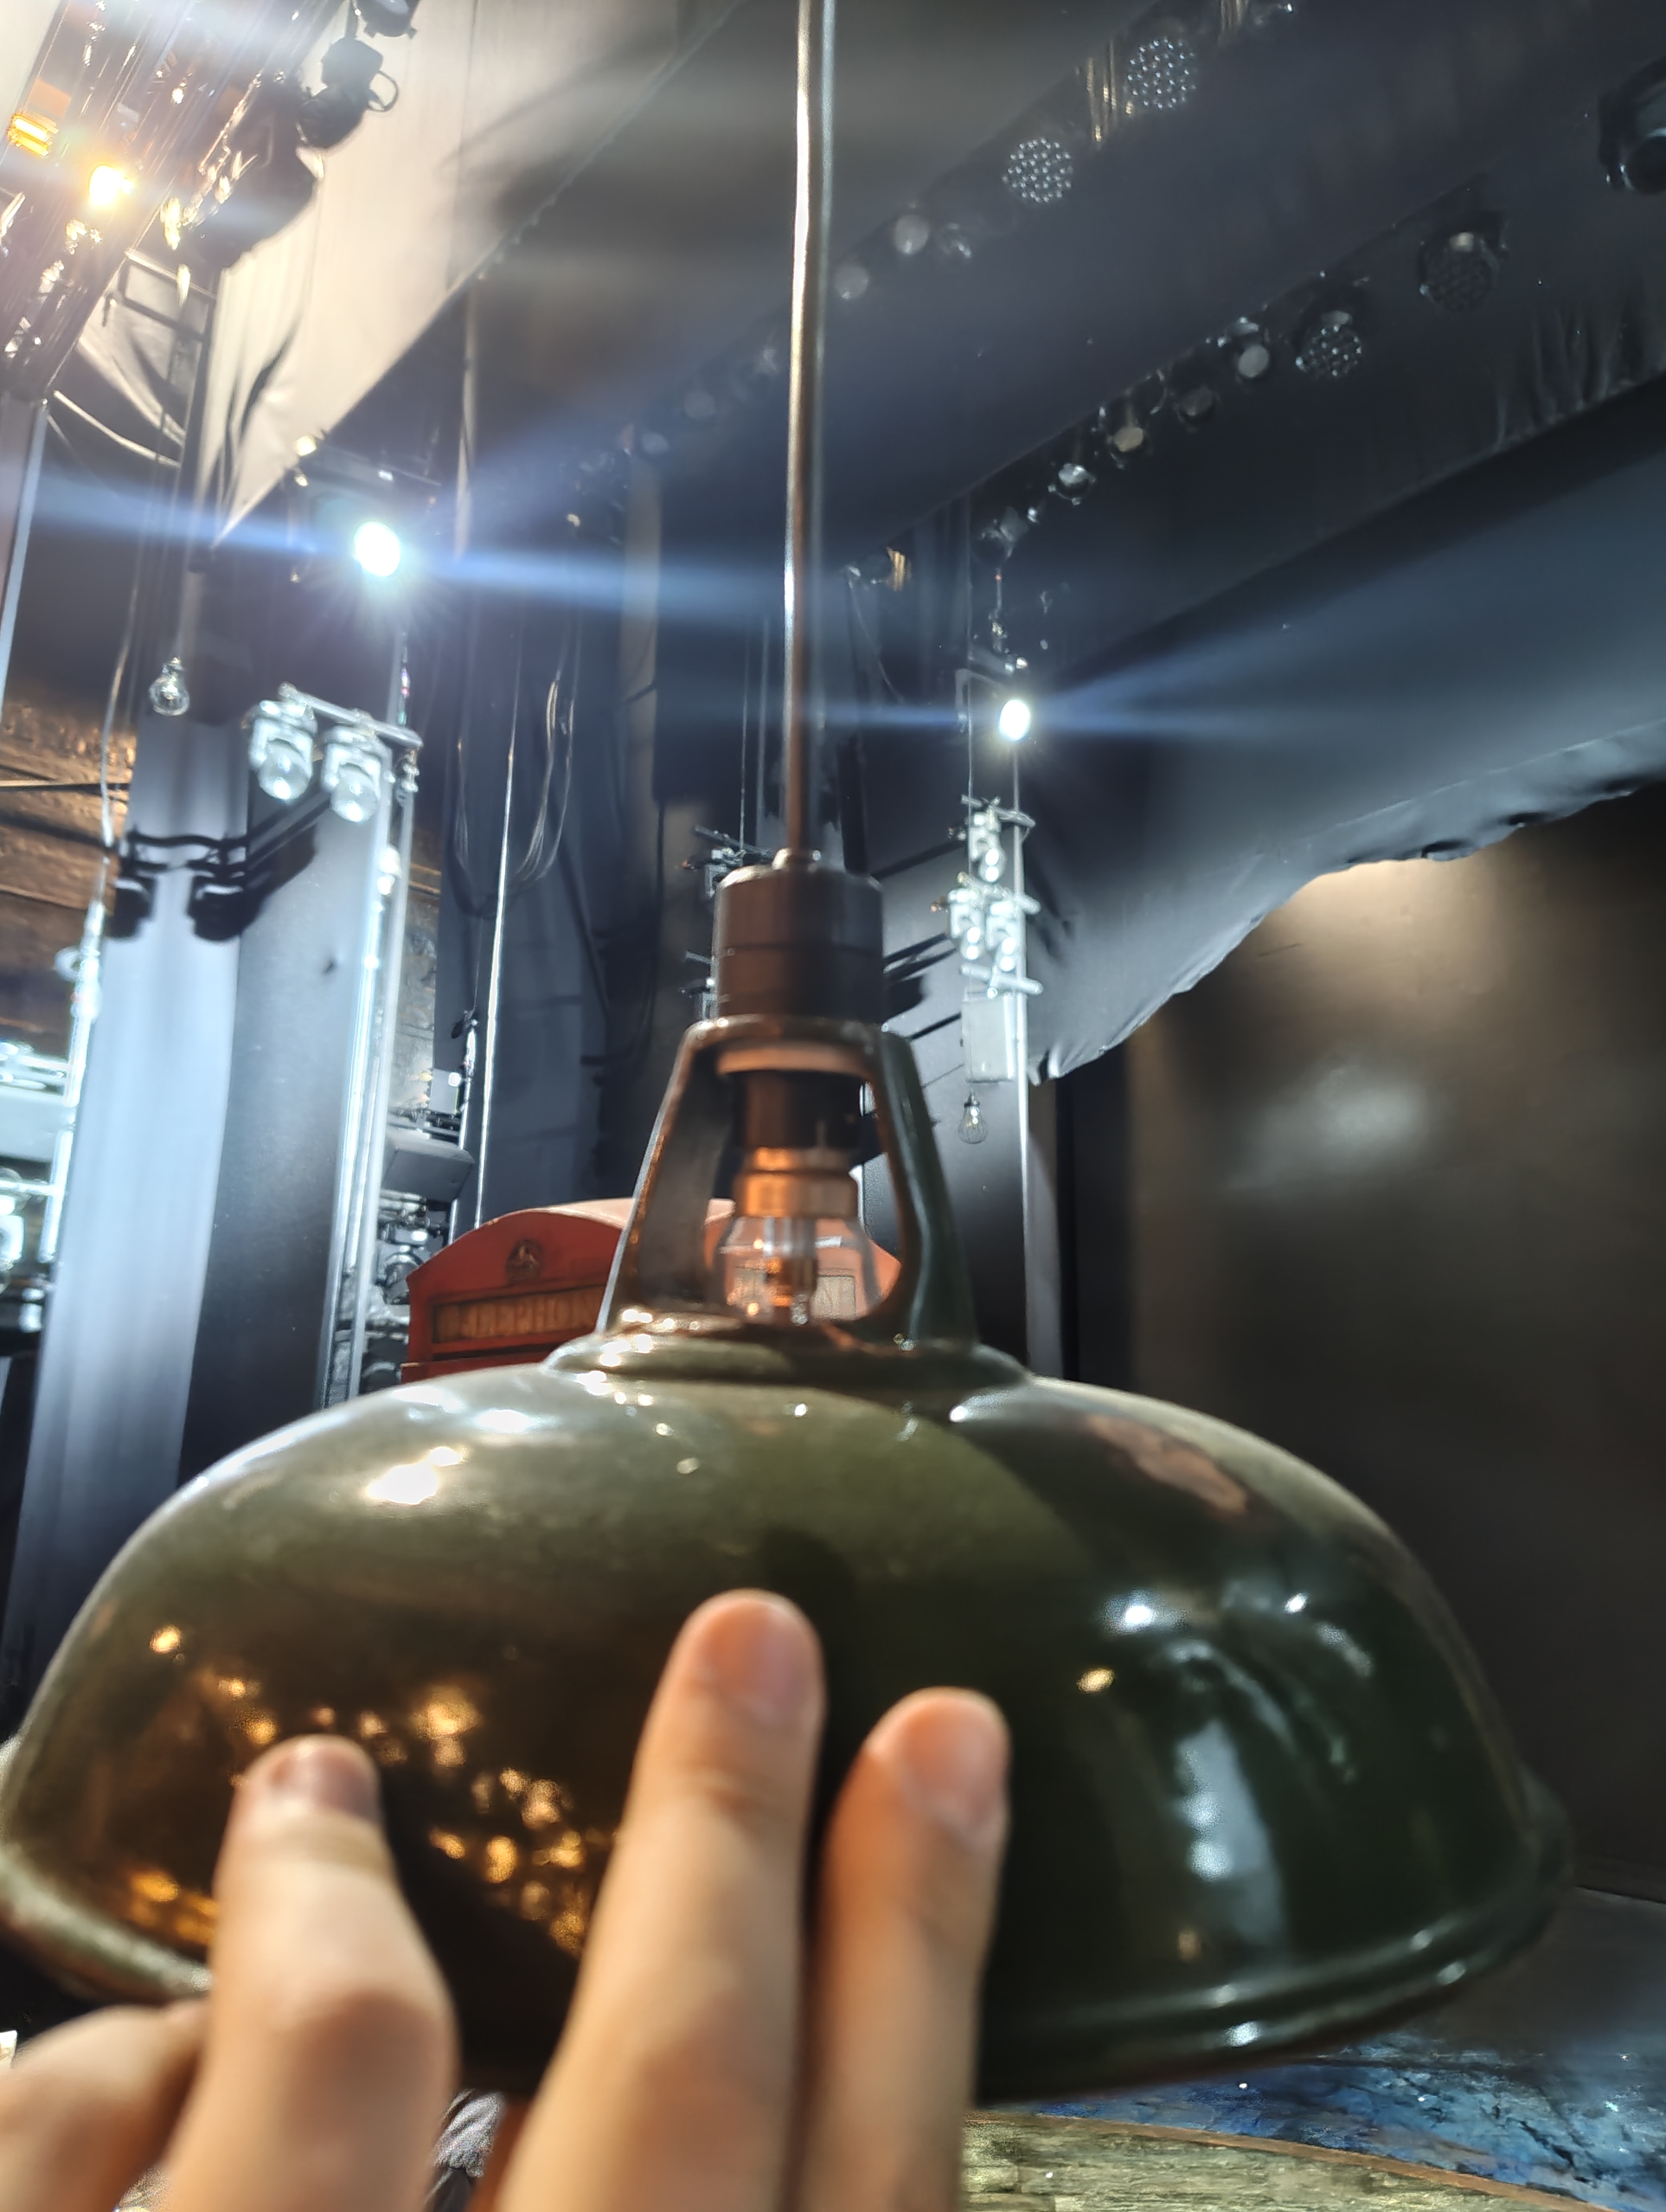
The flown lamp is a single household lighting fixture flown in and out manually via the flys (on a pulley in the grid). It is located DSL in front of the brewery slider. It's just a light bulb — not too exciting.
Channels & Addressing
- Channel: 751
- Fixture Type: Dimmer
- Universe/Address: 1/105
- Label: STATIONARY FLOWN LAMP
- Parameters: Intensity only (single channel dimmer)
Power & Control
| Power Source | House Dimmer |
| Cable Type | 15 amp TRS |
Images
Key Views
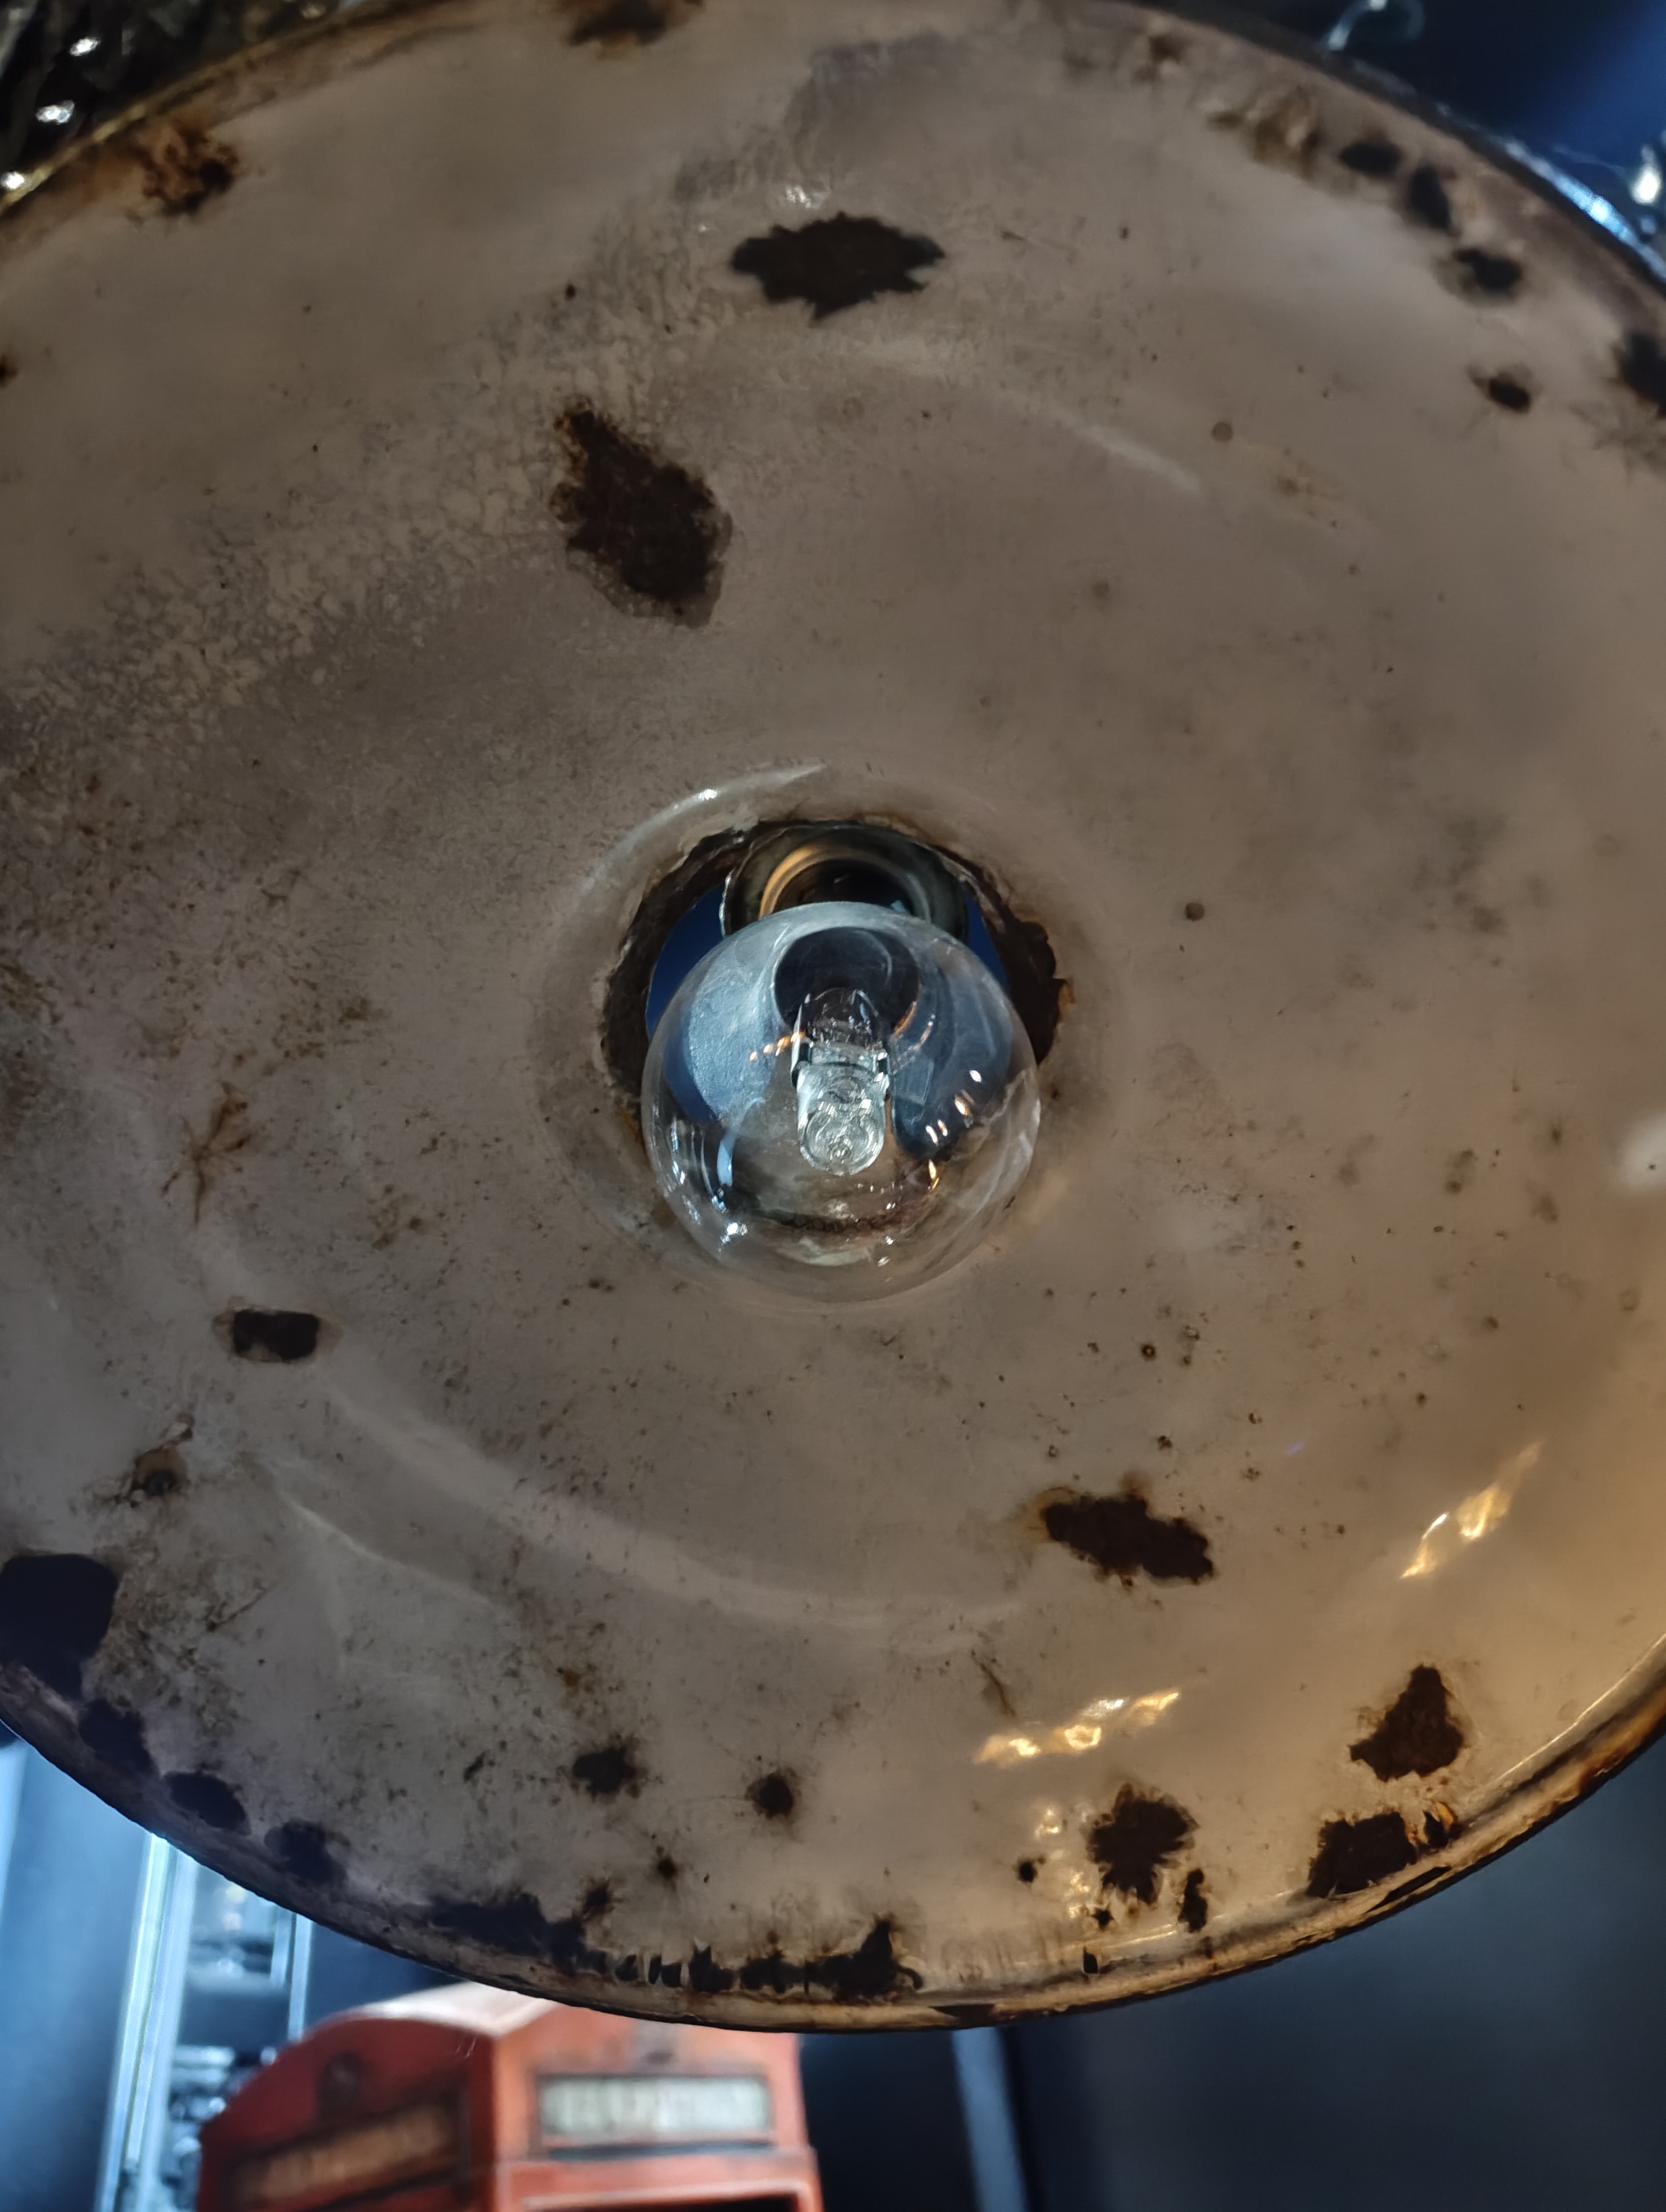
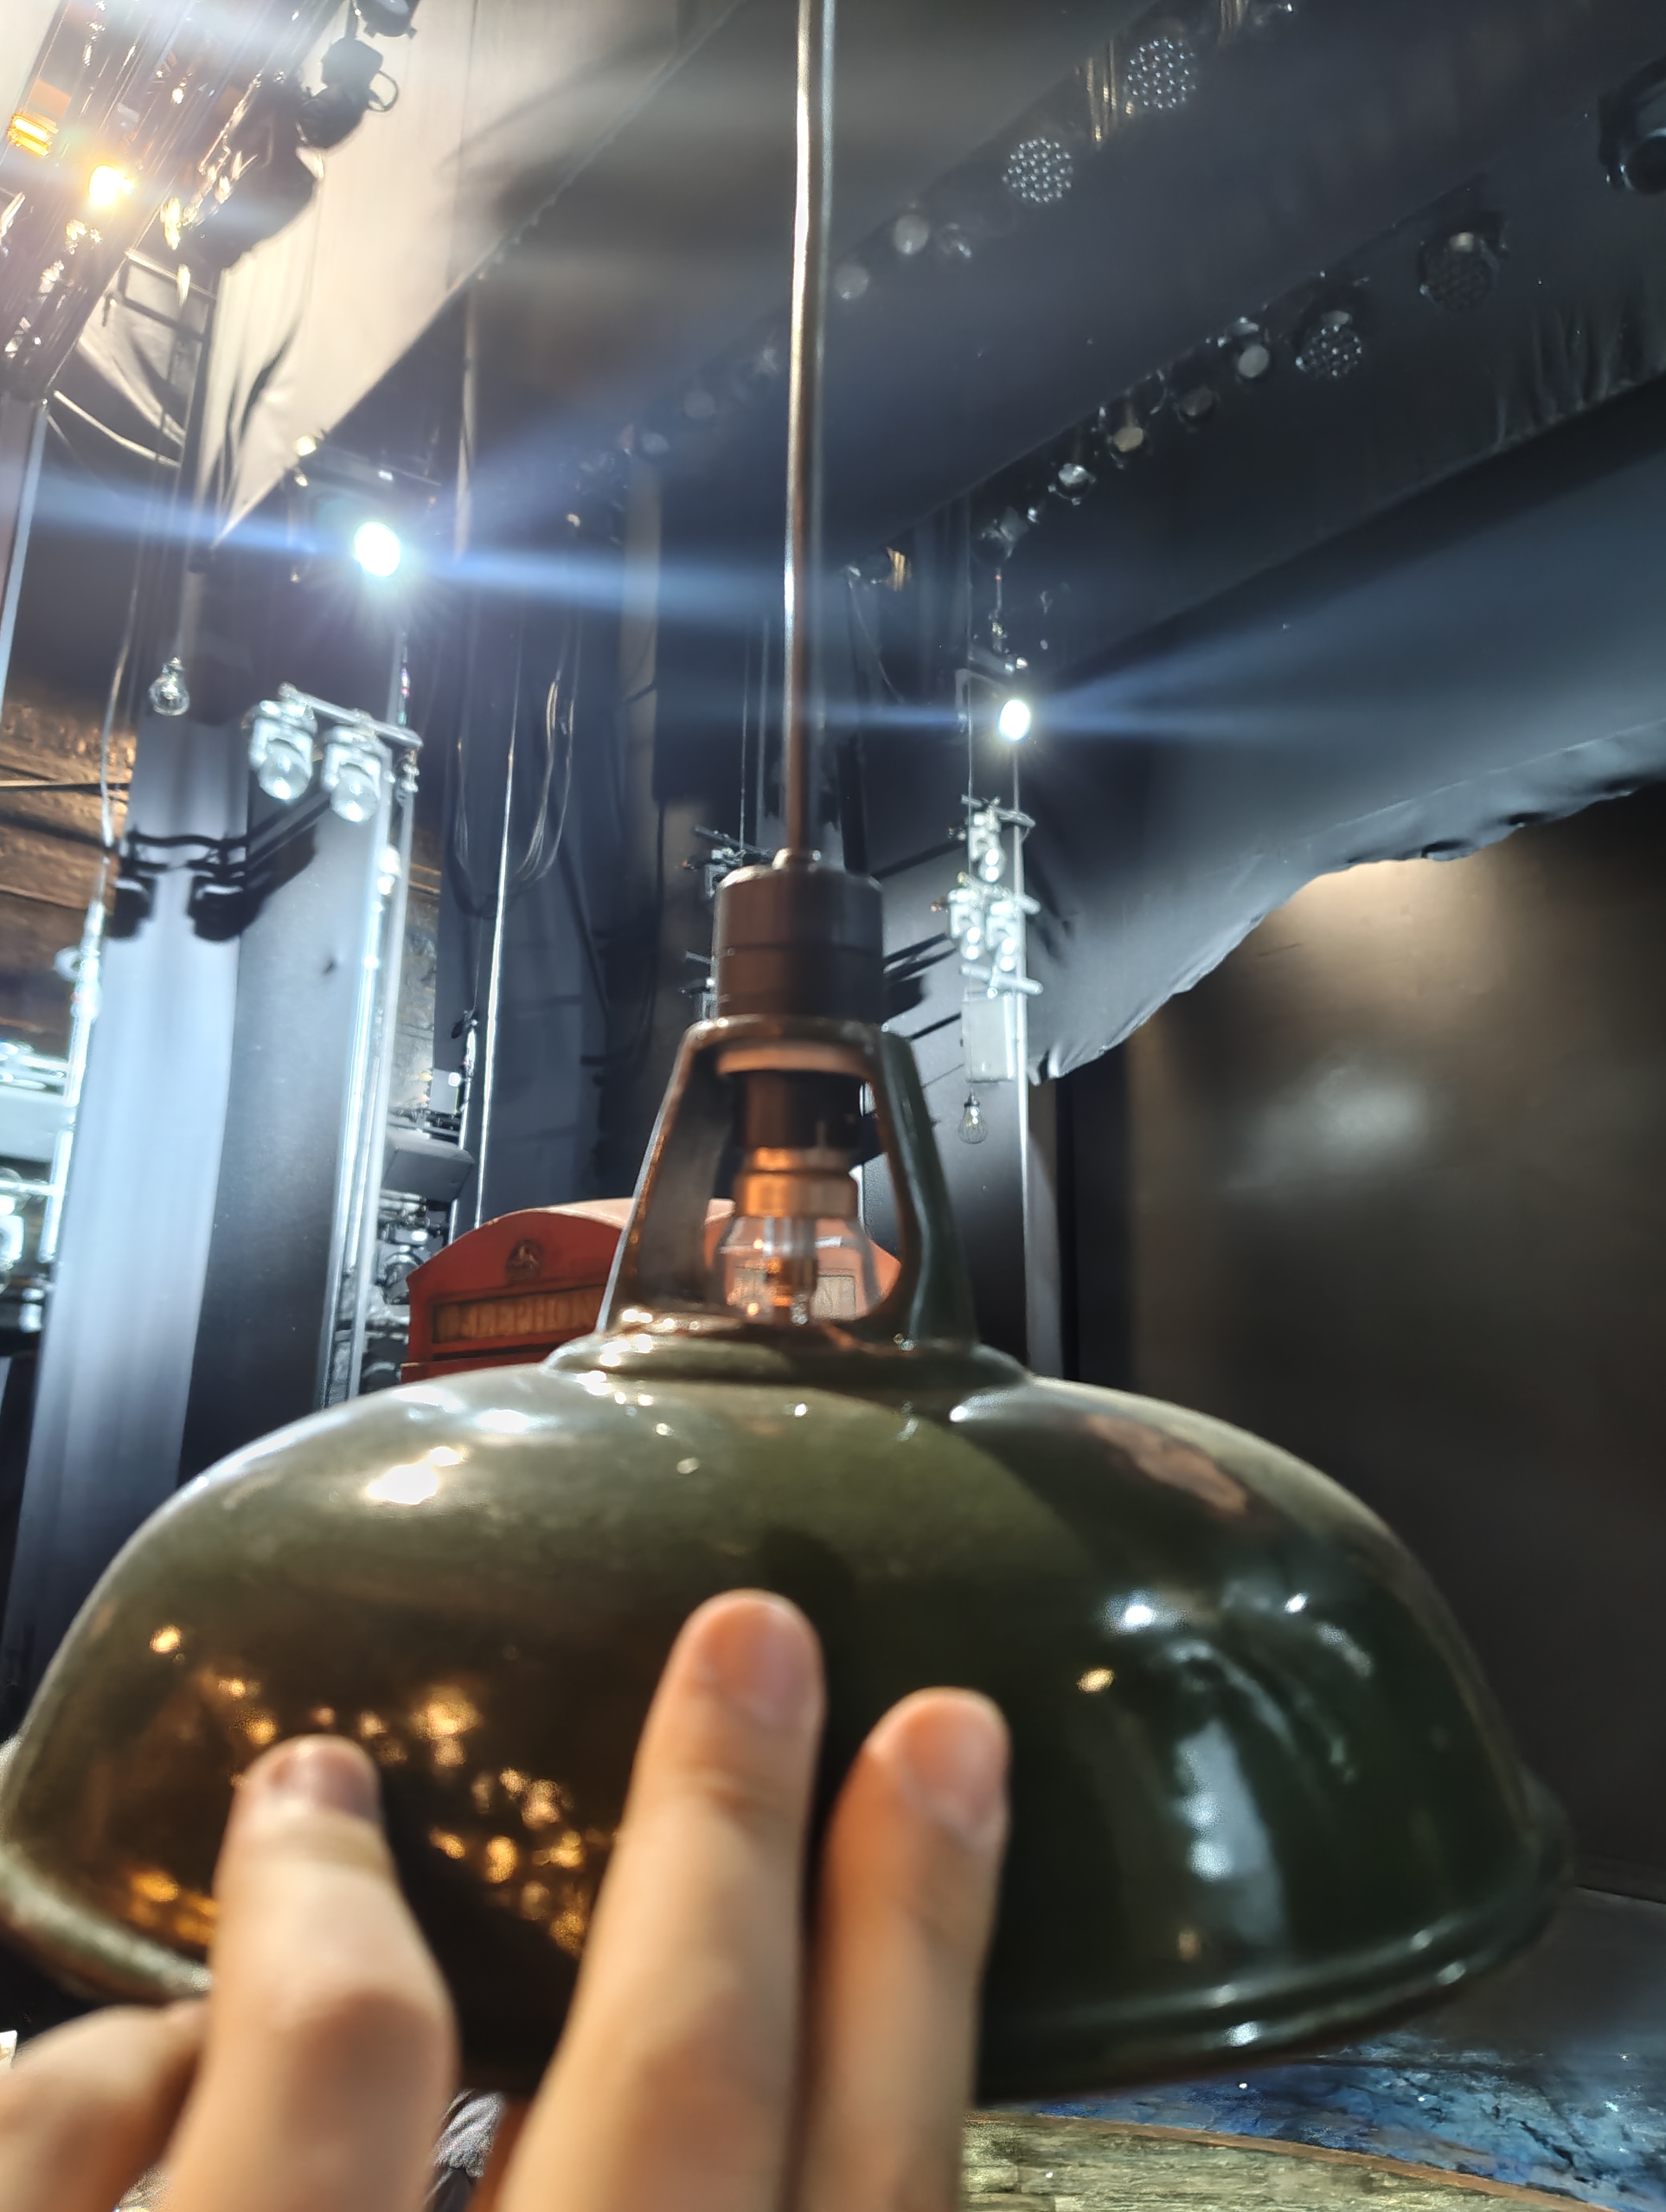
All Reference Photos (click to expand)
Usage
Used for the stationery cupboard scene.
Floor & Pros LED Ring
Overview
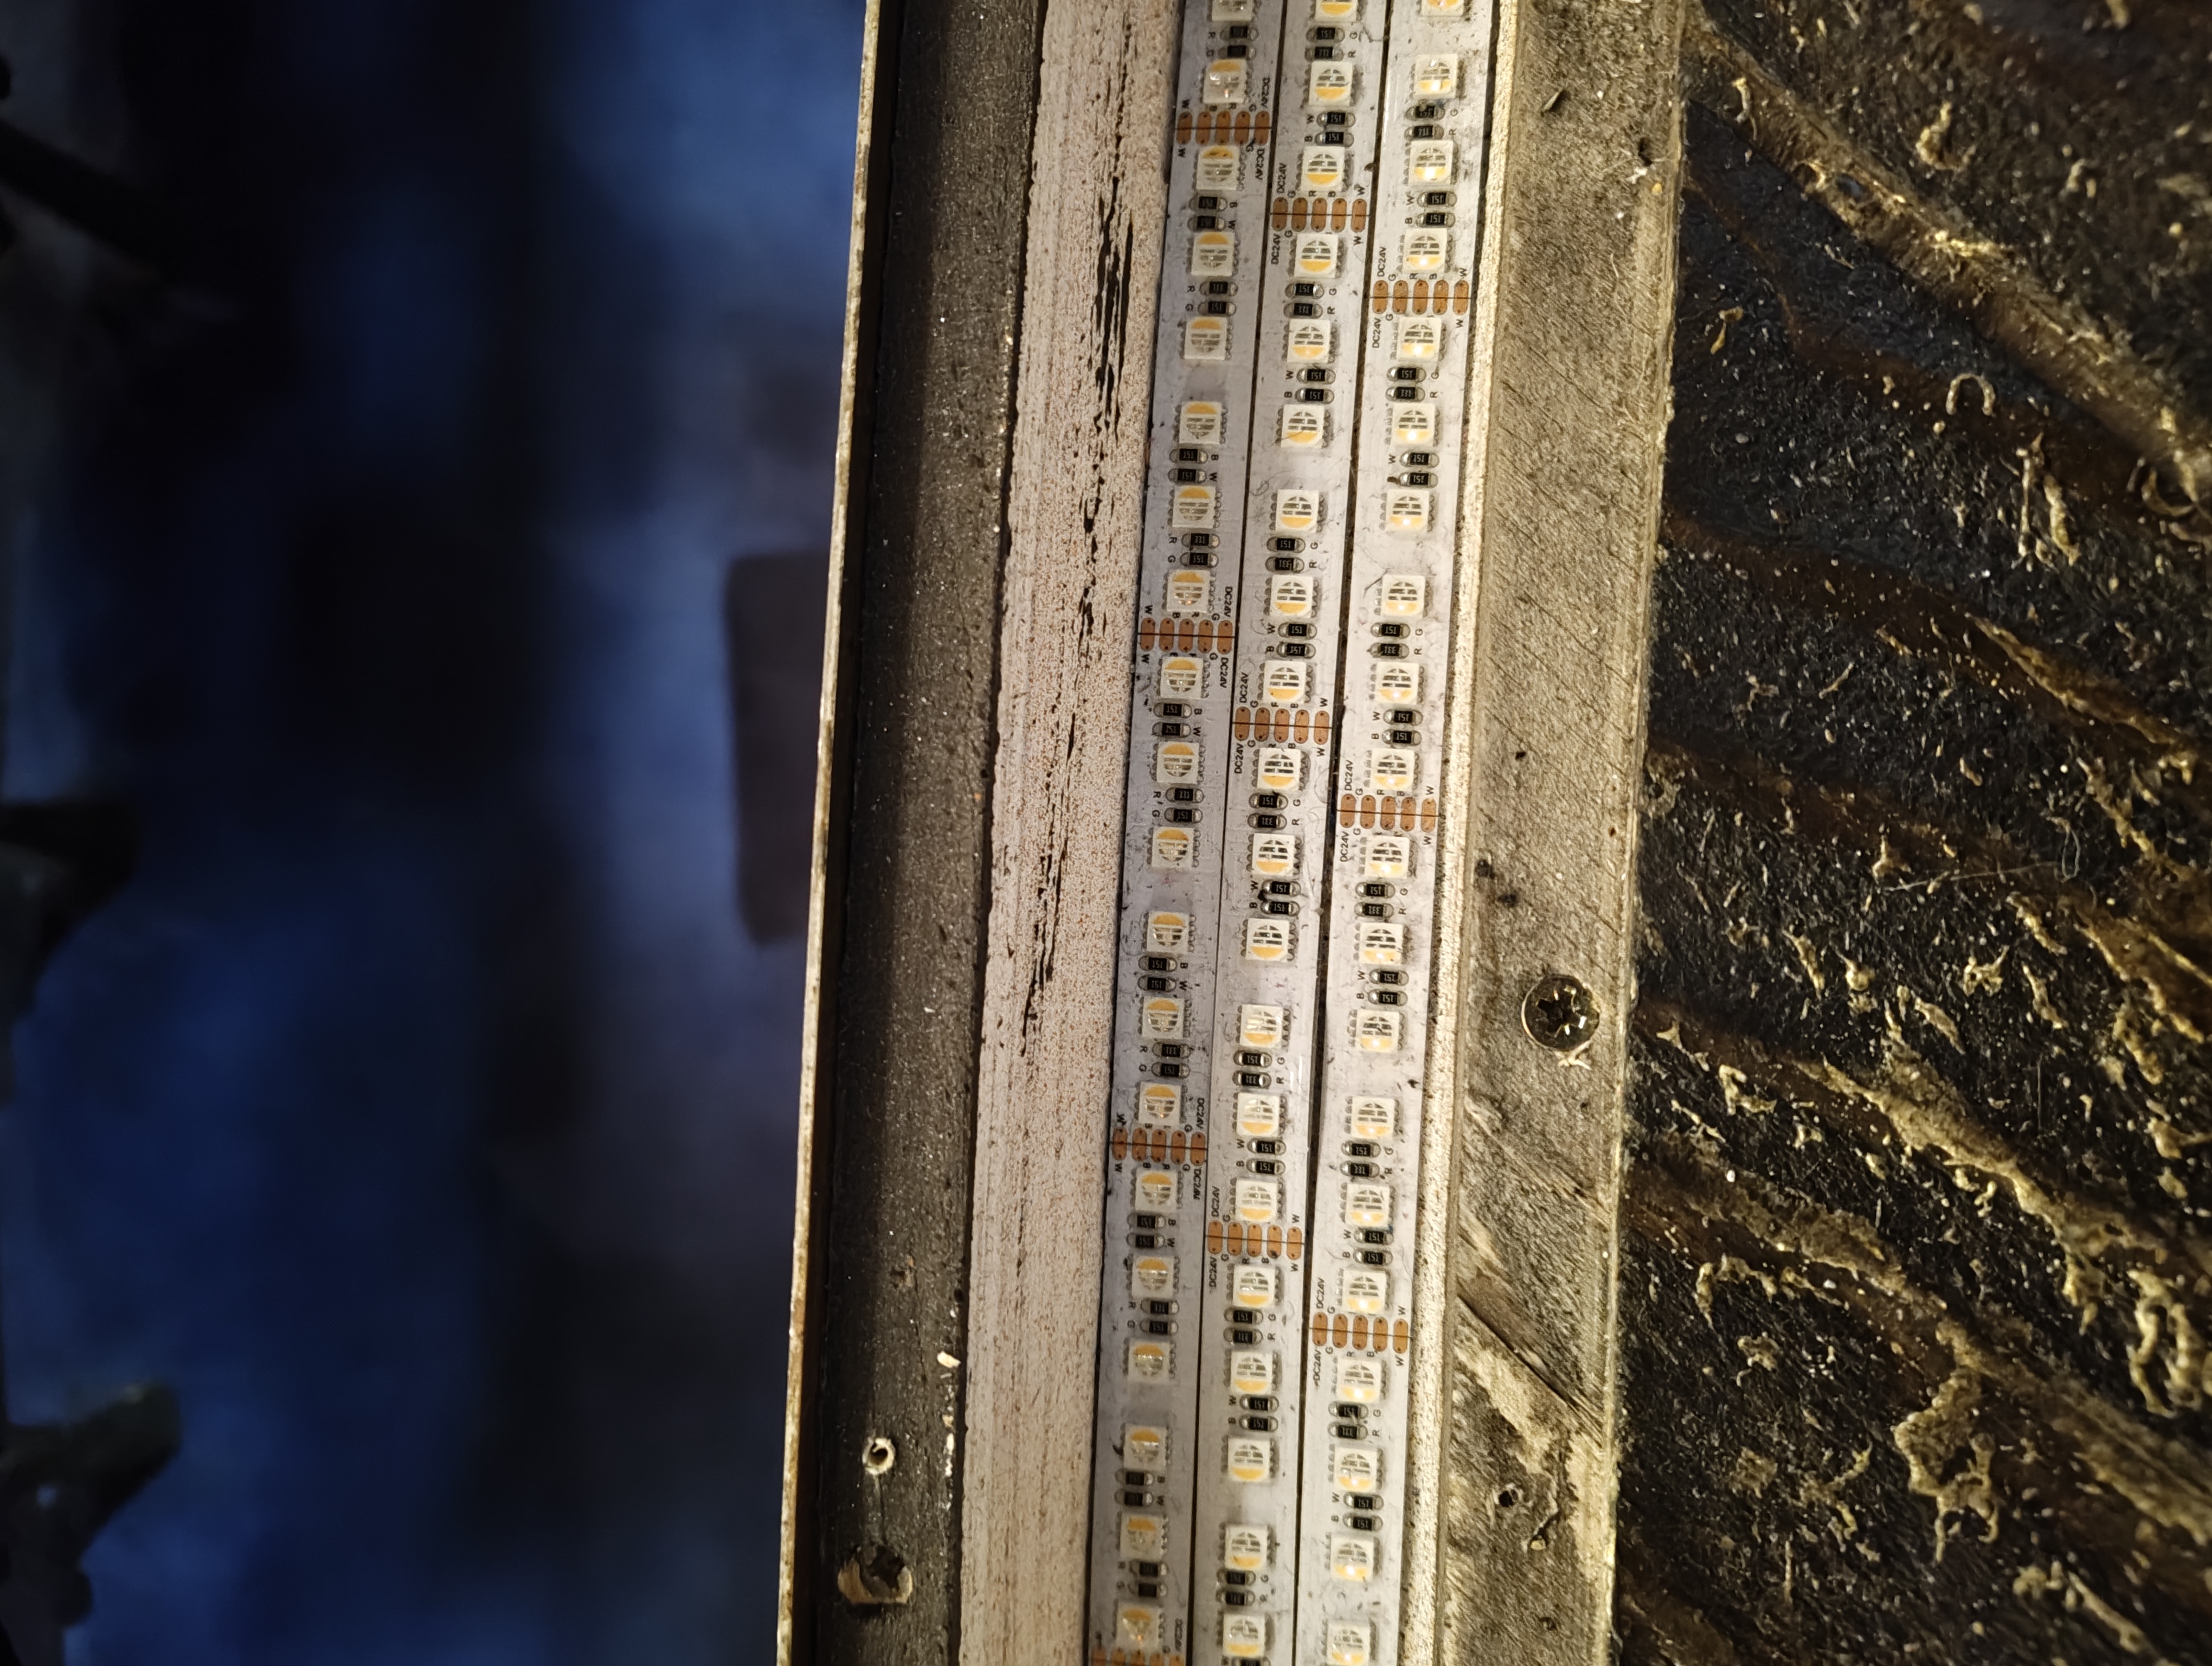
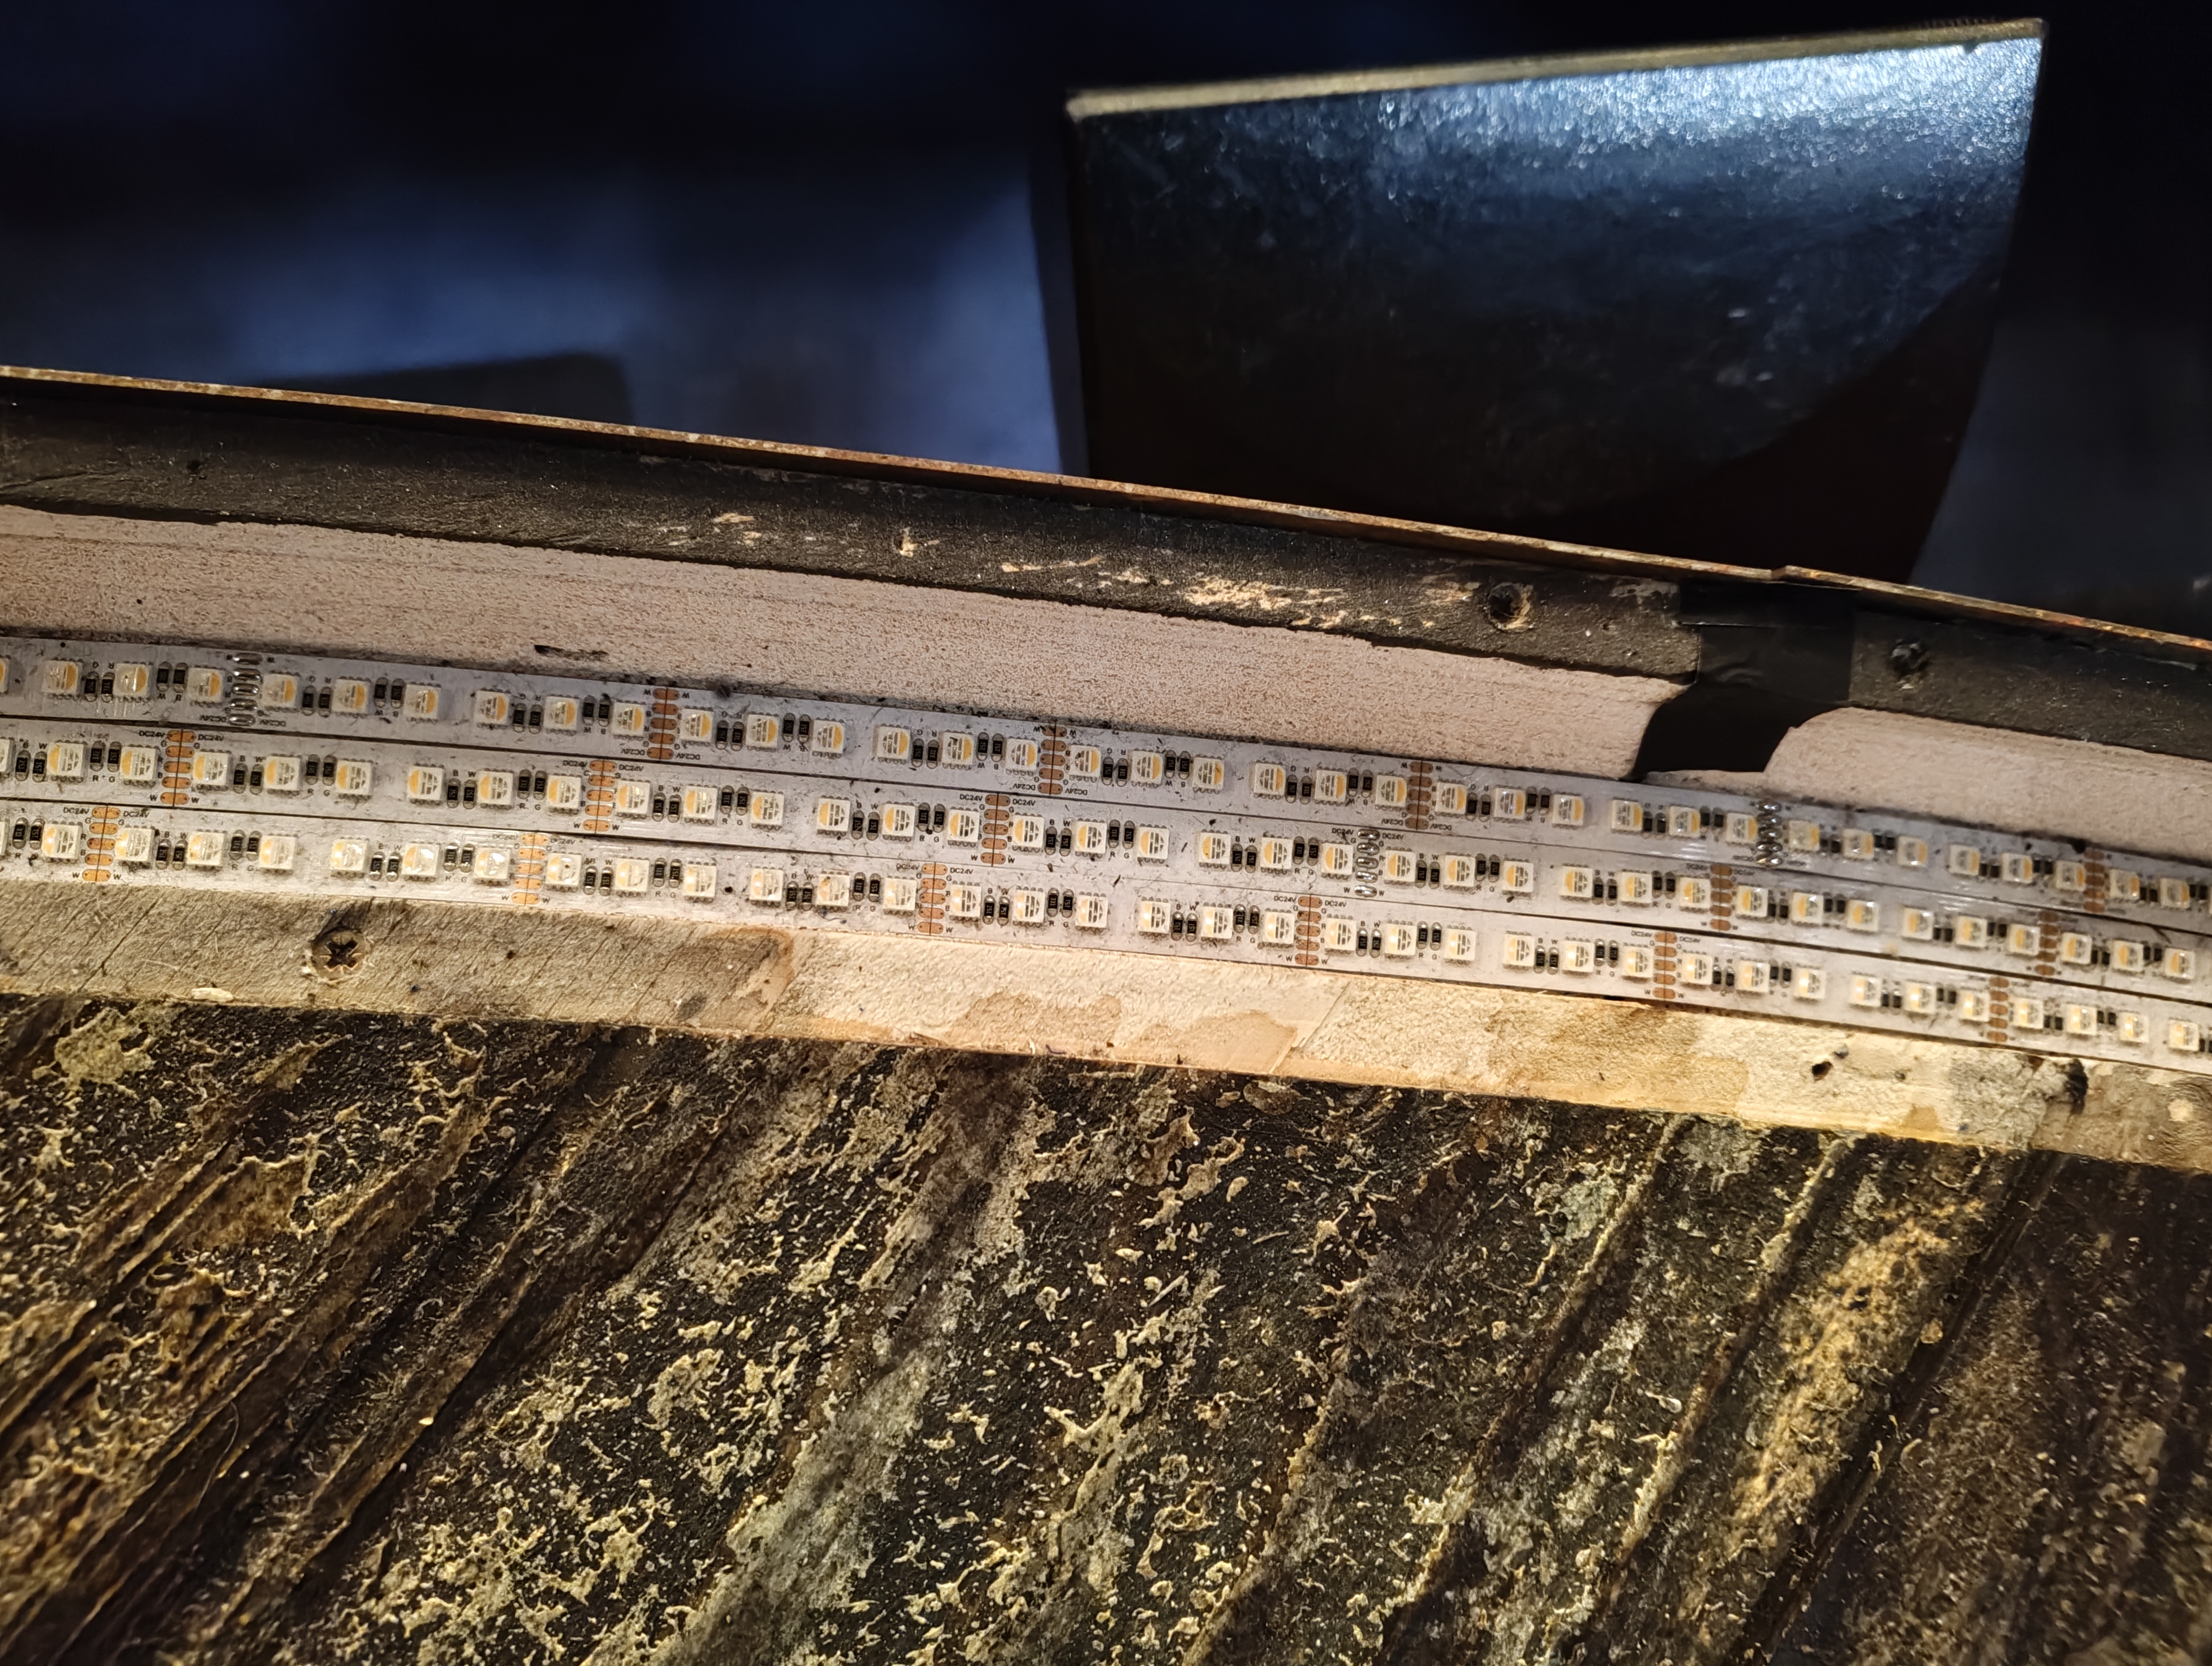
The floor and pros rings have built-in RGBW LED tape, covered with an opal perspex cover finished to look like wood. They are powered and built by Electric Foundry dimmers.
Channels & Addressing
- Channels: 701–708
- Fixture Type: LED RGBW 16B (Generic)
- Addresses by channel:
- Ch 701: 12/177–184, 12/185–192, 12/1–8
- Ch 702: 12/9–16, 12/17–24, 12/25–32
- Ch 703: 12/33–40, 12/41–48, 12/49–56
- Ch 704: 12/57–64, 12/65–72, 12/73–80
- Ch 705: 12/81–88, 12/89–96, 12/97–104
- Ch 706: 12/105–112, 12/113–120, 12/121–128
- Ch 707: 12/129–136, 12/137–144, 12/145–152
- Ch 708: 12/153–160, 12/161–168, 12/169–176
- Parameters: Intensity, Red, Green, Blue, White (RGBW 16-bit)
Power & Control
| Power Source | SR/SL Fly Floors & Pit distro |
| Driver / PSU | Electric Foundry EF1K - LED Driver |
| DMX Source | SR/SL Fly Floors & Pit |
| Cable Type | 5 core built into floor and false pros |
Images
Key Views
All Reference Photos (click to expand)
Usage
Used extensively throughout the show.
Bonfire Barrel
Overview
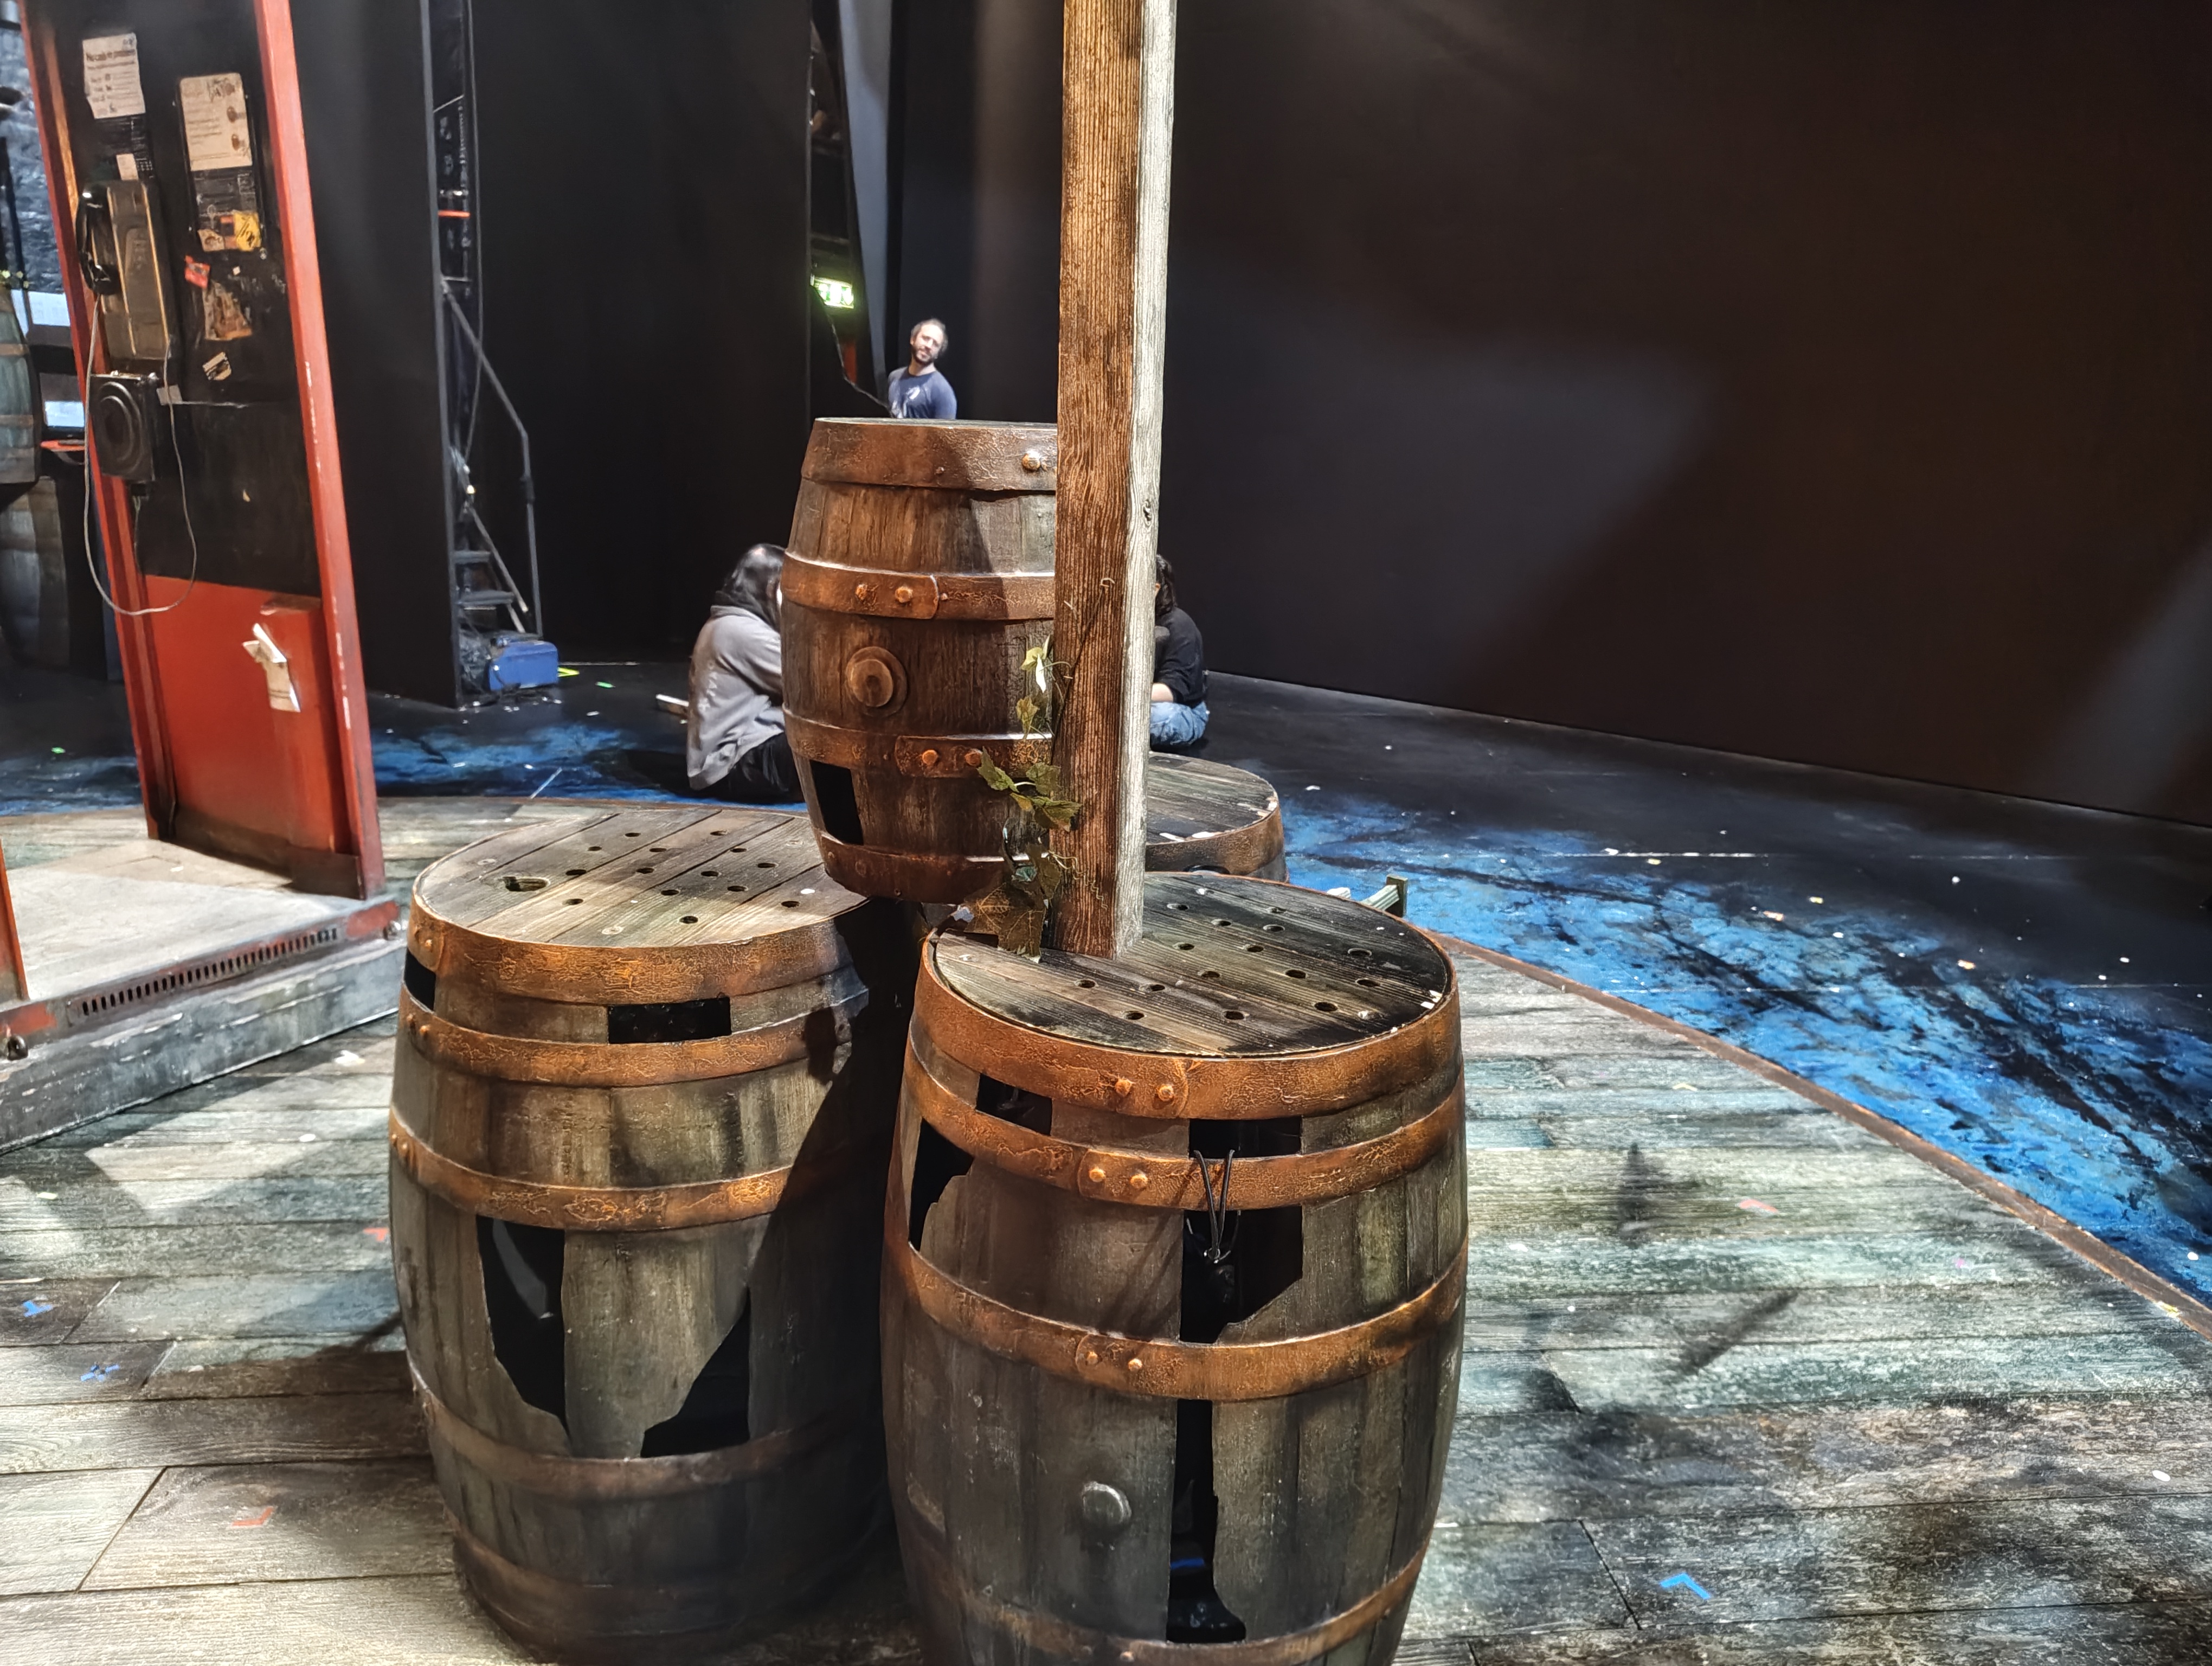
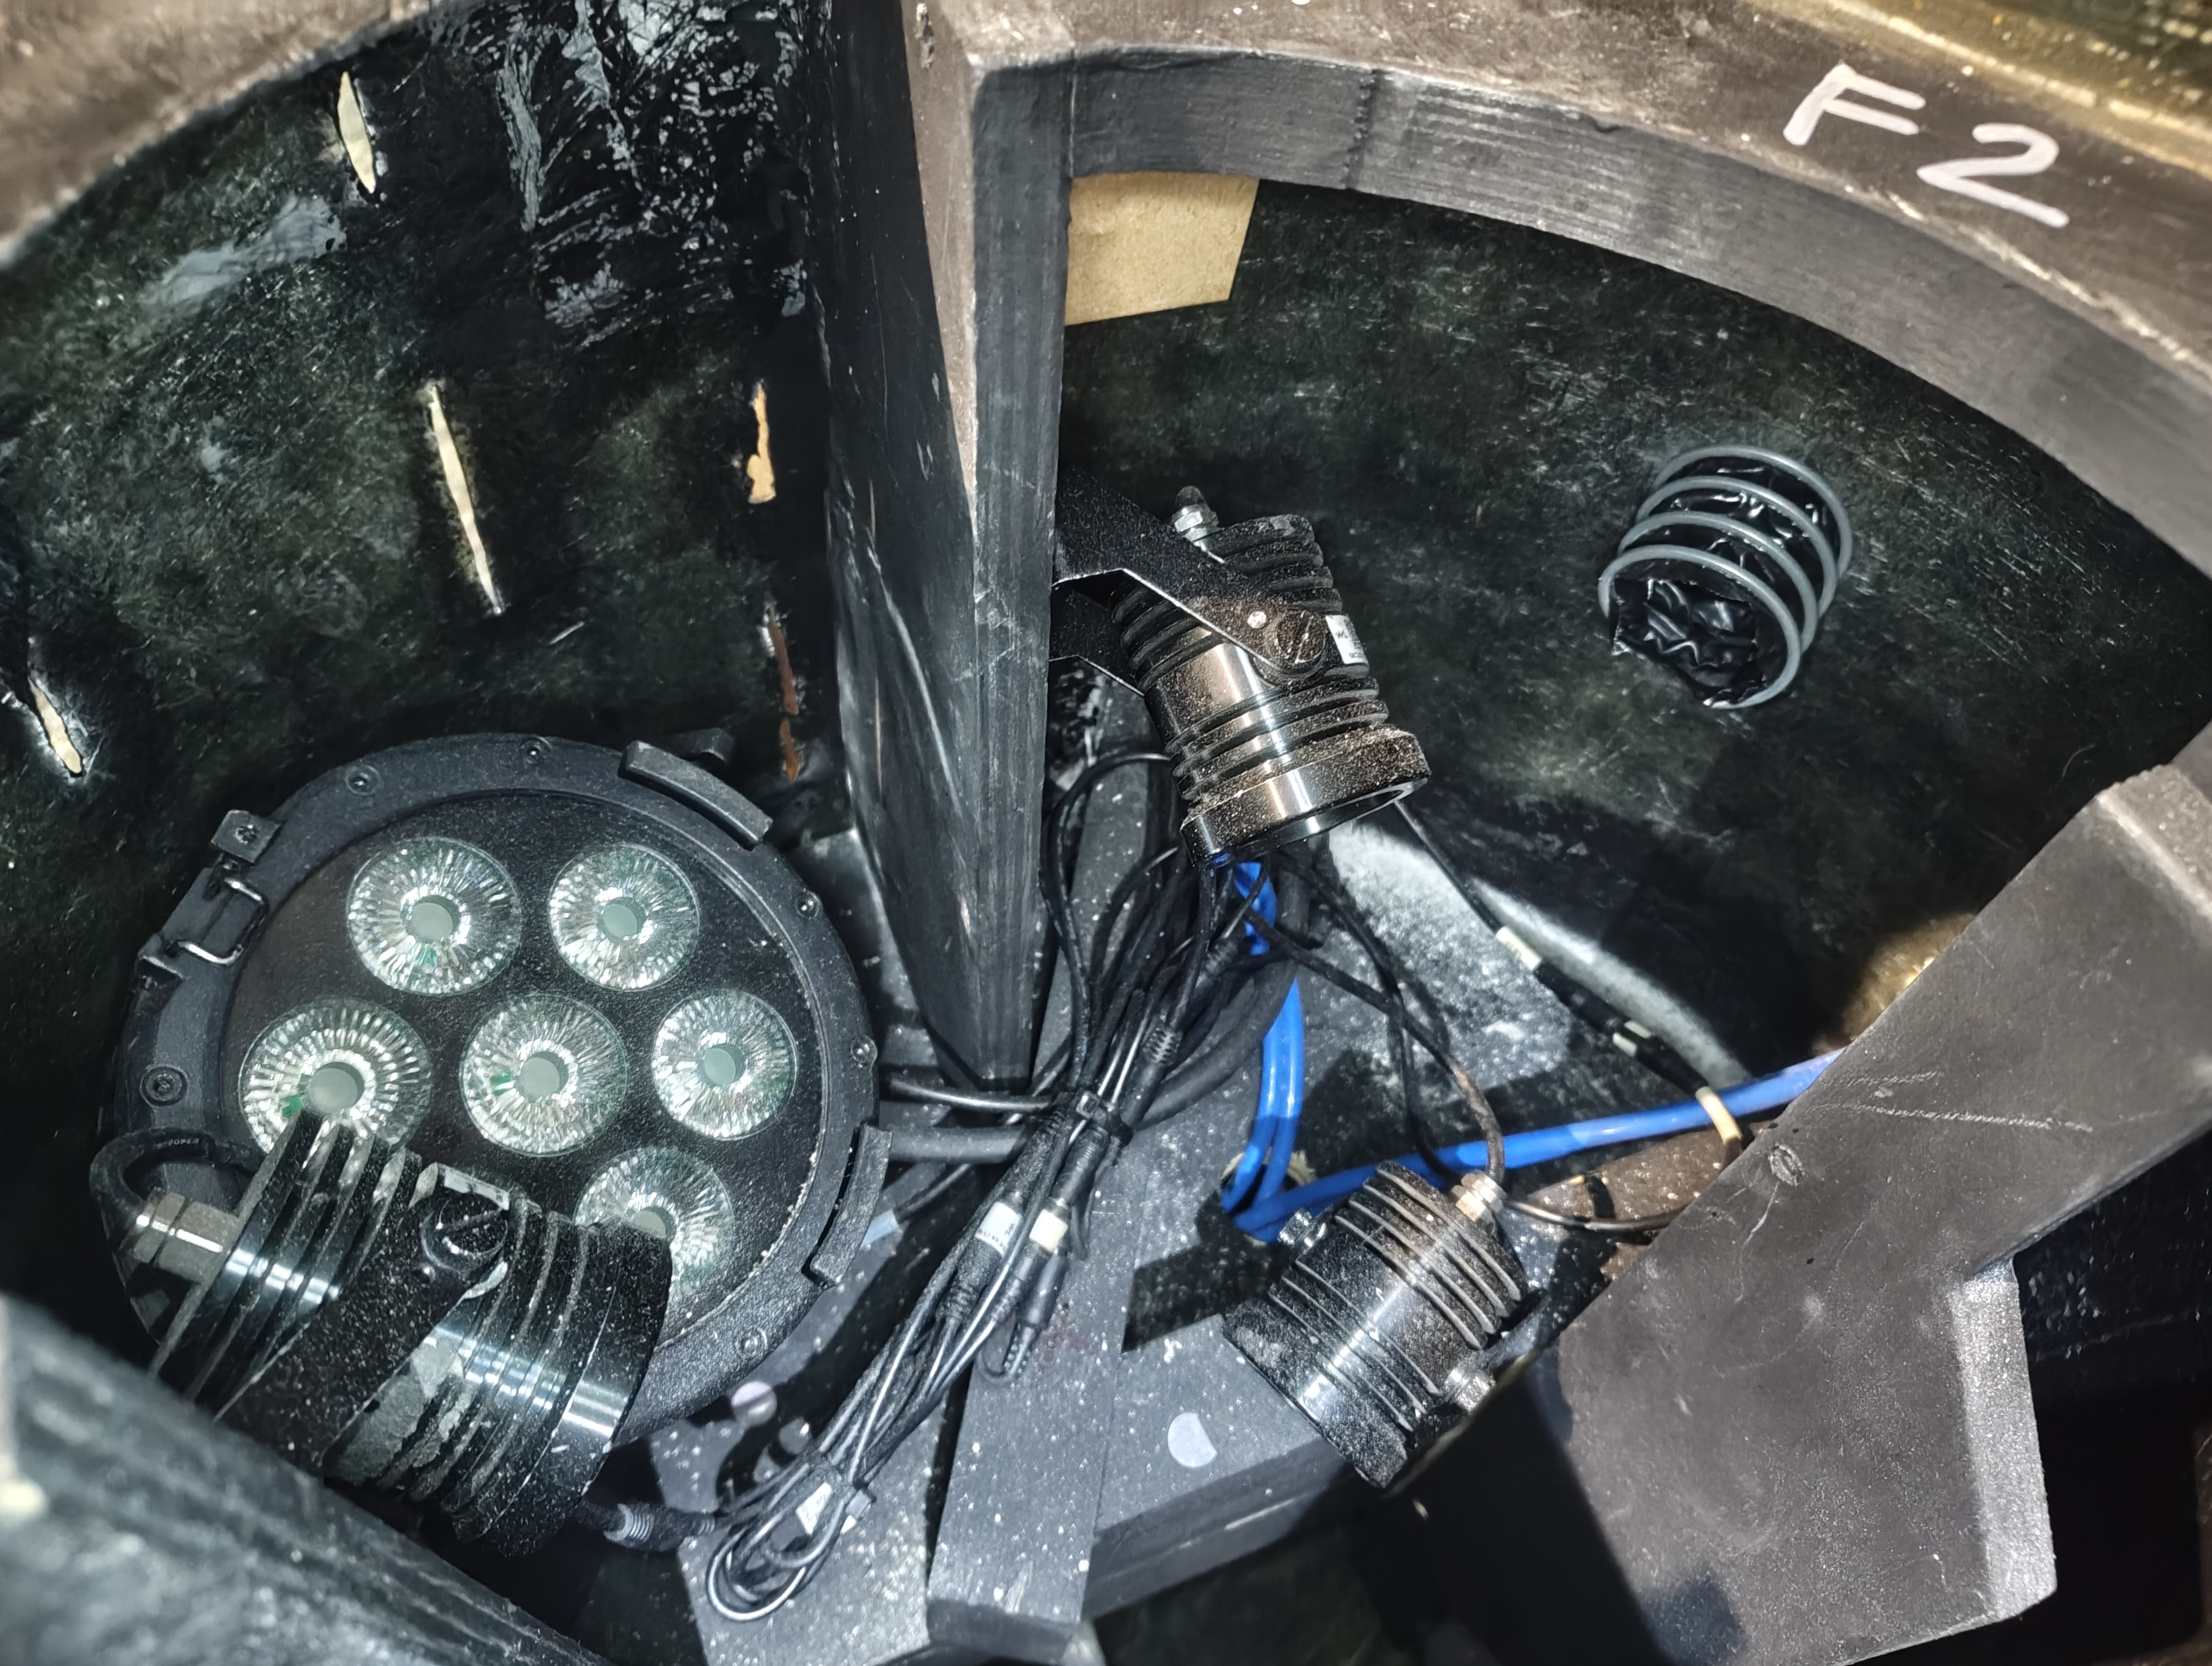
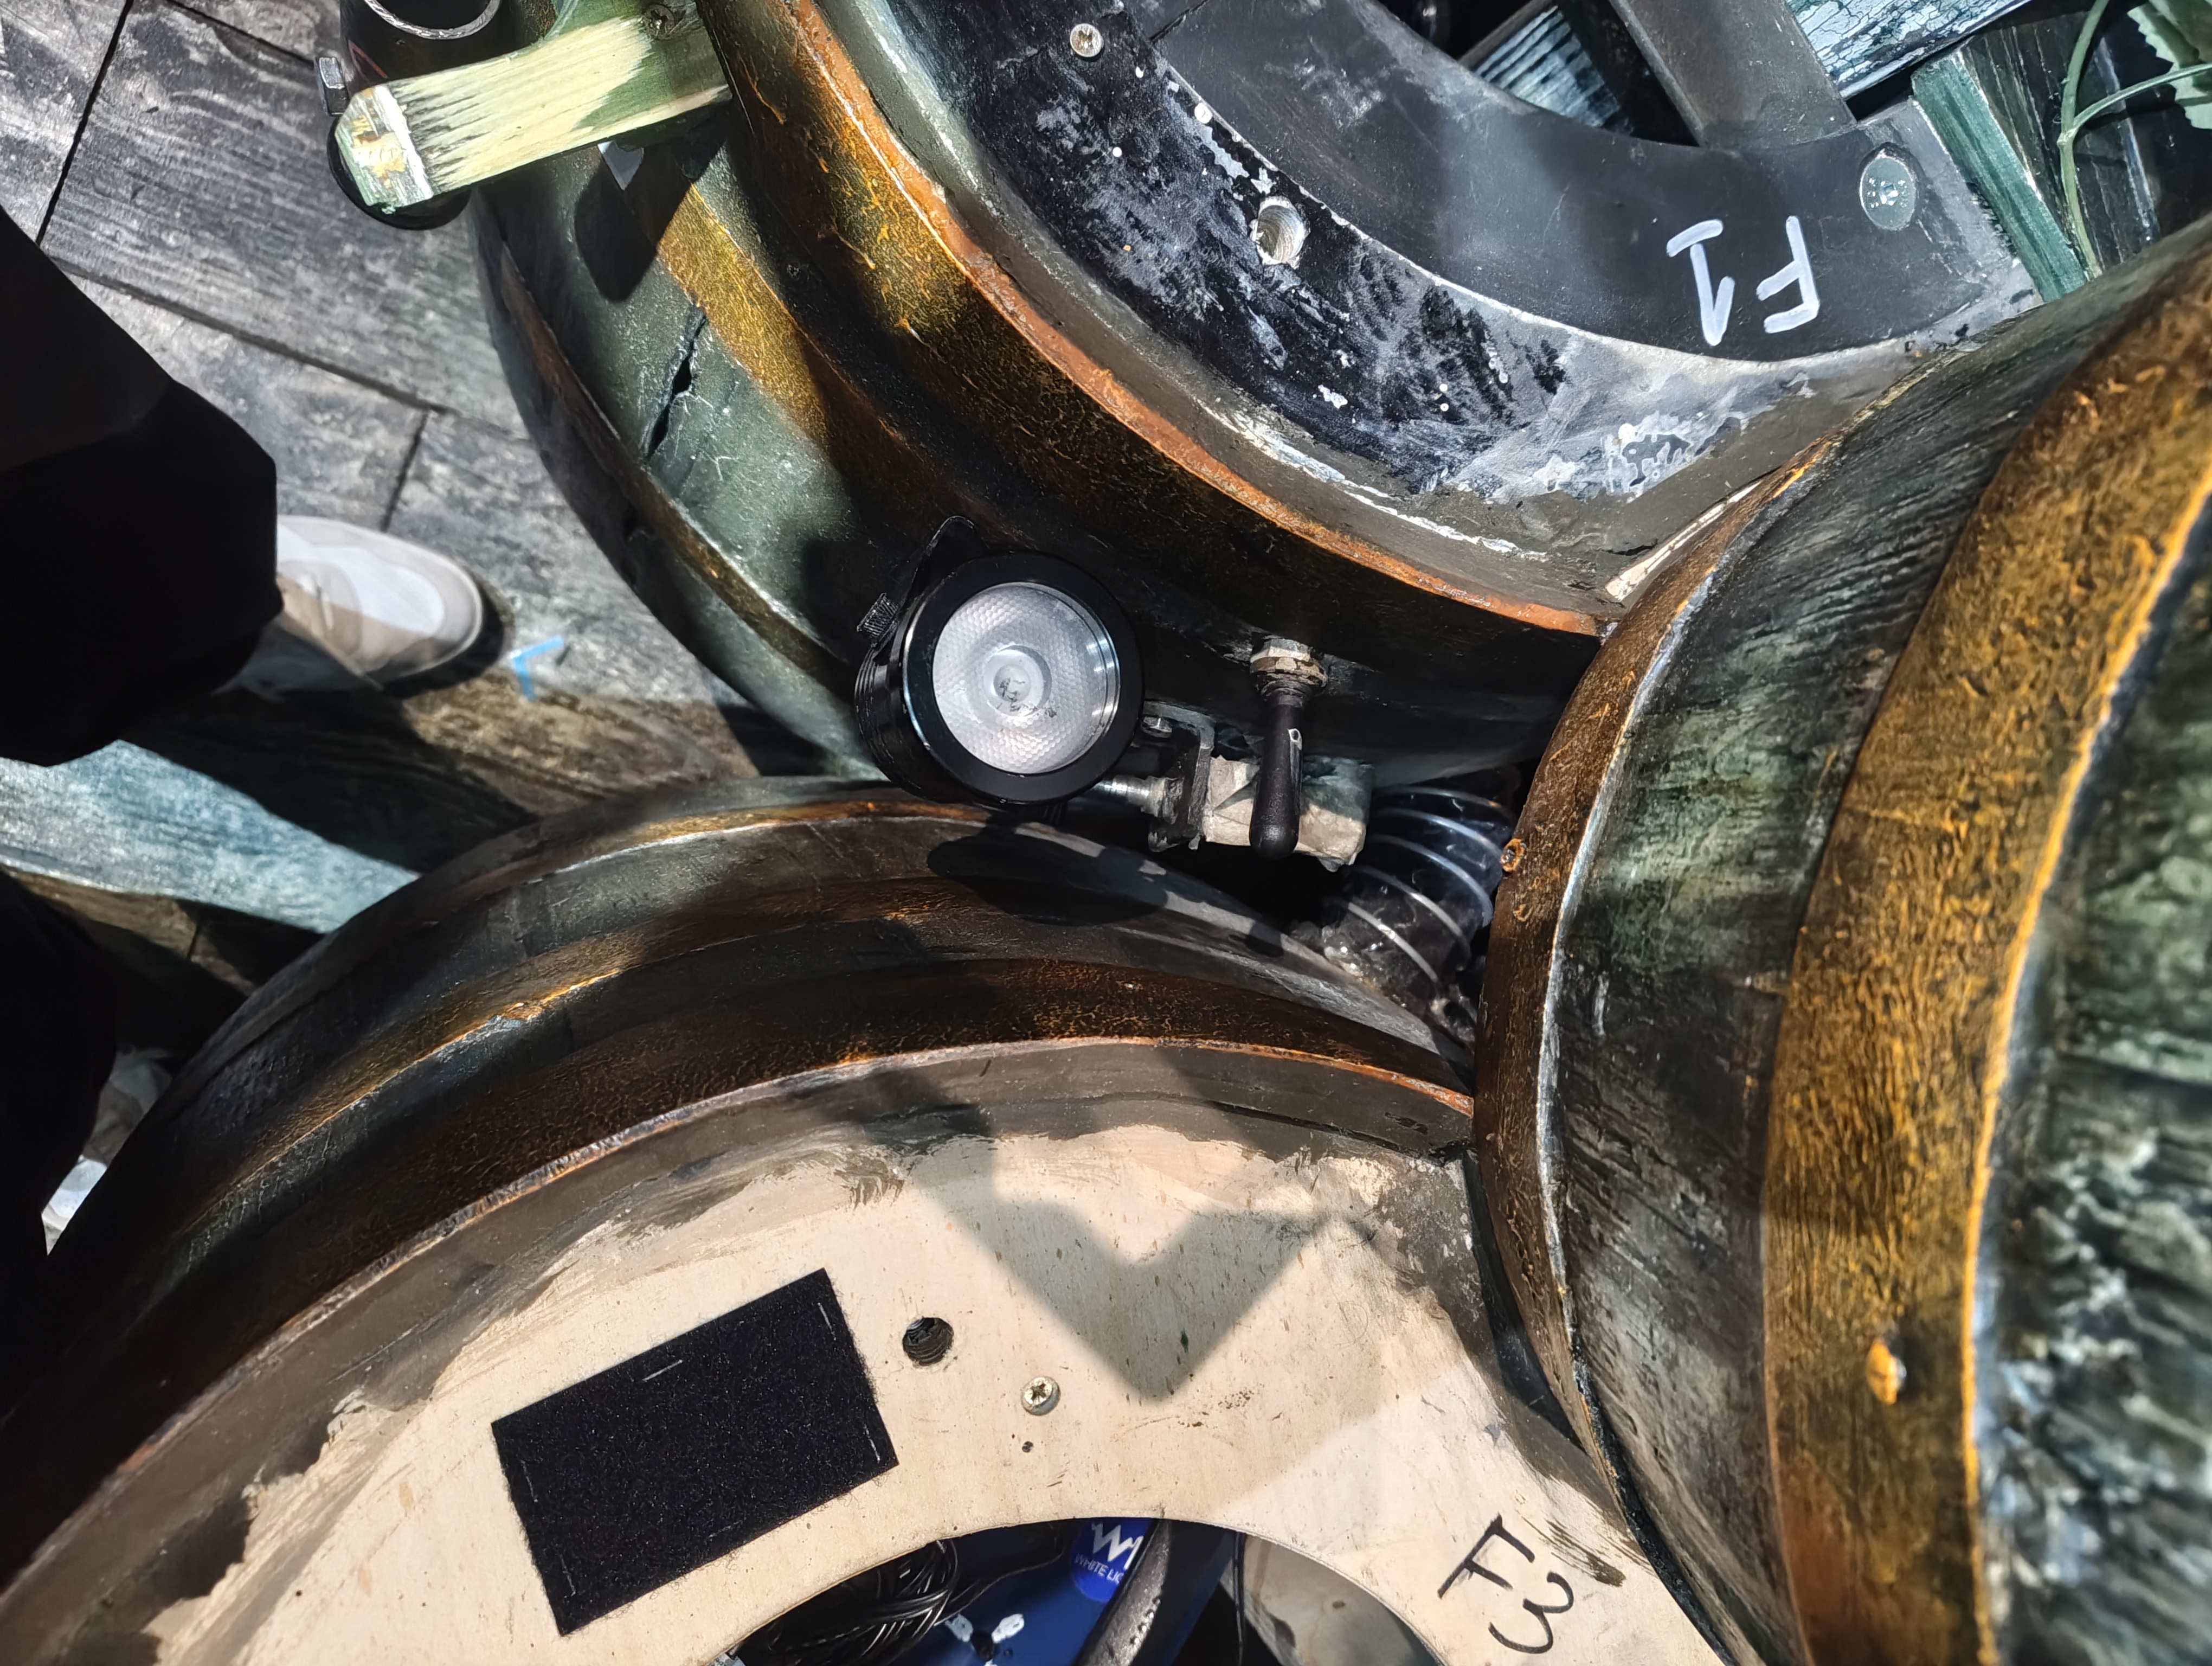
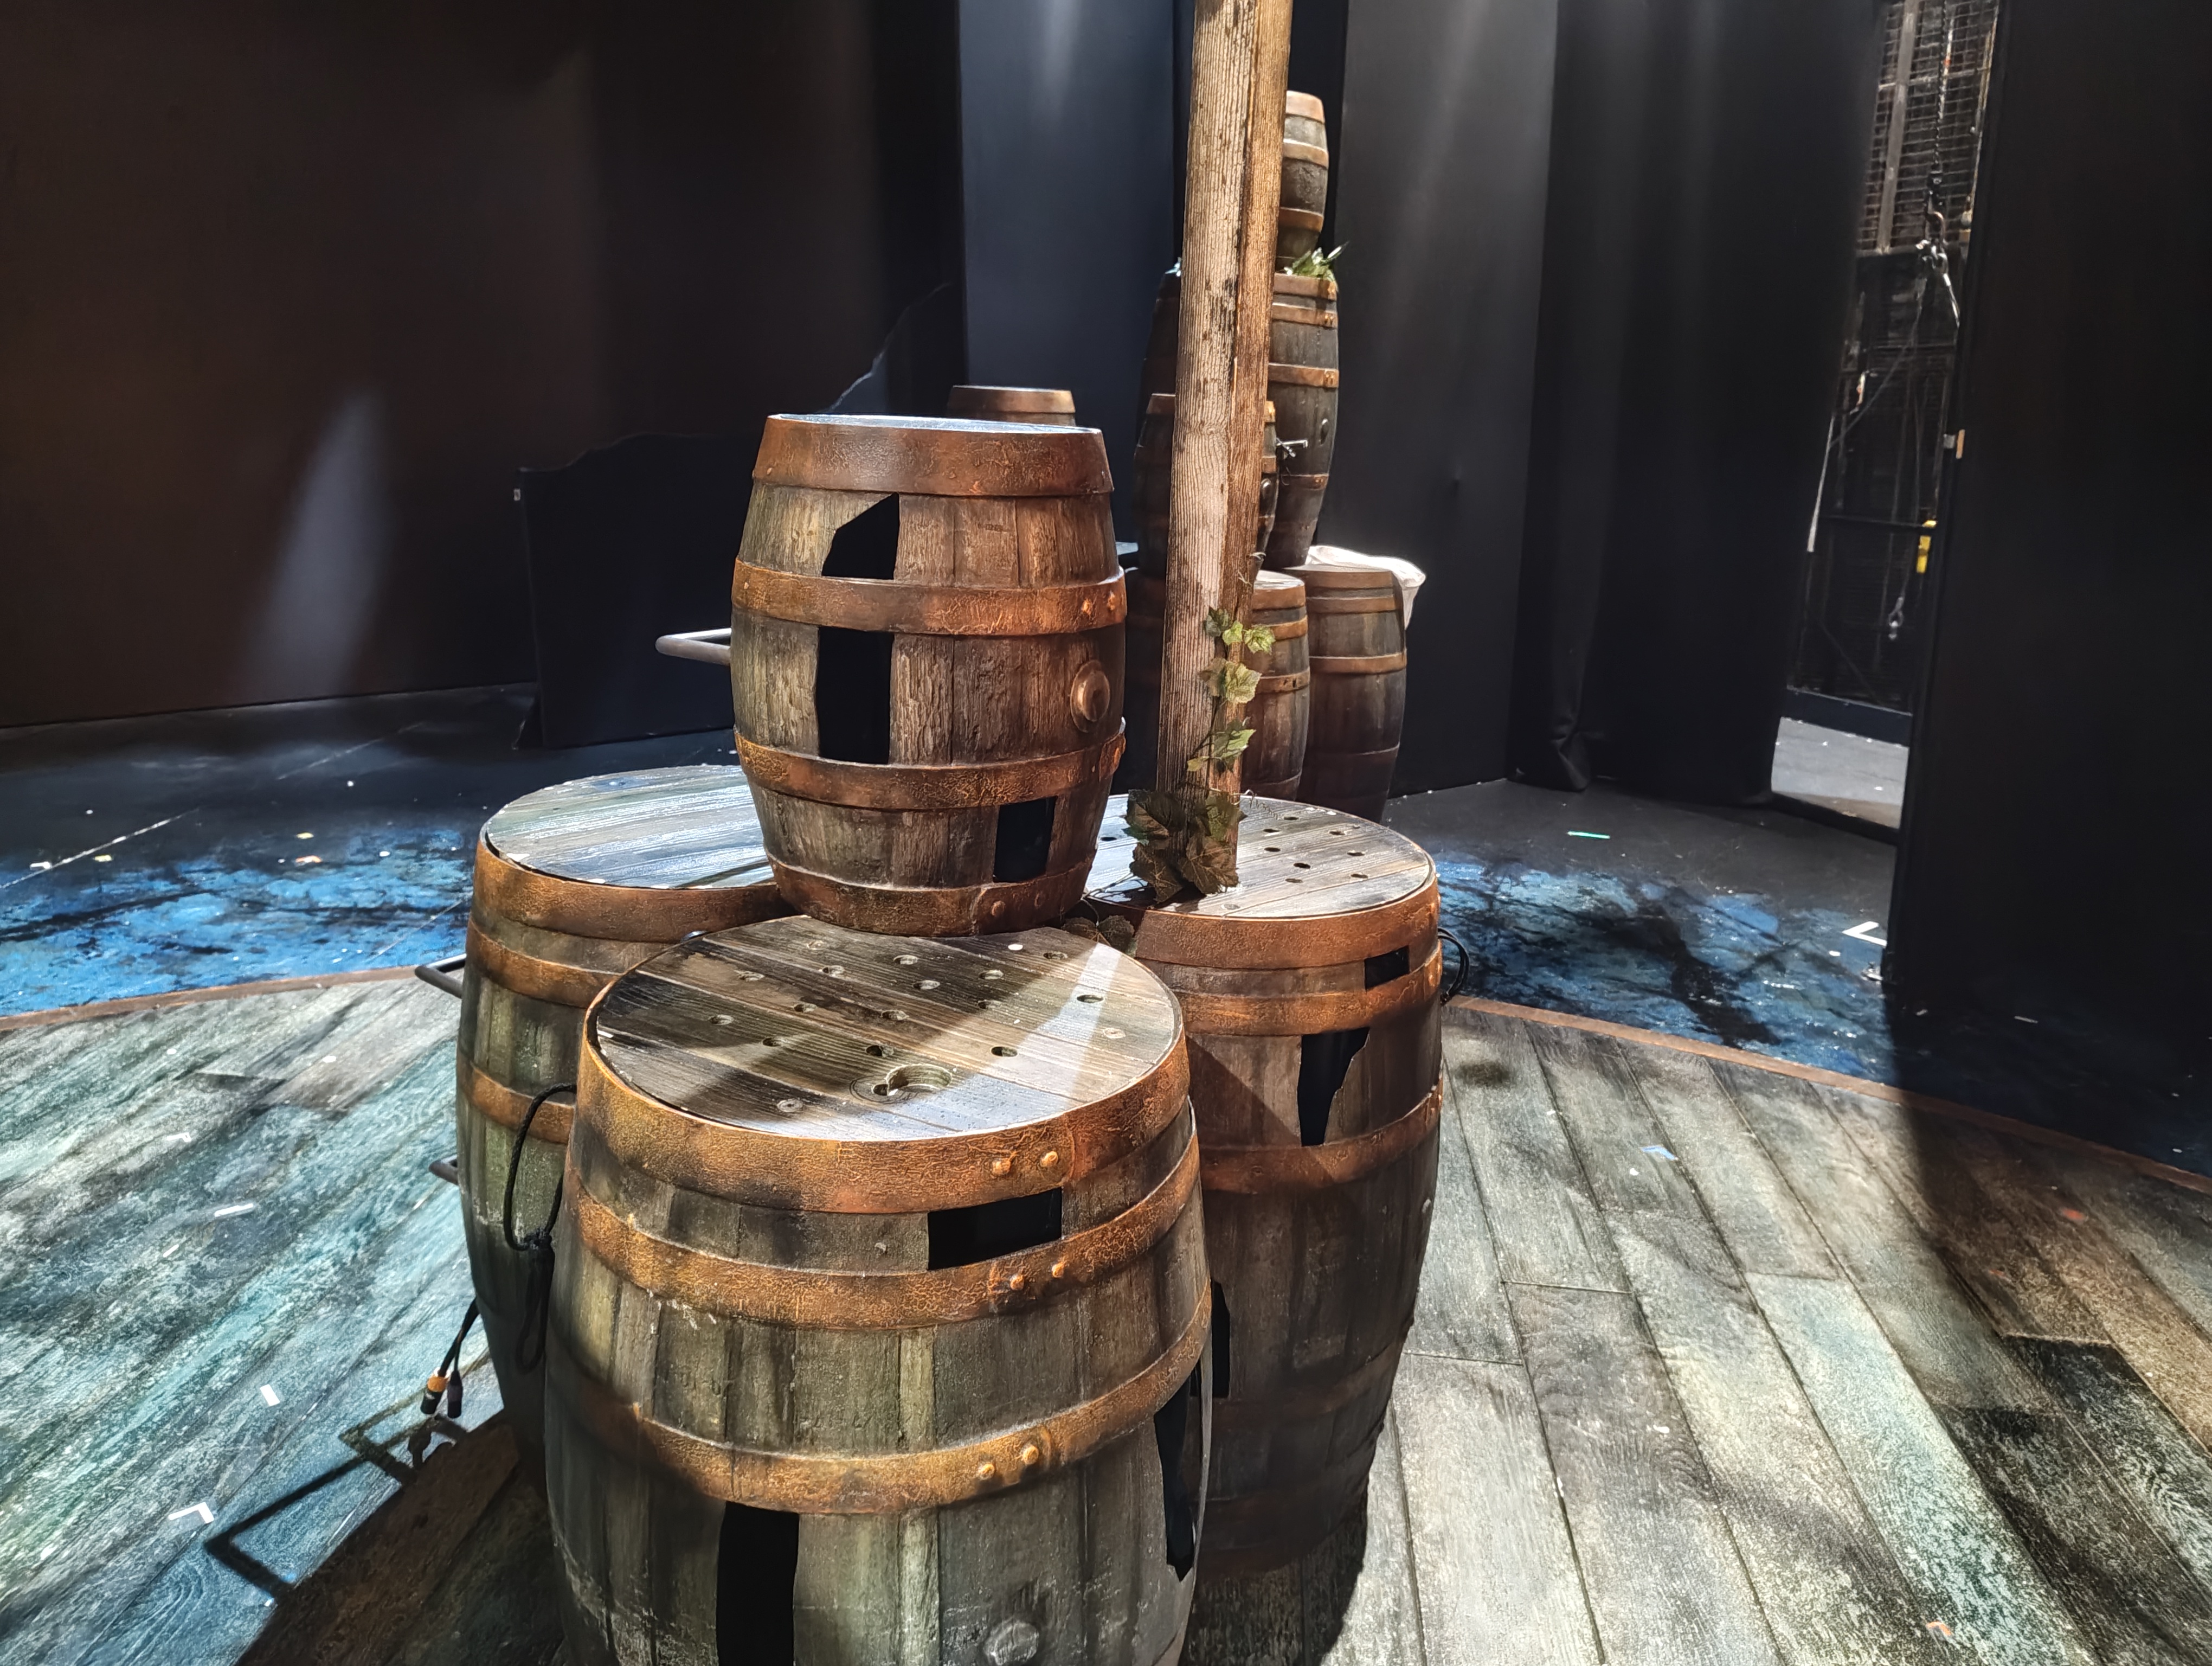
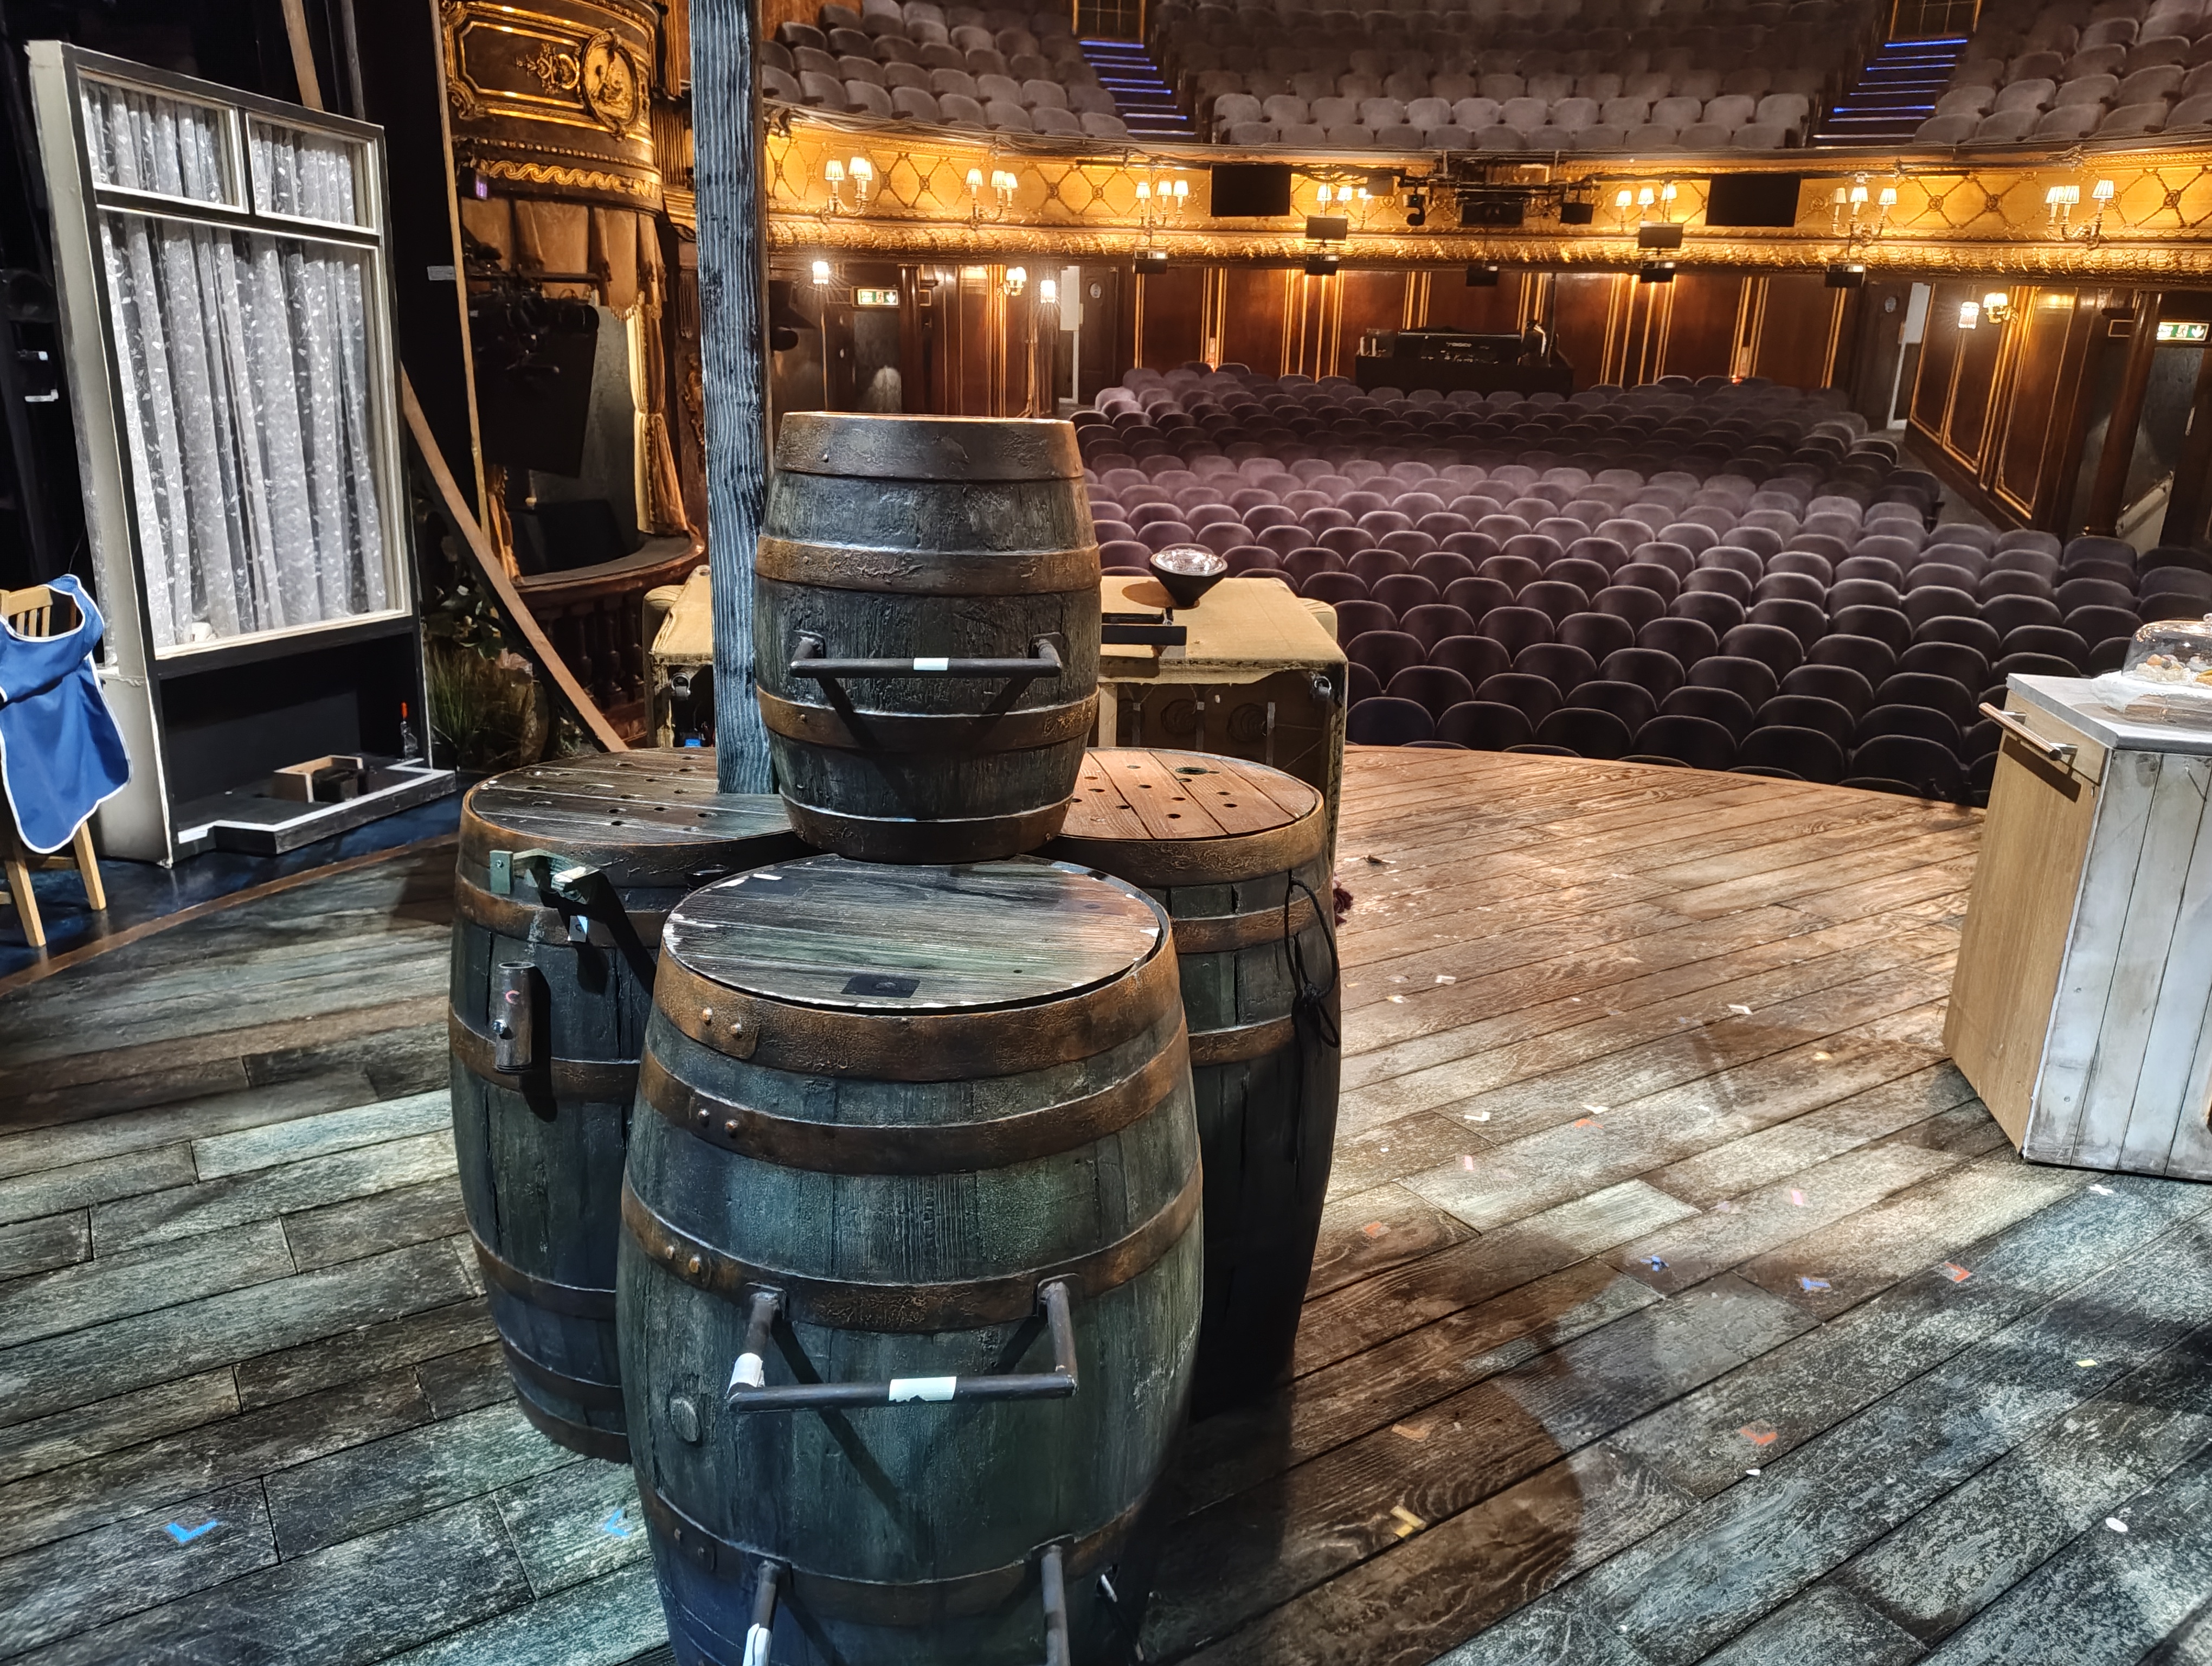
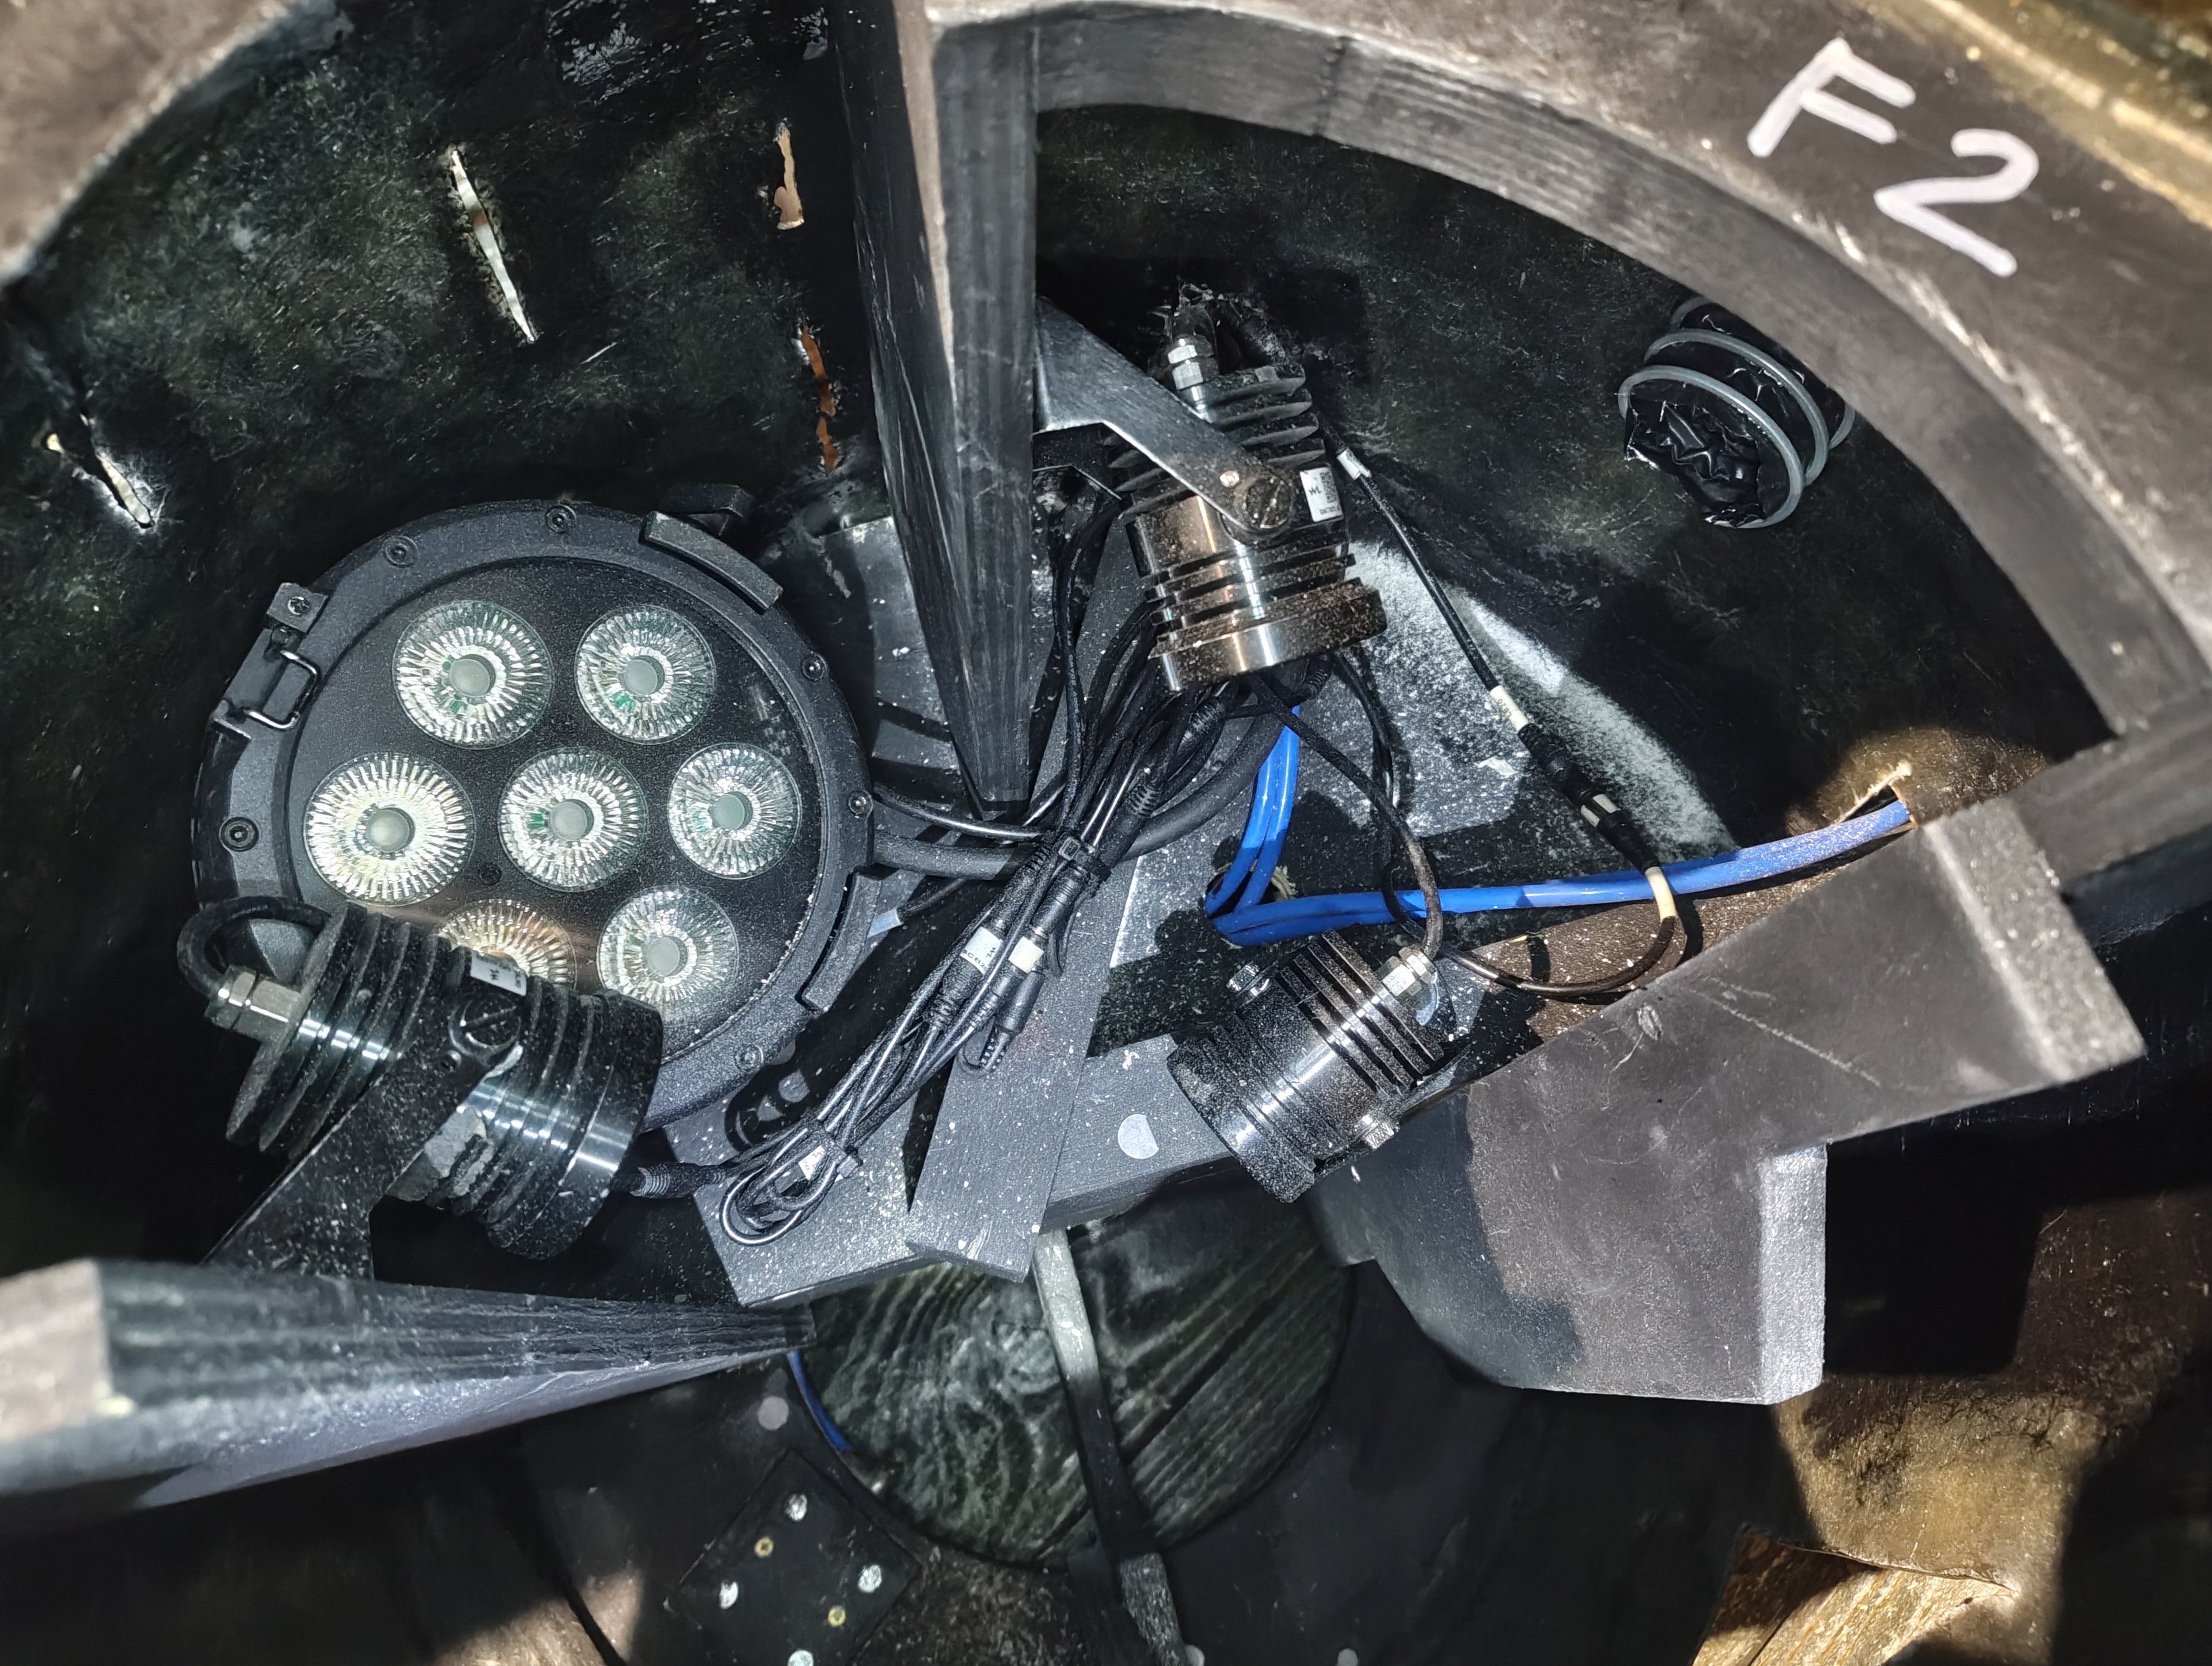
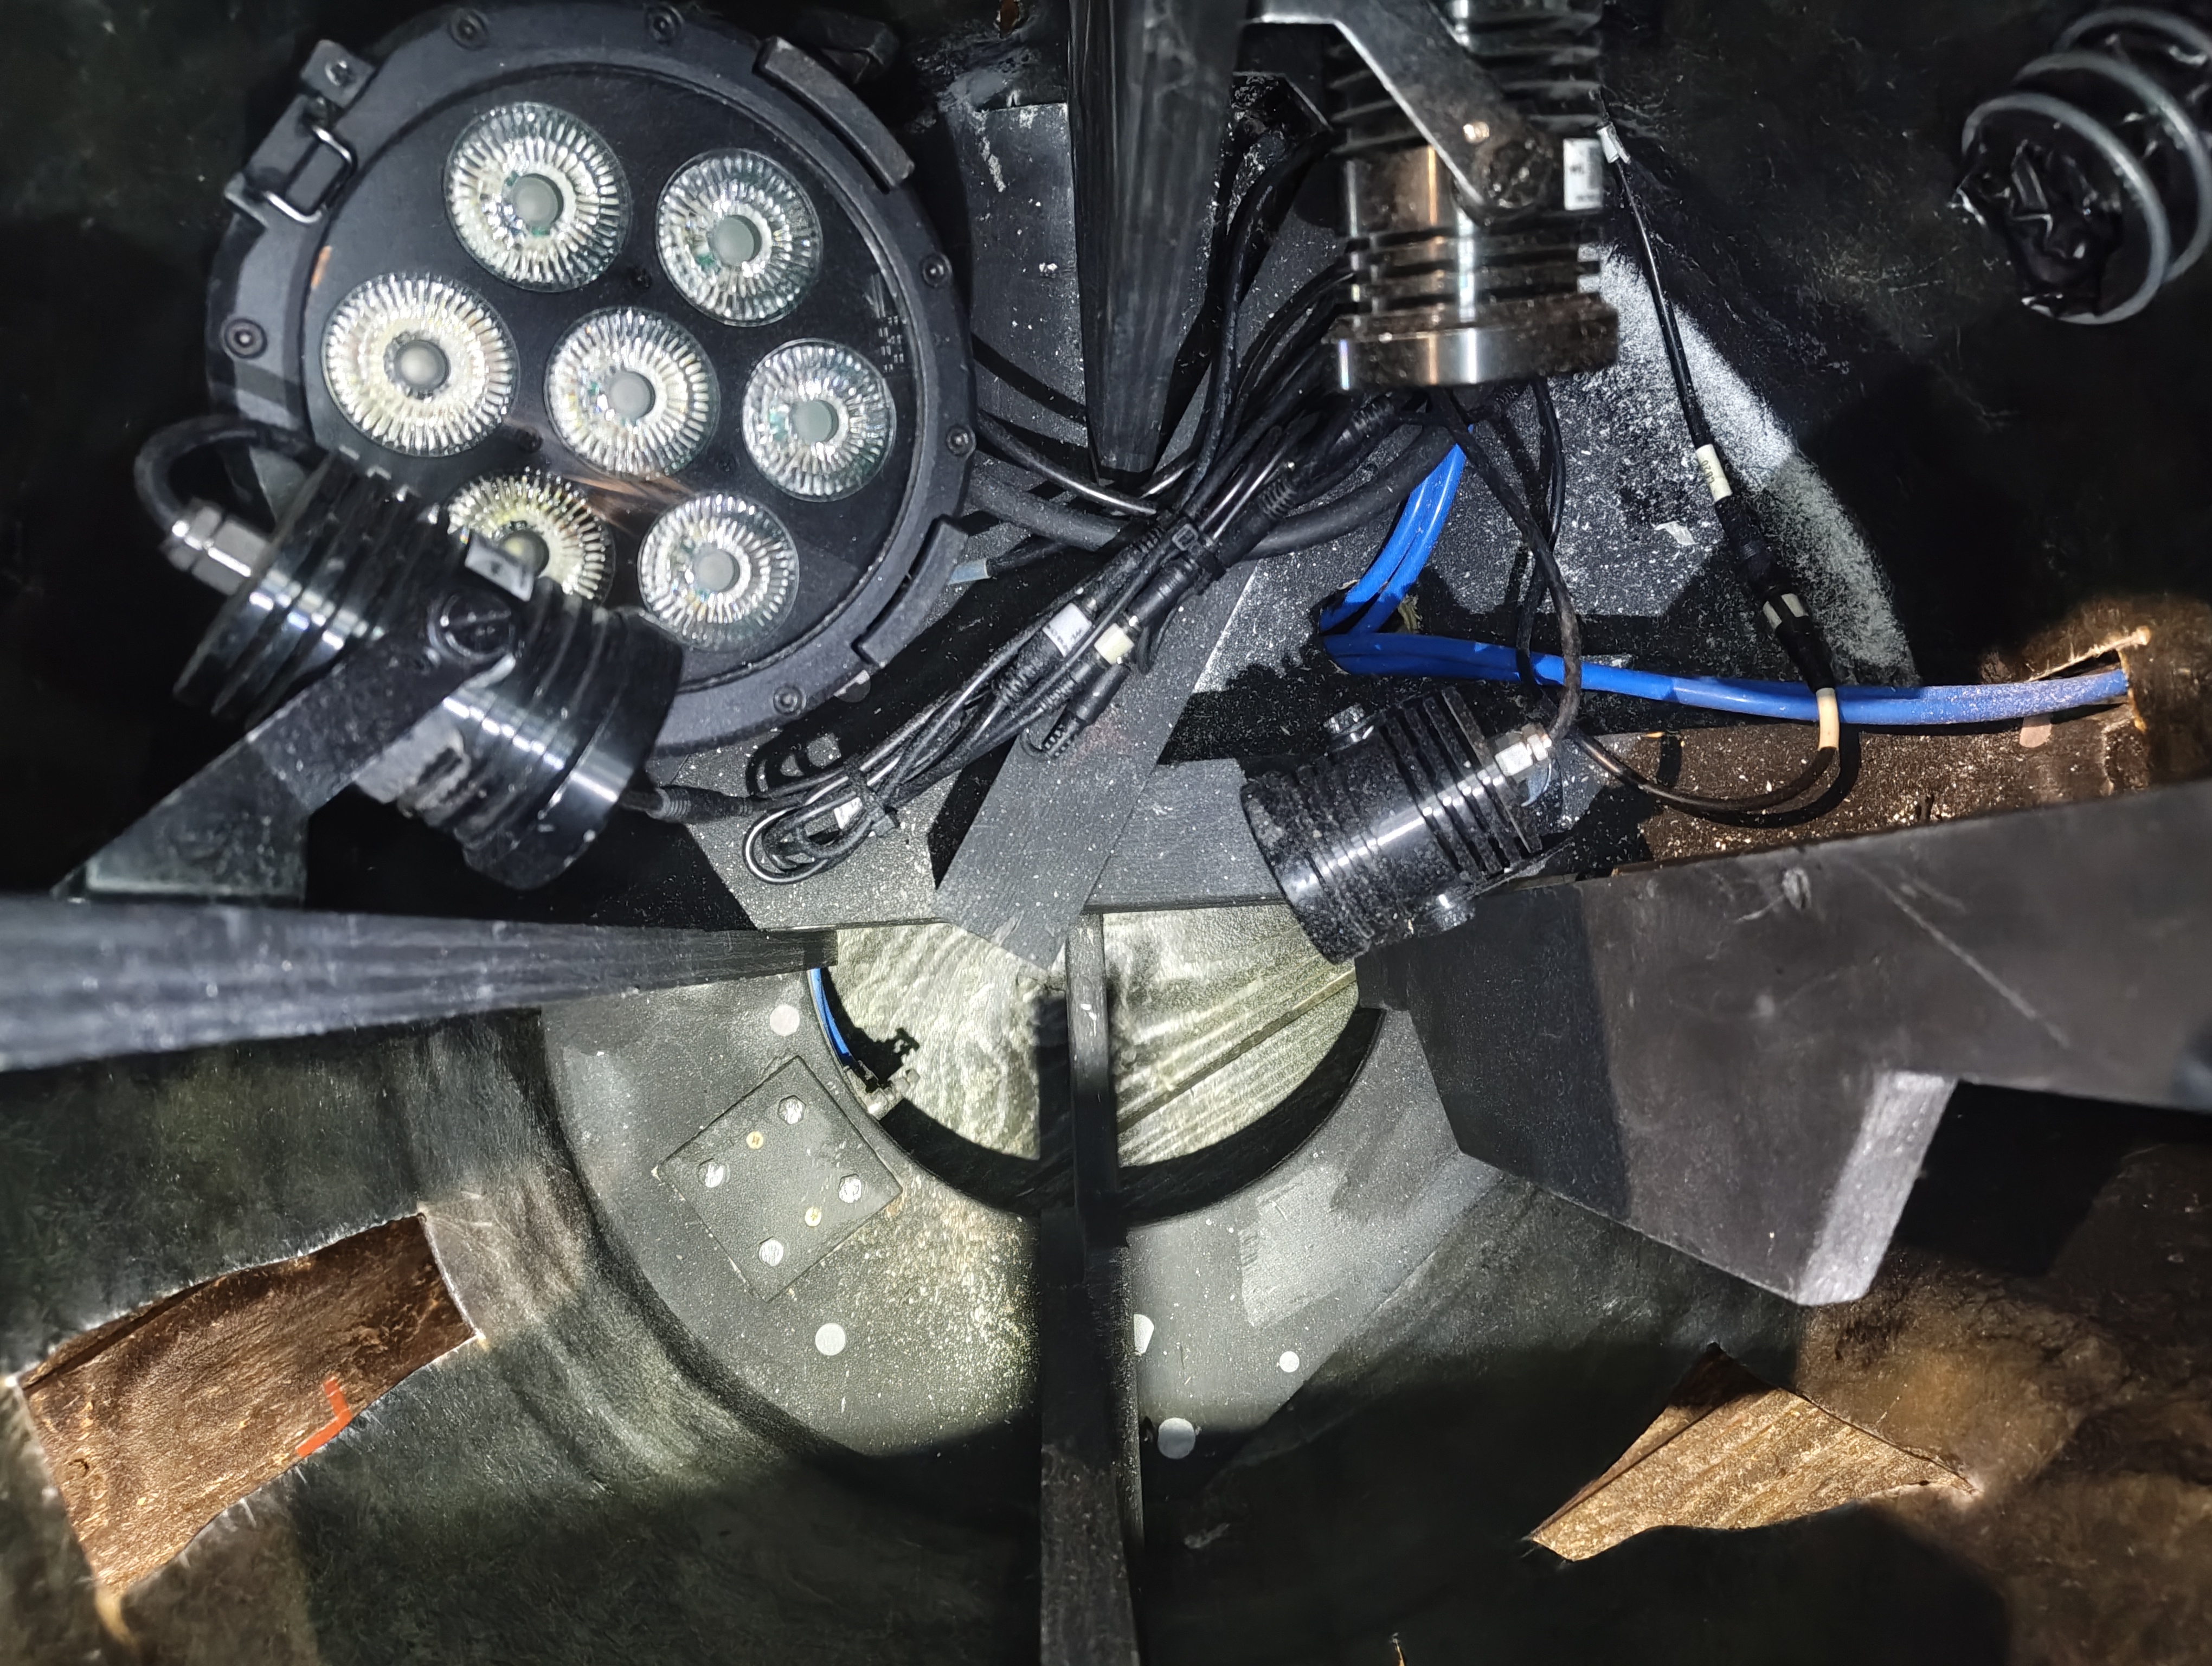
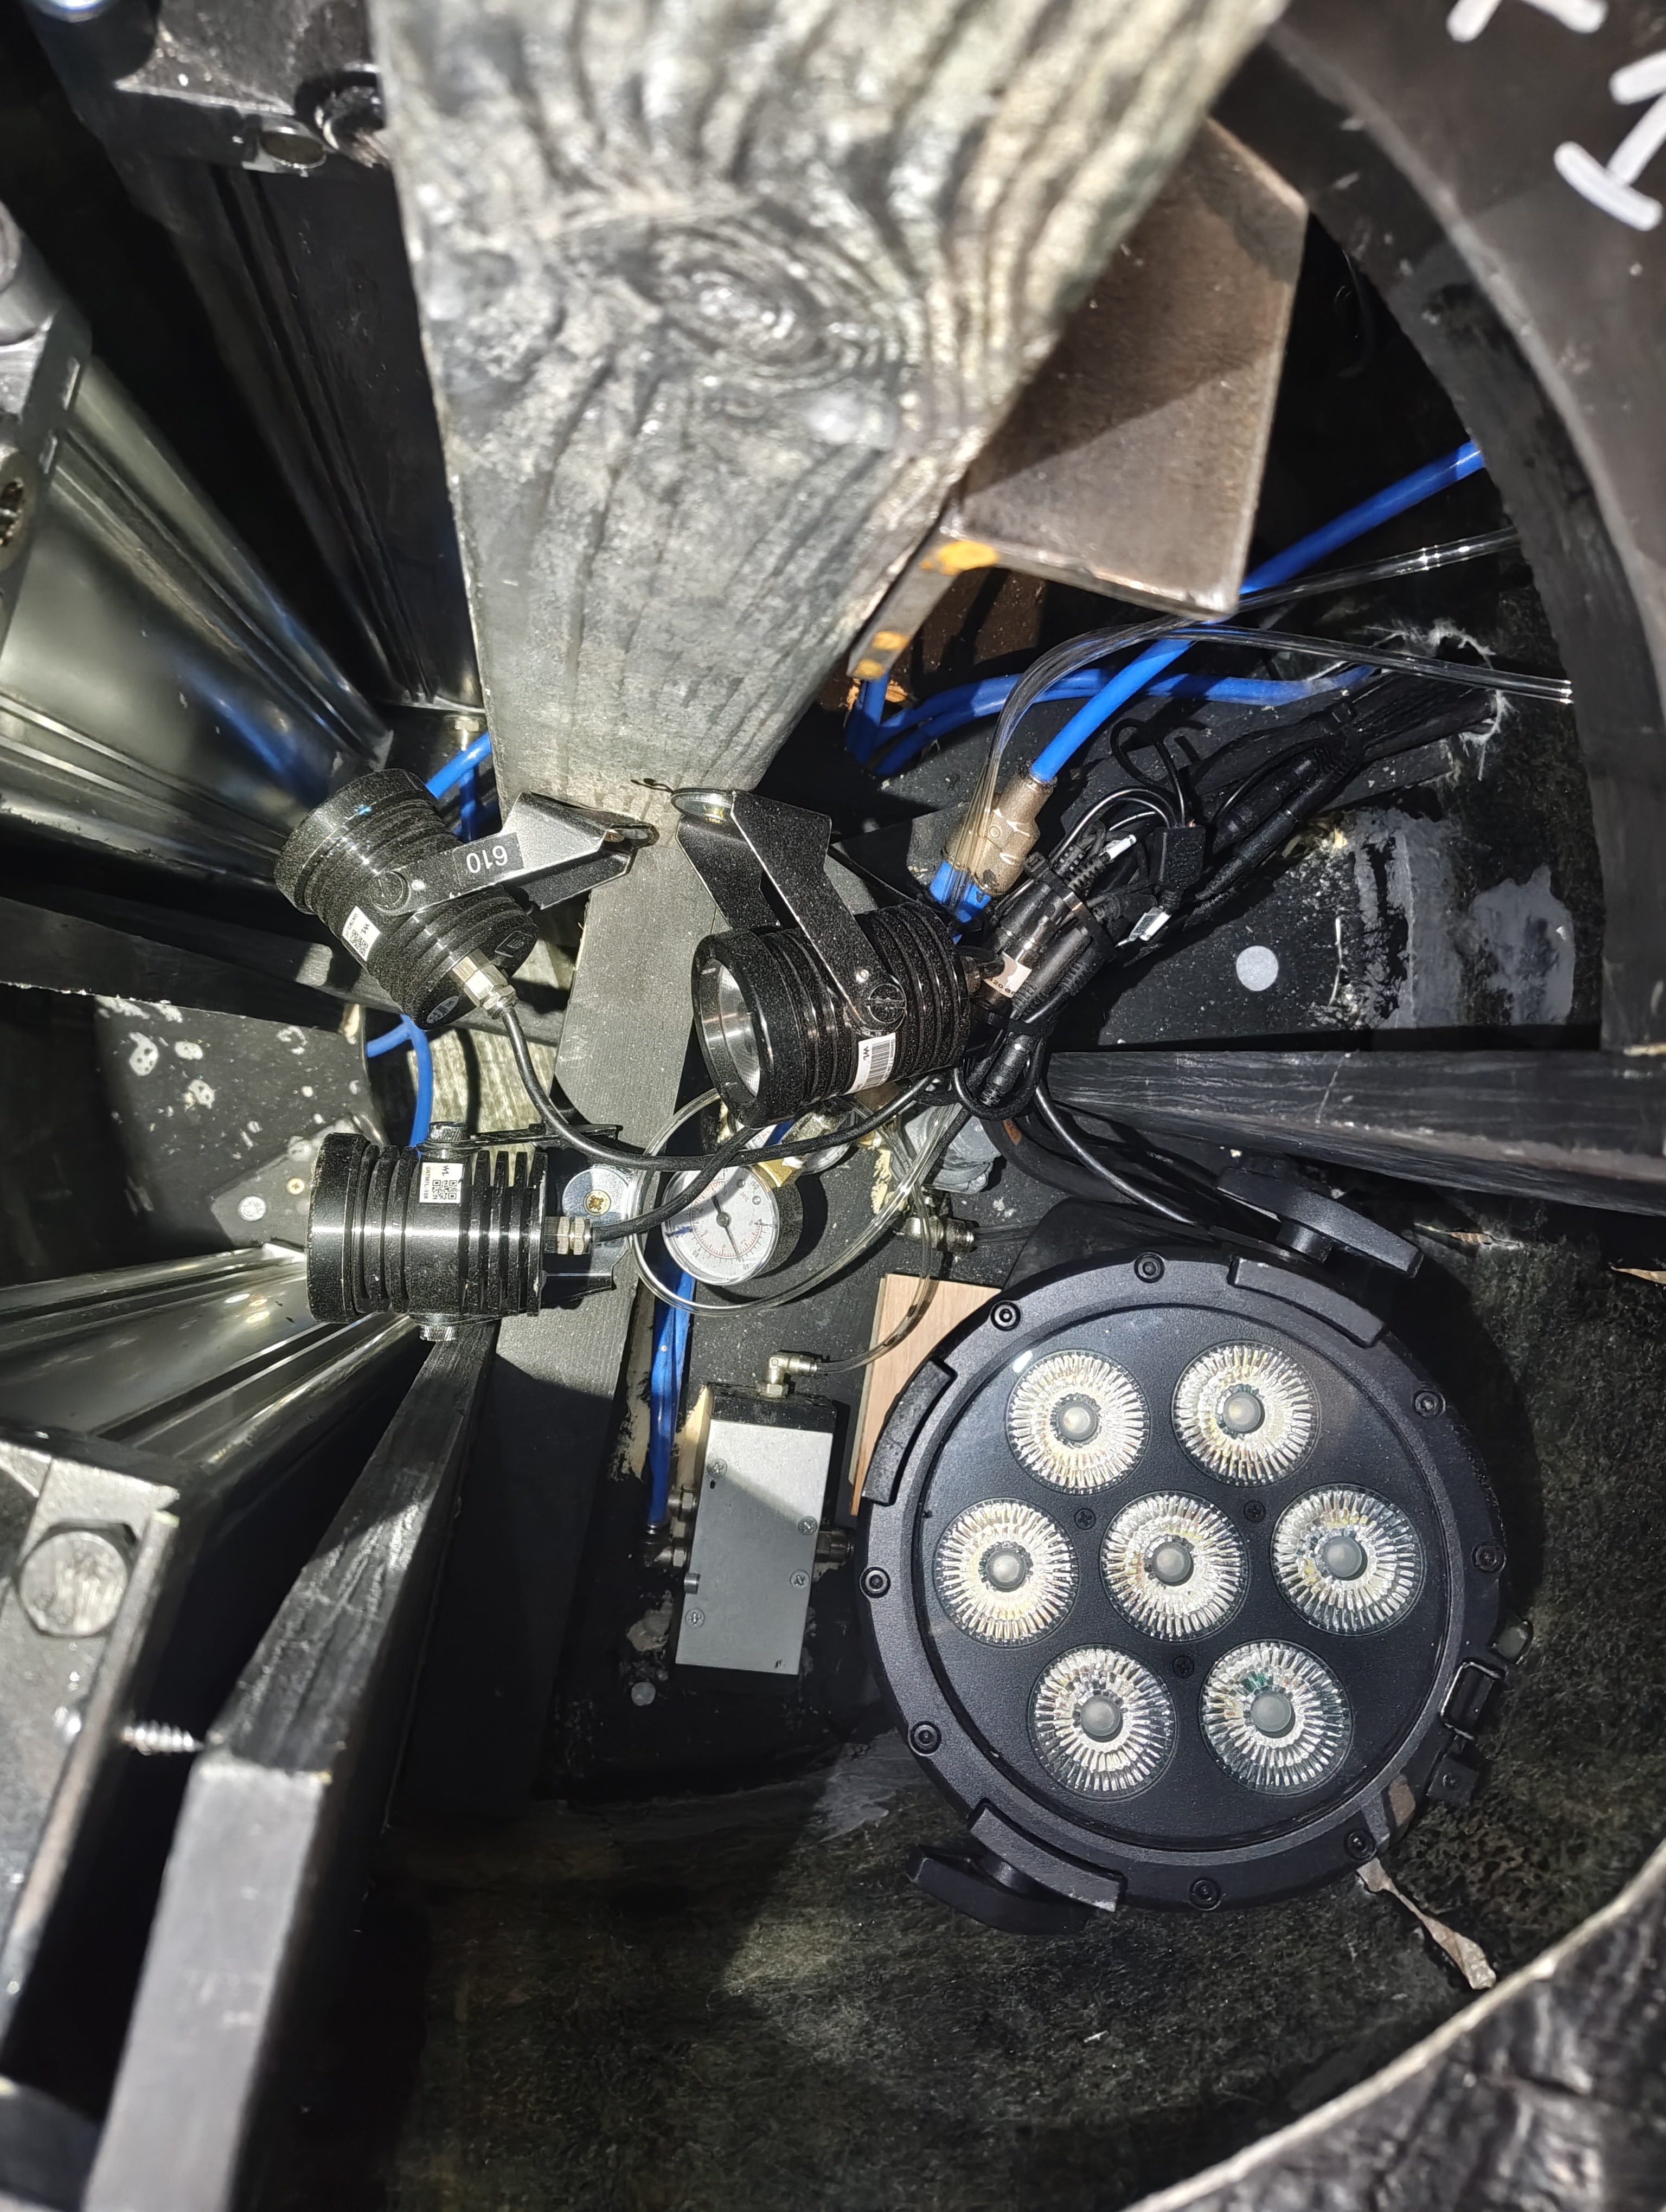
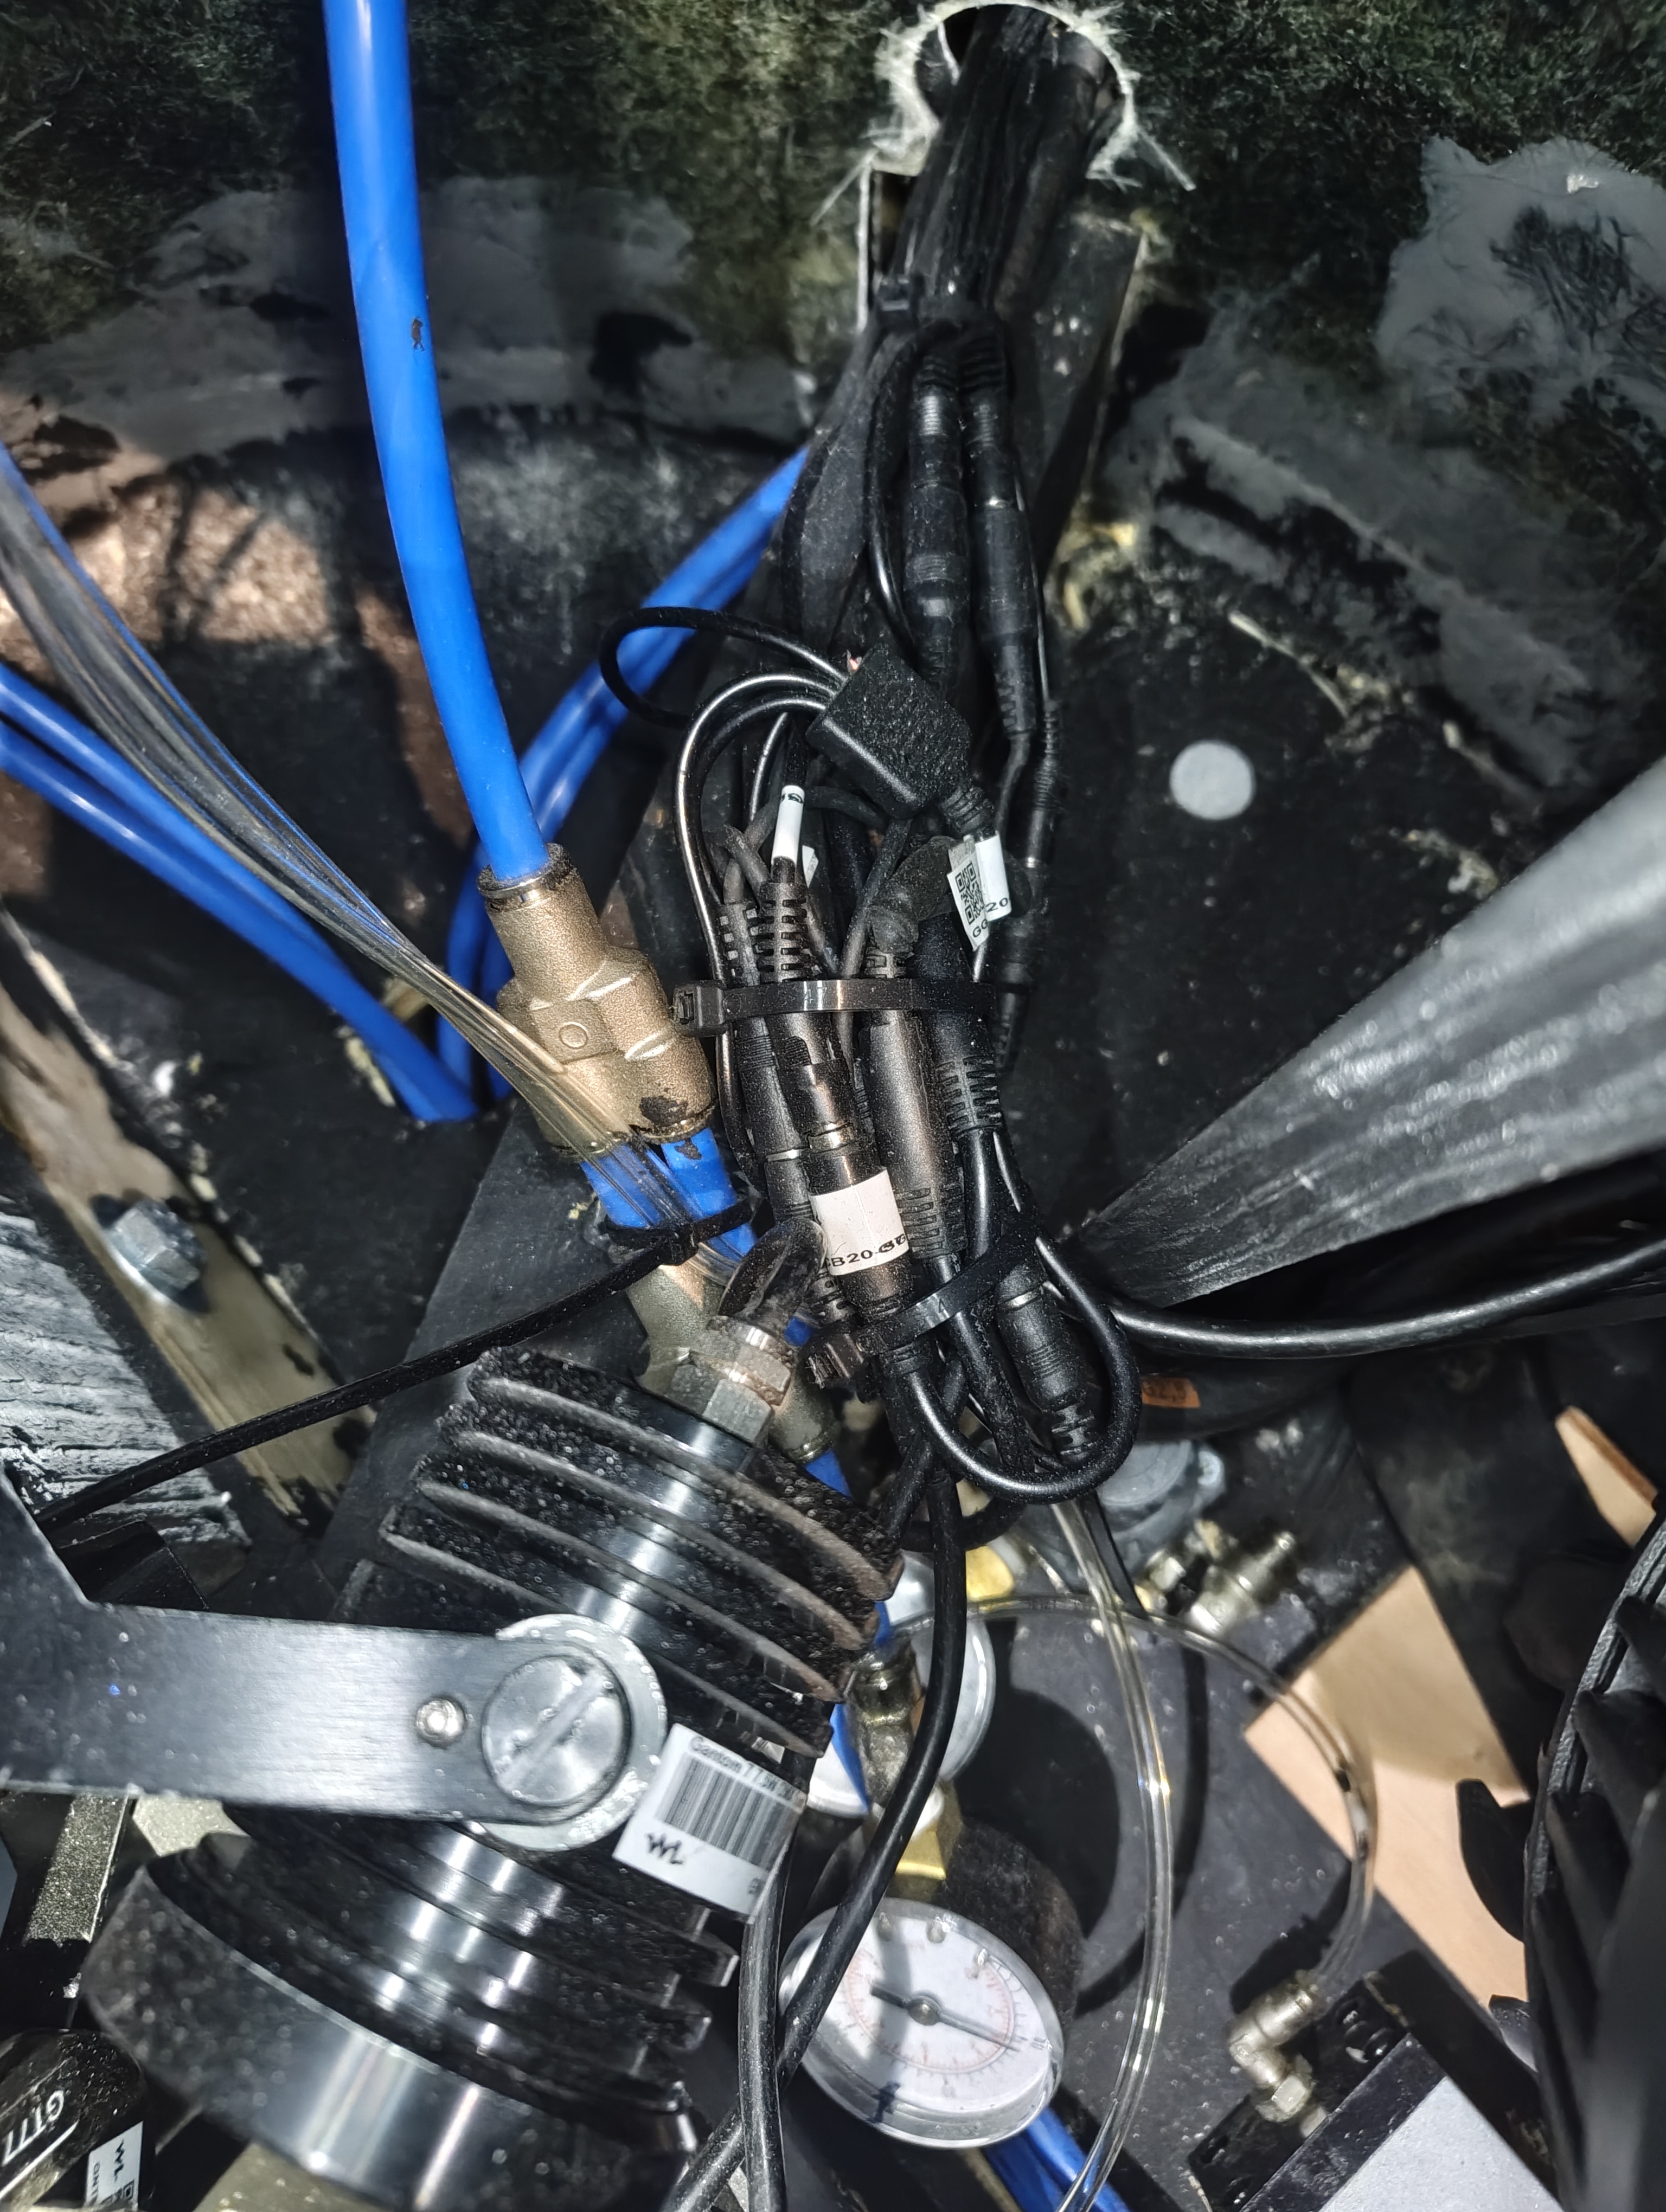
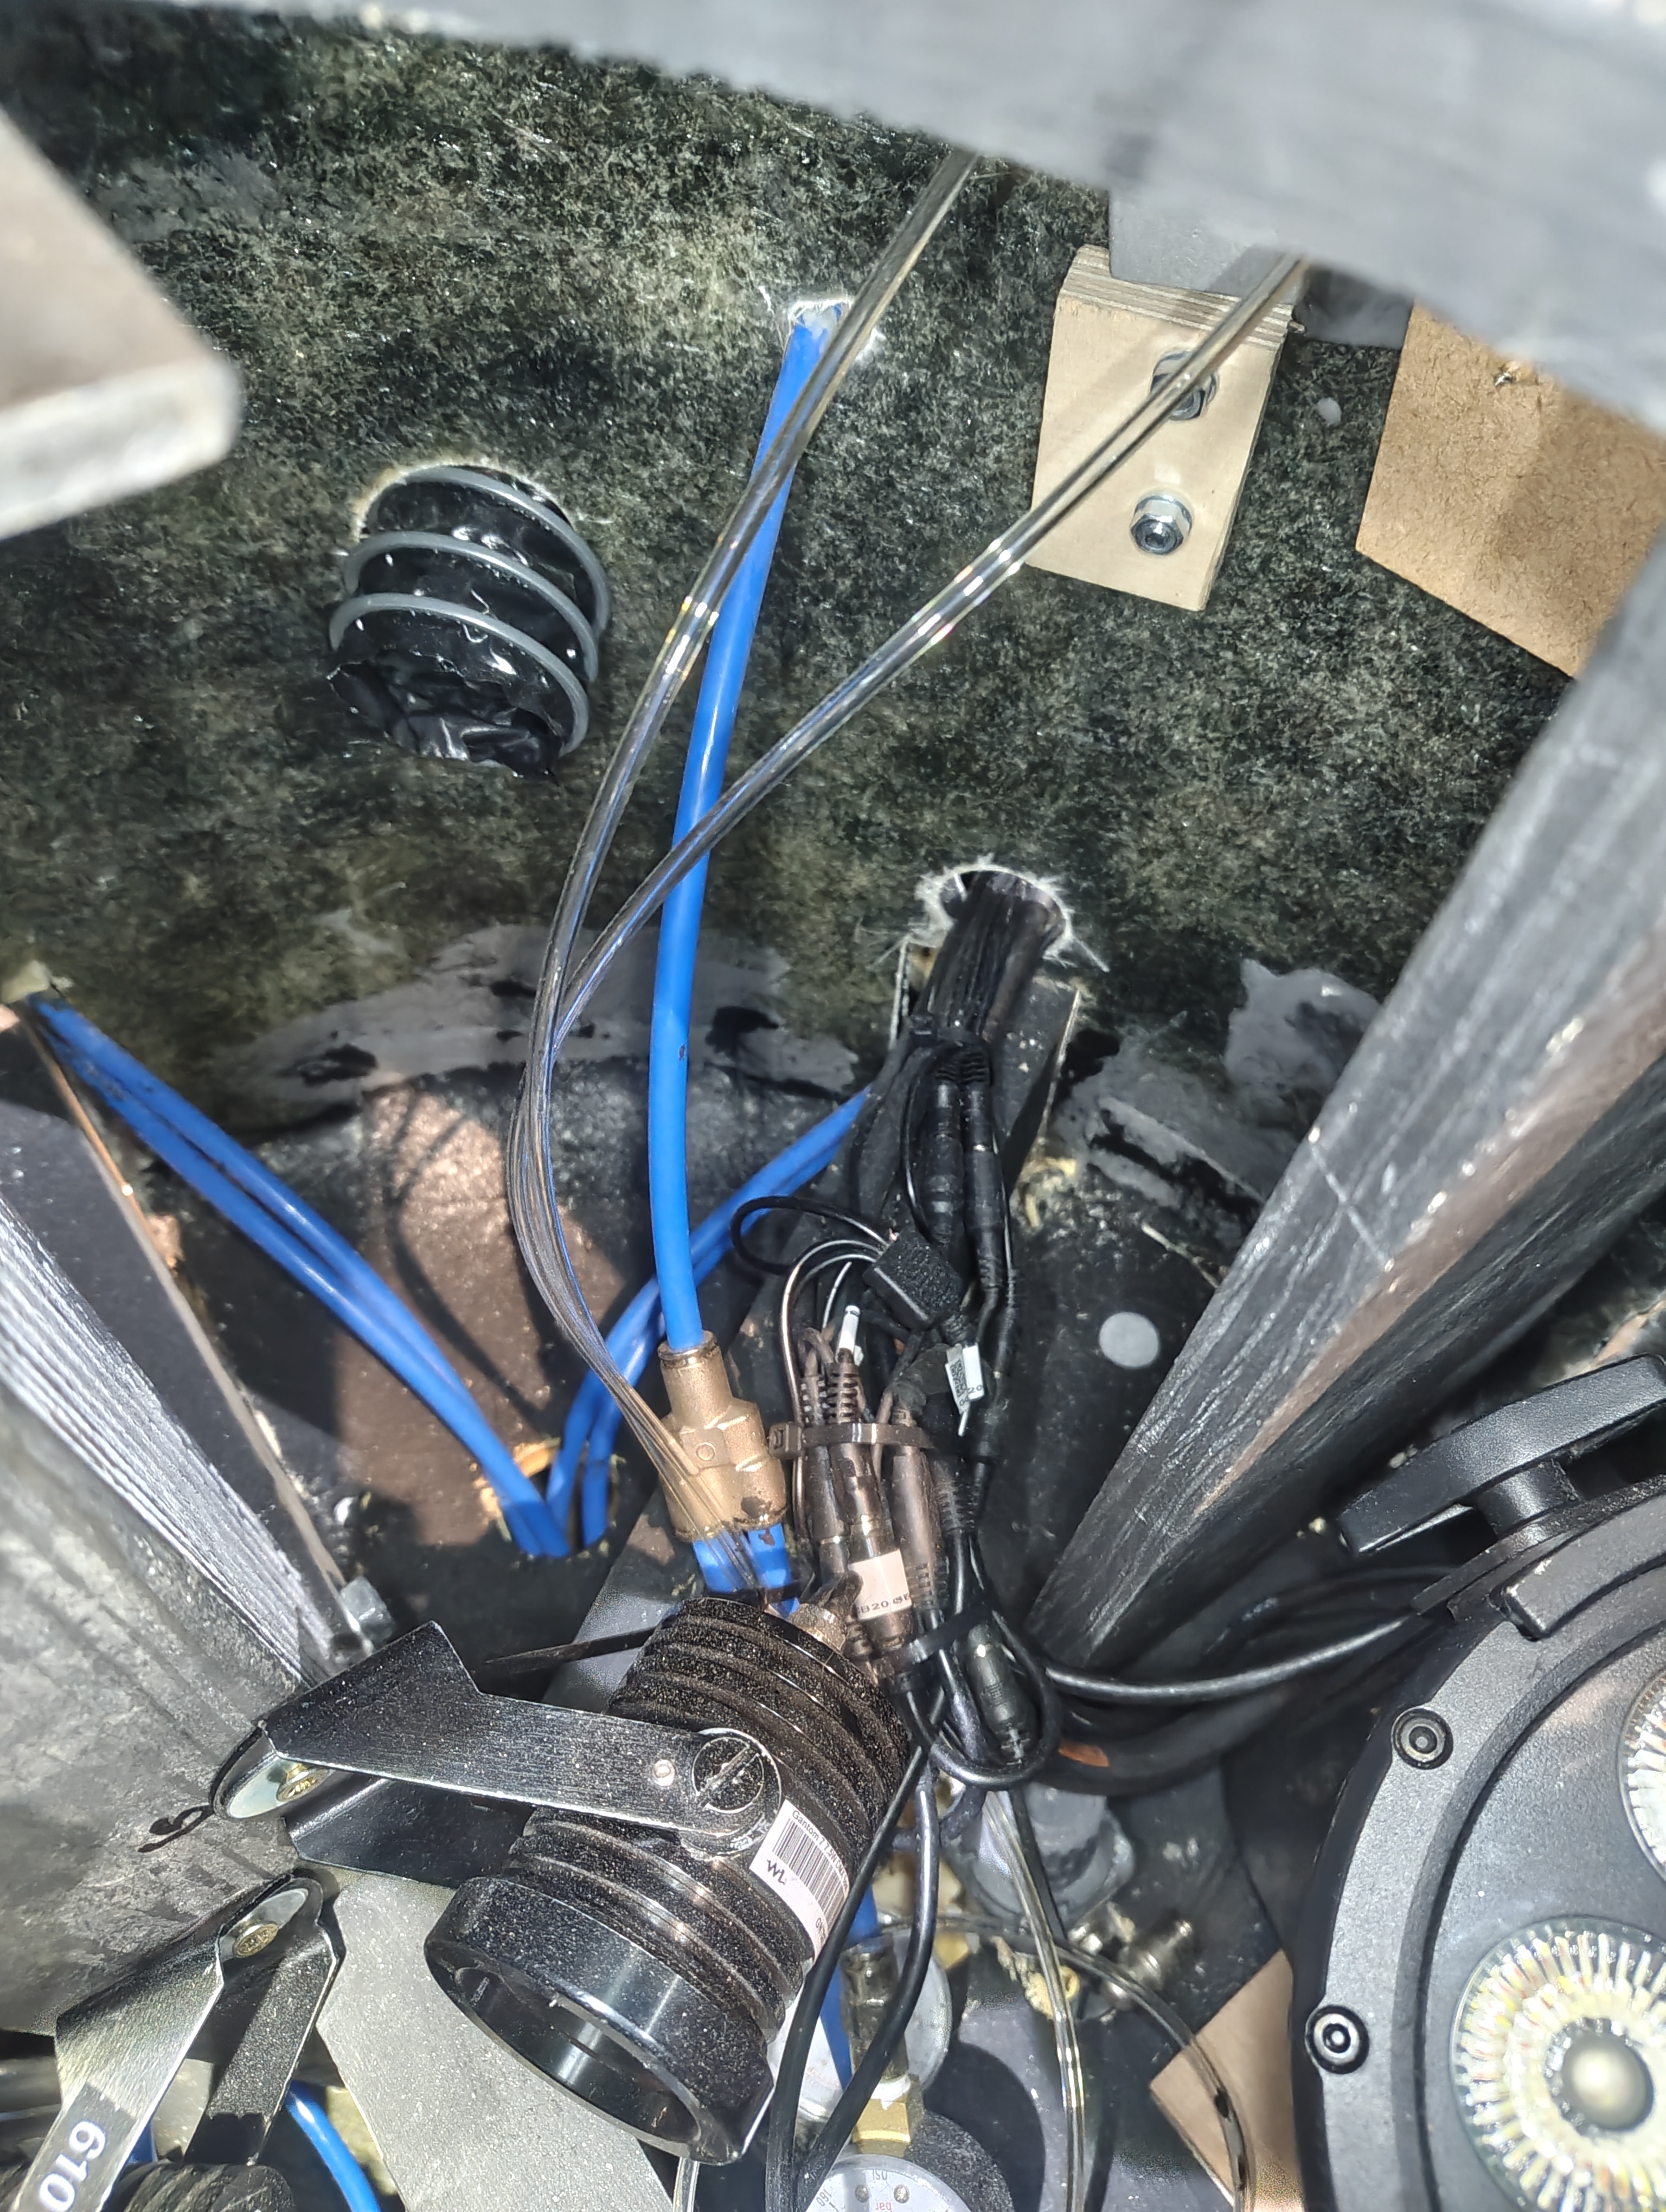
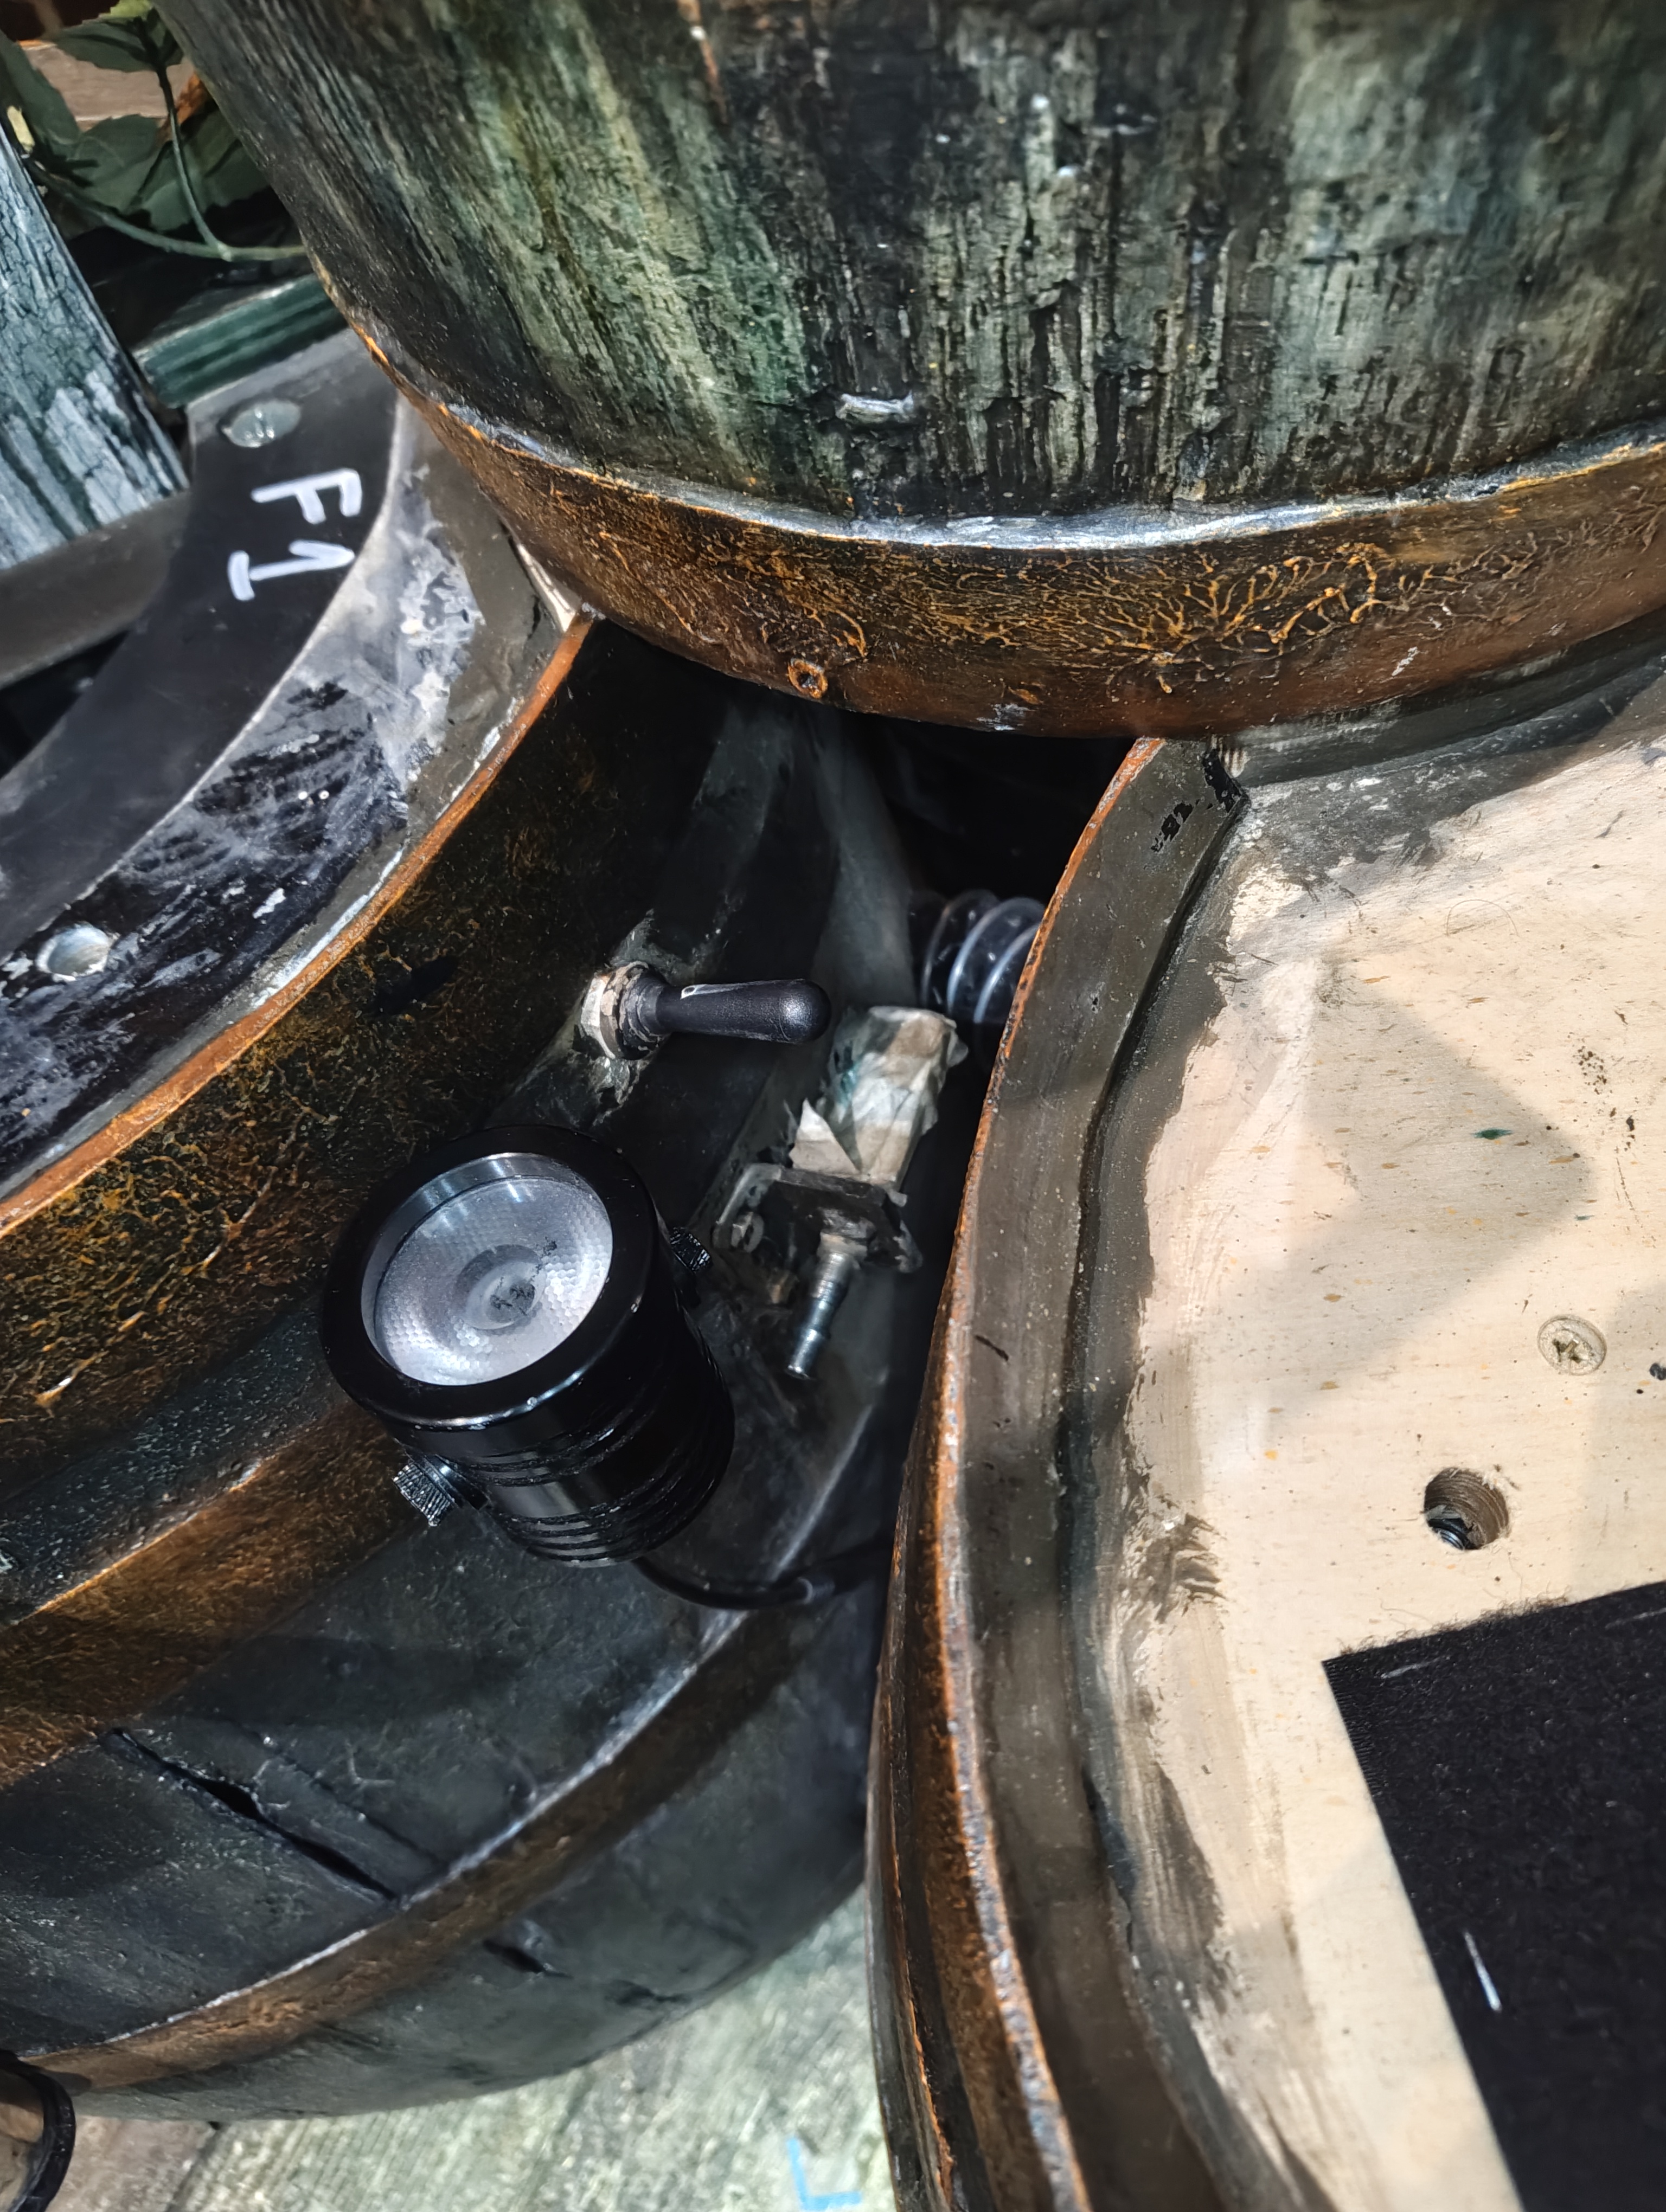
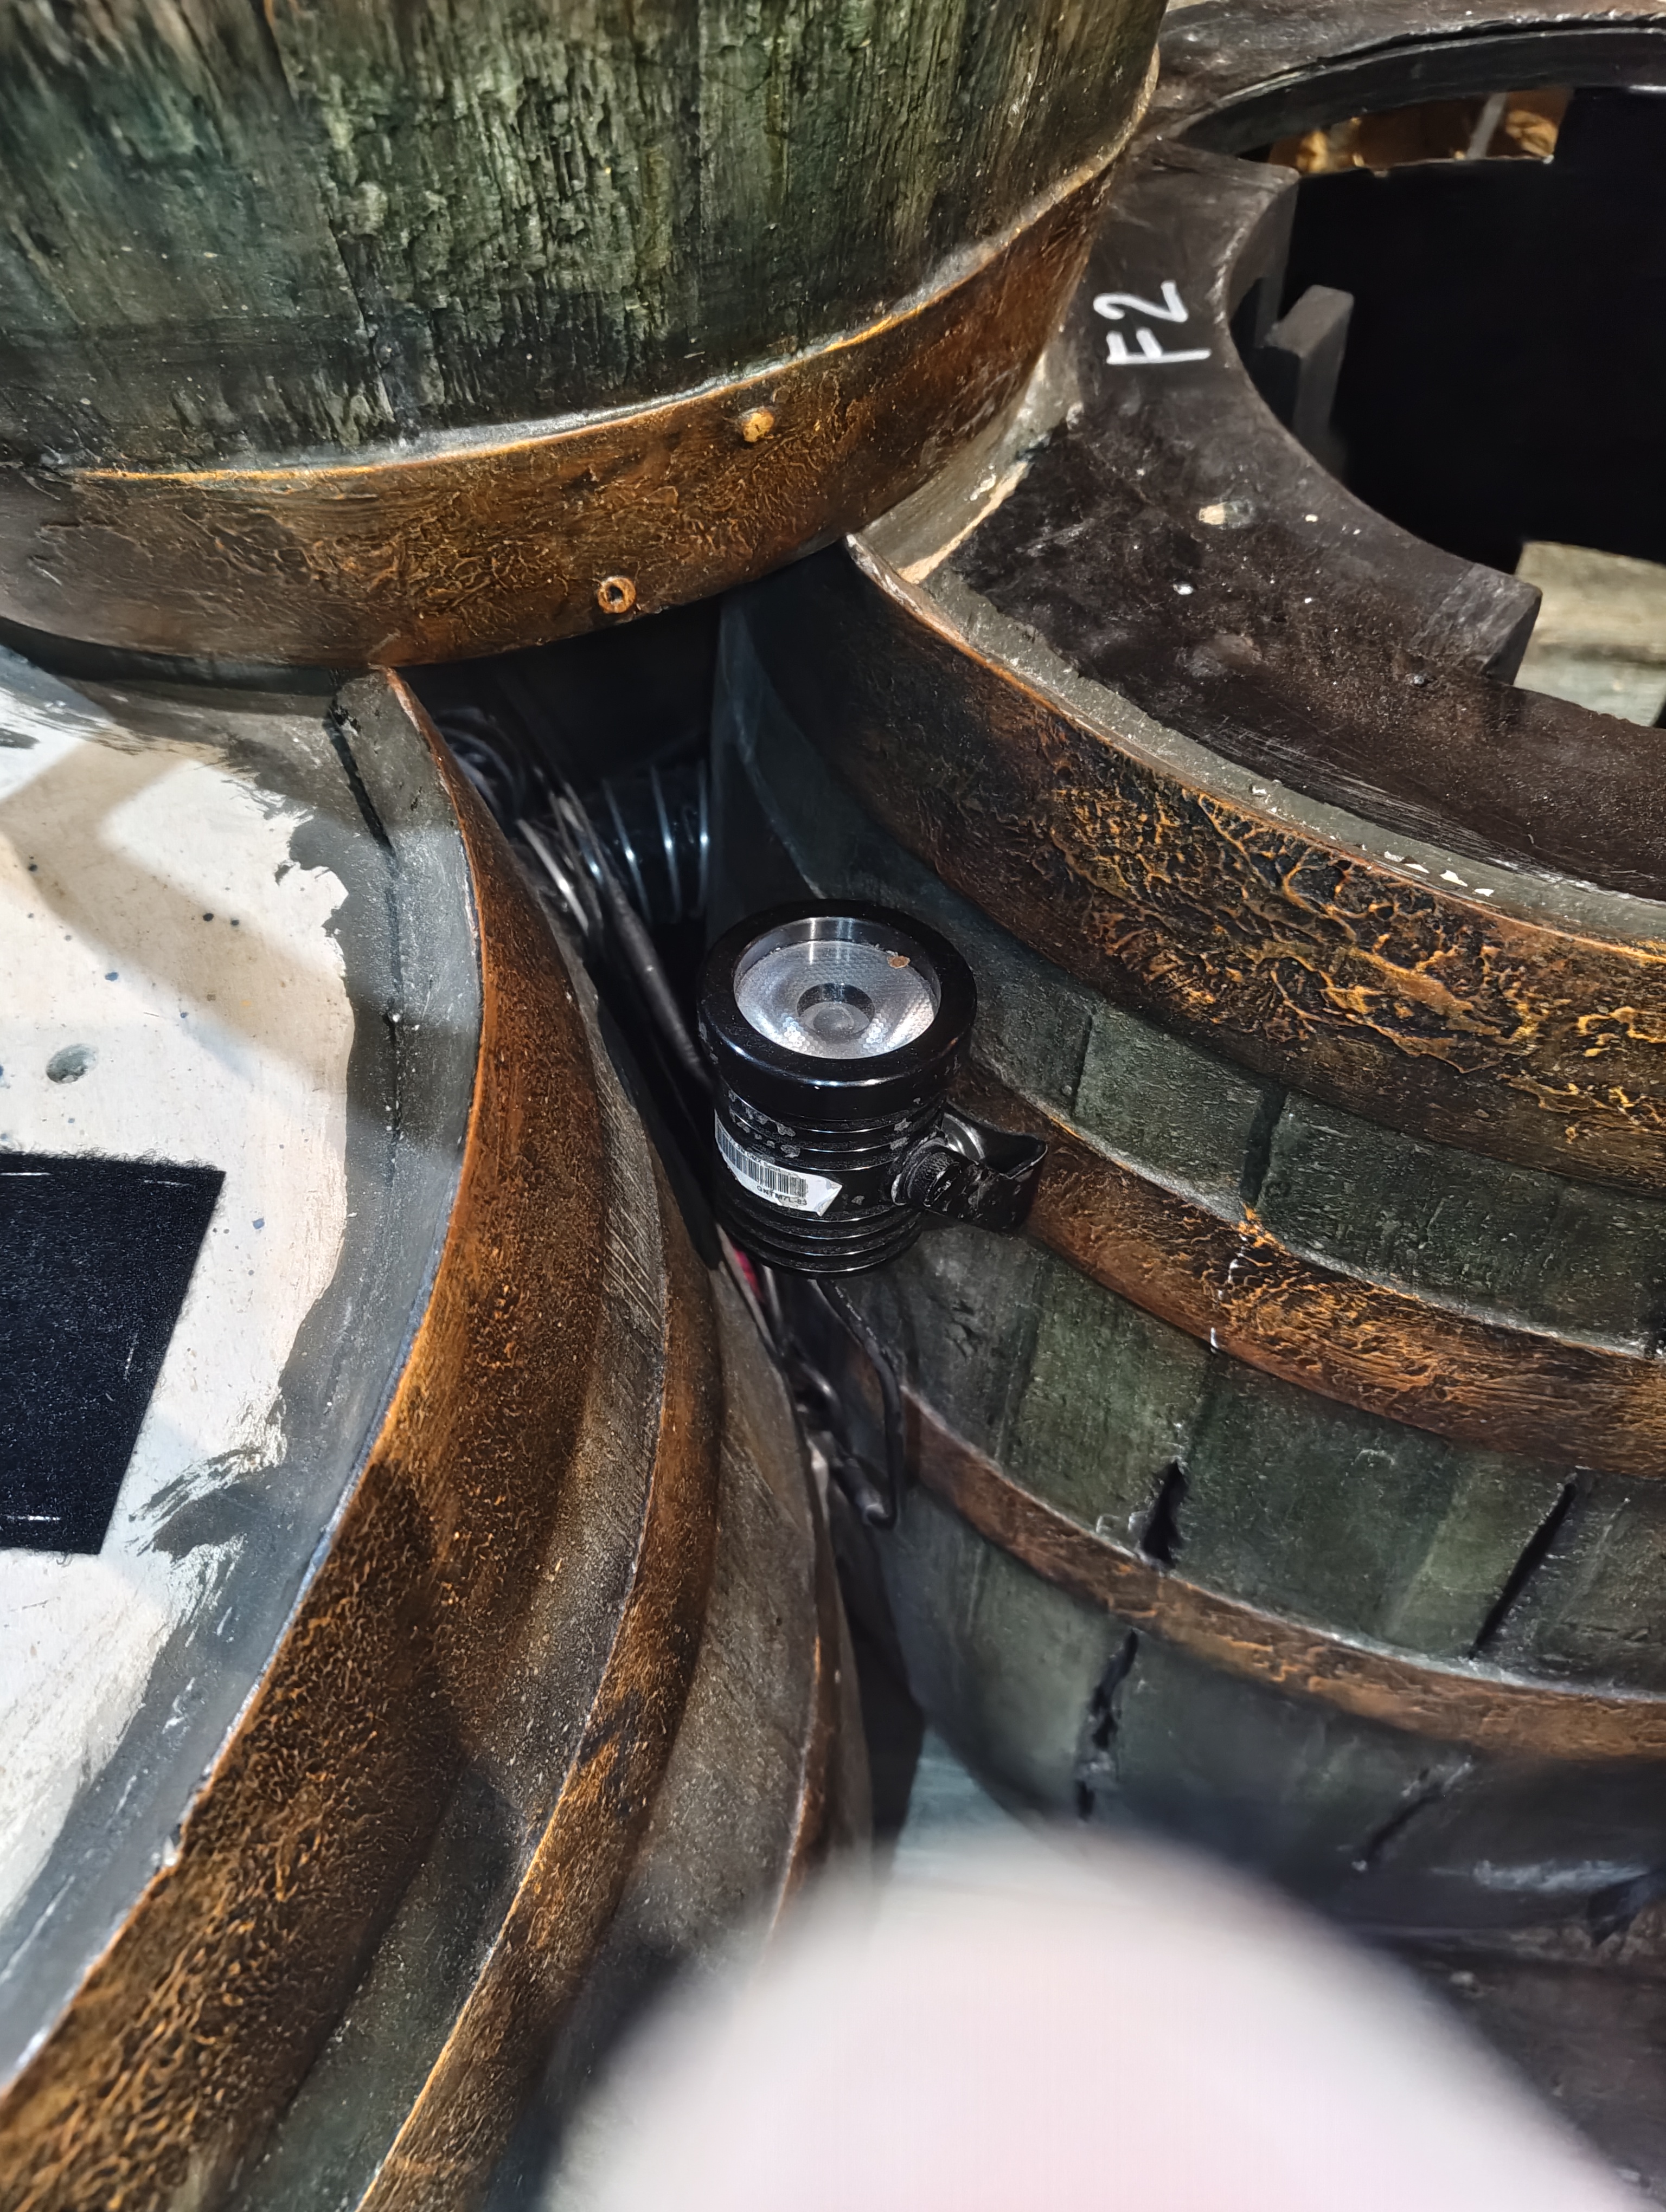
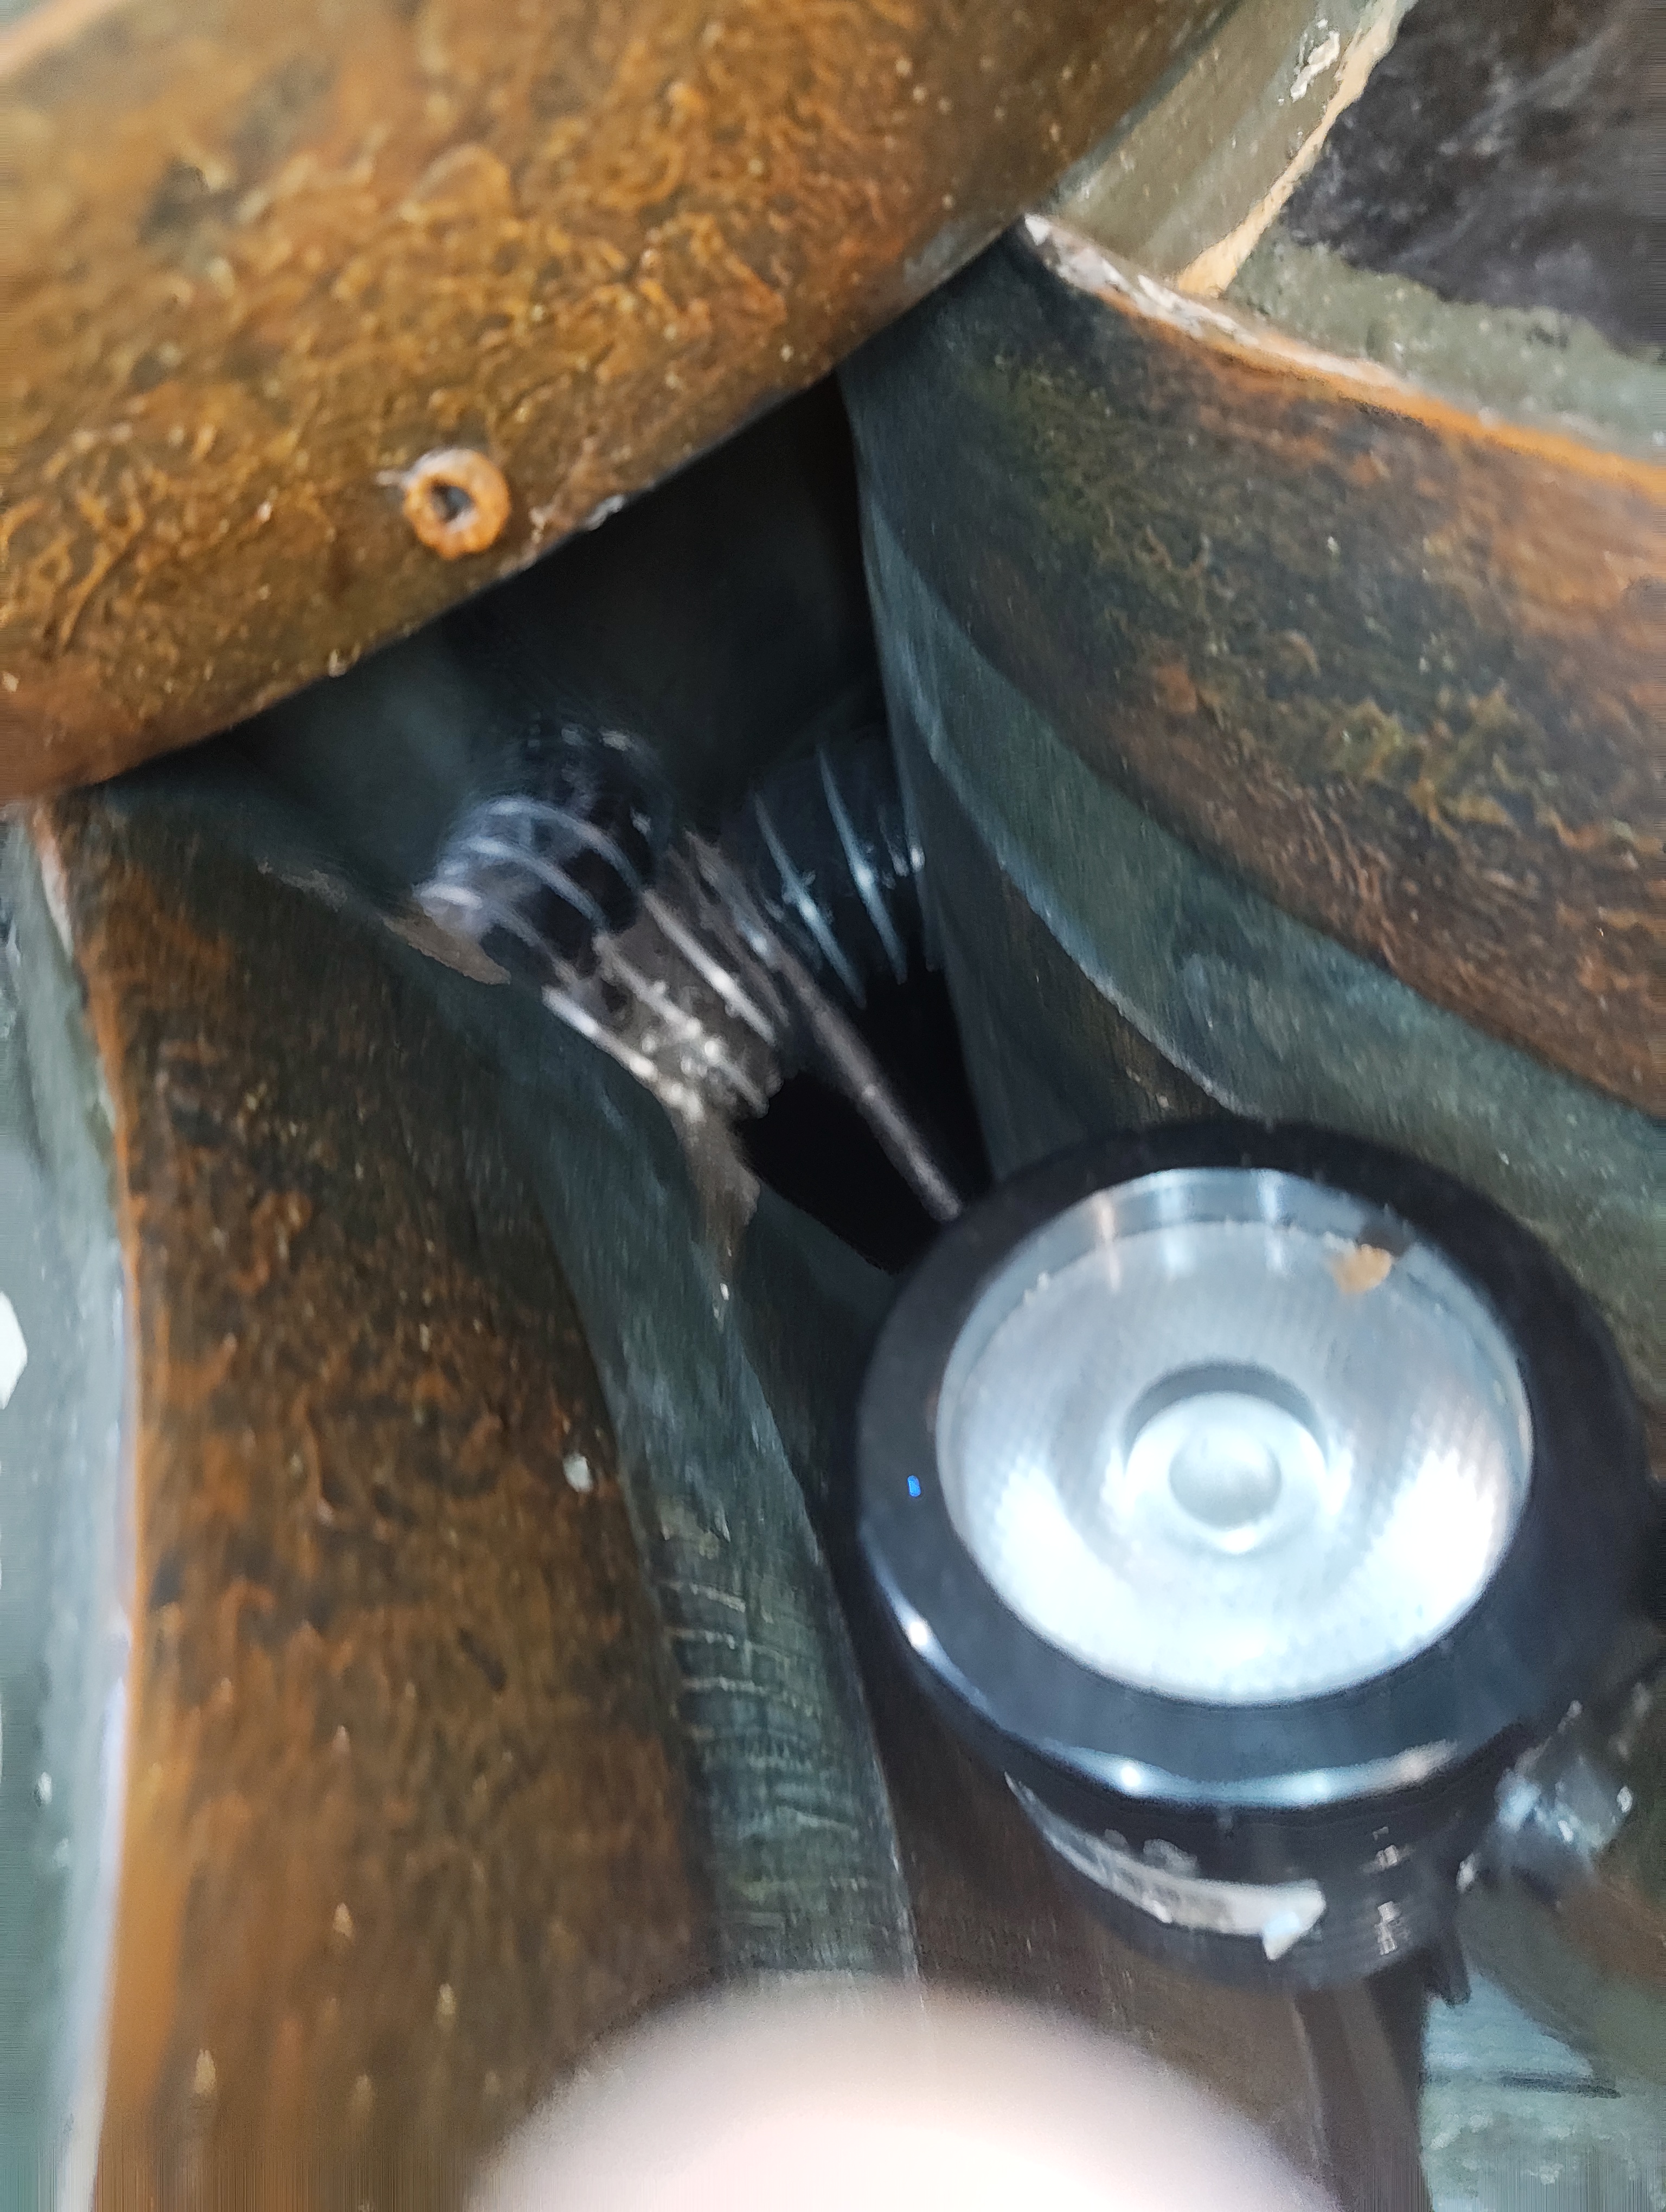
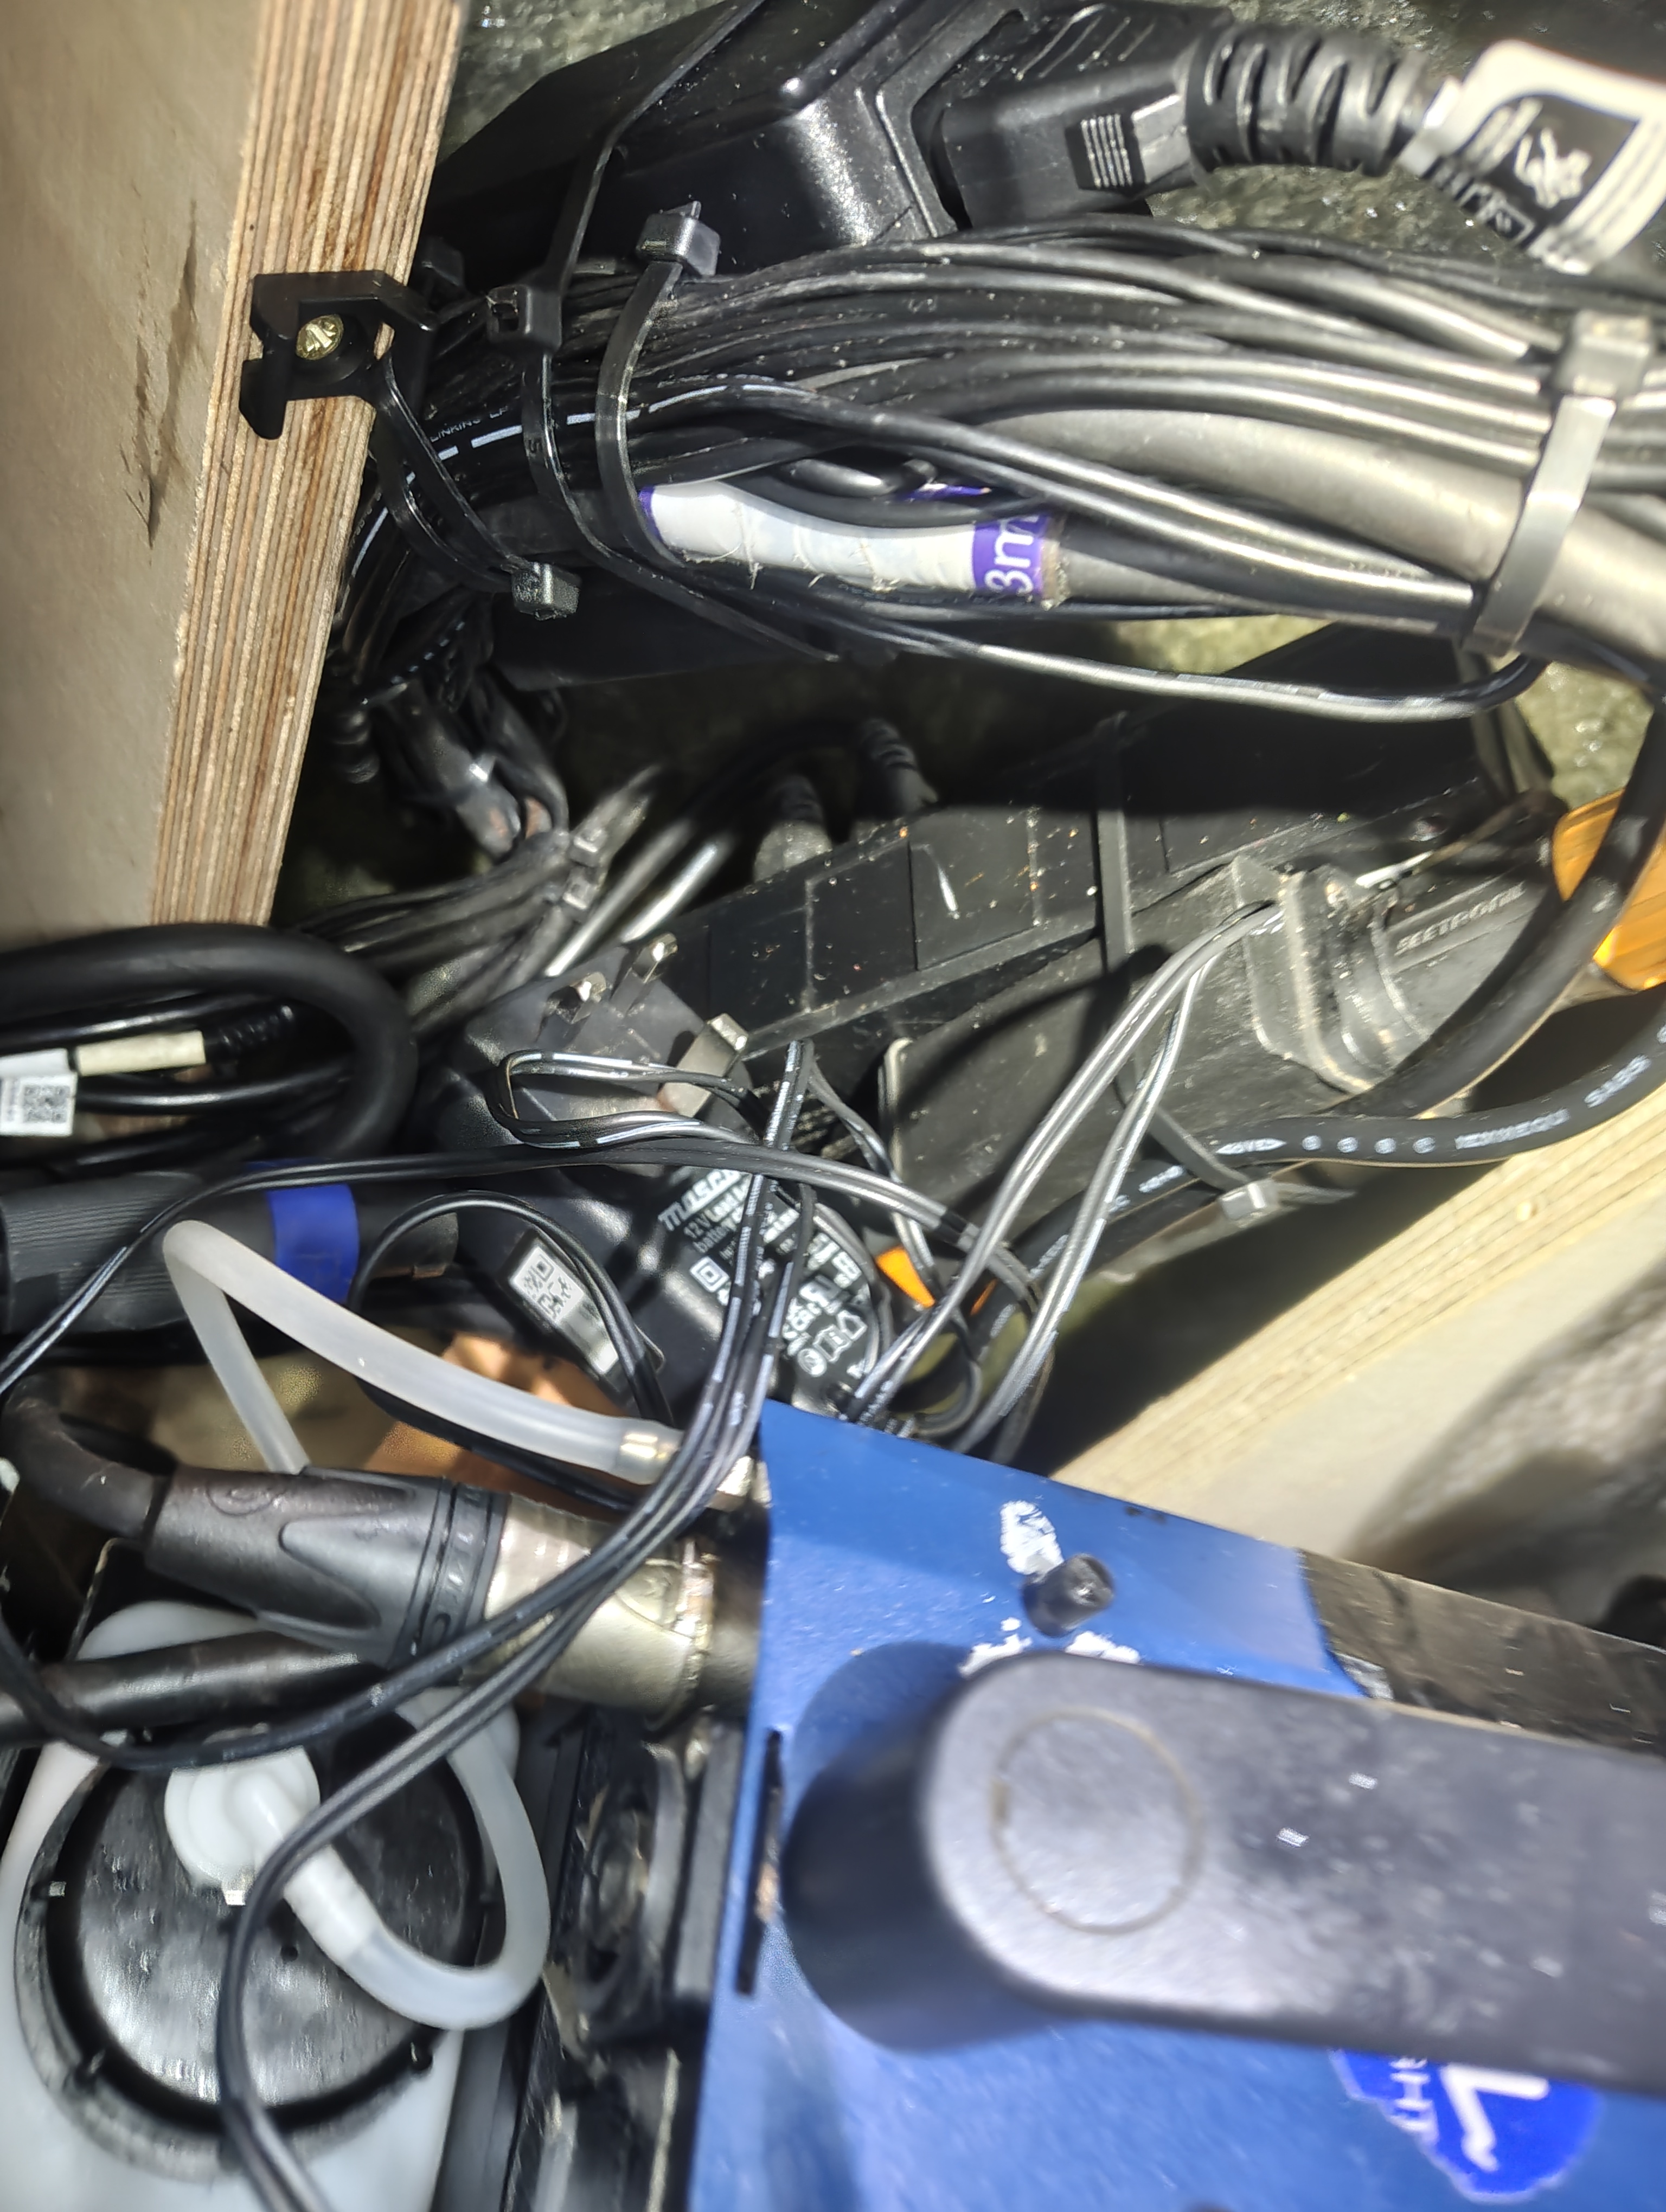
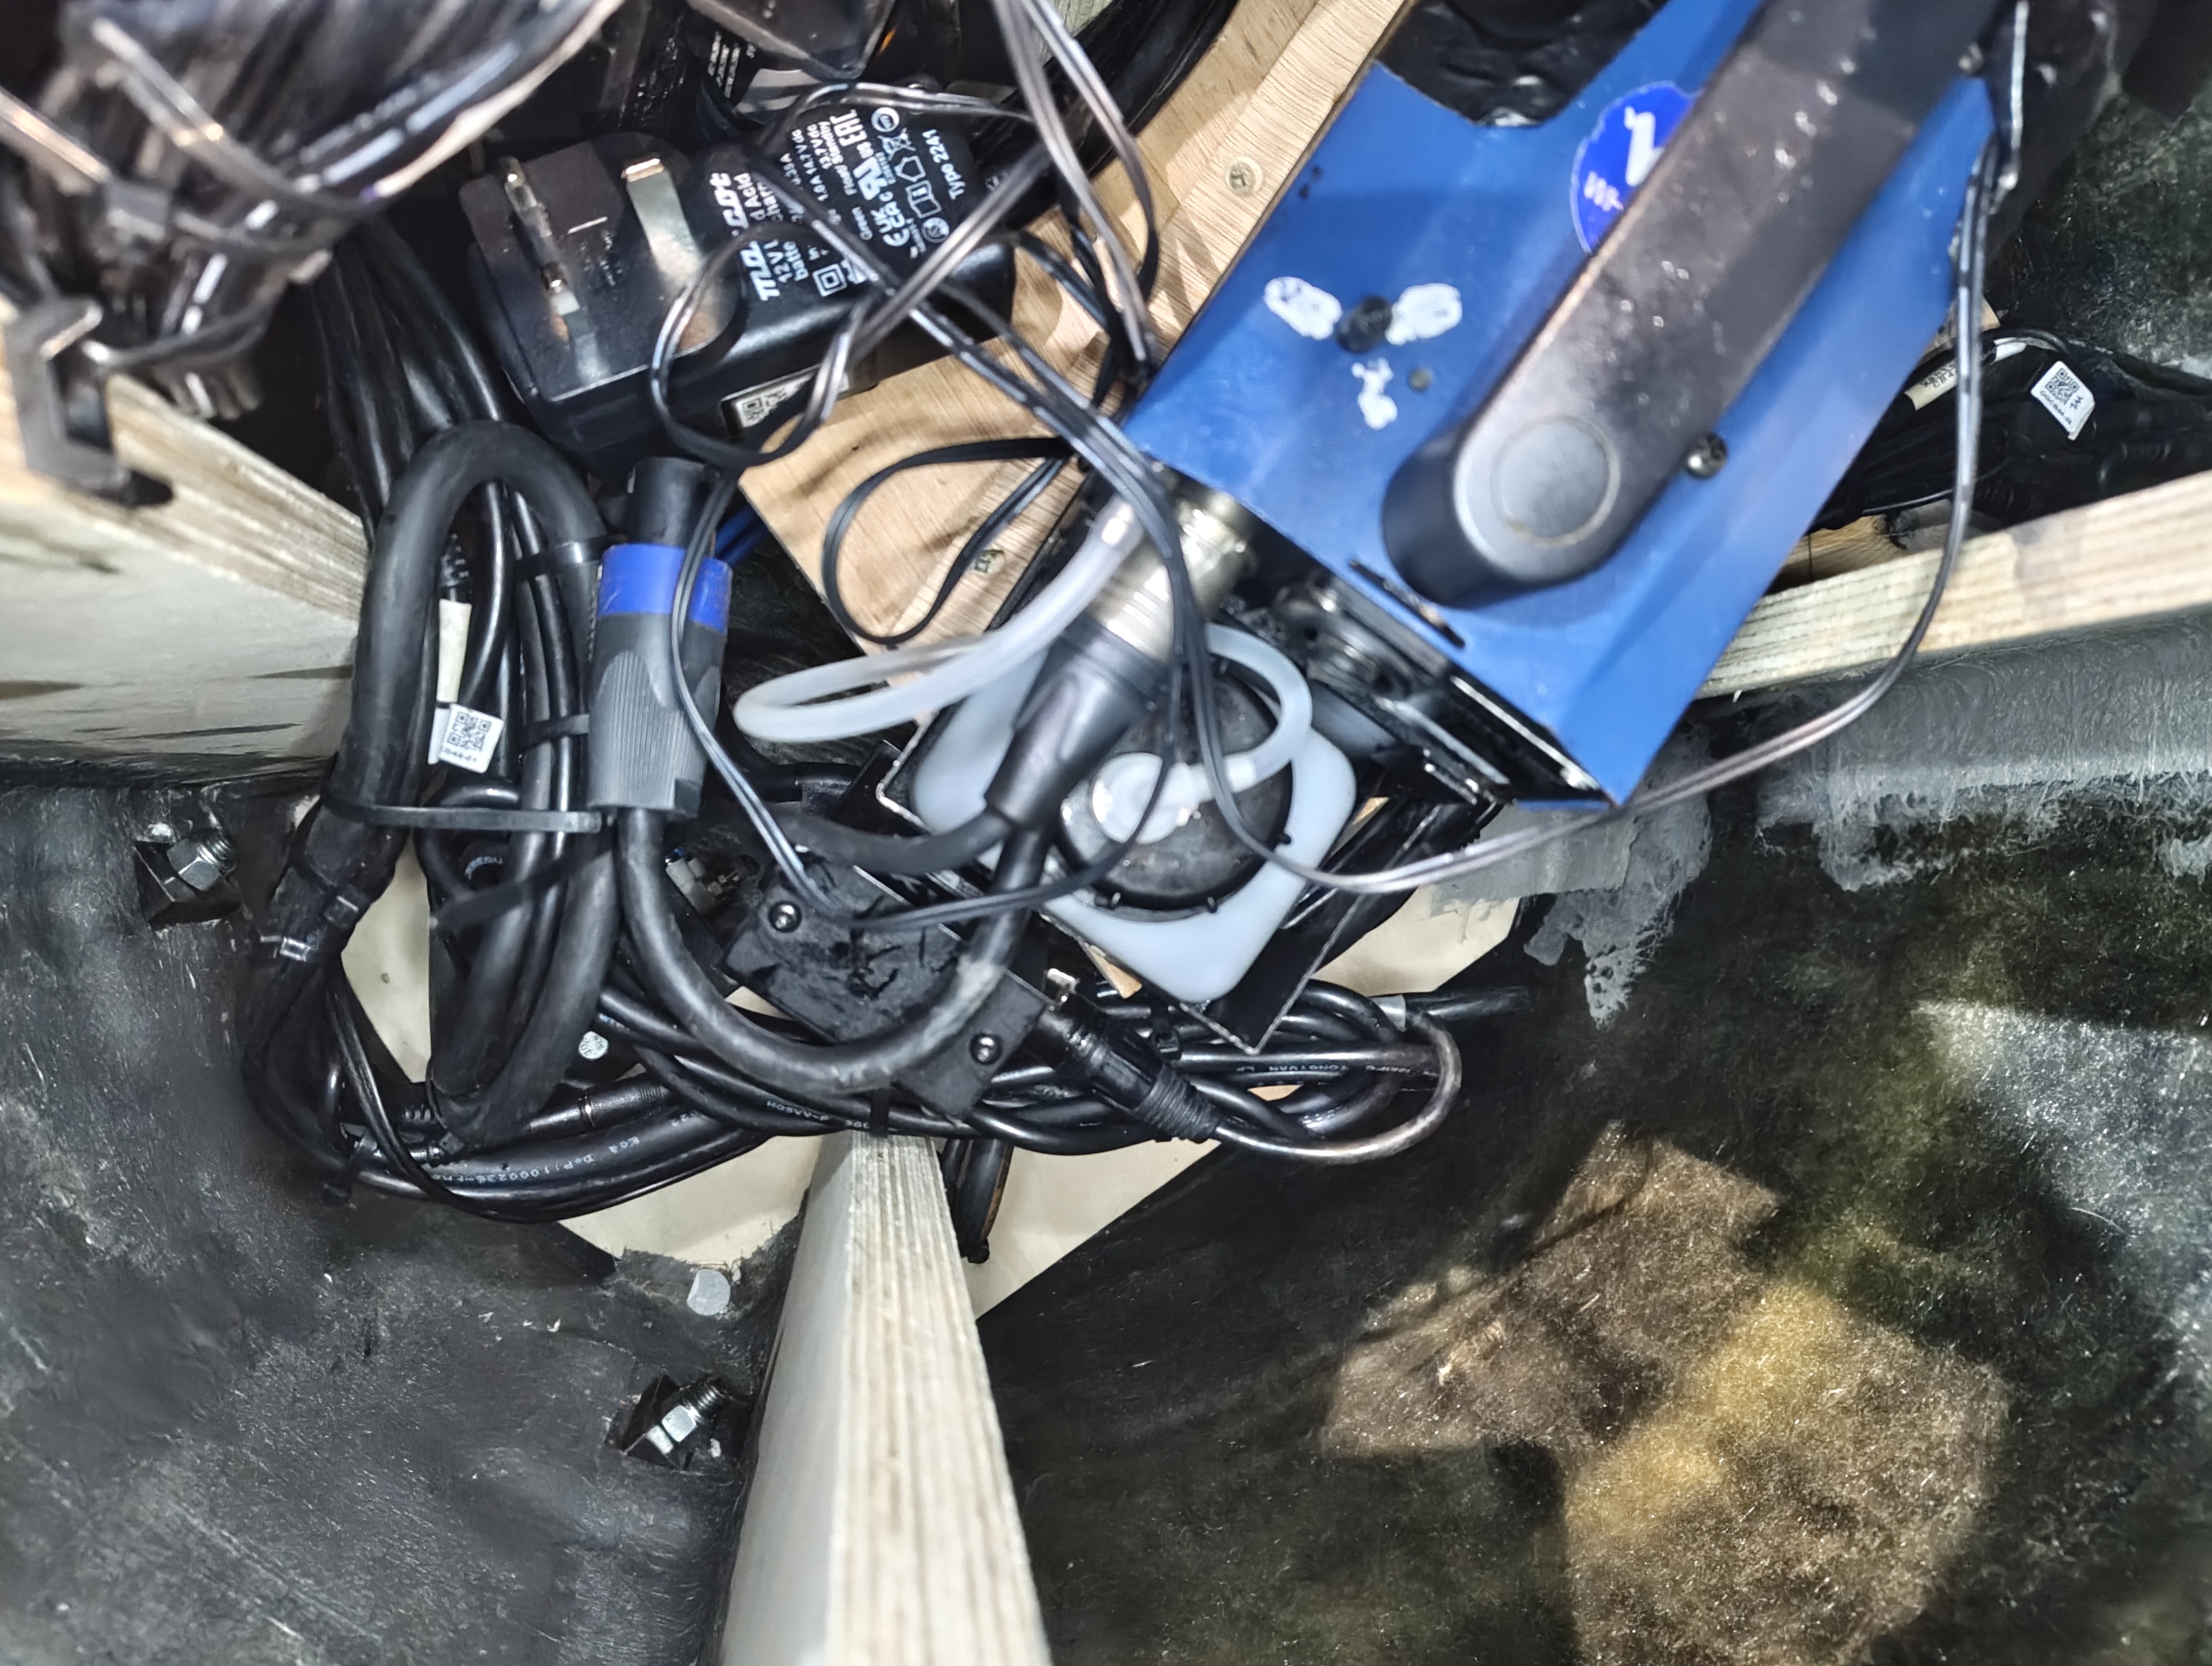
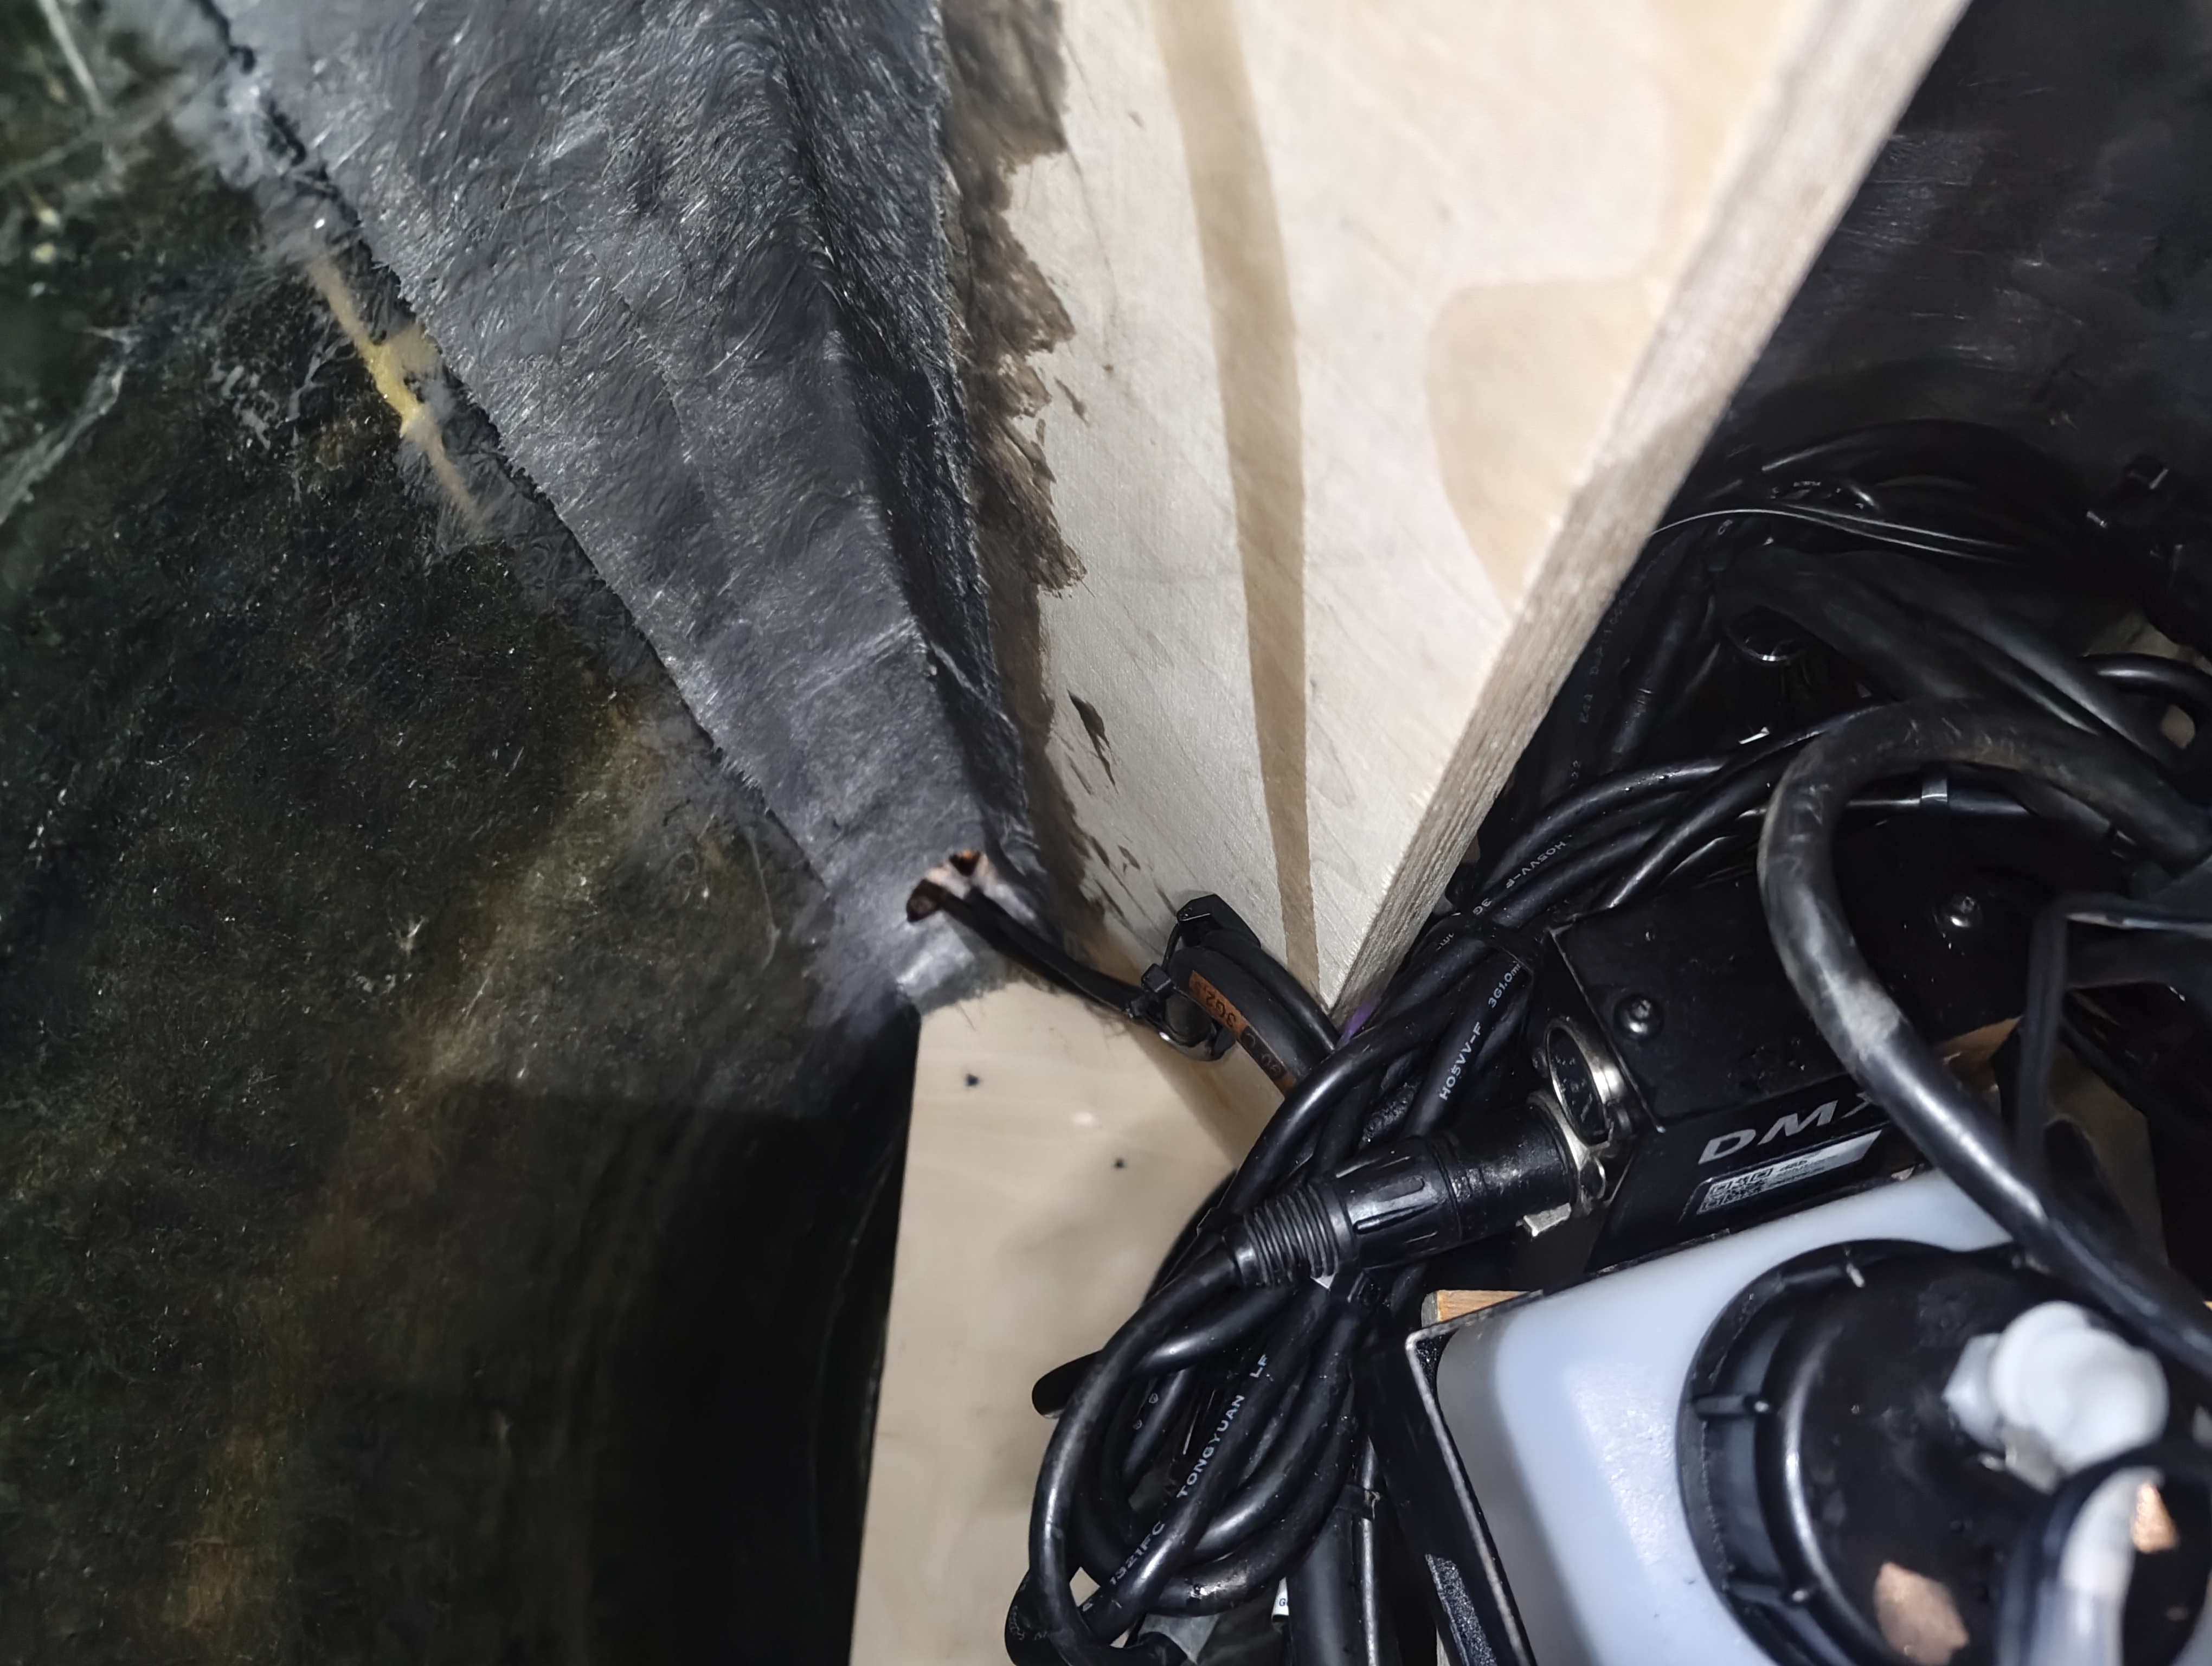
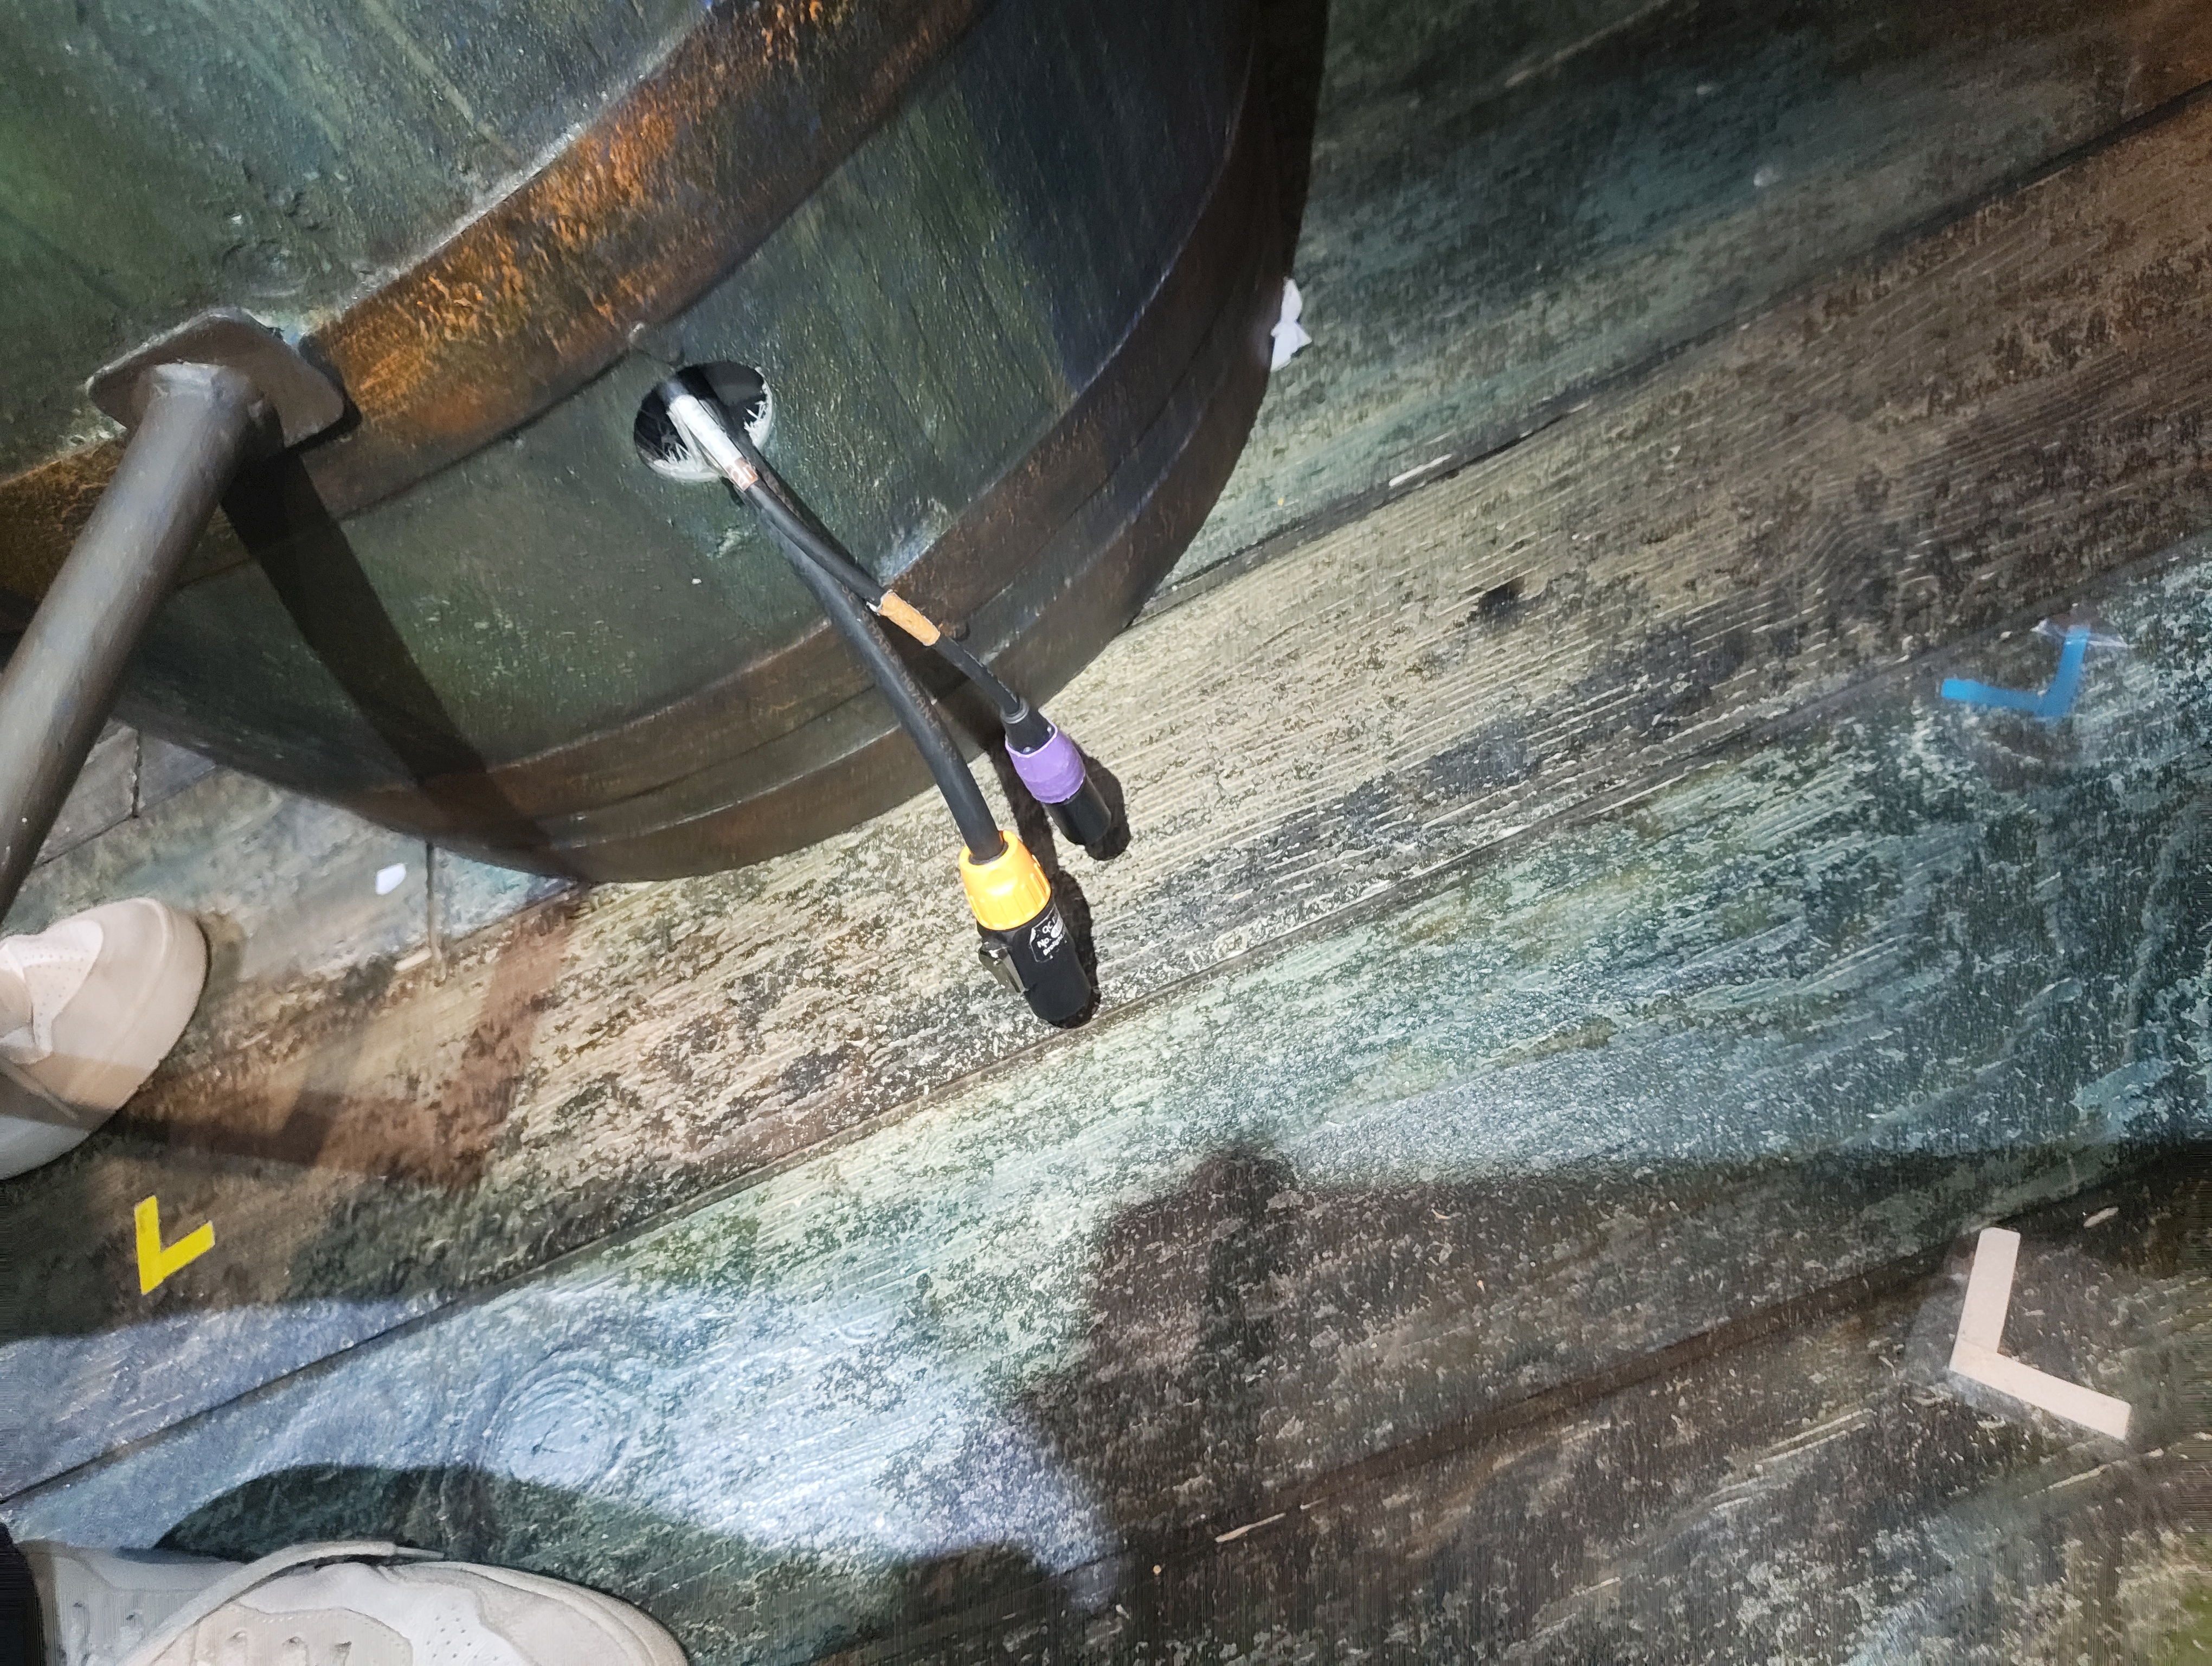
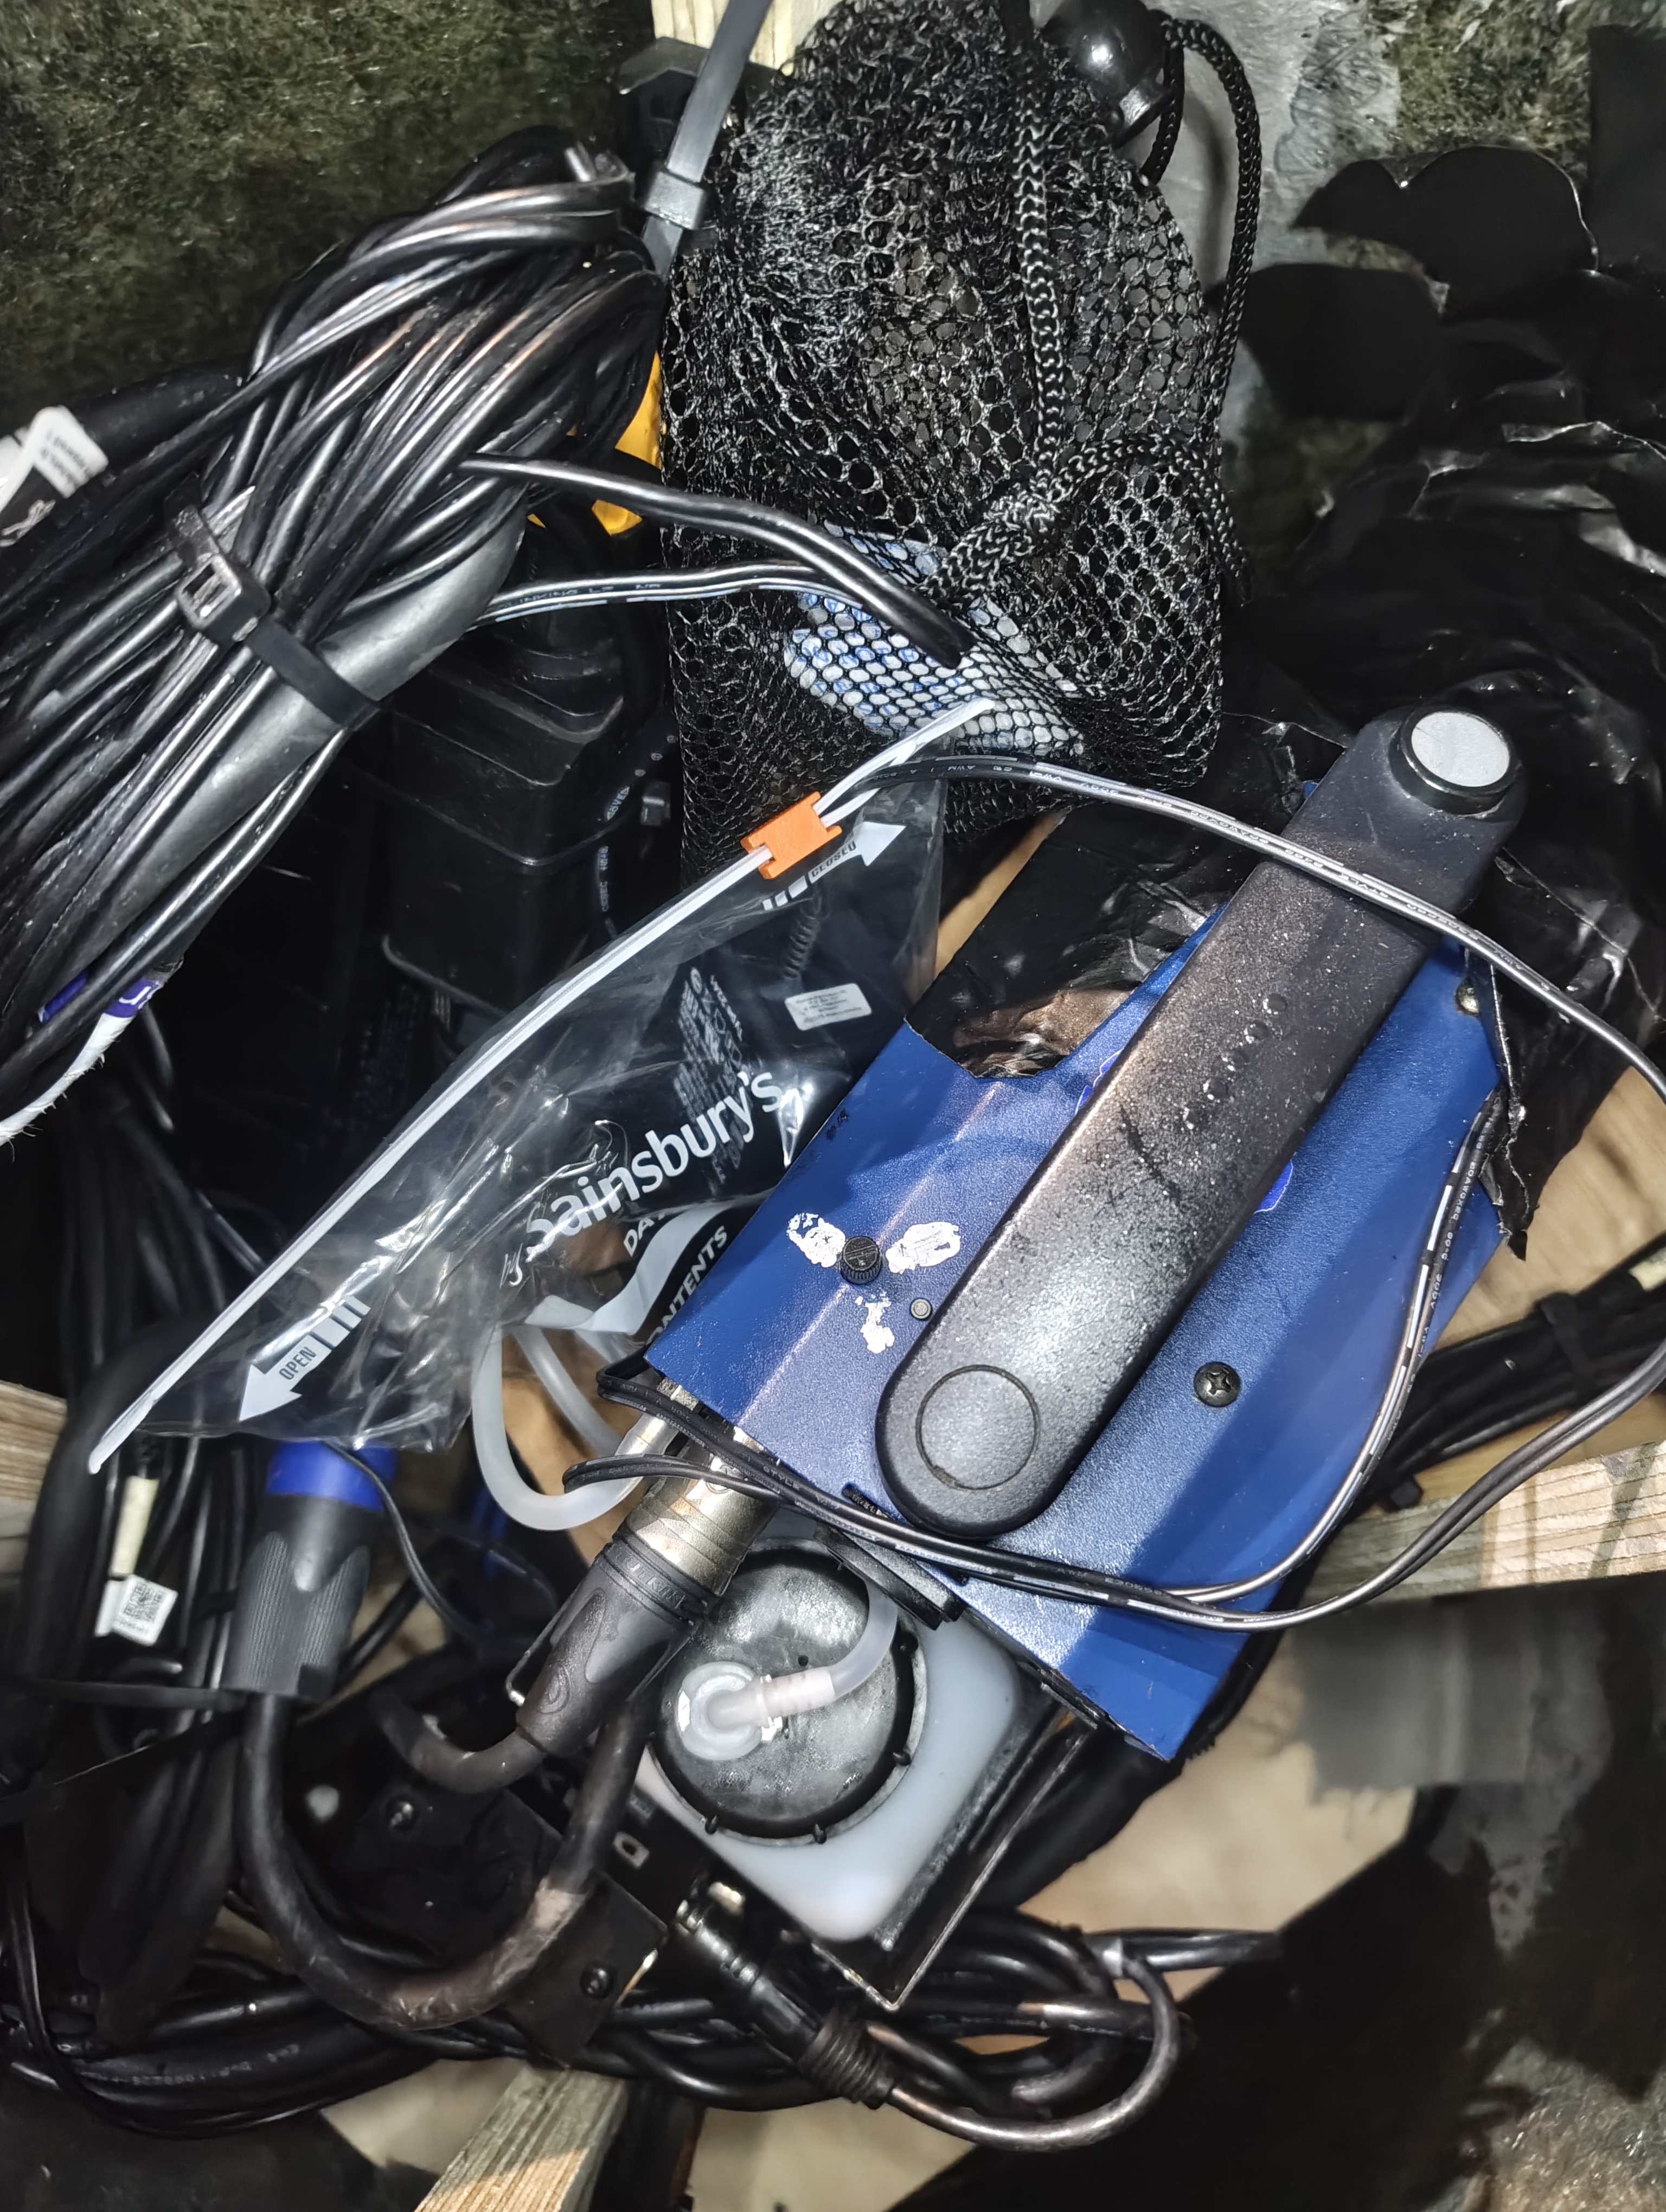
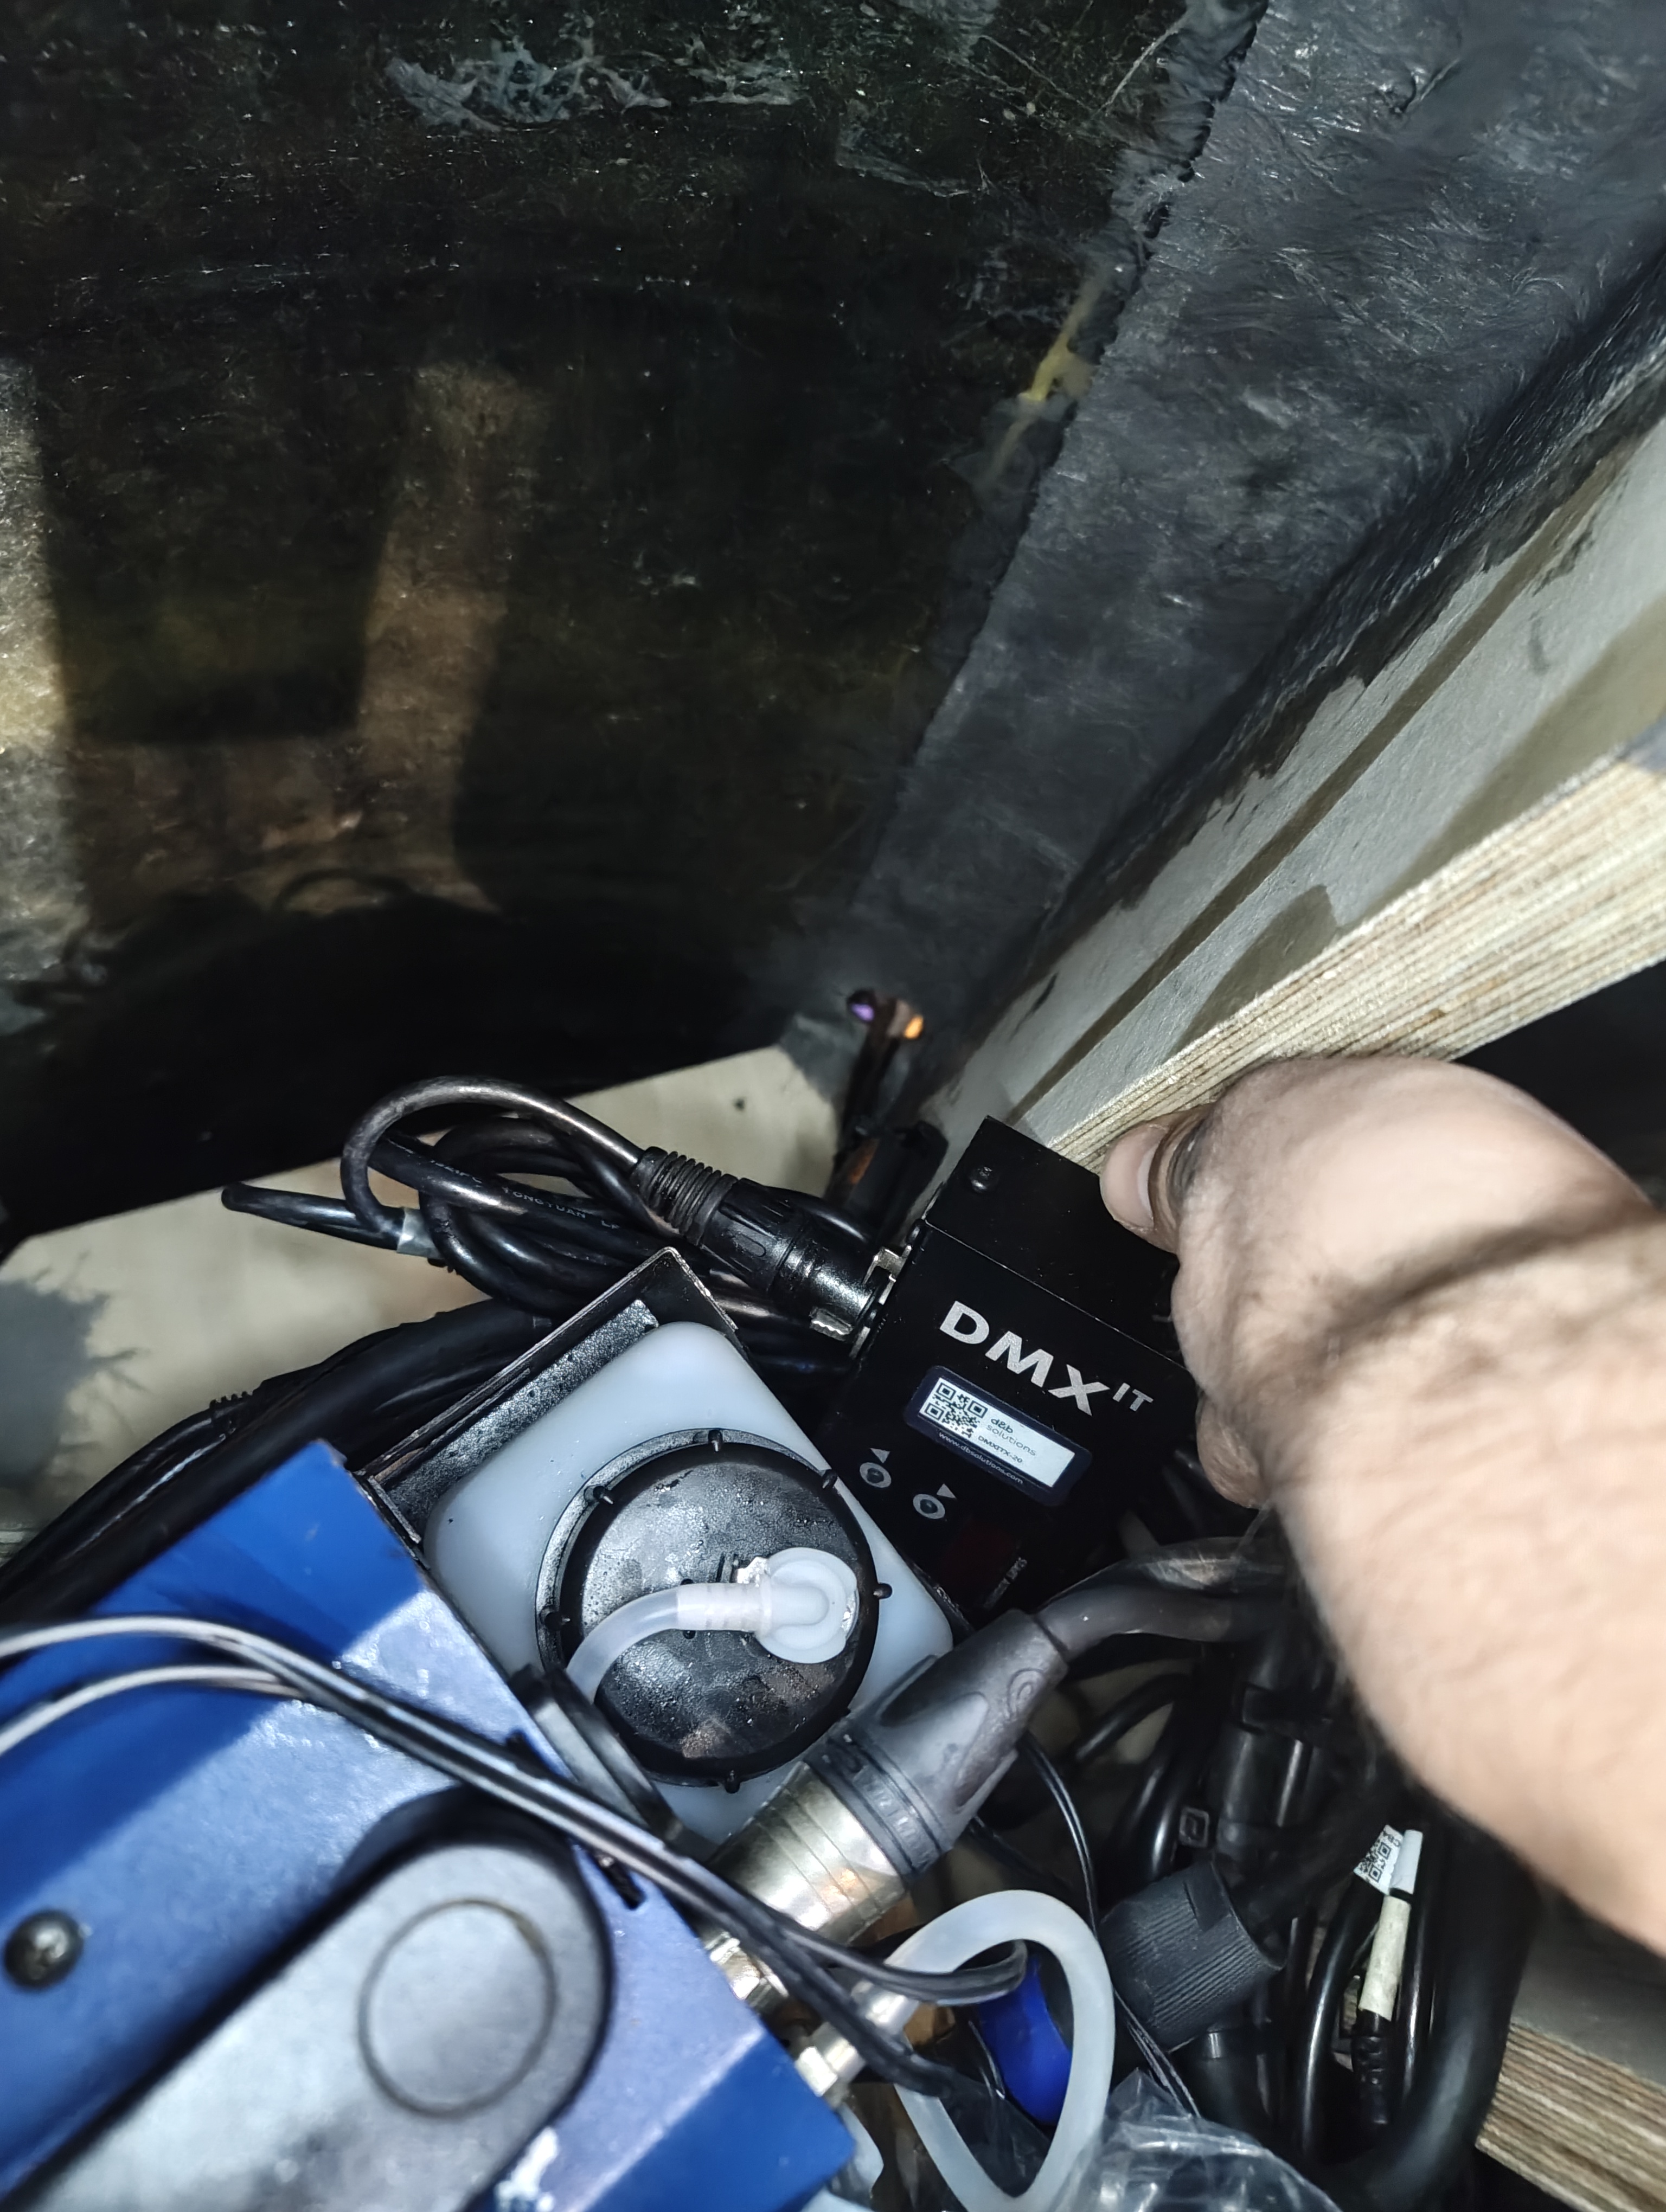
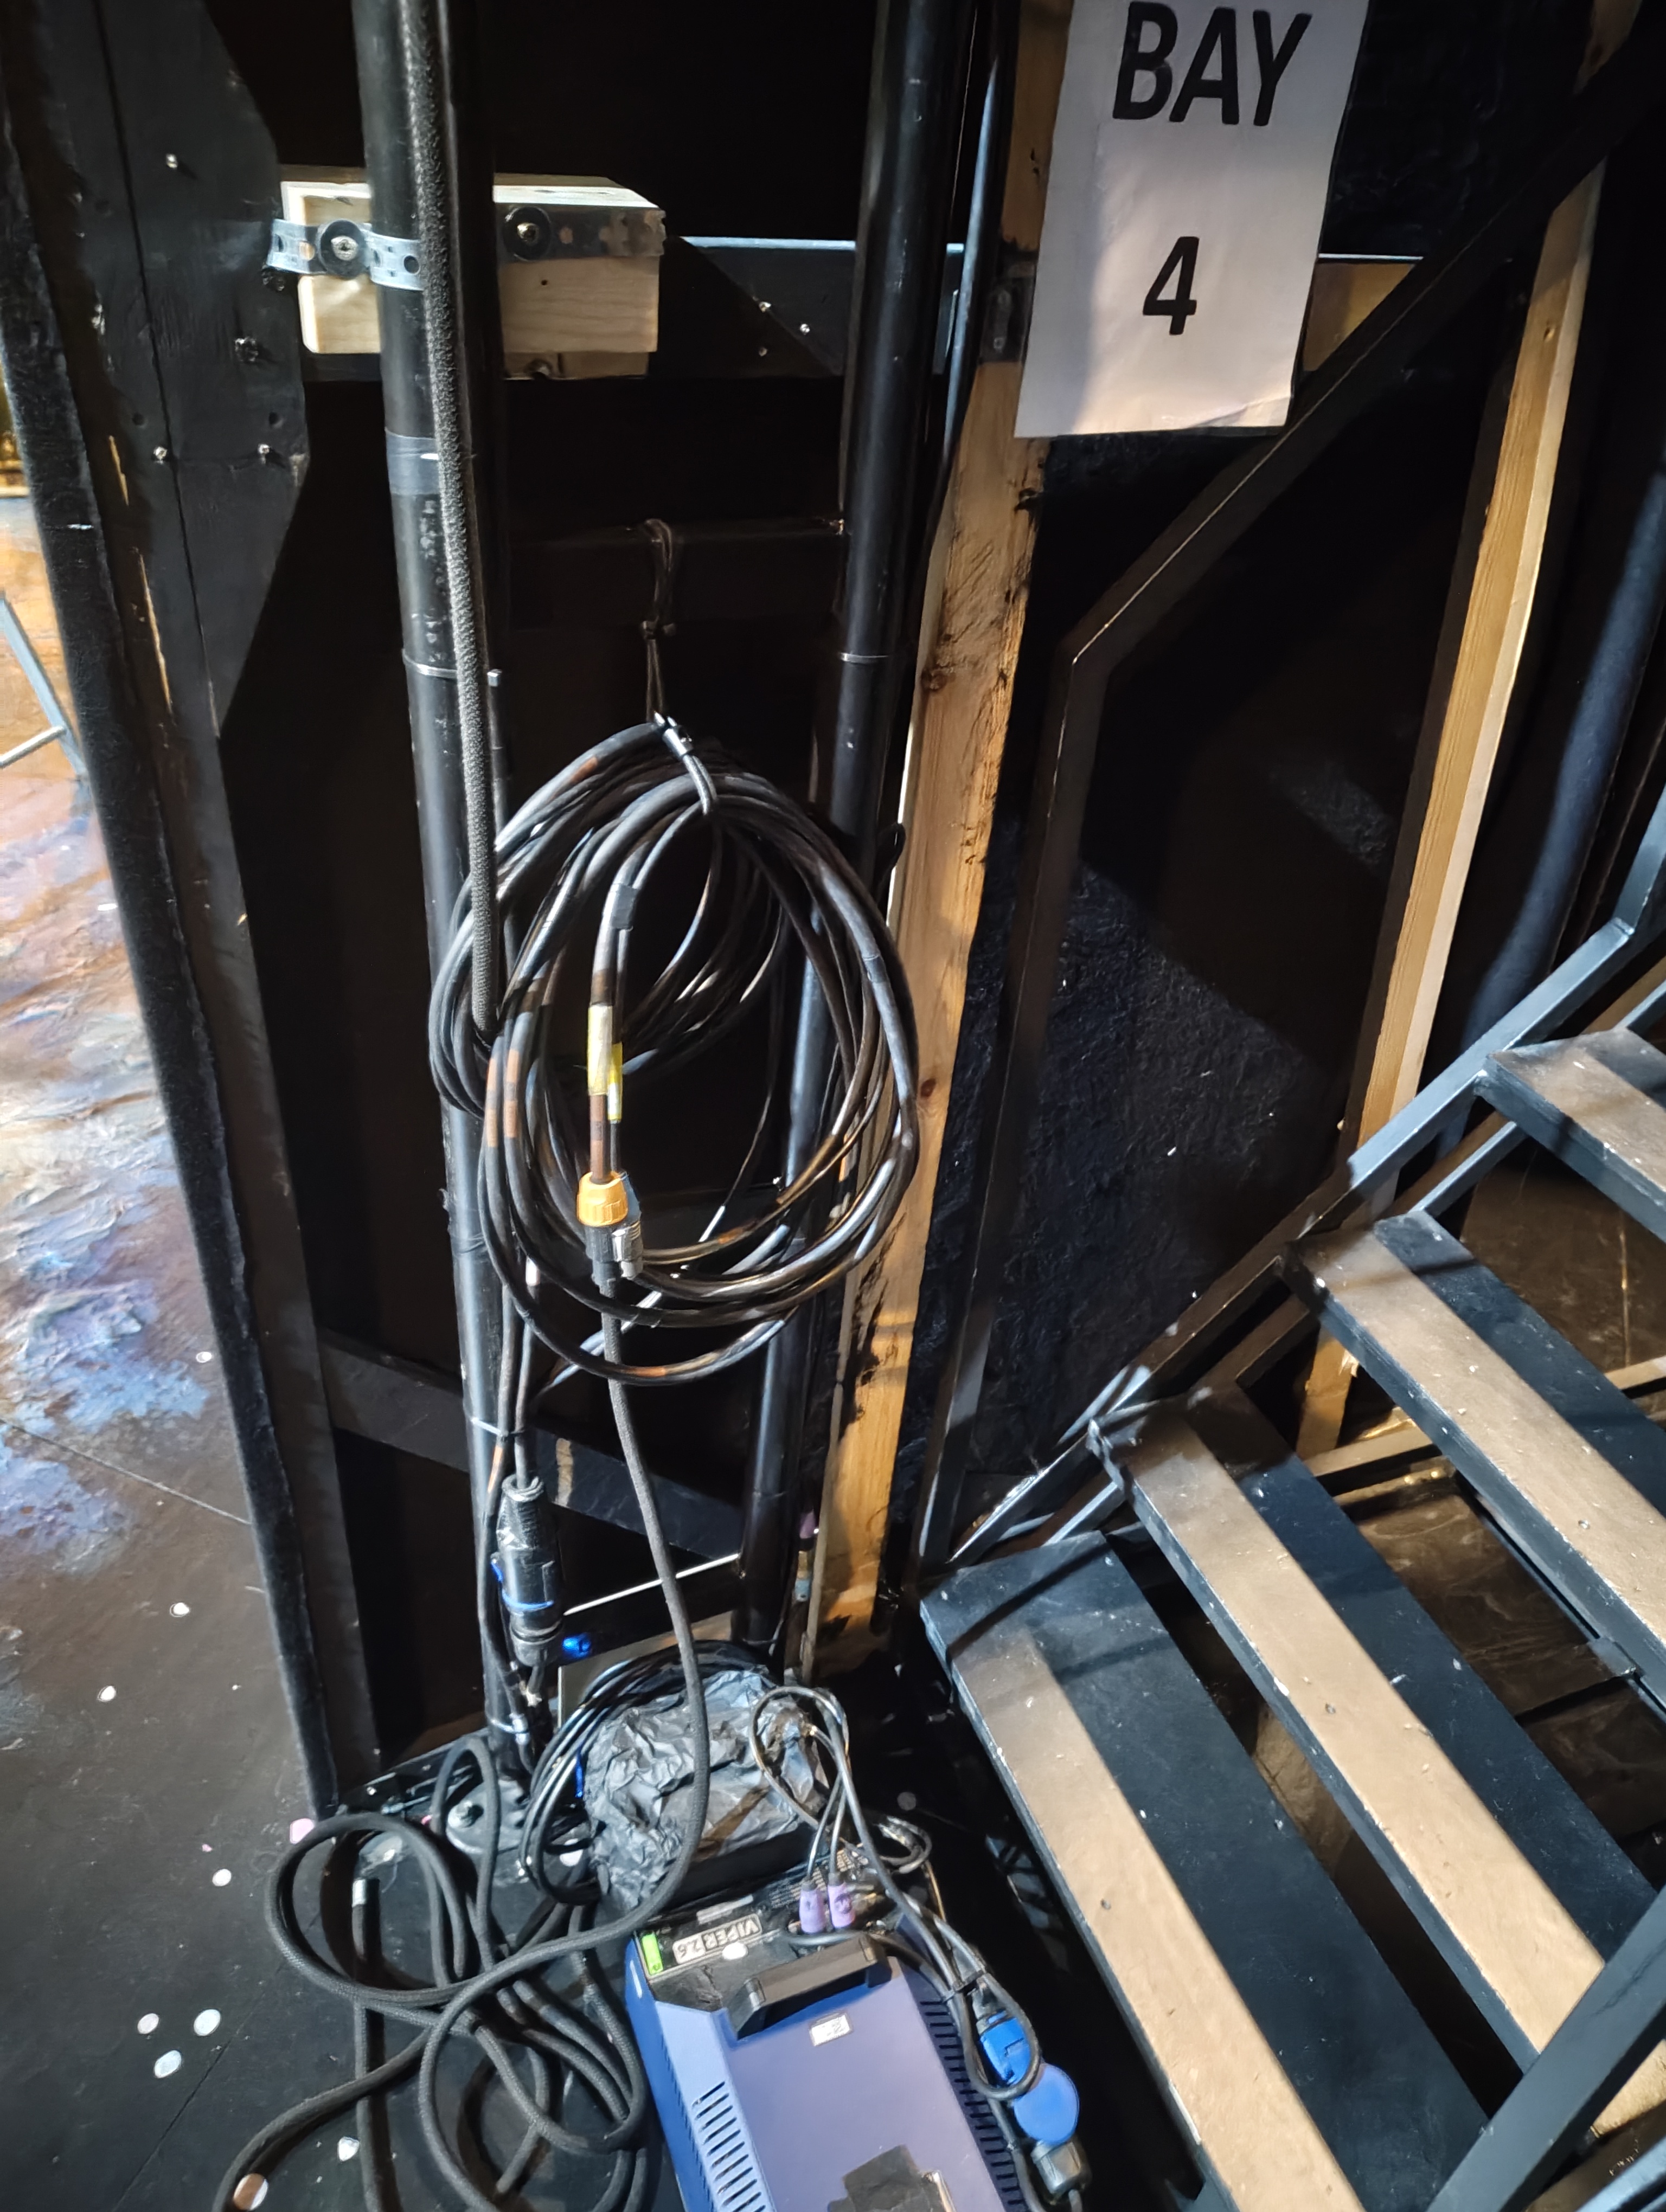
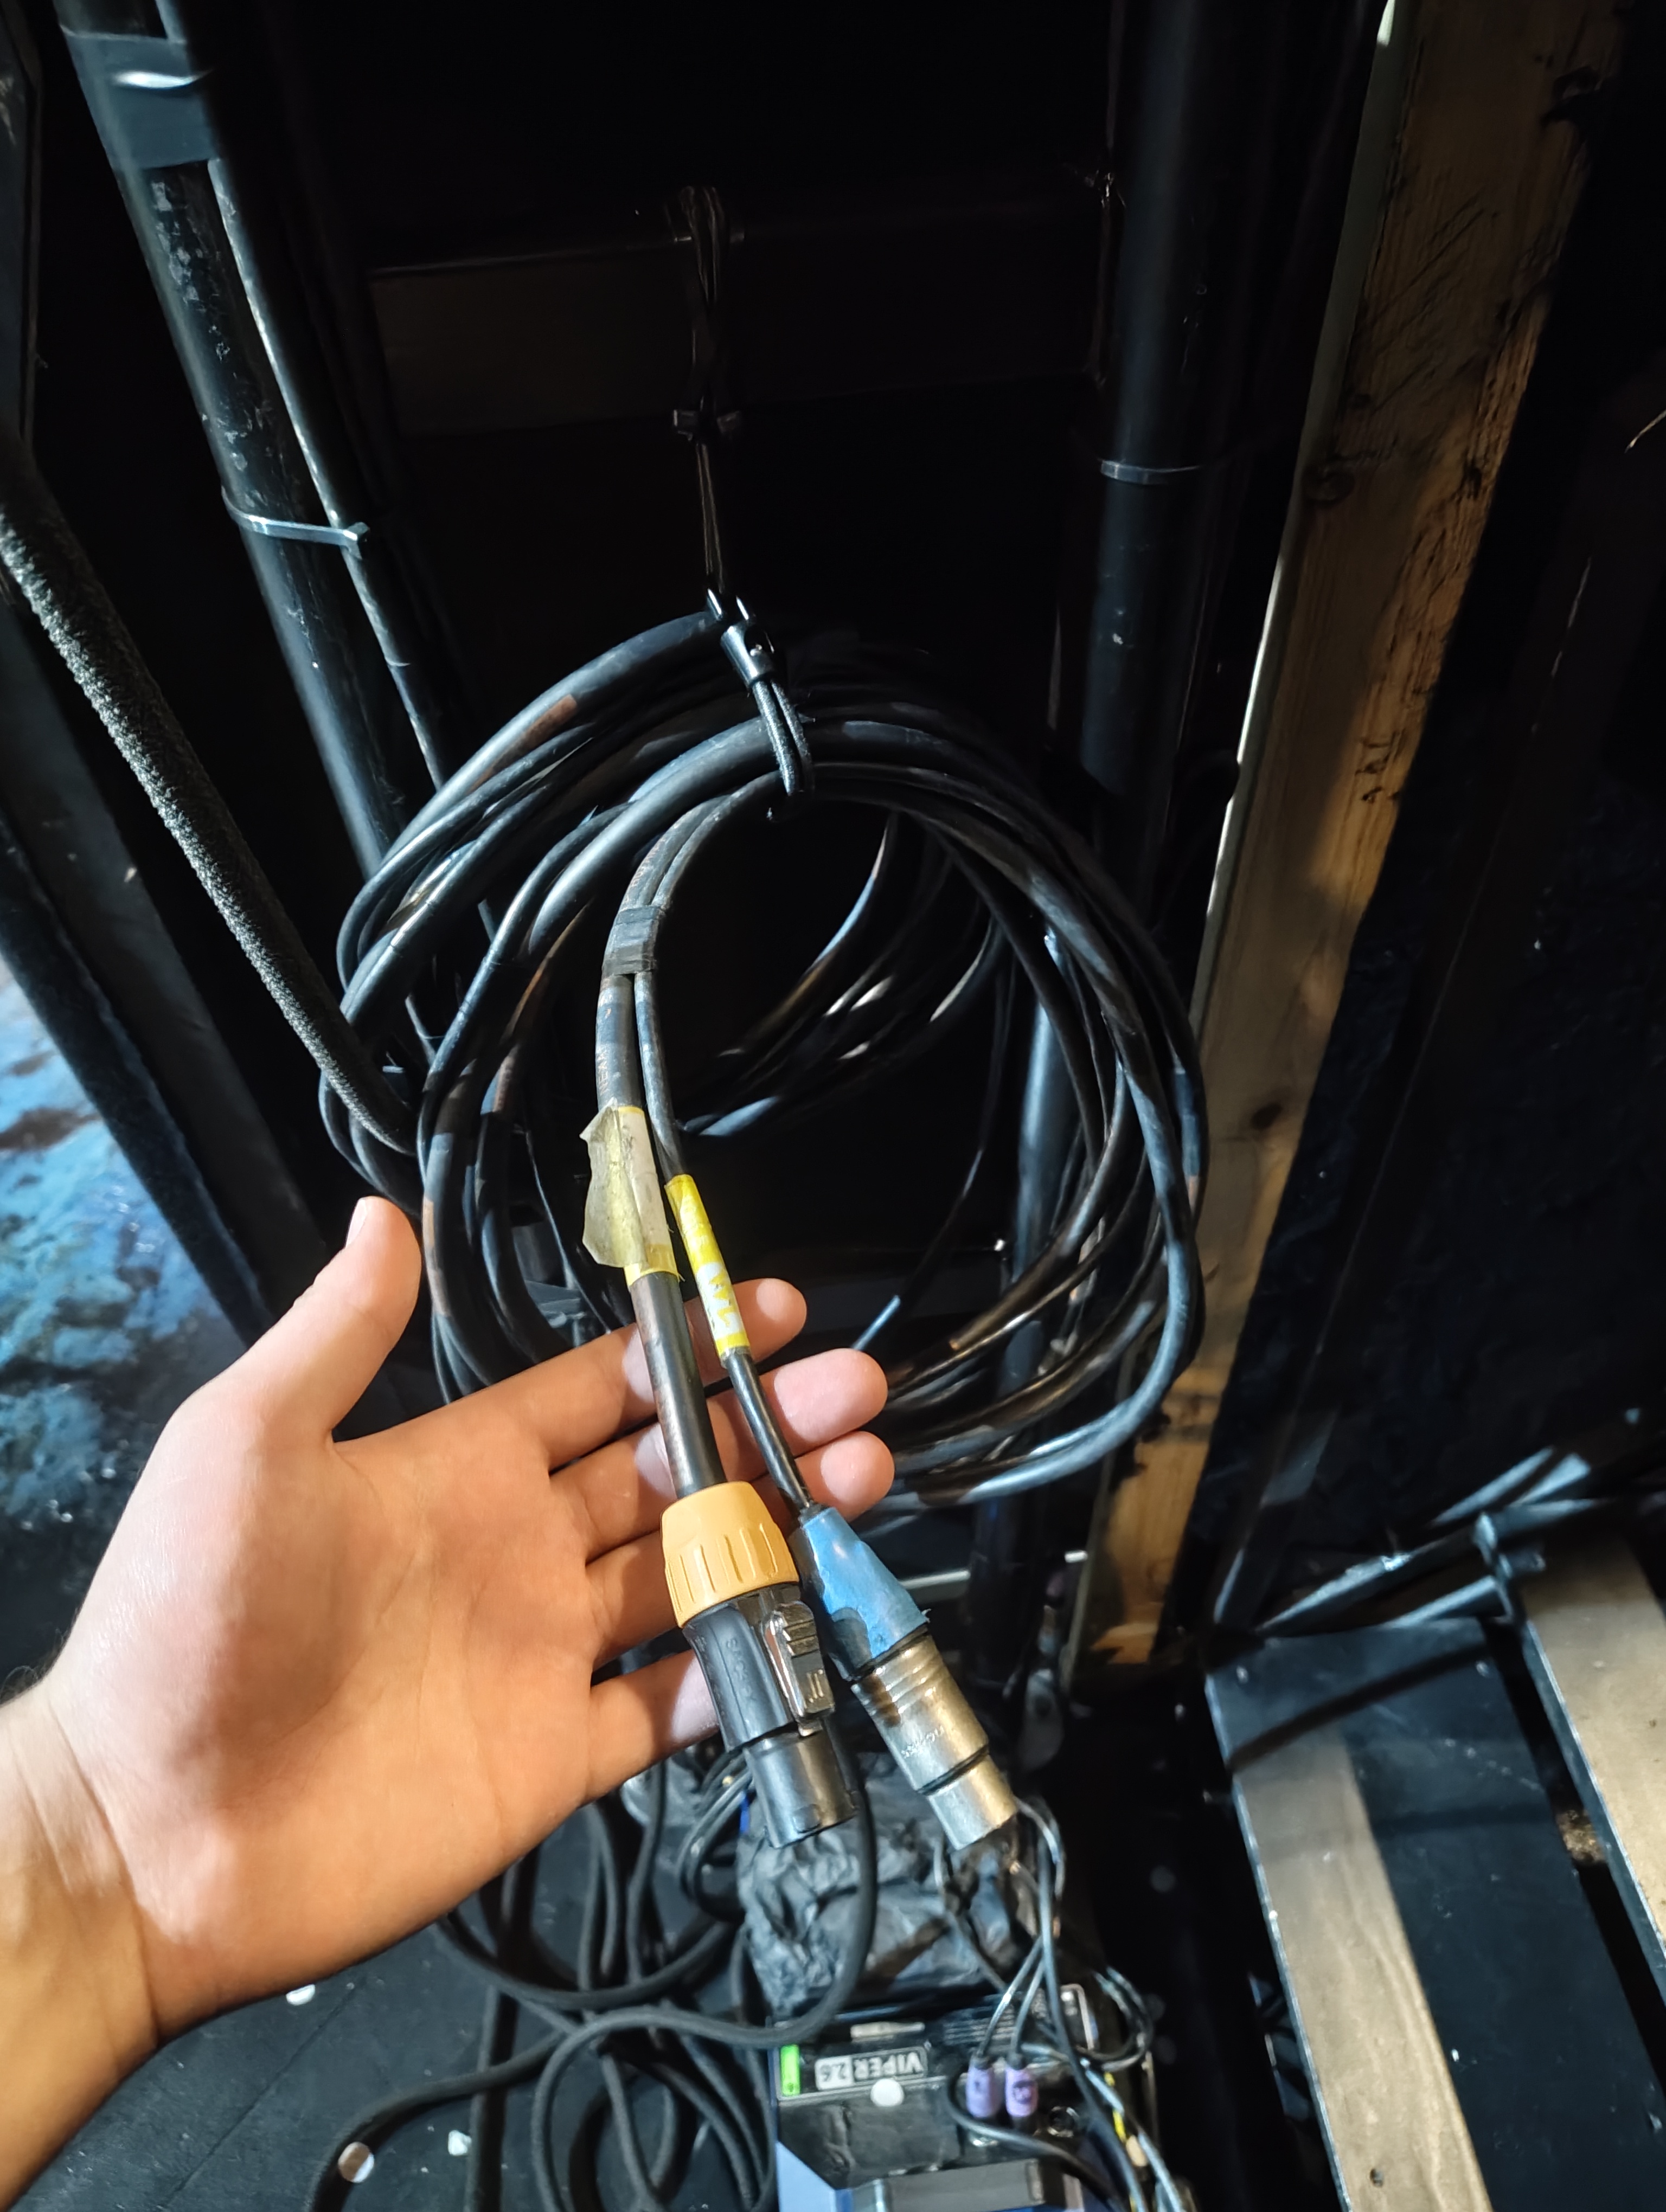
The Bonfire Barrel is a cluster of three wooden barrels mainly used as dressing for SR bay 4. The barrels are on air lift casters to enable them to move. they have a trailing Trueone and 5-pin DMX connection. The barrels have a collection of 2 Chauvet COLORdash Par H7 IP, 8 Gantum Led spots and a Look Solutions PowerTiny.
Build
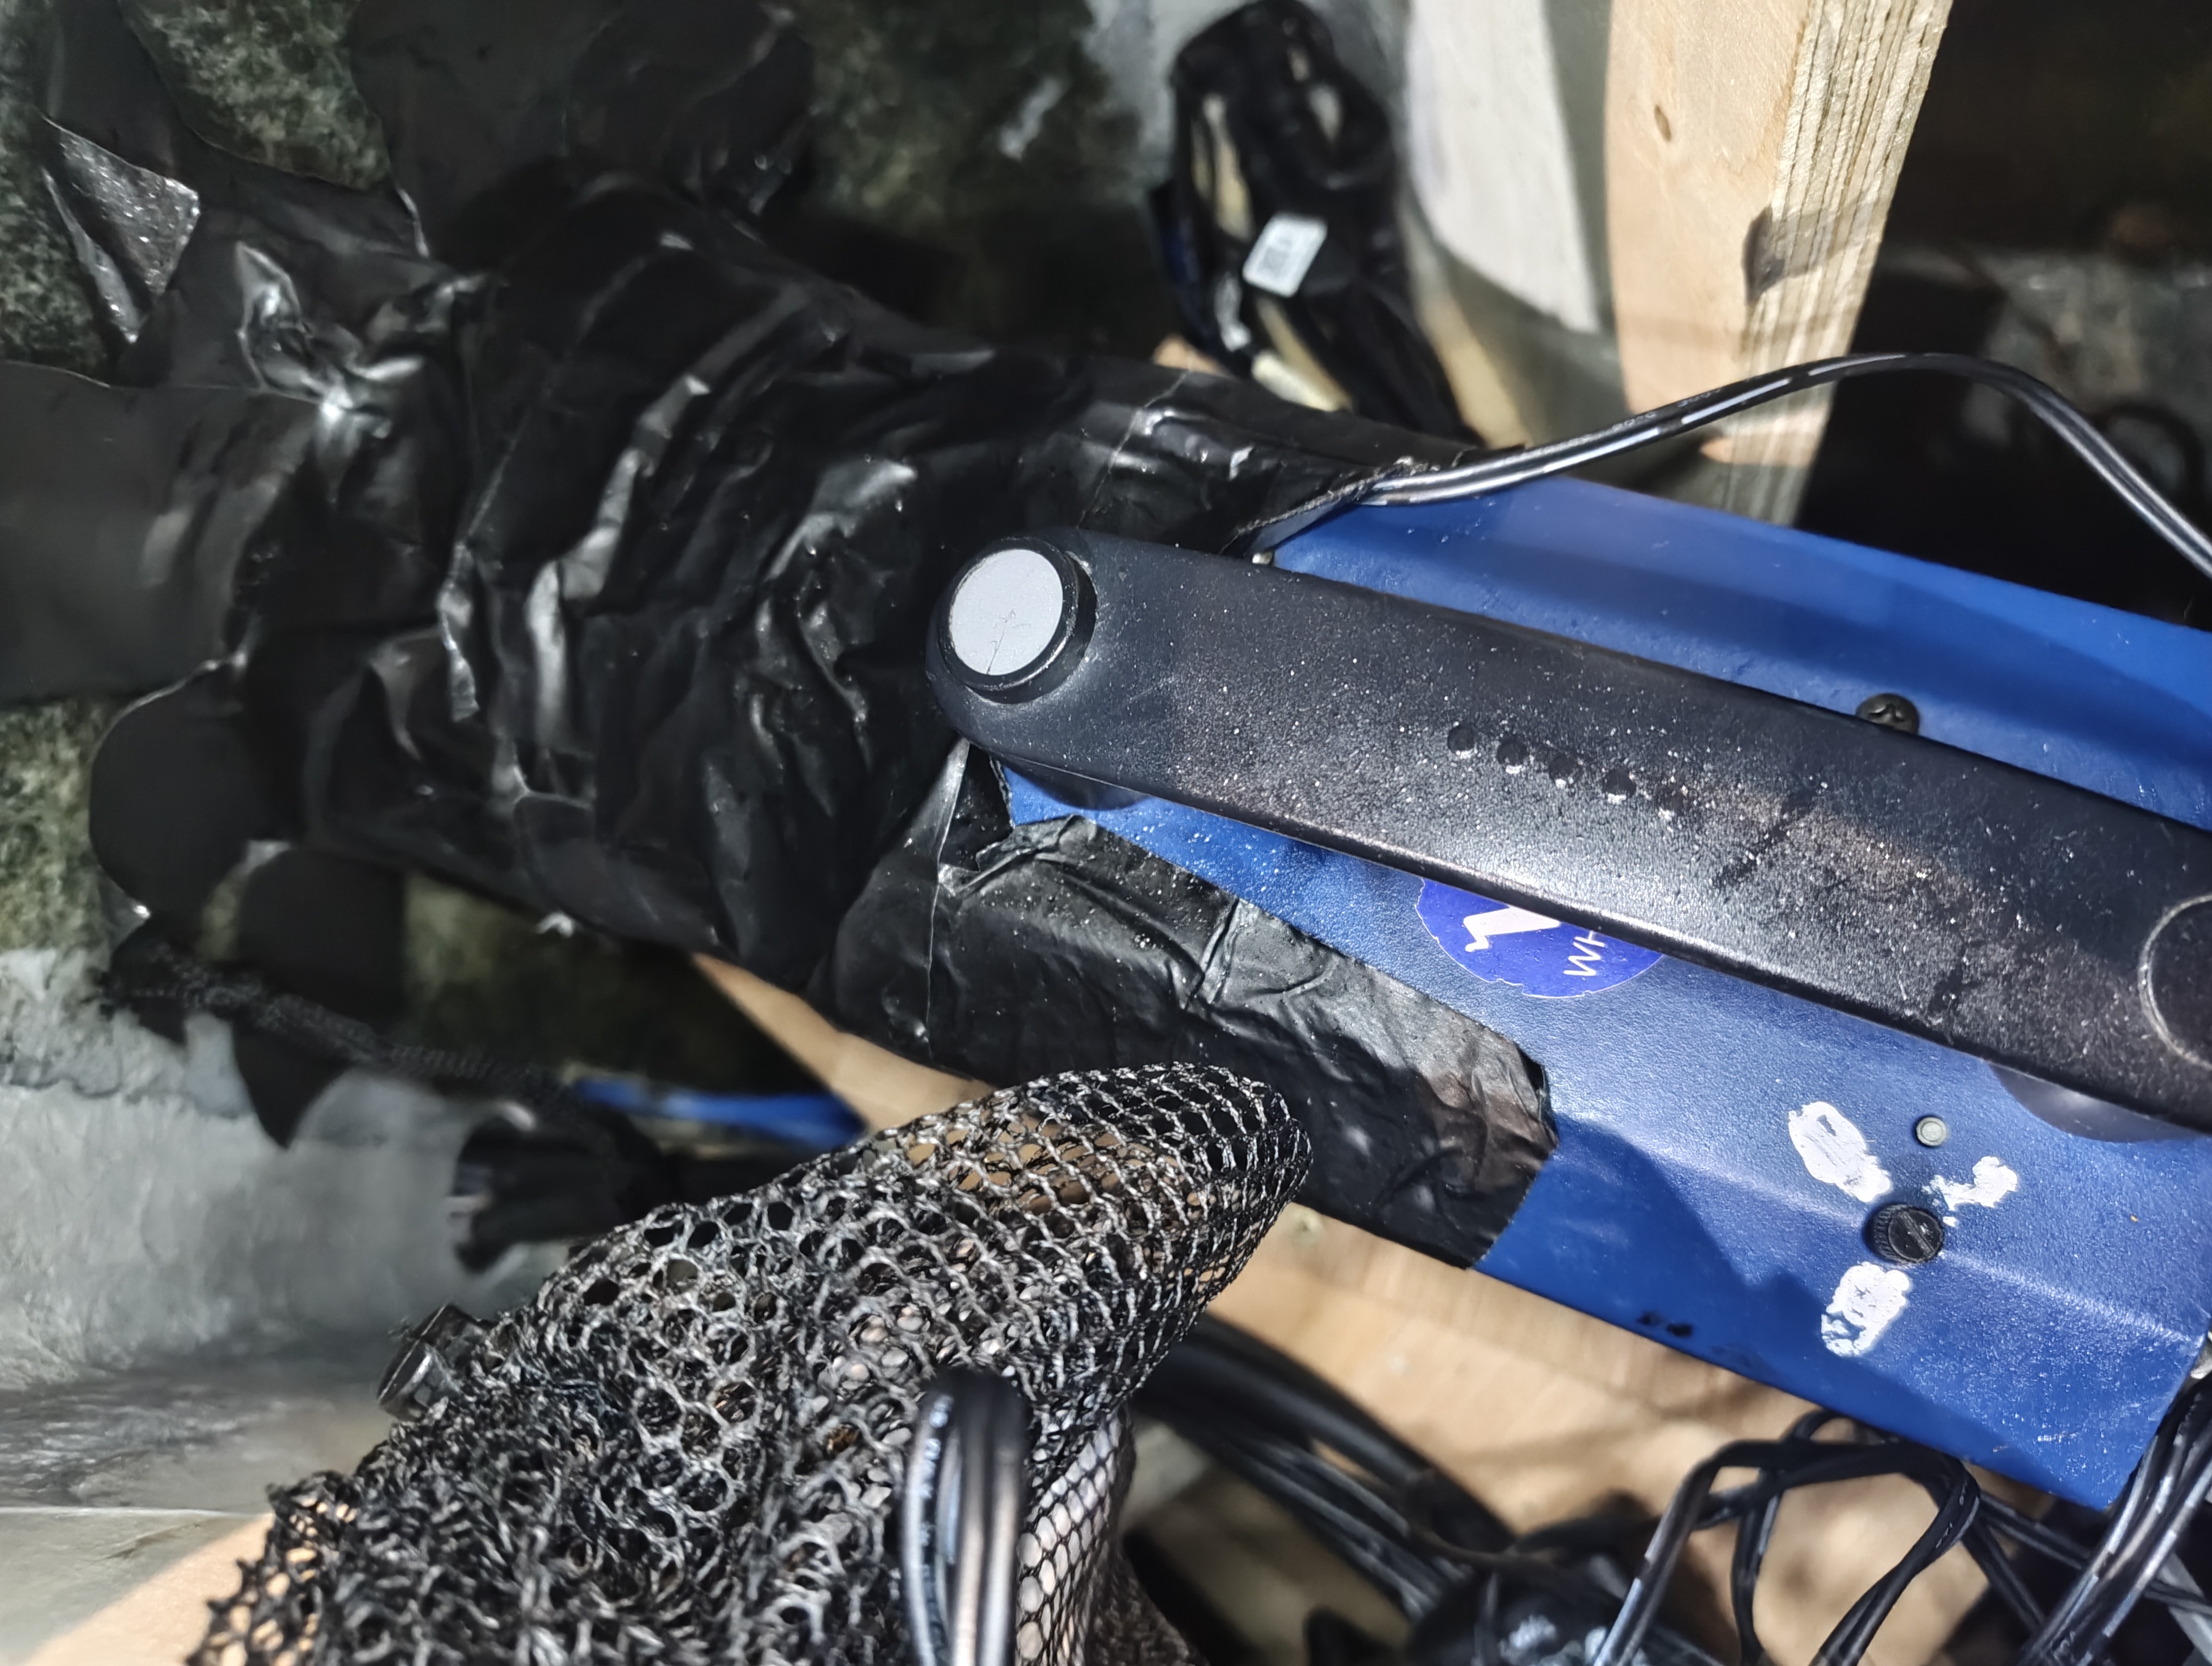
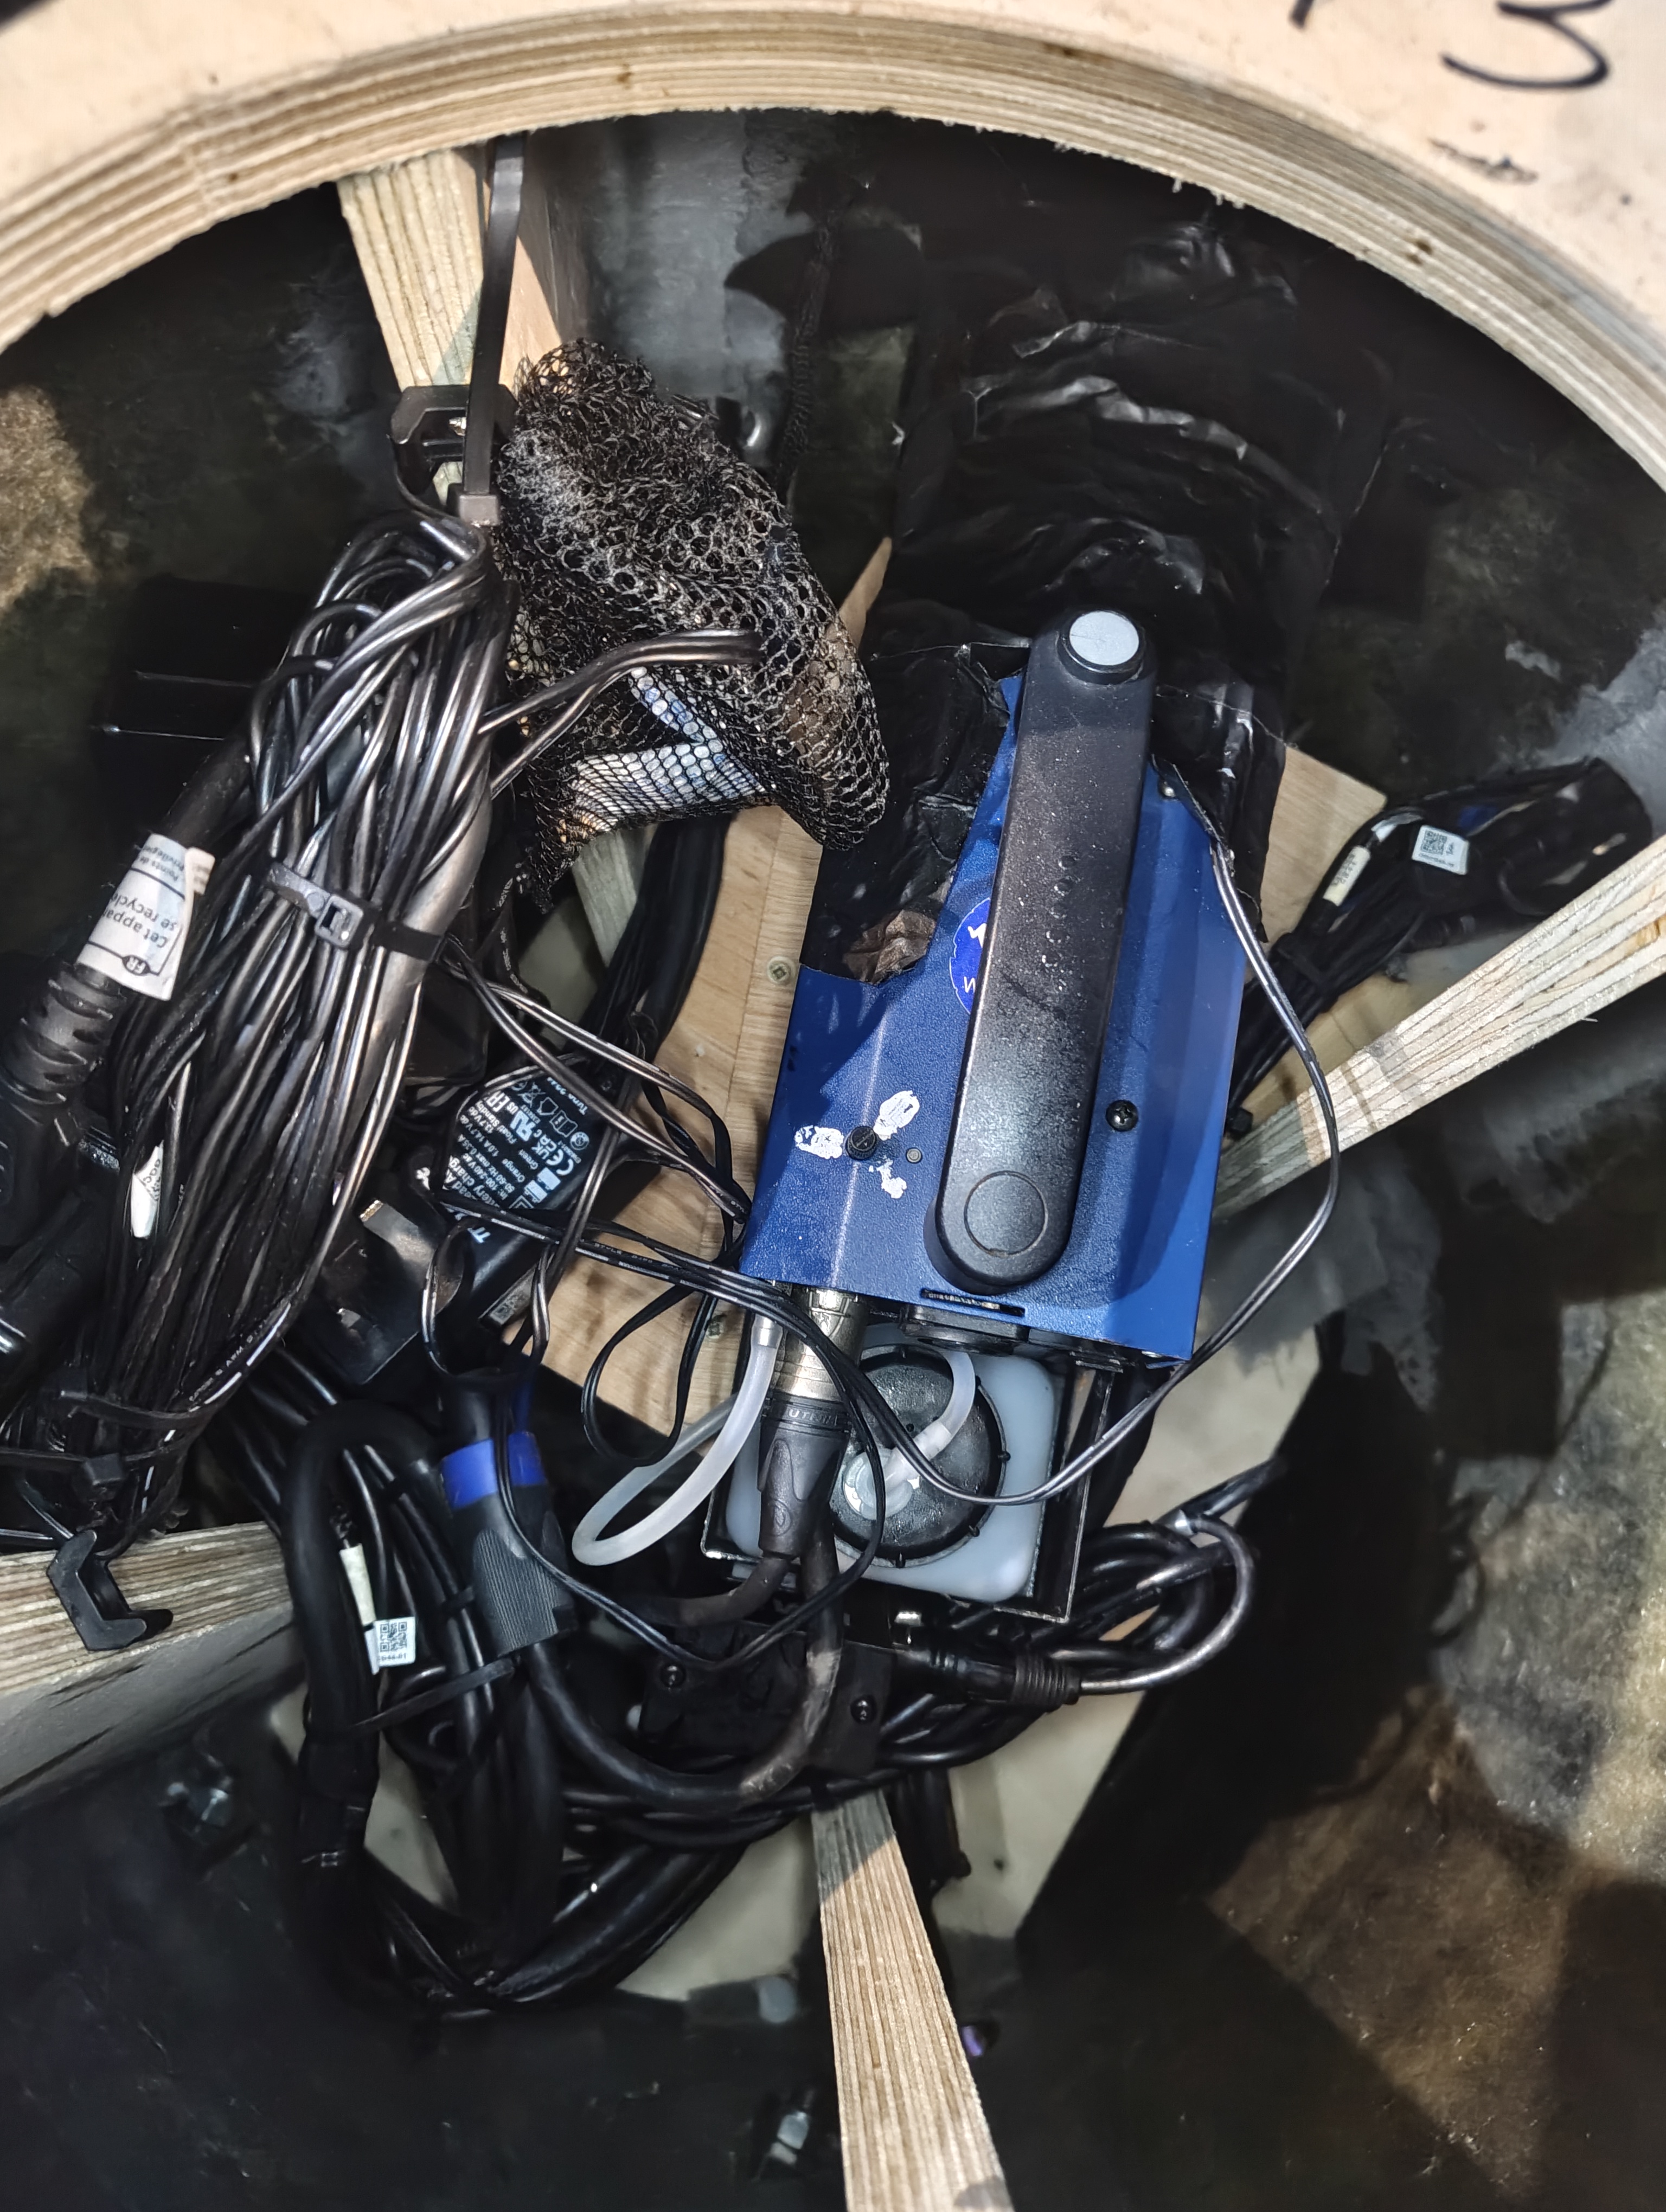
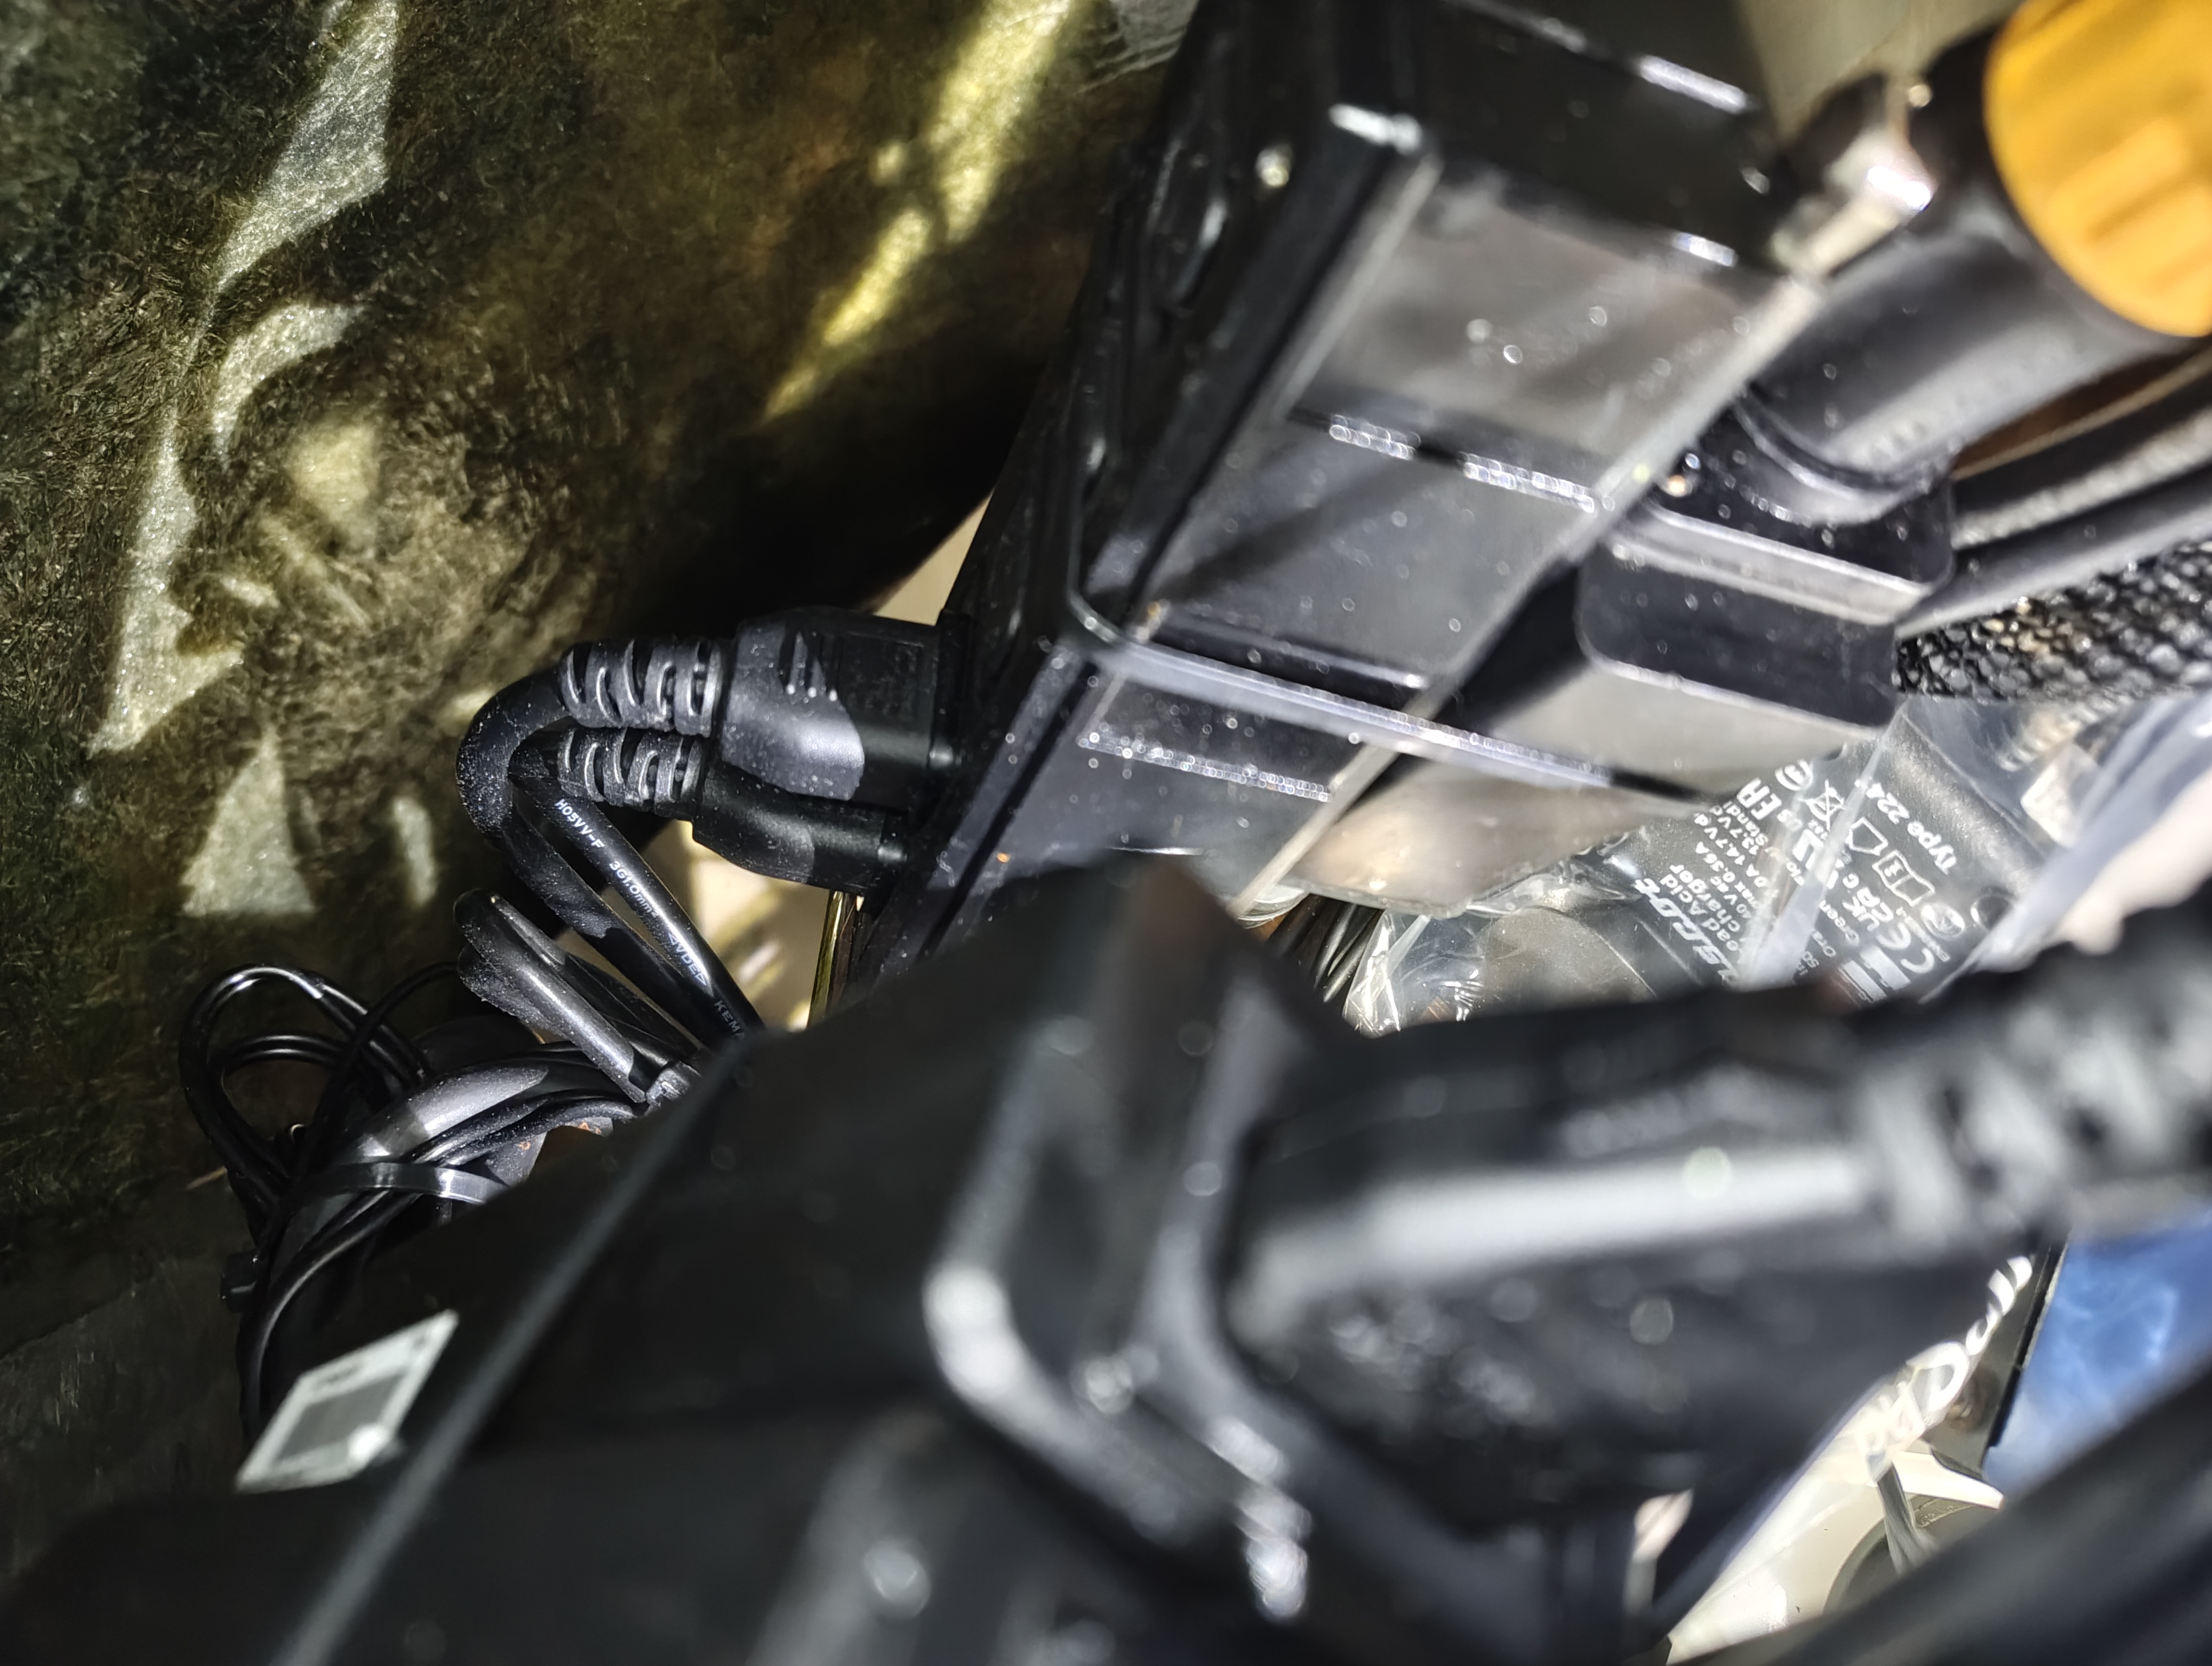
The fixtures are afixed in to the frame of the barrels with wood screws (this includes the two gantoms on the outside of the barrels). The PowerTiny has a wooden shelf it is sat on, it is blacktaked on the front to piping to distribute the smoke to the front to barrels where the smoke can exit through the holes on the top of the front barrels. Power is supplied via a True One cable (there is a break in the loom as no power is required for Act 2), the True one is split to an IEC multi block that powers the Gantum PSU's and the other way of the True One powers the two Slimpars. The PowerTiny is Powered by its own internal battery, the charger is permantly connected to the inputs as the piping makes it difficult to access it. The dmx is shared in as a daisy chain as normal, the PowerTiny receives DMX via a Look Solutions DMXit unit mounted on the side.
Tip
The Charger is stored in a sandwich bag to reduce the amount of residue left on it.
Power & Control
- Power source: SR Fly FLoor
- Driver / PSU: Internal
- DMX source: SR Fly FLoor
- Connector type: True 1 & DMX Loom
Note
The PowerTiny Smoke Machine inside is powered by it's internal battery this needs charging over night.
Channels & Addressing
- COLORdash Par H7 IP
- Channels: 621–622
- Fixture Type: COLORdash Par H7 IP 6ch (Chauvet)
- Addresses:
- Ch 621: 10/267–272
- Ch 622: 10/273–278
- Parameters: 6 channel mode (RGBWAU)
- Gantom LED Spots
- Channels: 861–869
- Fixture Type: Gantom 7 M510
- Addresses:
- Ch 861: 10/279–285
- Ch 862: 10/287–293
- Ch 863: 10/295–301
- Ch 864: 10/303–309
- Ch 865: 10/311–317
- Ch 866: 10/319–325
- Ch 867: 10/327–333
- Ch 868: 10/335–341
- Ch 869: 10/343–349
- Parameters: 7 channel mode (per Gantom M510 profile)
- PowerTiny (Bonfire)
- Channel: 951
- Fixture Type: Viper_Smoke (custom)
- Universe/Address: 10/351
- Parameters: Smoke output (single channel)
Images
Key Views
All Reference Photos (click to expand)
Usage
The Barrels are only used in Pilgrim's Trail where actors move the barrels up to US centre.
Scenes
- Pilgrim's Trail
- It emulates fire (it's pretty)
Maintenance
- Check: The loom is stored on the SR bay 4 portal, it is paged out by deck LX as a part of their show track.
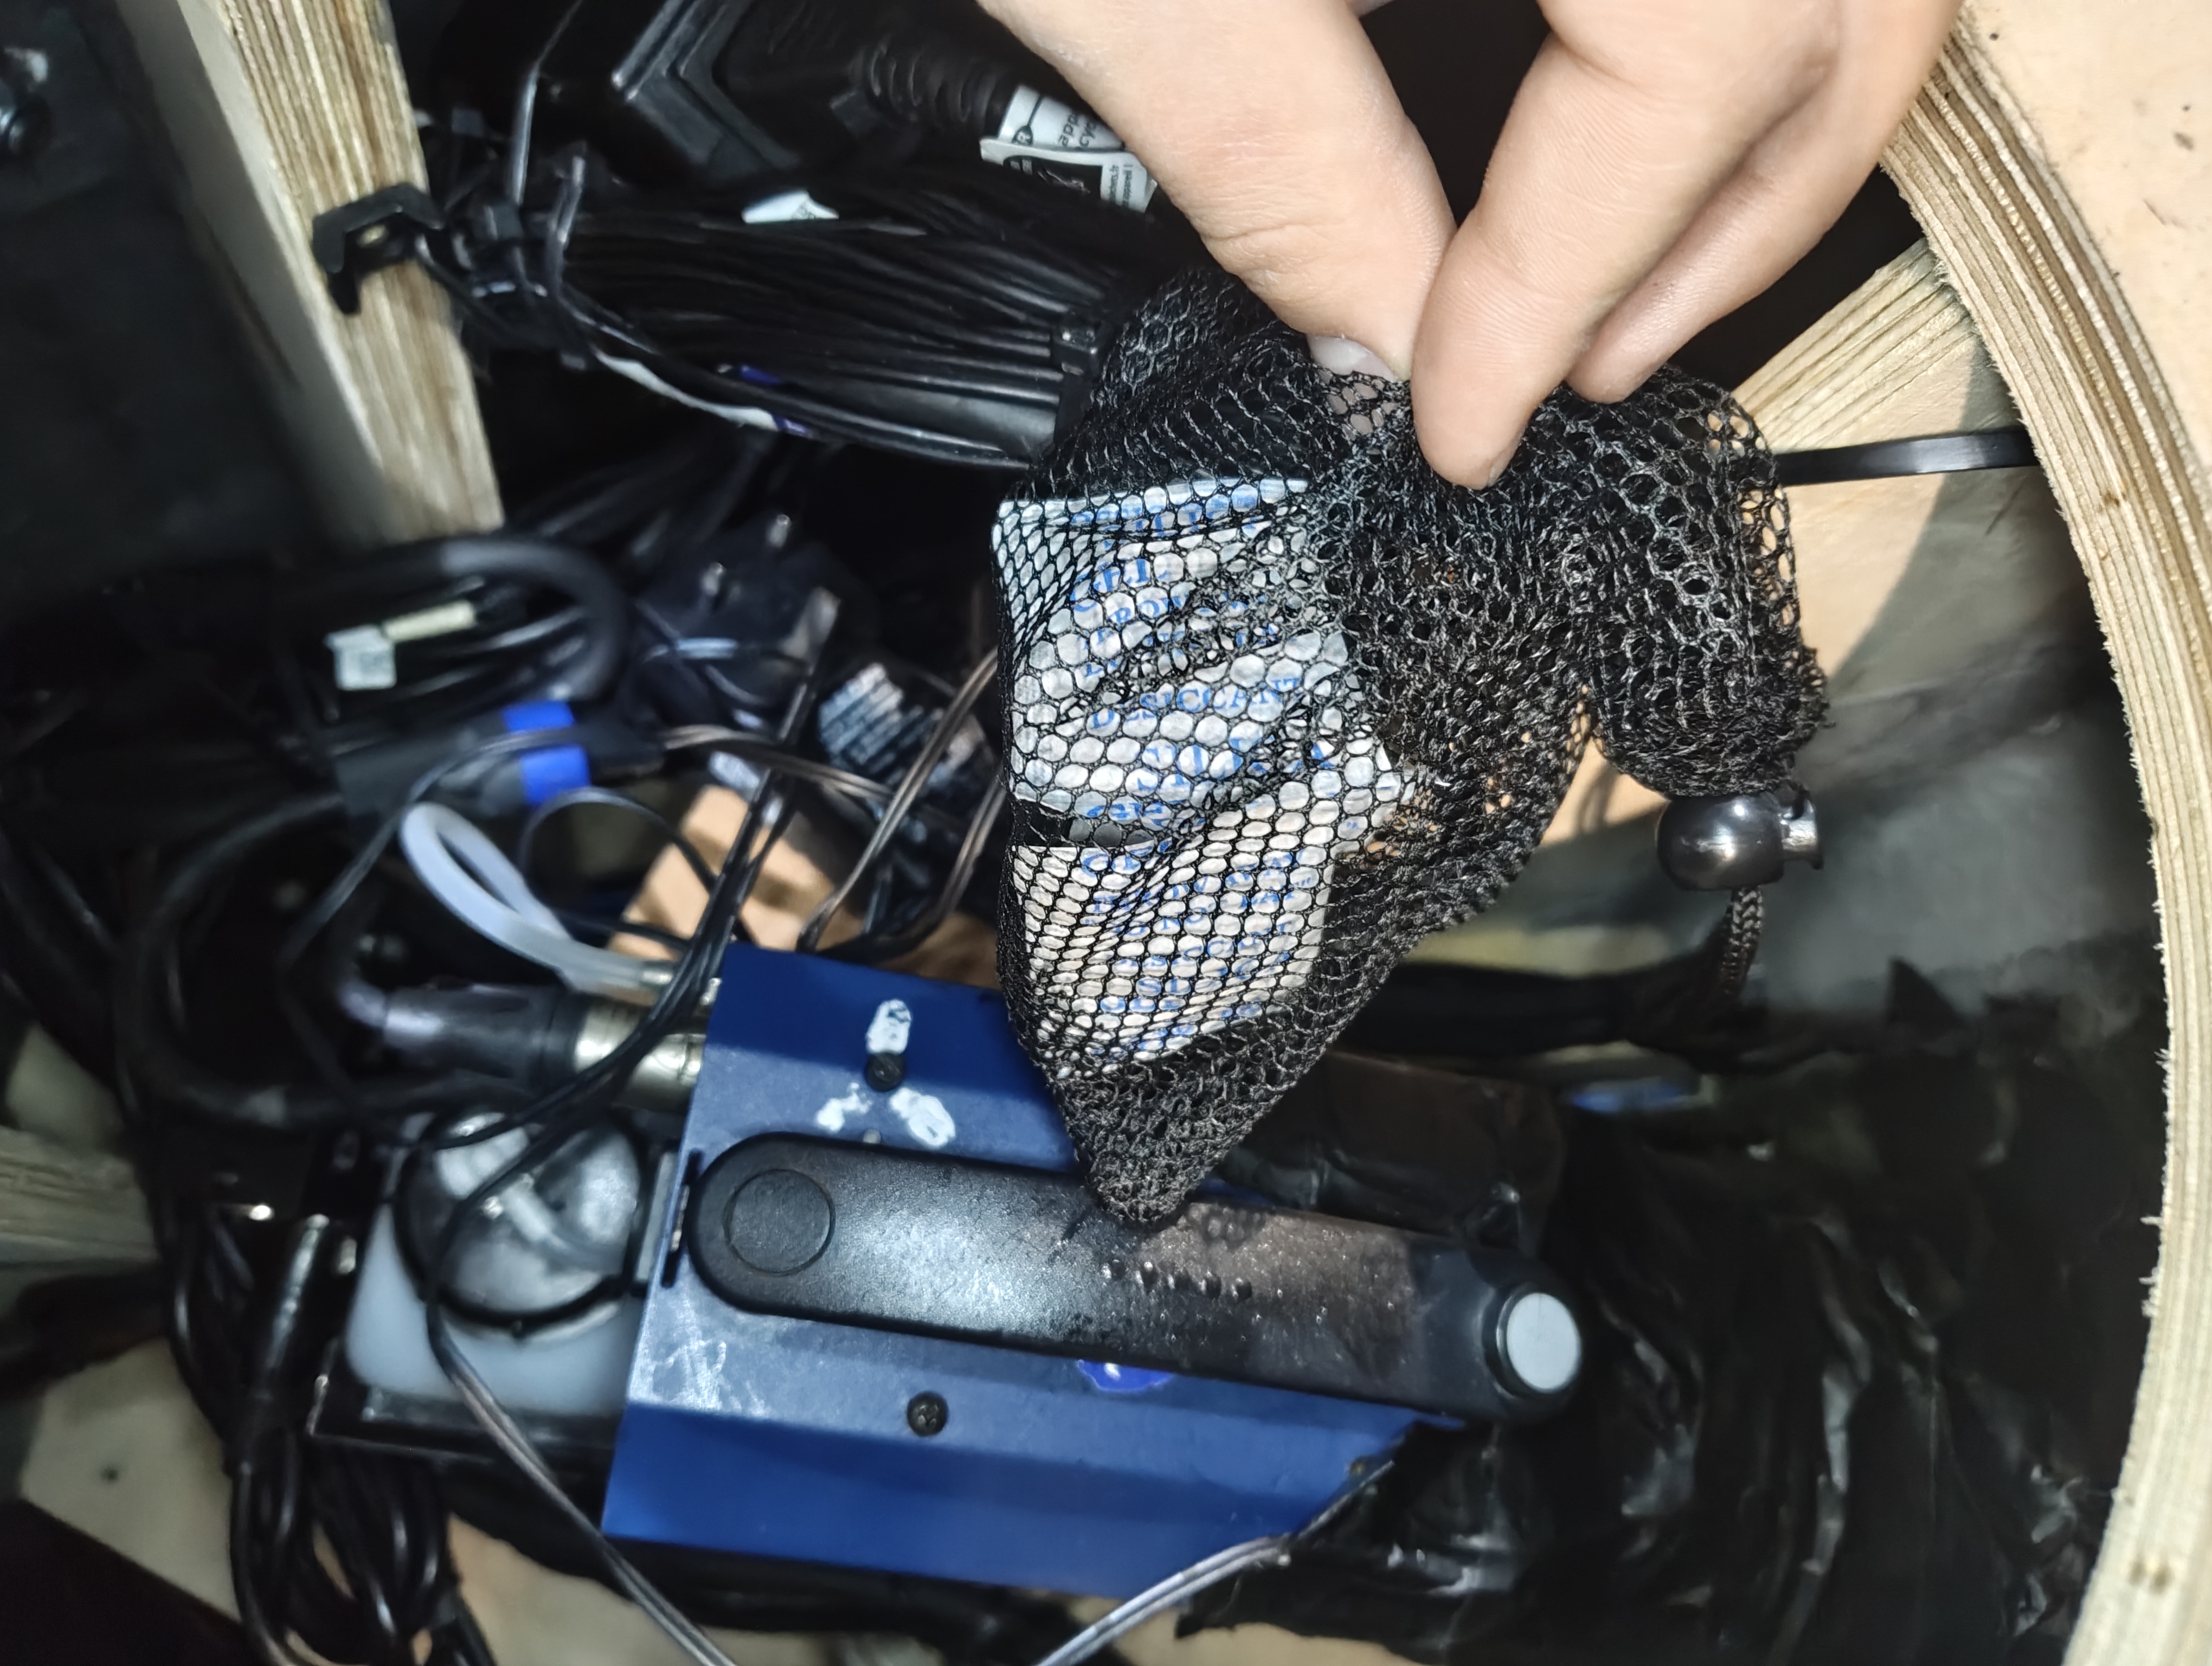
- Maintenance: As the PowerTiny is enclosed in the barrels the smoke leaves residue inside this requires occasional cleaning. There is a mesh bag affixed inside containing silca pouches in order to help the damp.
- Consumables: Fluid for the PowerTiny
PDFs & Manuals
Street Lamp
Overview
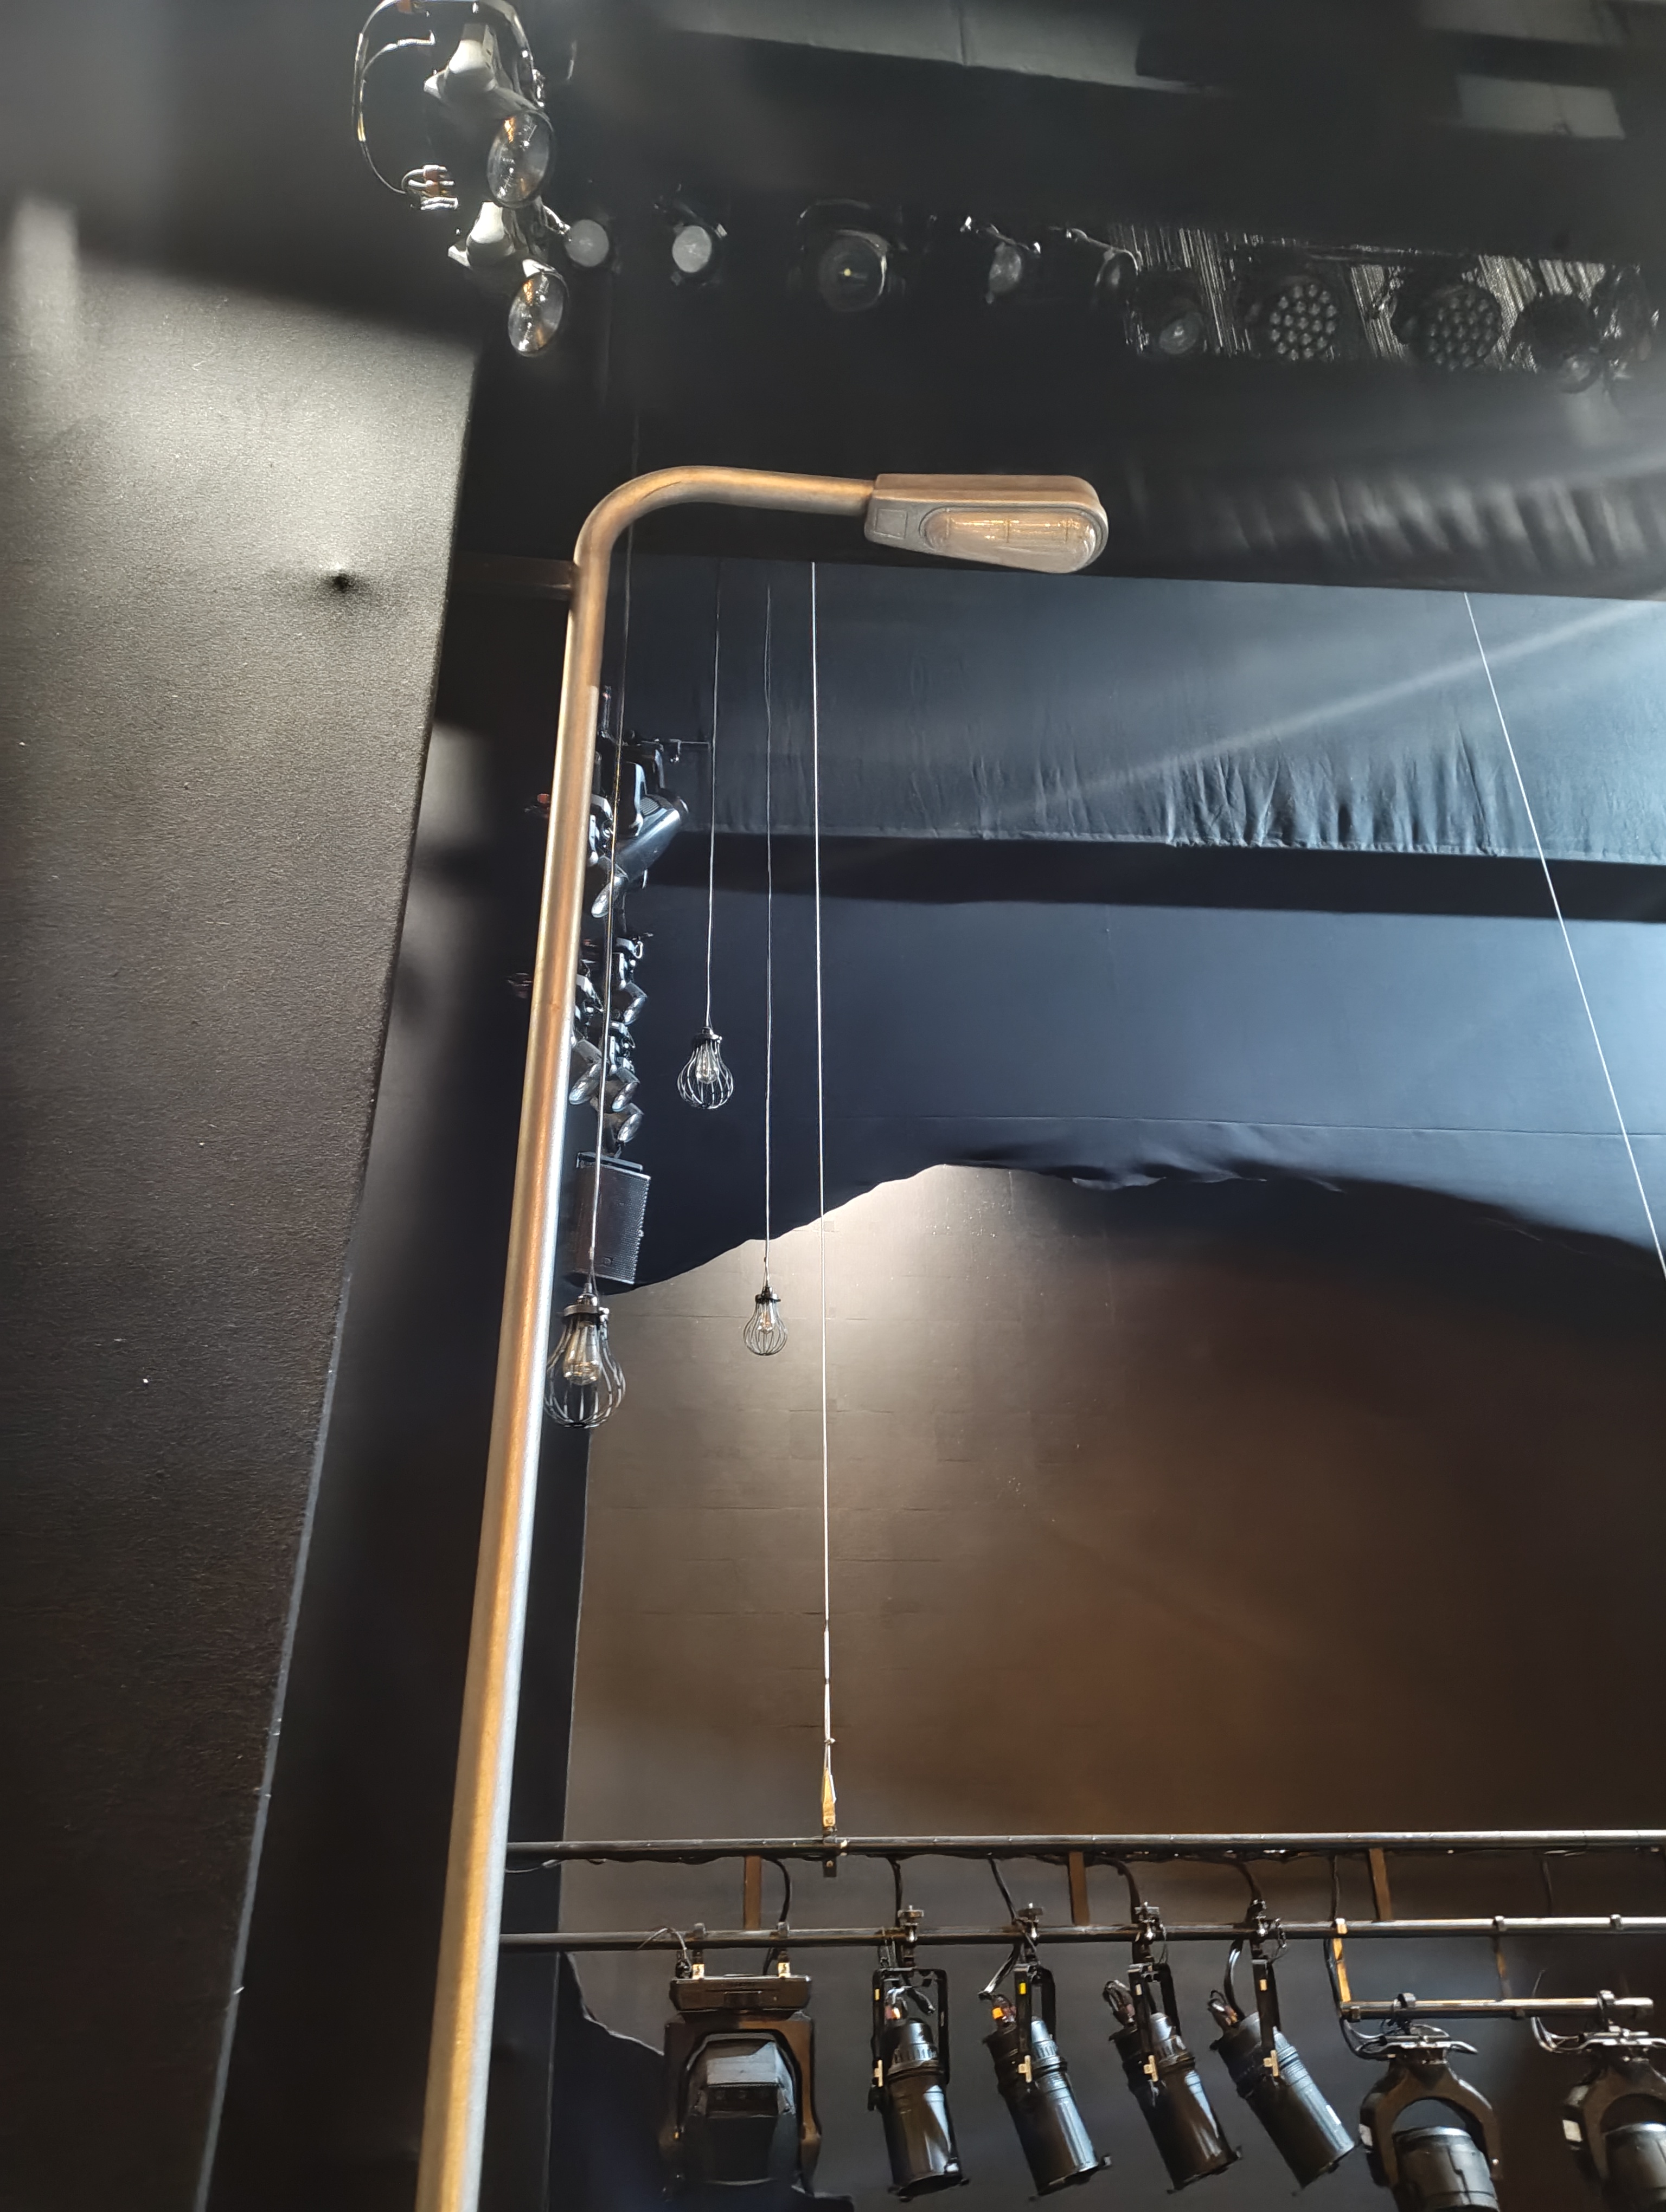
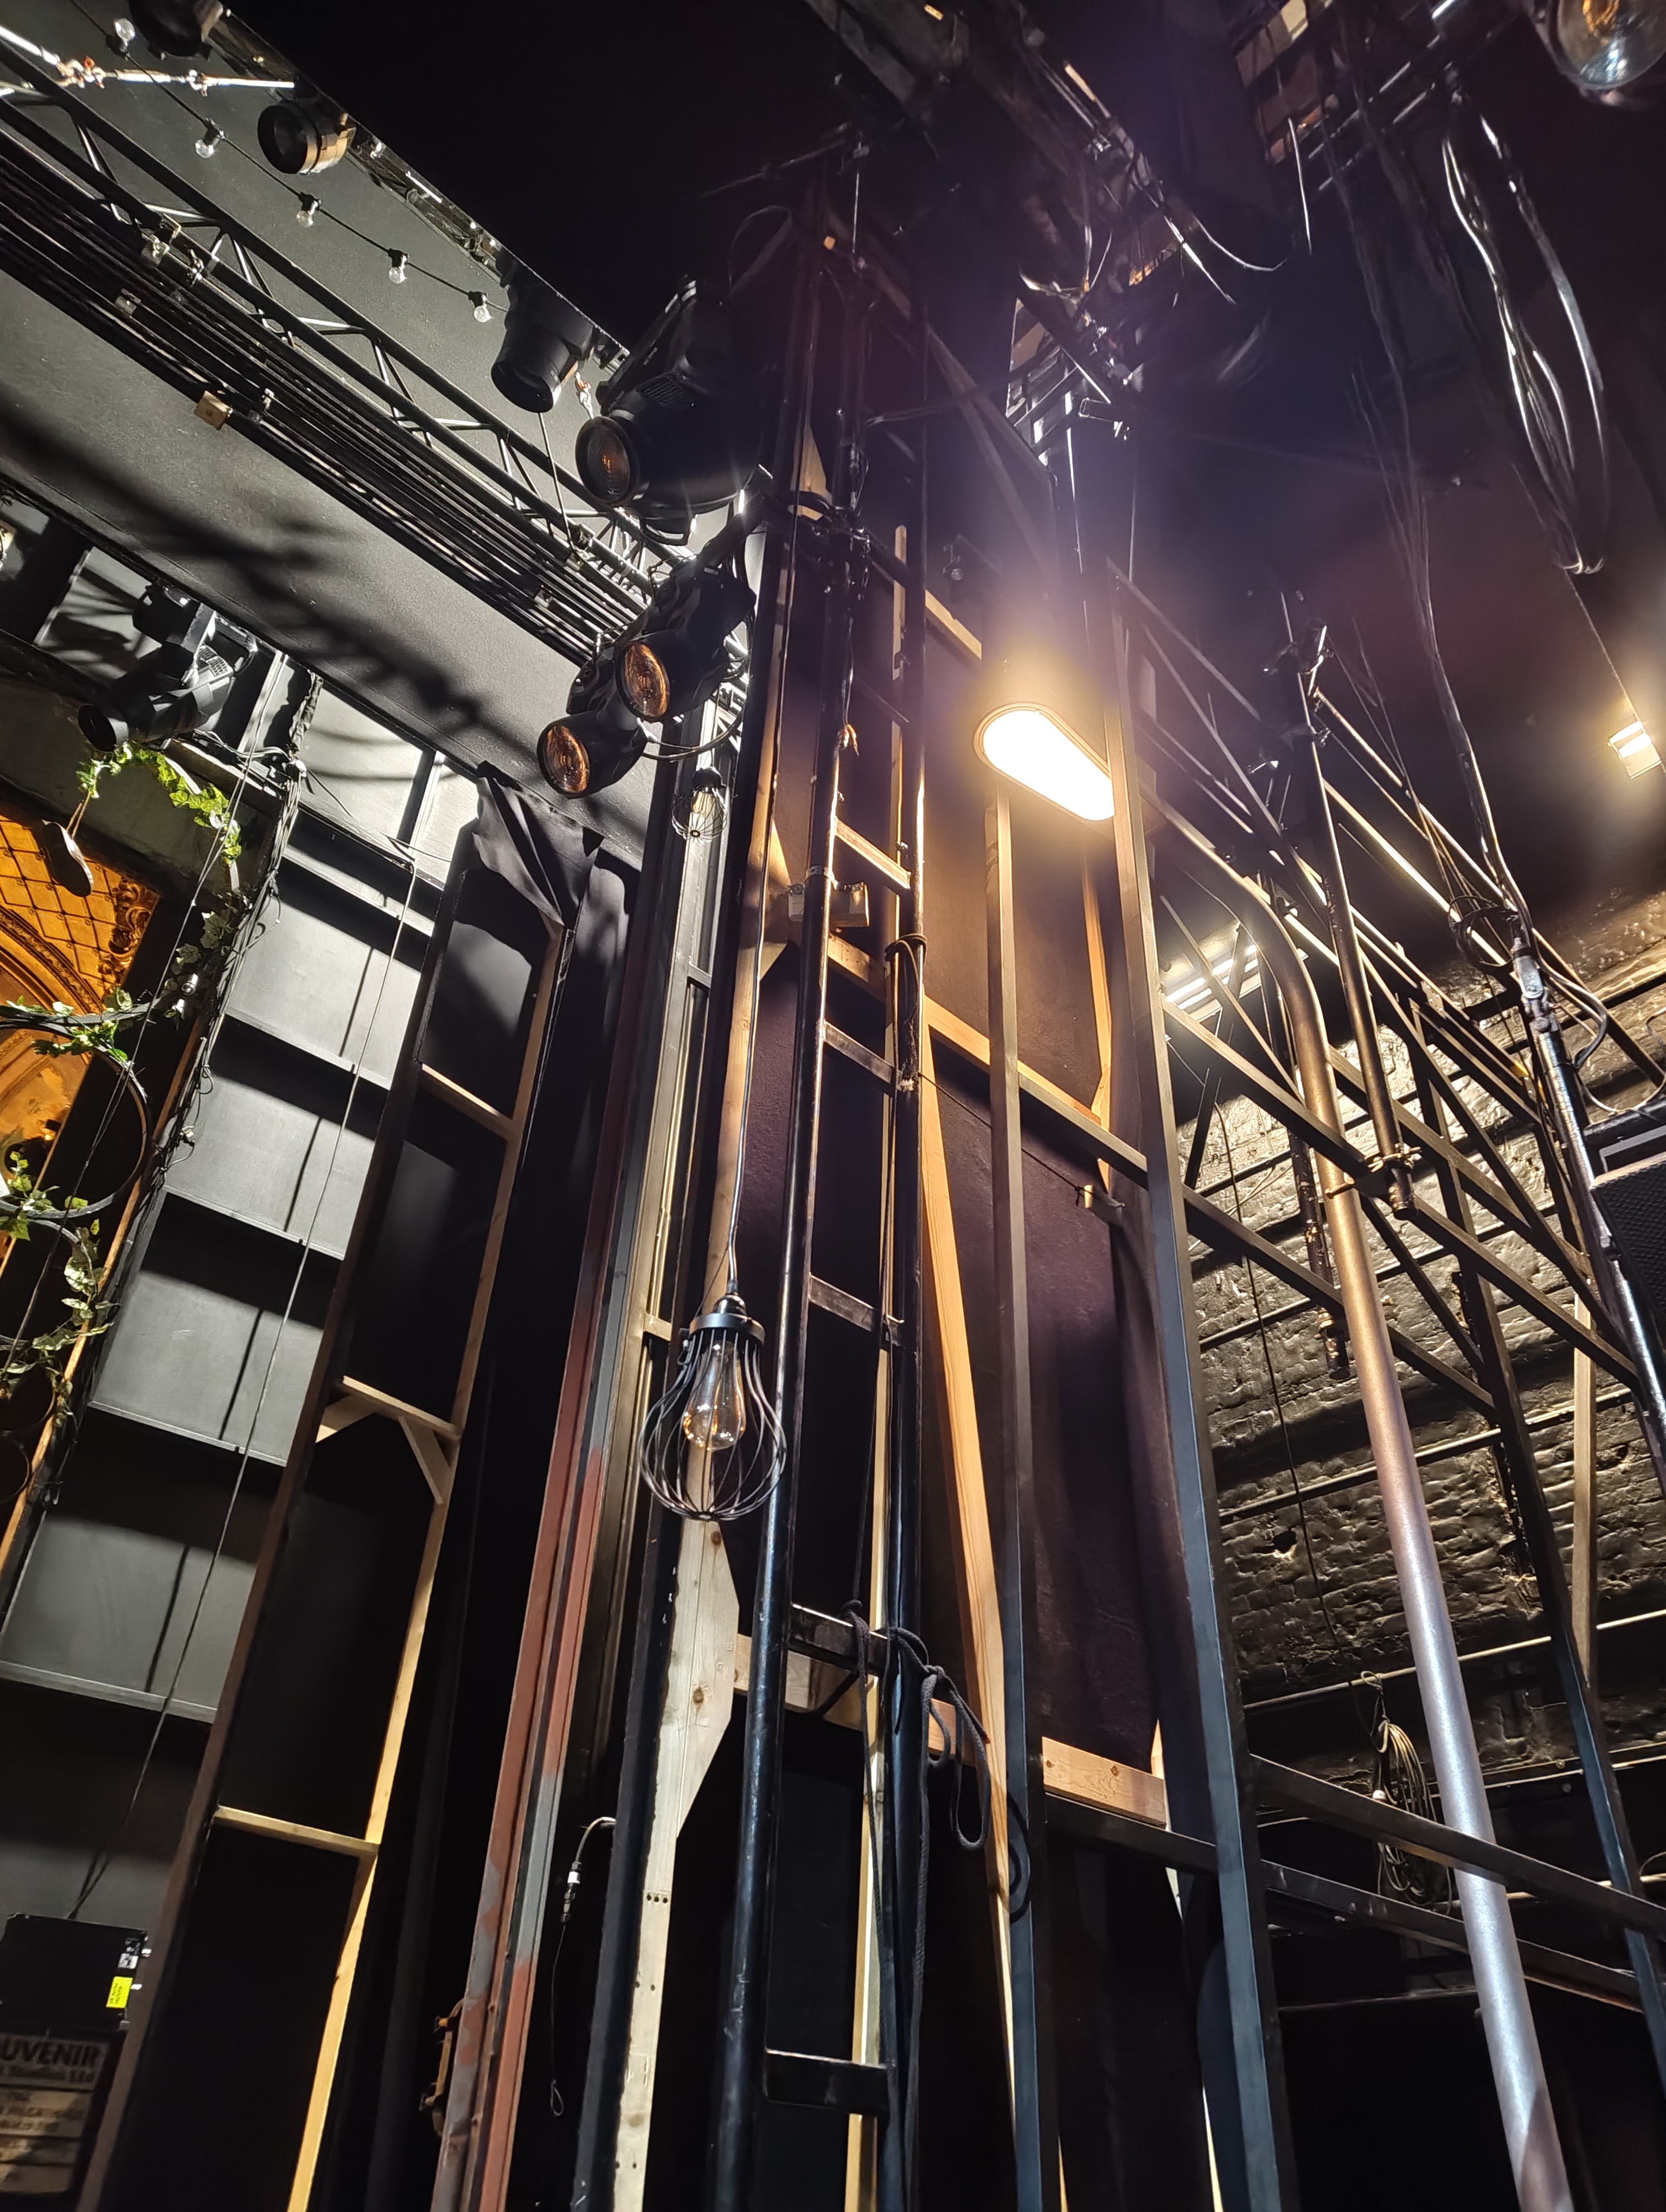
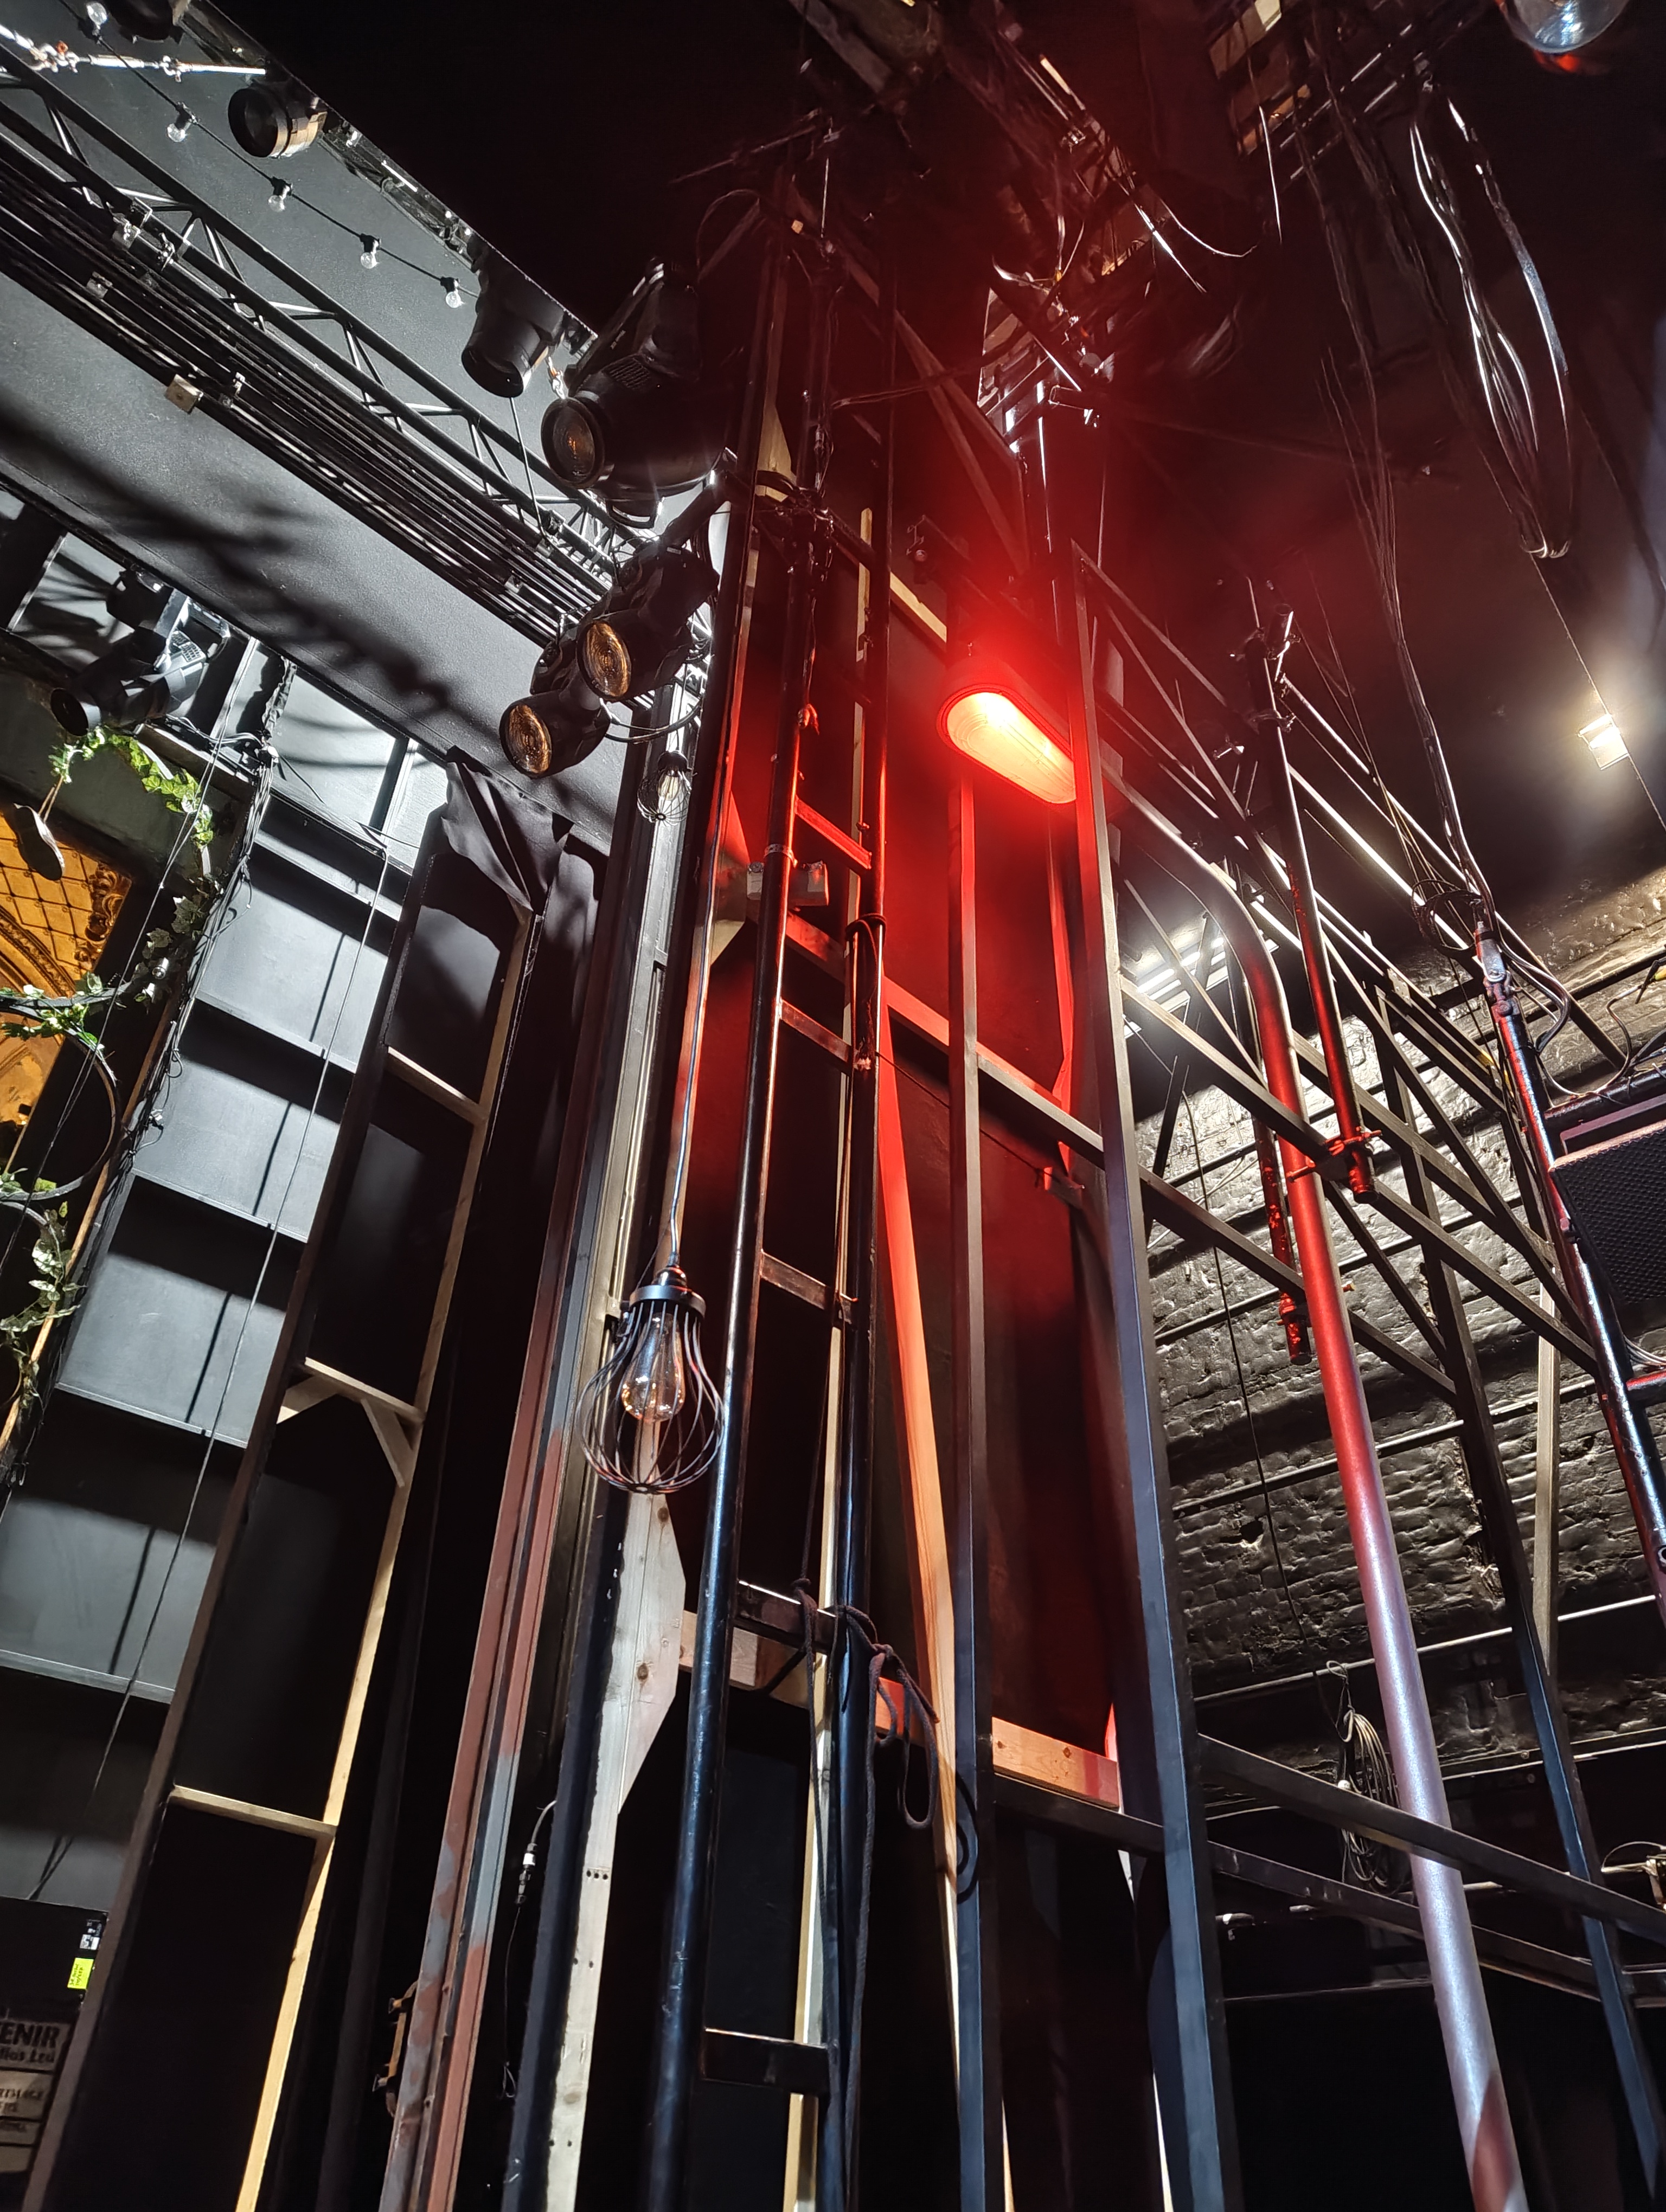
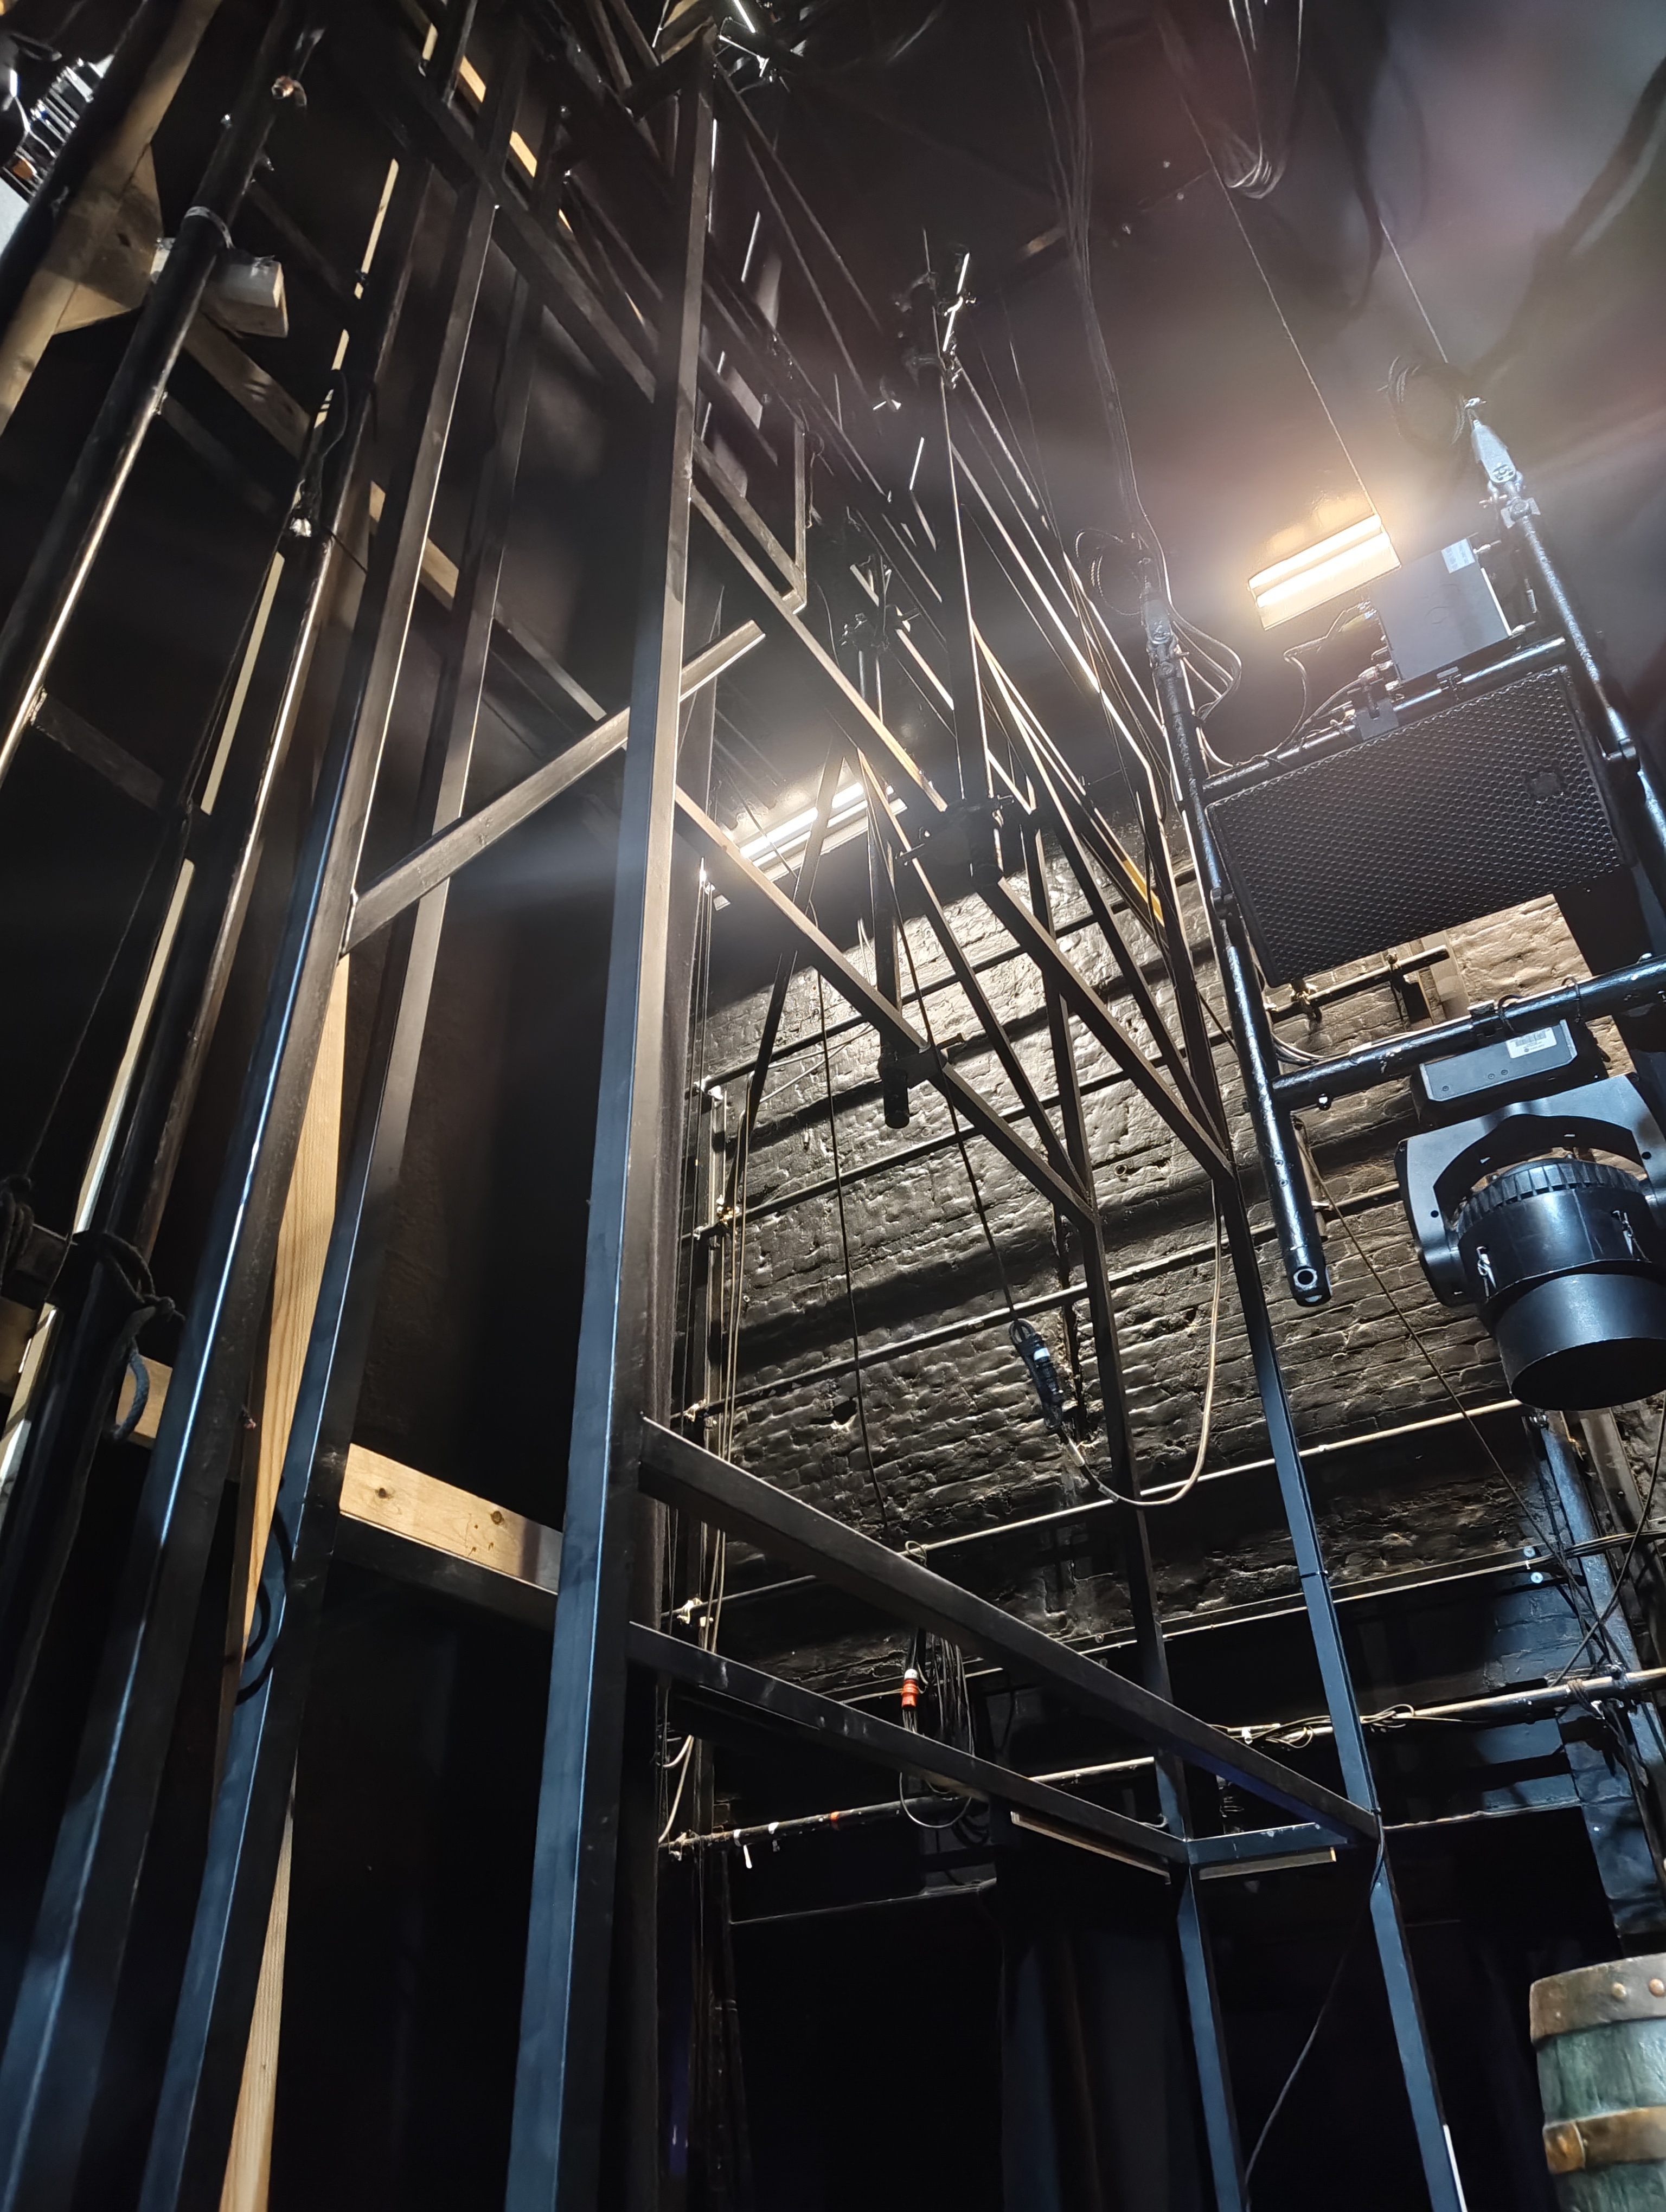
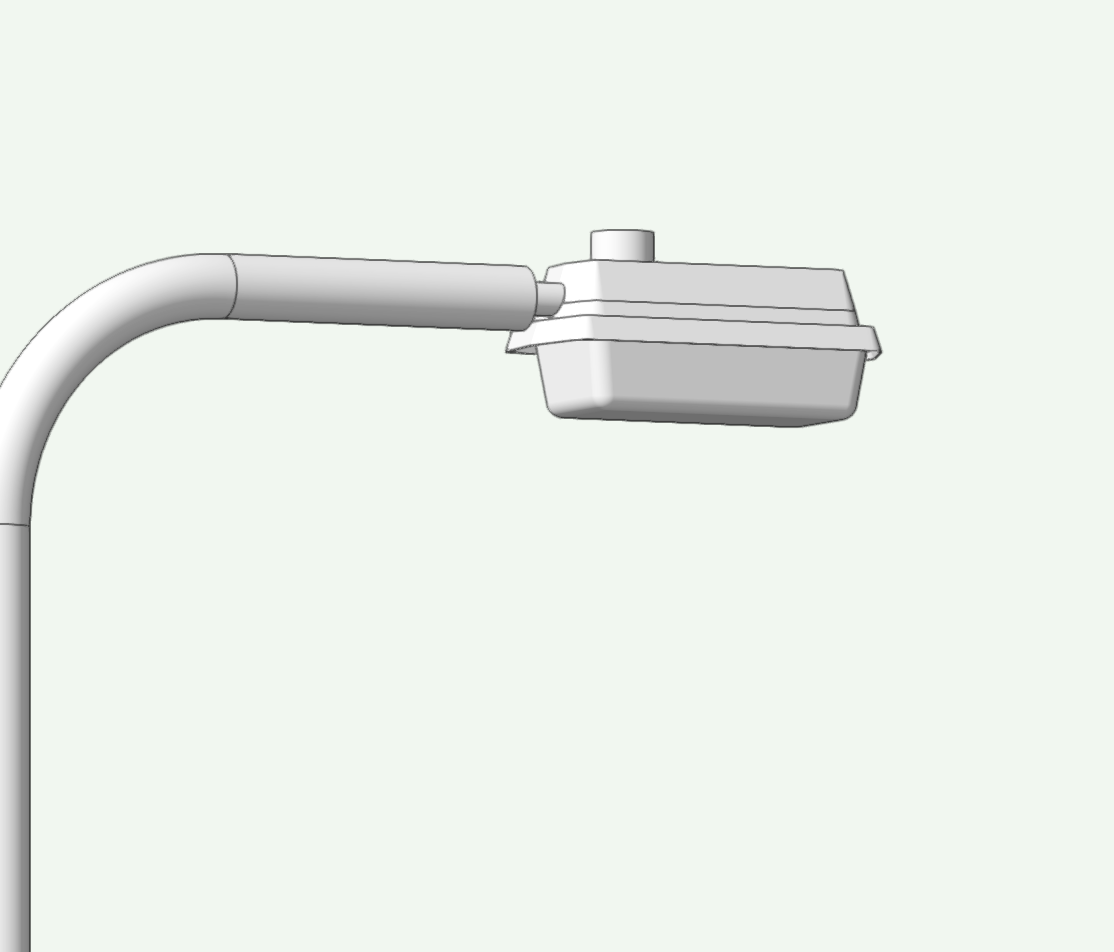
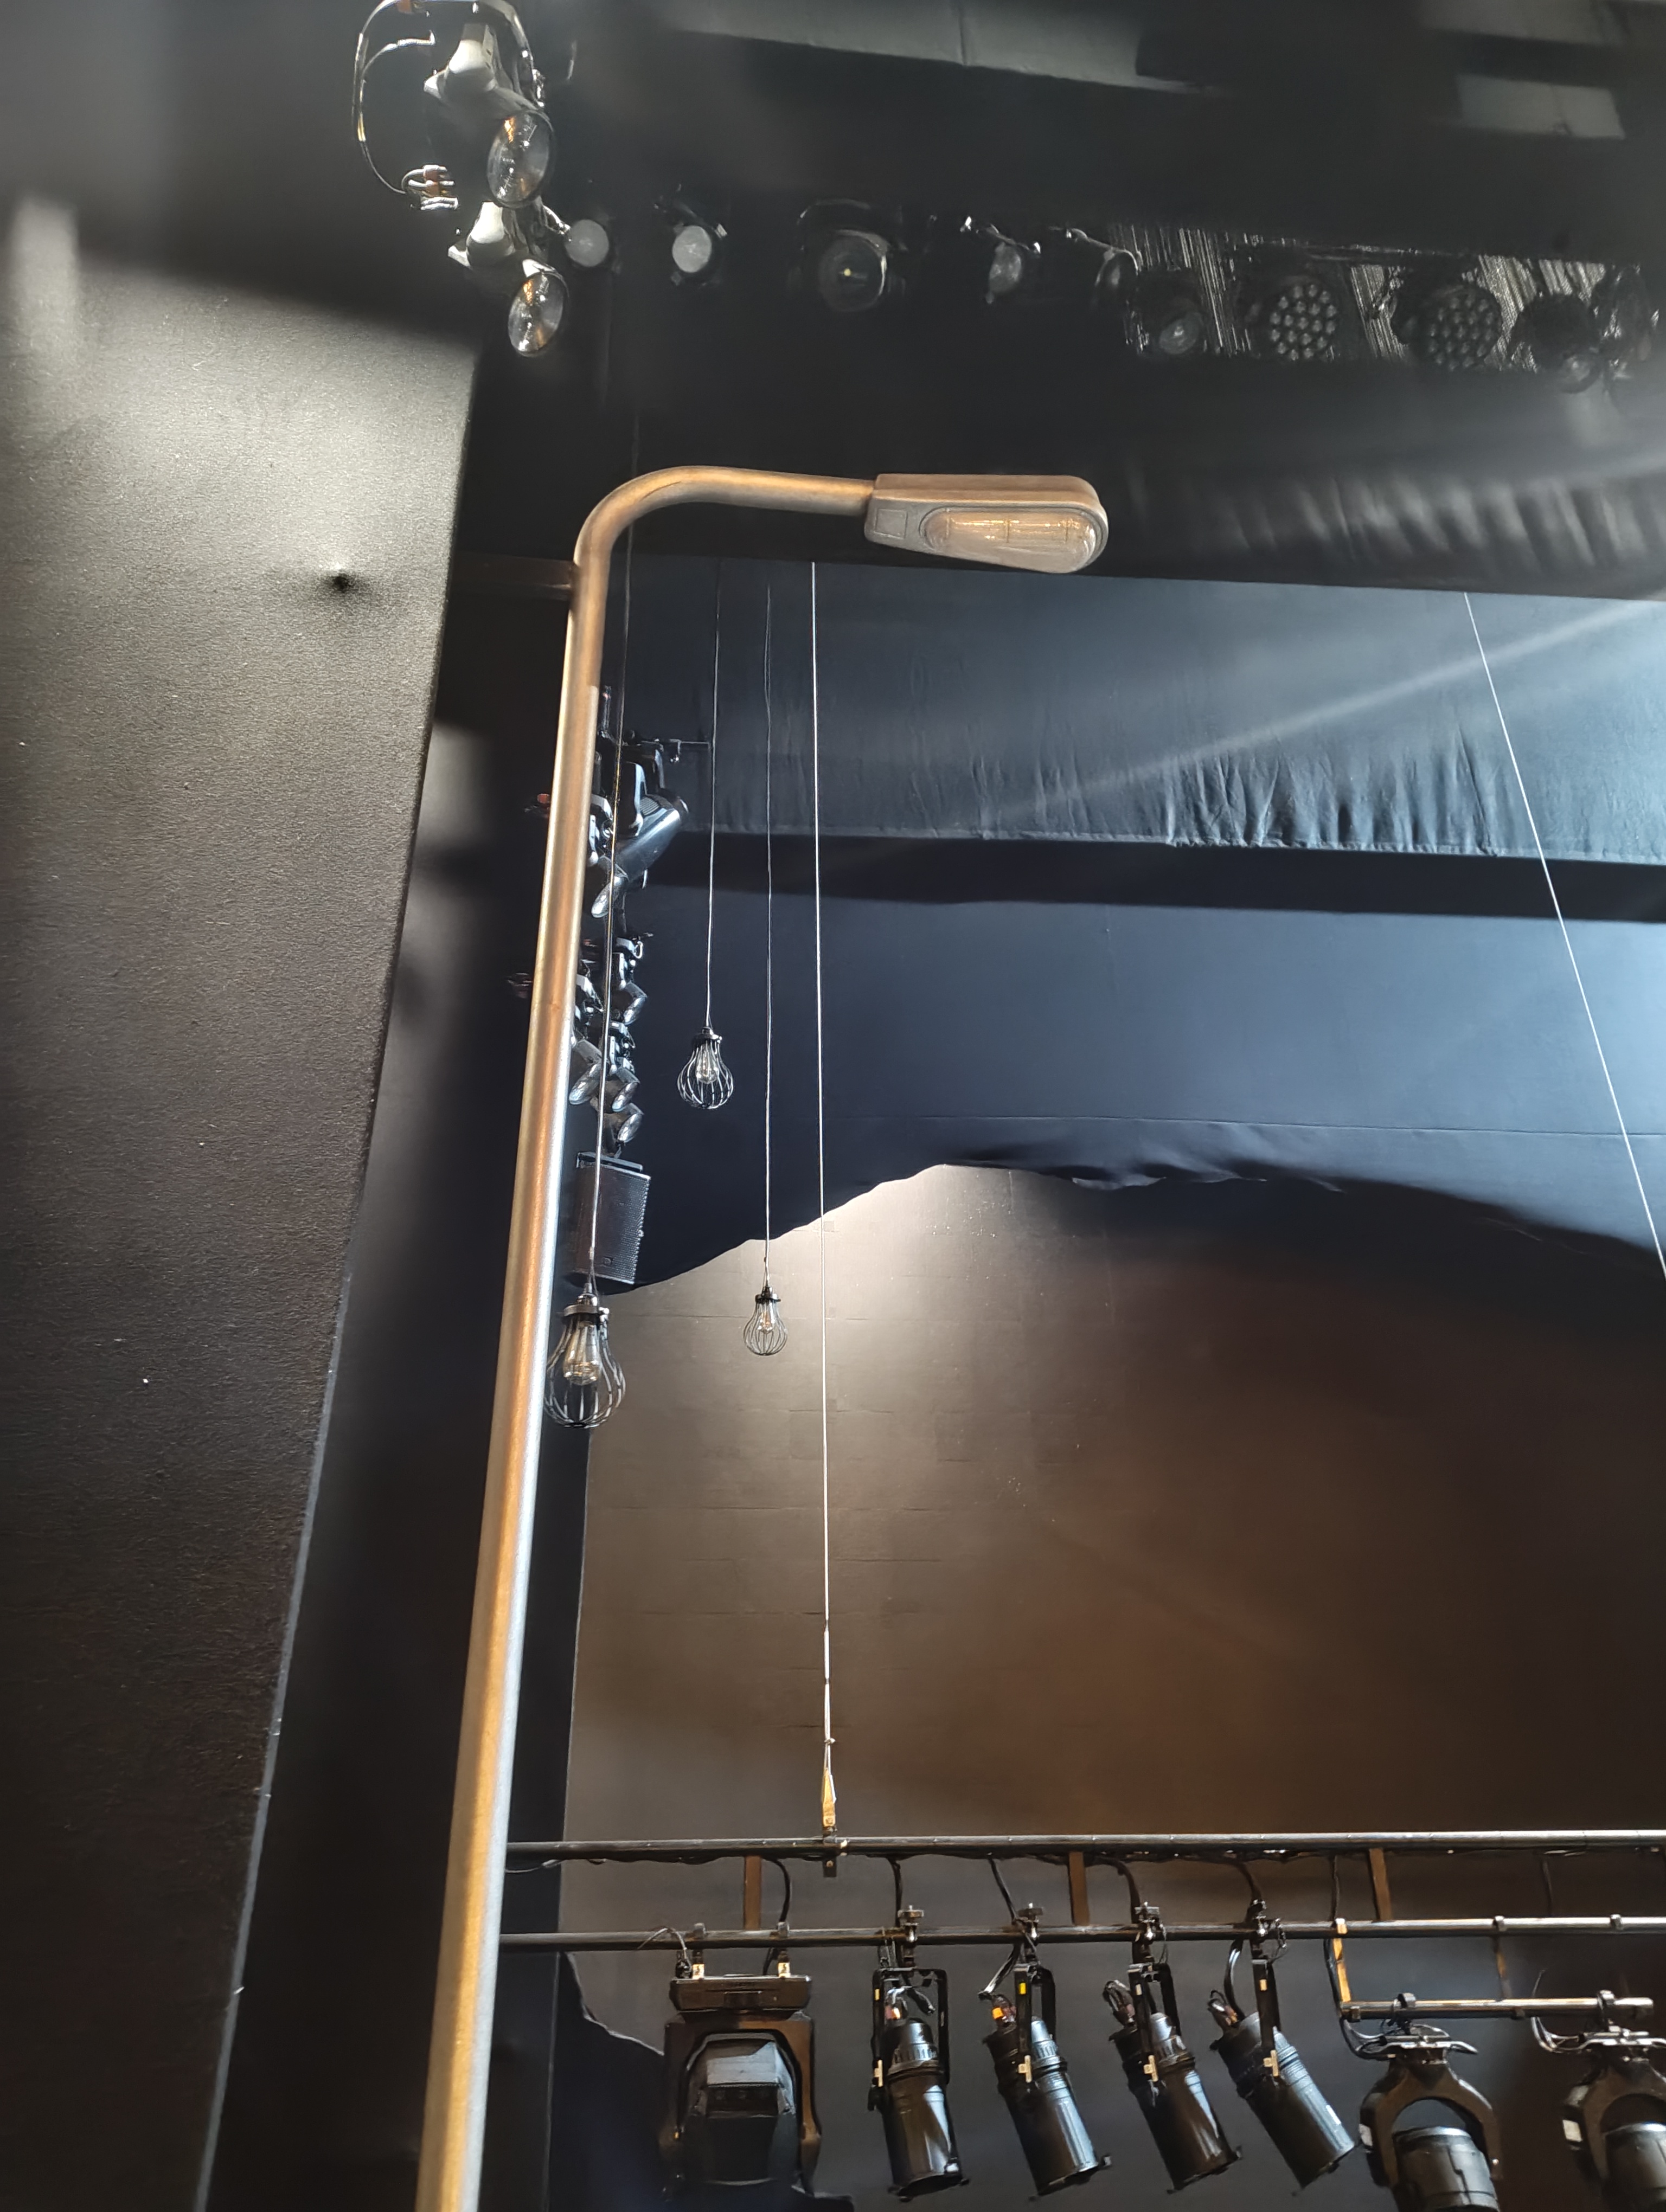
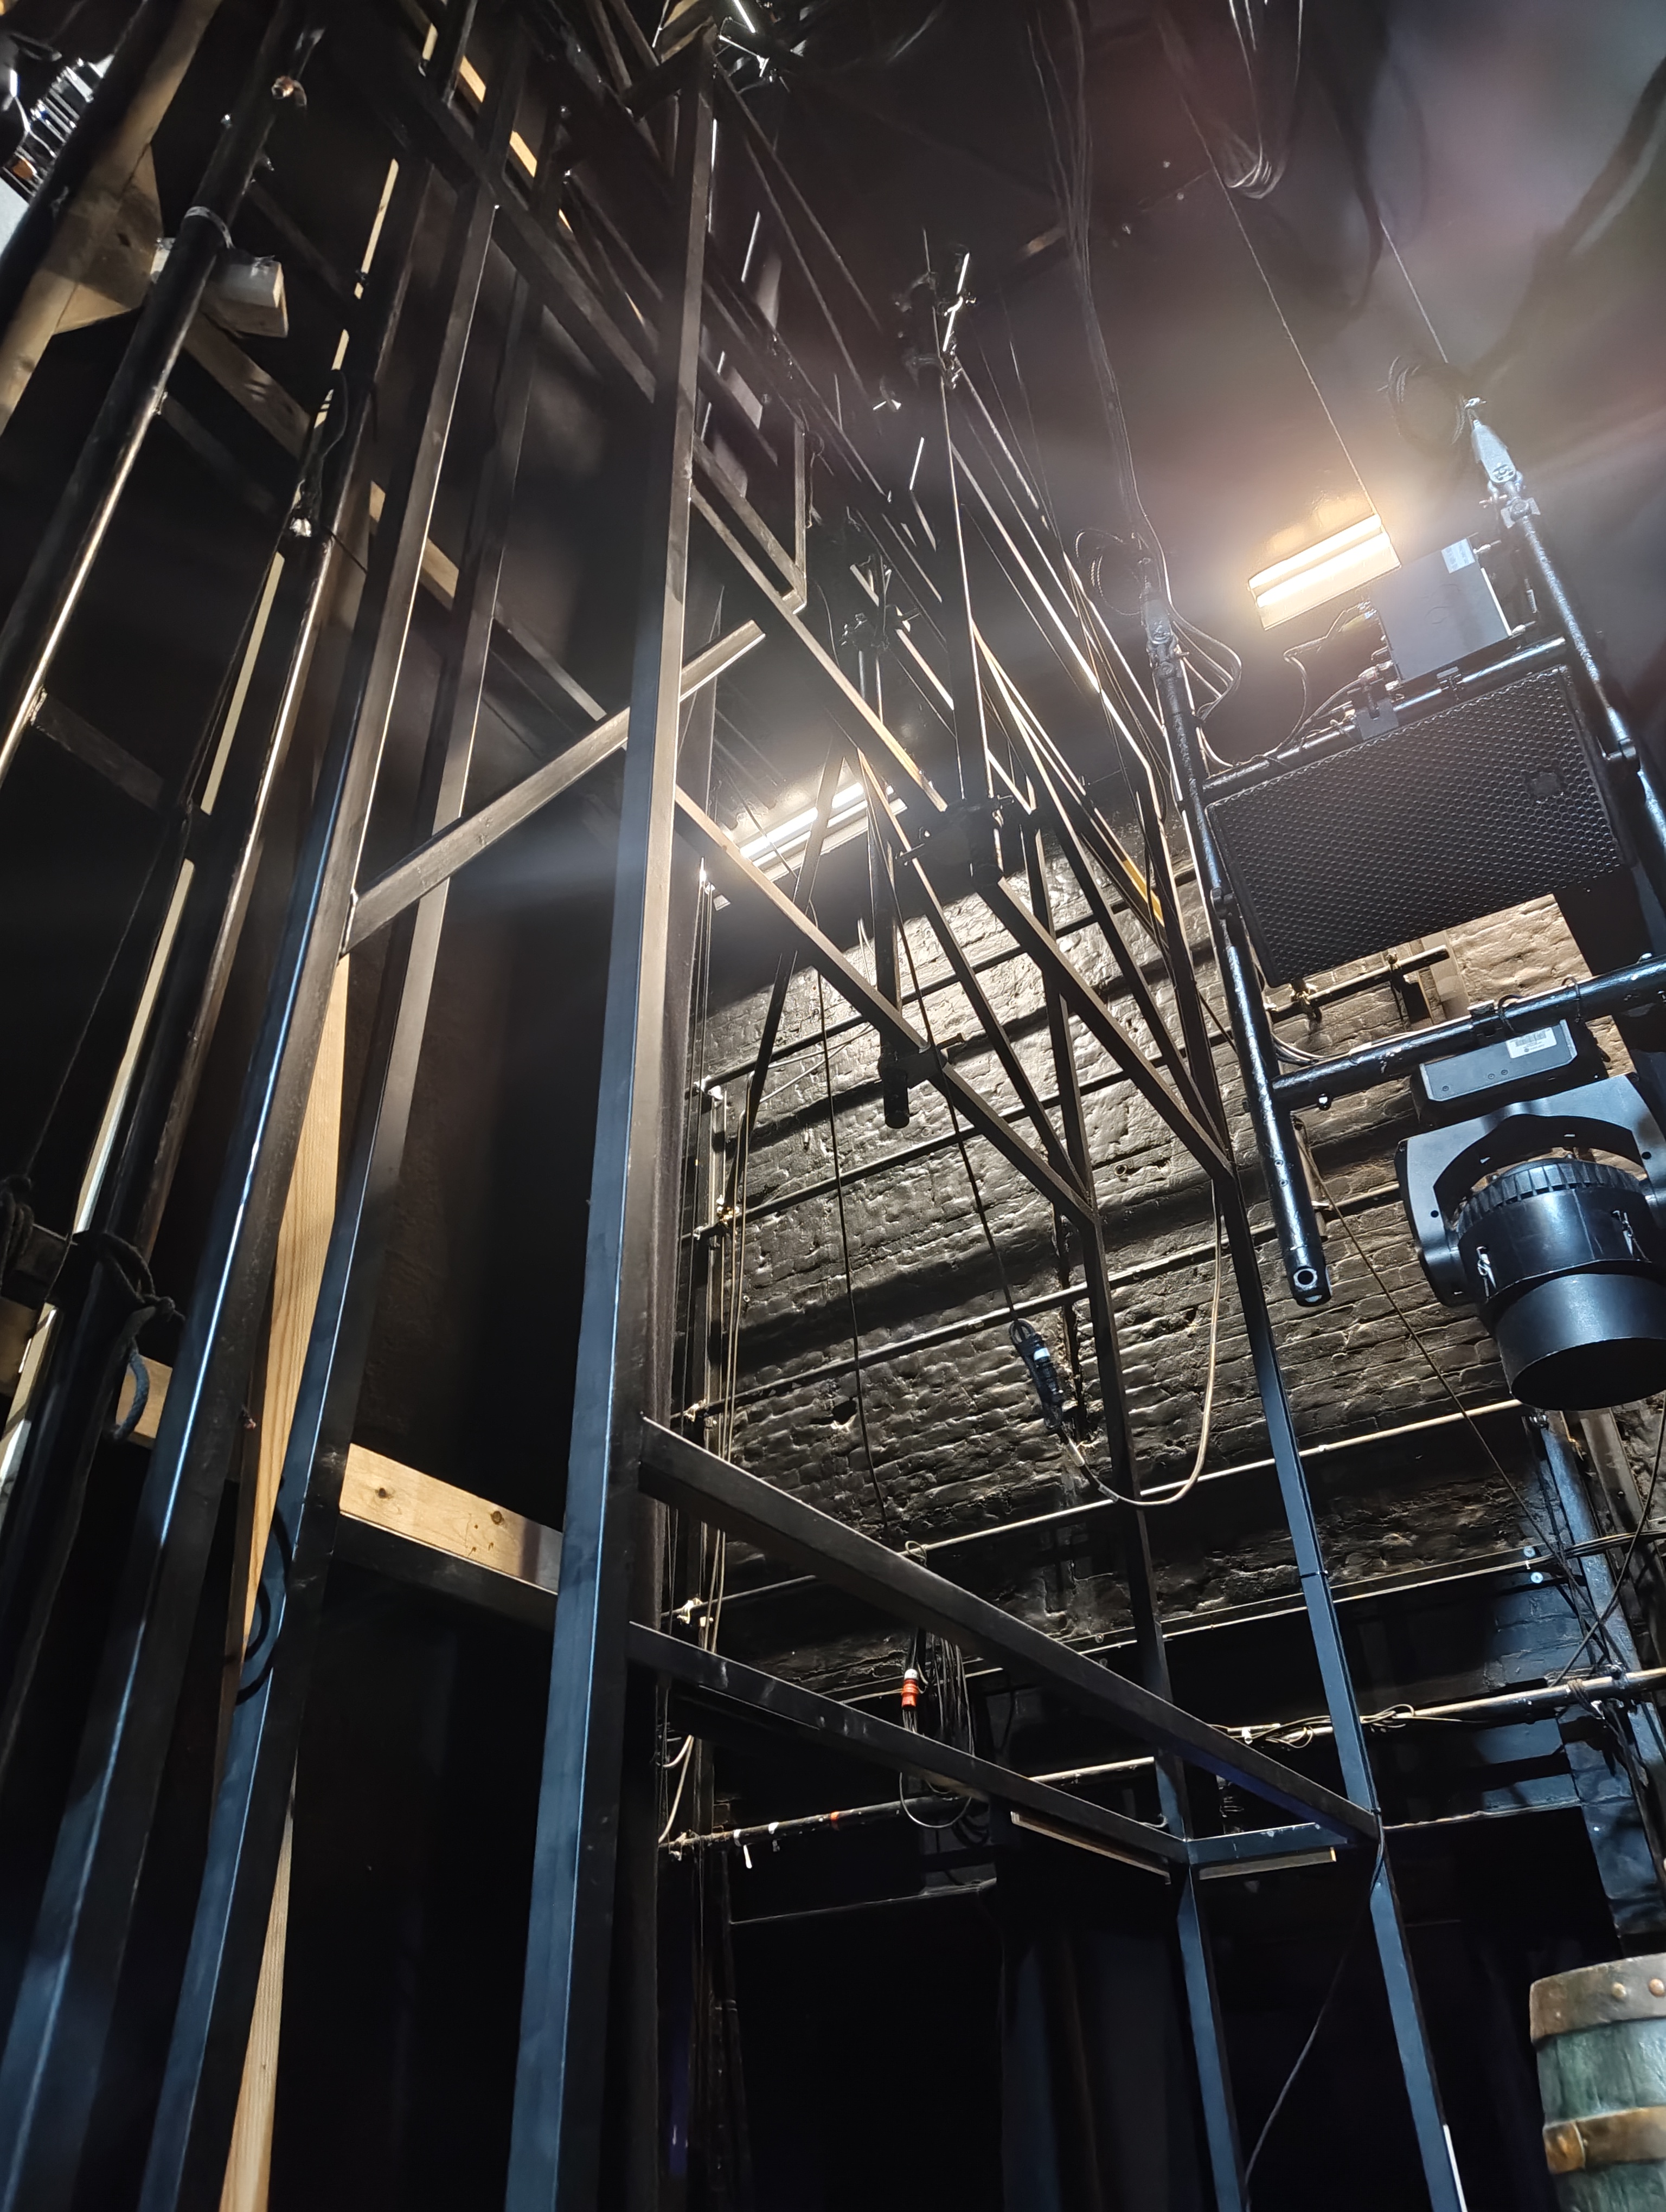
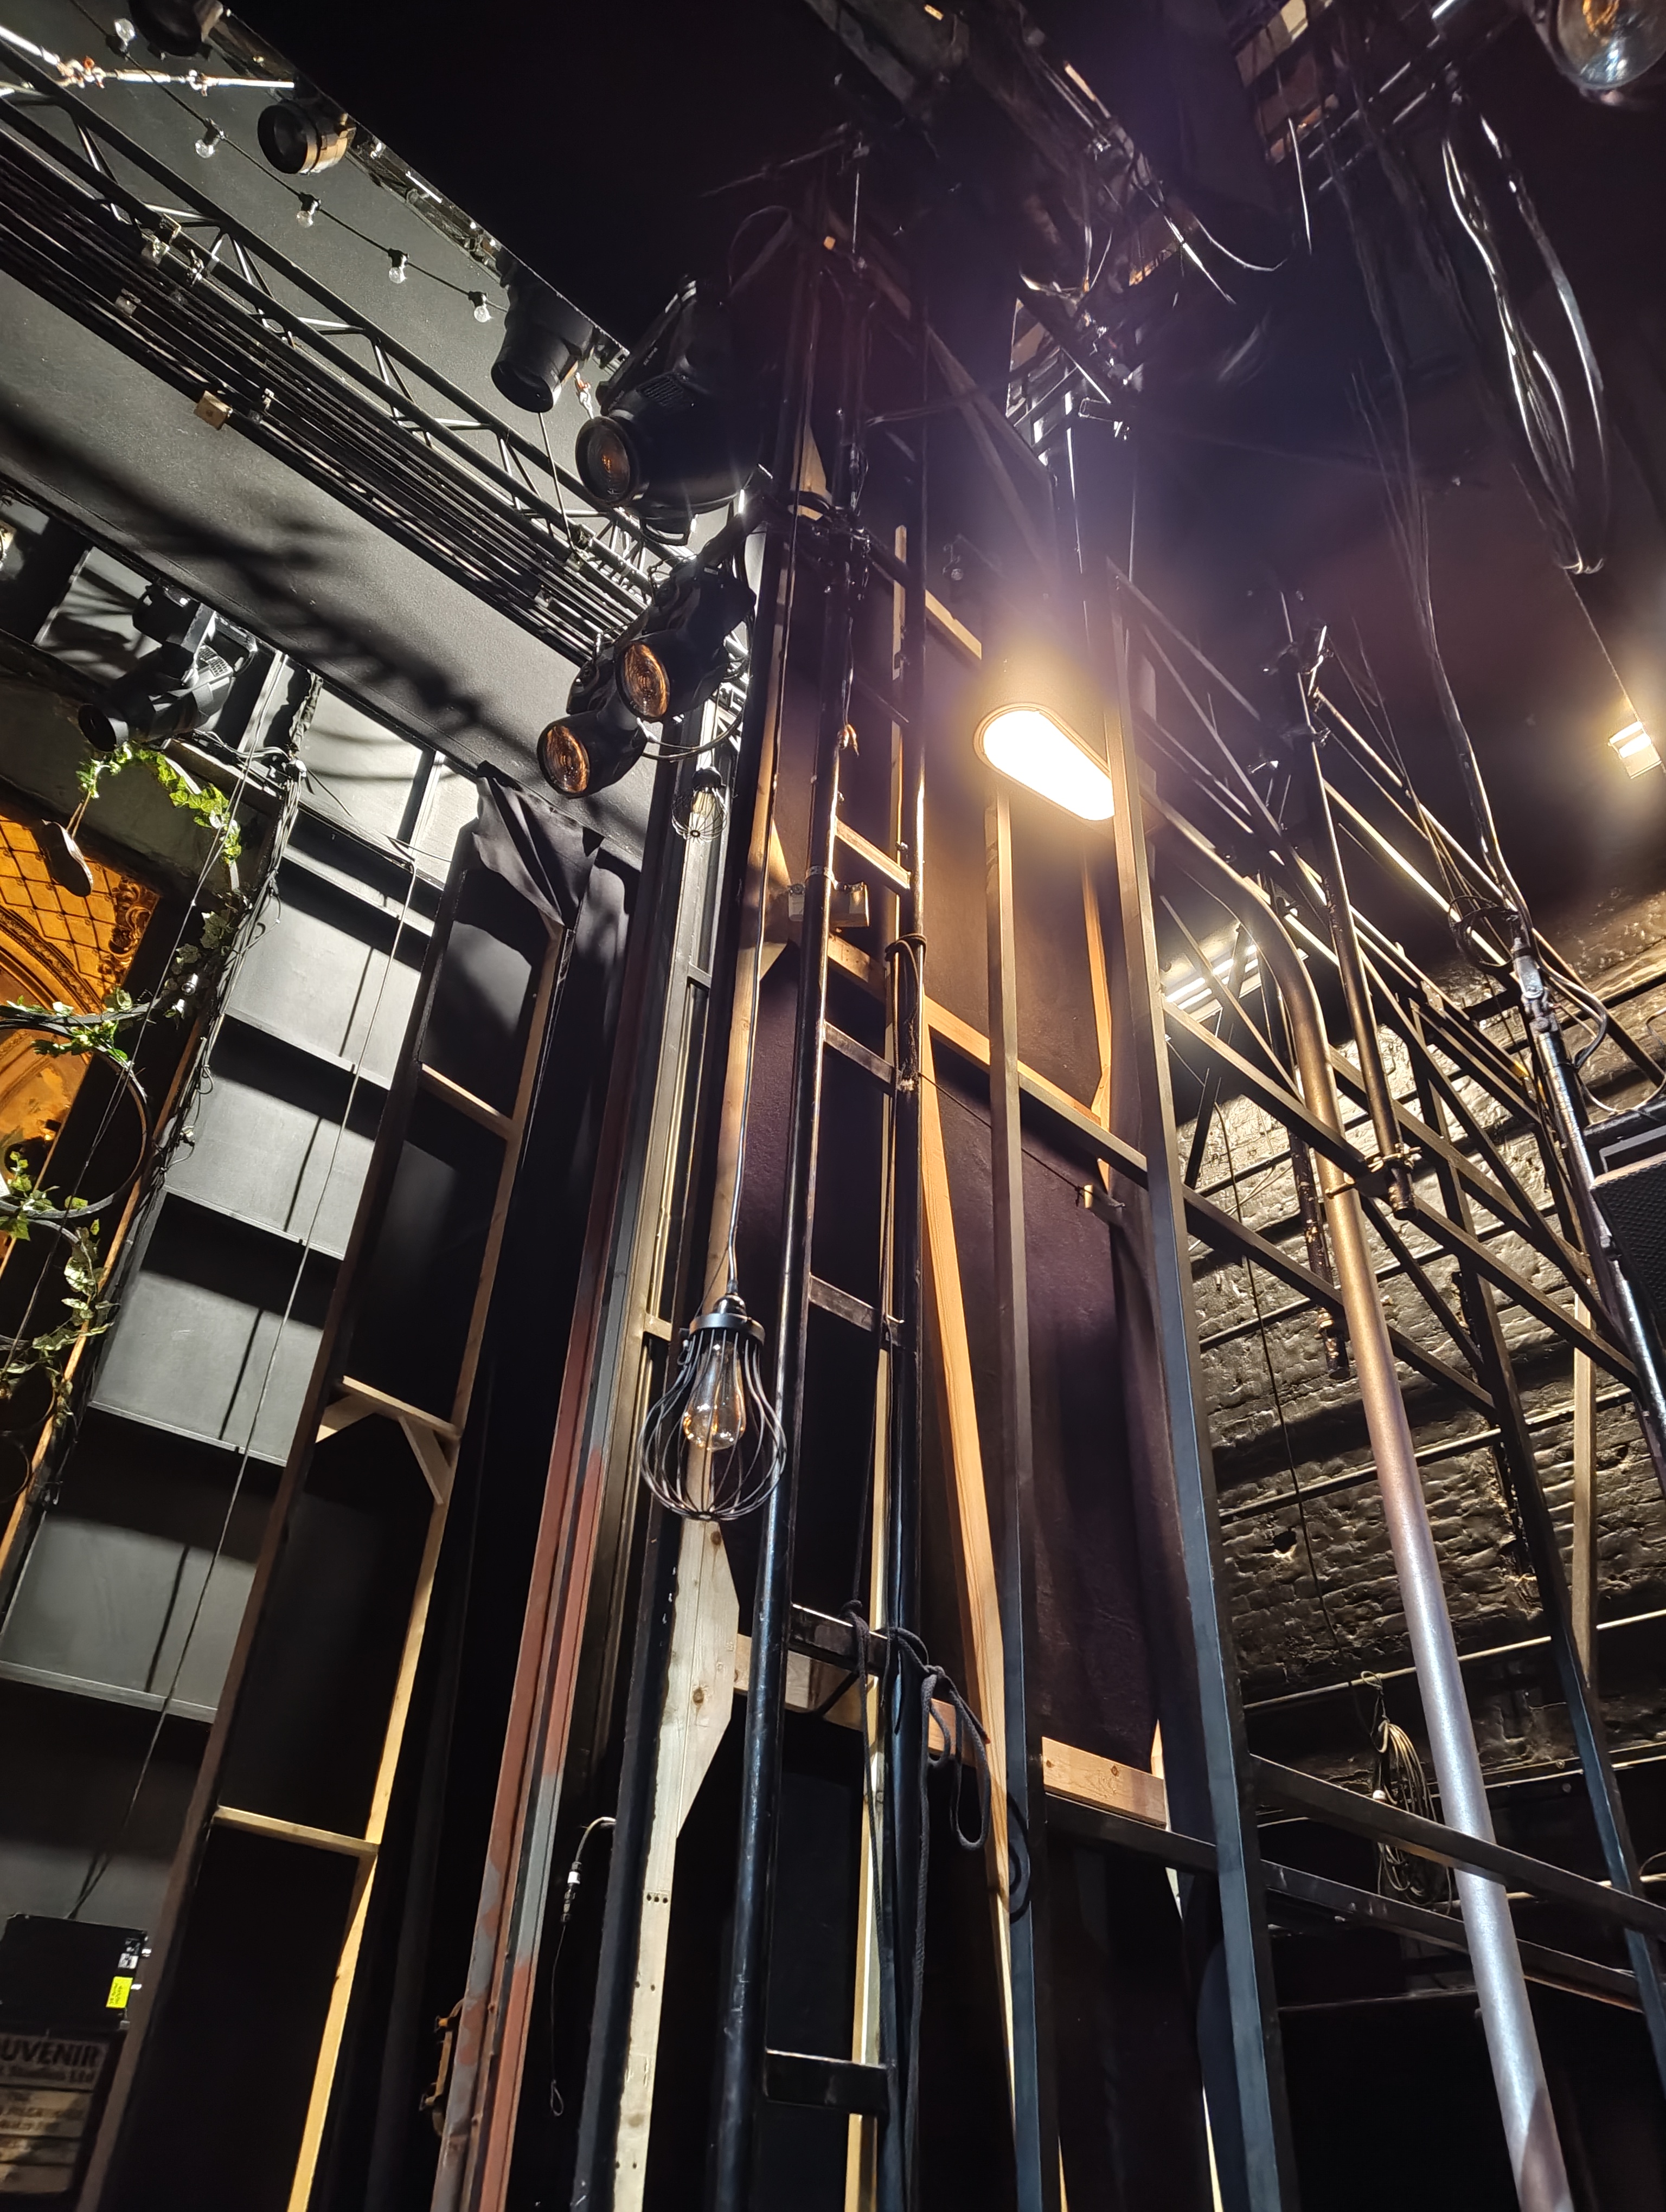
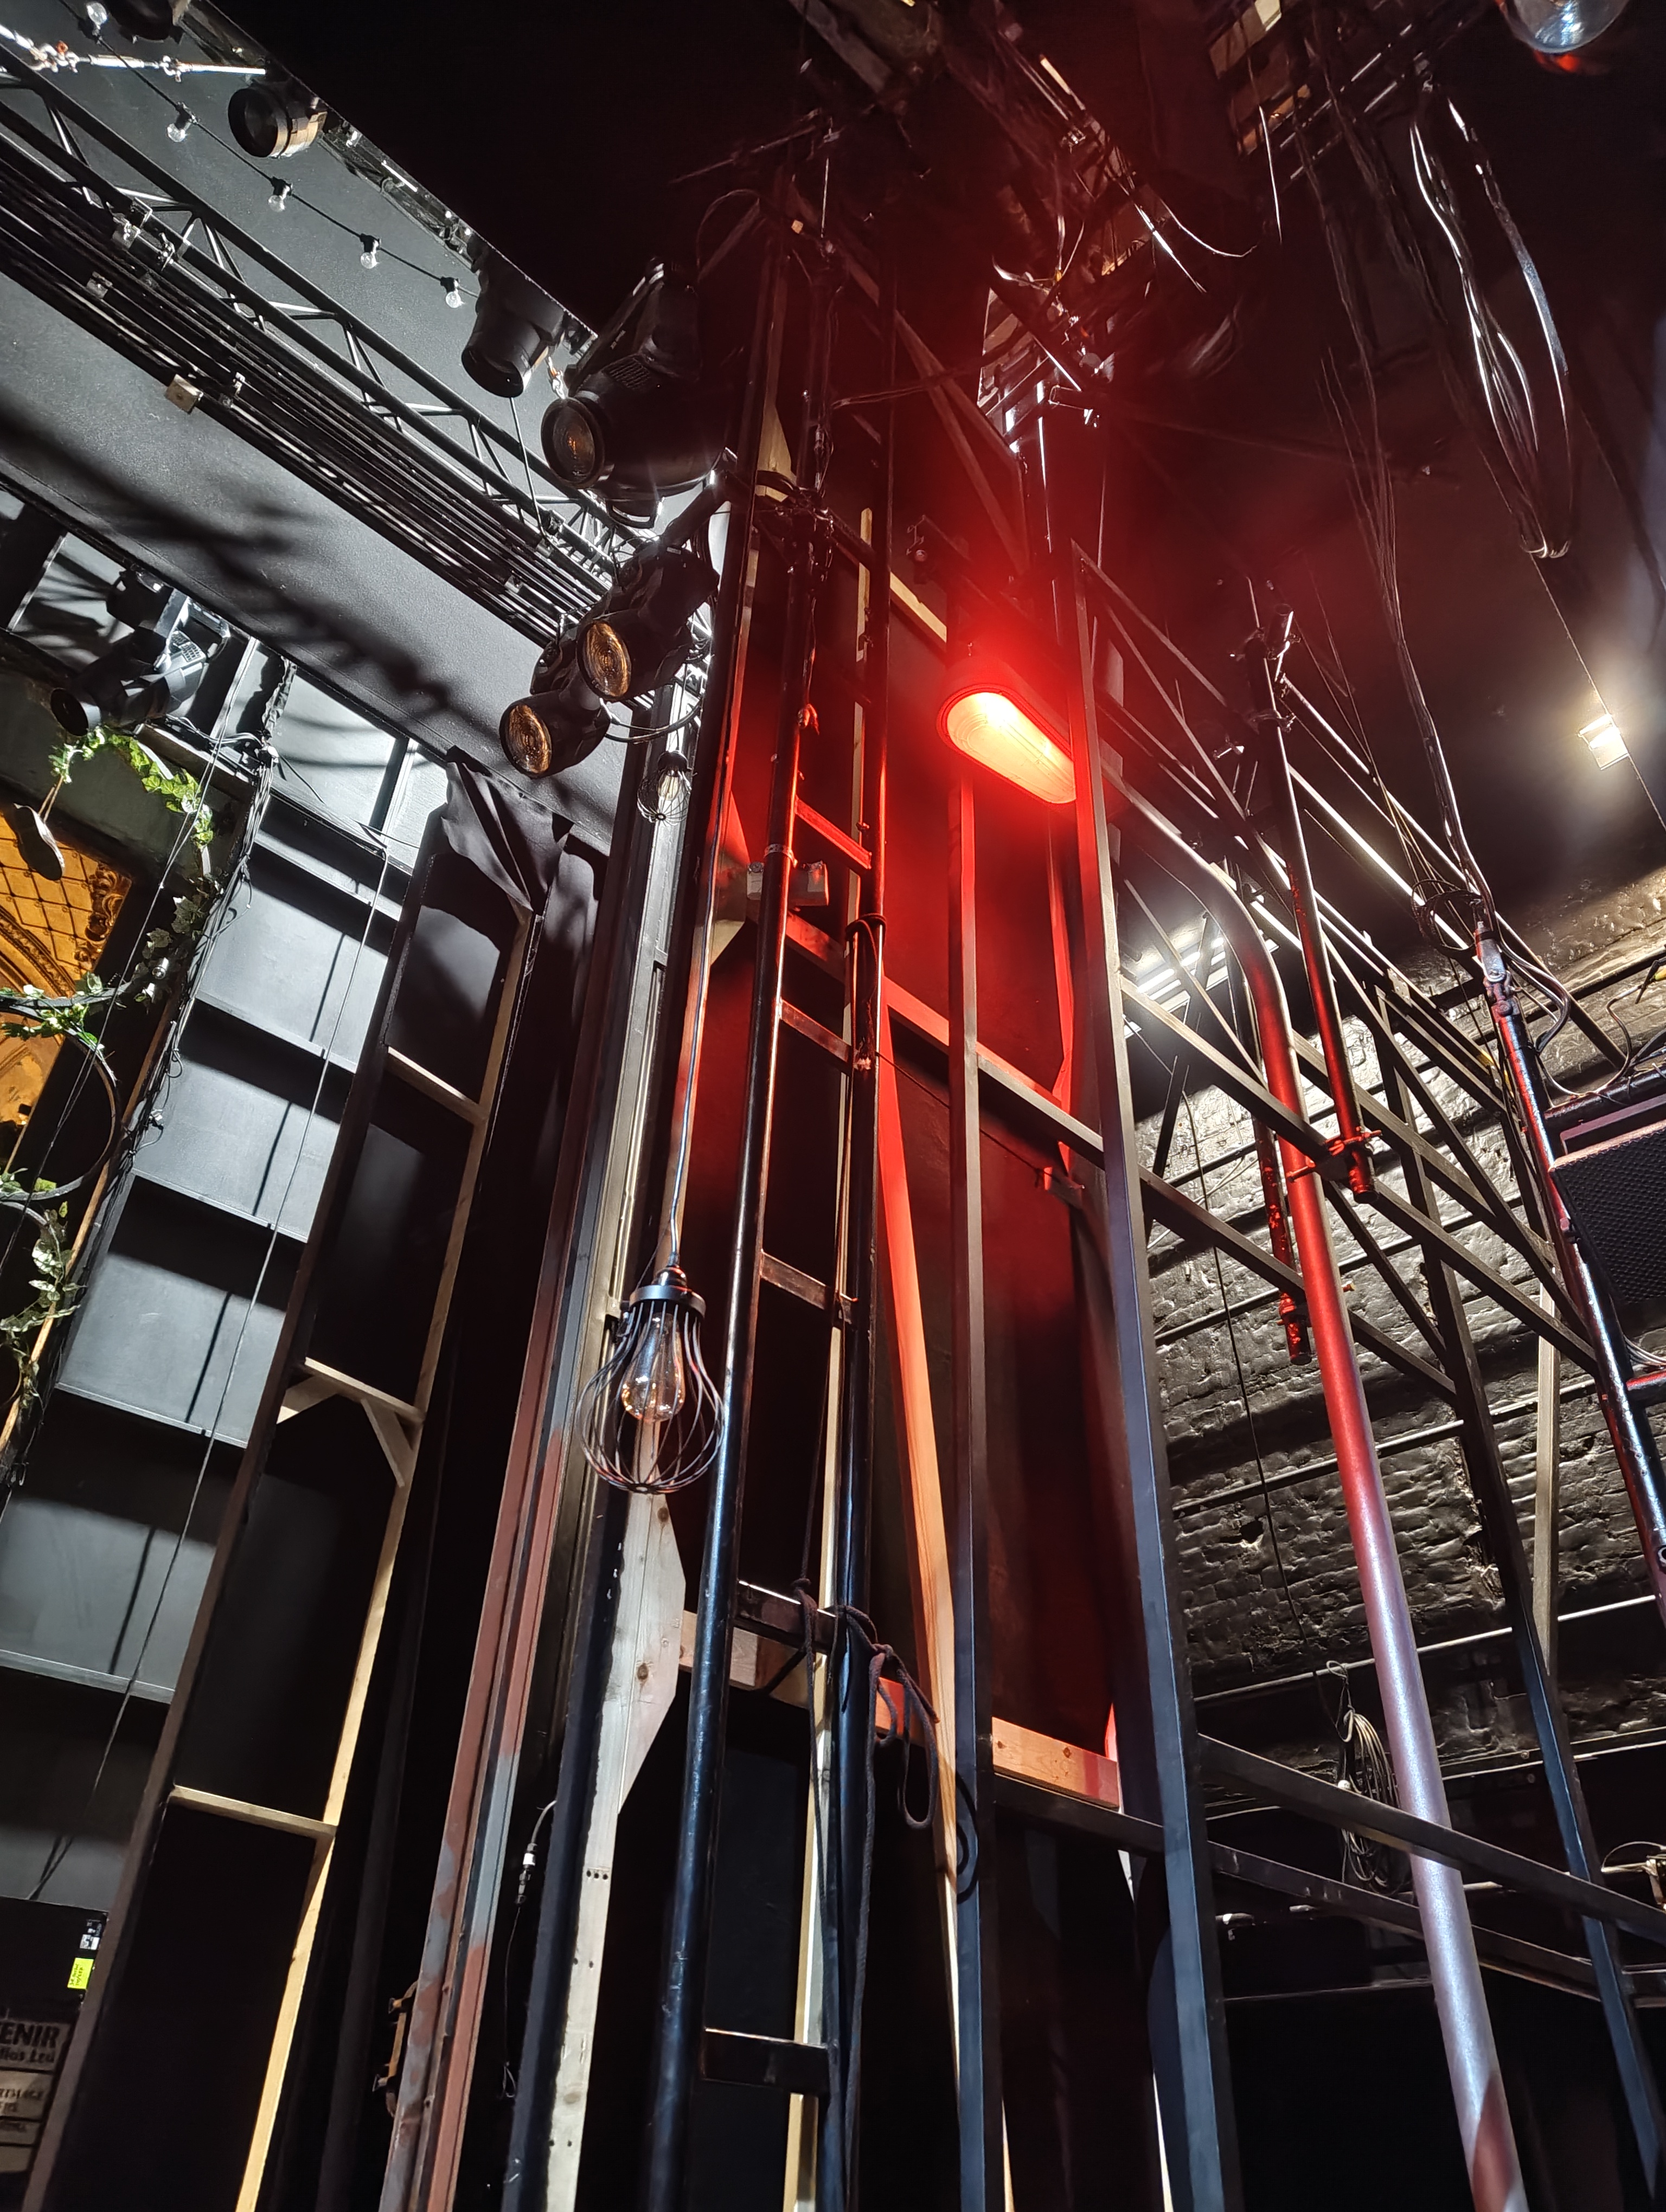
The Street Lamp is a full-size sliding street lamp in SR Bay 3. It is RGBW LED tape with a diffused cover, powered by an Electric Foundry EF1K LED Driver on the SR Fly Floor.
Channels & Addressing
- Channel: 761
- Fixture Type: LED RGBW 16B (Generic)
- Universe/Address: 12/321–328
- Parameters: Intensity, Red, Green, Blue, White (RGBW 16-bit)
Power & Control
| Power Source | SR Fly Floor |
| Driver / PSU | Electric Foundry EF1K - LED Driver |
| DMX Source | SR Fly Floor |
| Cable Type | 5 core cable drop |
Note
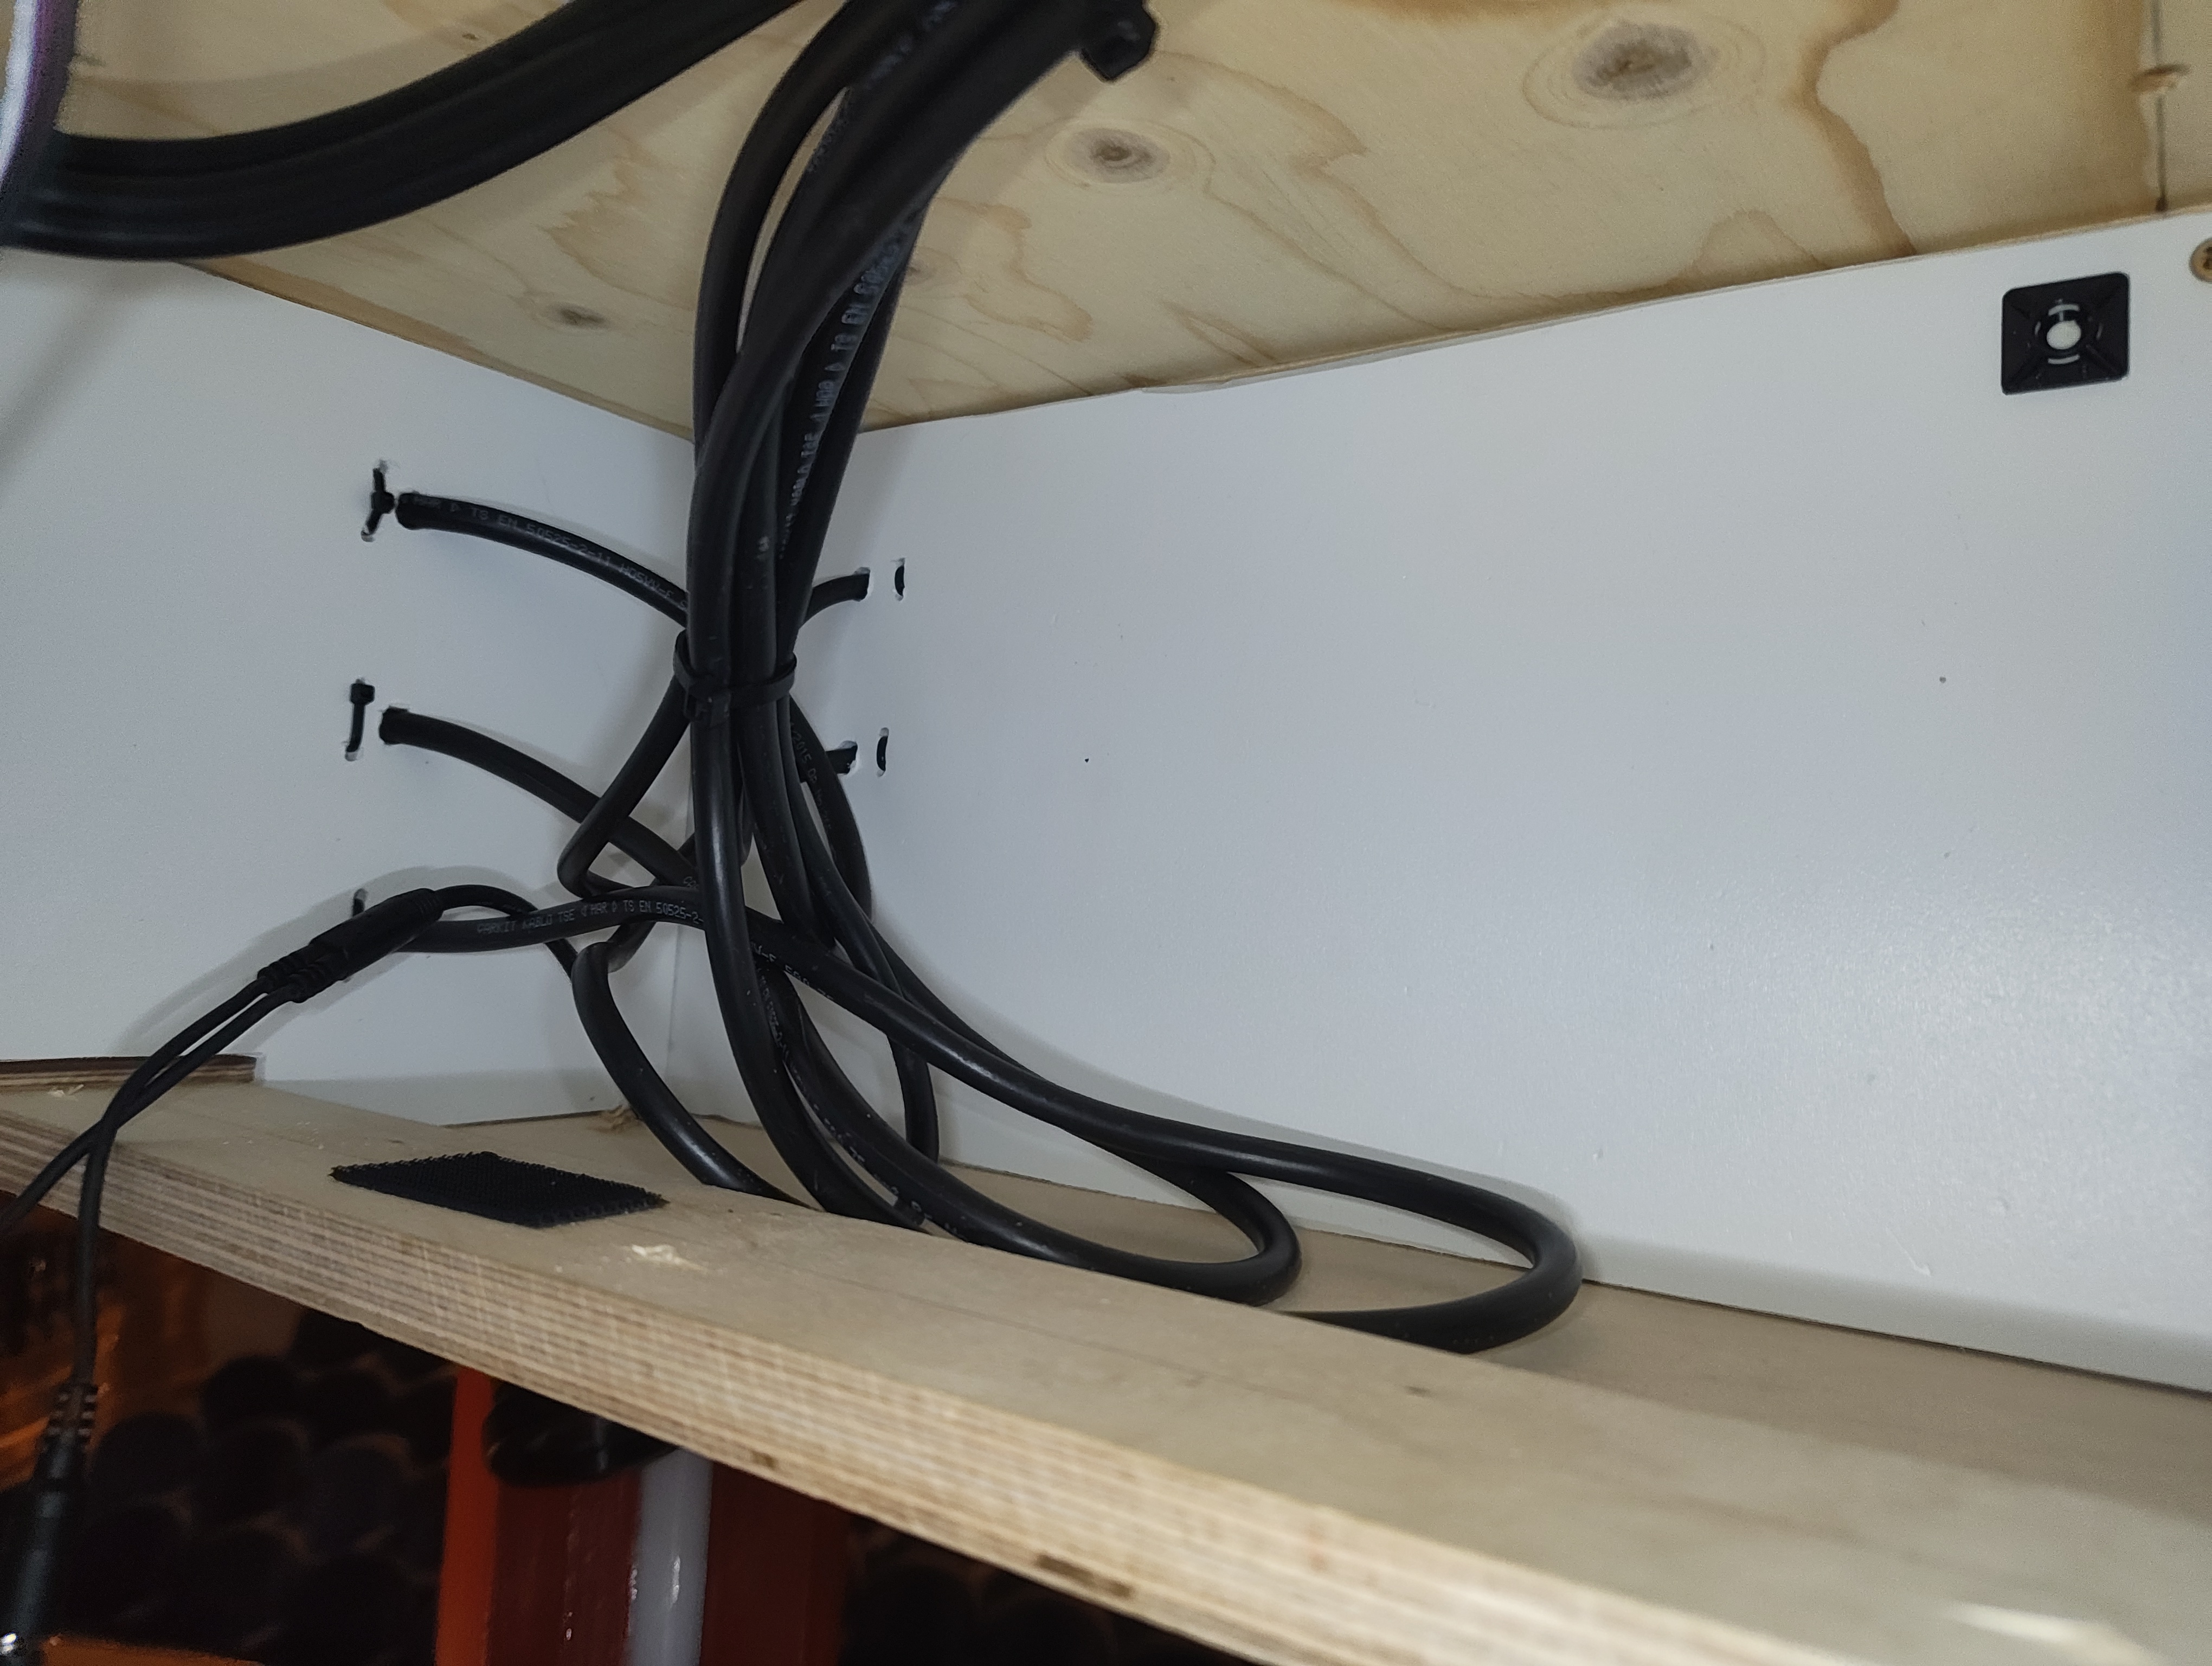
The drop of the 5 core cable has enough swag to allow the Street Lamp to be slid all the way on stage in its gantry.
Images
Key Views
All Reference Photos (click to expand)
Usage
The Street Lamp is used in multiple scenes throughout the show, usually in a static warm white colour.
Scenes
- Campsite — pulled off before the storm
- Various other scenes
PDFs & Manuals
Brewery Bulkheads
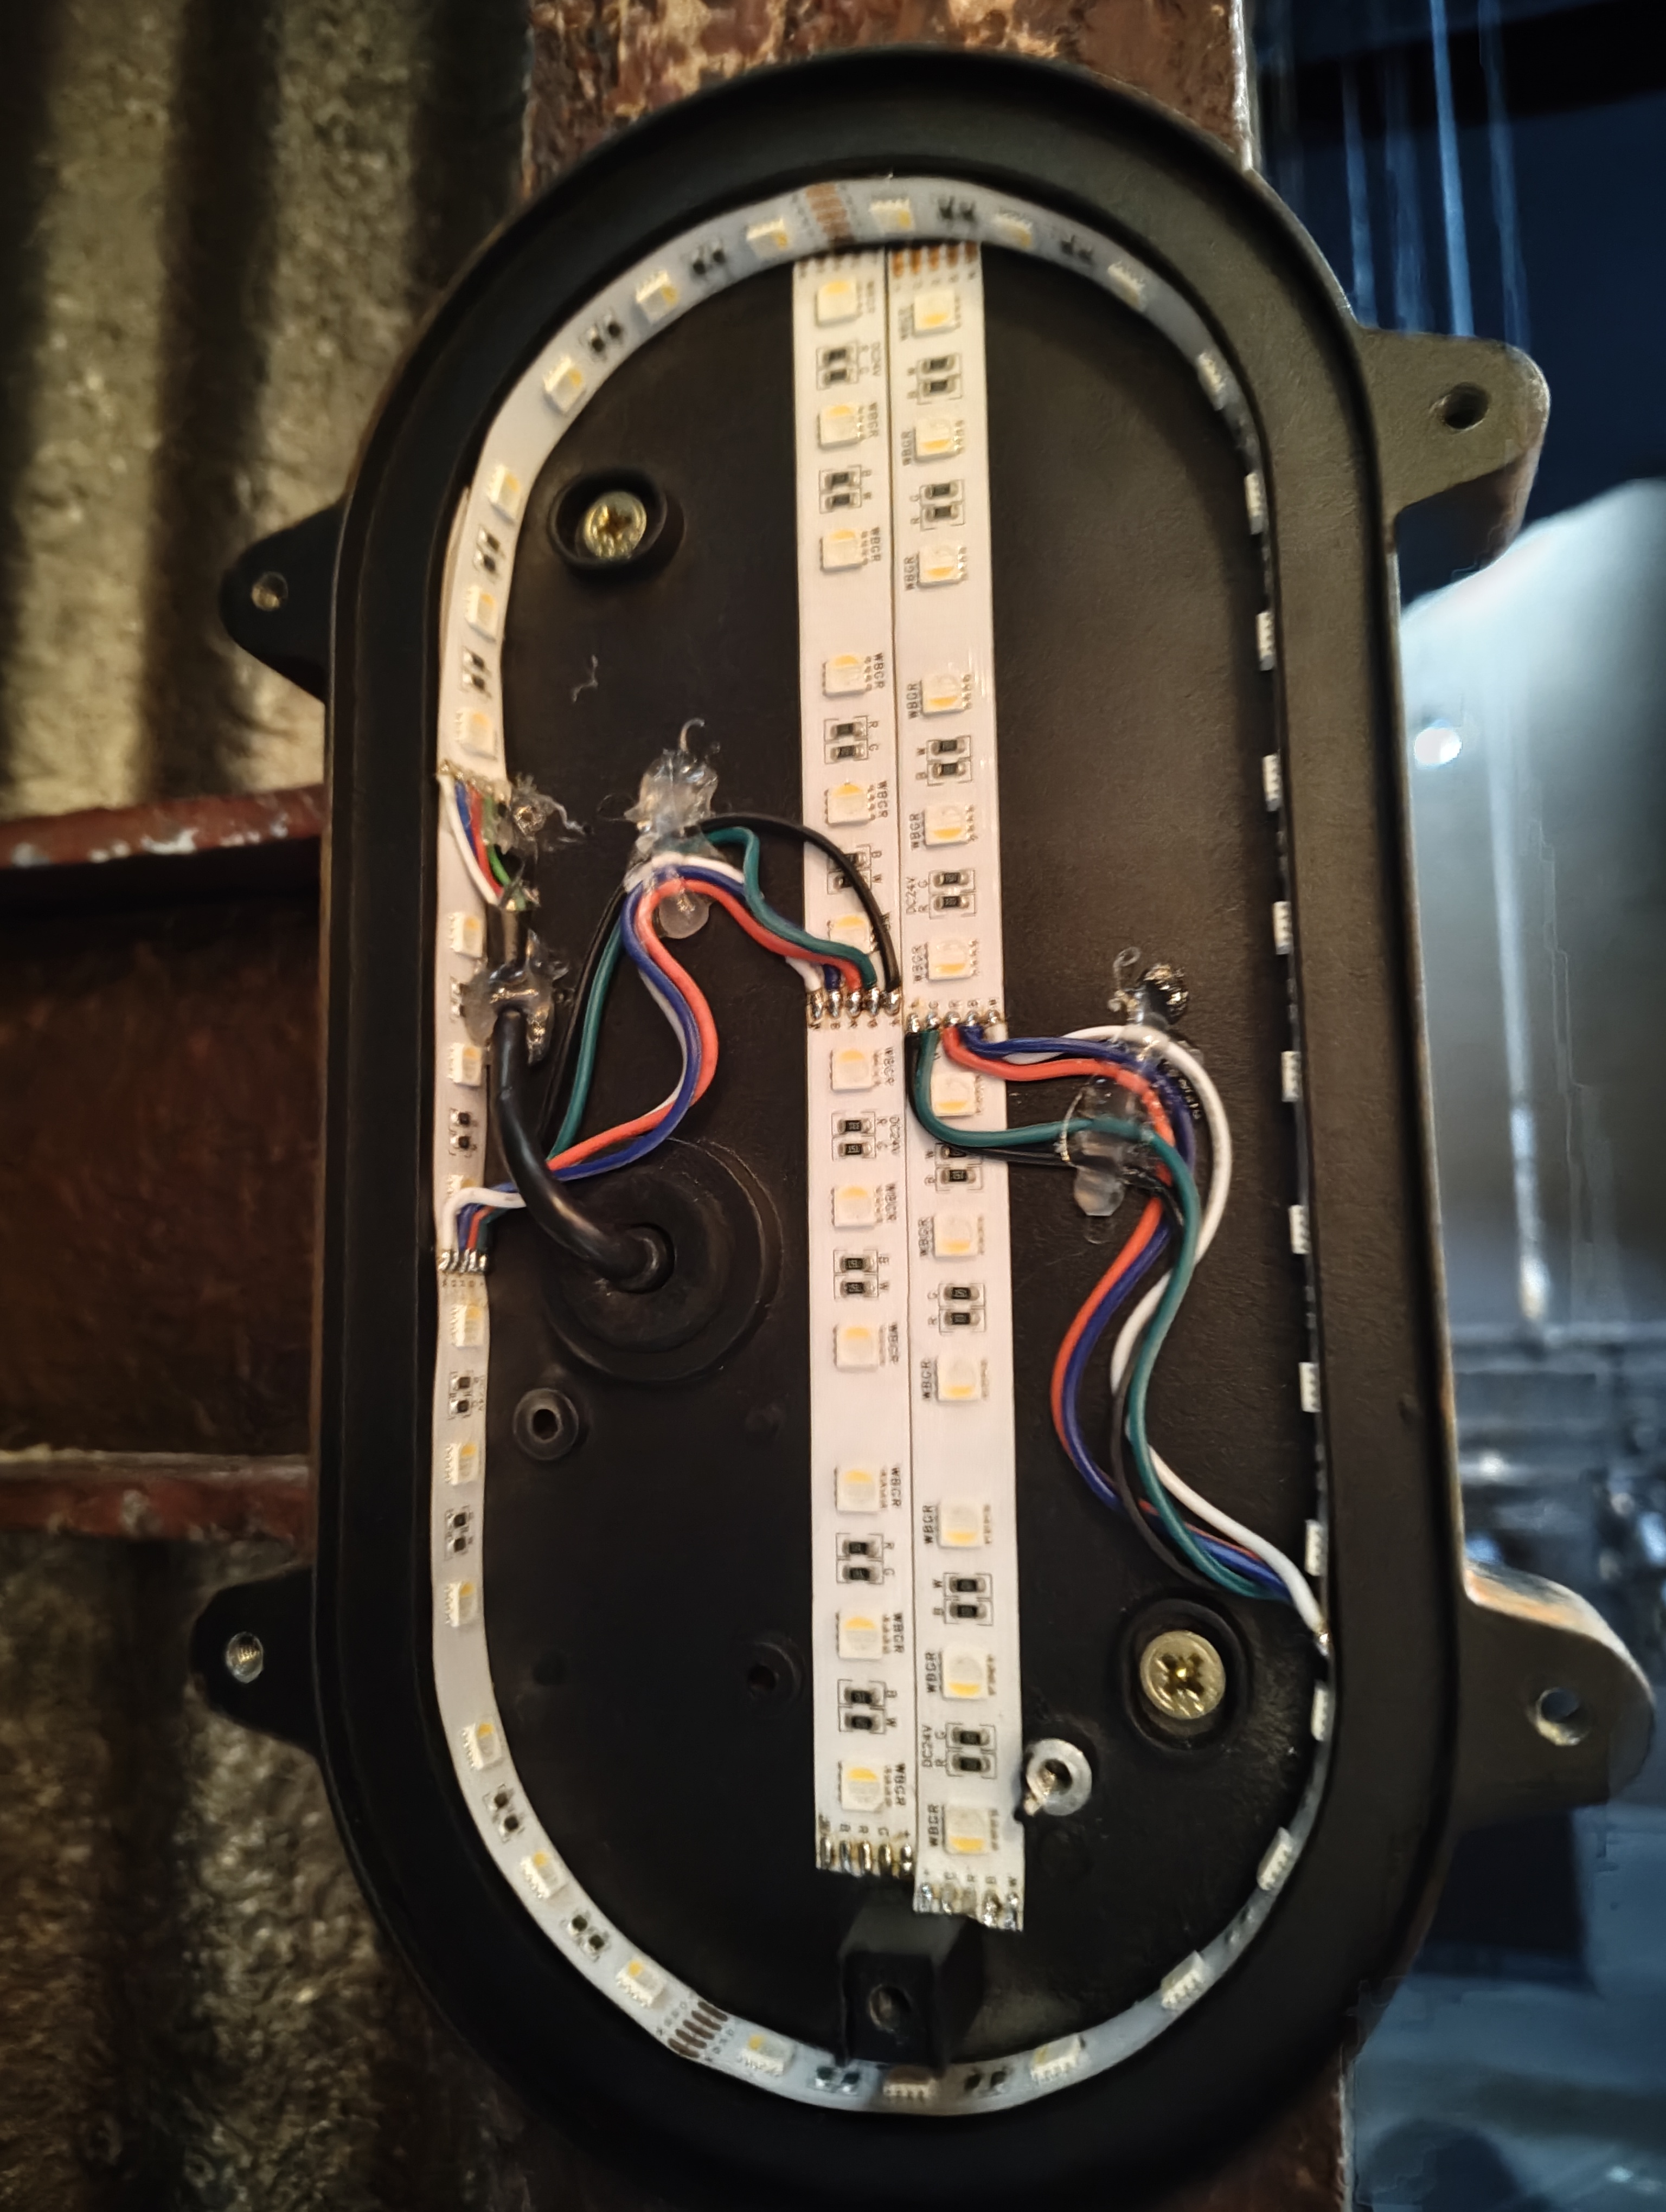
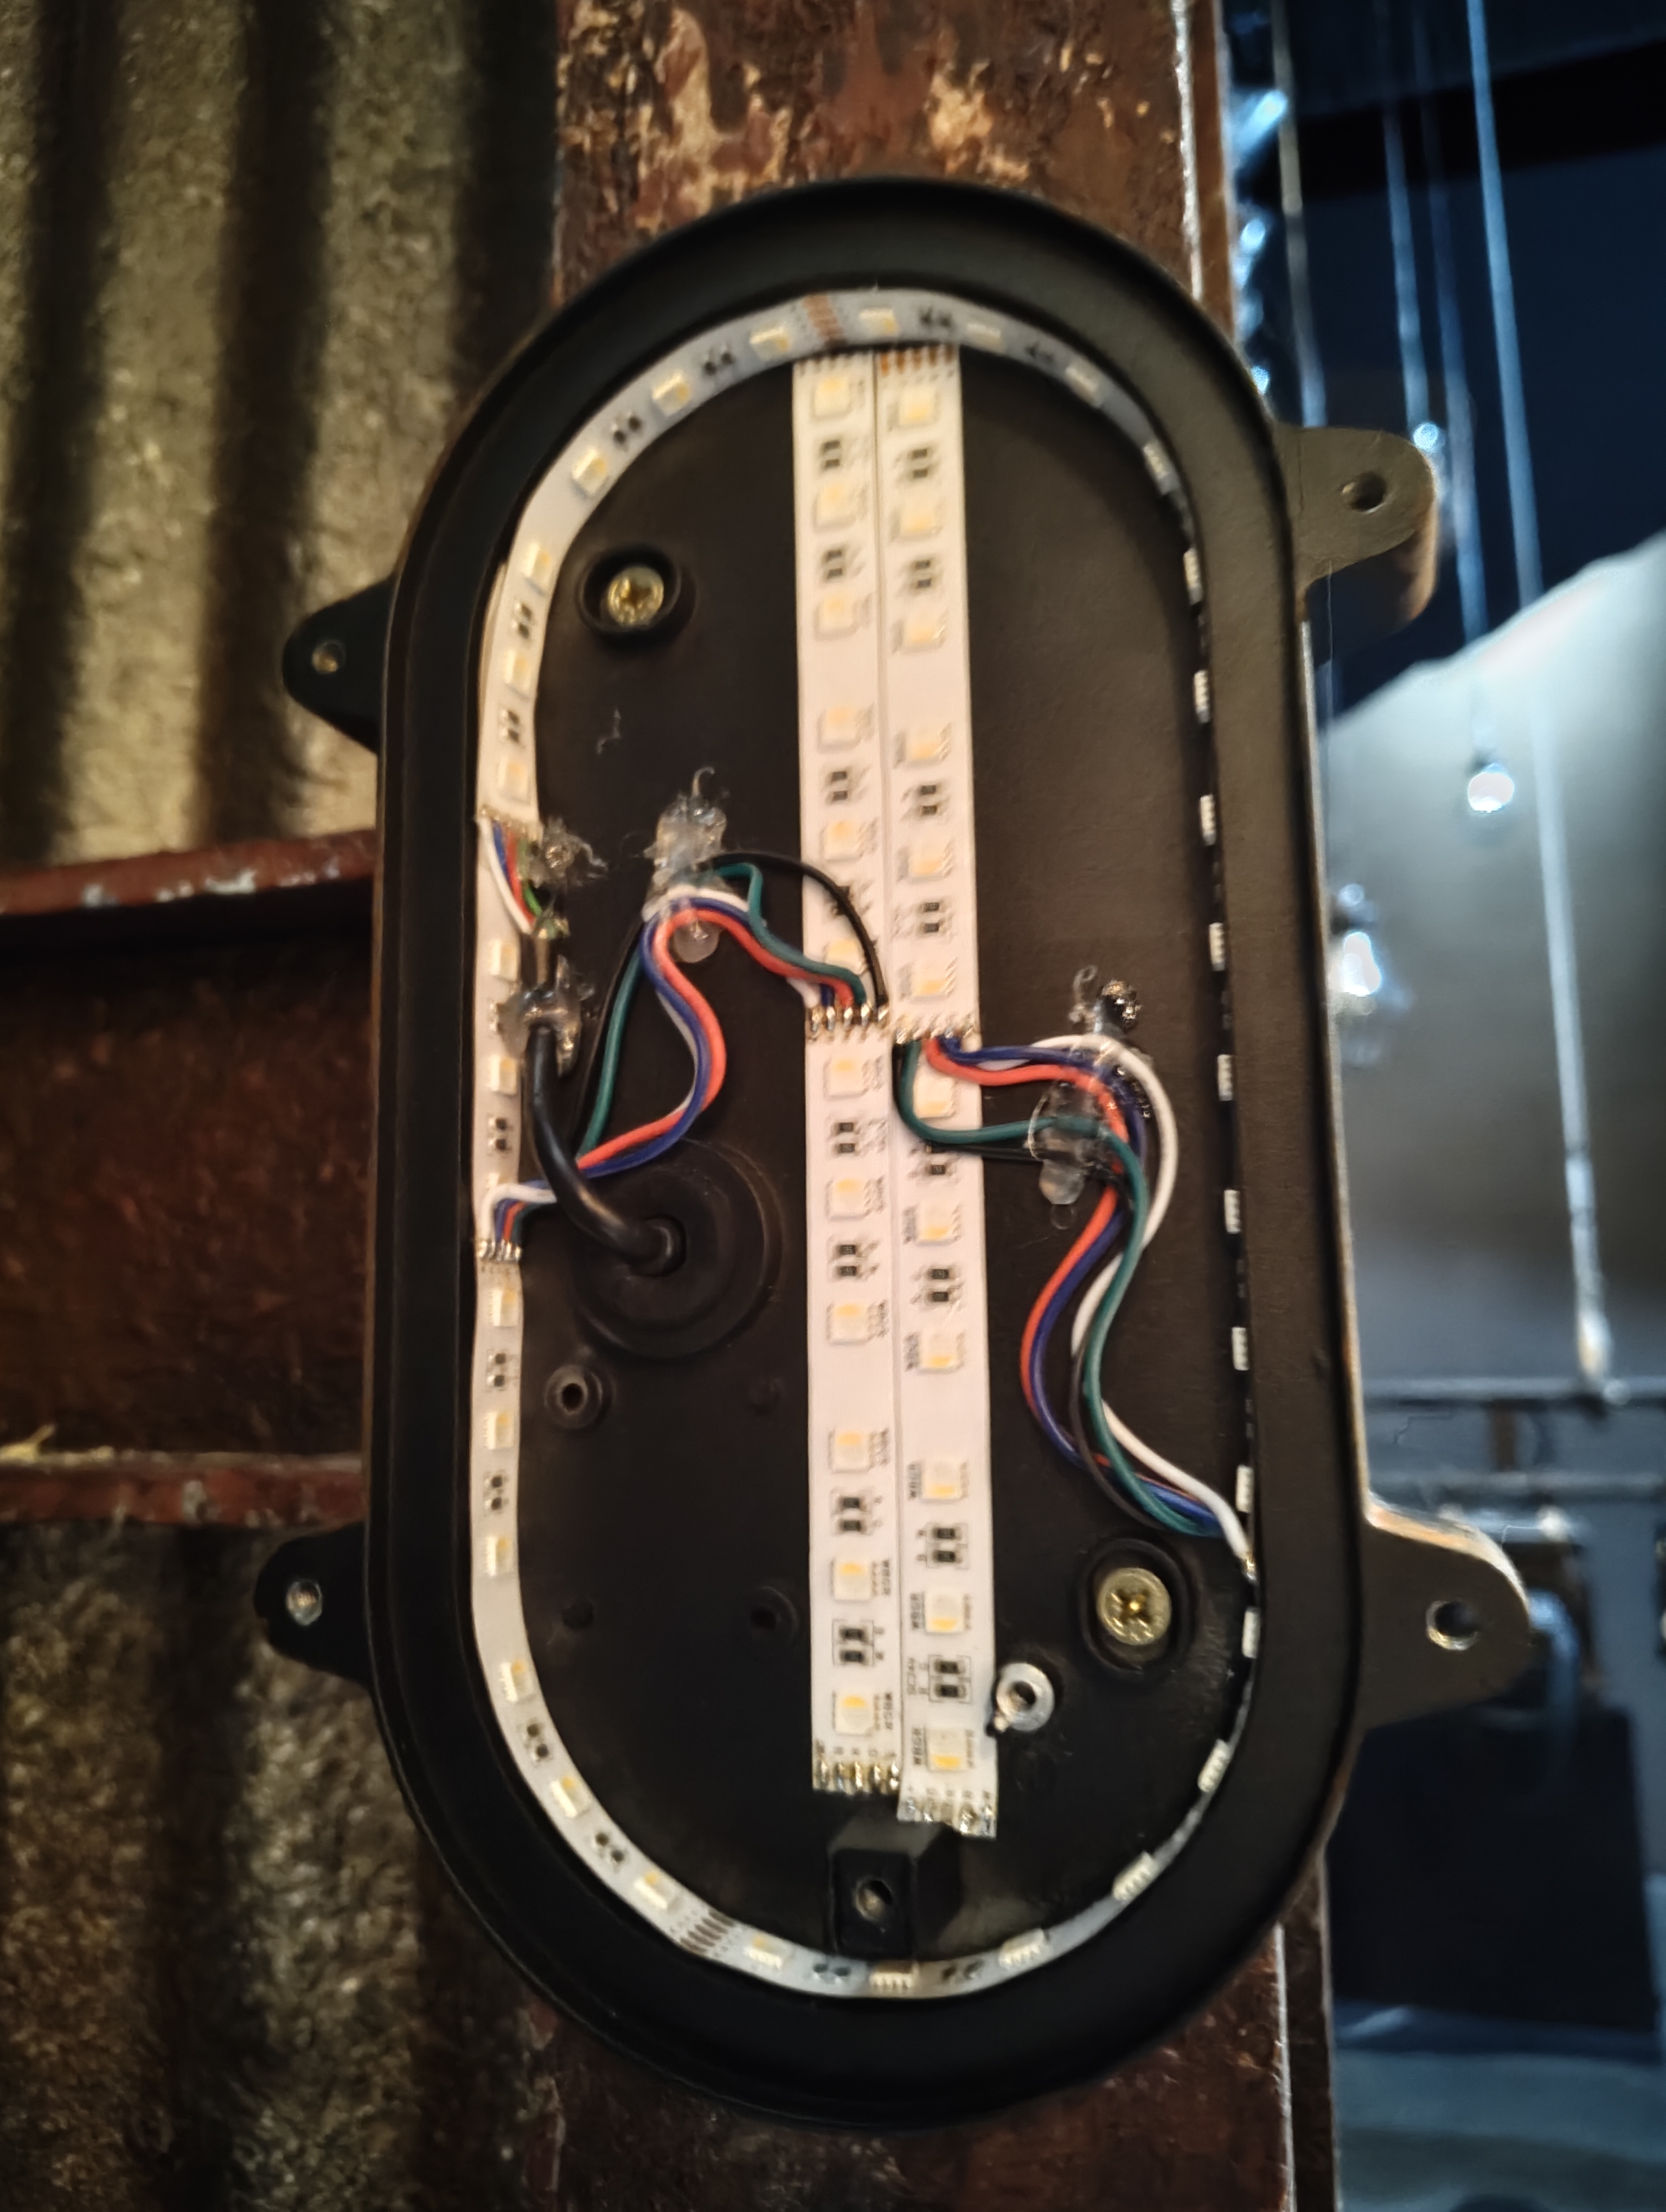
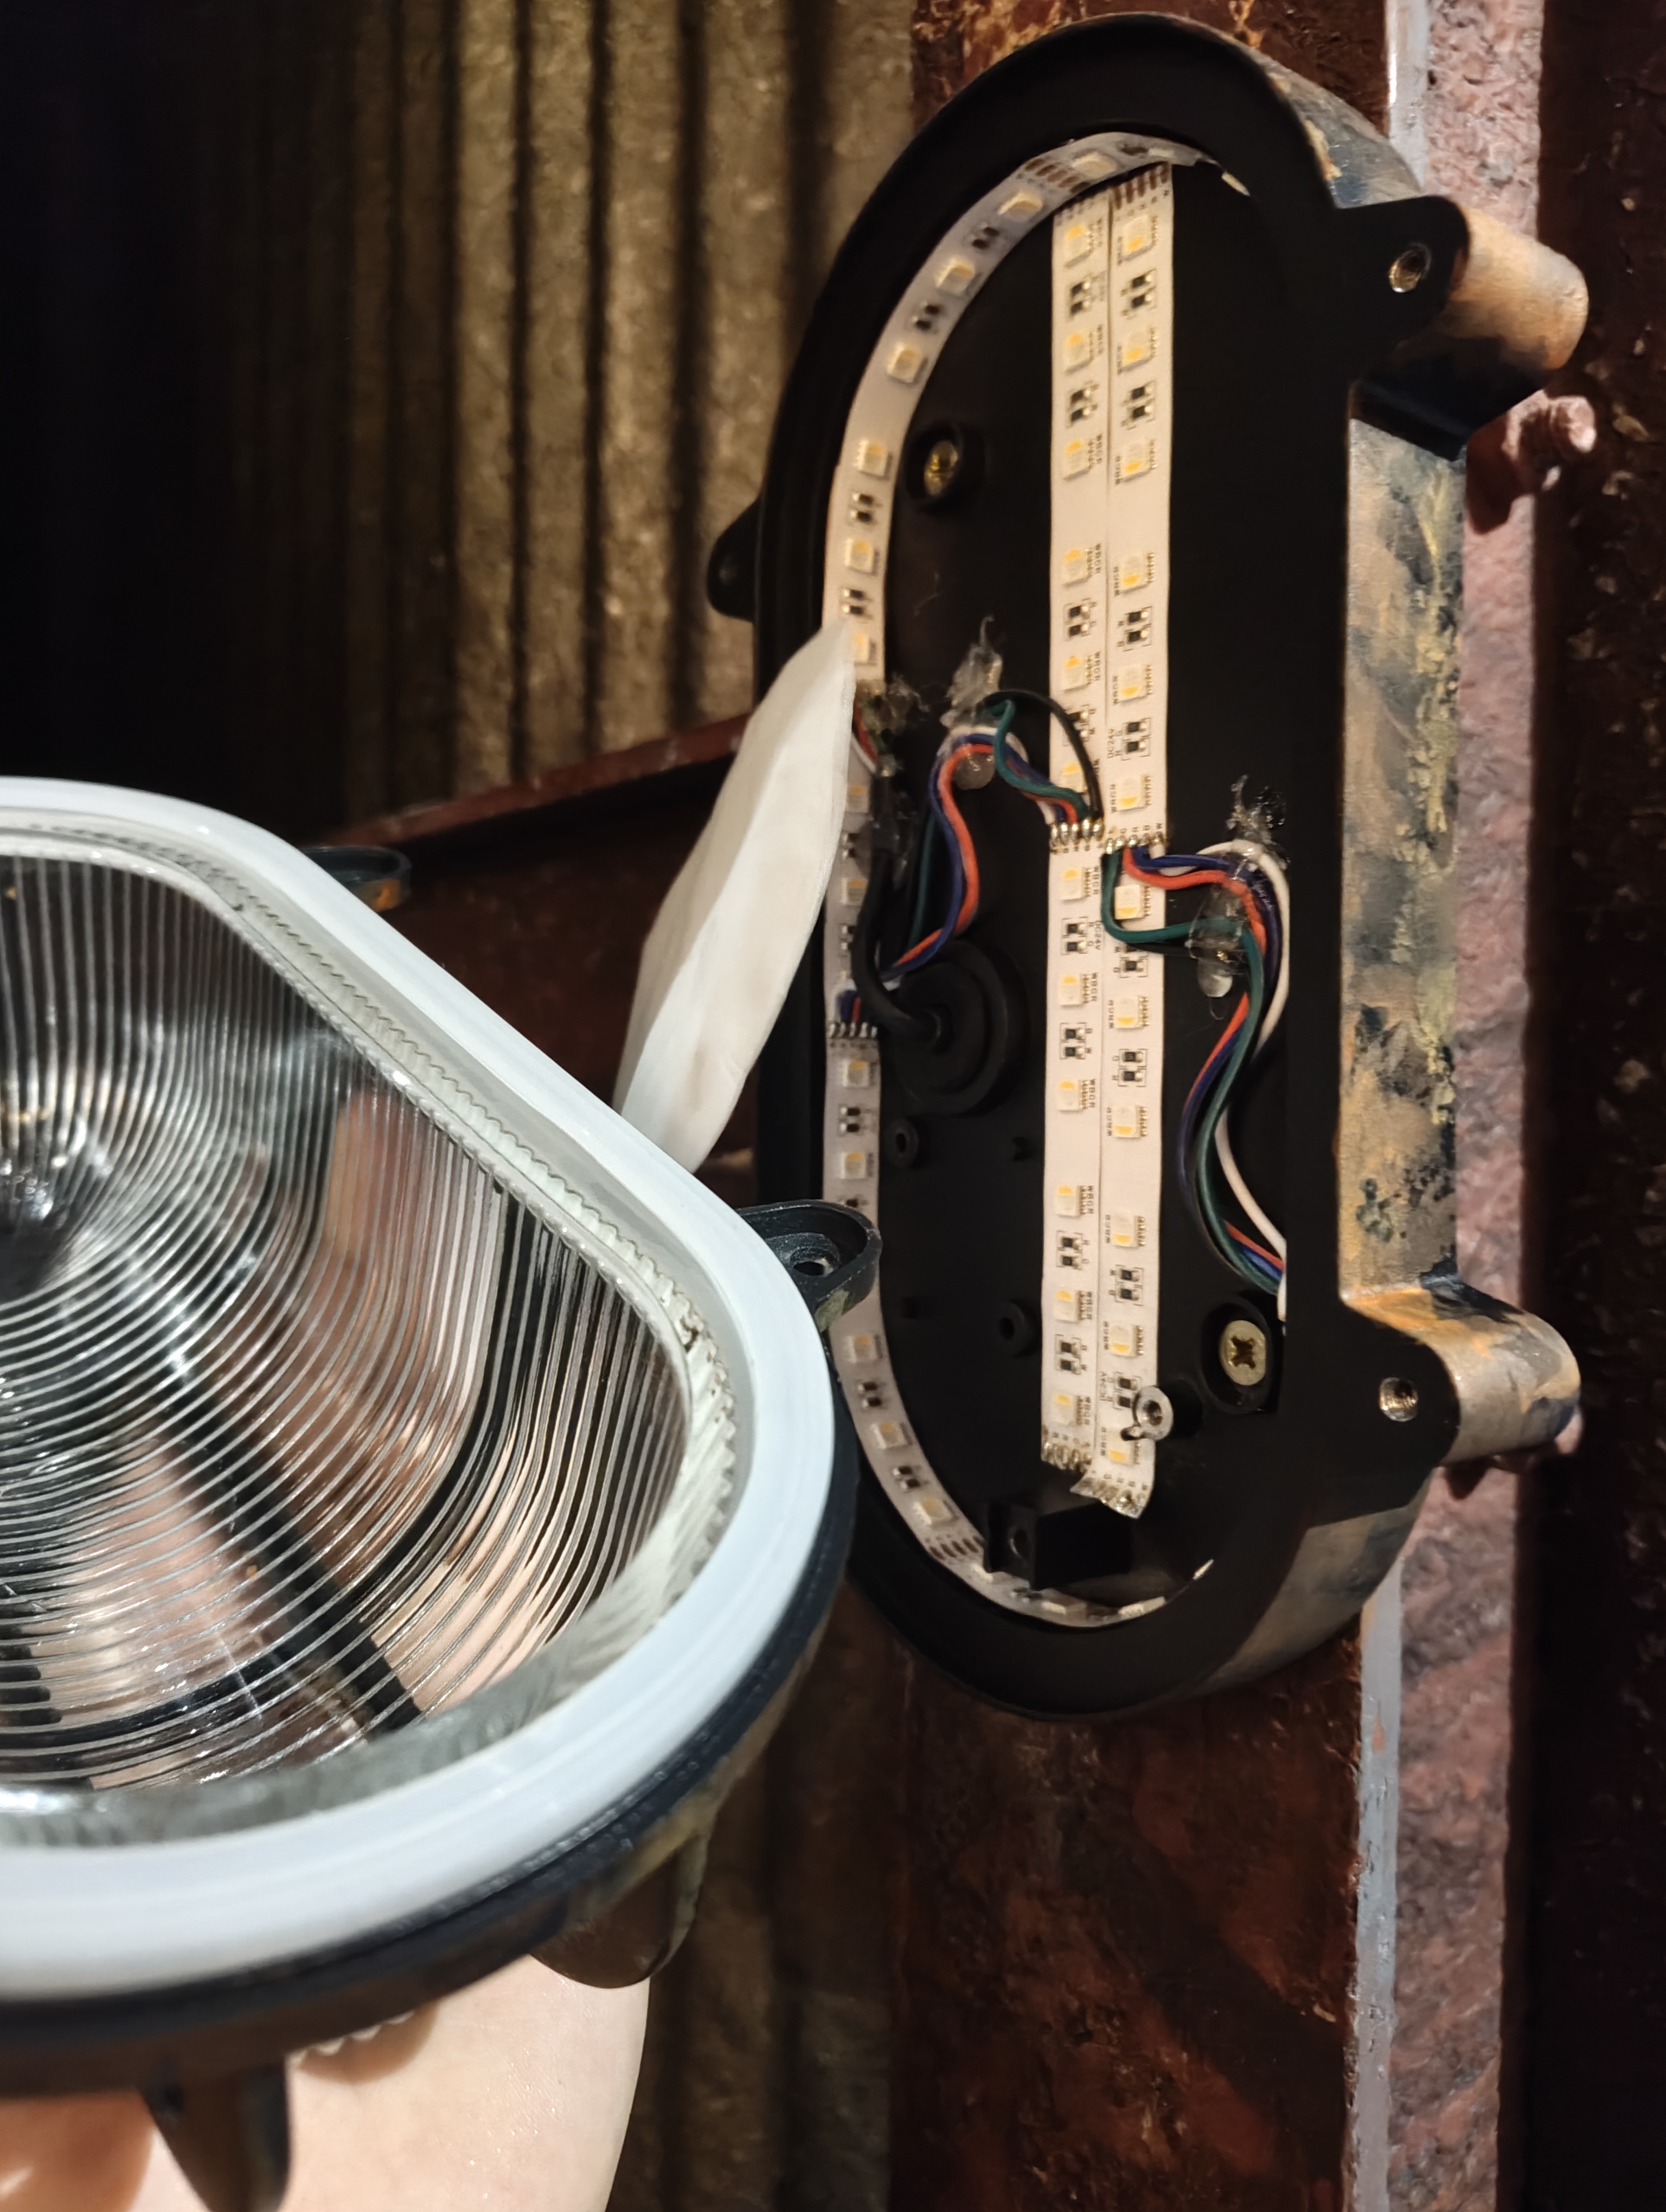
Overview
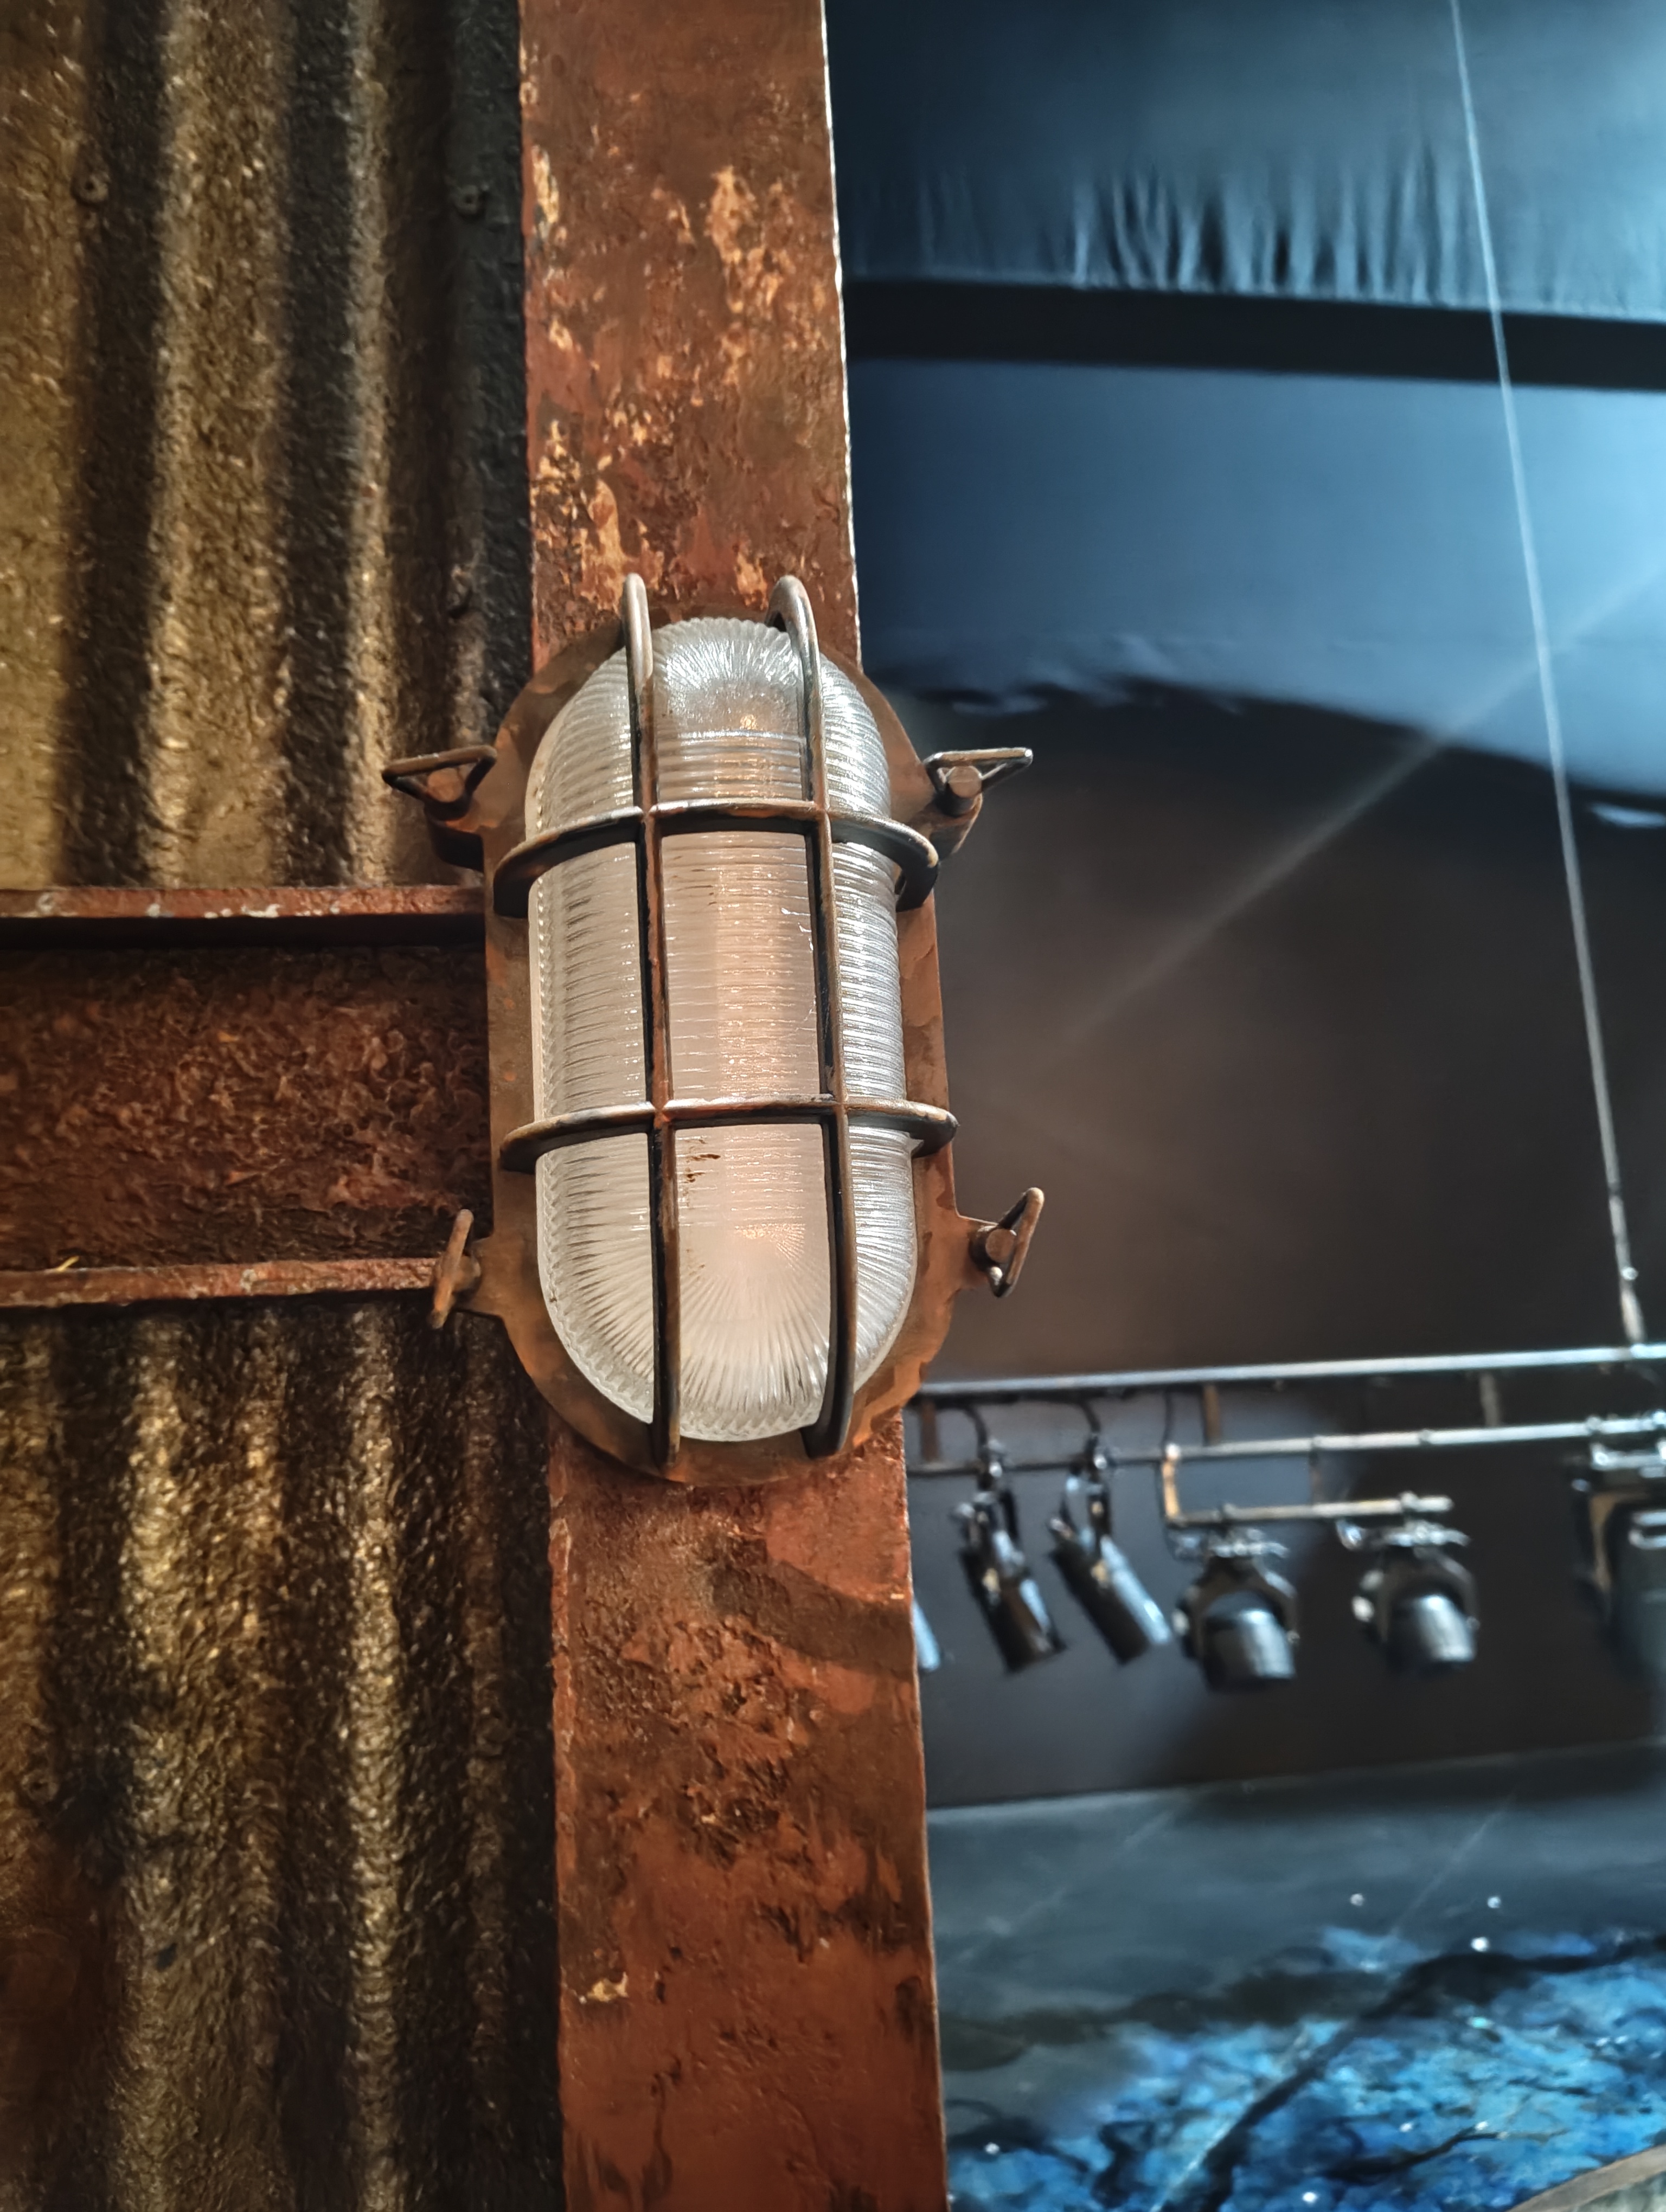
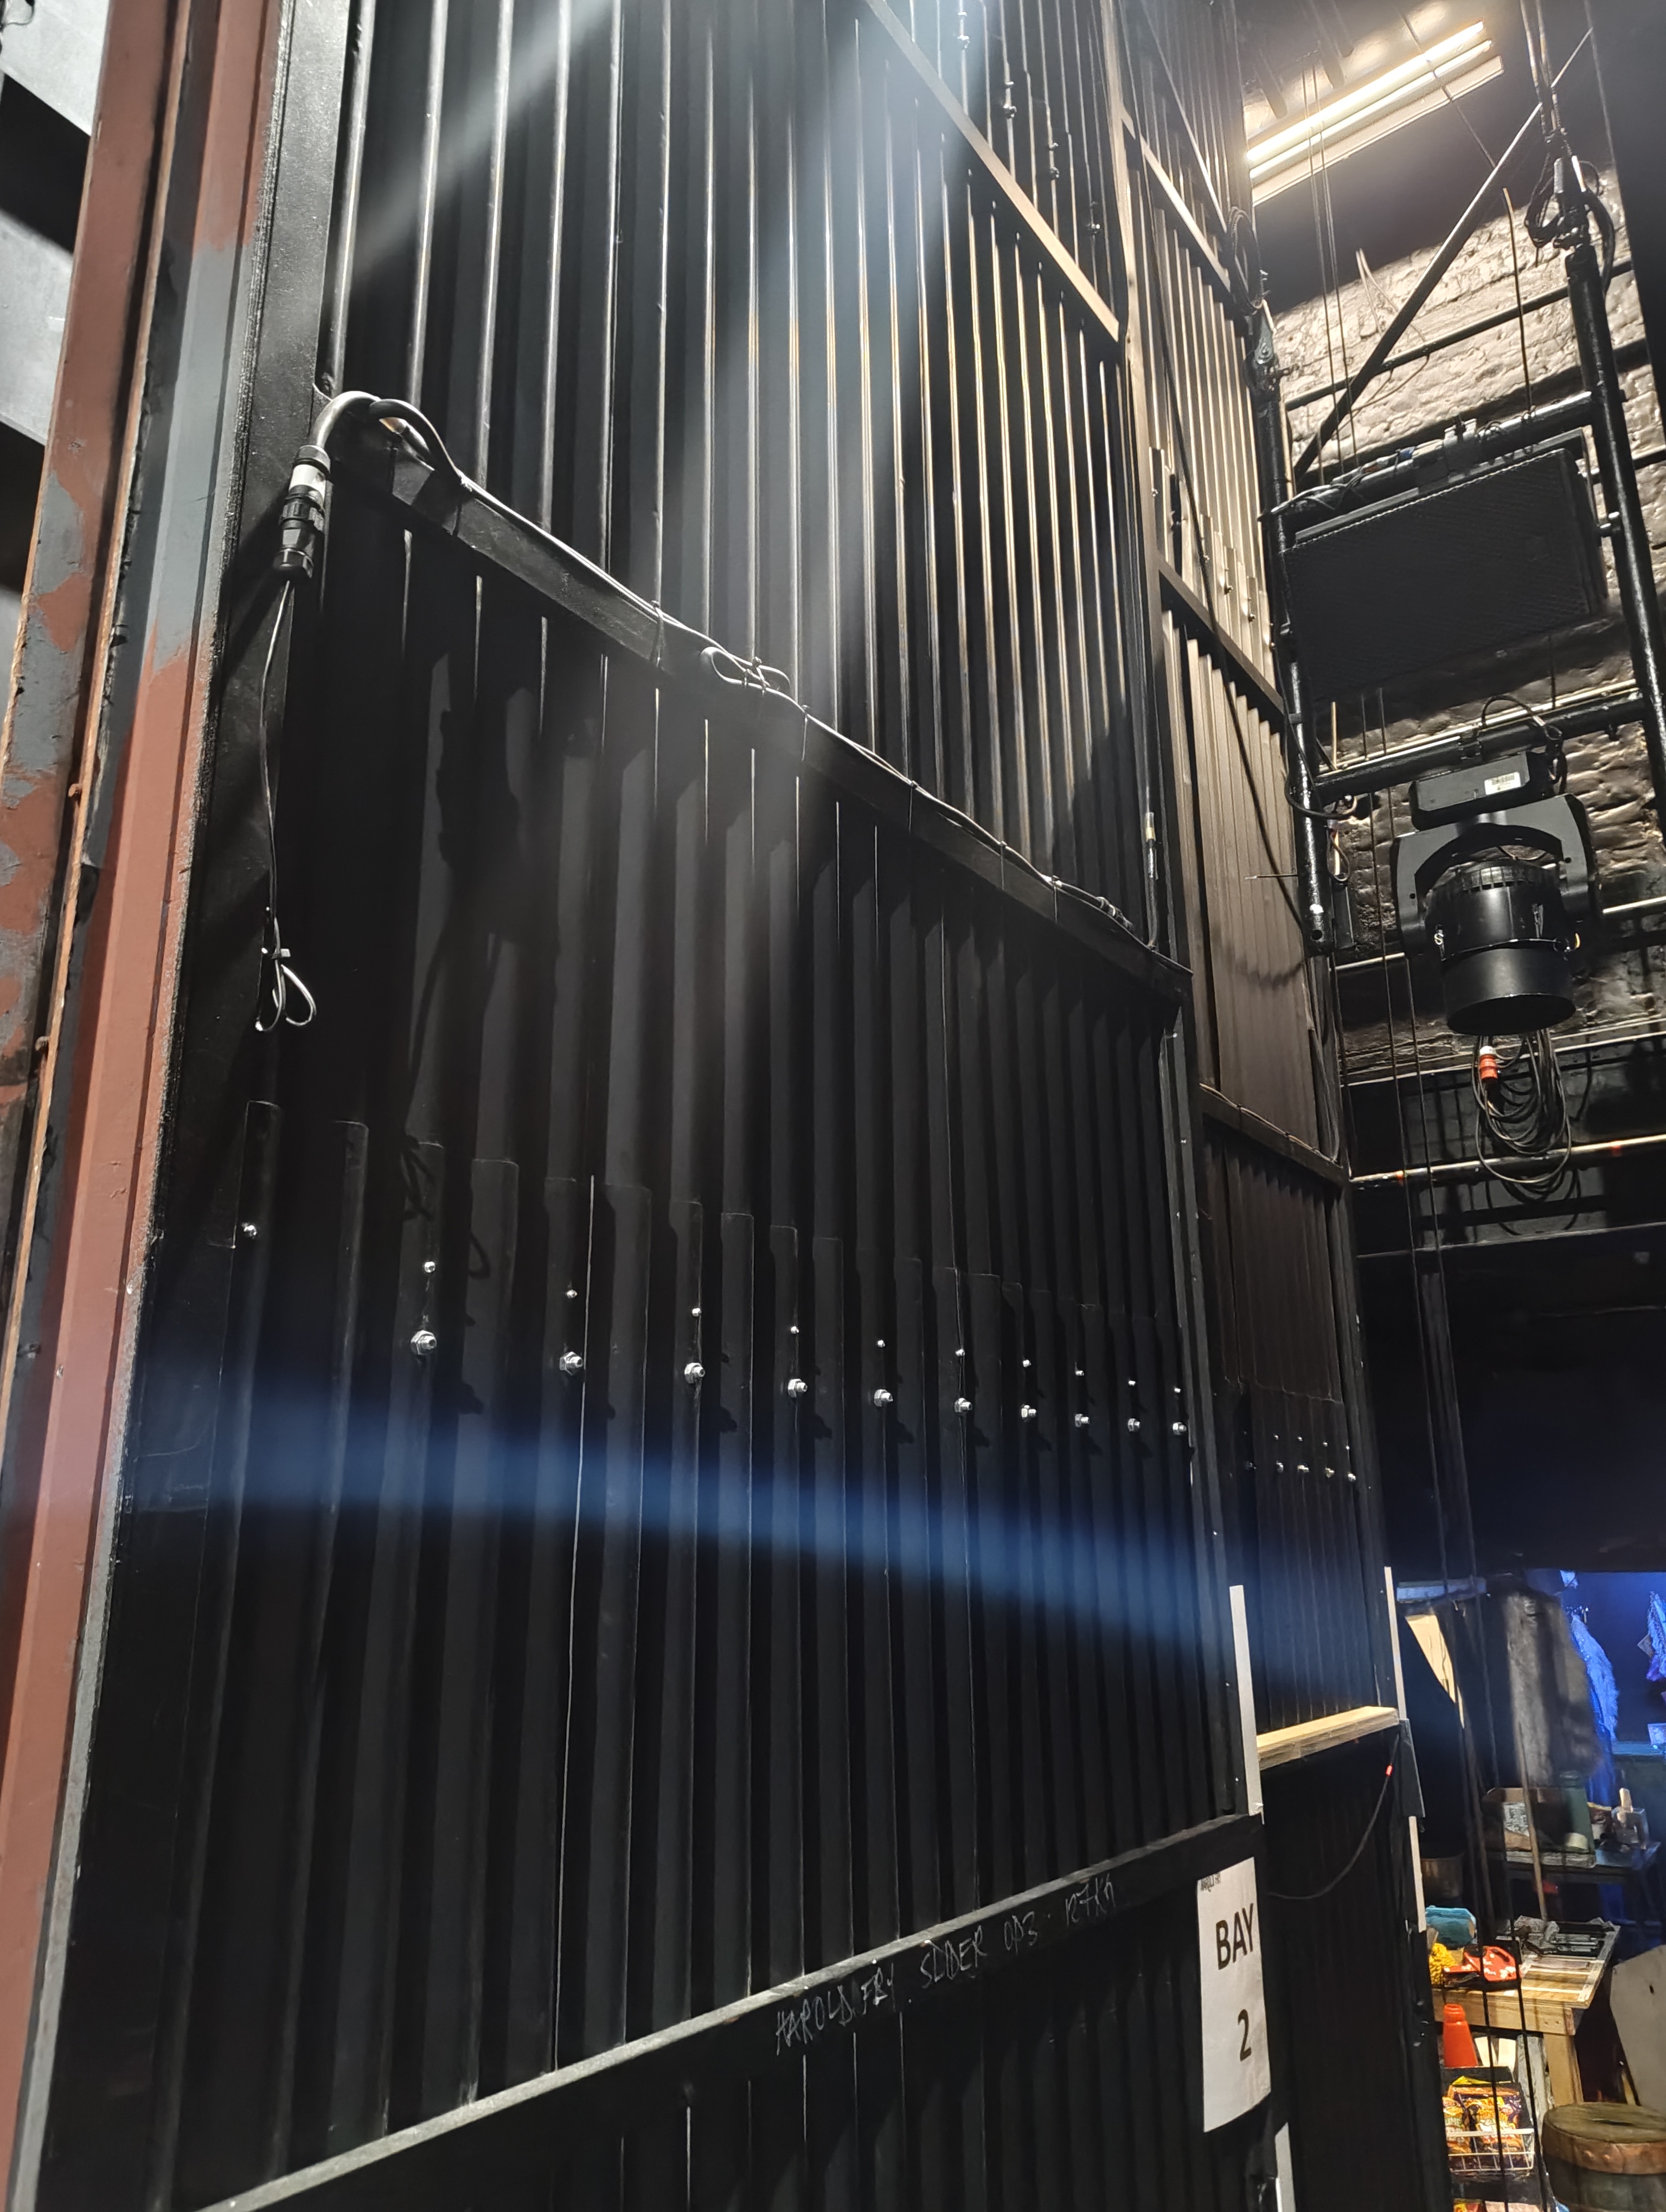
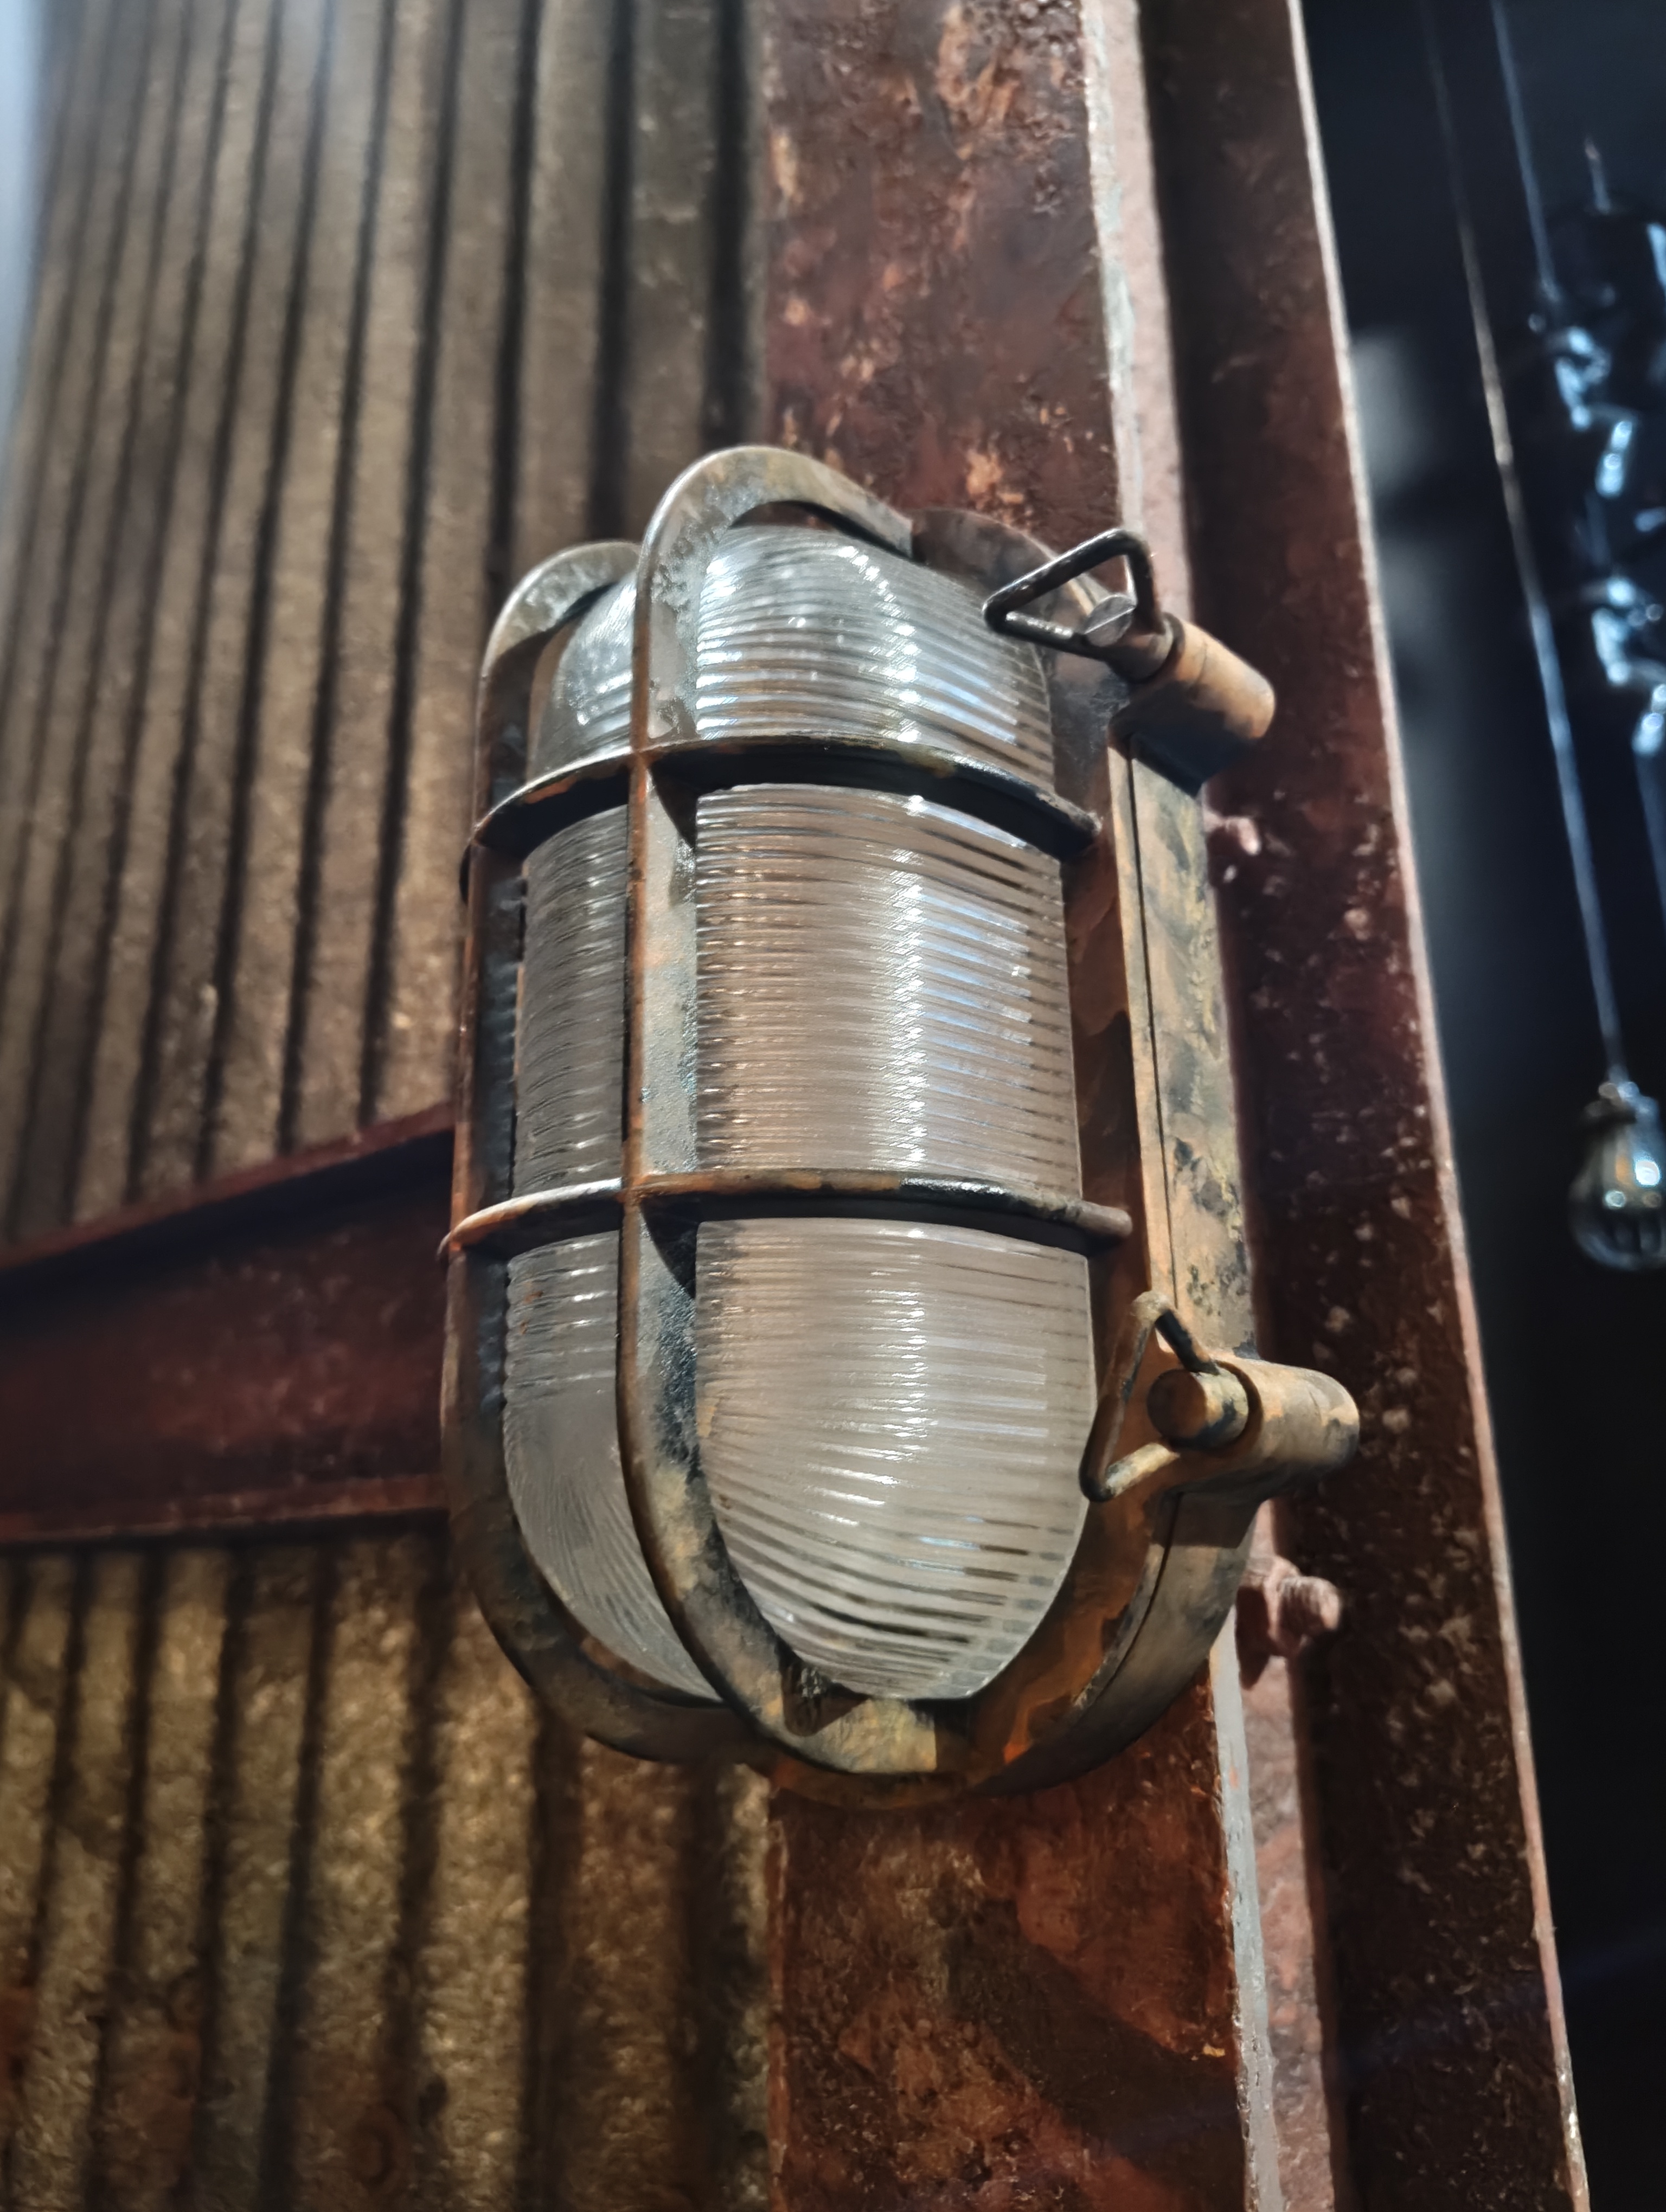
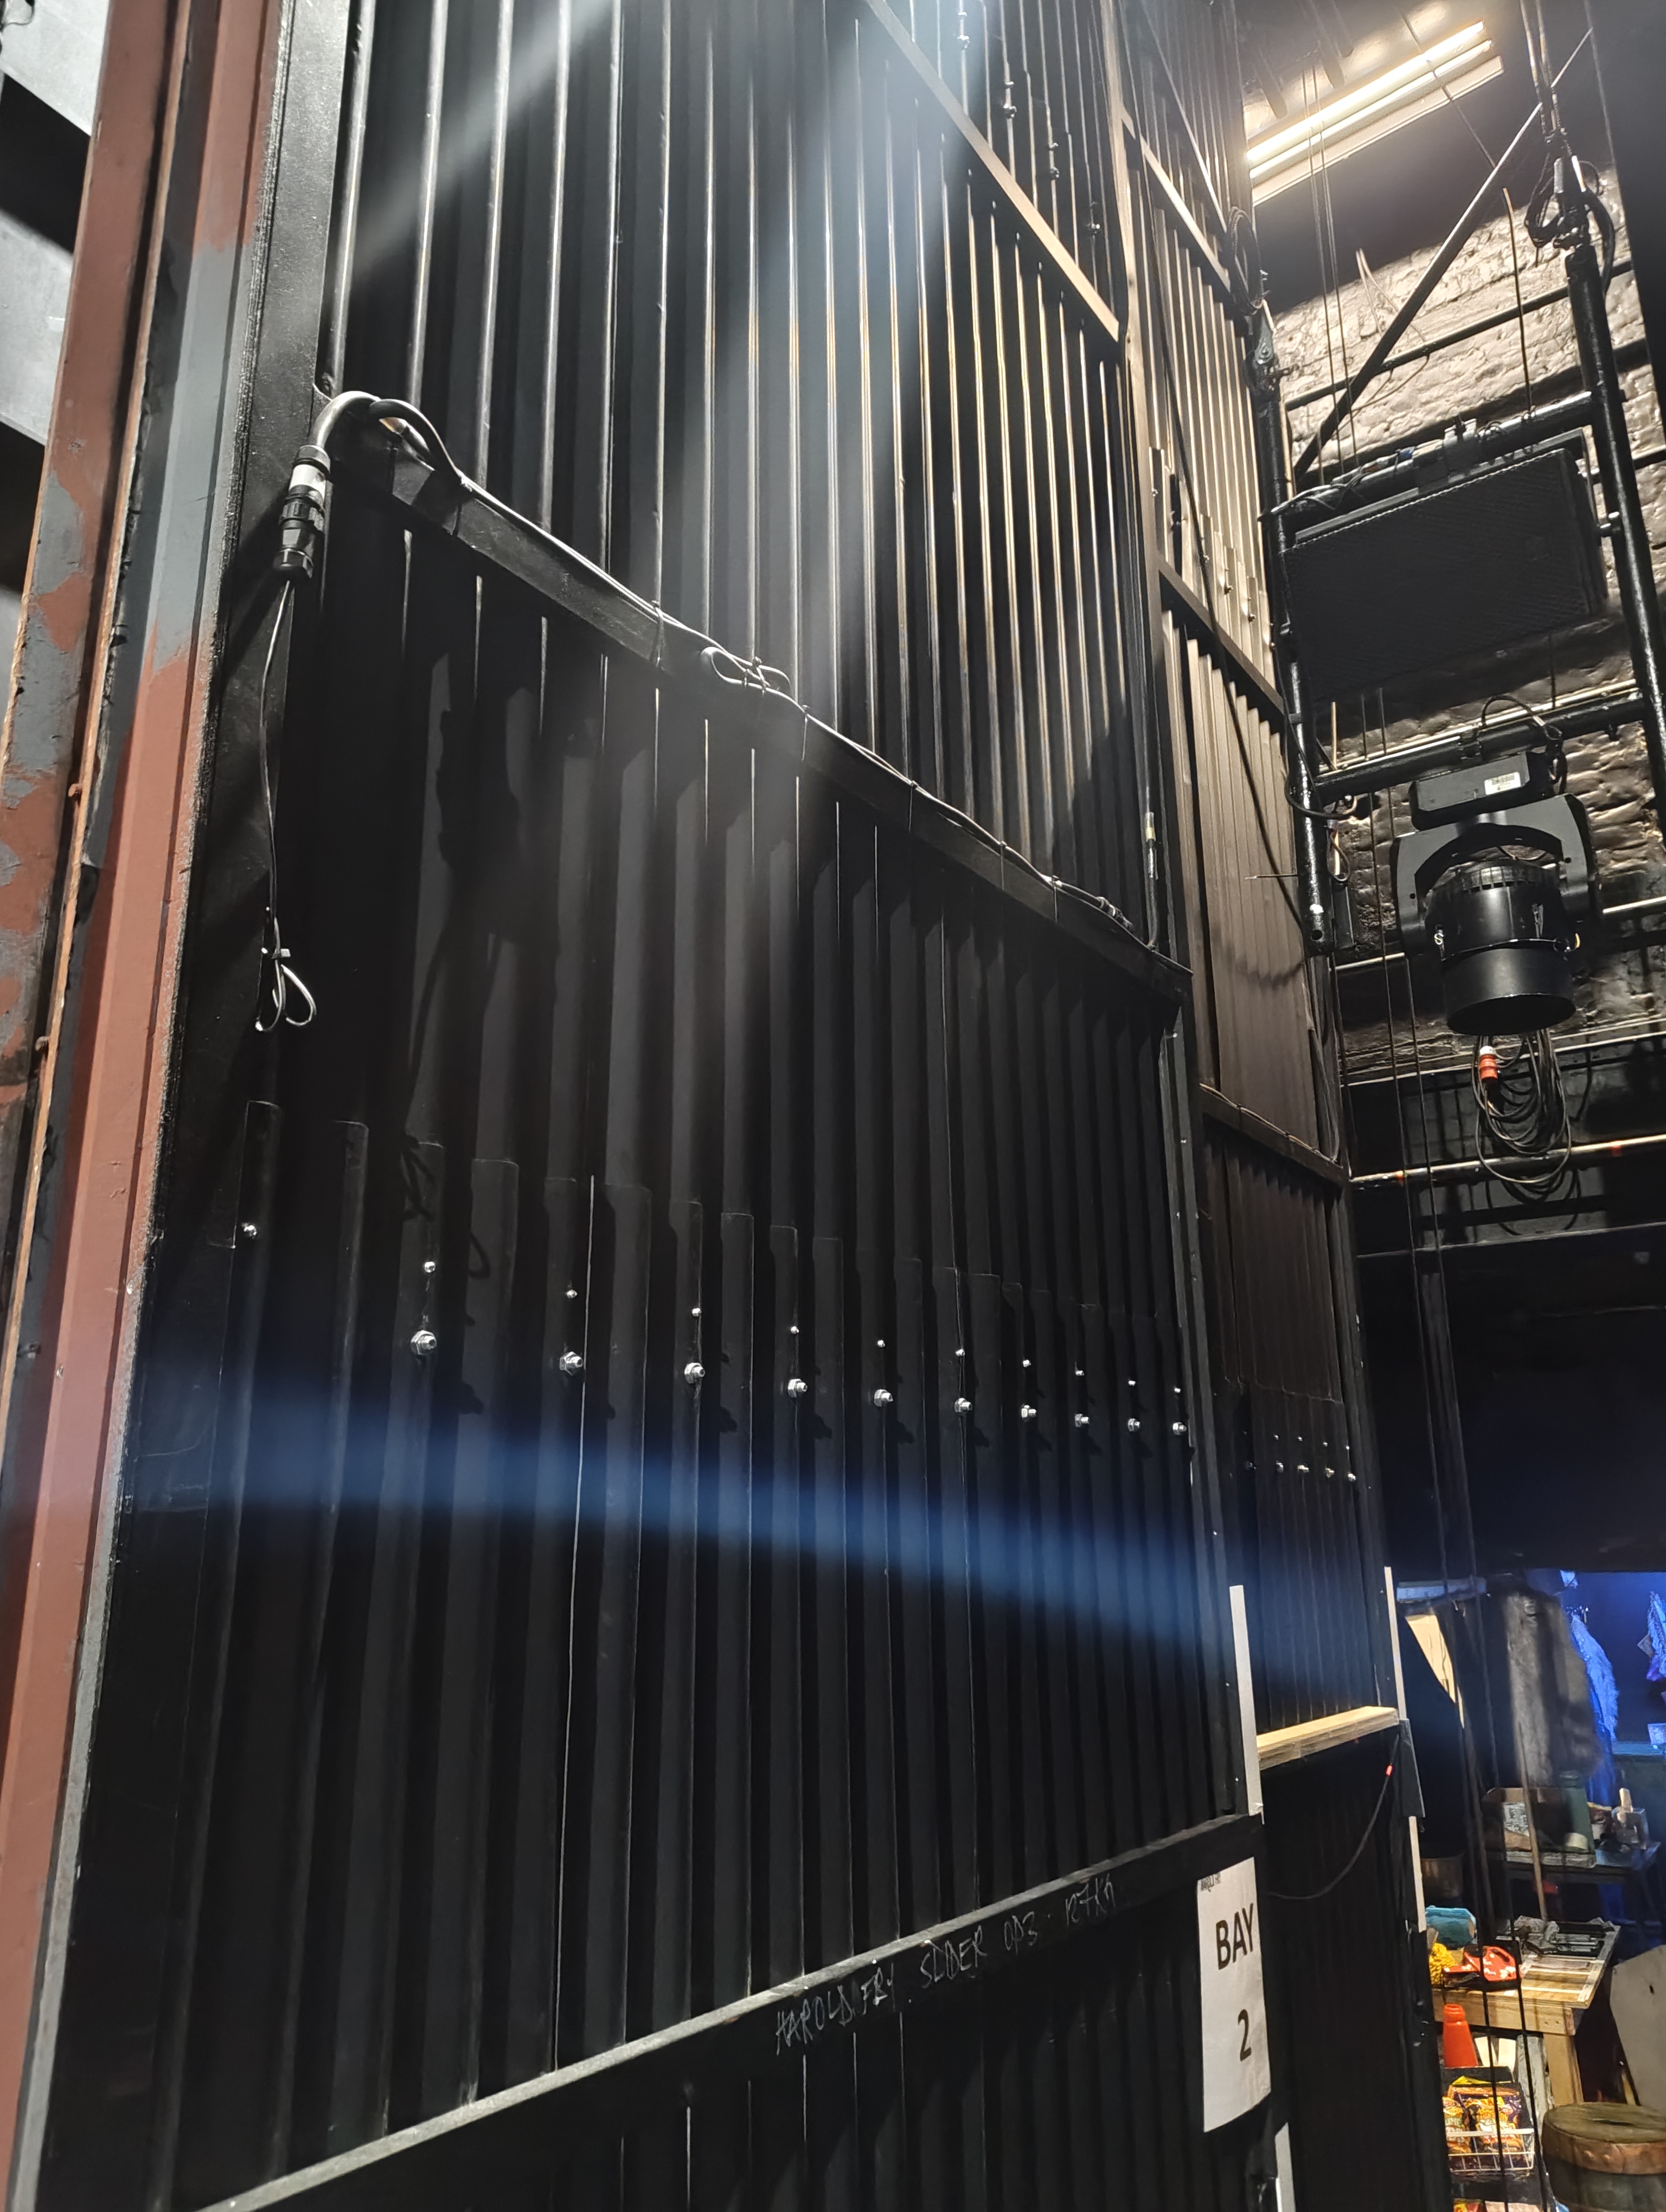
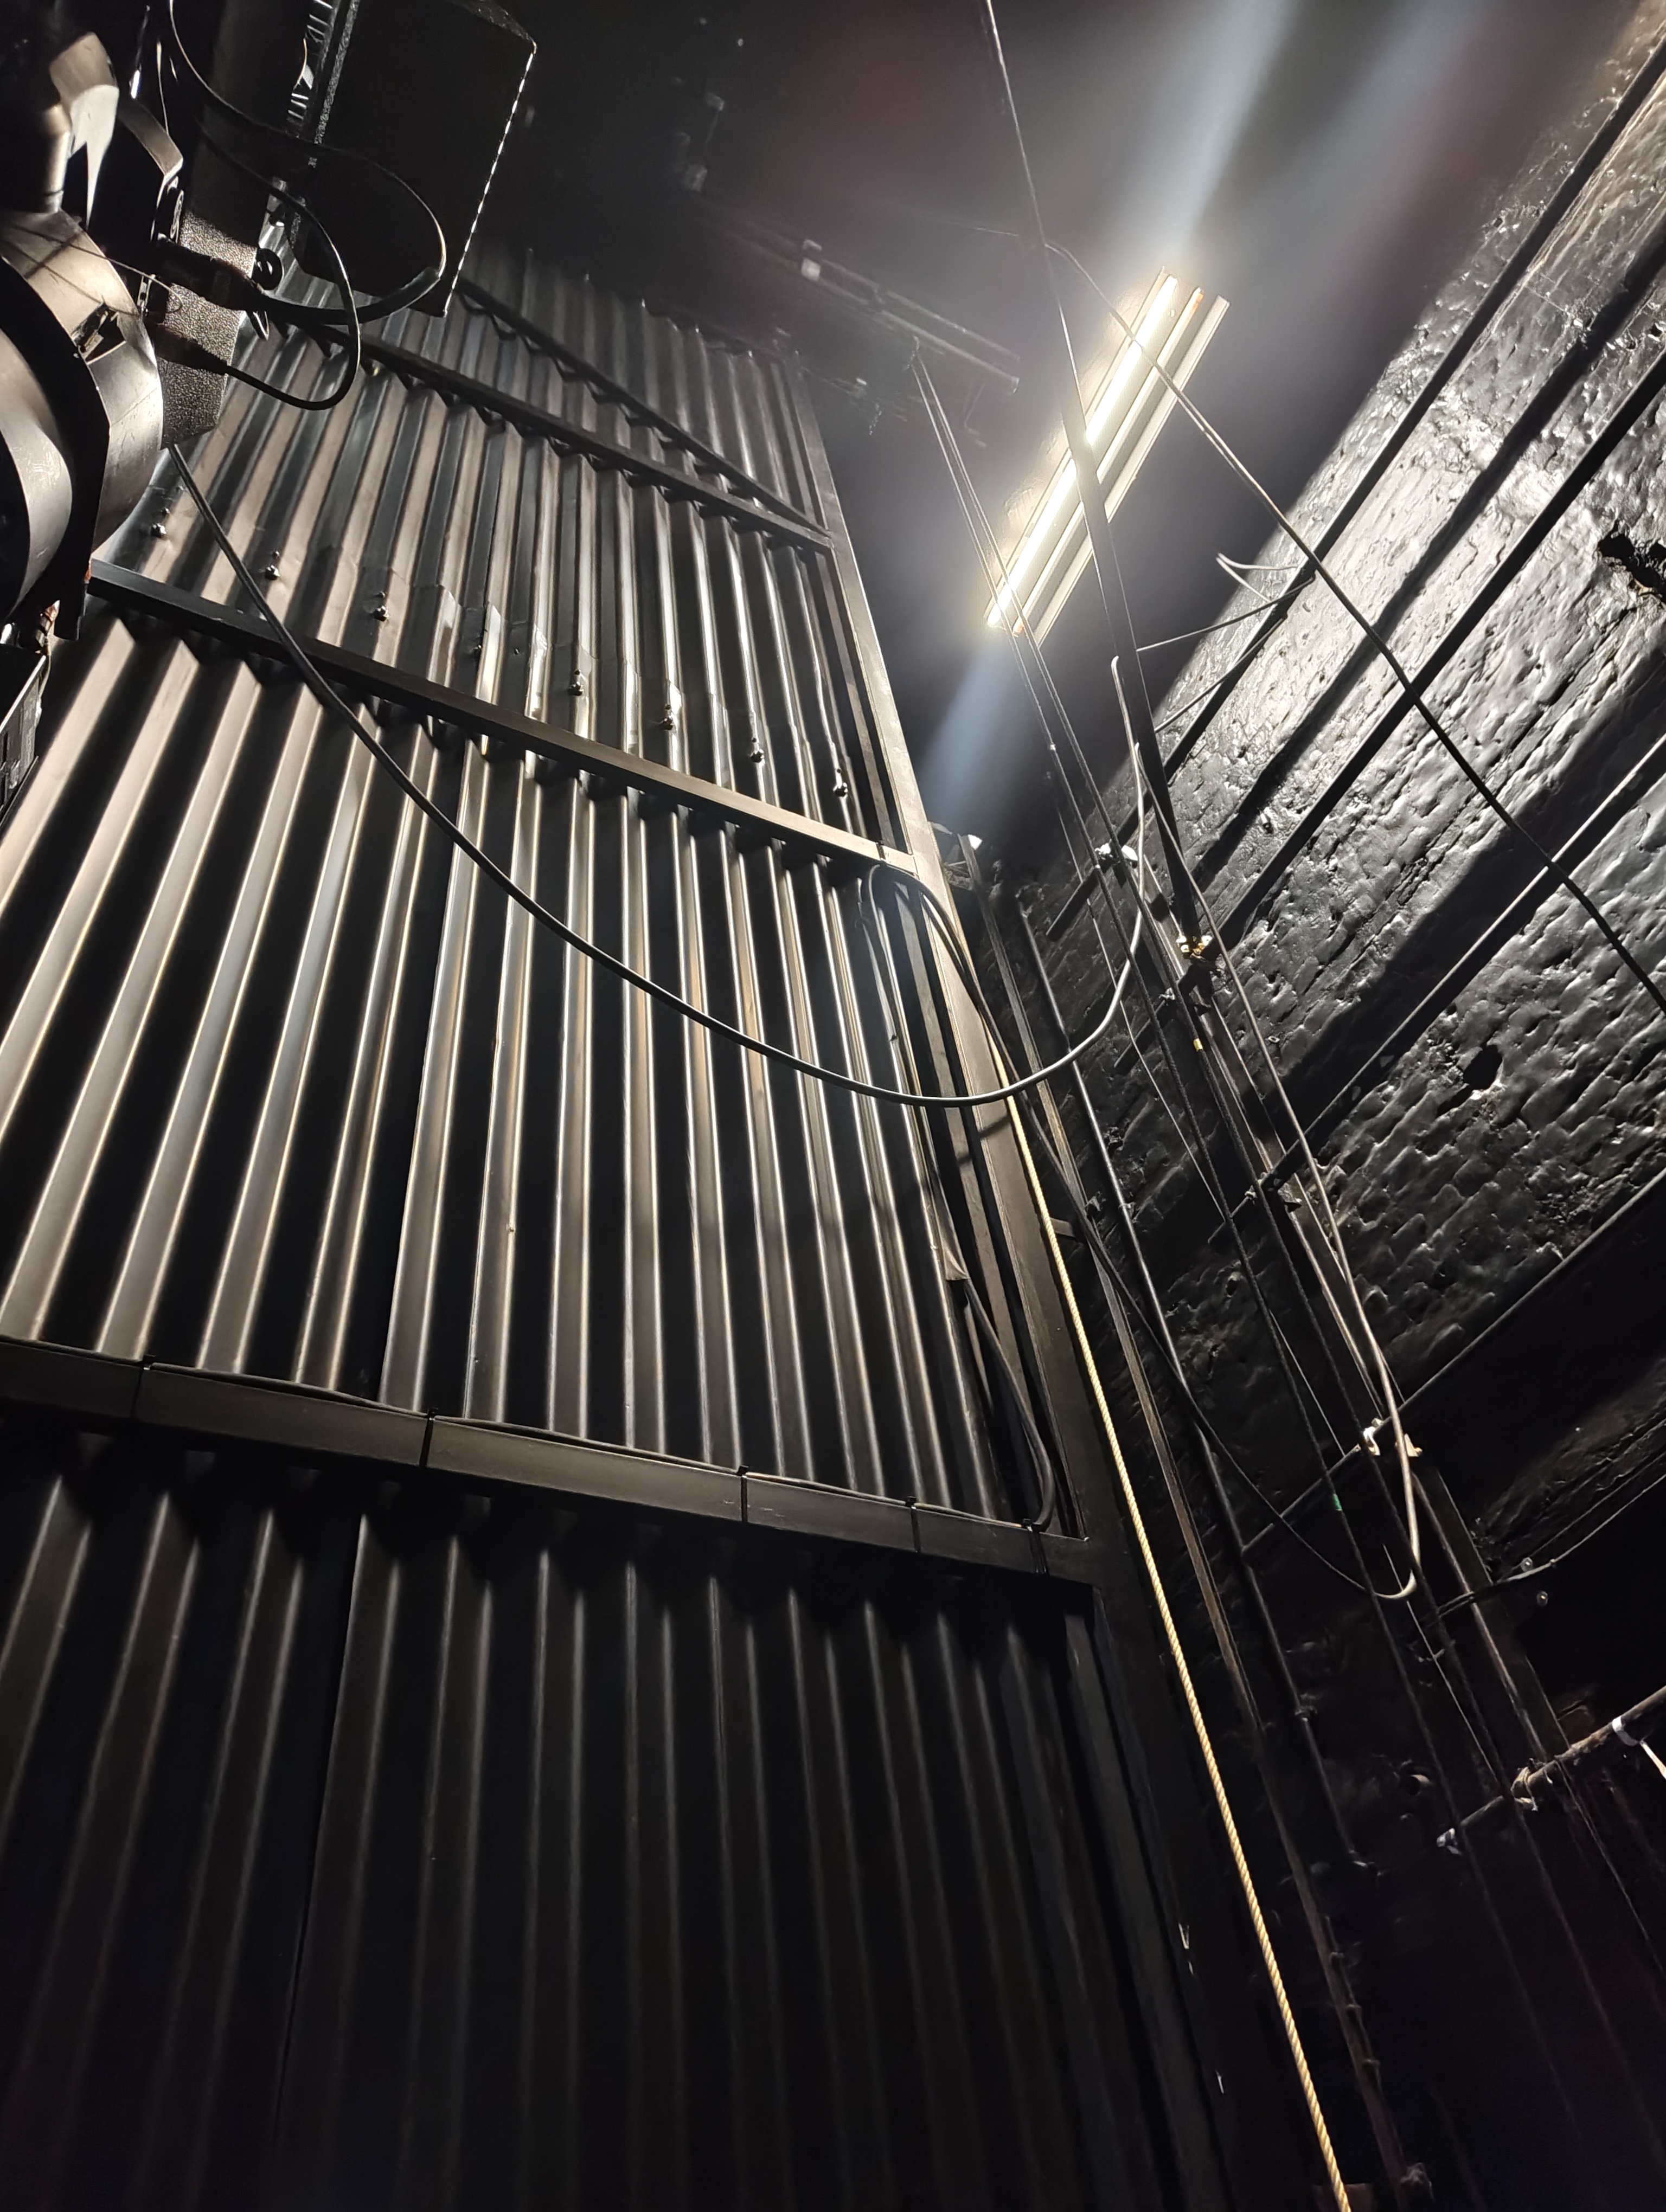
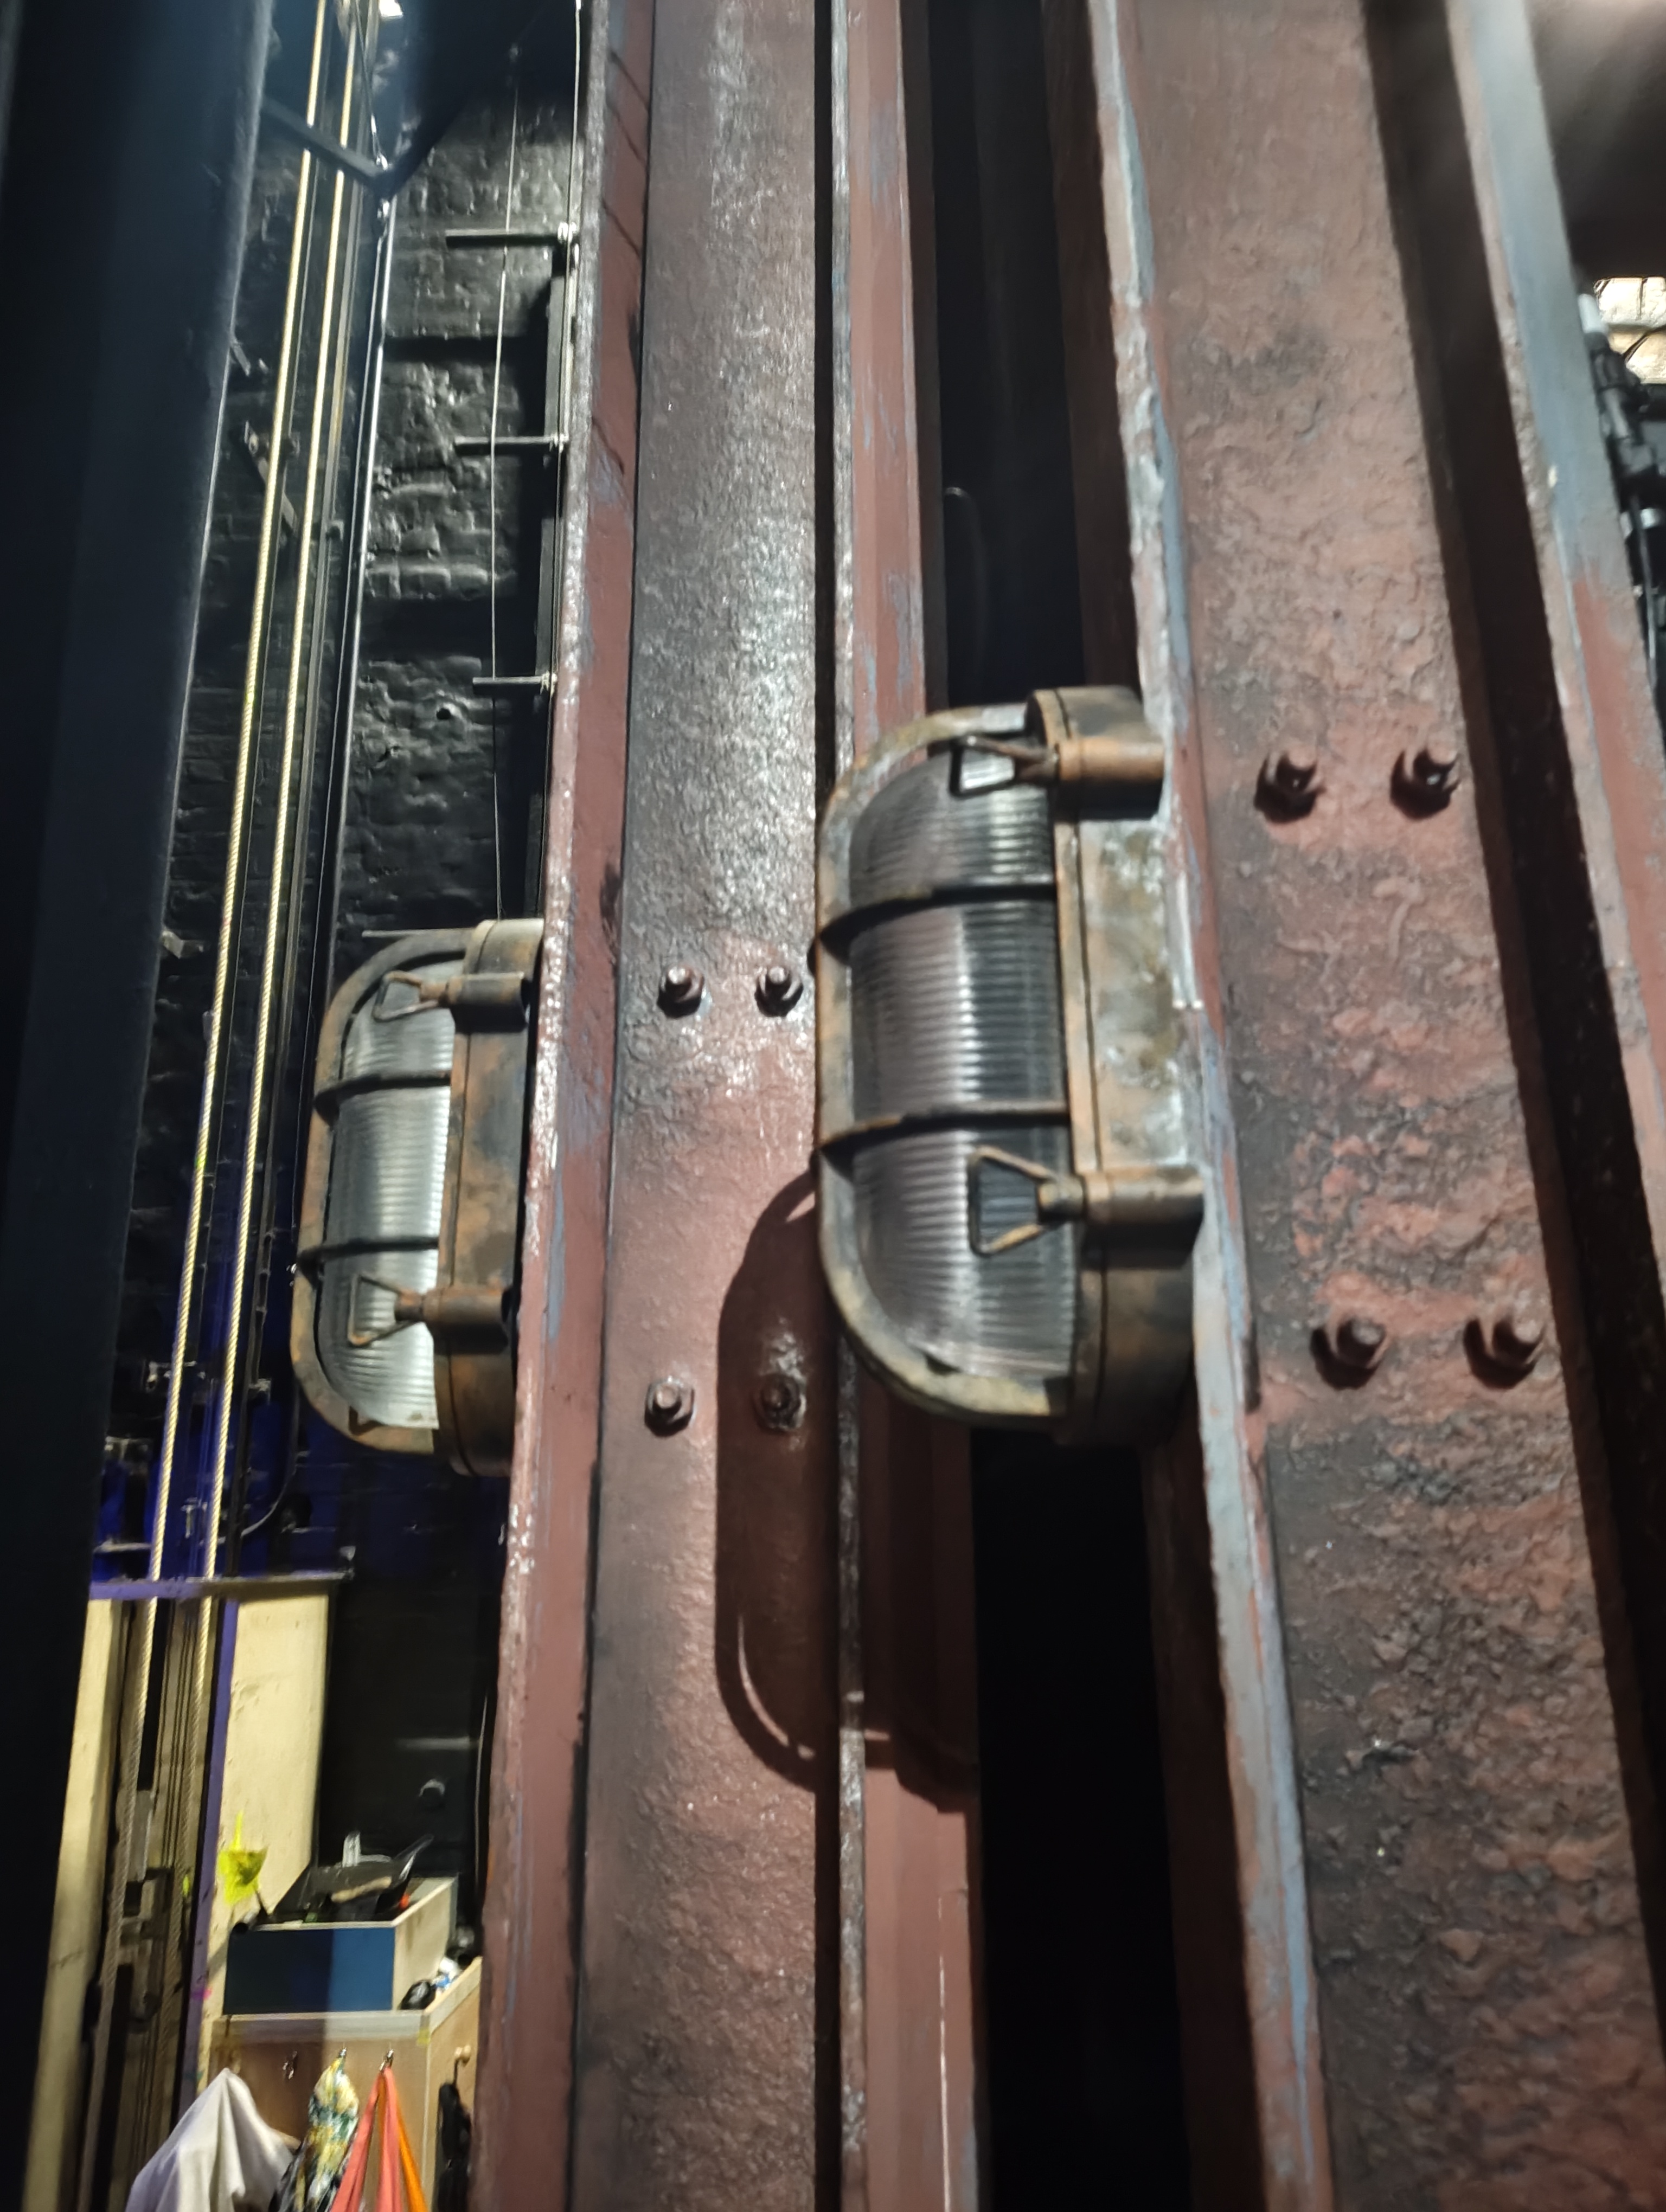
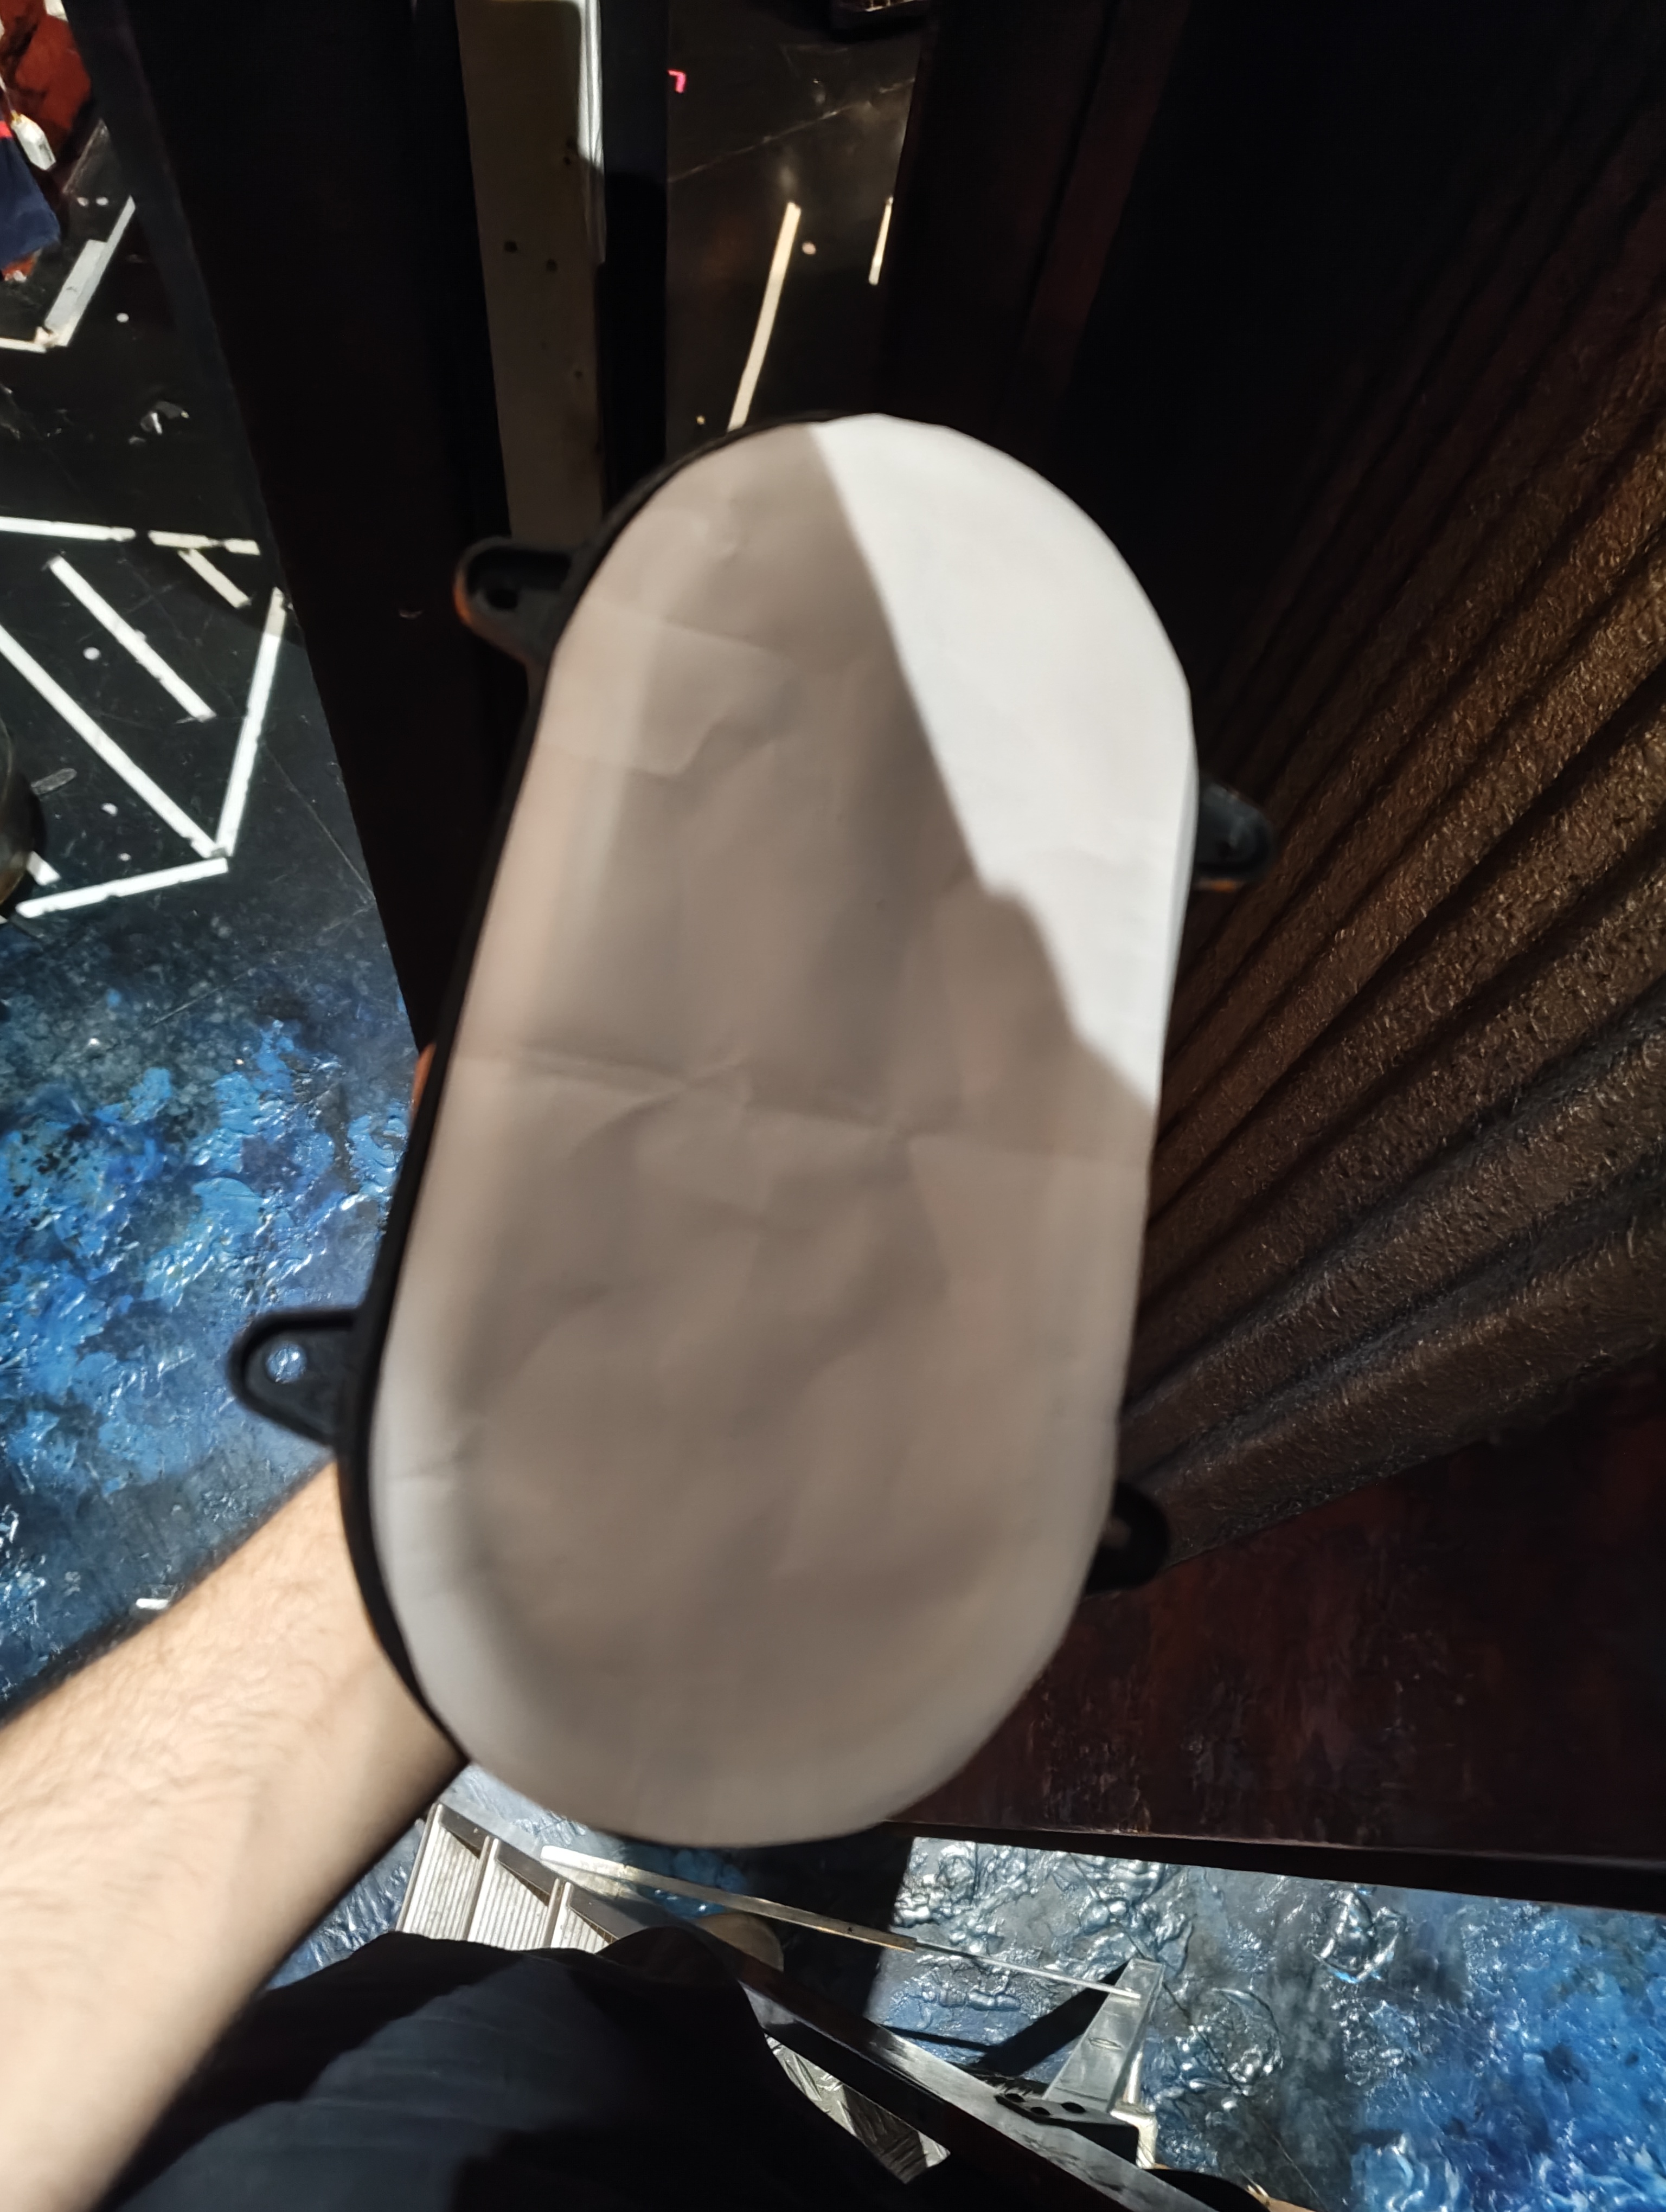
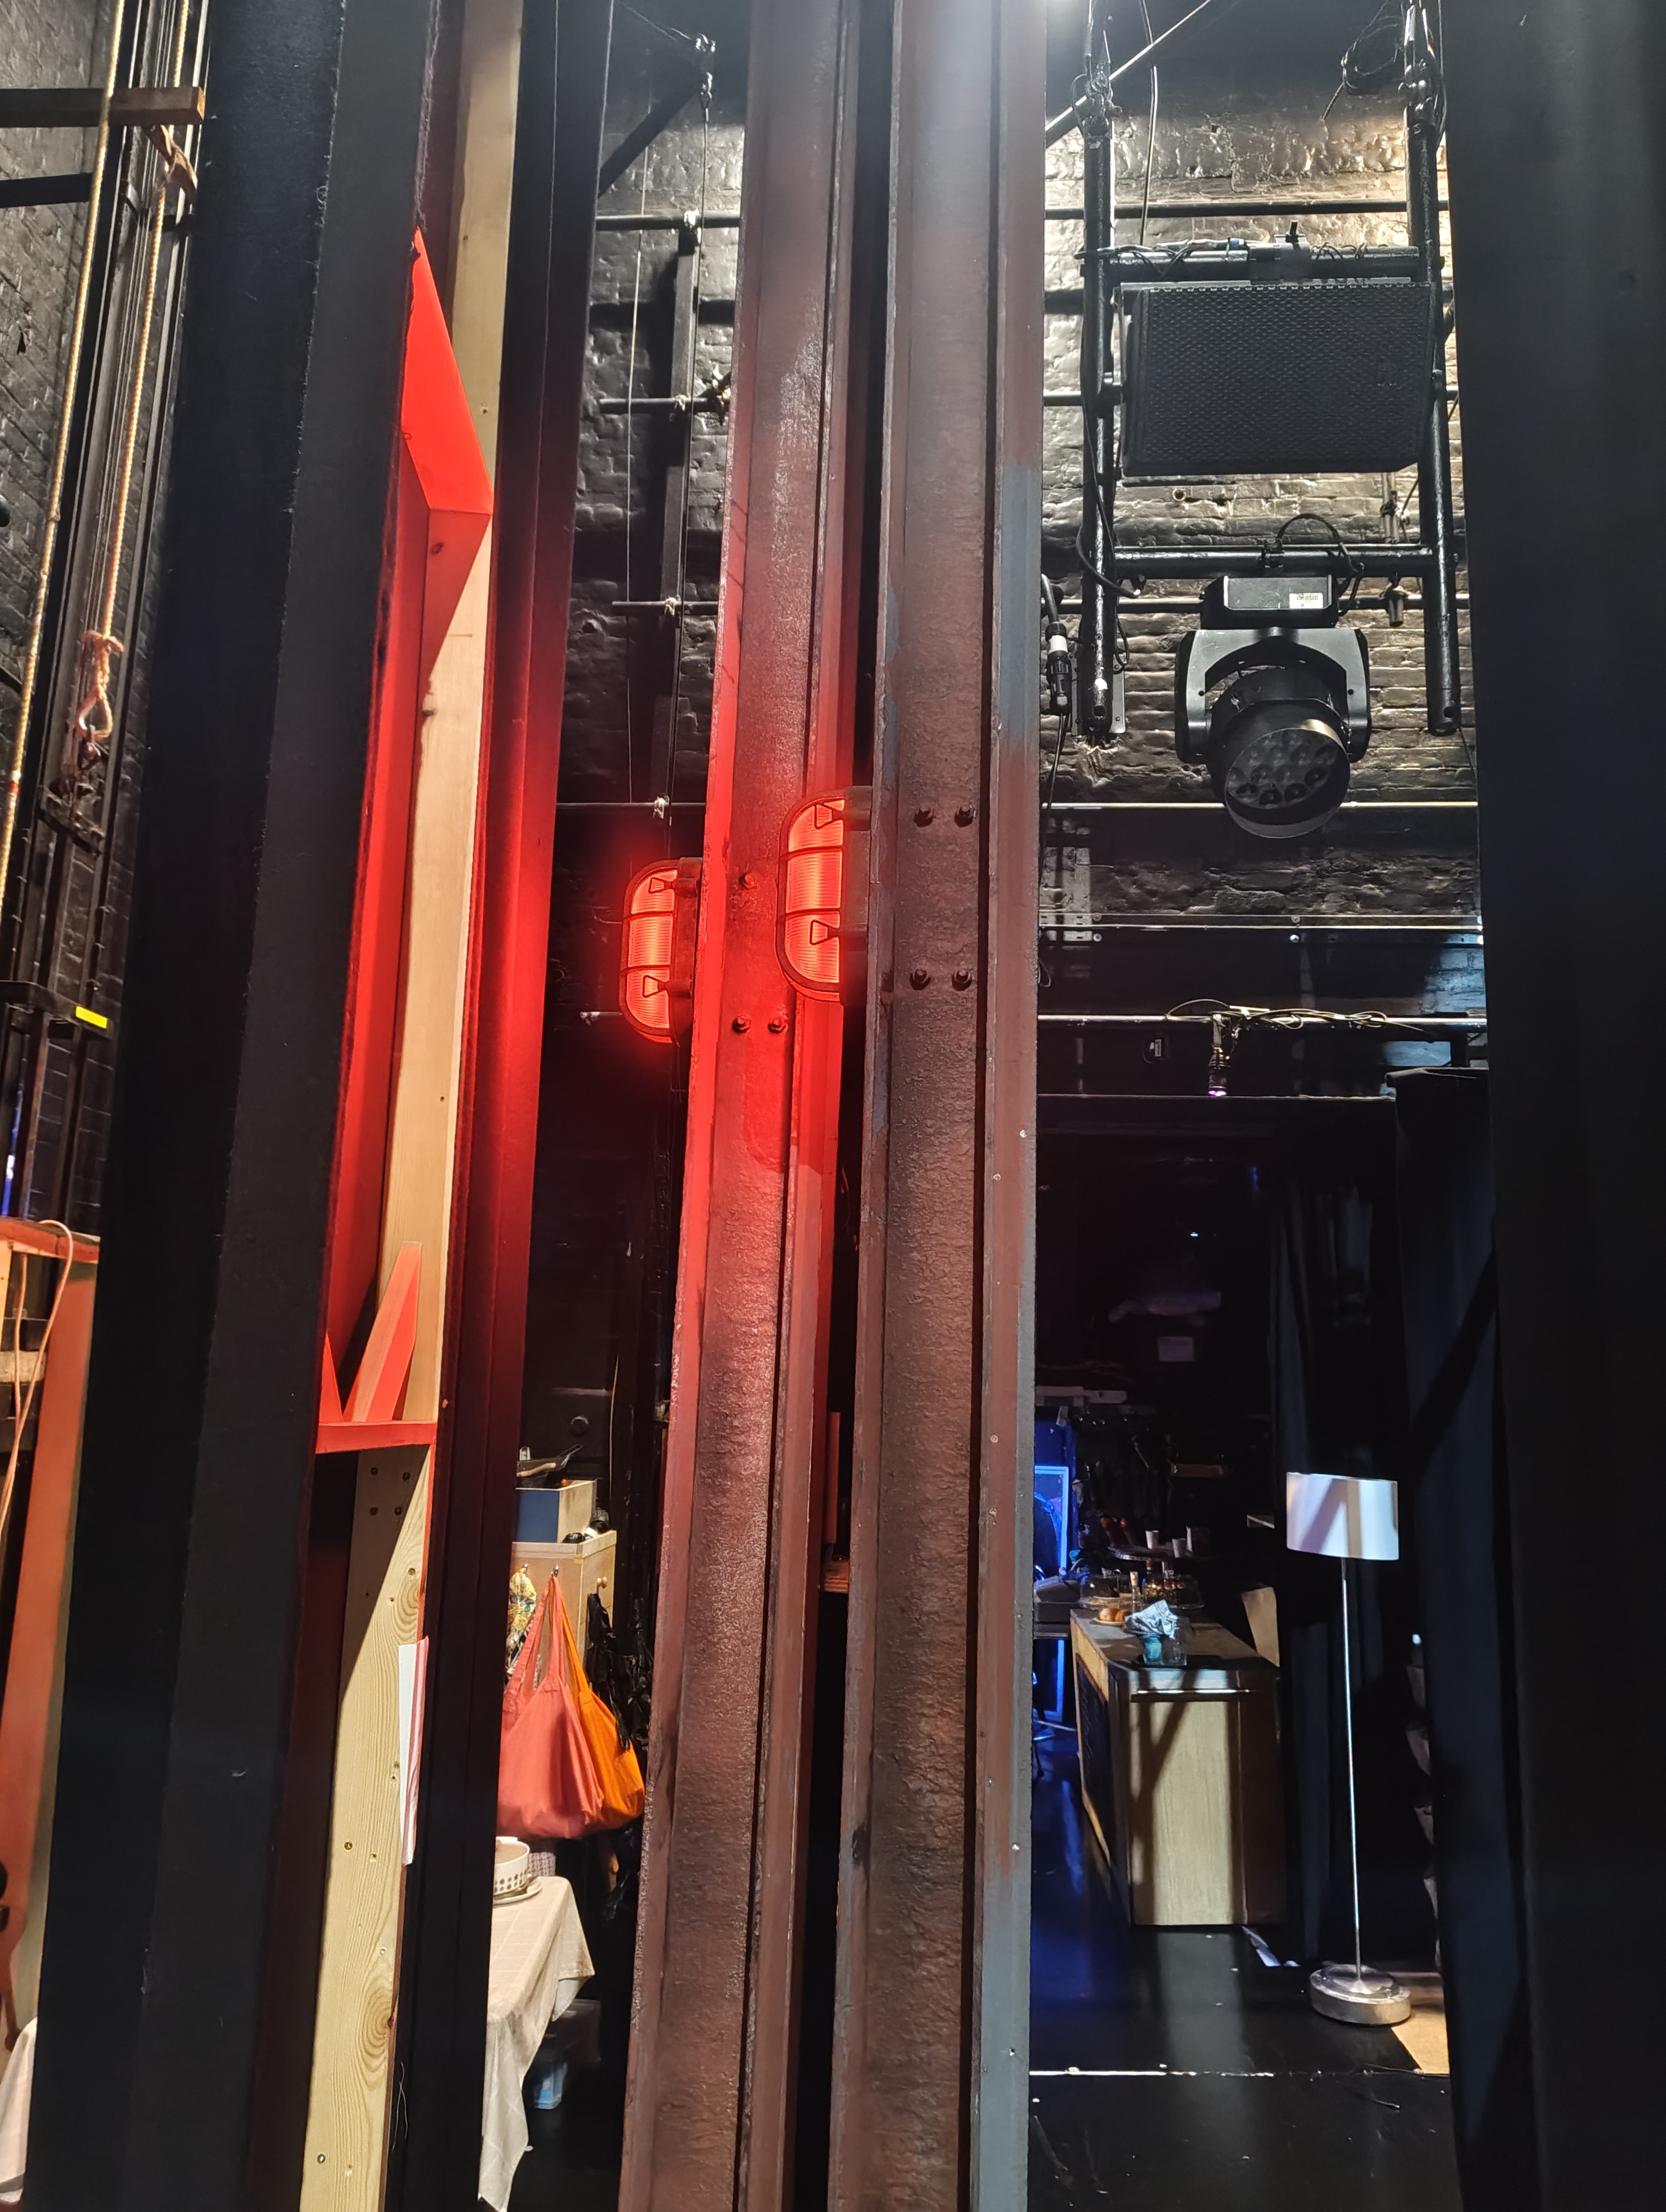
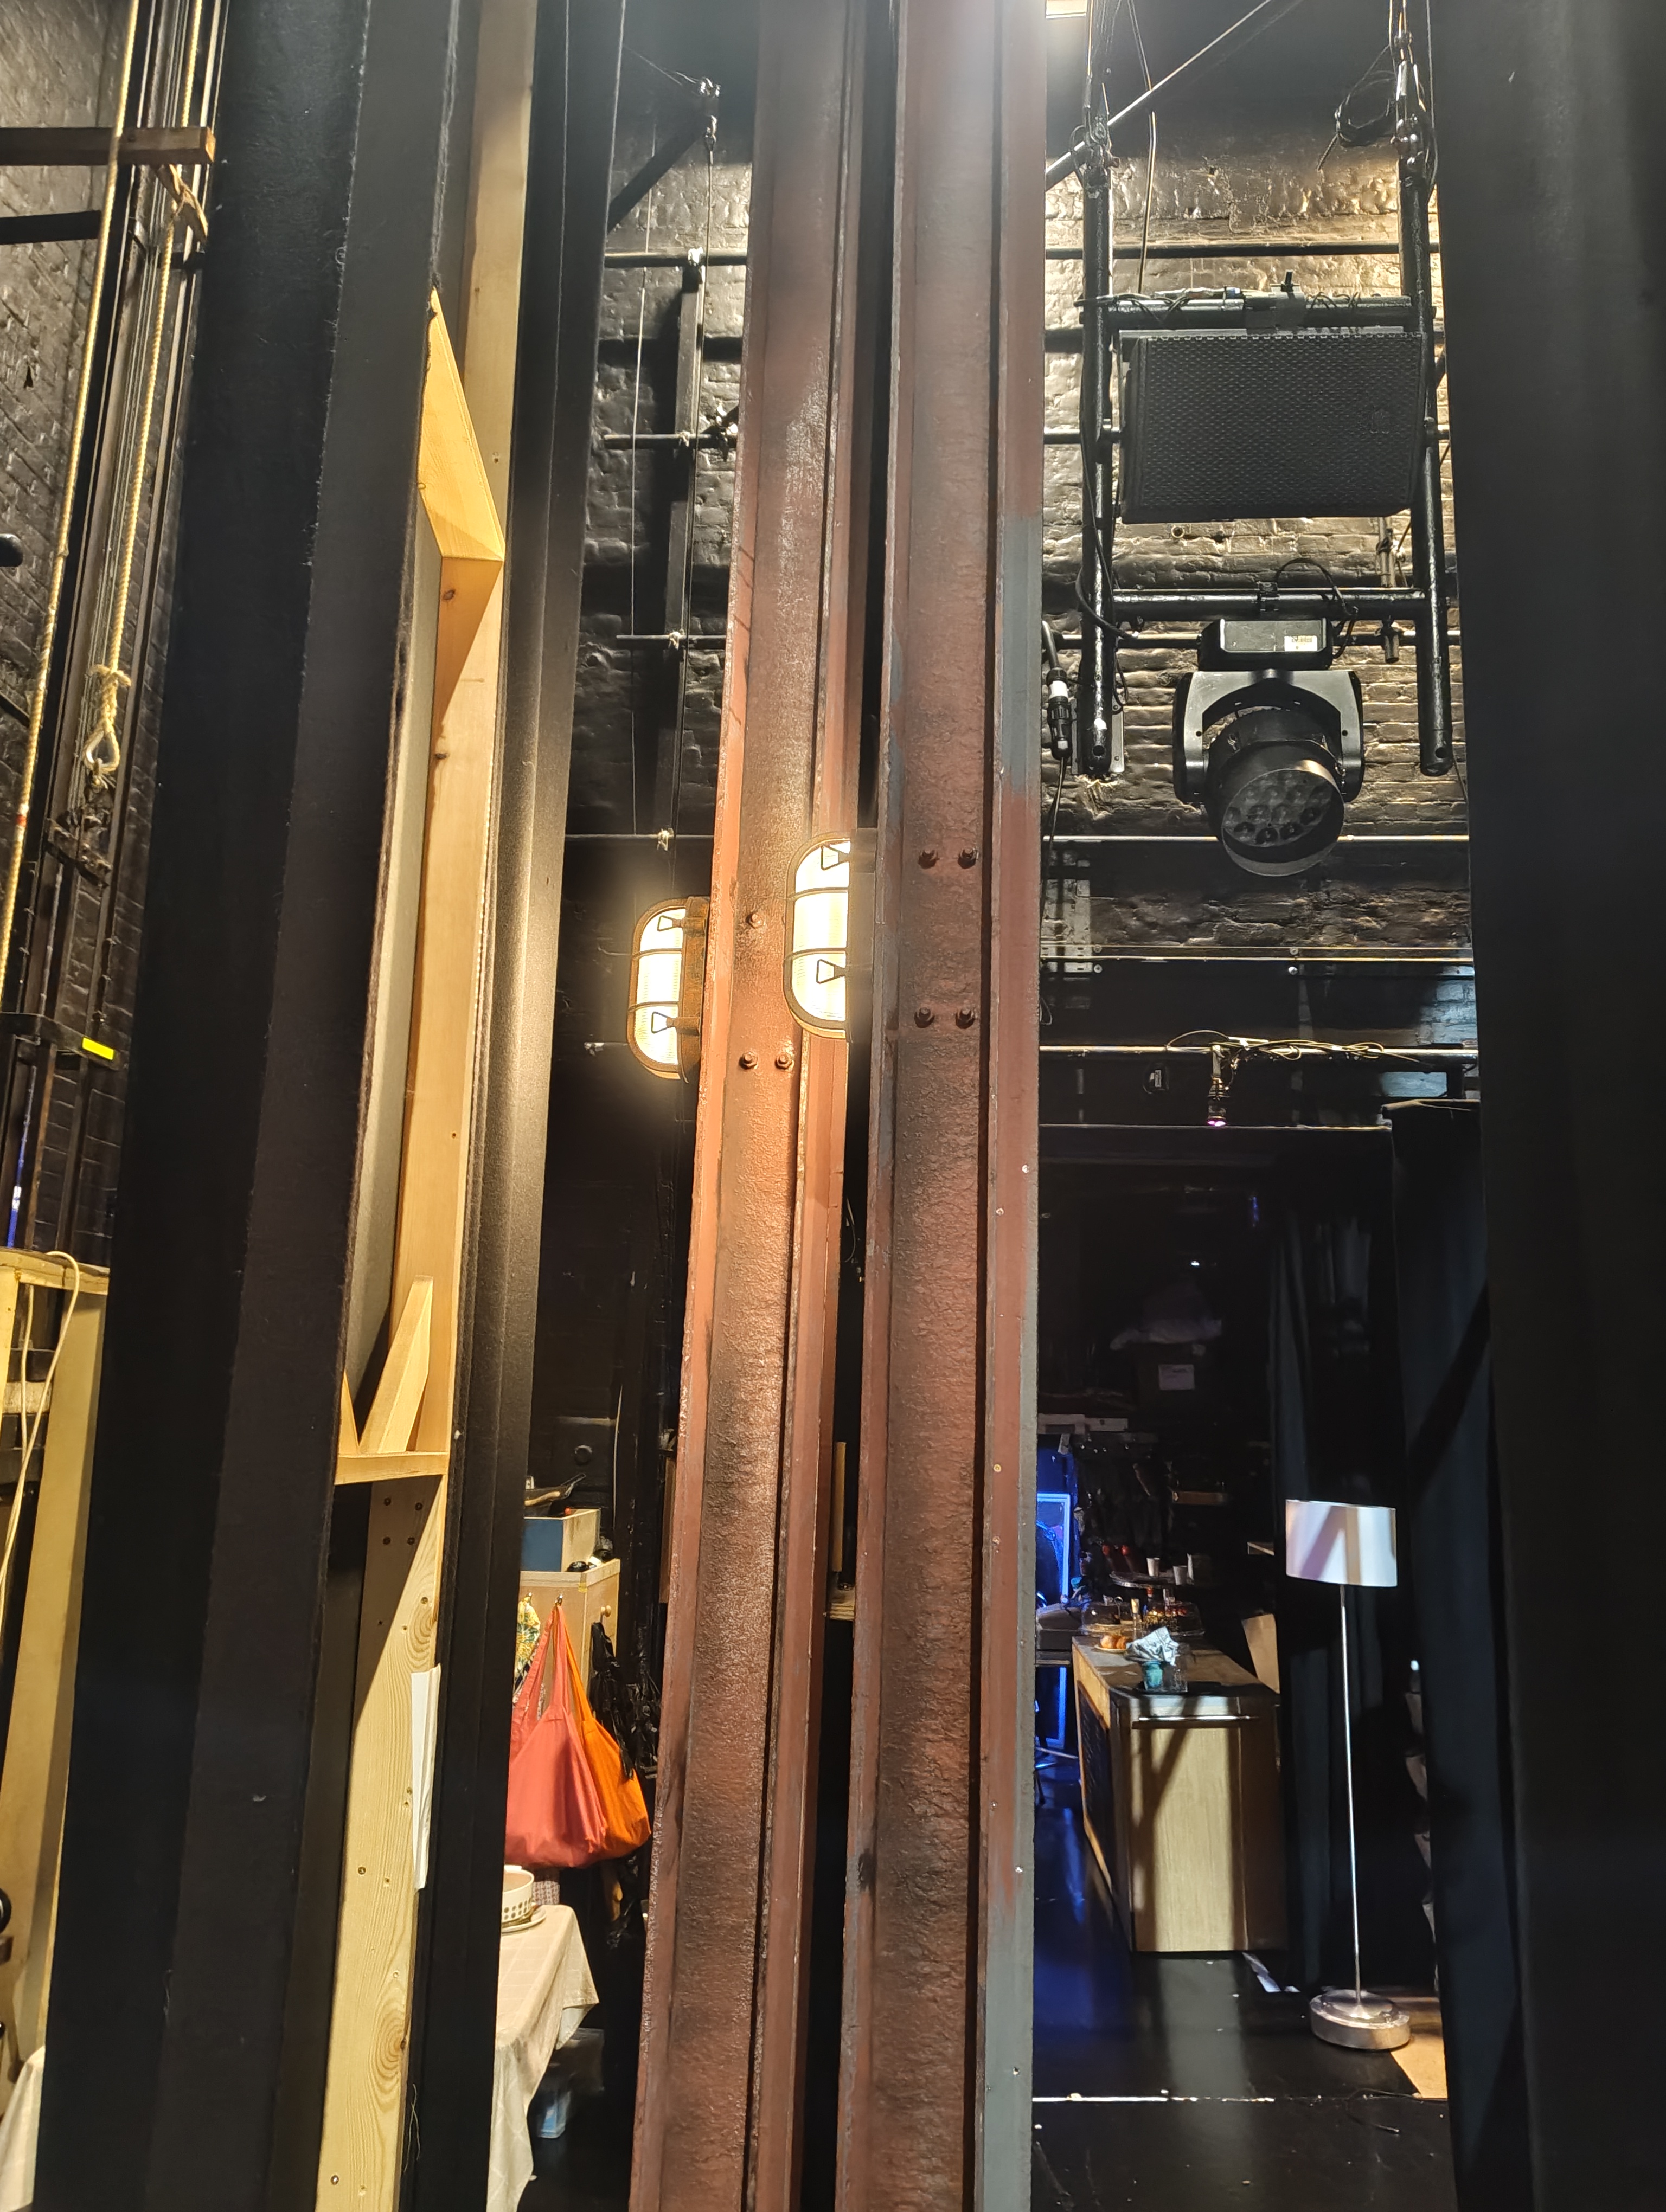
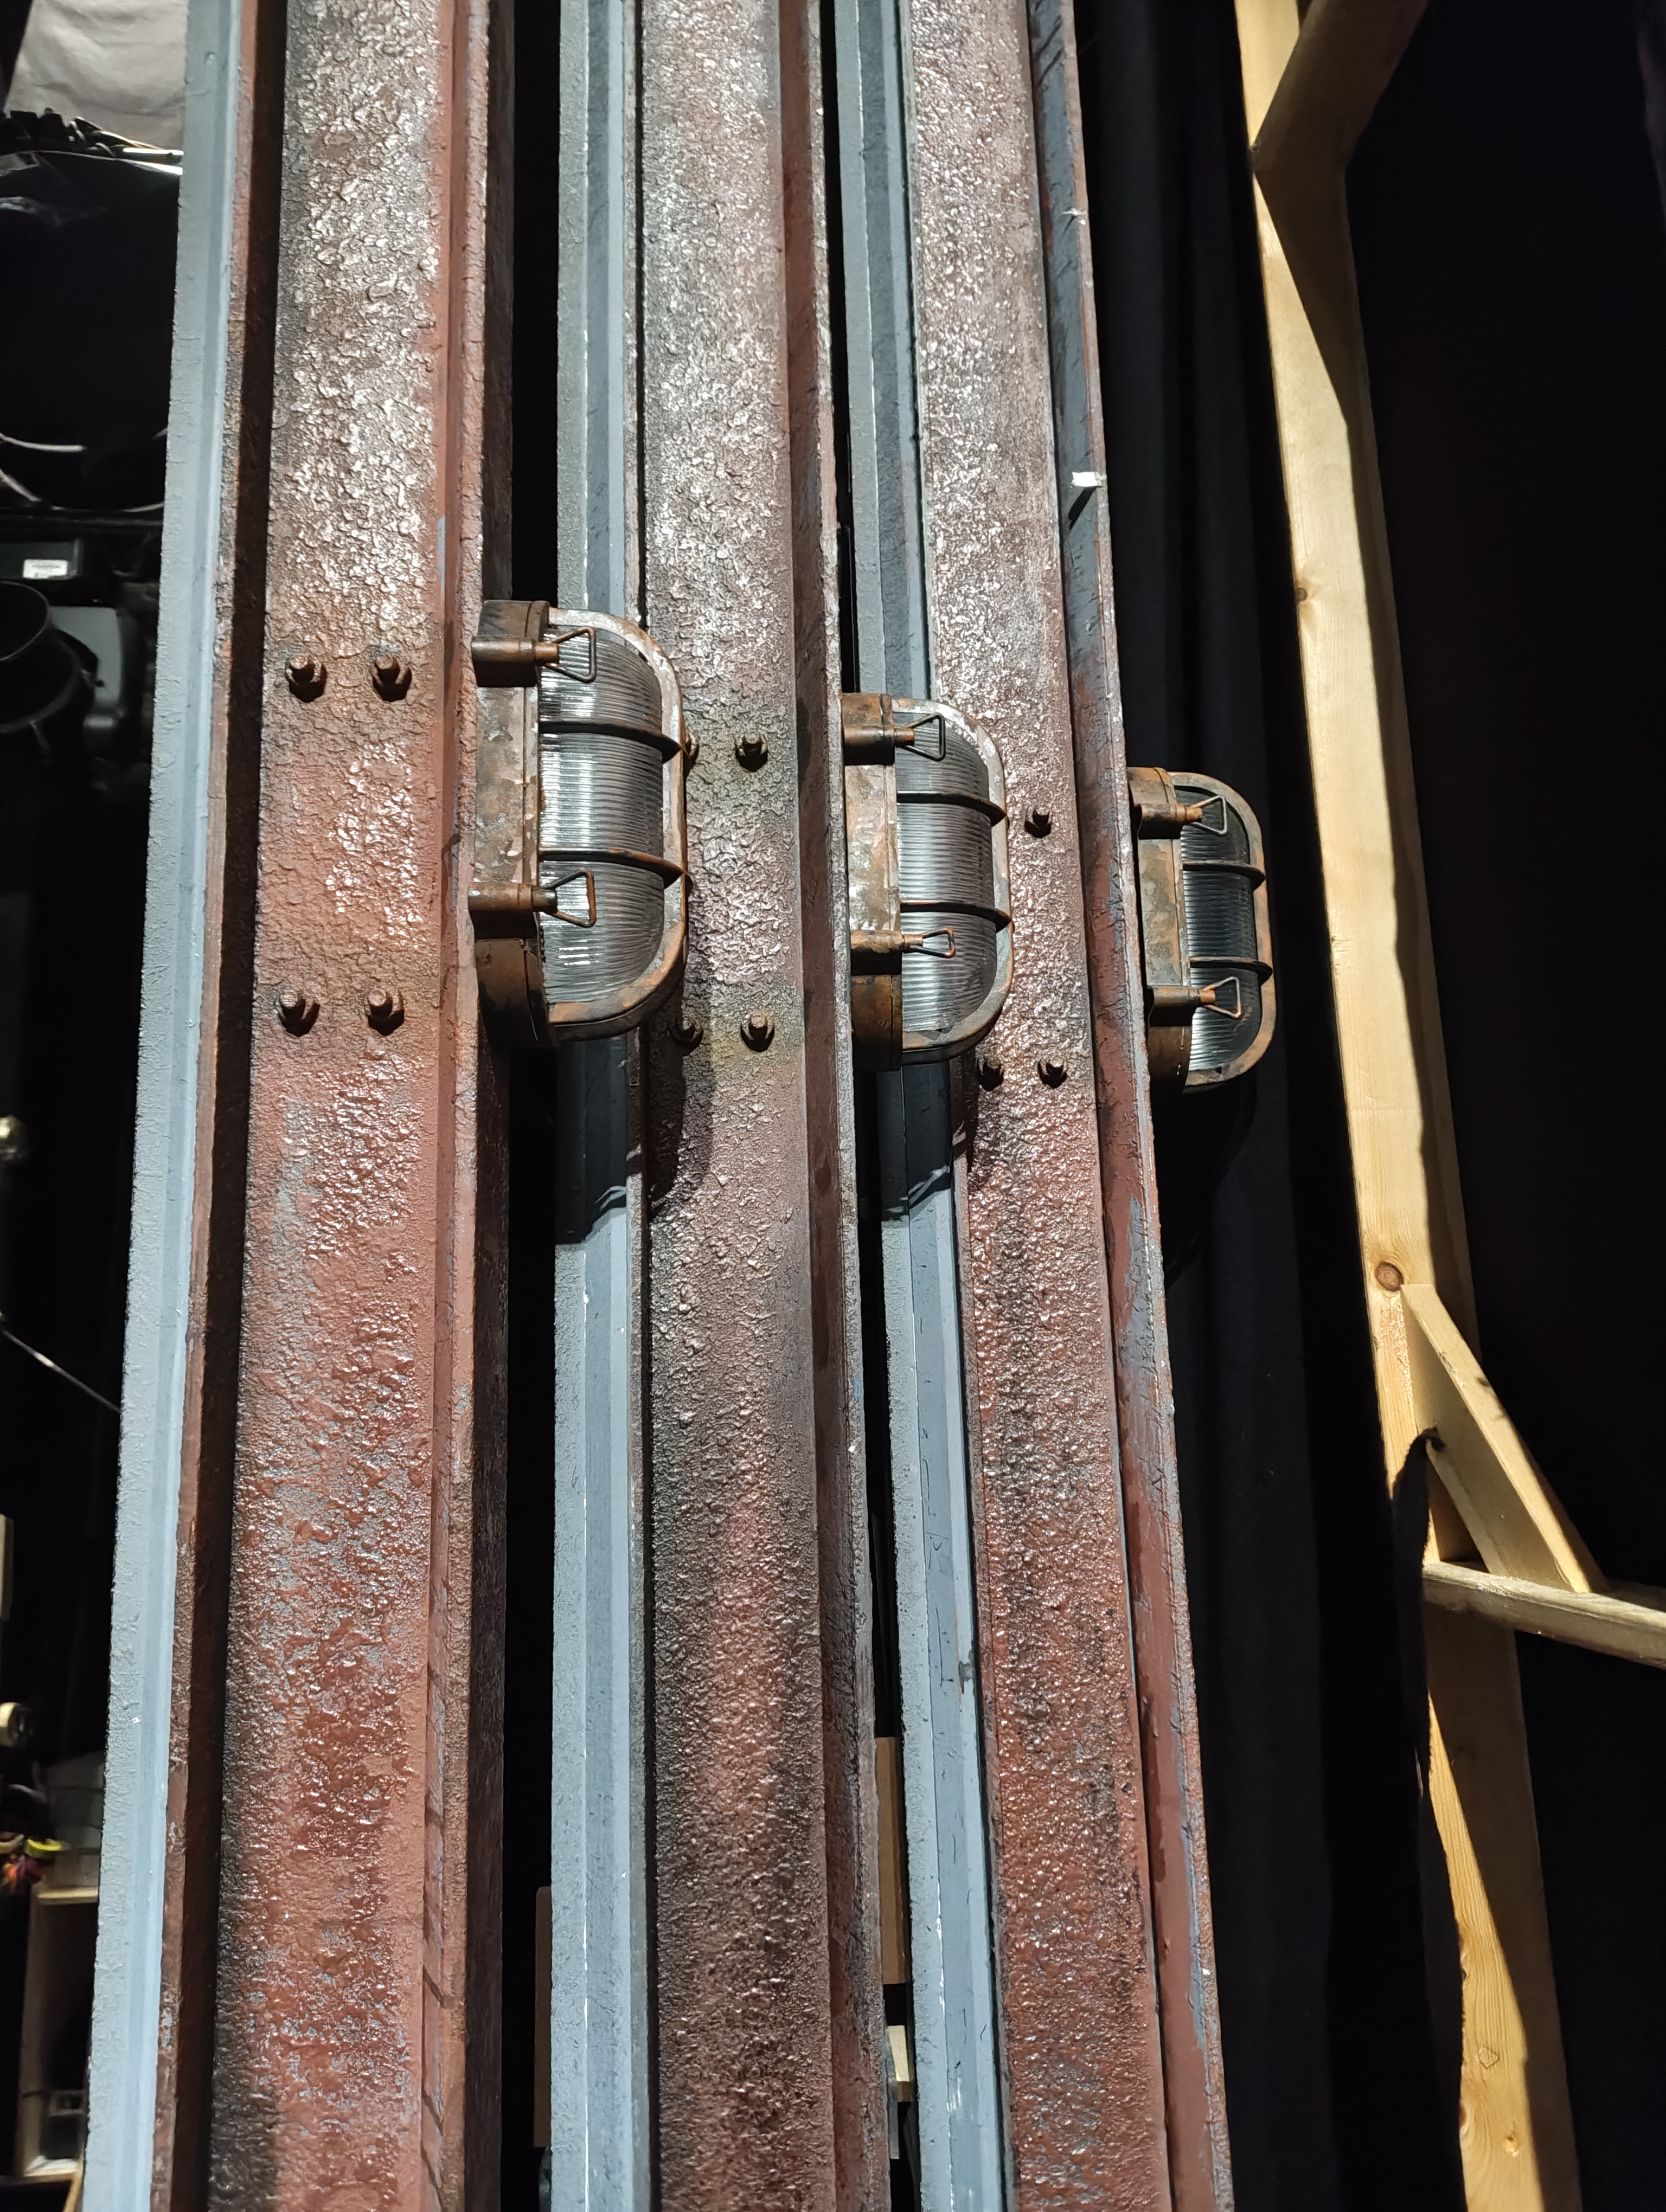
There are 5 Brewery Bulkheads situated on the end of each brewery slider — 2 SR and 3 SL. They are industrial-looking bulkhead lighting sconces with RGBW LED tape being diffused with gel. They are powered and built by Electric Foundry dimmers.
Channels & Addressing
- Channels: 821–825
- Fixture Type: LED RGBW 16B (Generic)
- Addresses:
- Ch 821: 12/449–456
- Ch 822: 12/457–464
- Ch 823: 12/401–408
- Ch 824: 12/393–400
- Ch 825: 12/385–392
- Parameters: Intensity, Red, Green, Blue, White (RGBW 16-bit)
Power & Control
| Power Source | SR/SL Fly Floors |
| Driver / PSU | Electric Foundry EF1K - LED Driver |
| DMX Source | SR/SL Fly Floors |
| Cable Type | 5 core drops to each slider panel |
Note
Each slider has a cable loop left in it to allow the individual panels to slide on and off stage.
Images
Key Views
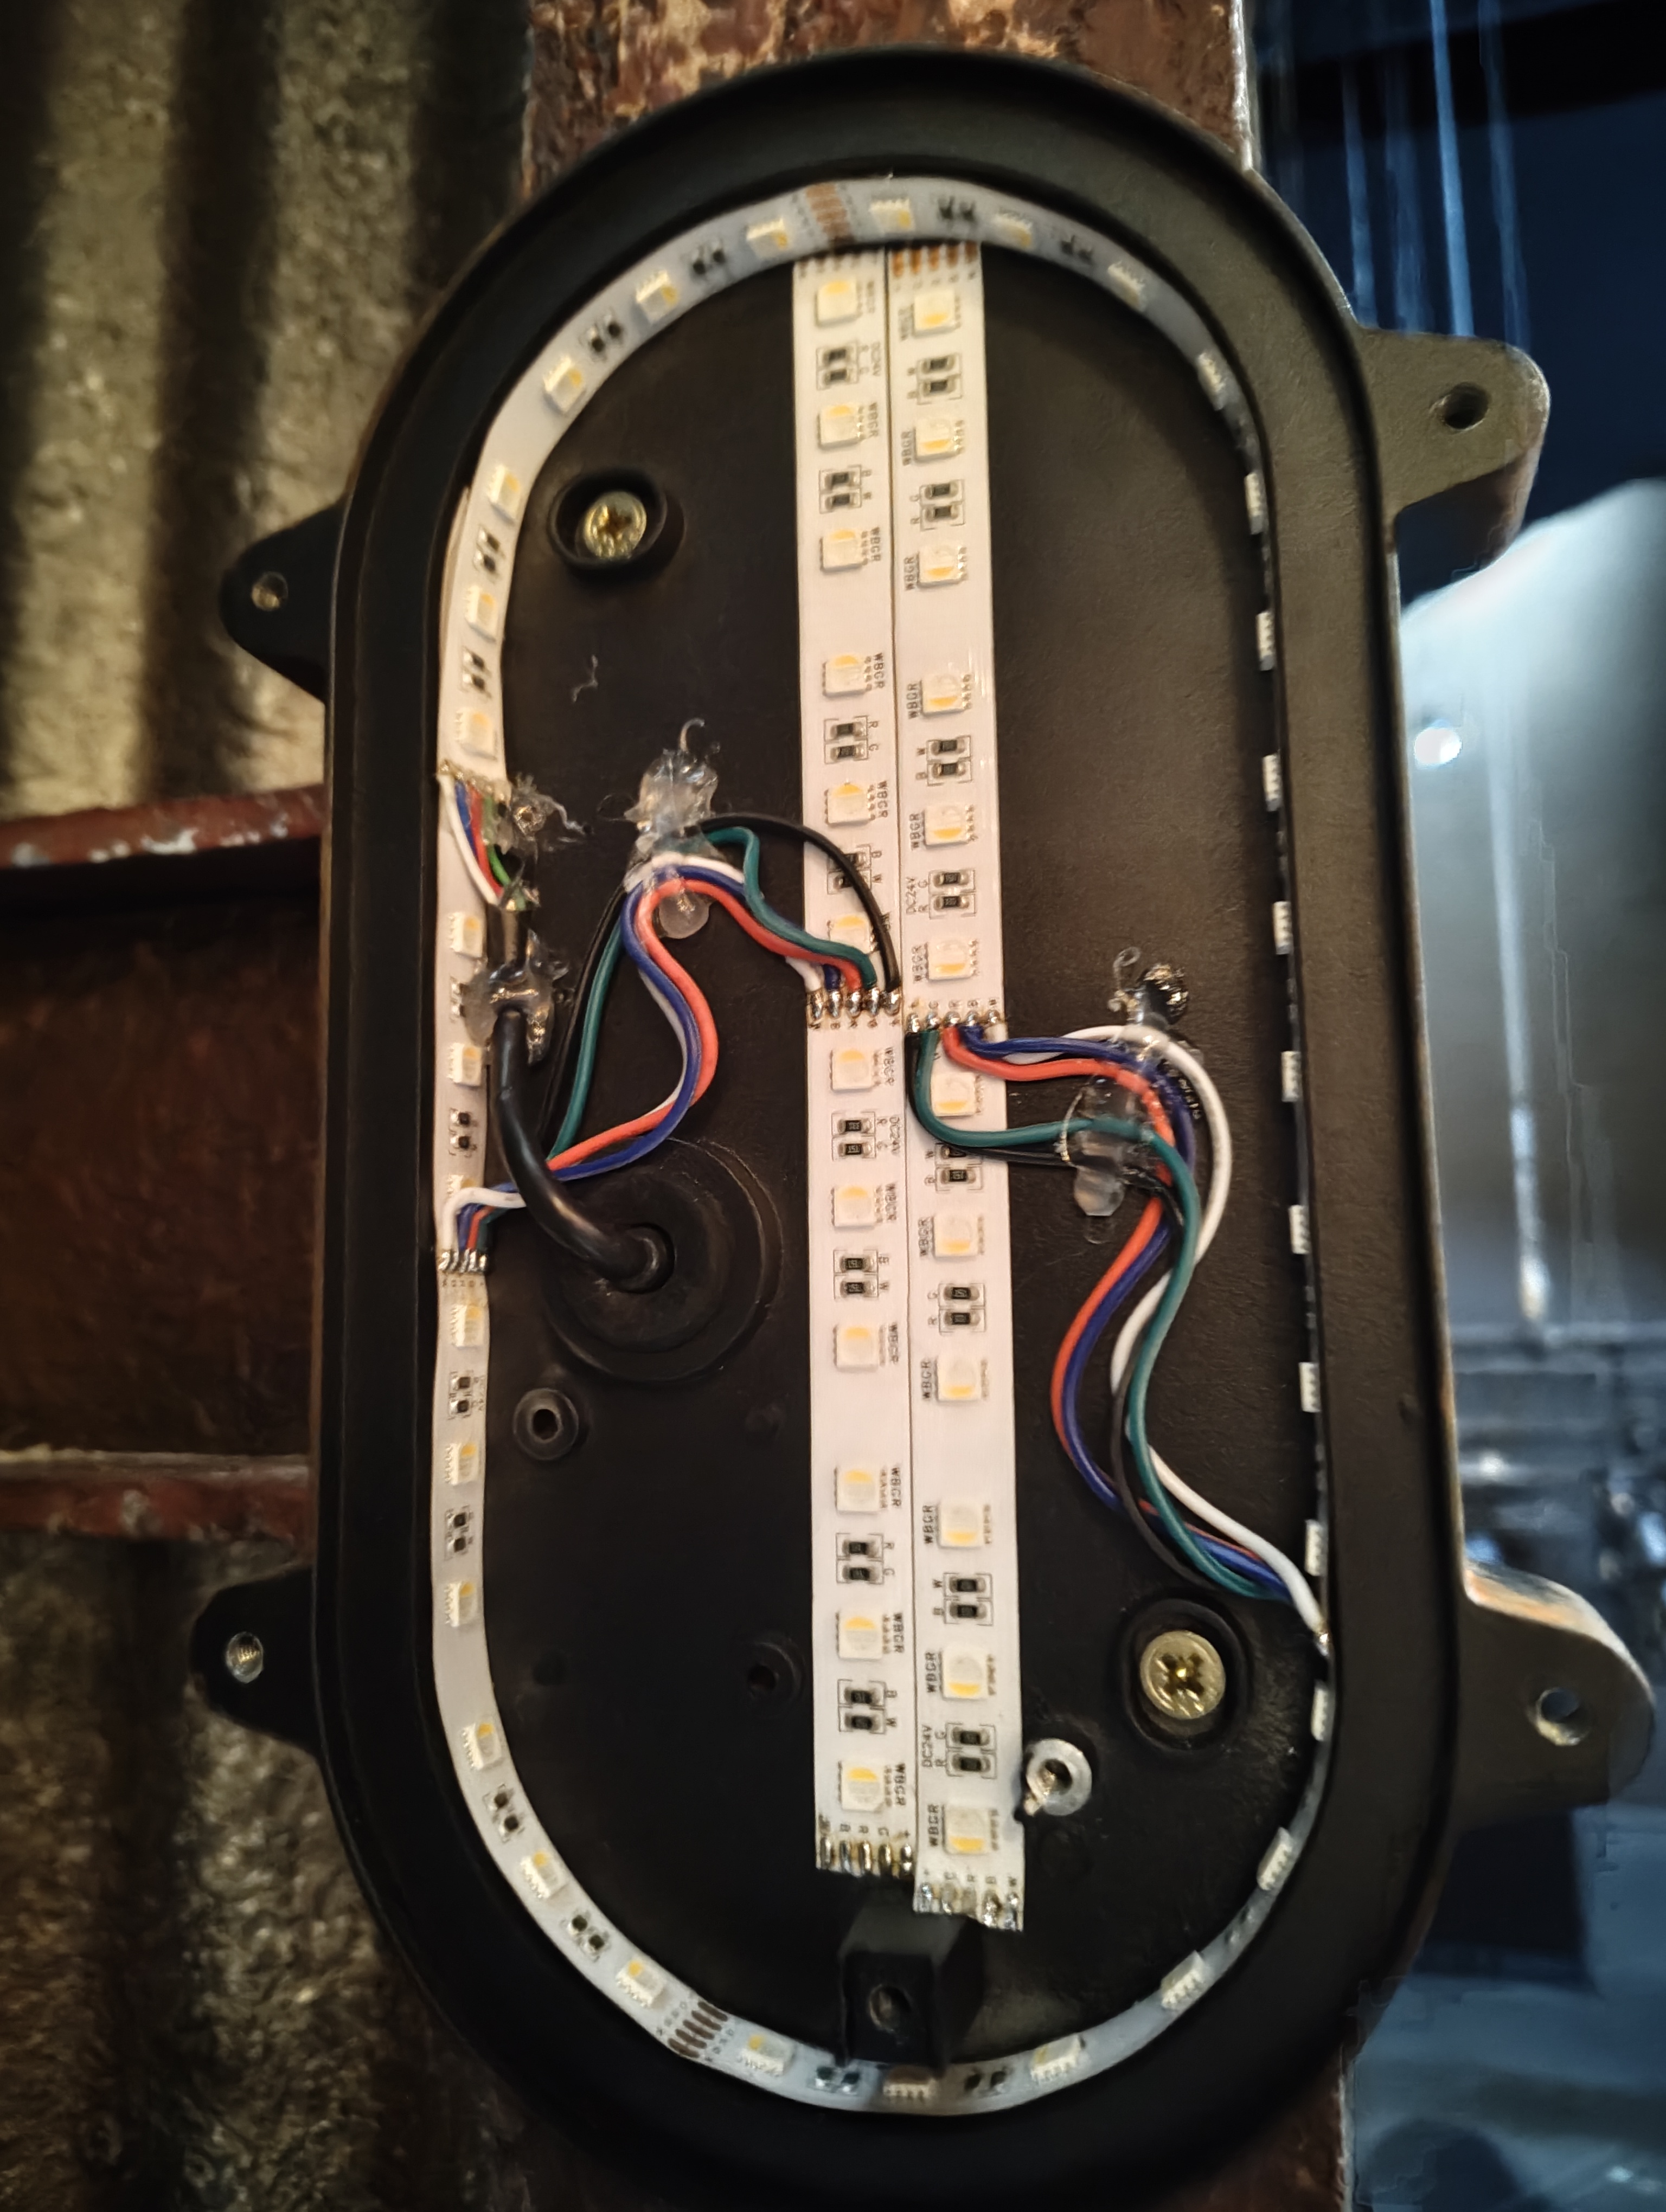
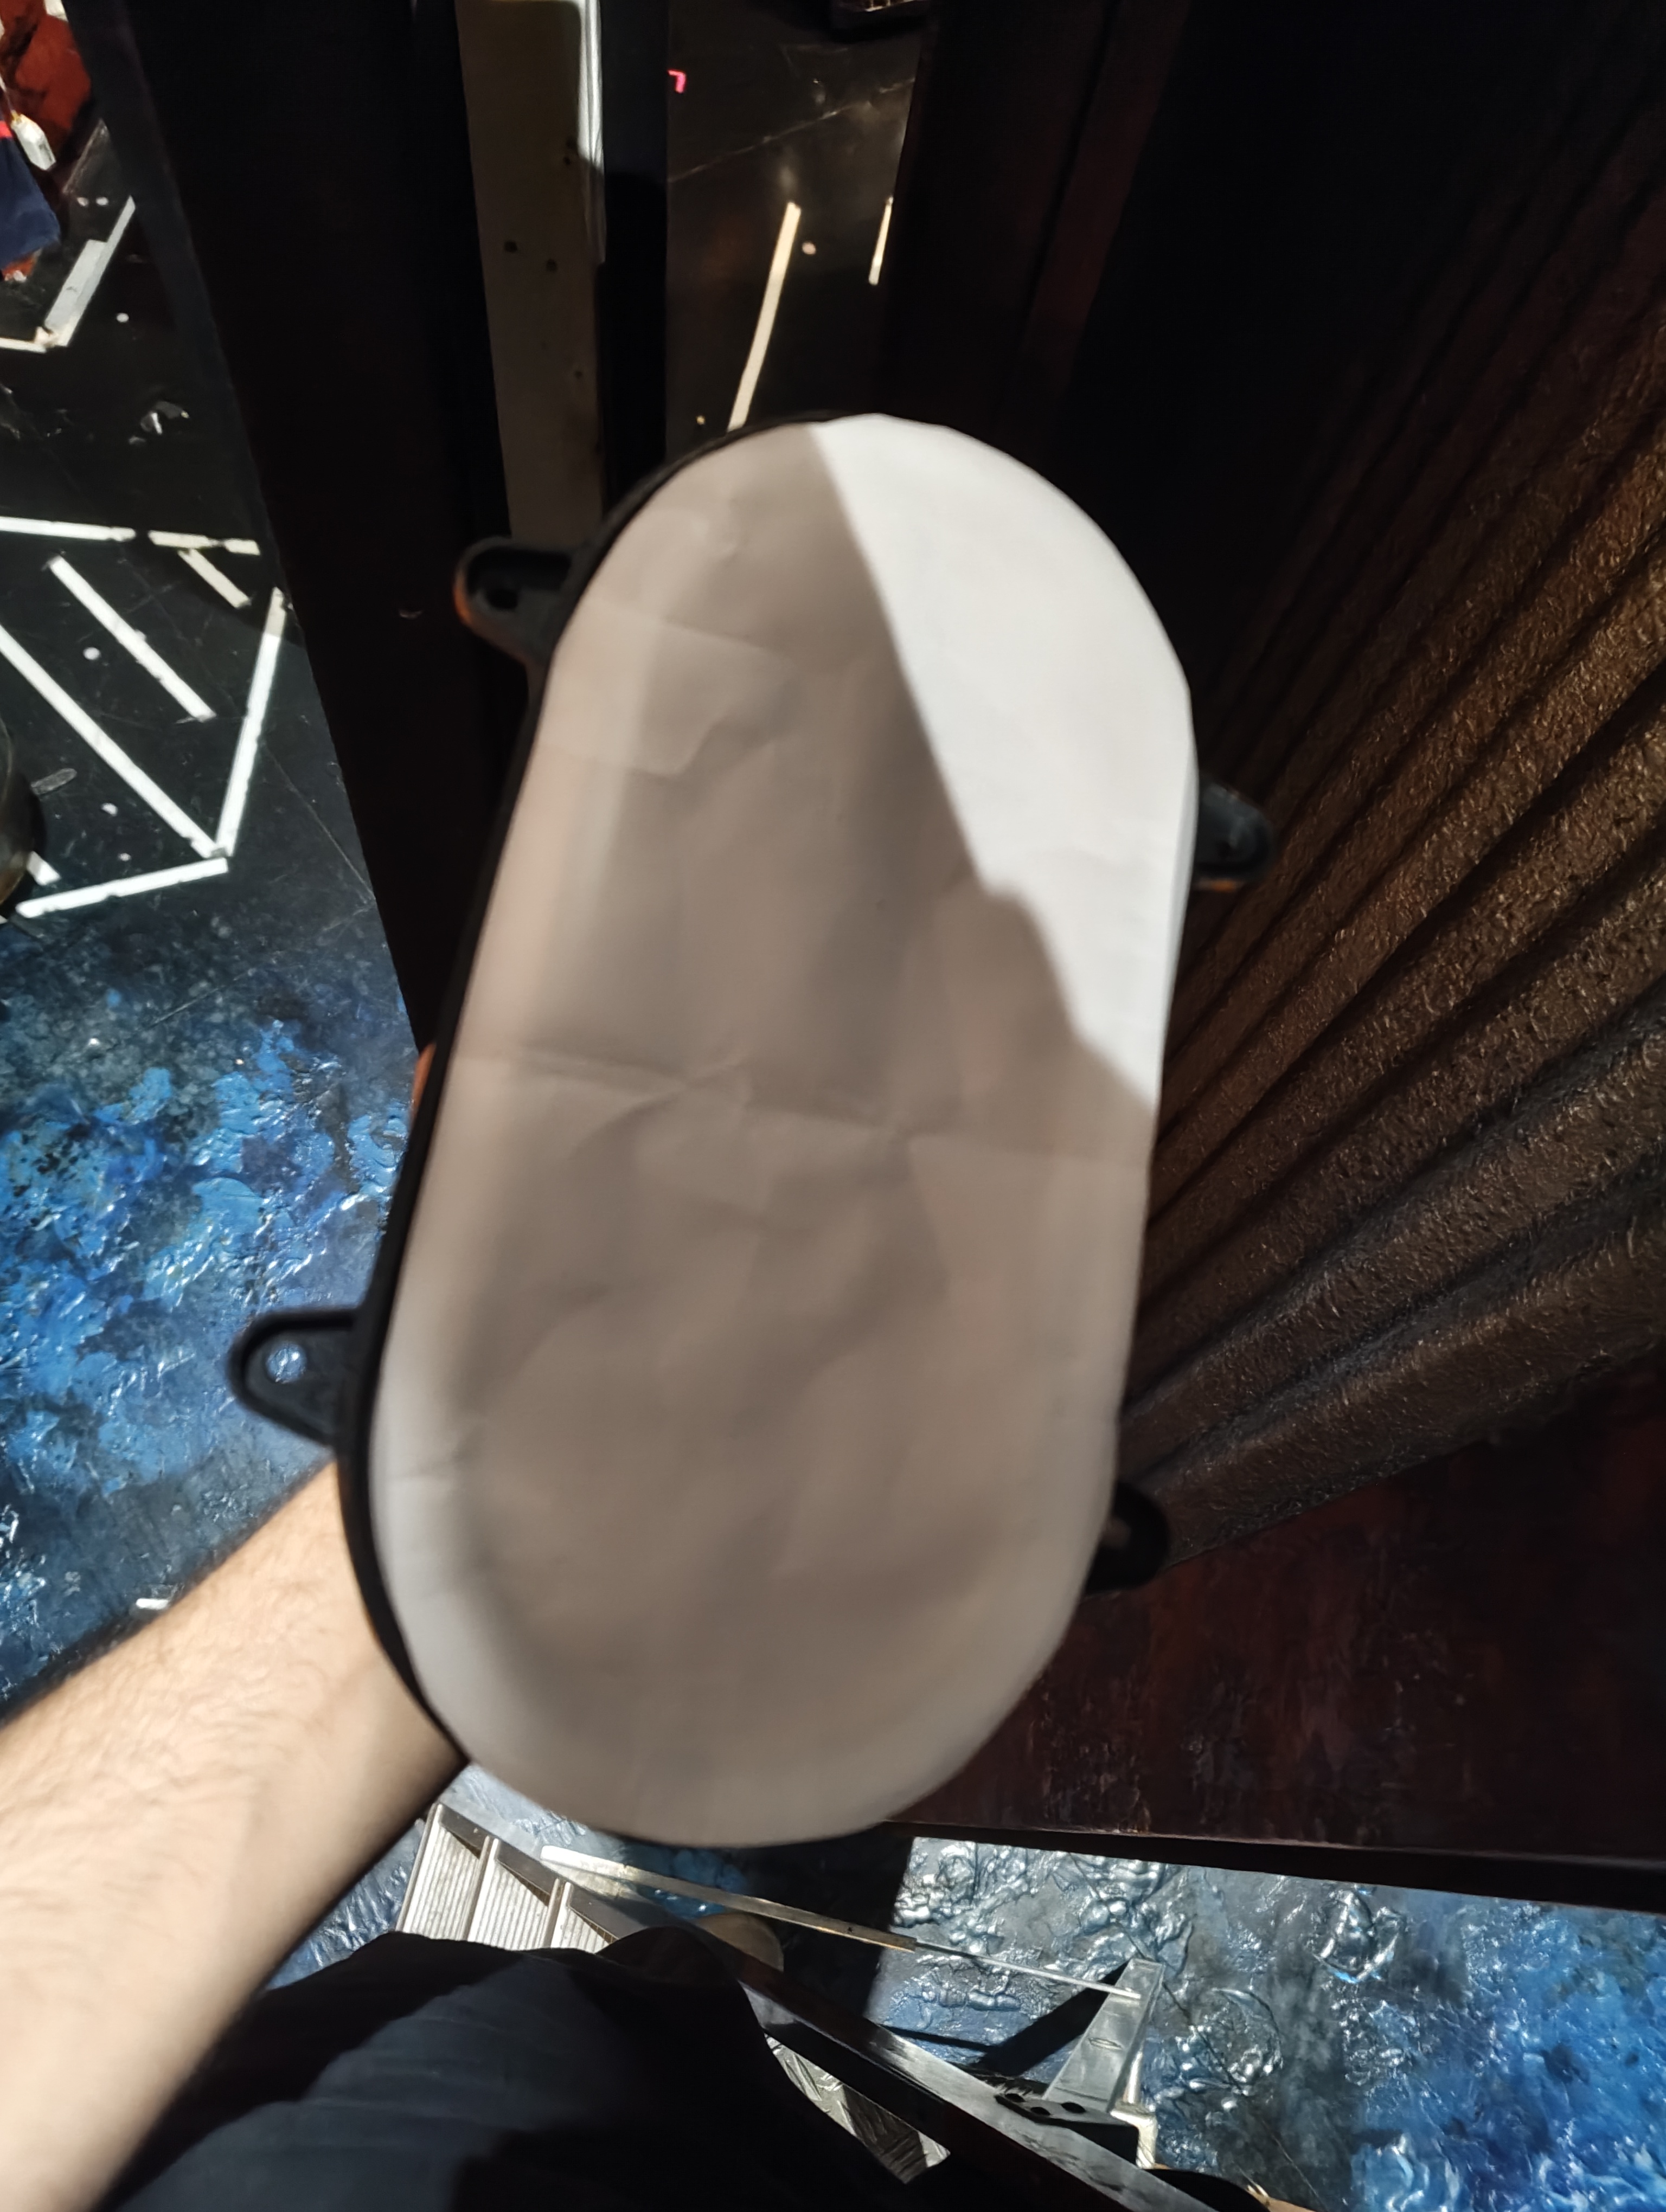
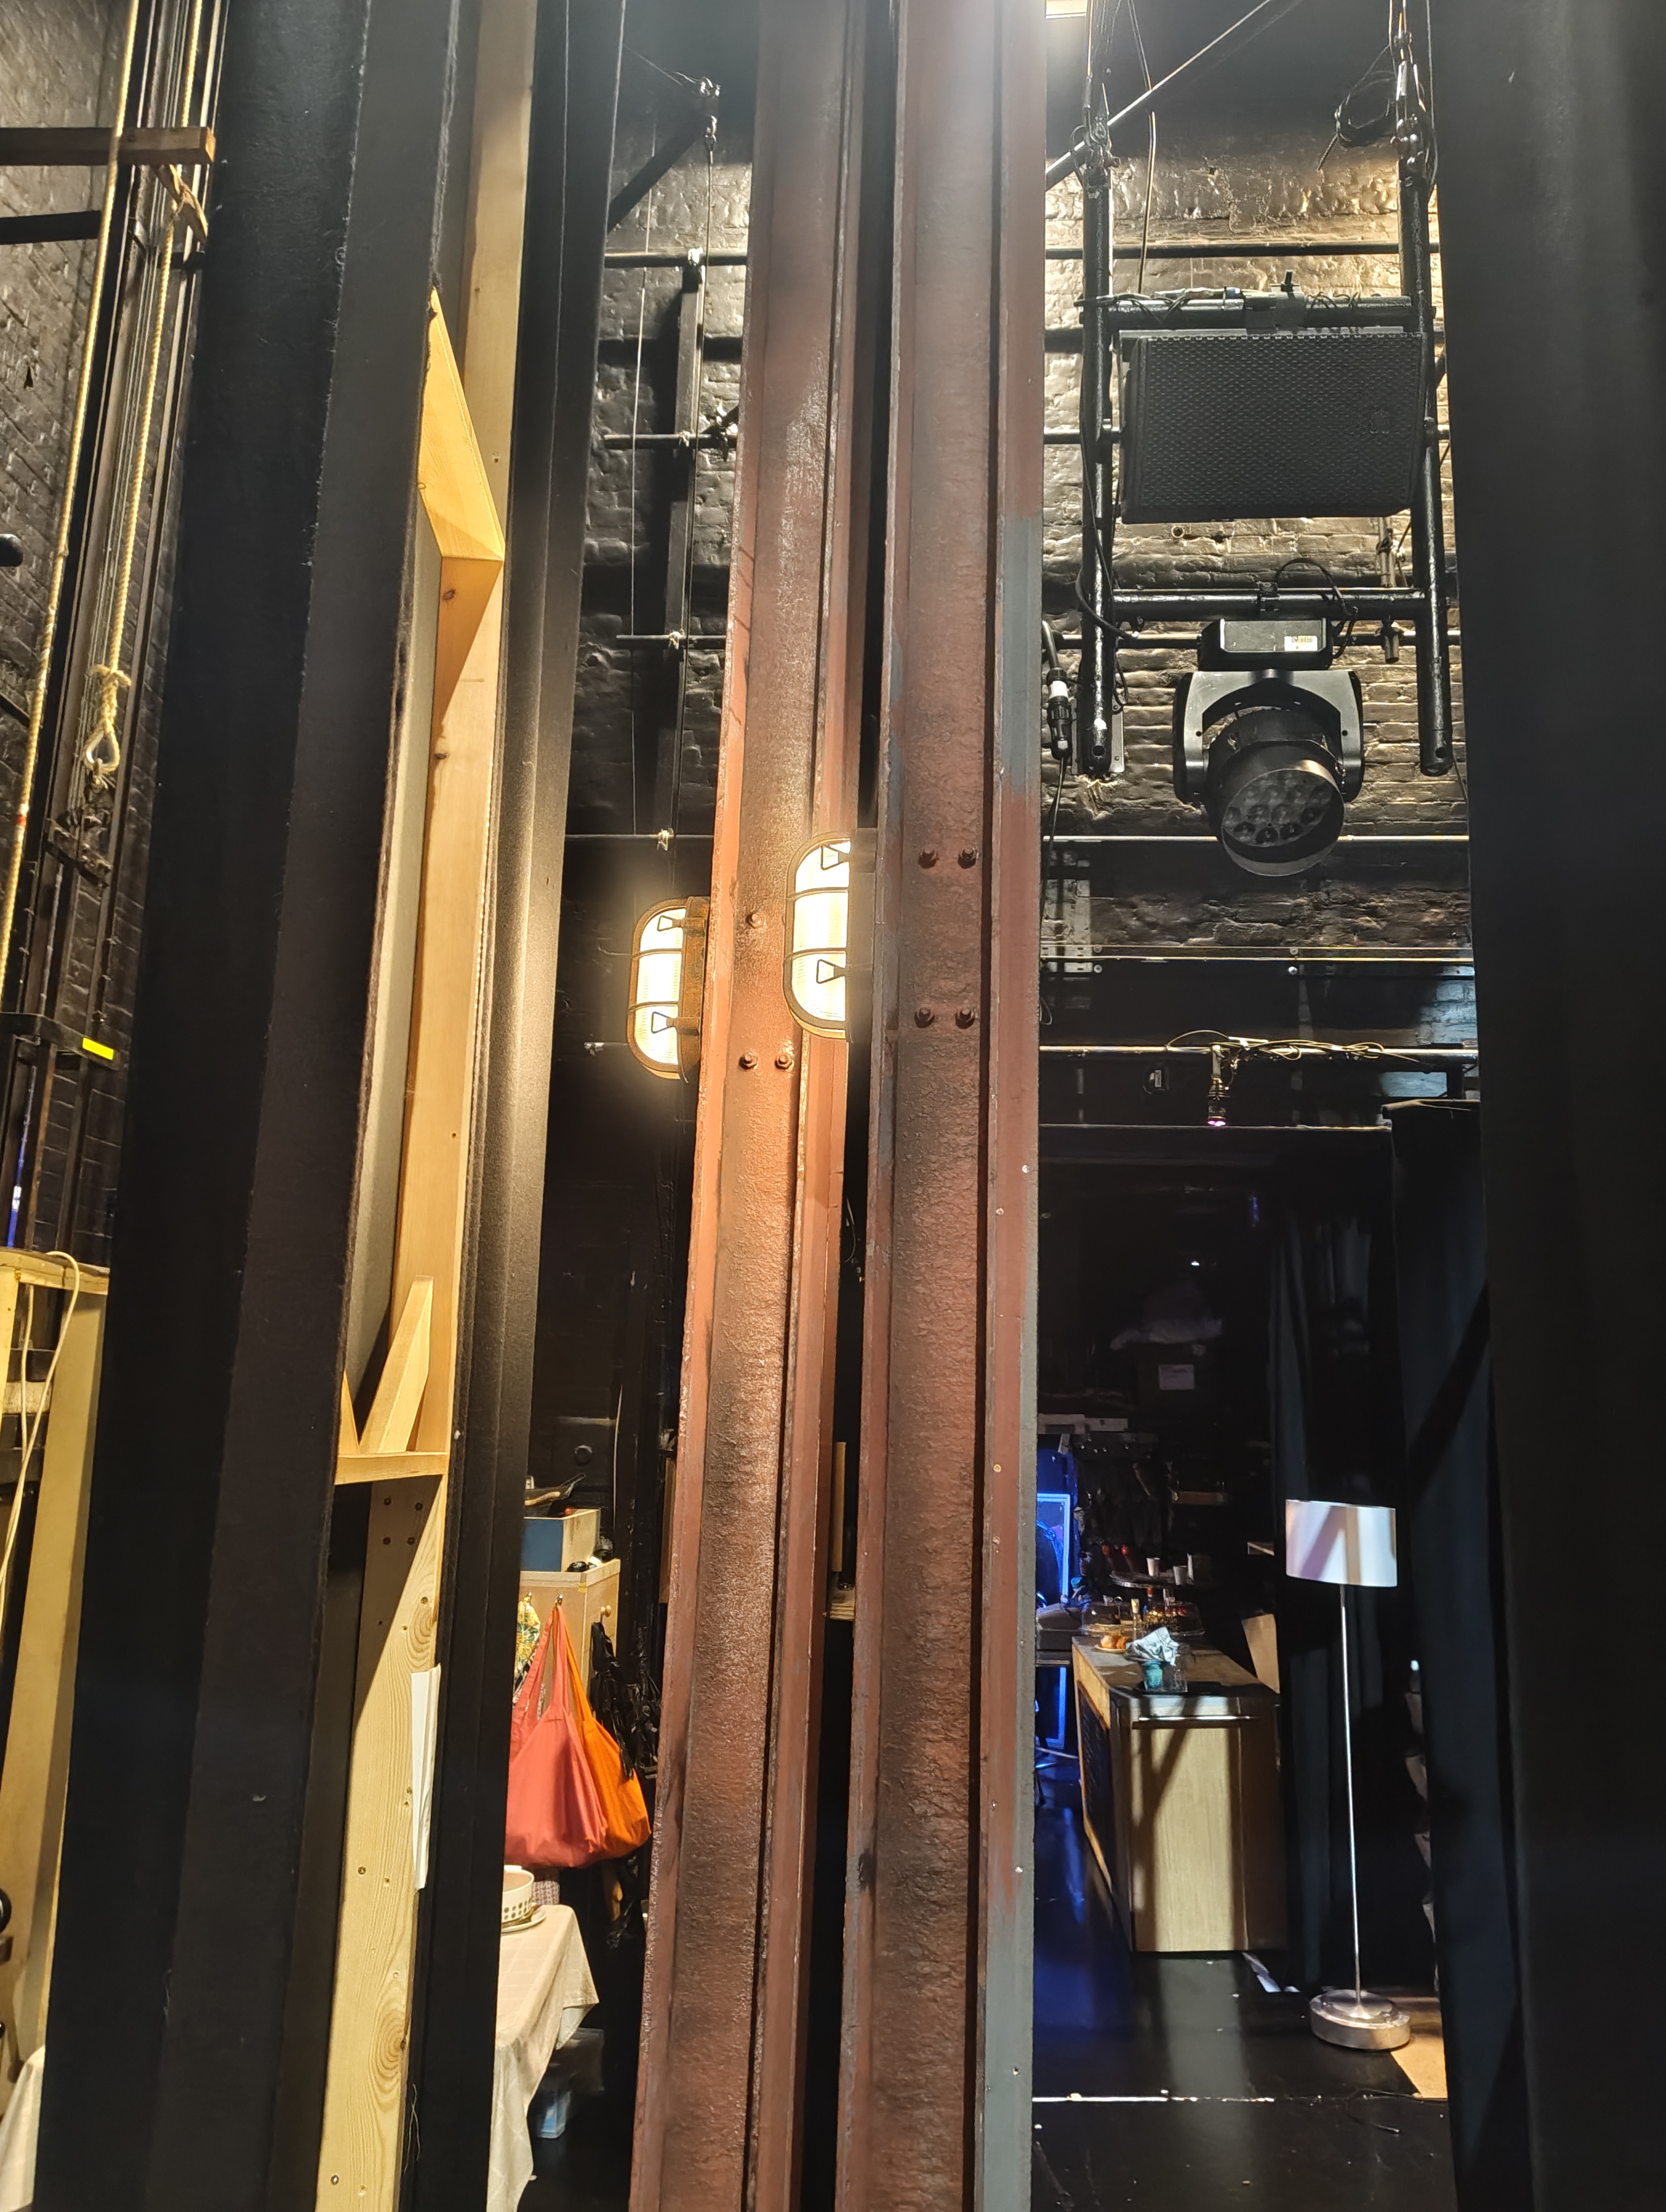
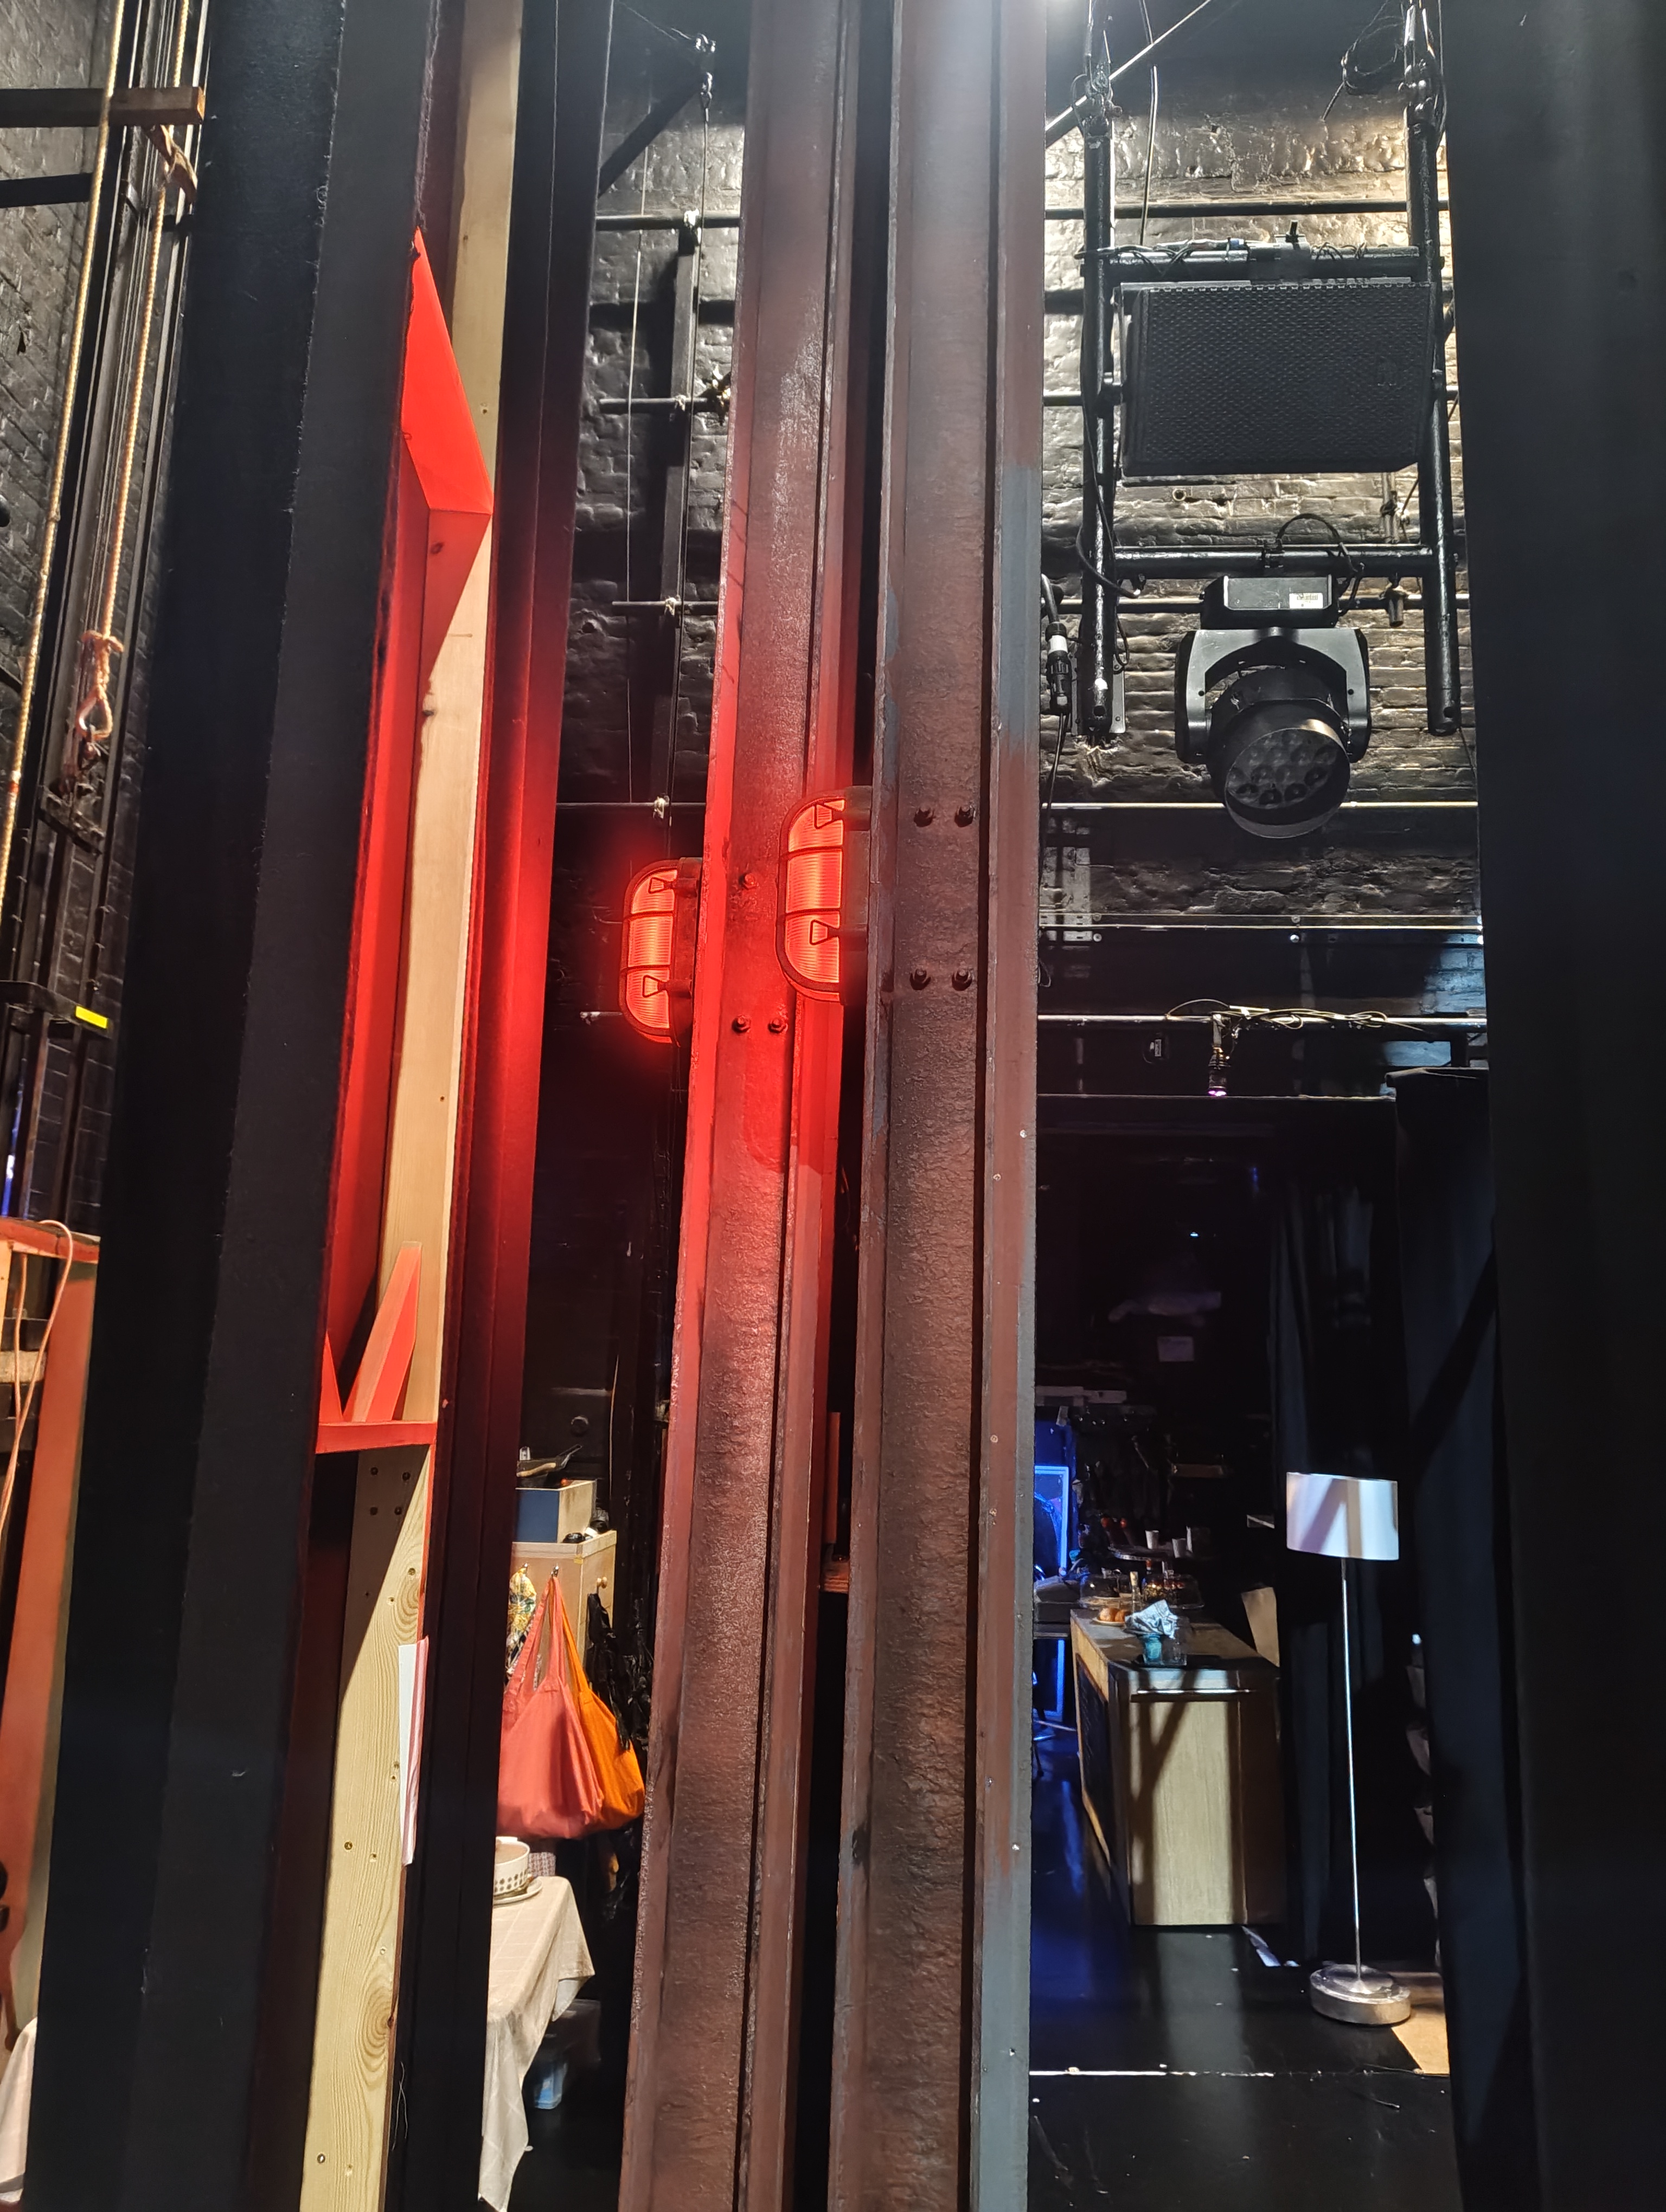
All Reference Photos (click to expand)
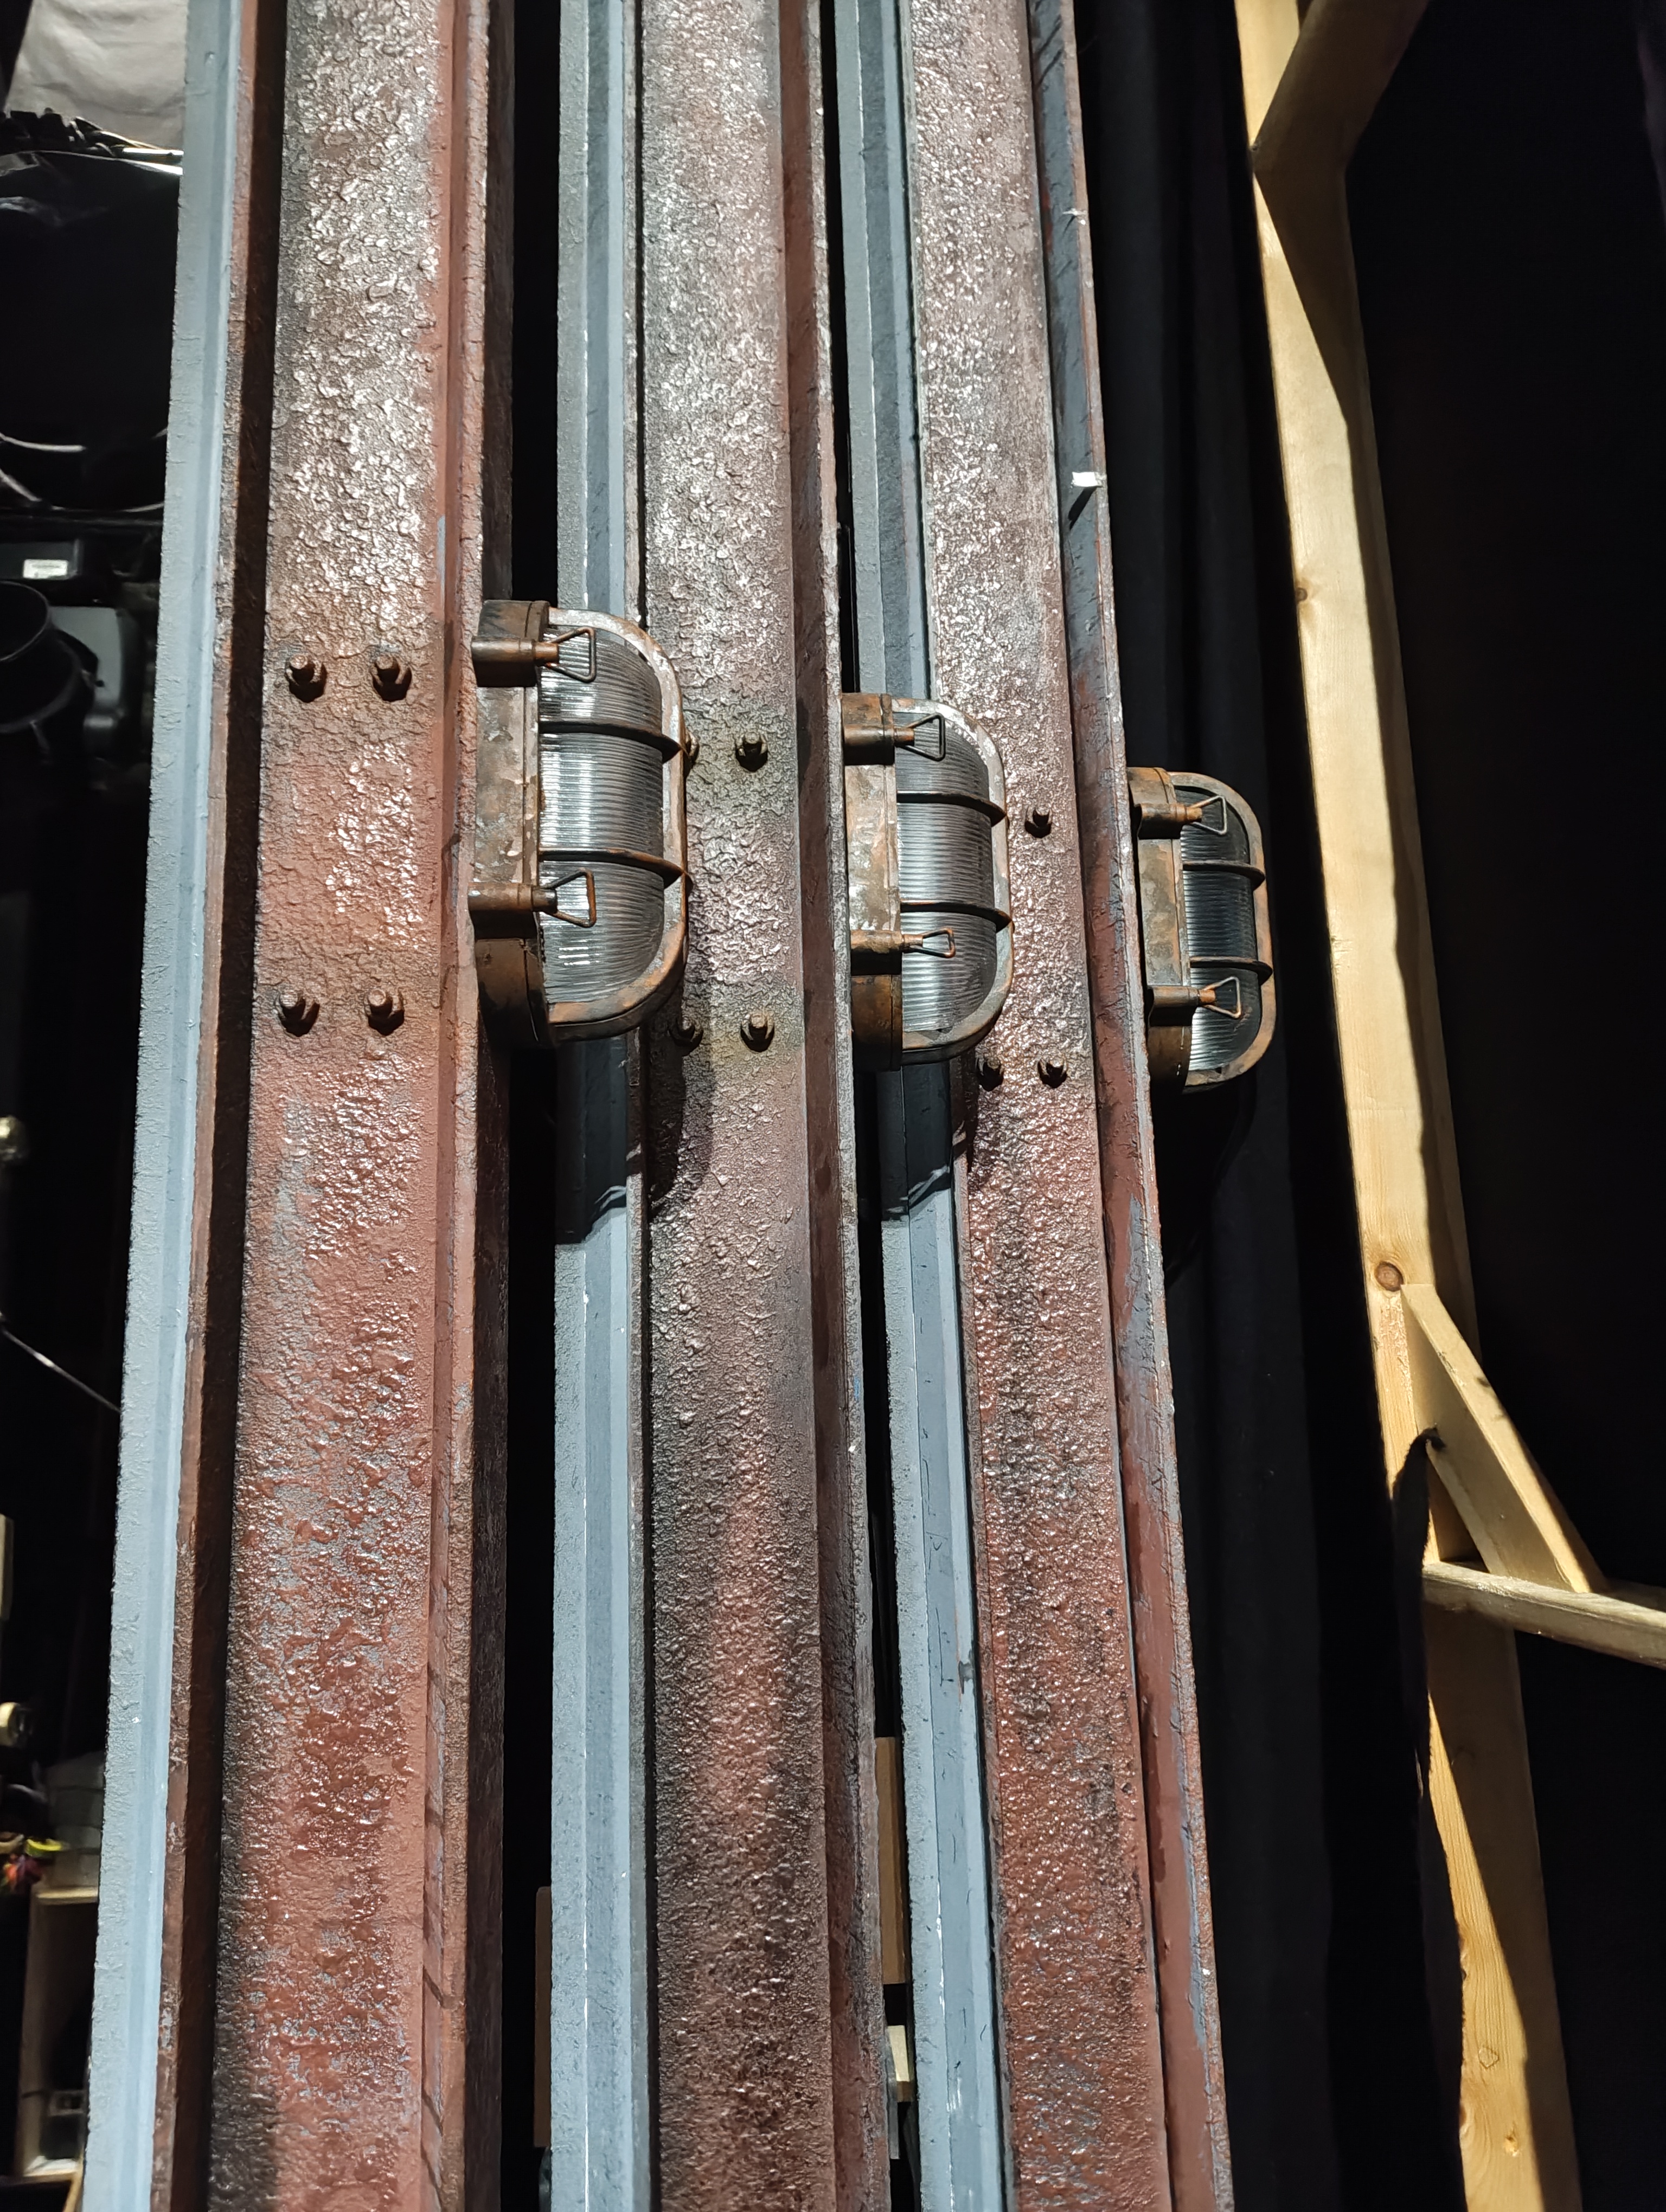
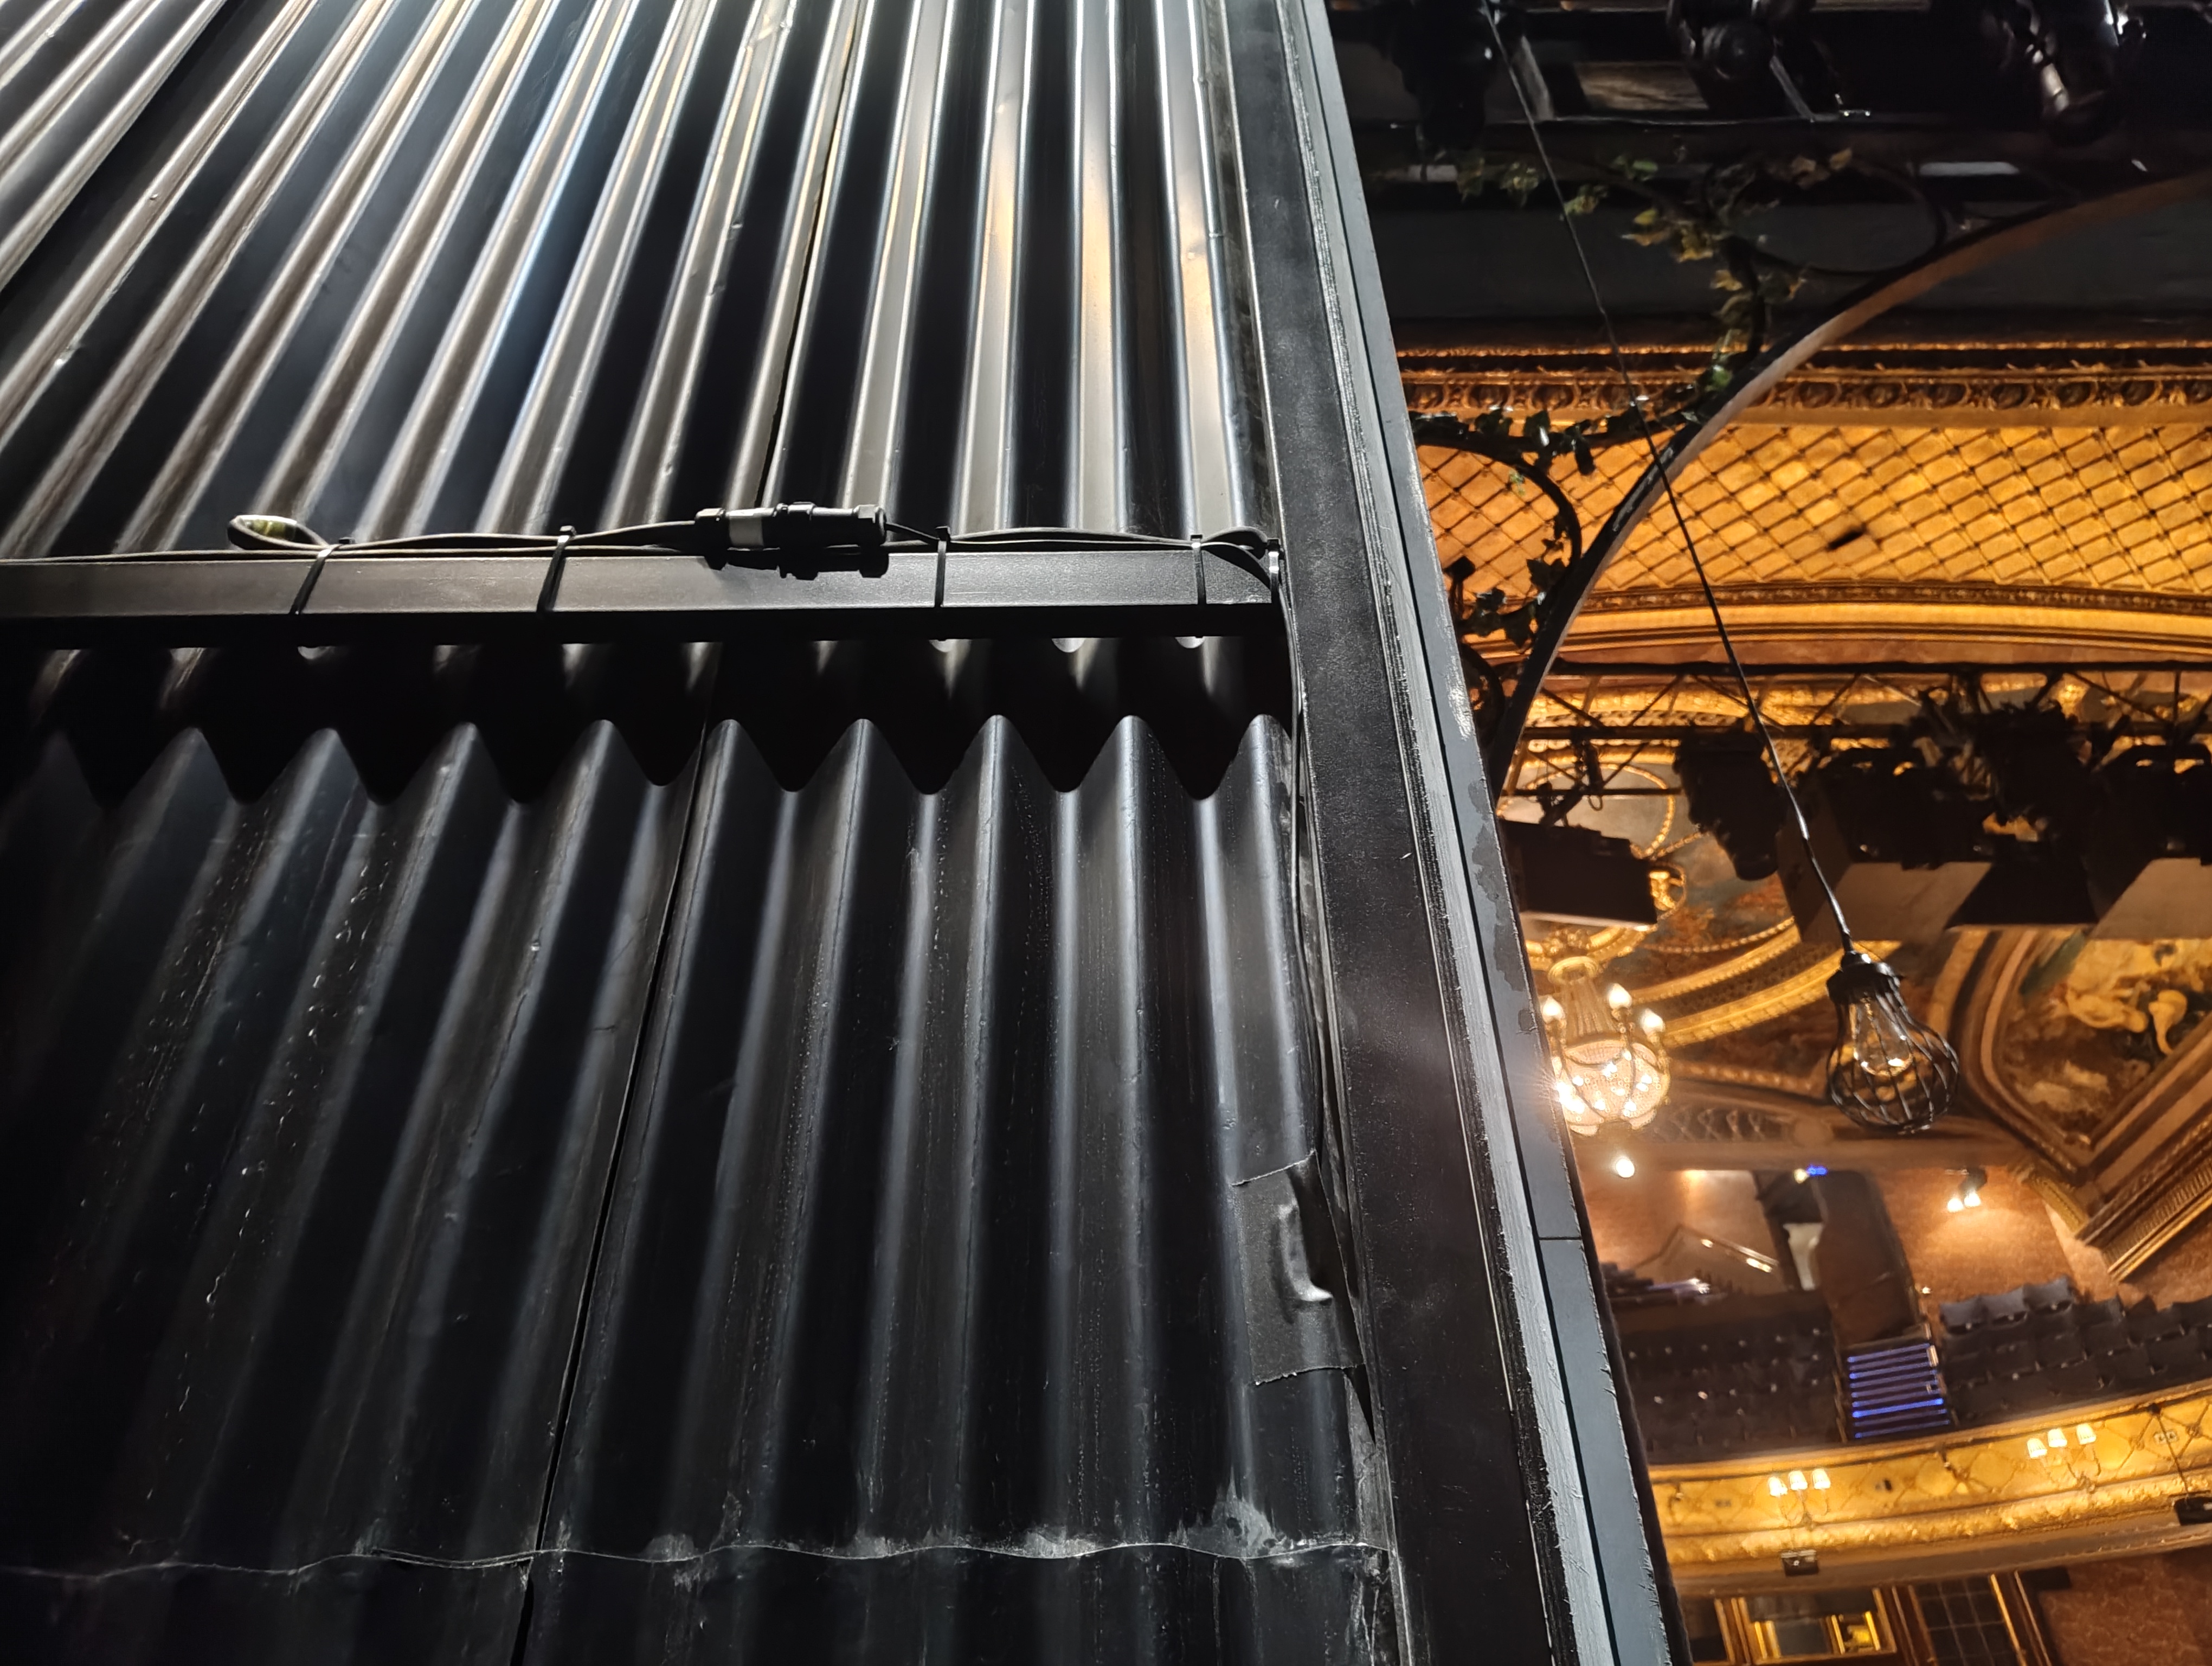
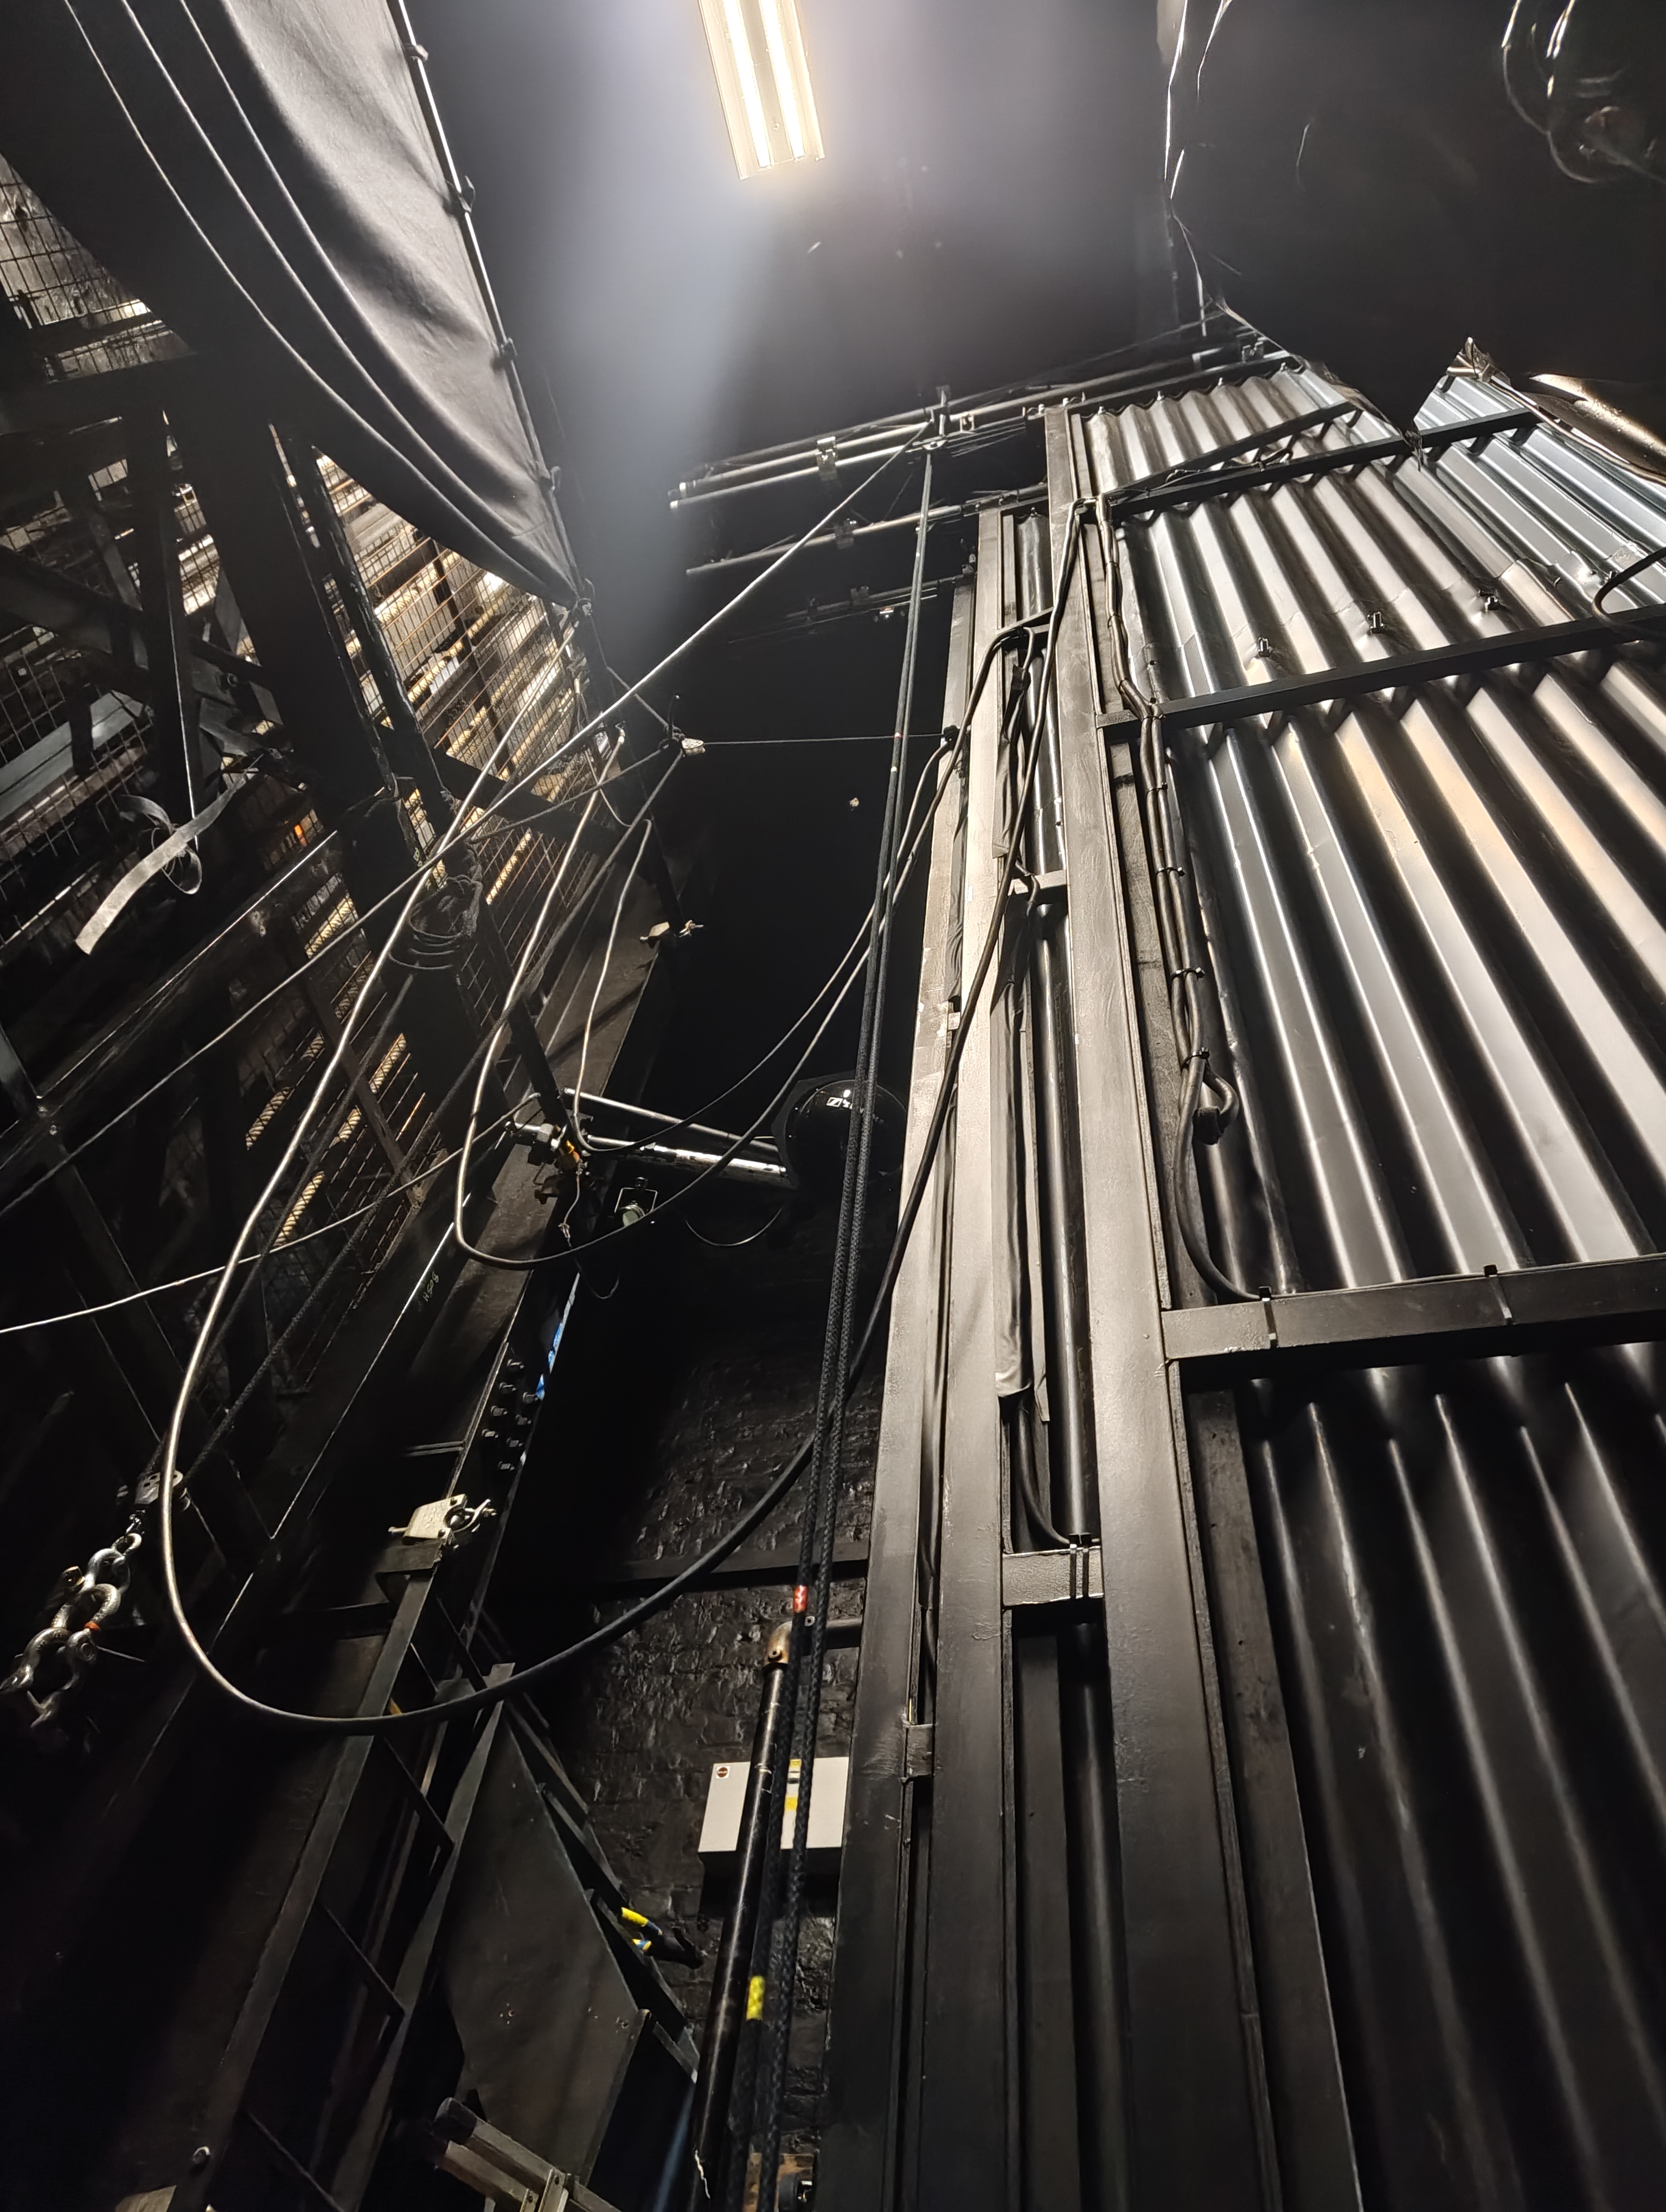
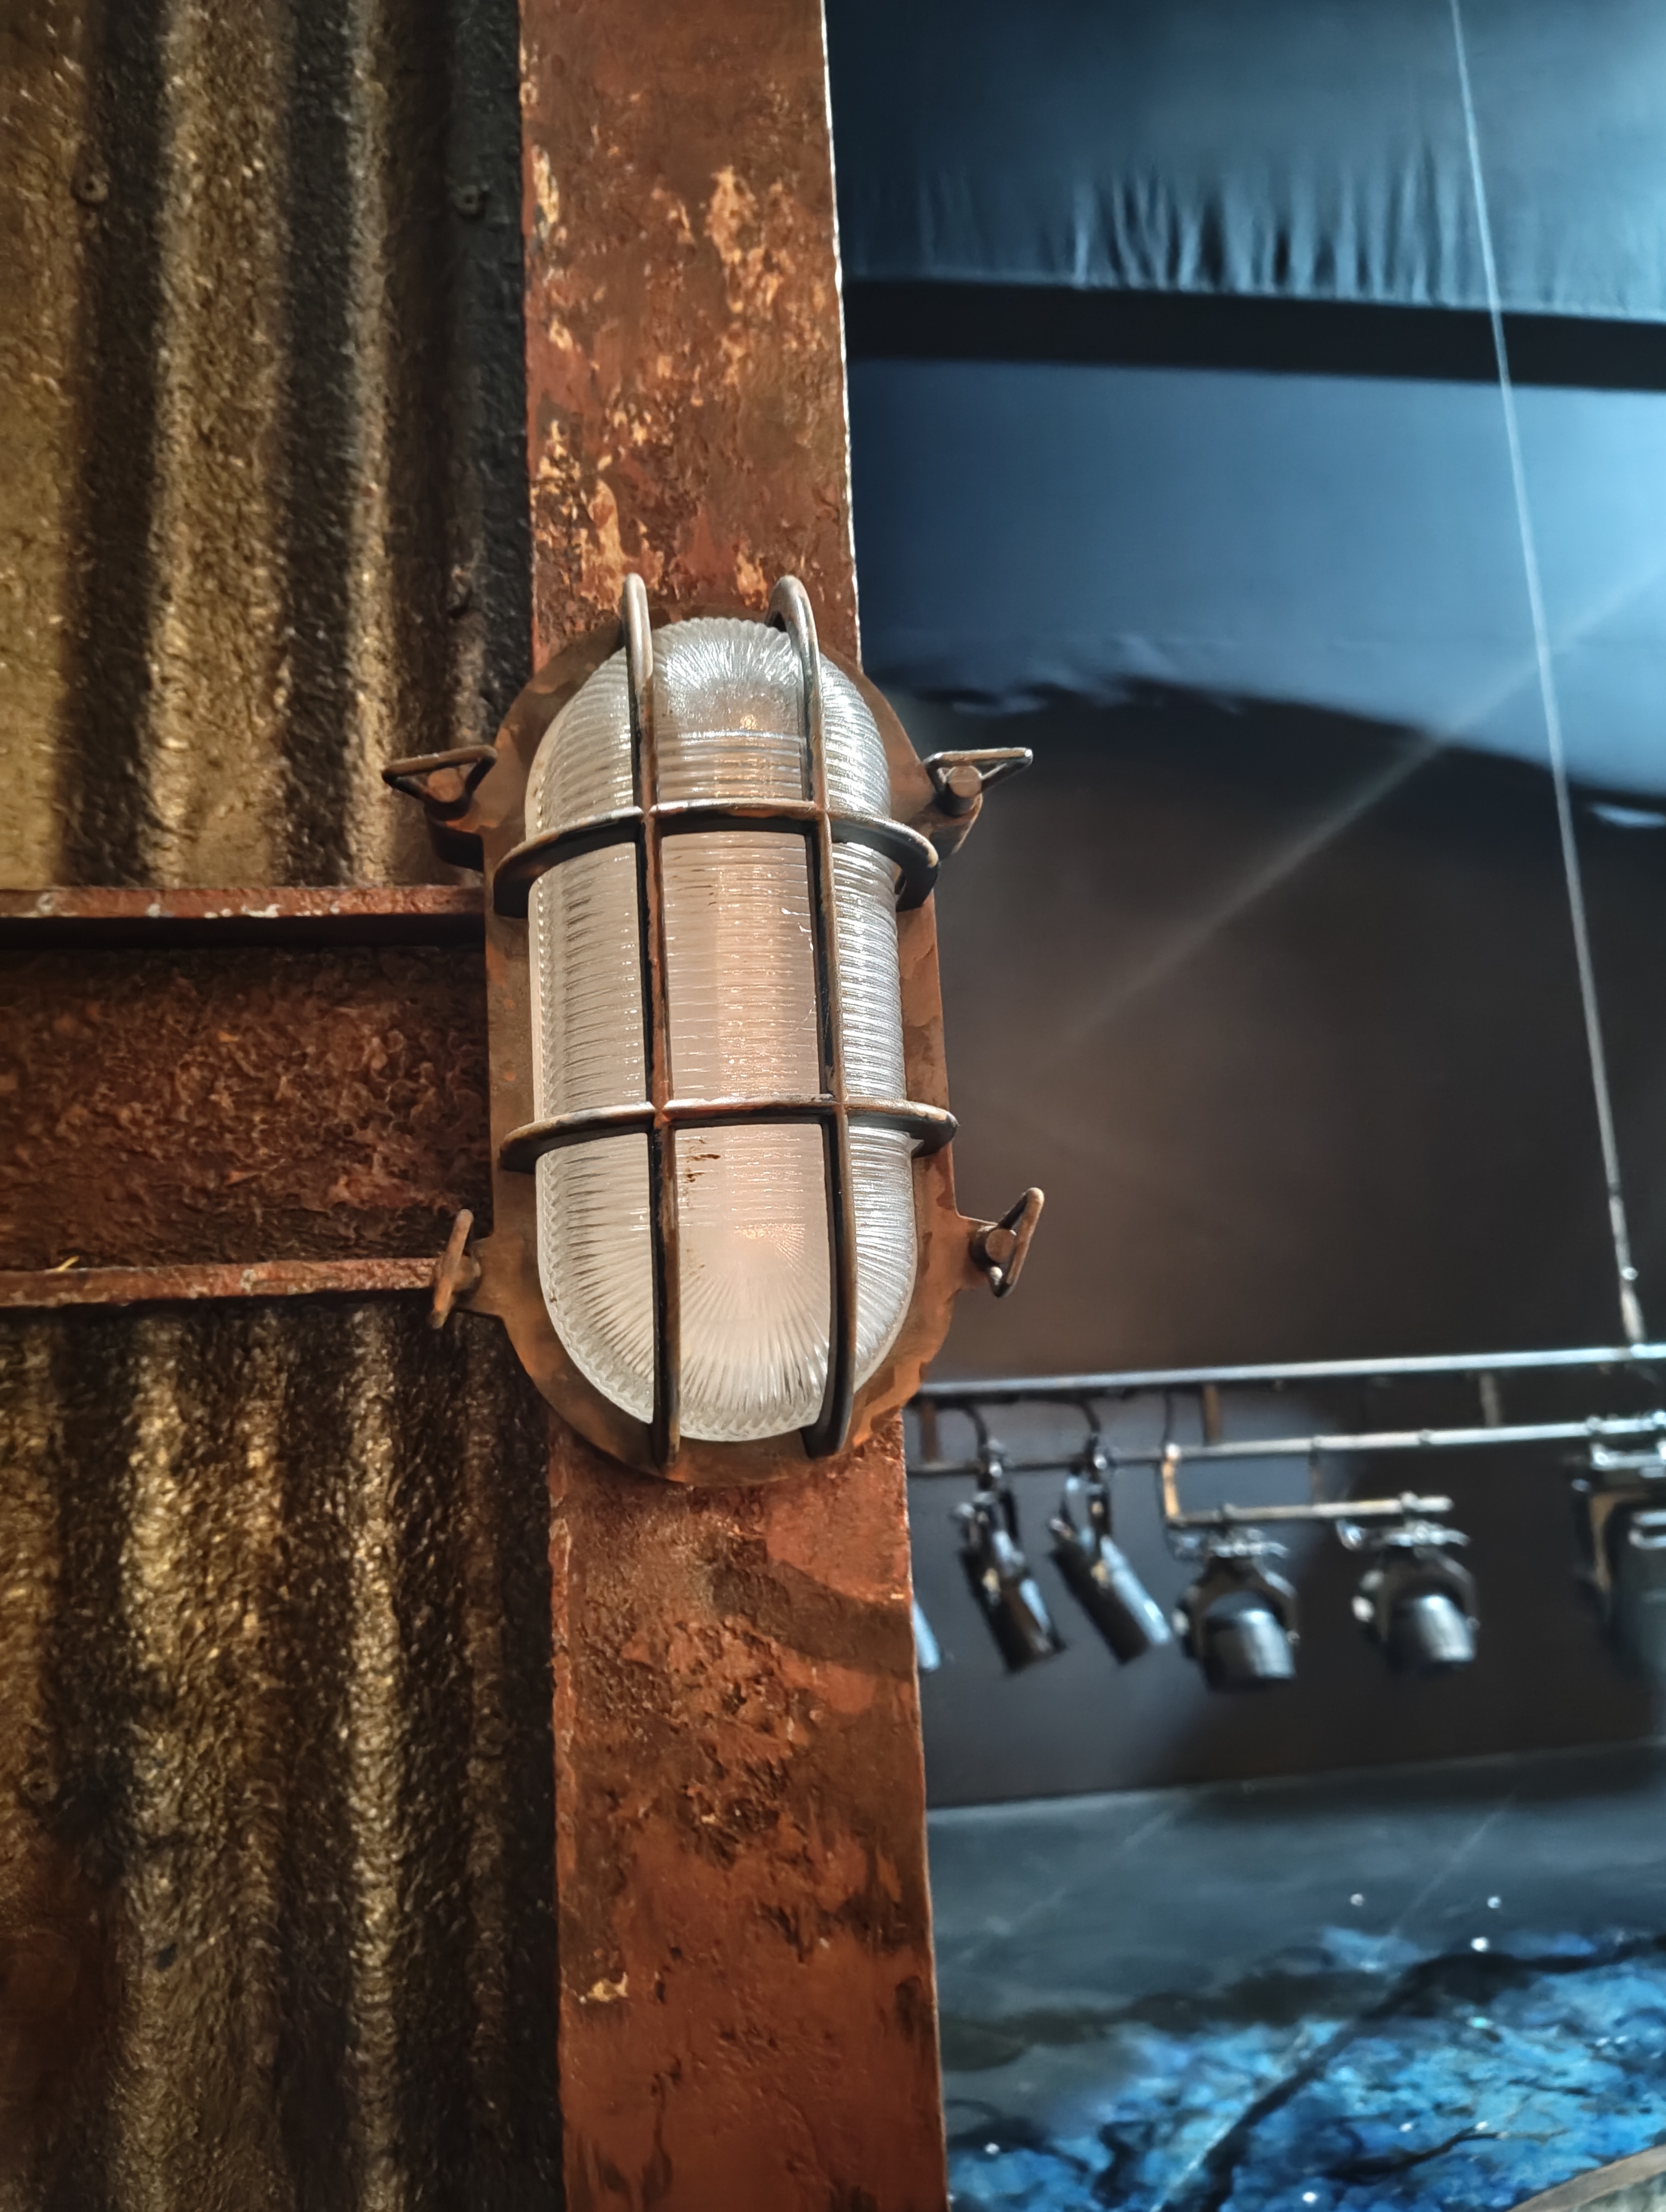
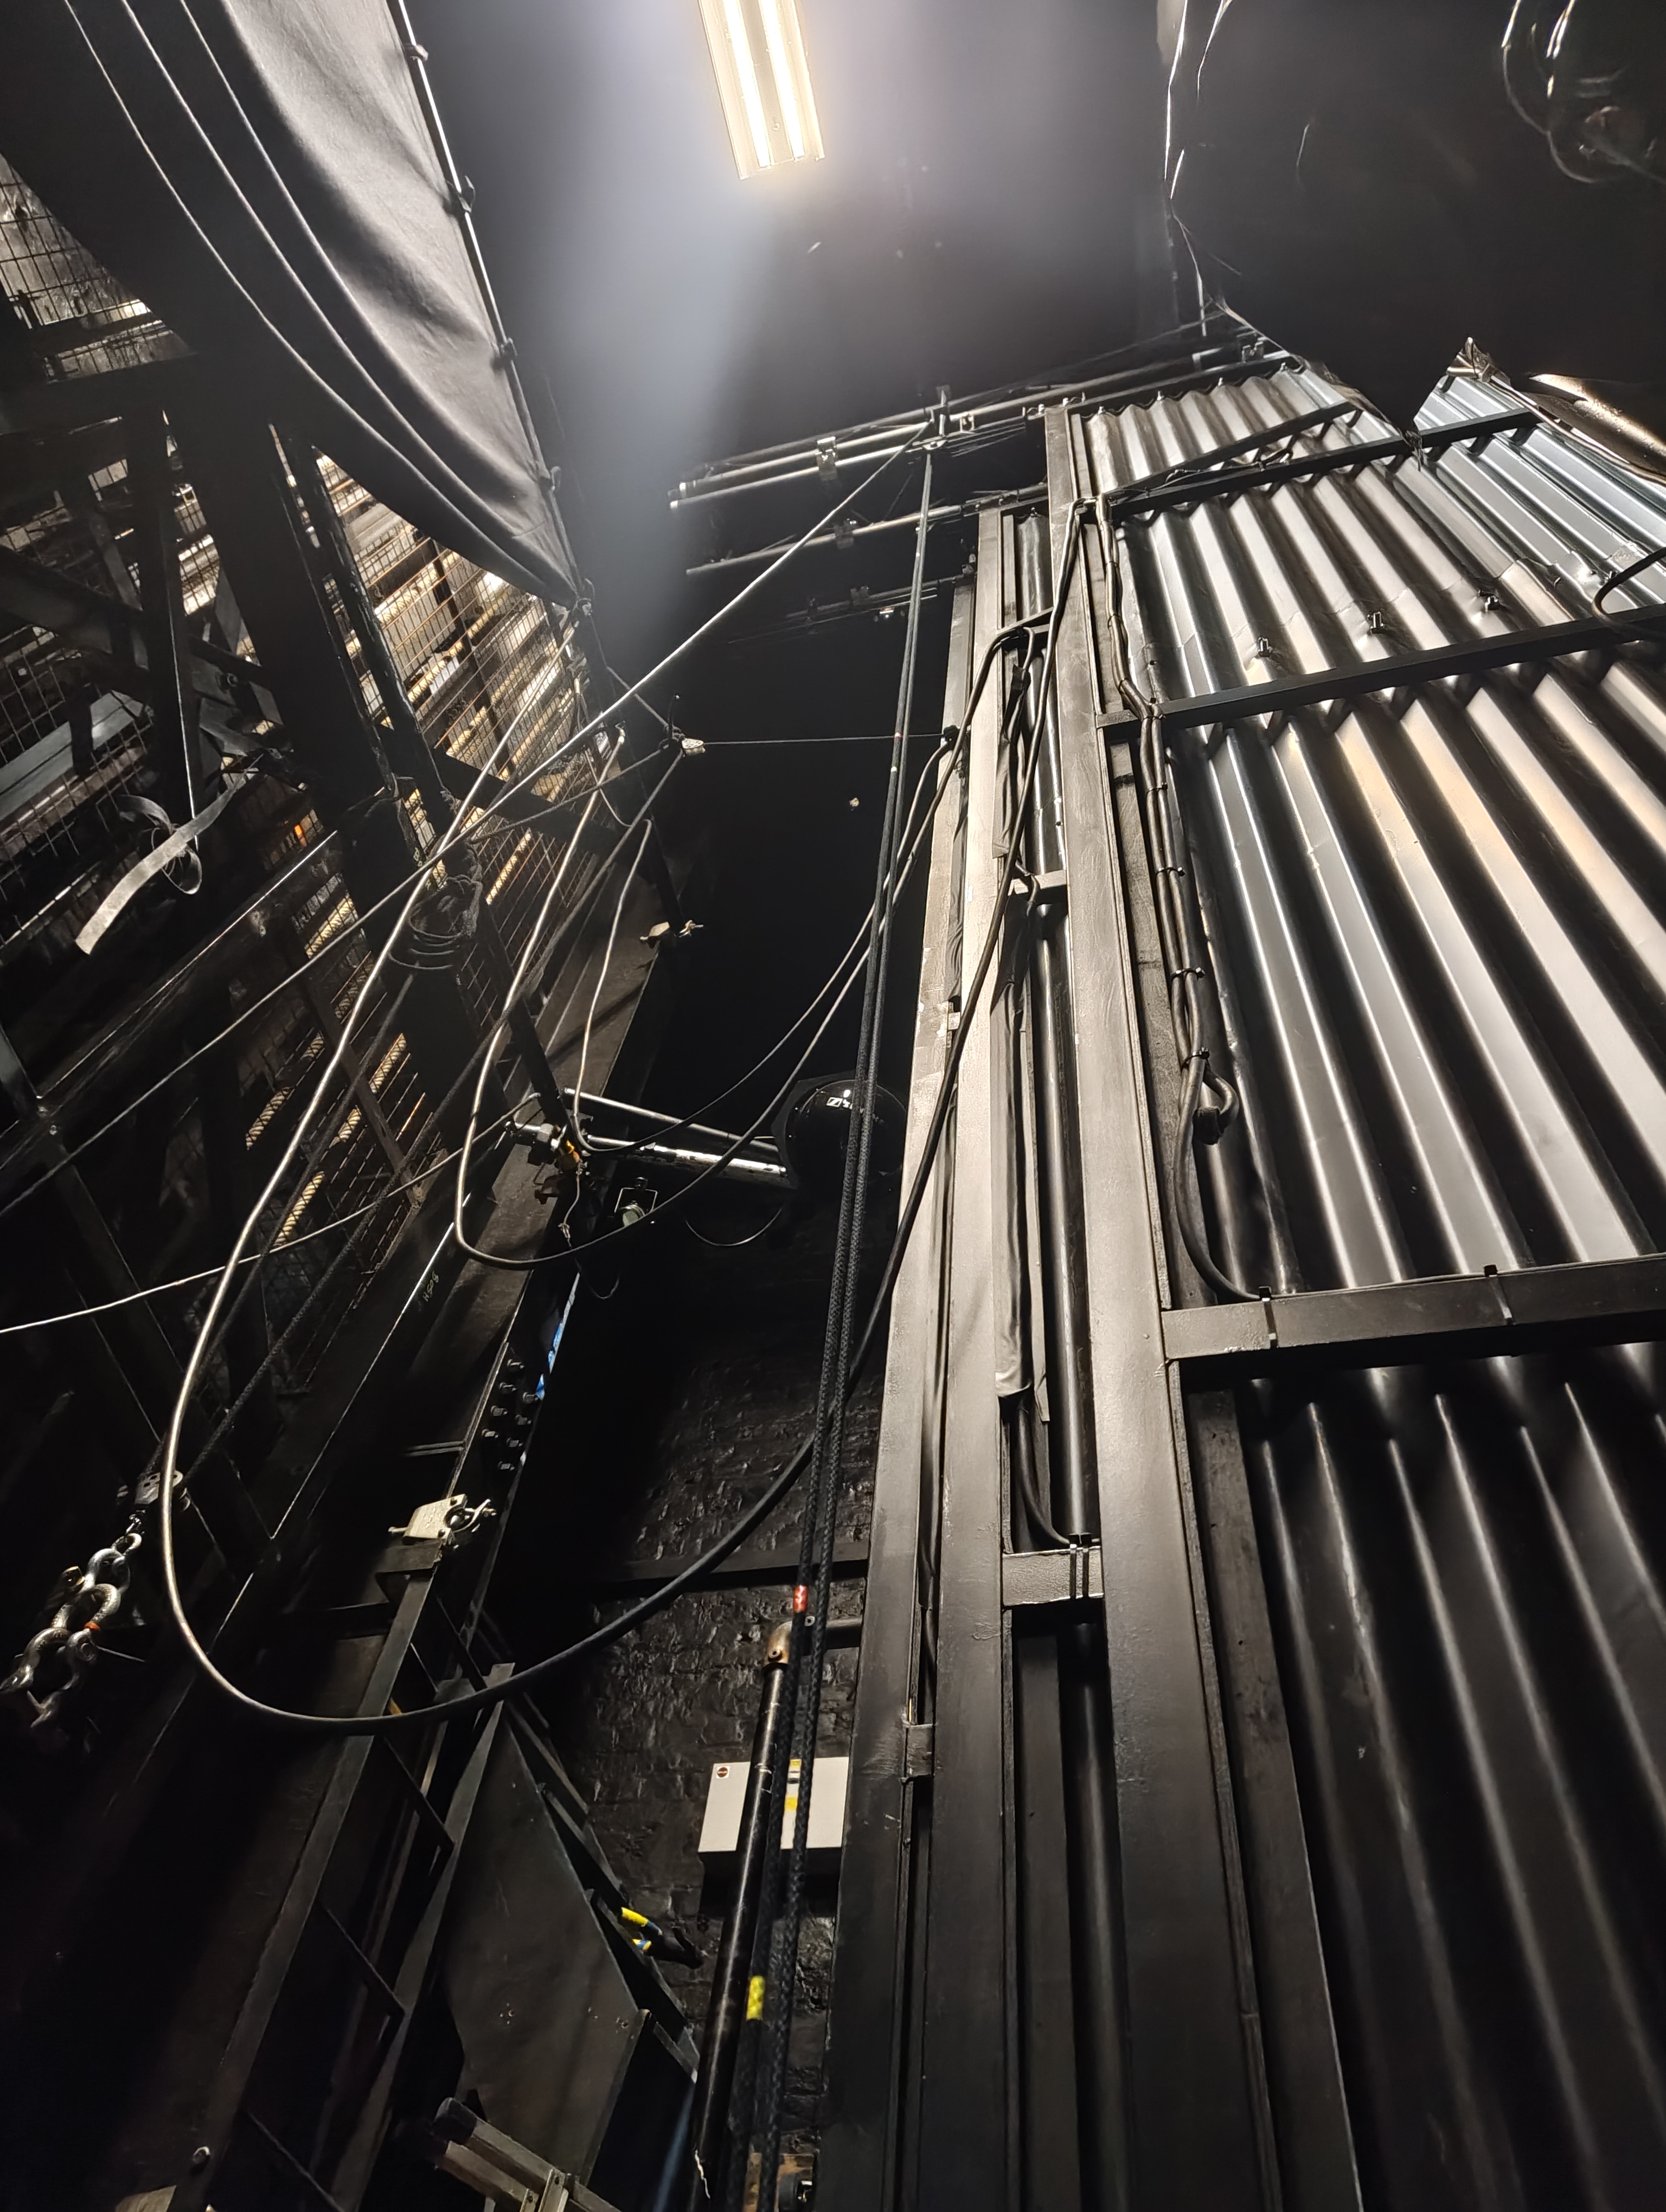
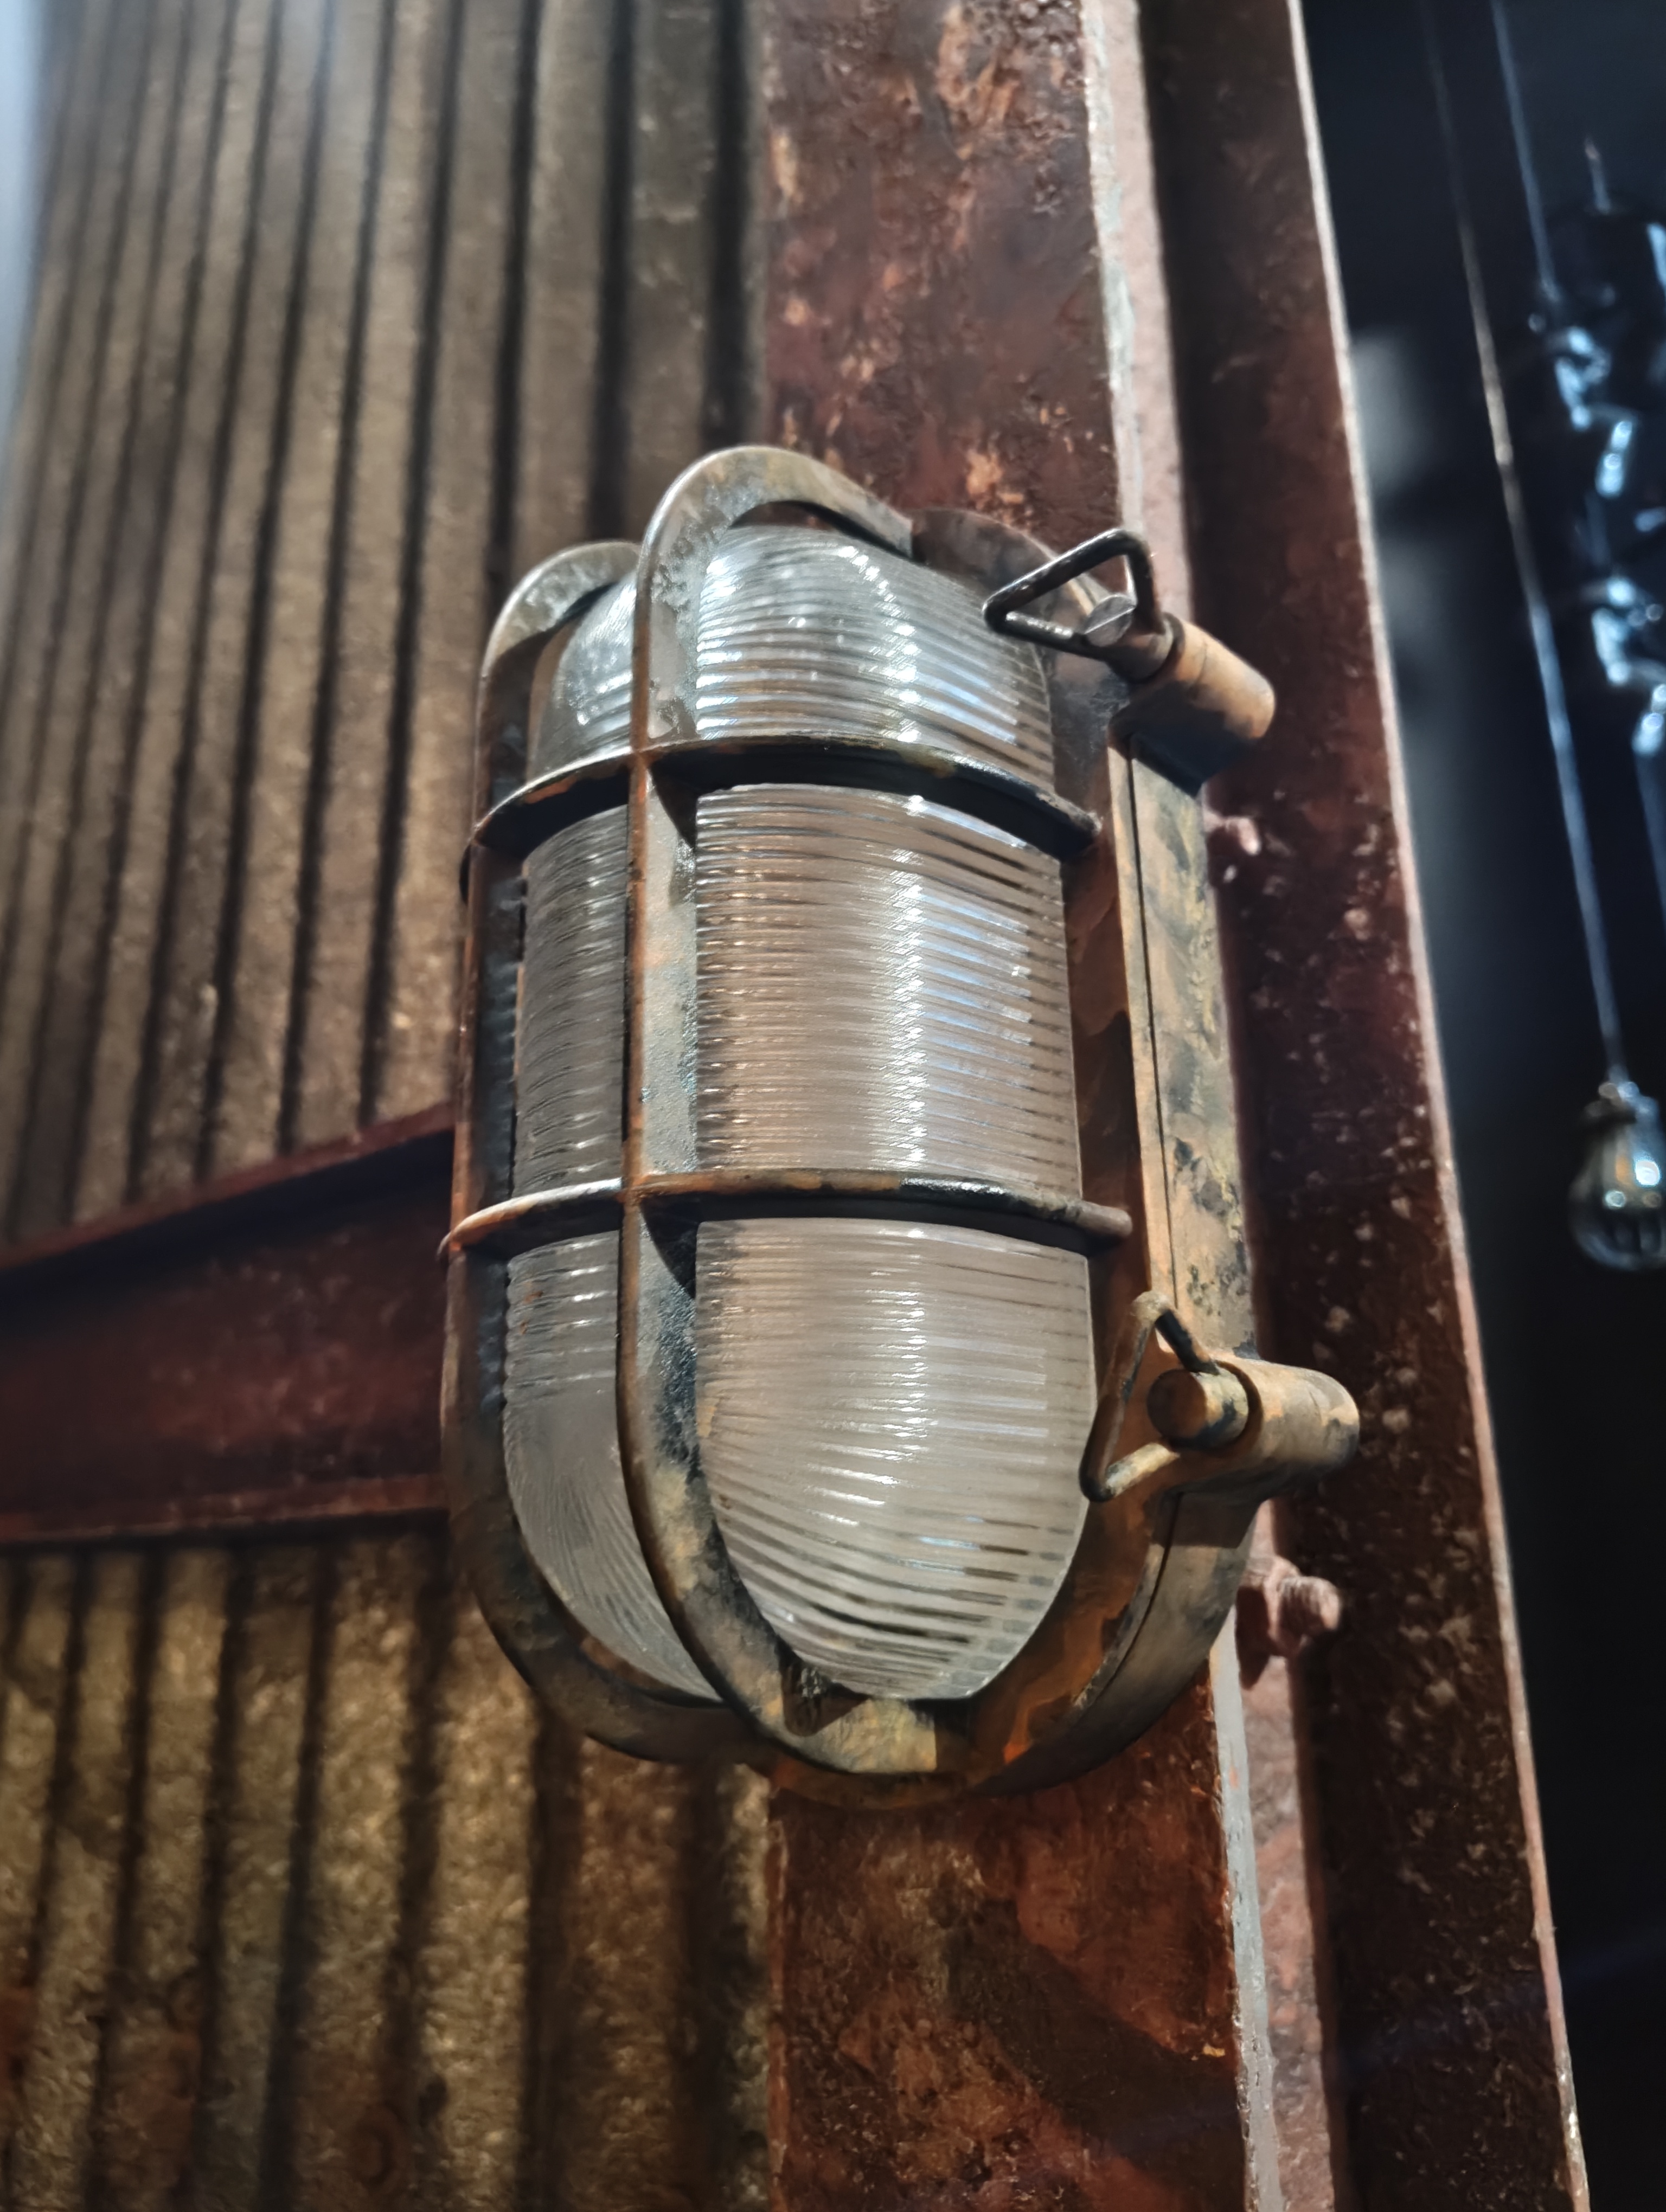
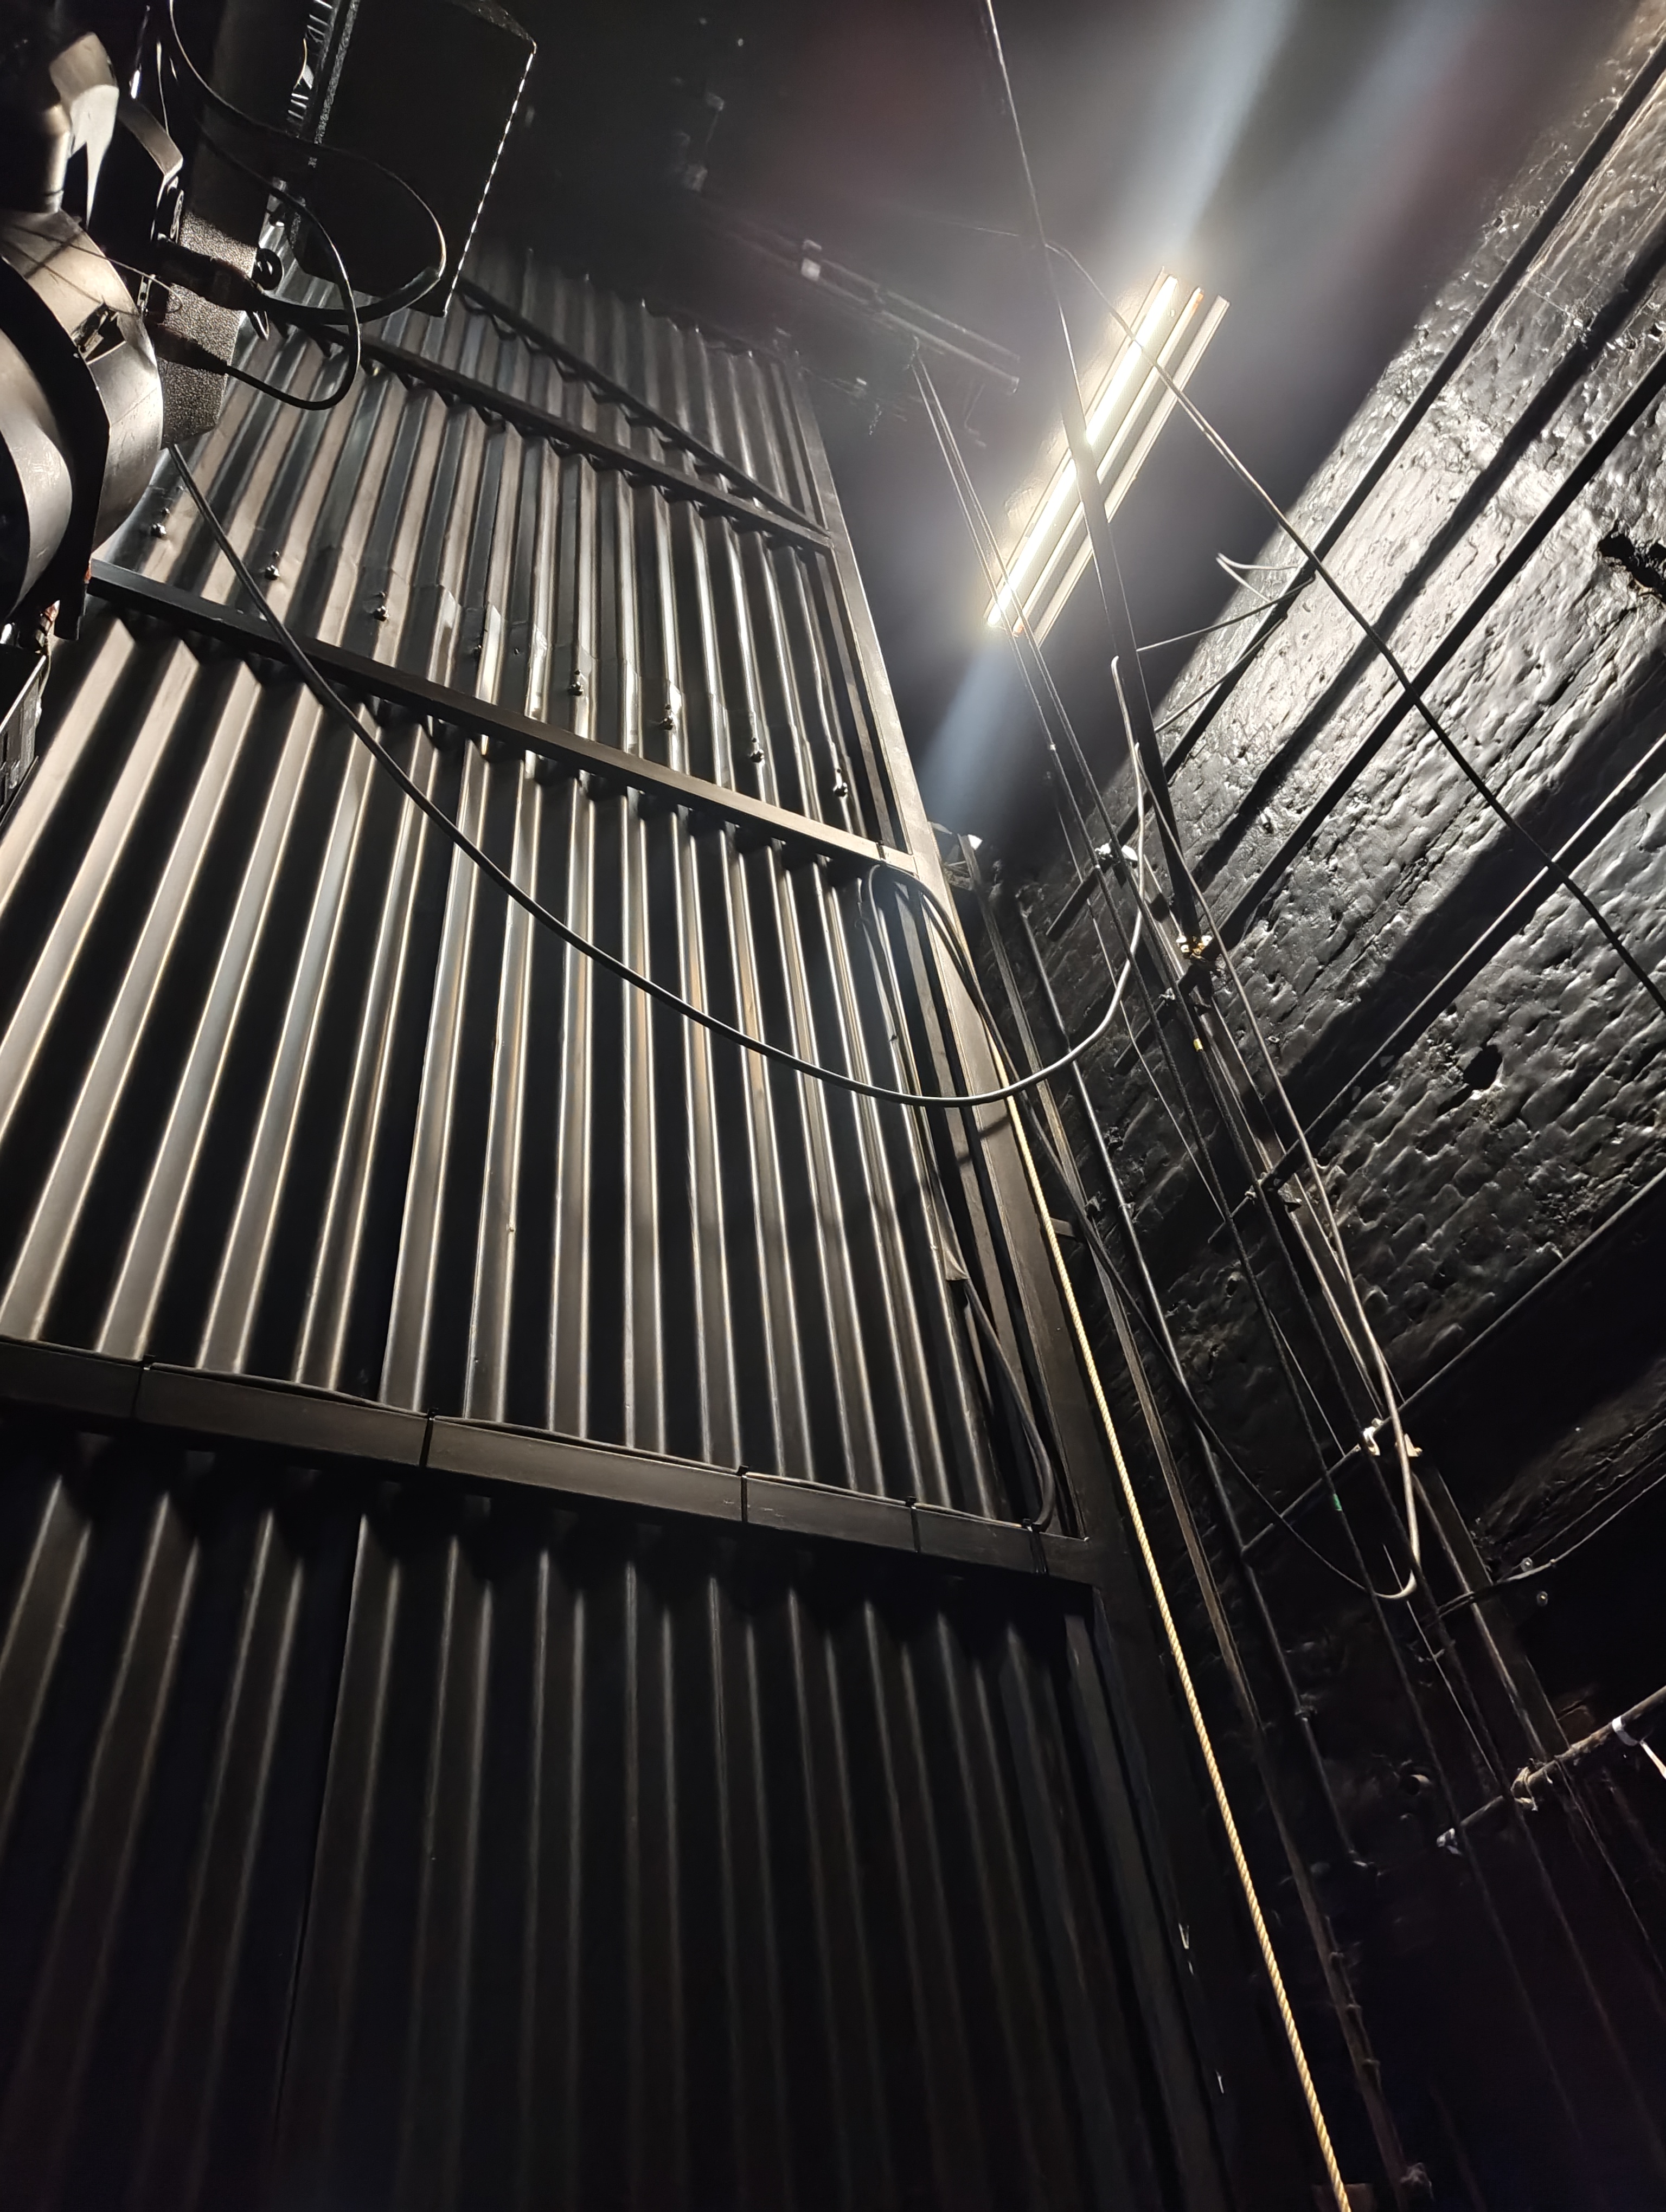
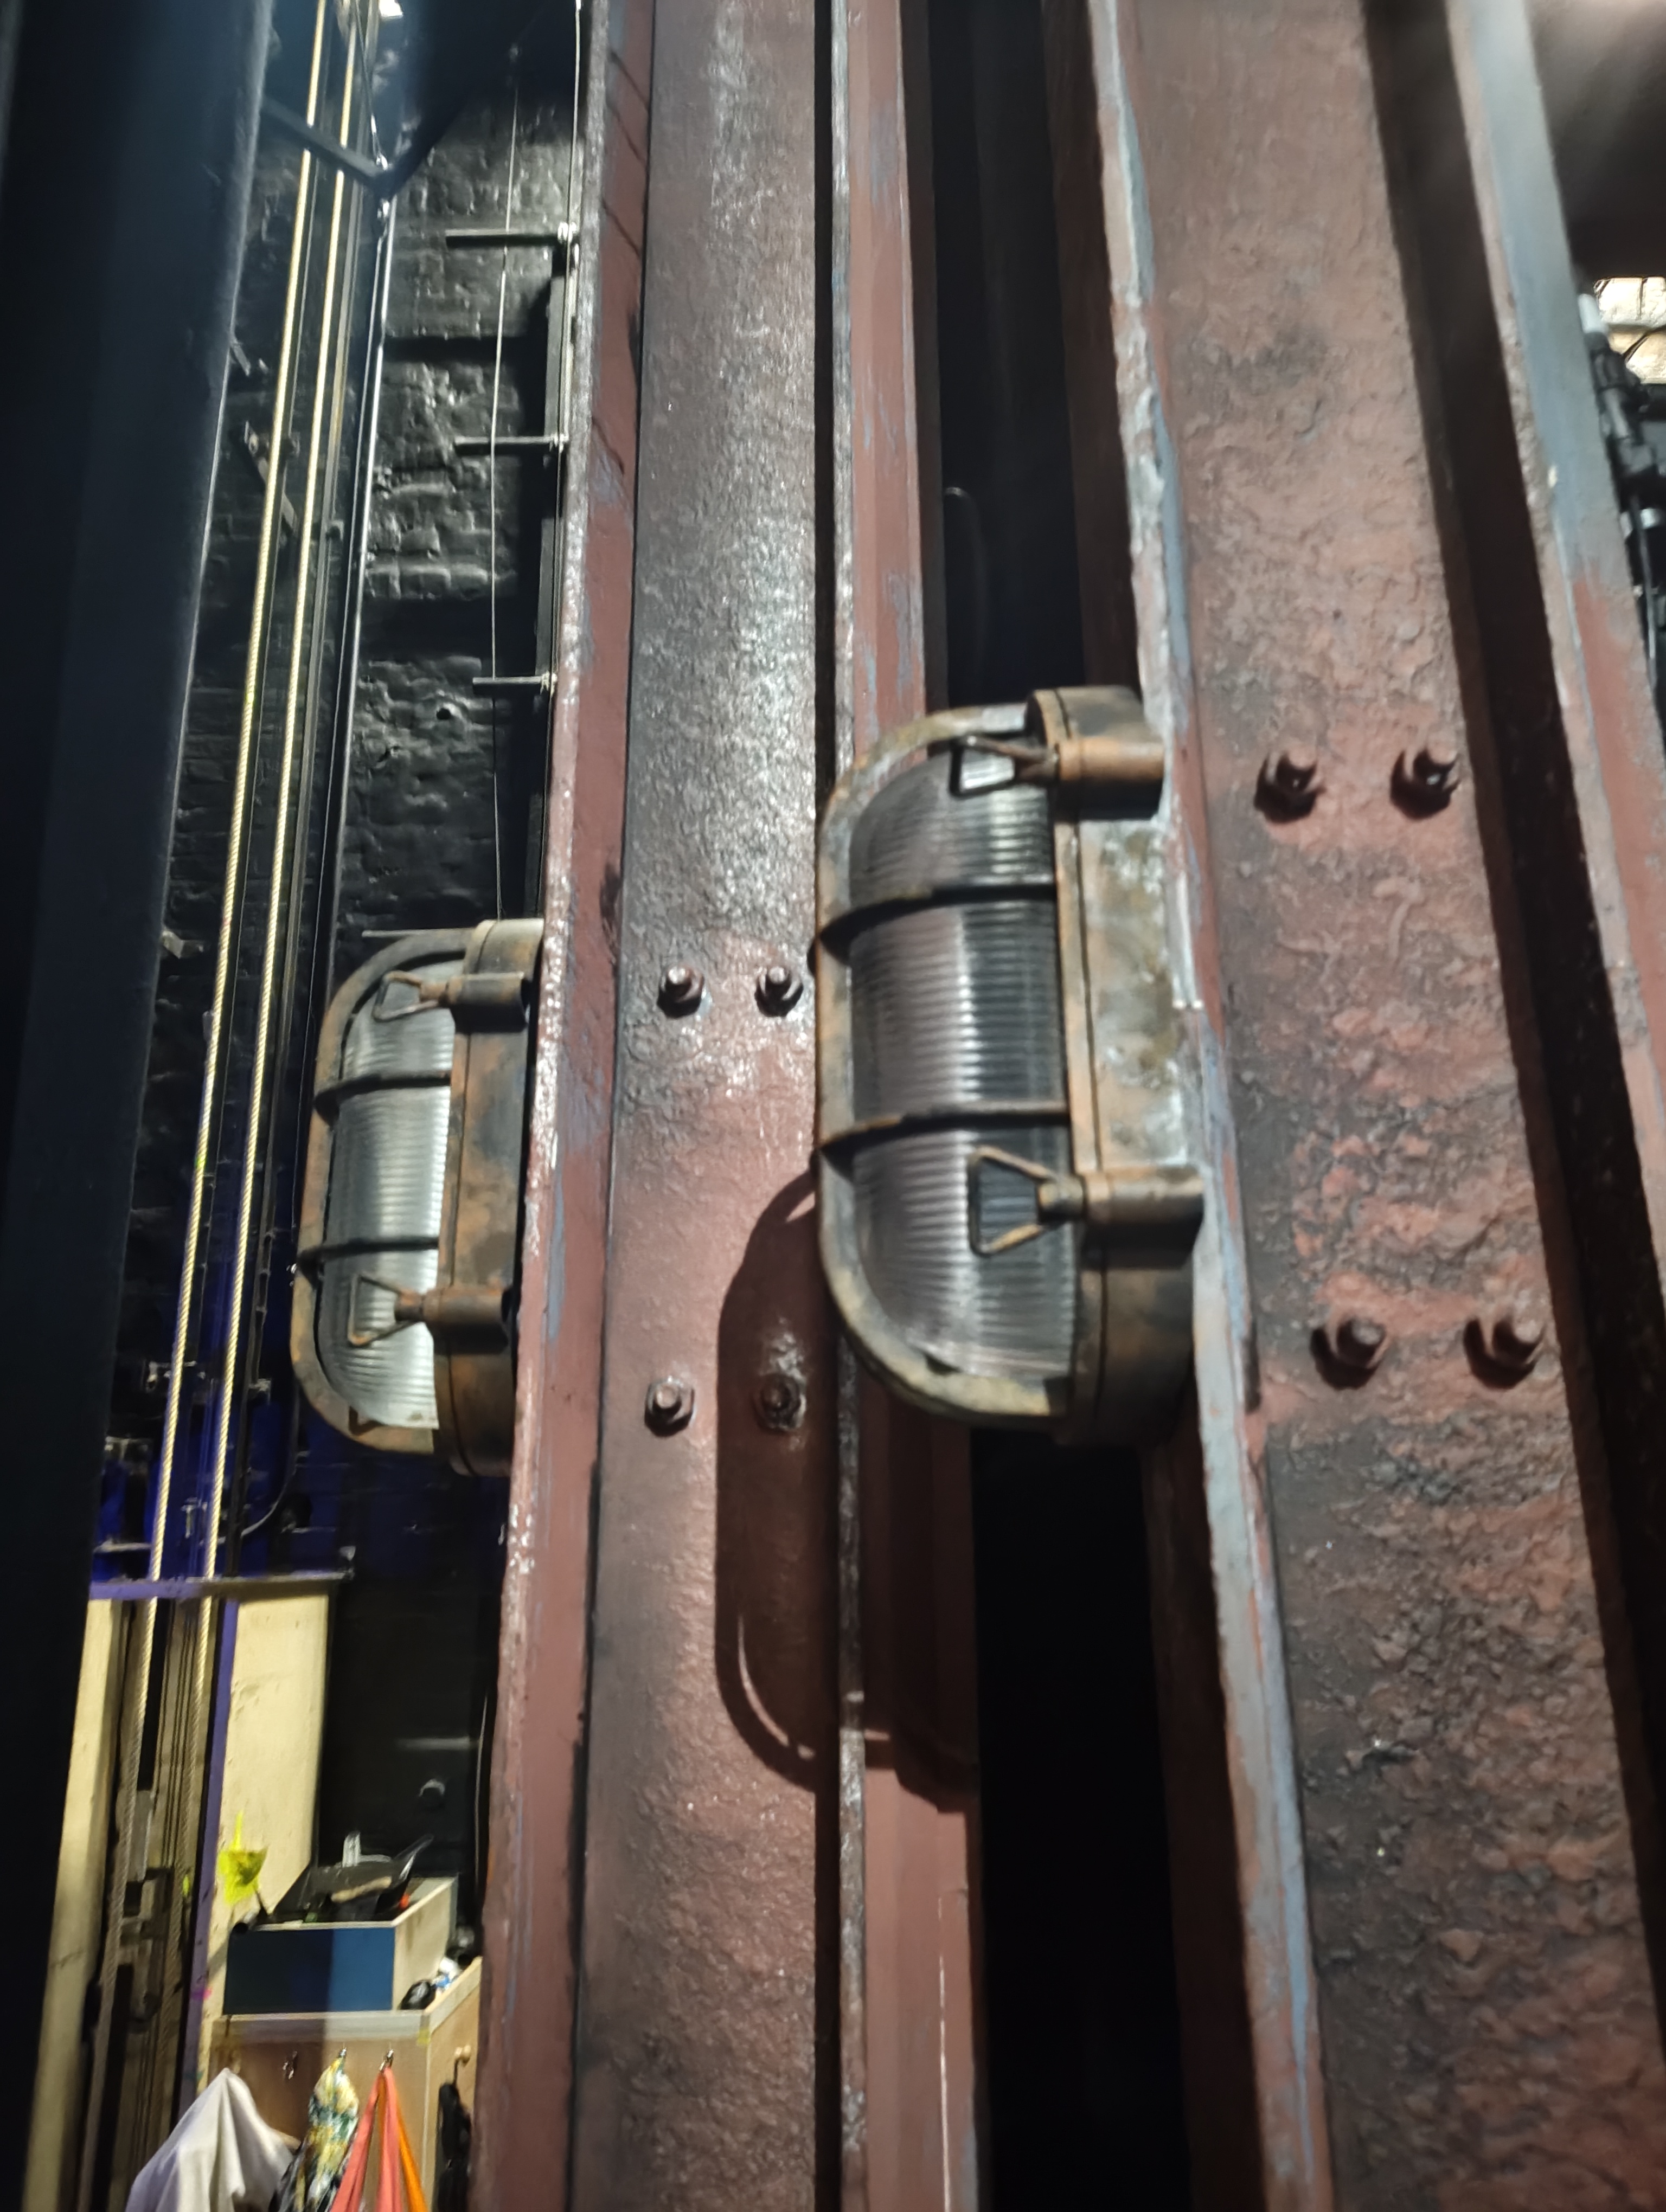
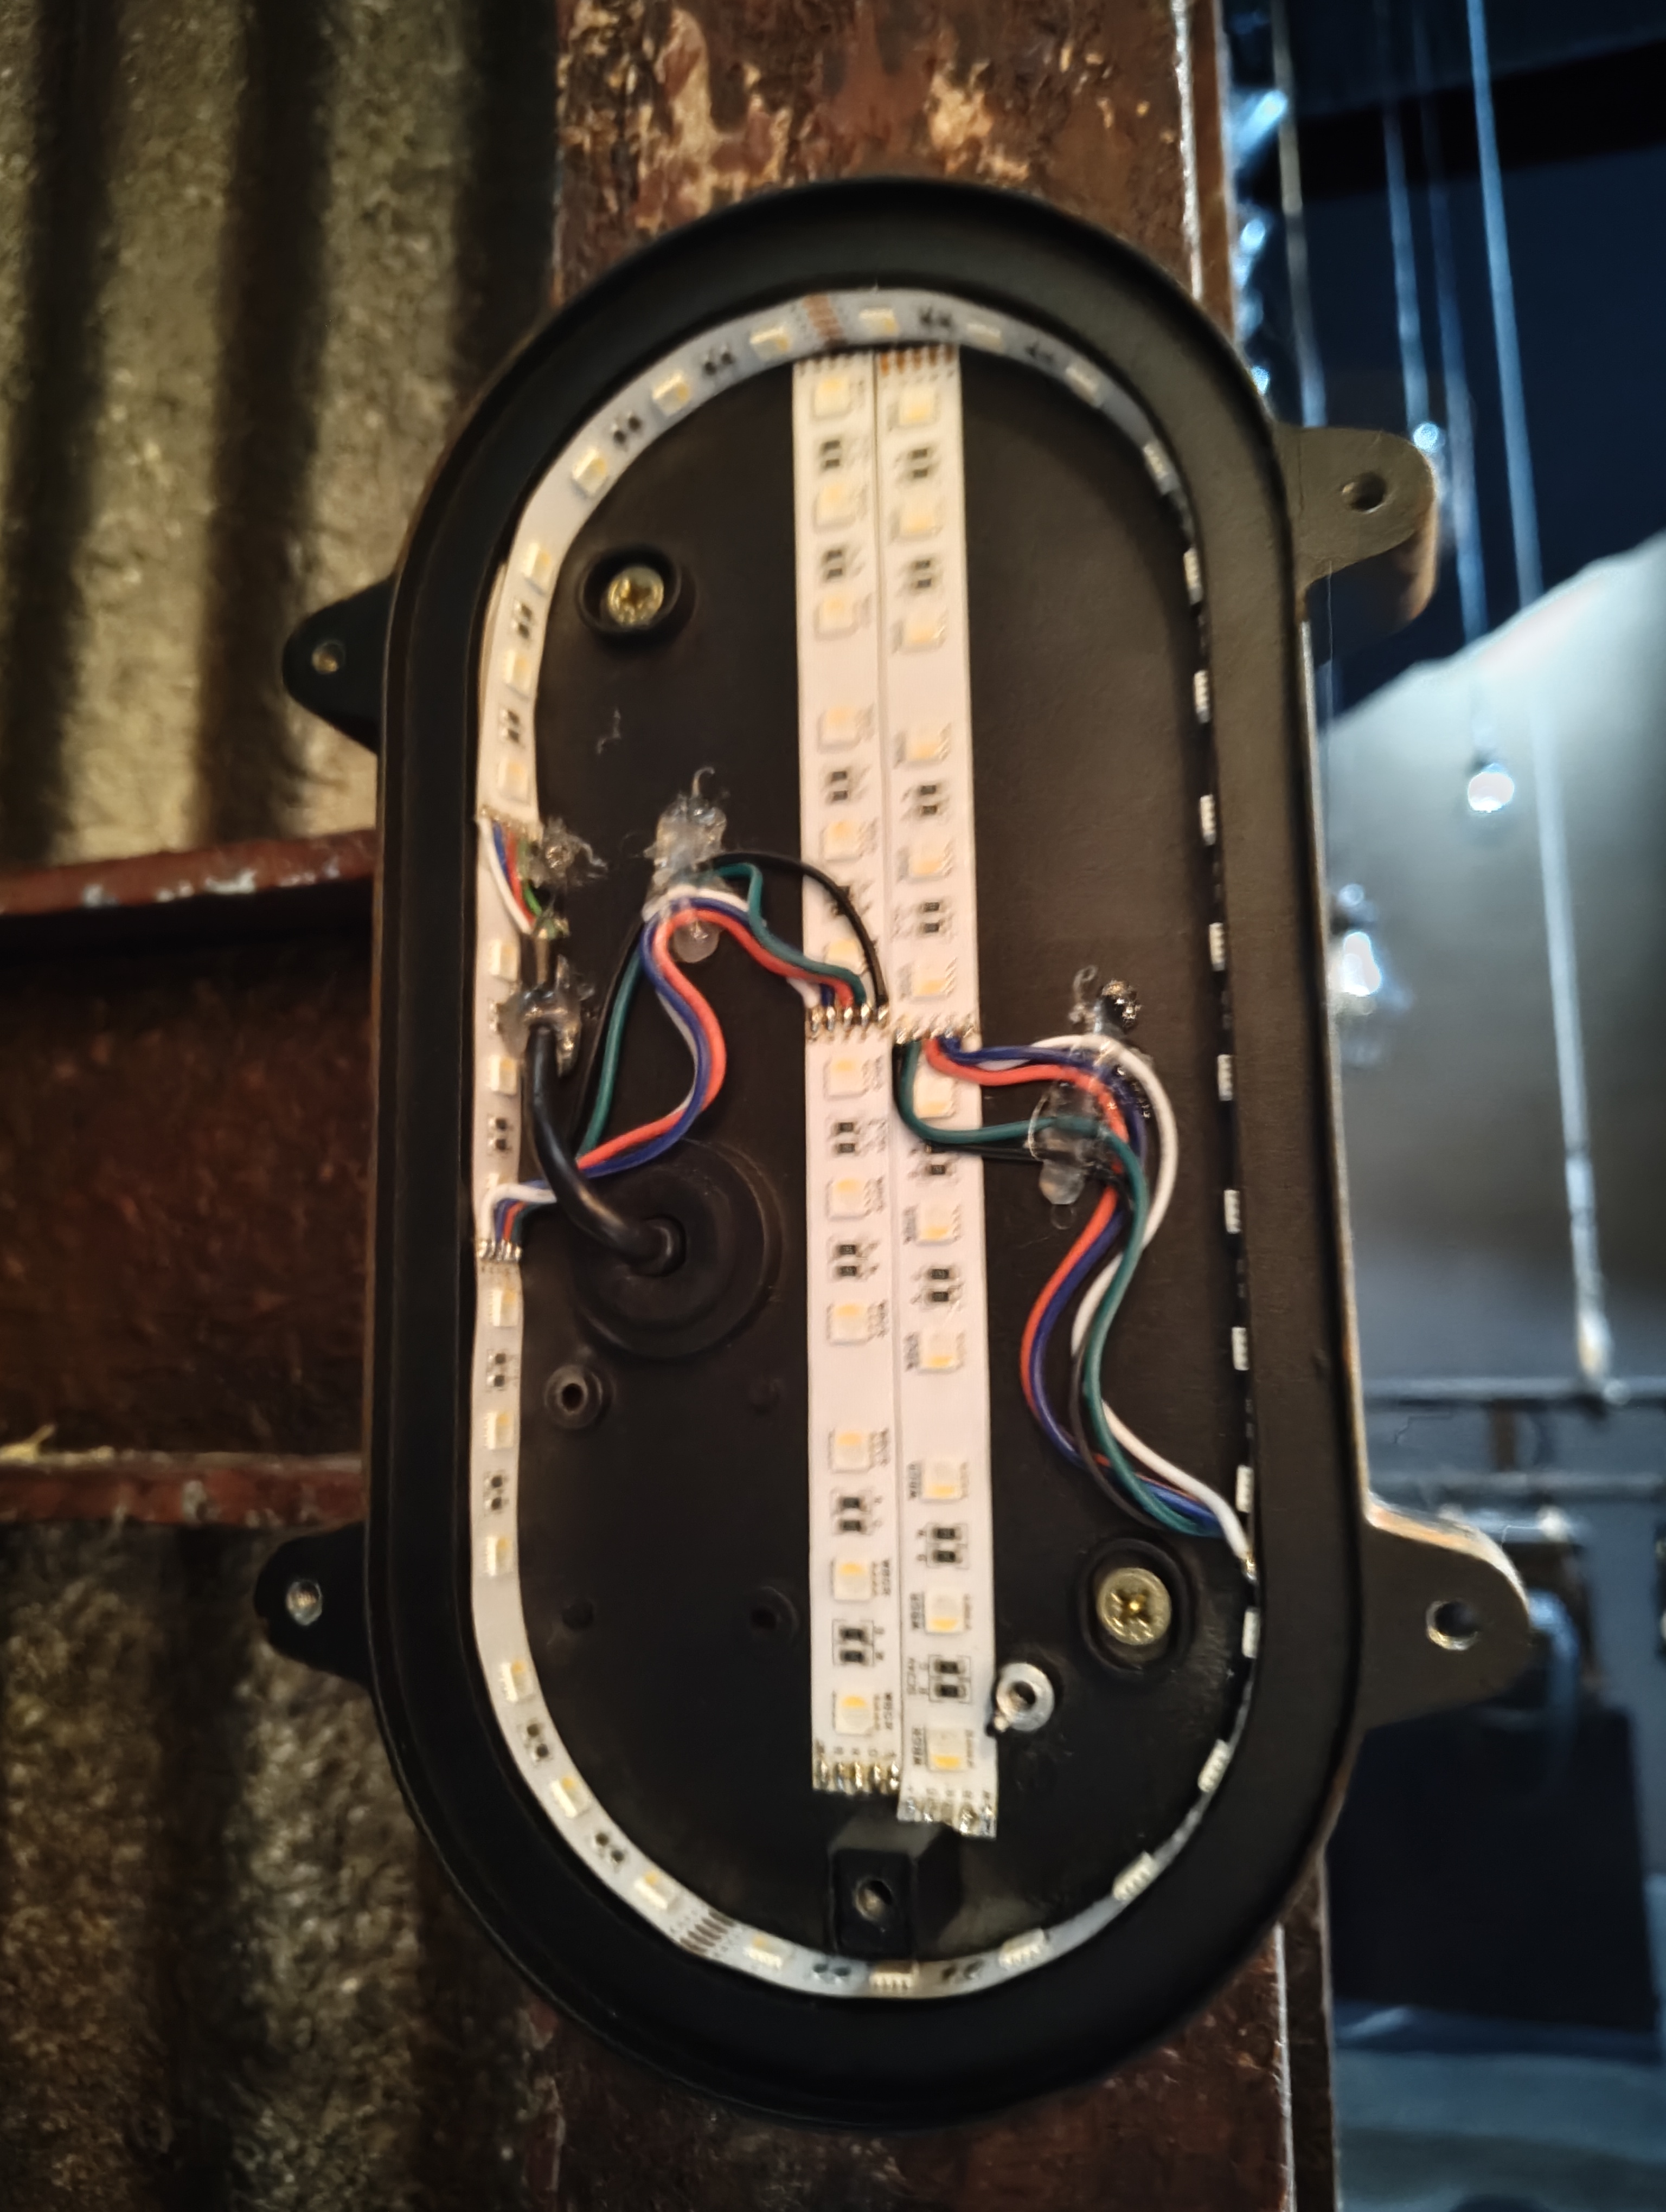
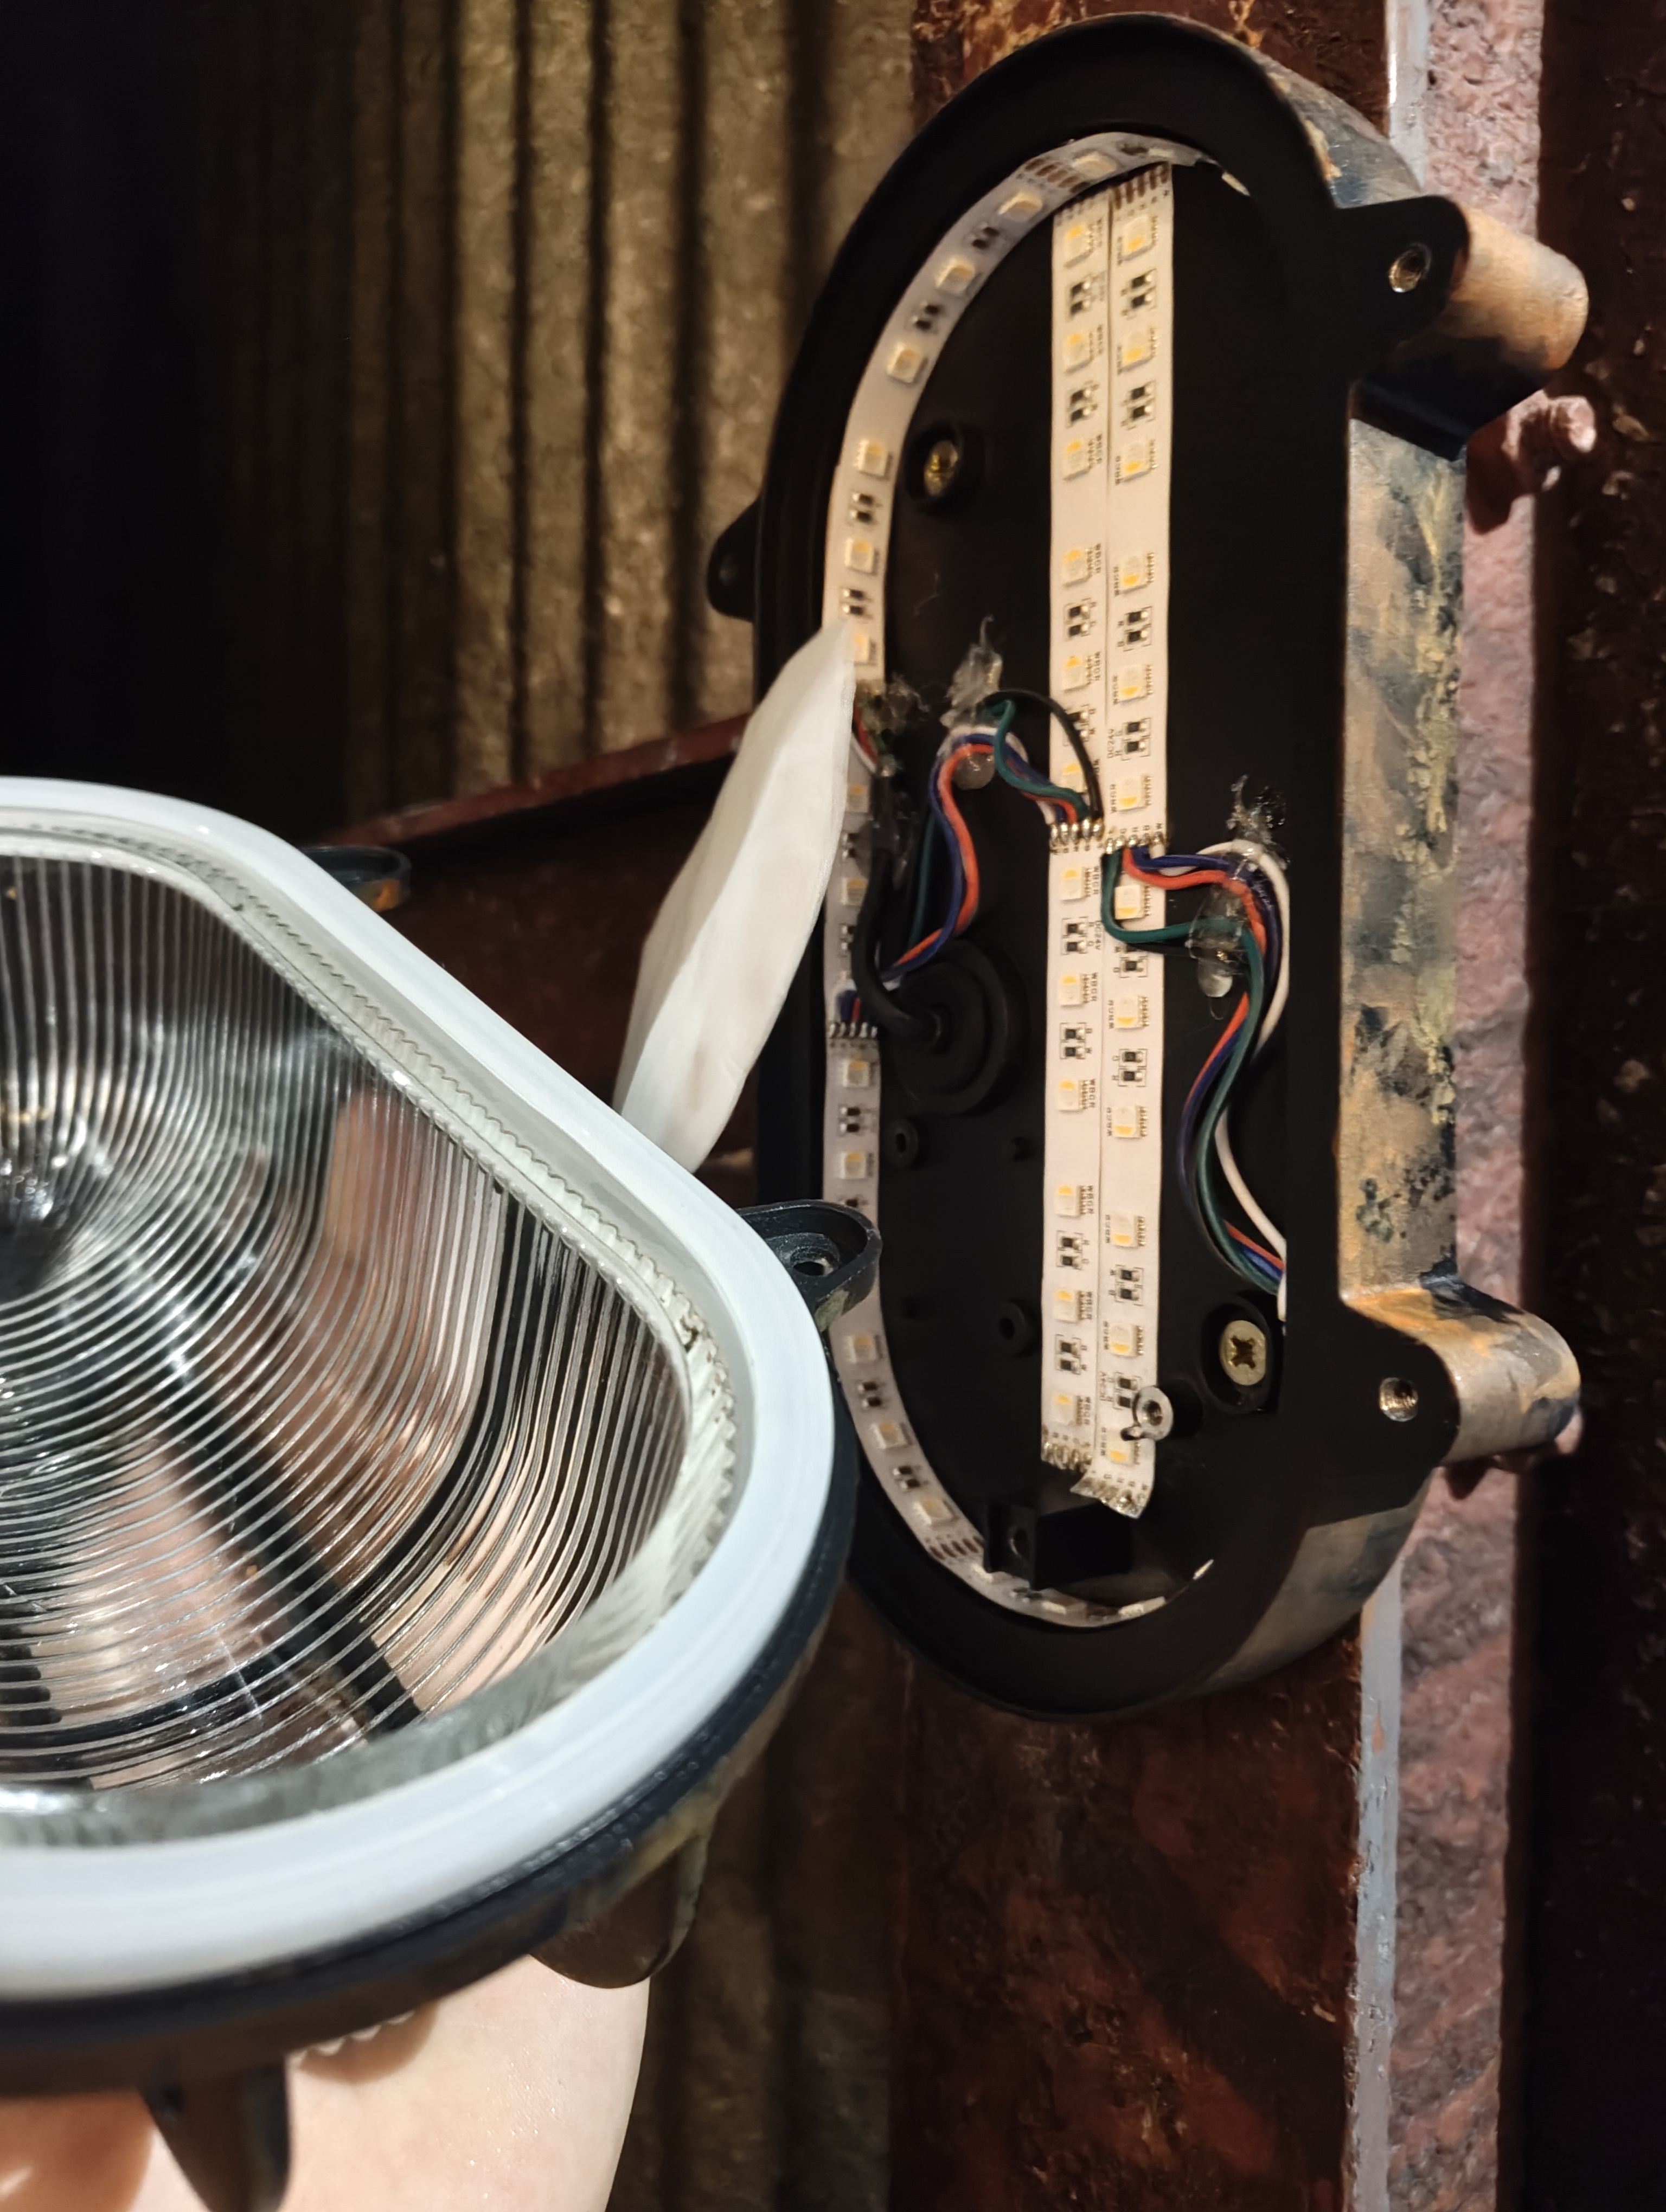
Usage
The Bulkheads are used in the scenes set in the brewery.
Maintenance
- Spare parts: Source from Electric Foundry
PDFs & Manuals
Wireless
Wireless System
Overview
The wireless DMX system for Harold Fry is based around a LumenRadio CRMX Stardust transmitter. The Stardust is an 8-universe CRMX/W-DMX transmitter that receives sACN over Ethernet and outputs wireless CRMX to all wireless practicals on stage.
The unit is mounted on the SR Bay 3 Ladder for line-of-sight coverage across the stage.
Transmitter
| Unit | LumenRadio CRMX Stardust |
| Location | SR Bay 3 Ladder |
| Input Protocol | sACN (Streaming ACN / E1.31) |
| Output Protocol | CRMX (2 universes) |
| Power | PowerCON TRUE1 from SR Fly Floor distro |
| Network | LX Network |
CRMX Universes
| CRMX Output | sACN Universe | Usage |
|---|---|---|
| Output 1 | 14 | PhoneBox, Counter, Sofa, Standard Lamp, Rave Trolley, Power Tiny (Roaming) |
| Output 2 | 12 | Flow Flurries (Titan Tubes) |
Network / IP Settings
Warning
Keep these settings accurate — if the Stardust loses its sACN feed, all wireless practicals go dark.
| Setting | Value |
|---|---|
| IP Address | 10.101.1.50 |
| Subnet Mask | 255.255.255.0 |
| sACN Source | LX Network (Fed From SR Flys Rack) |
| Web UI URL | http://10.101.1.50/app/dashboard |
Tip
The ip subnet and subnet mask is different to what the rest of the LX network is on. Requires swapping from DHCP to static IP and selecting a ip in the 10.101.1.x/24 range. (10.101.1.1-254) Do not use 10.101.1.50 as this is the transmitters IP.
Note
The Stardust has a built-in web UI accessible via its IP address for configuration and monitoring. Access via the venue network switch to reach the web portal.
Linking Receivers
To link a new receiver to the Stardust:
- On the Stardust front panel, navigate to the output you want to link to
- Select Link — all unlinked receivers in range will be linked
- Alternatively, use a Linking Key (8-digit code) for remote linking without access to the transmitter
To unlink a receiver, navigate to the output and select Unlink.
Tip
Receivers with Linking Key support (Moonlite, Aurora, Luna) can be linked via the CRMX Toolbox app without needing physical access to the Stardust.
Power & Signal Flow
SR Fly Floor Distro ──[PowerCON TRUE1]──► Stardust (SR Bay 3 Ladder)
SR Fly Floor Switch ──[Ethernet RJ45]──► Stardust (sACN input)
Stardust ──[CRMX wireless]──► All wireless practicals
PDFs & Manuals
PhoneBox
Overview
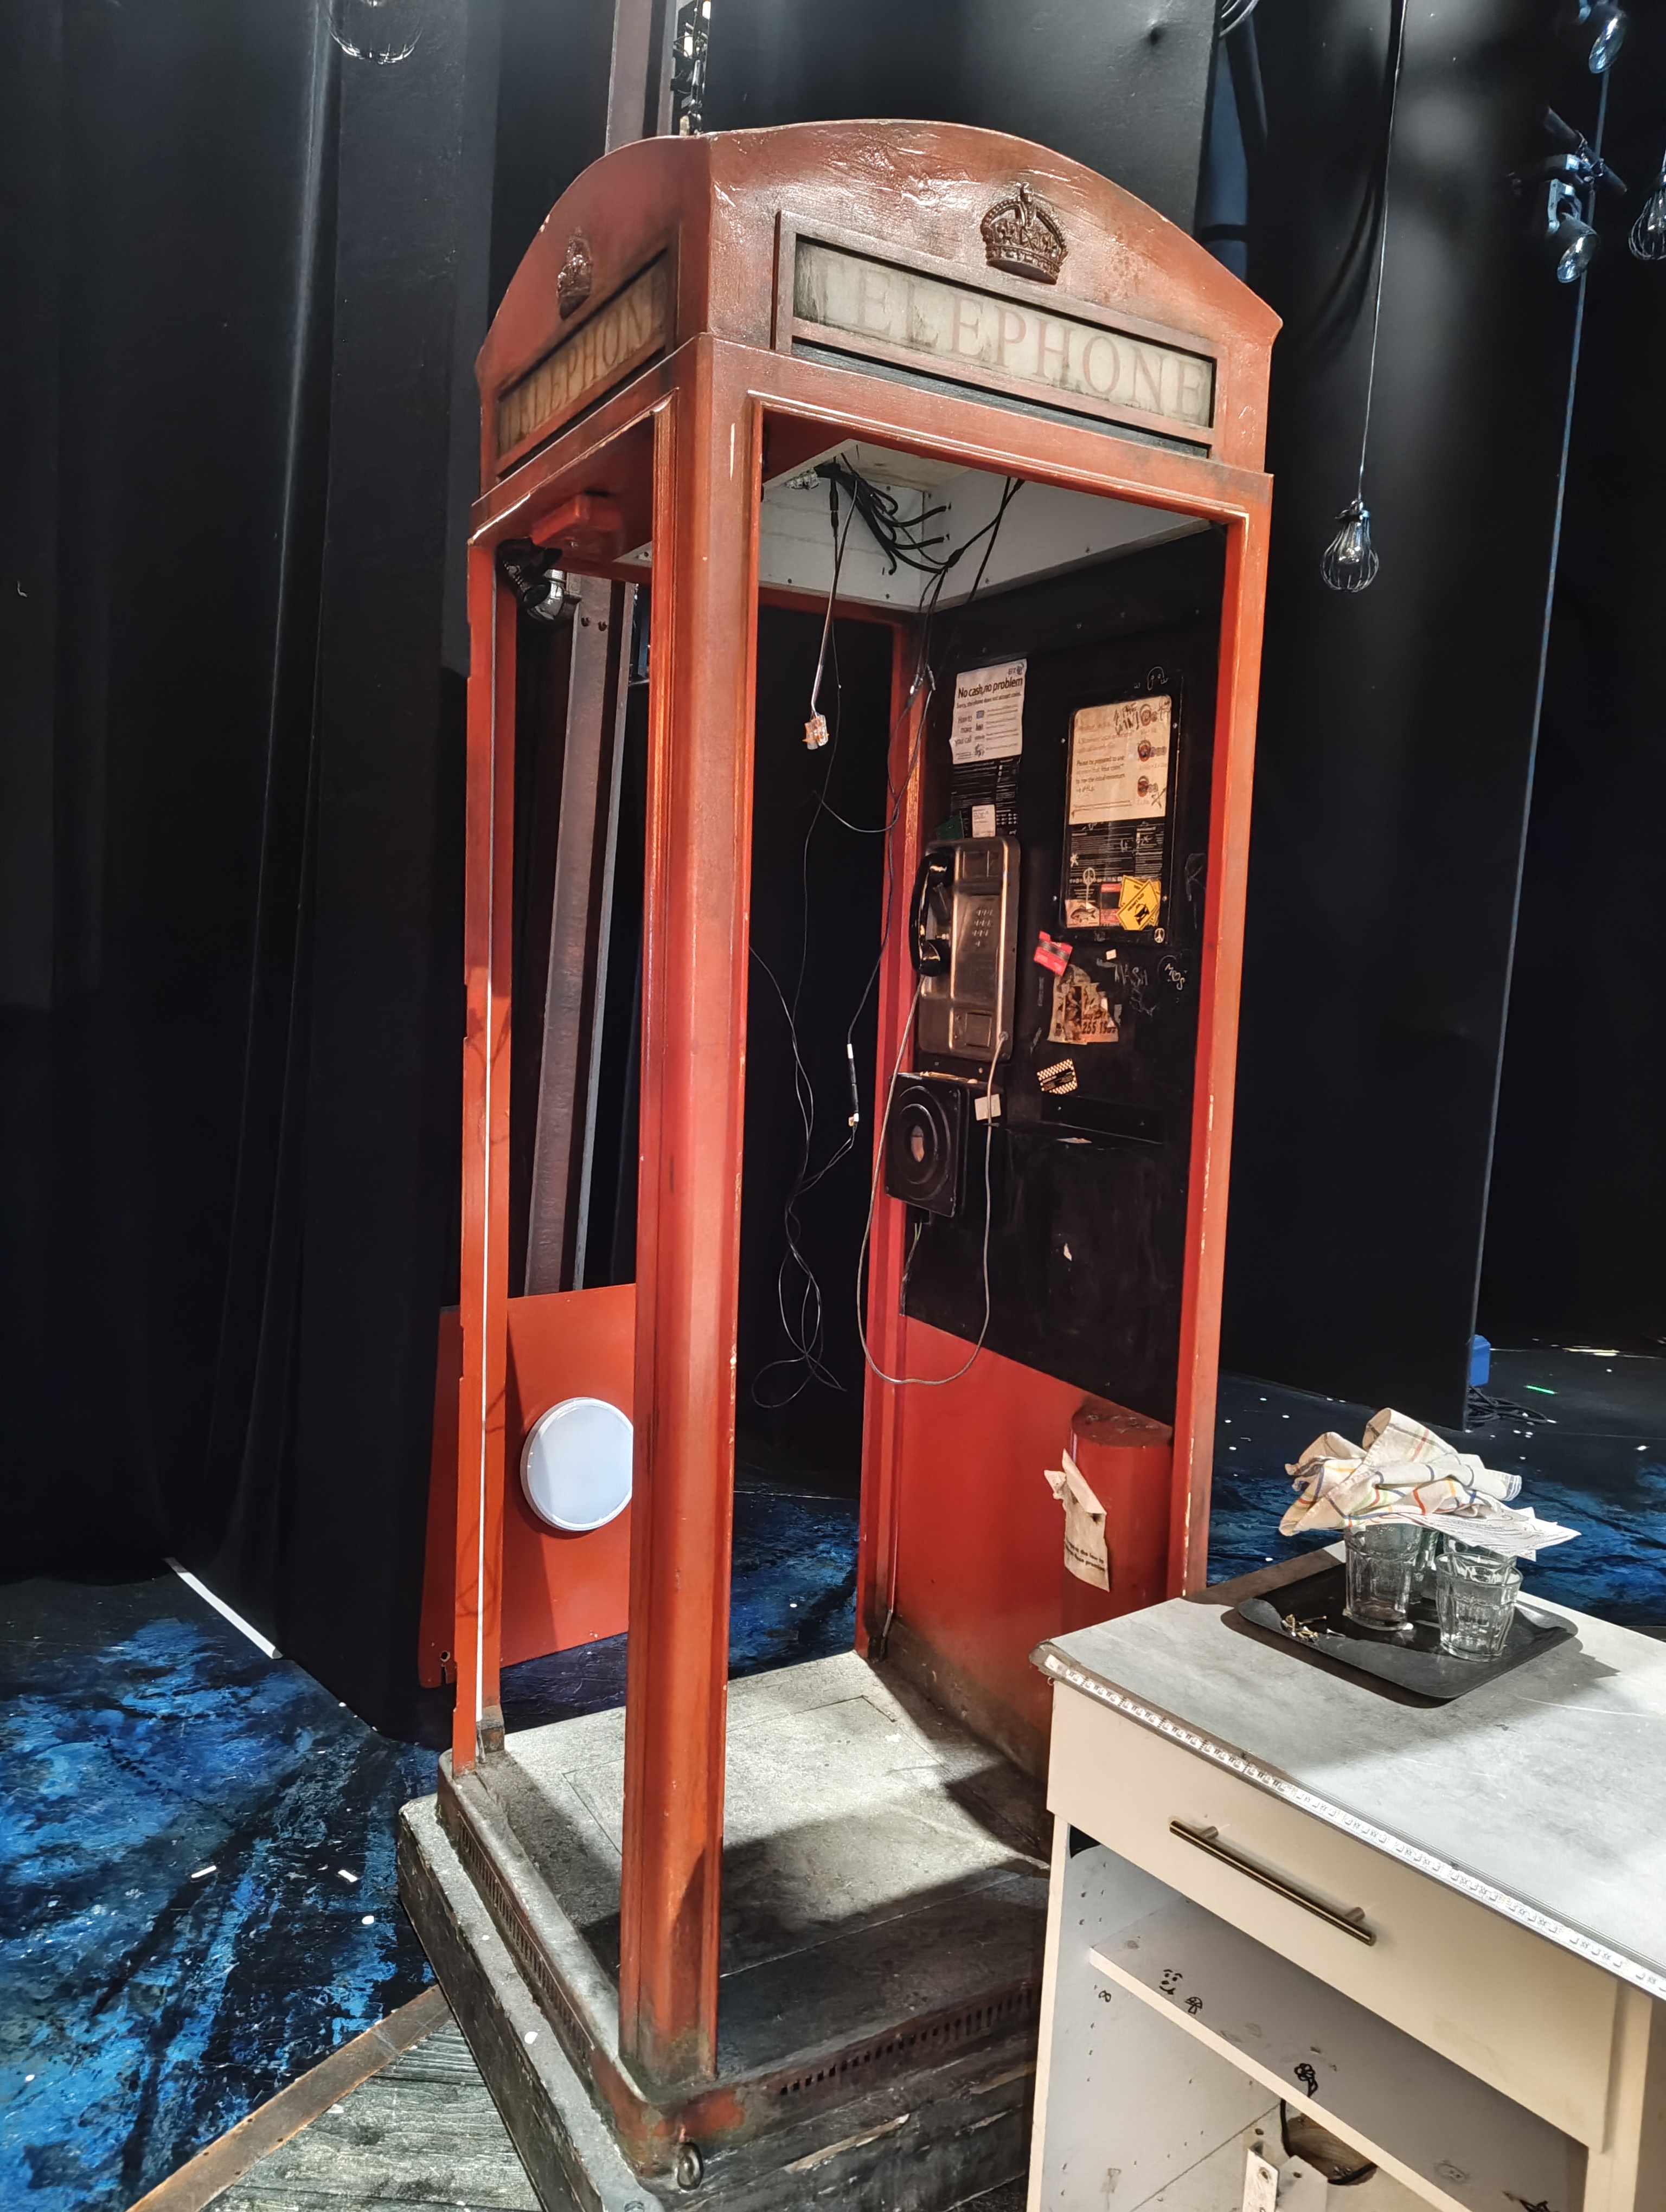
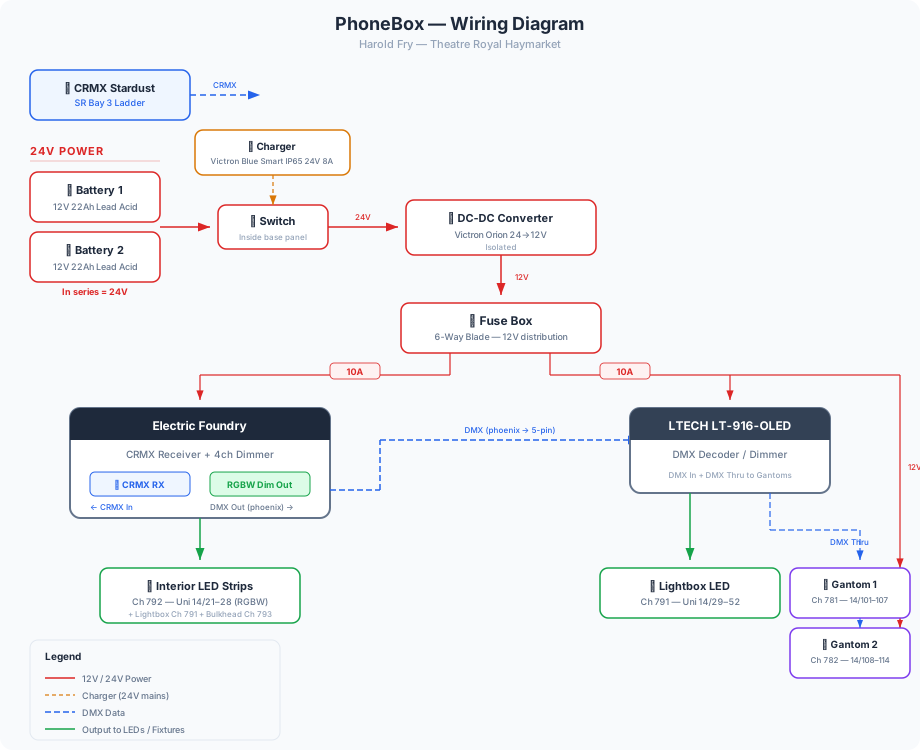
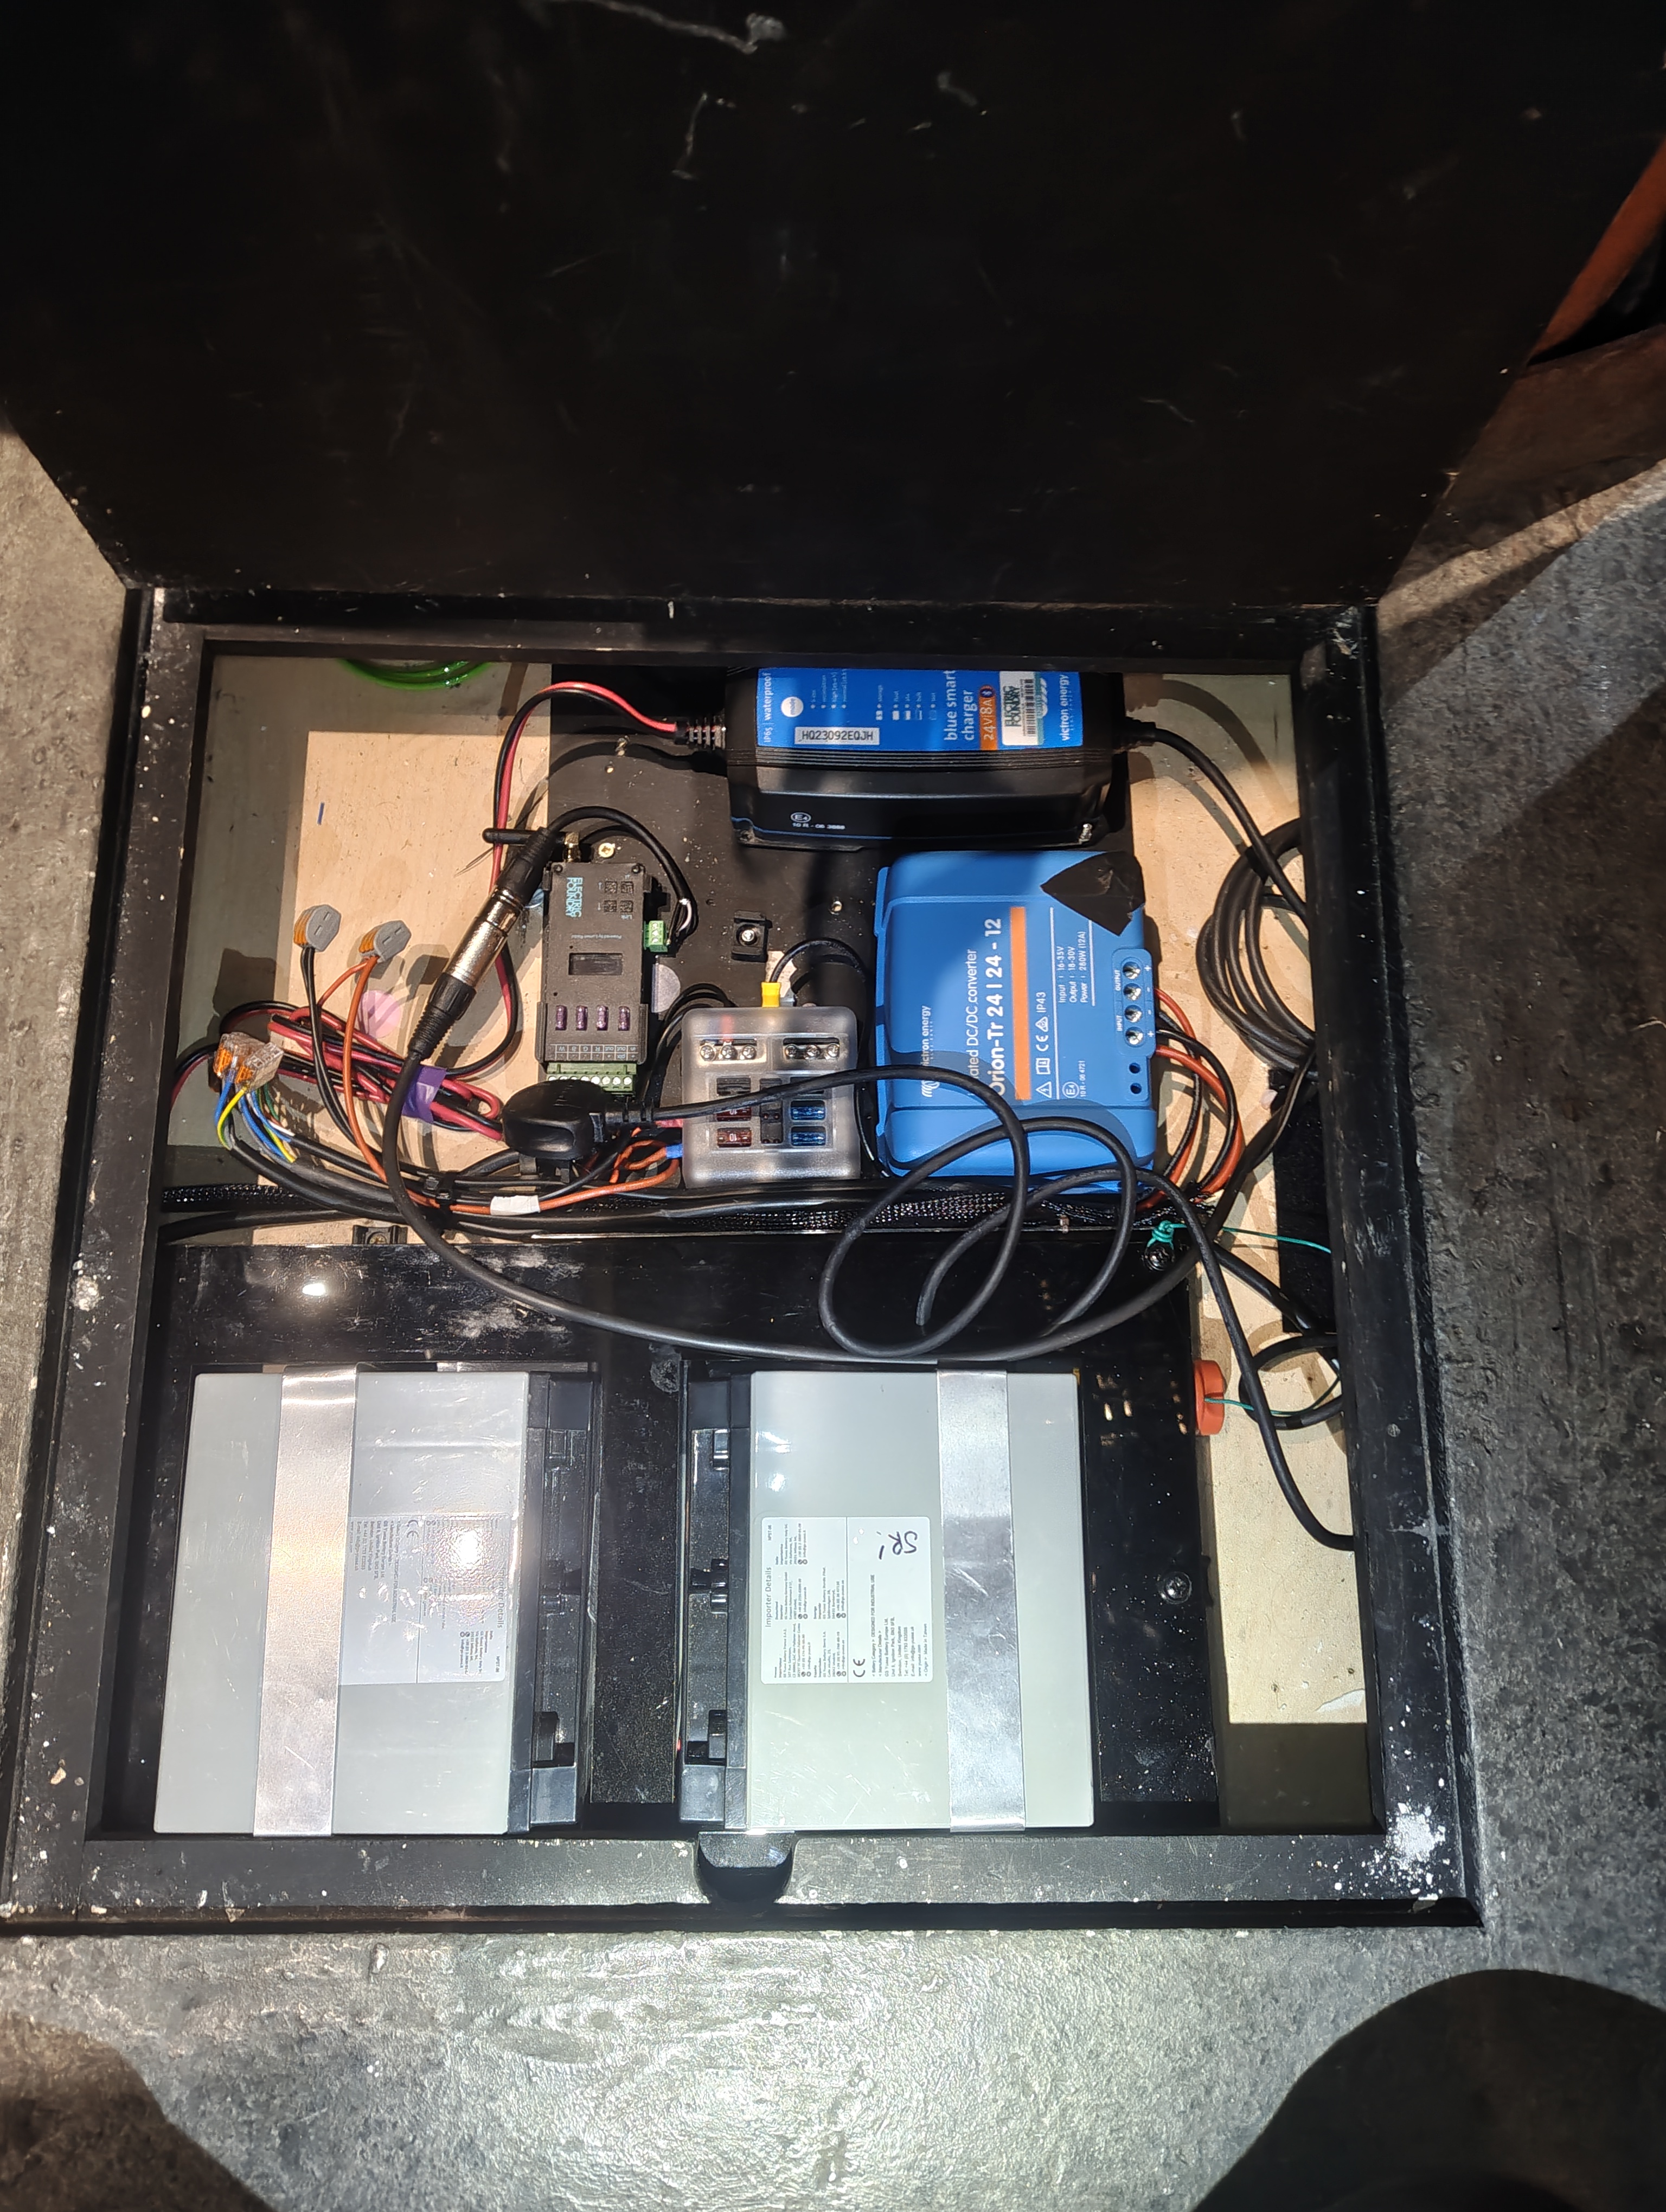
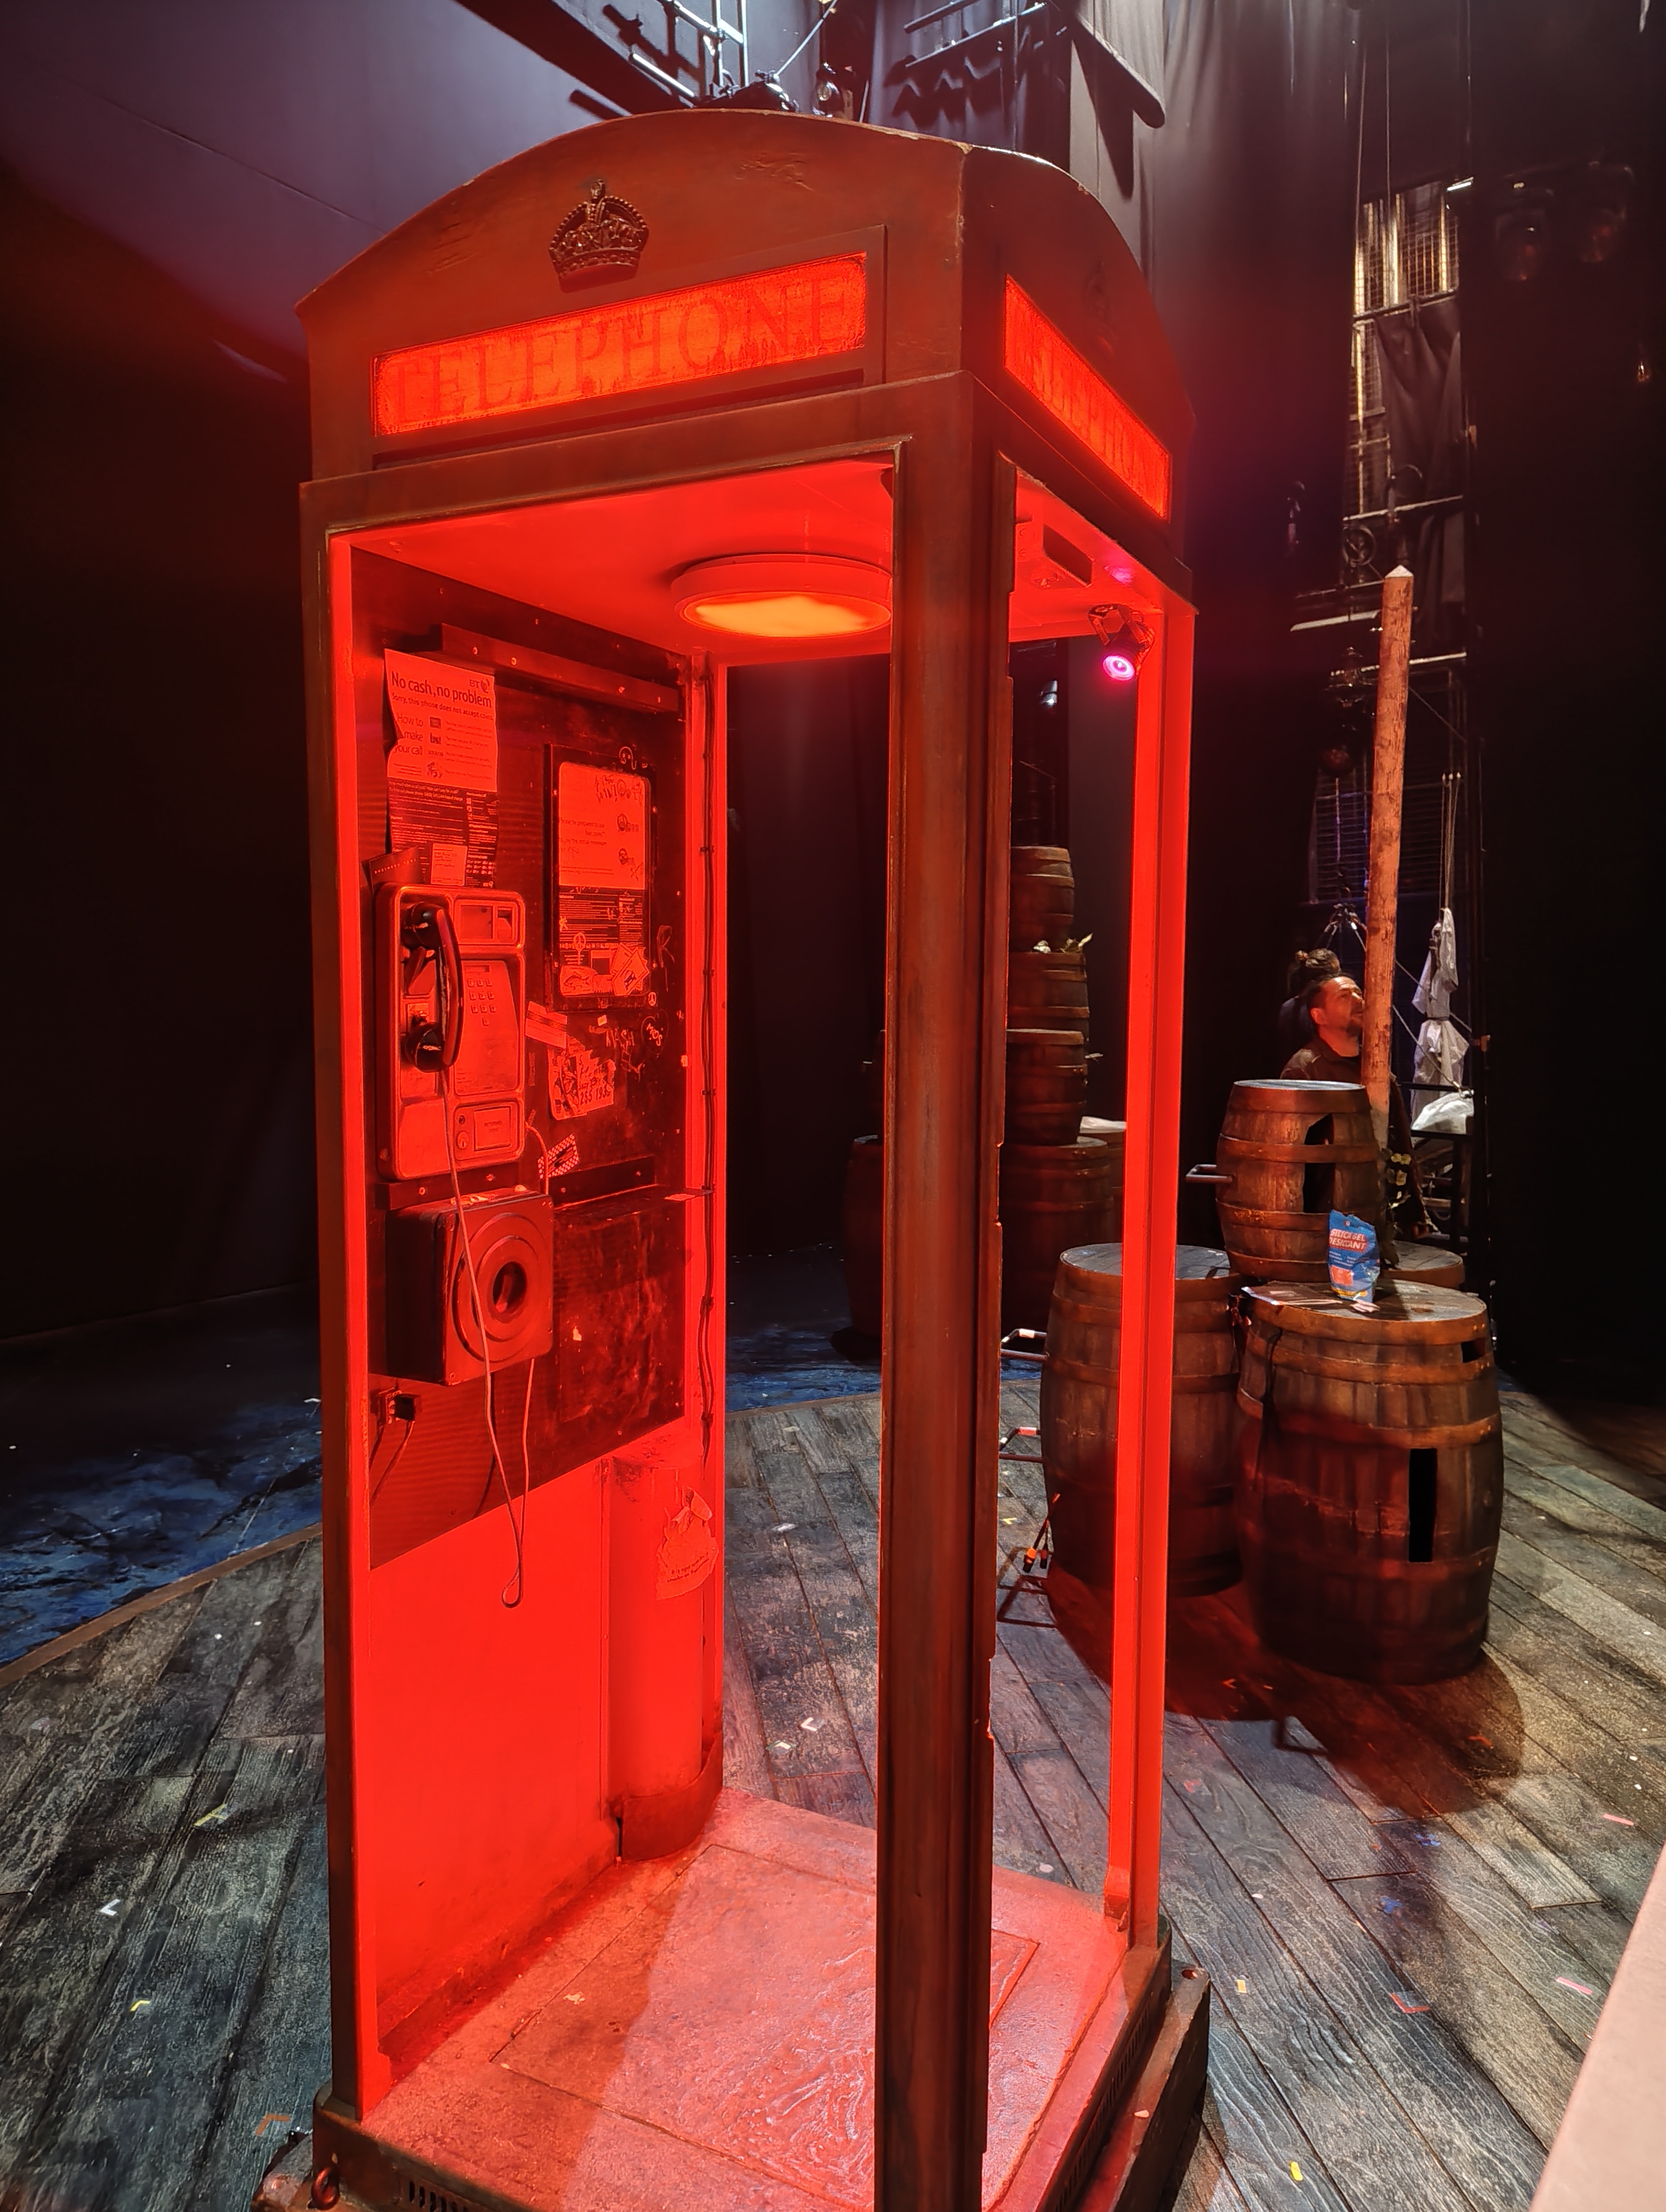
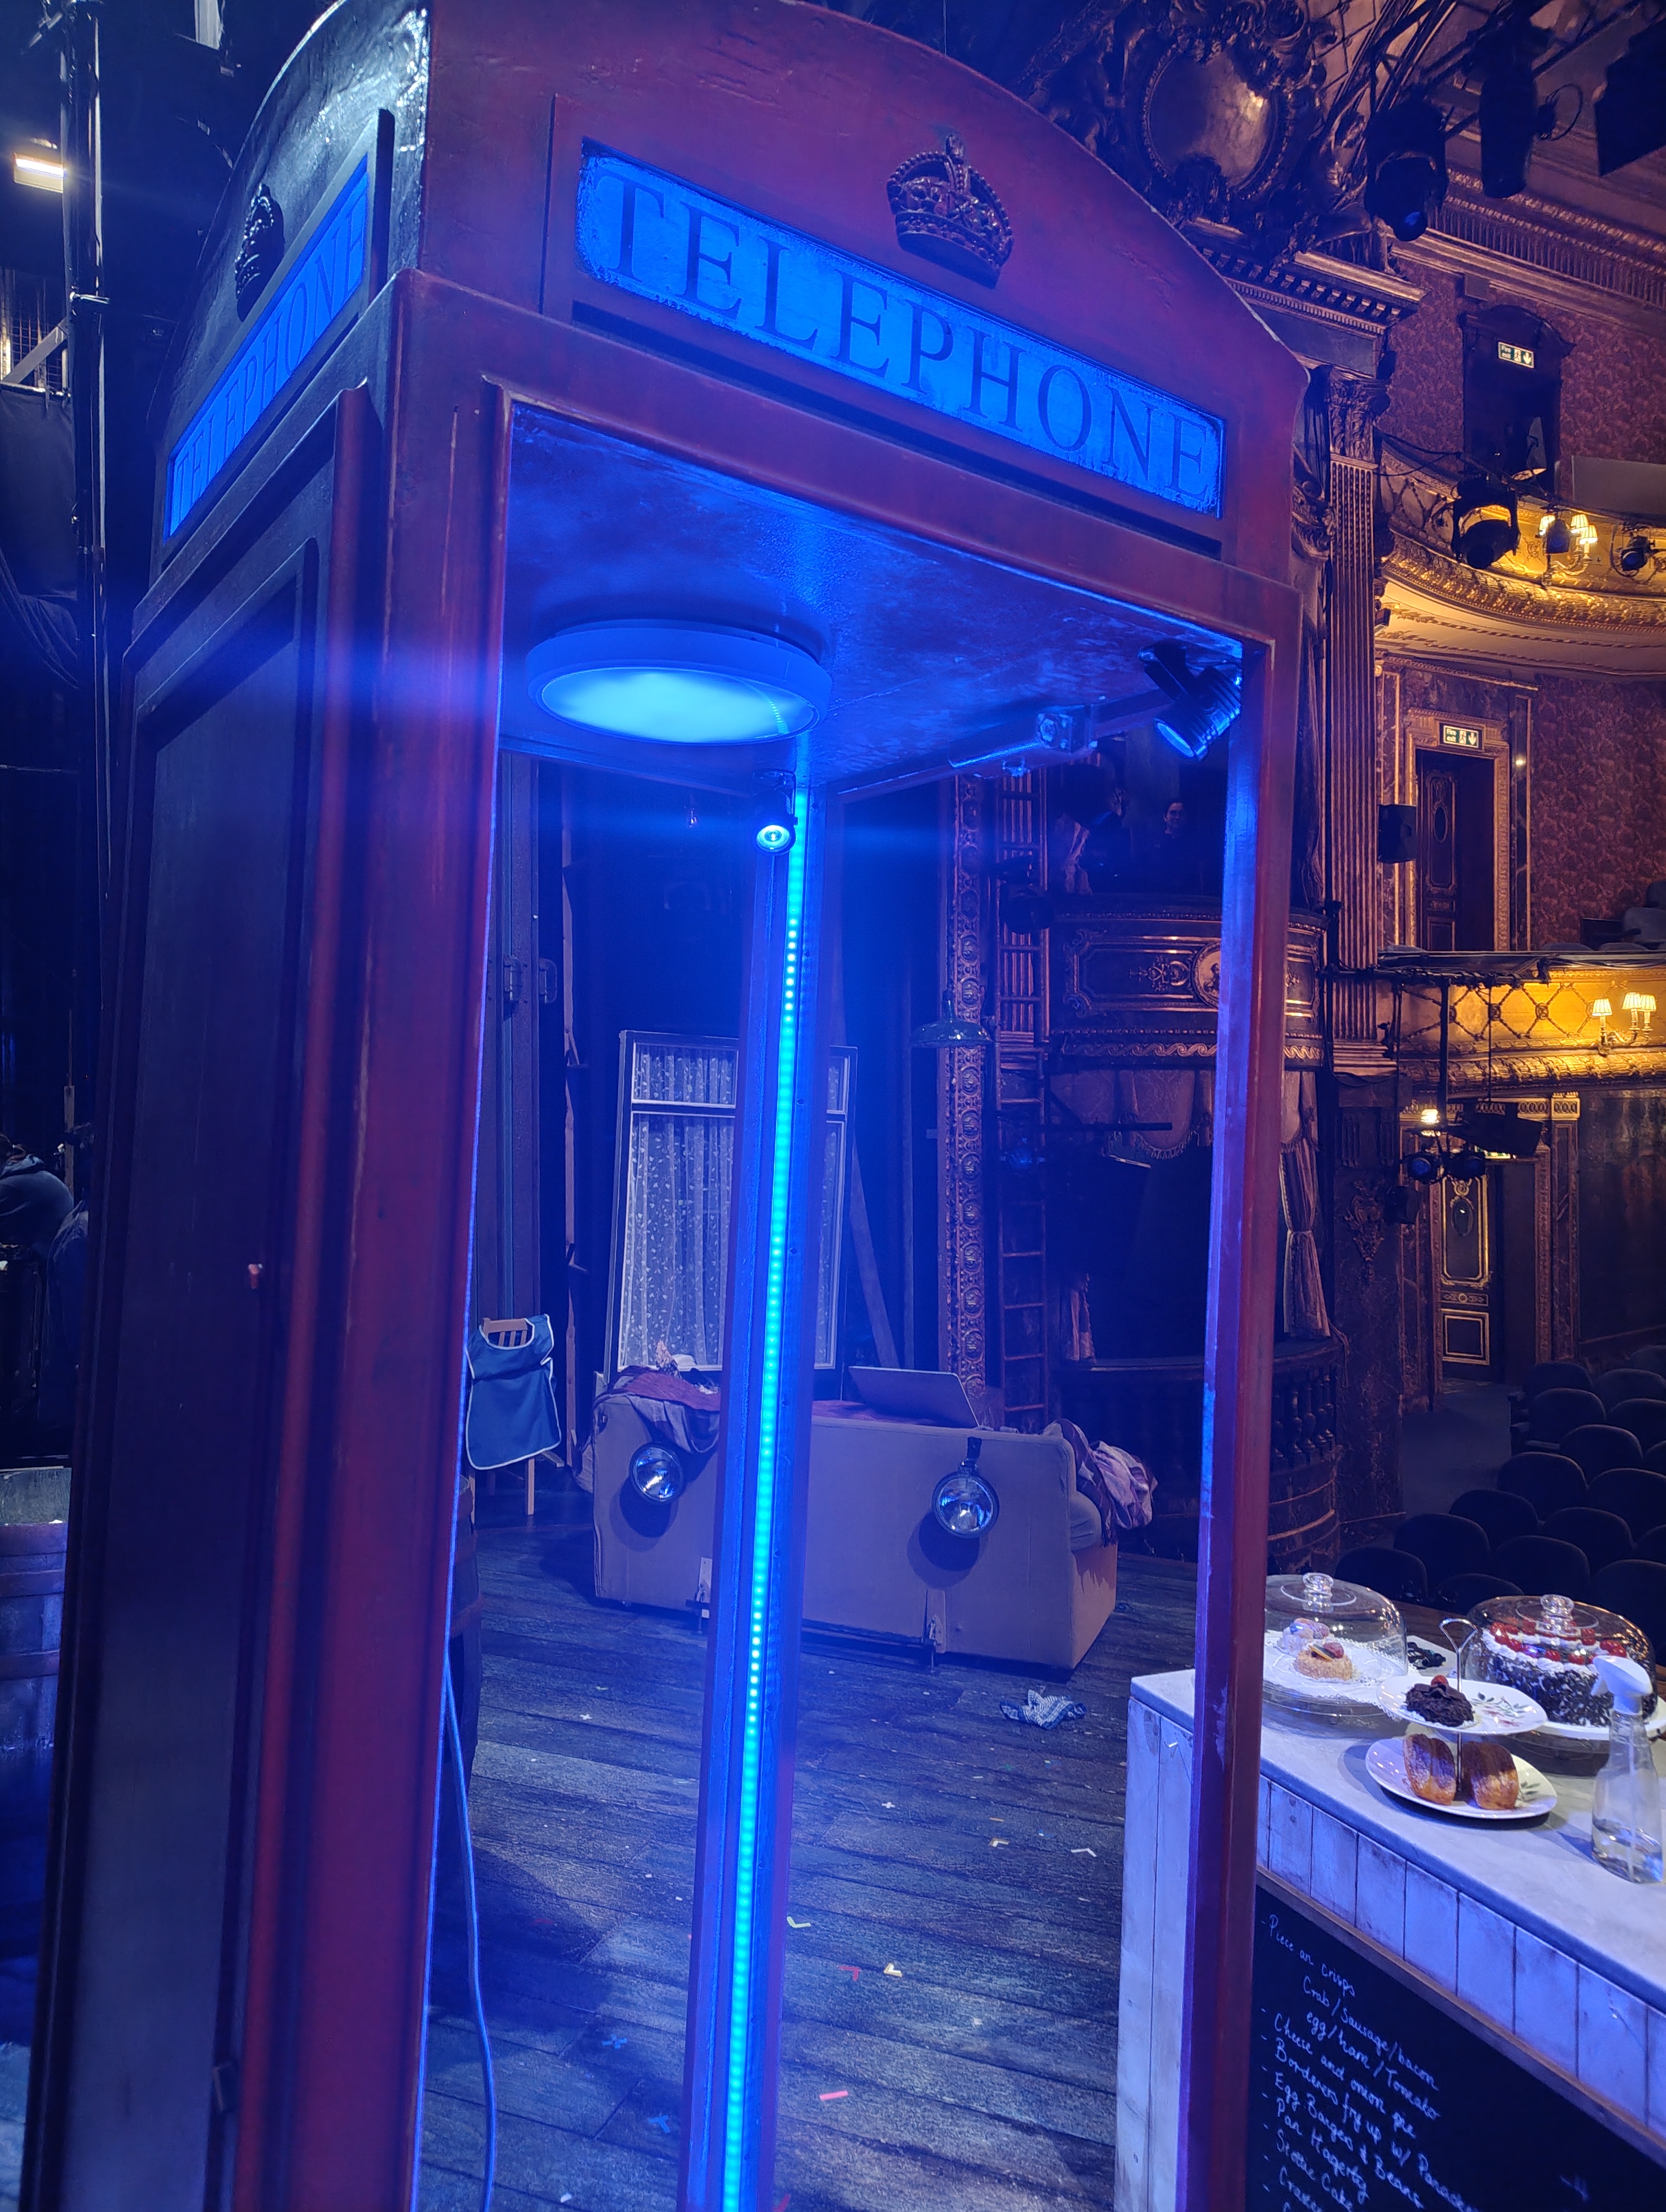
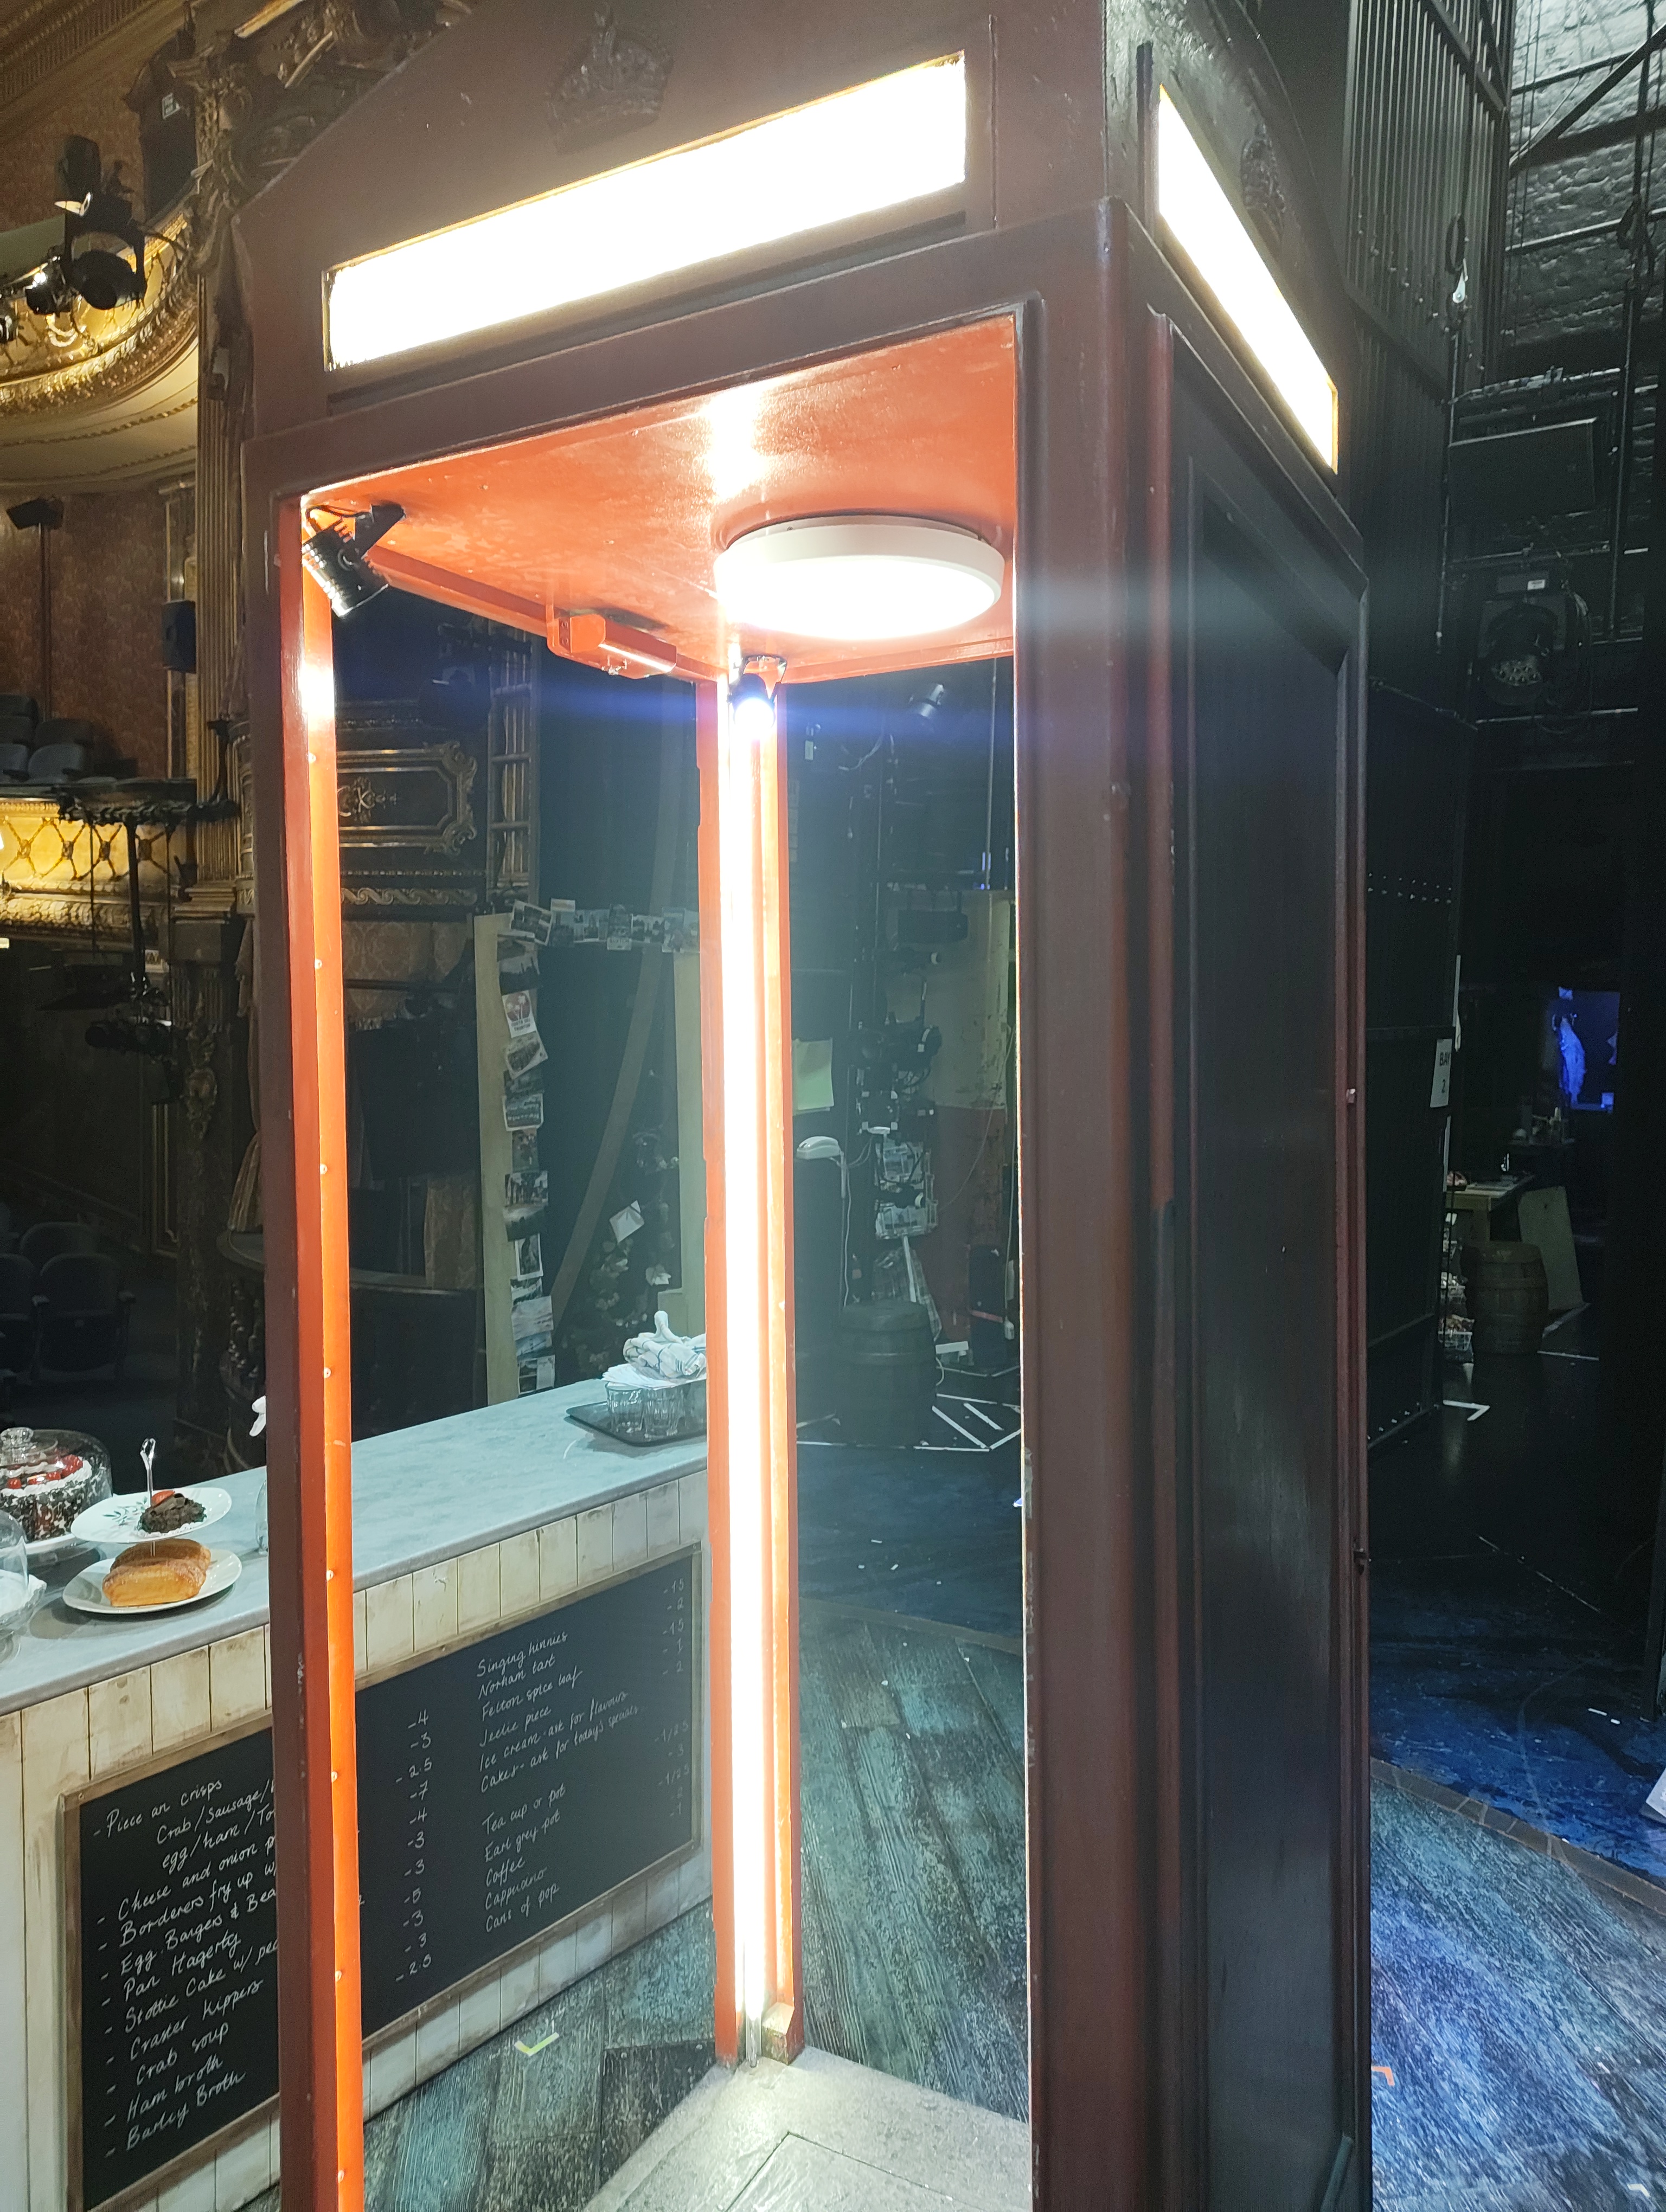
The PhoneBox is a wireless rolling practical containing multiple LED fixtures and two Gantom spots. It runs on a 24V system (two 12V lead acid batteries in series), stepped down to 12V via a Victron Orion isolated DC-DC converter. The CRMX signal is received by an Electric Foundry combo unit which handles both dimming for the interior LED strips and DMX output to the upper section of the box.
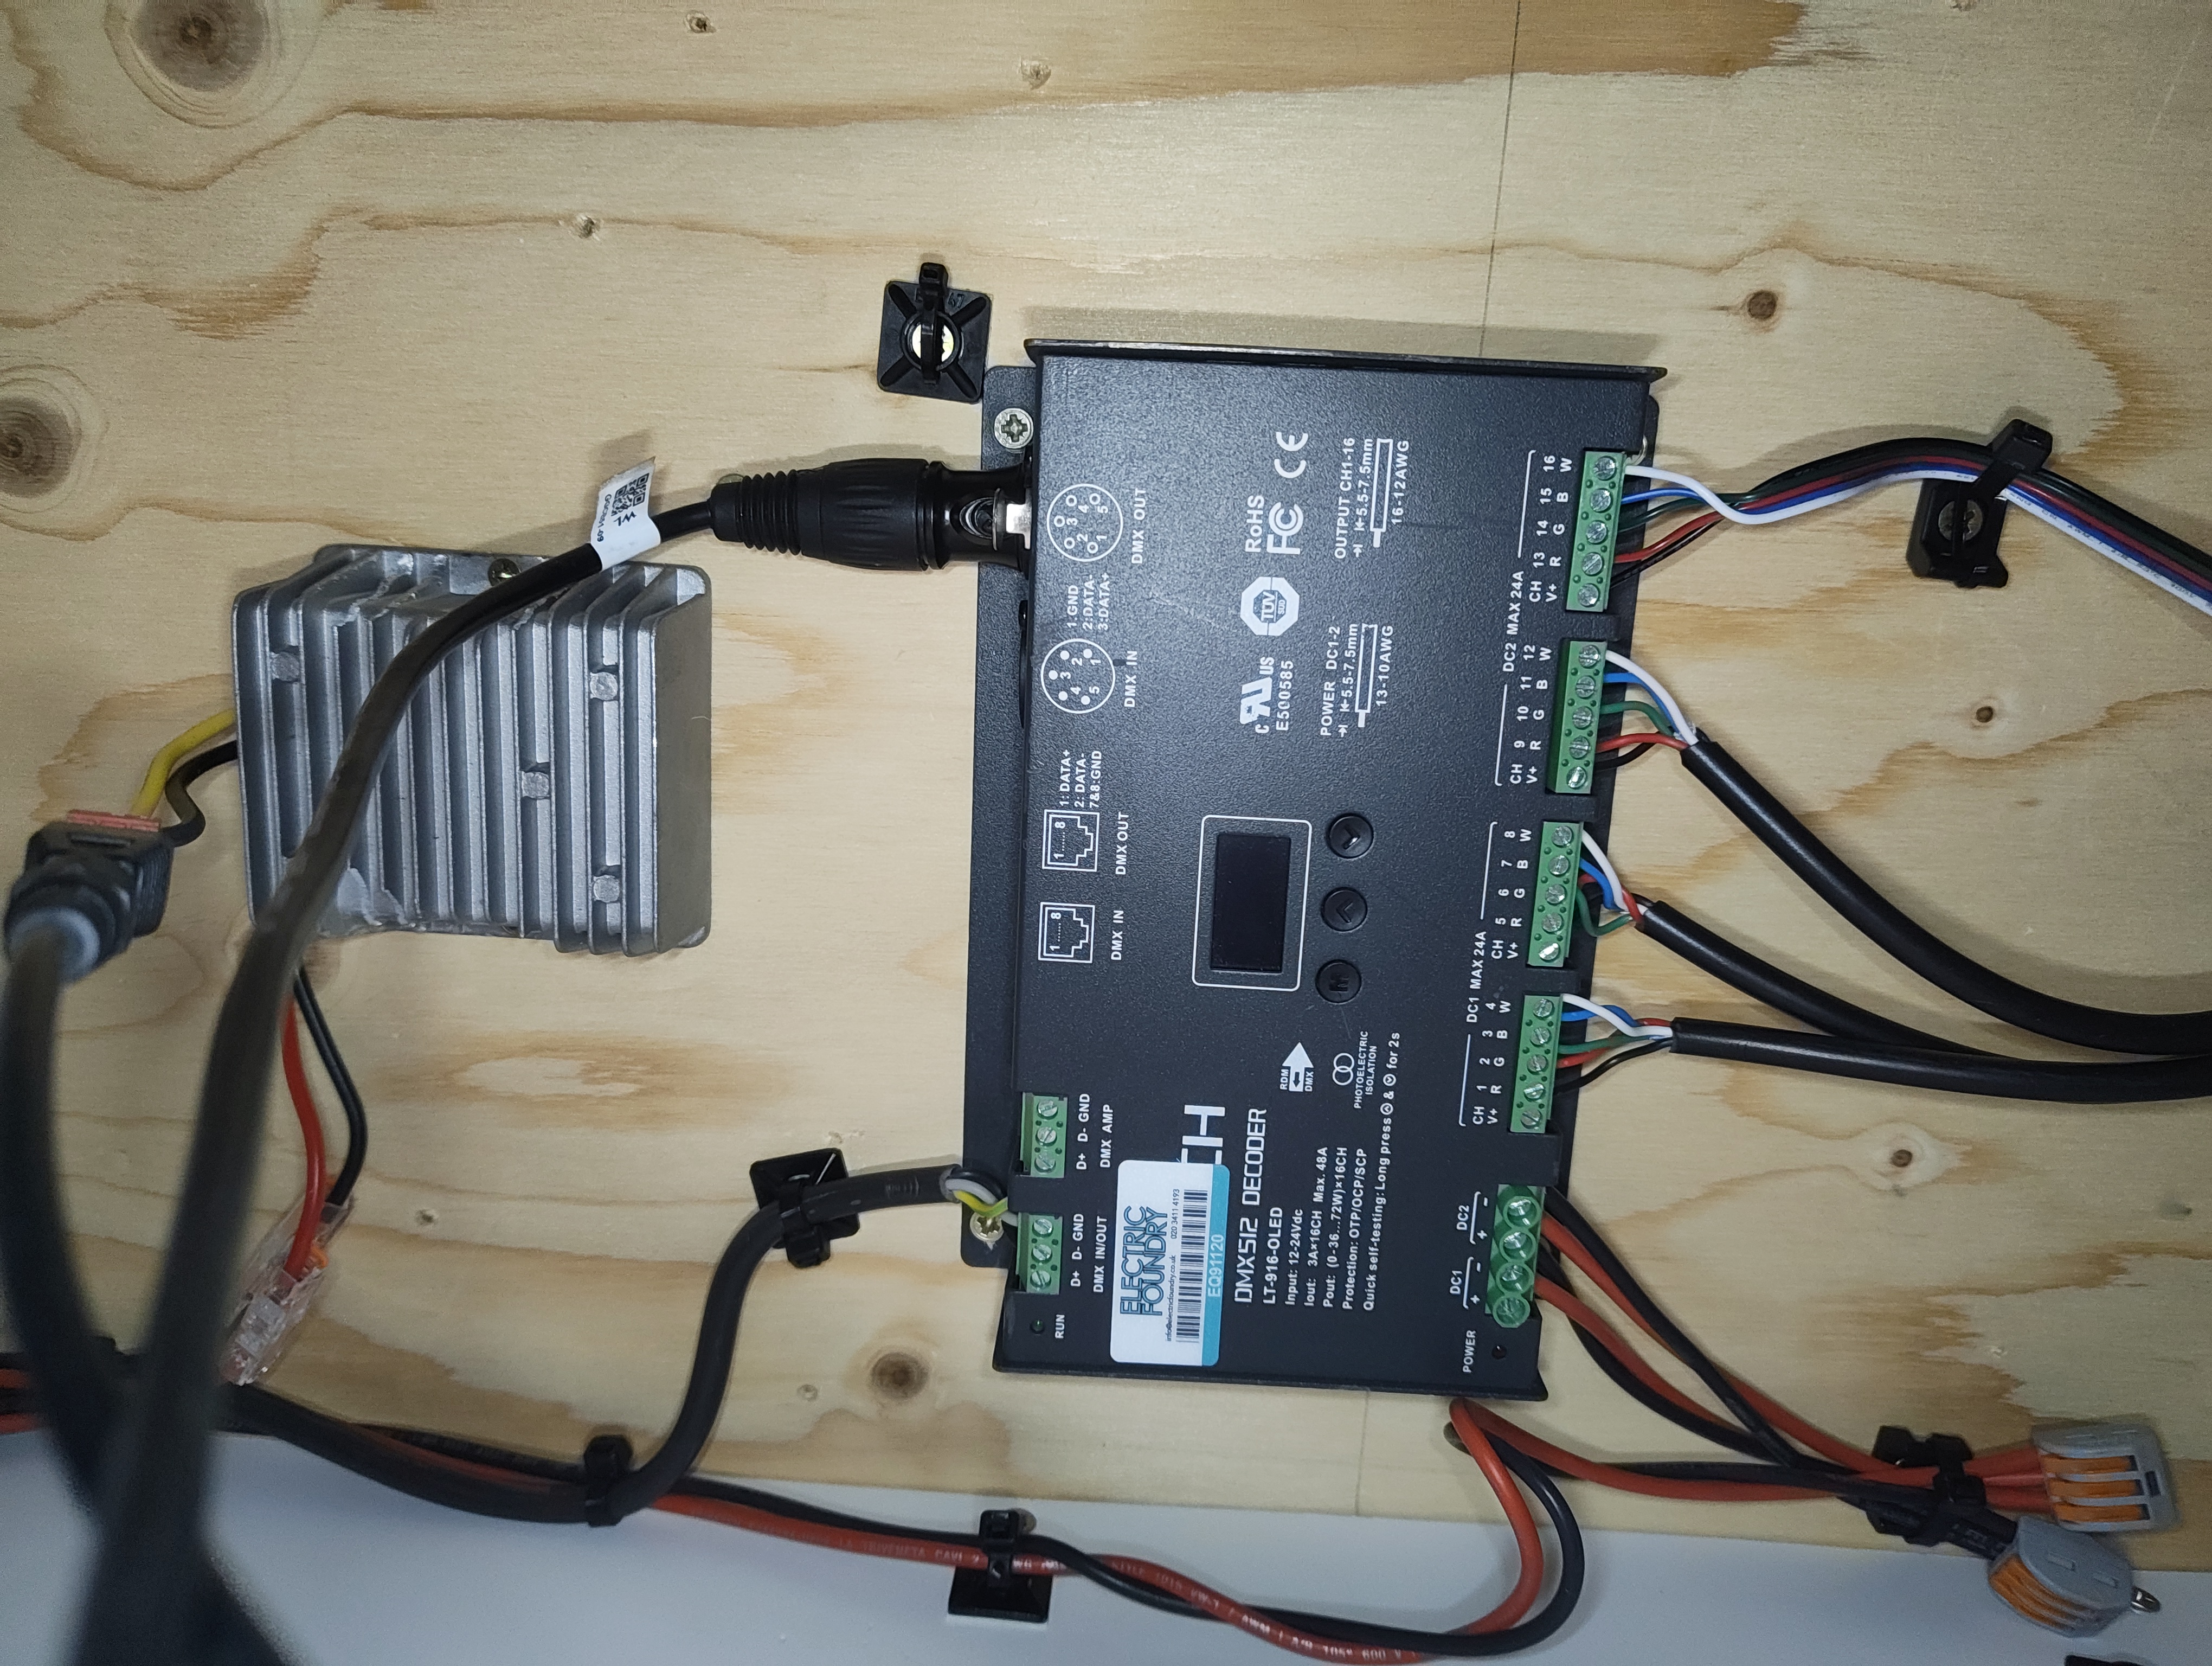
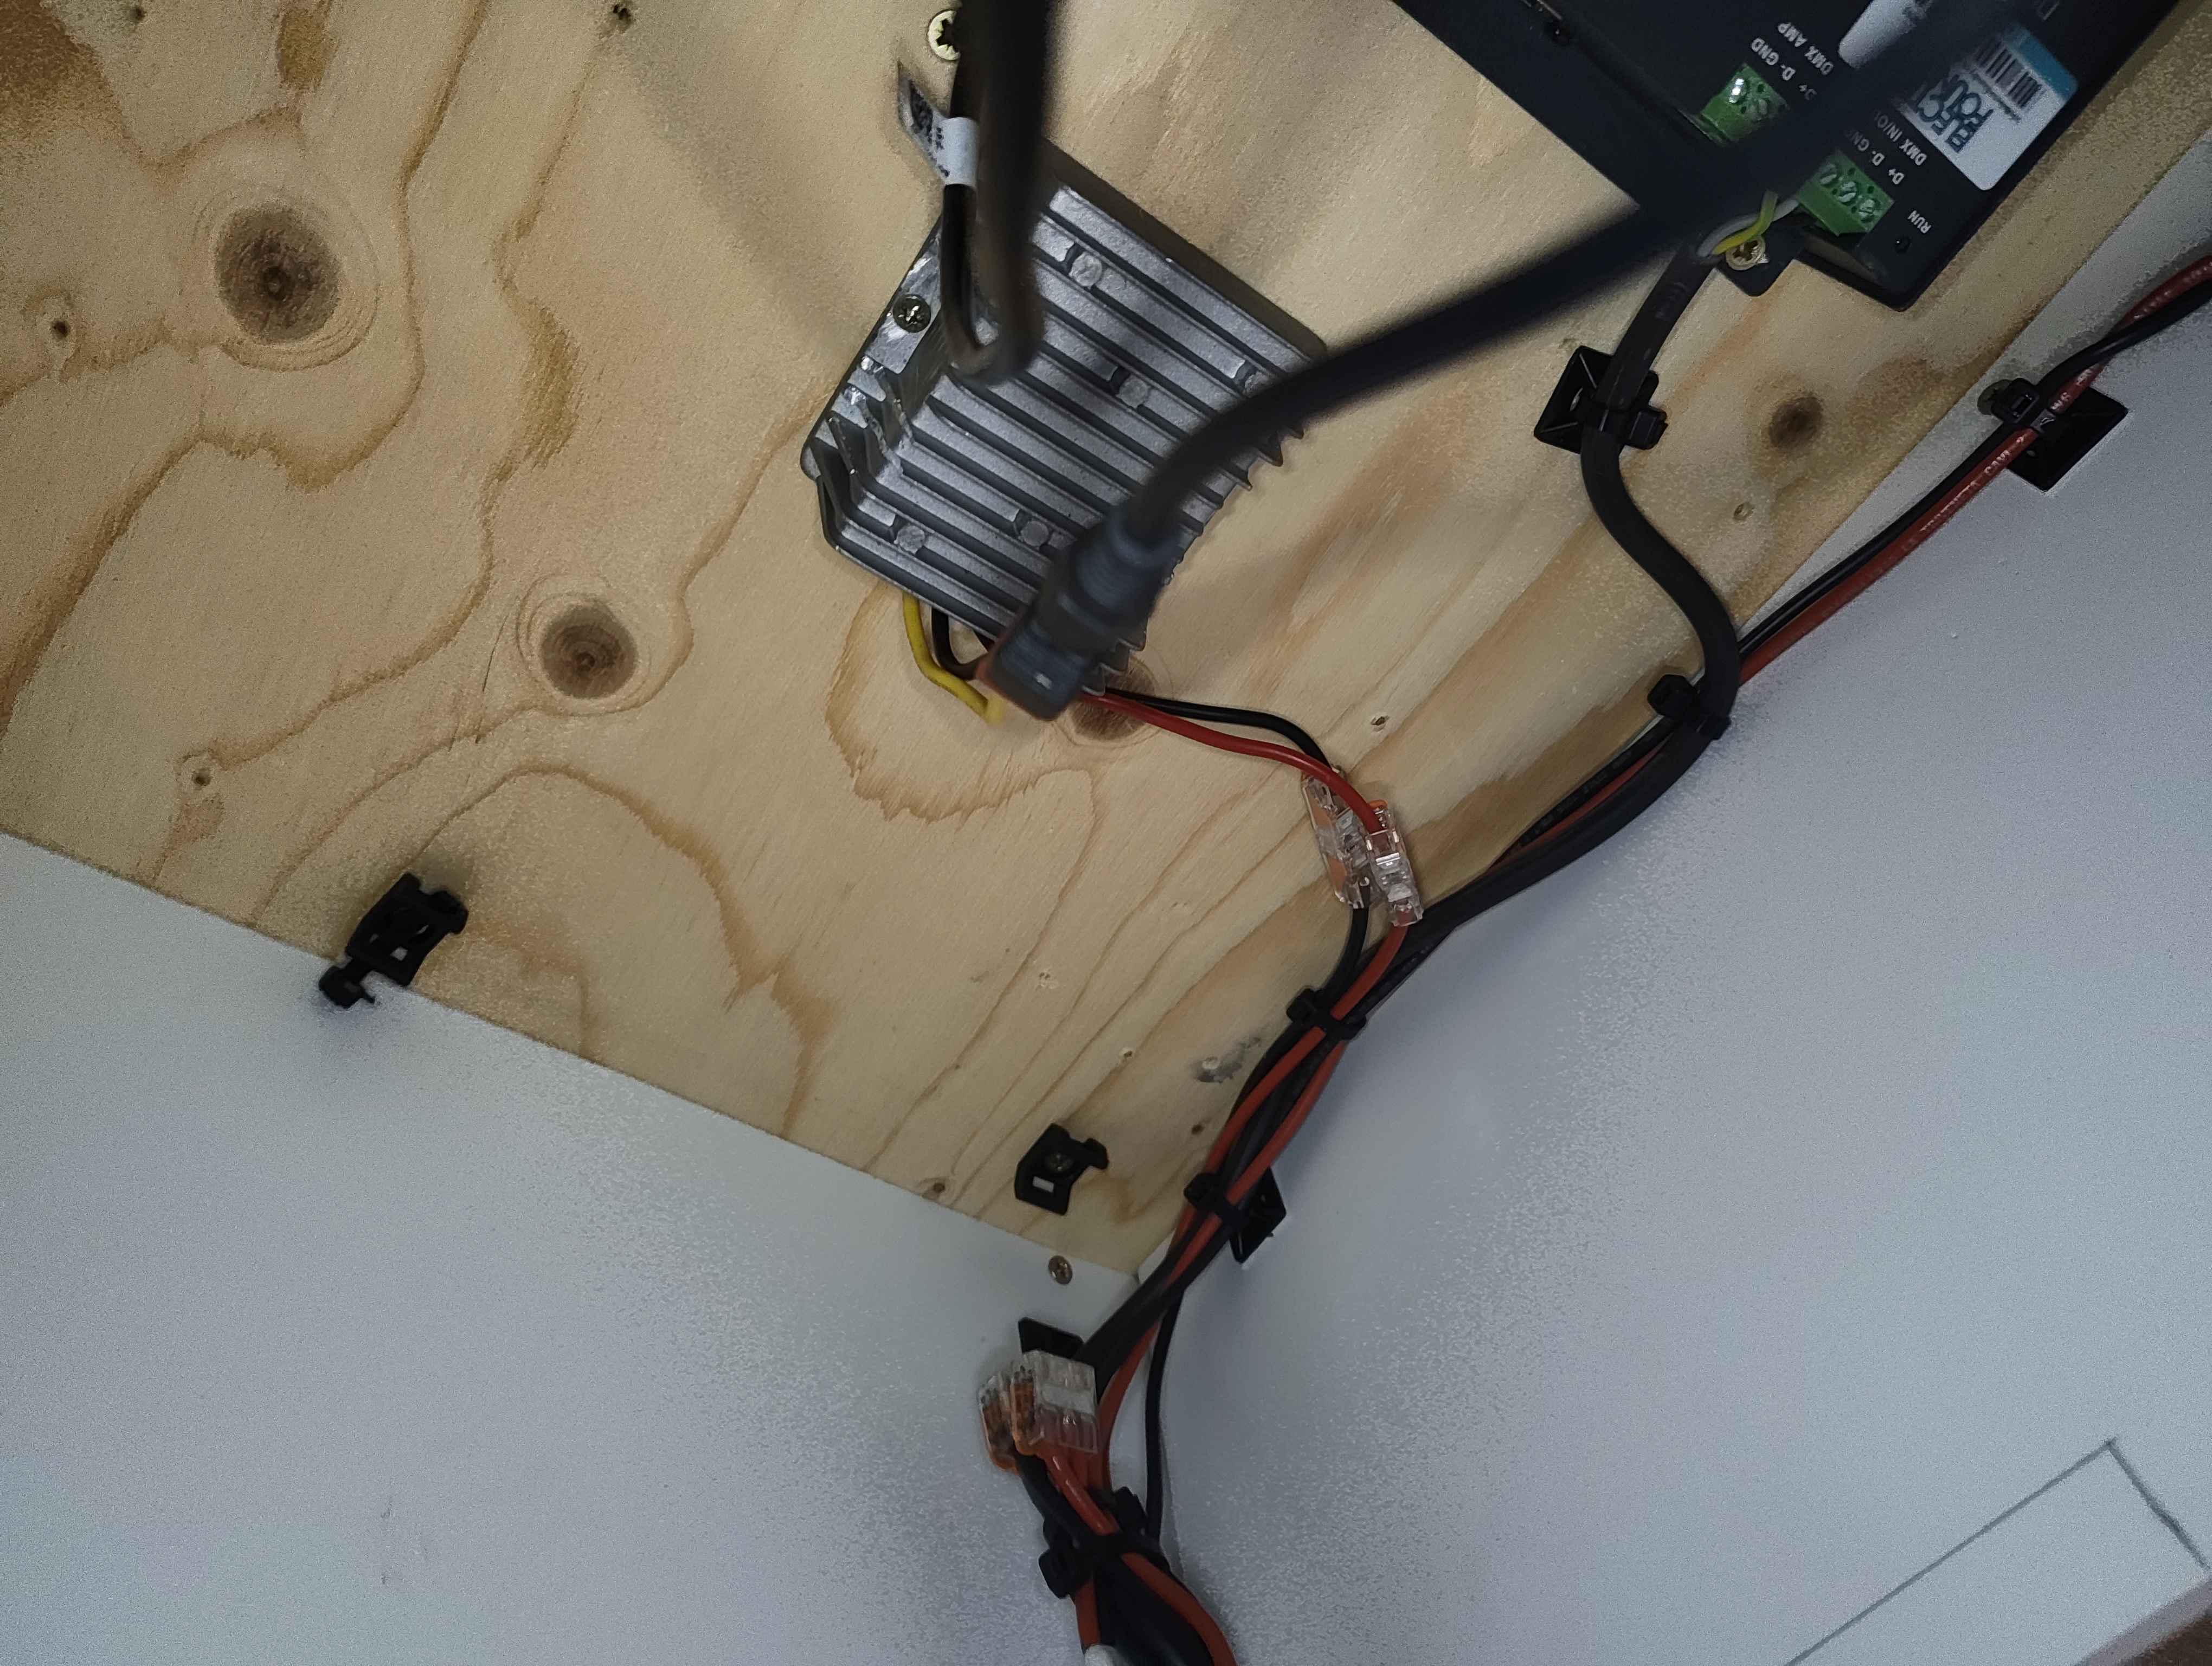
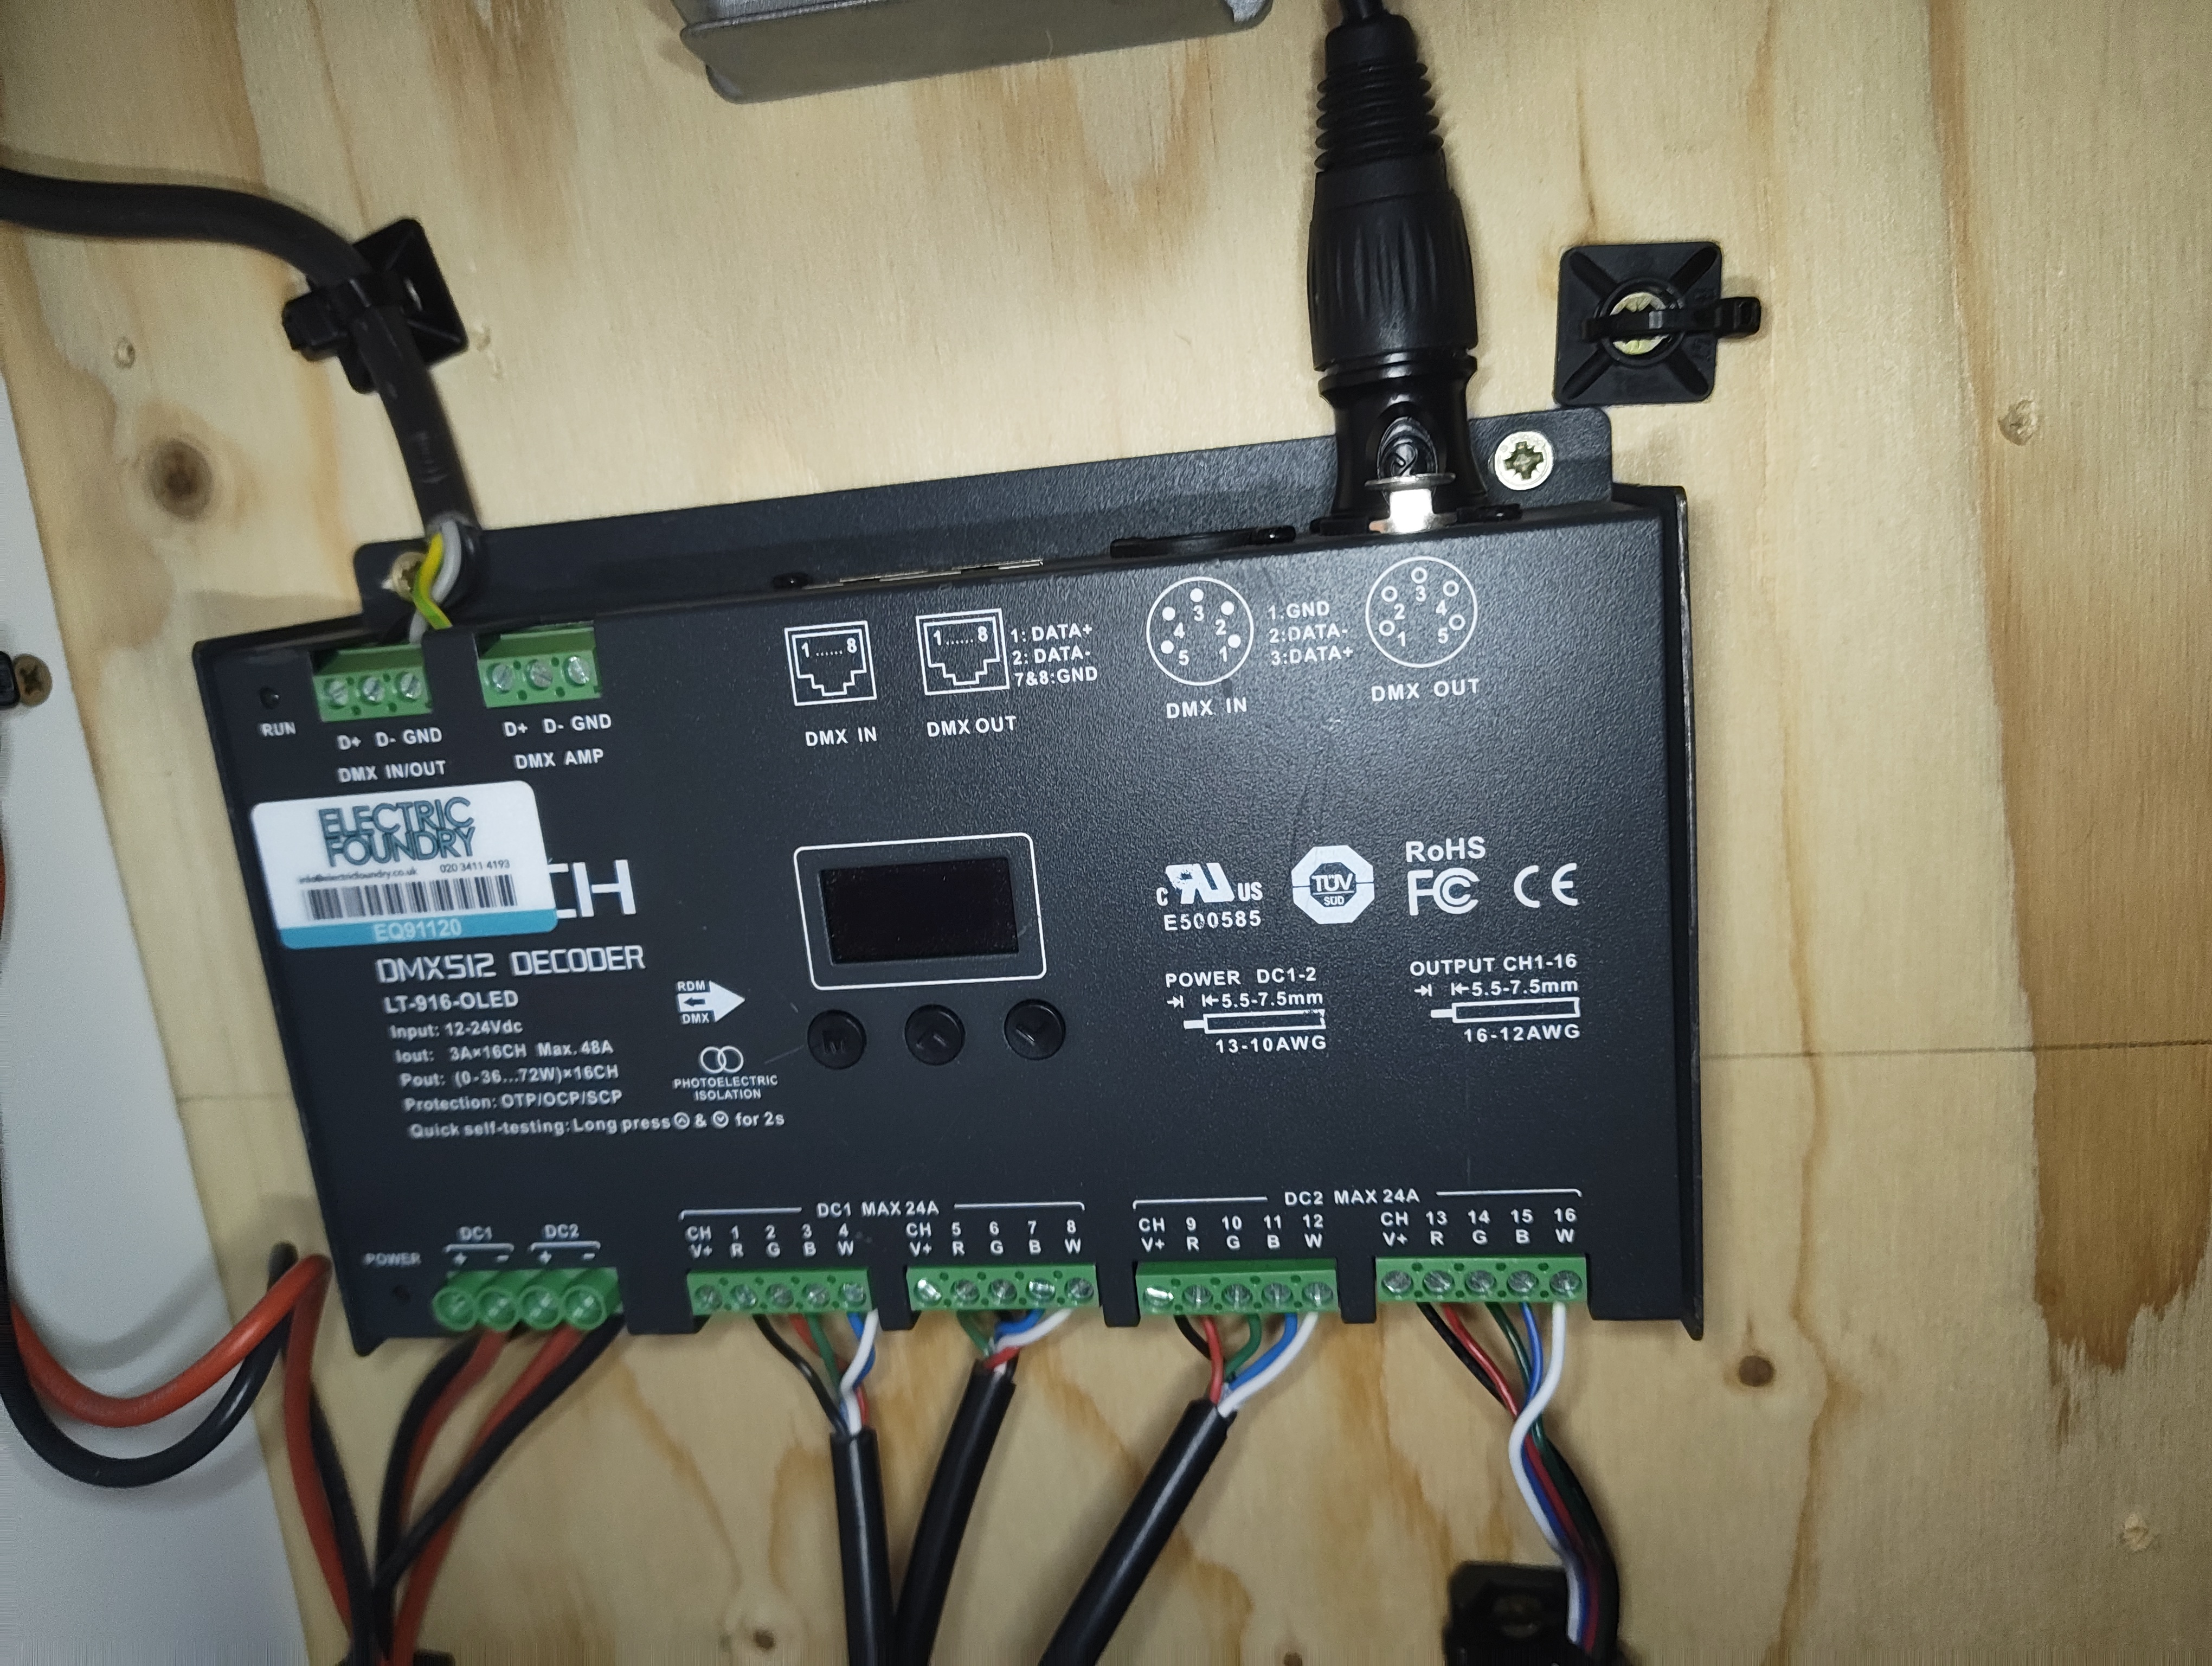
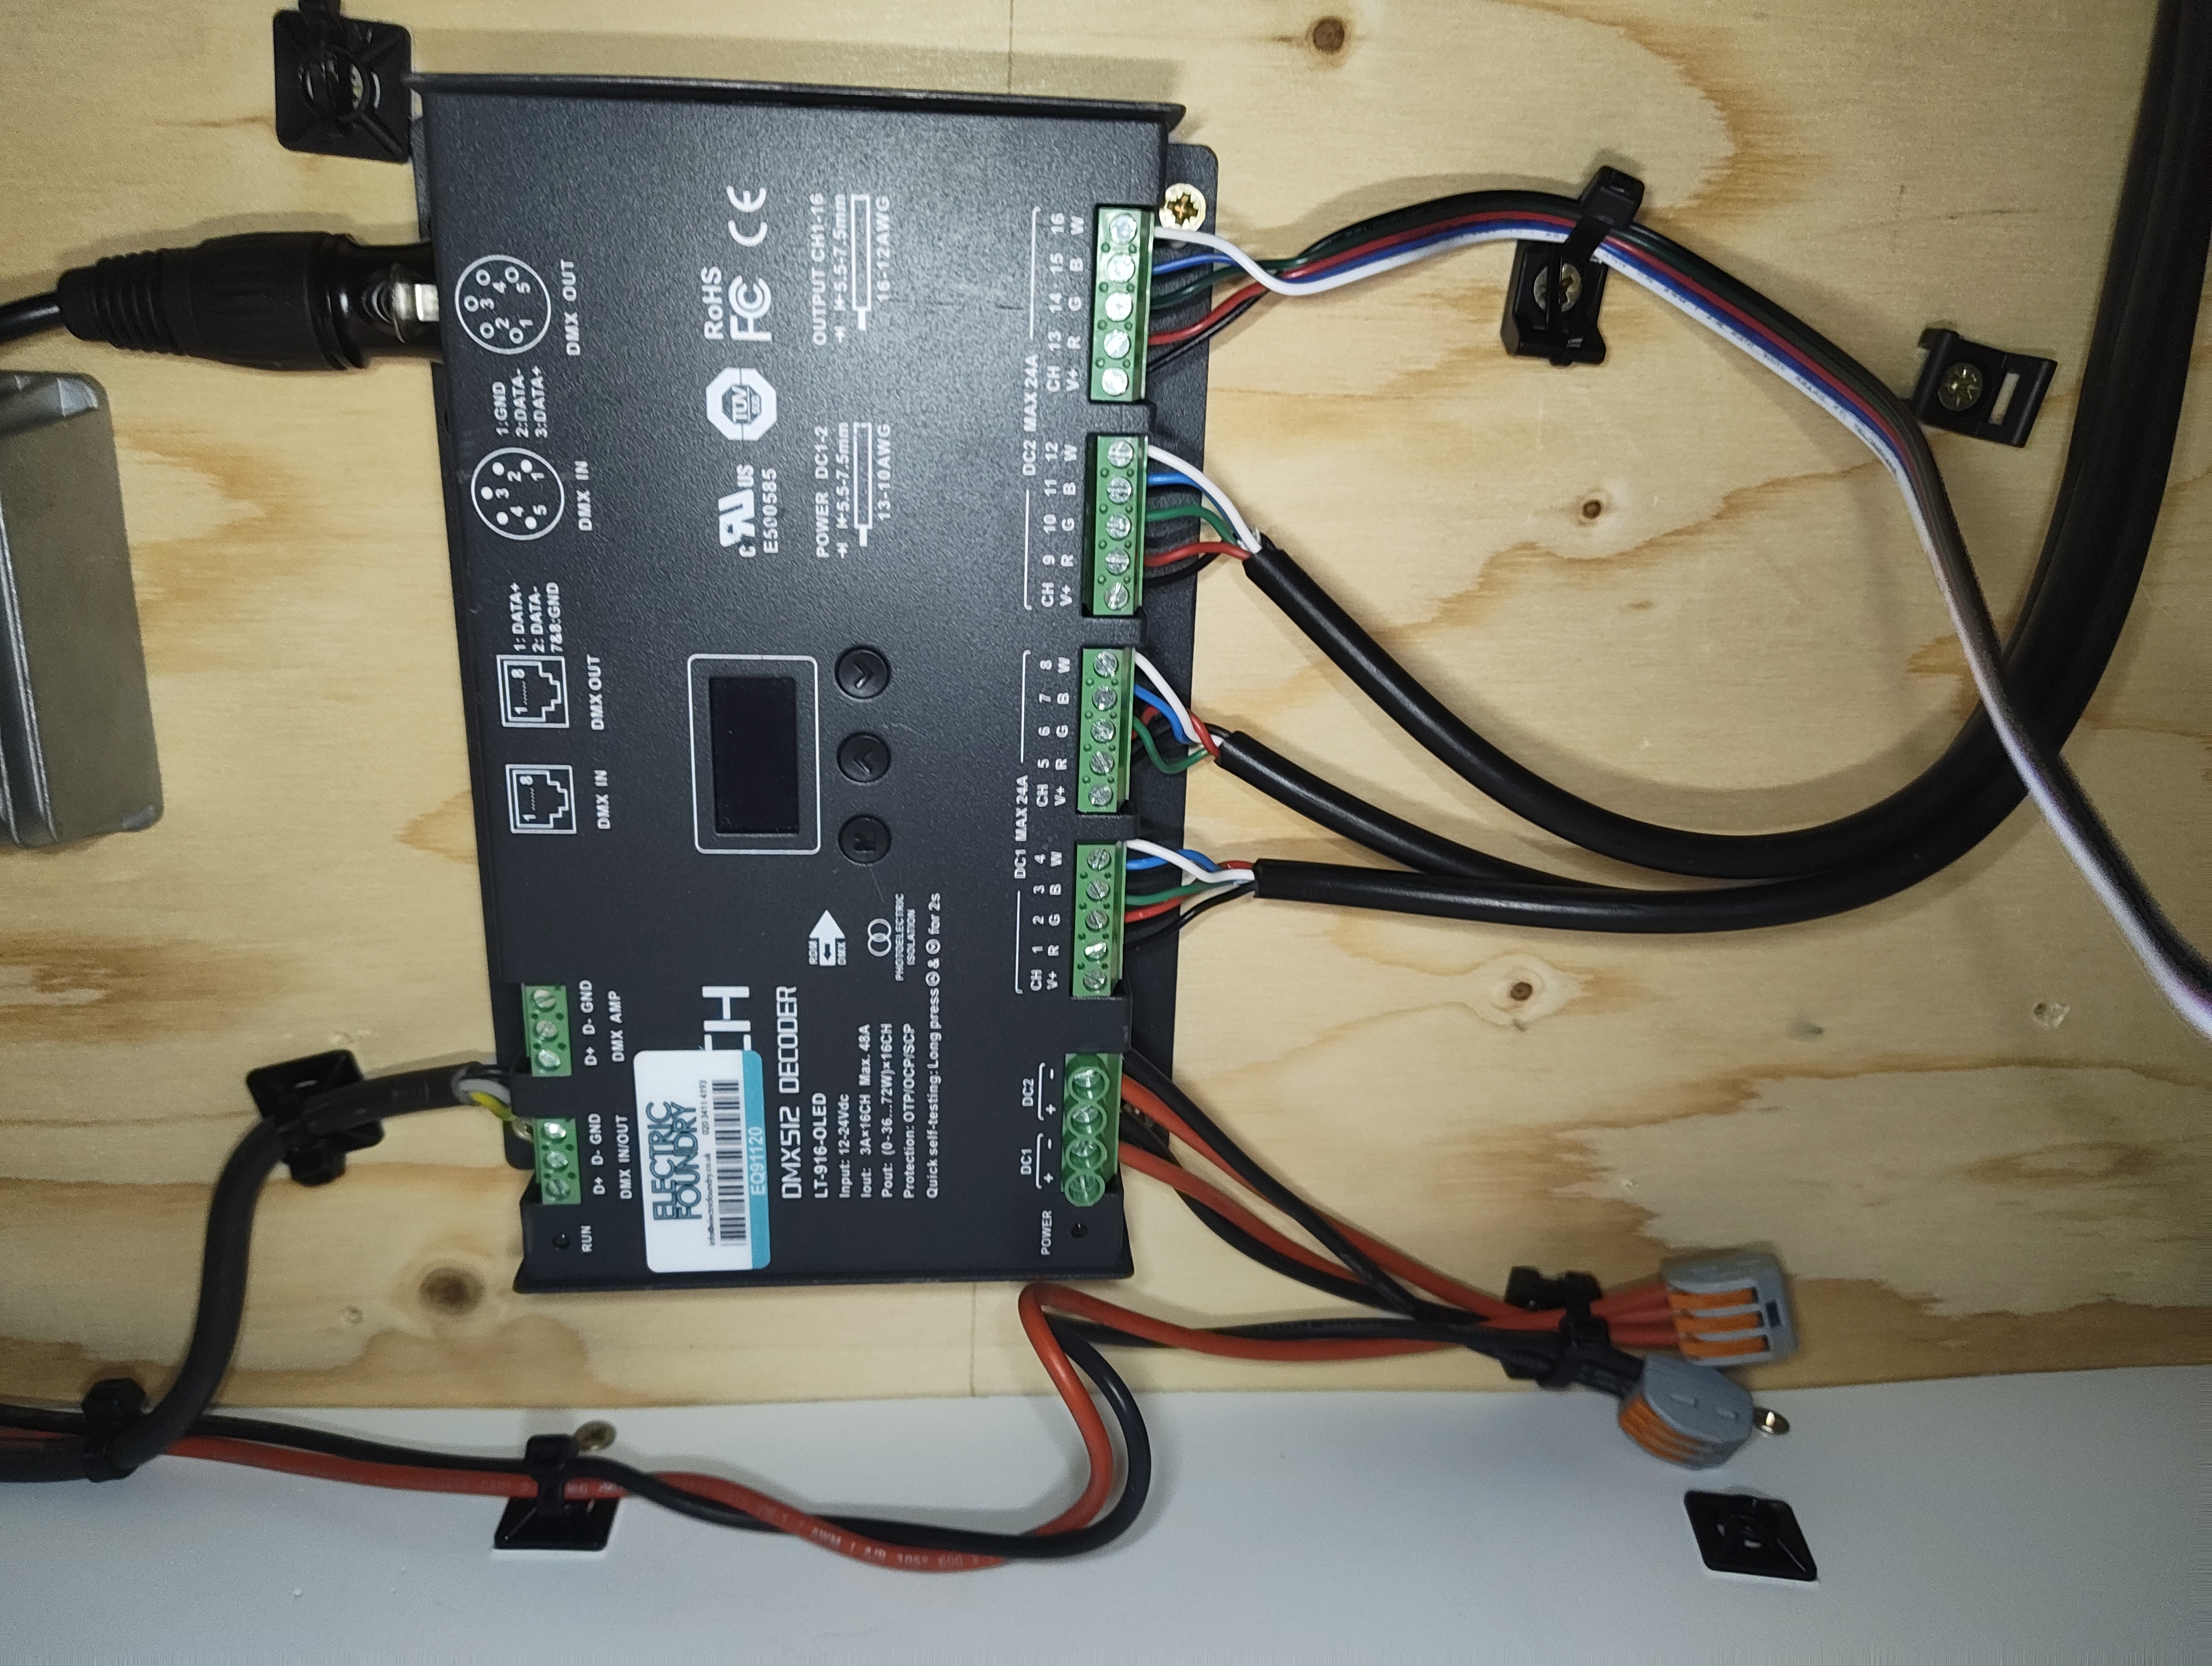
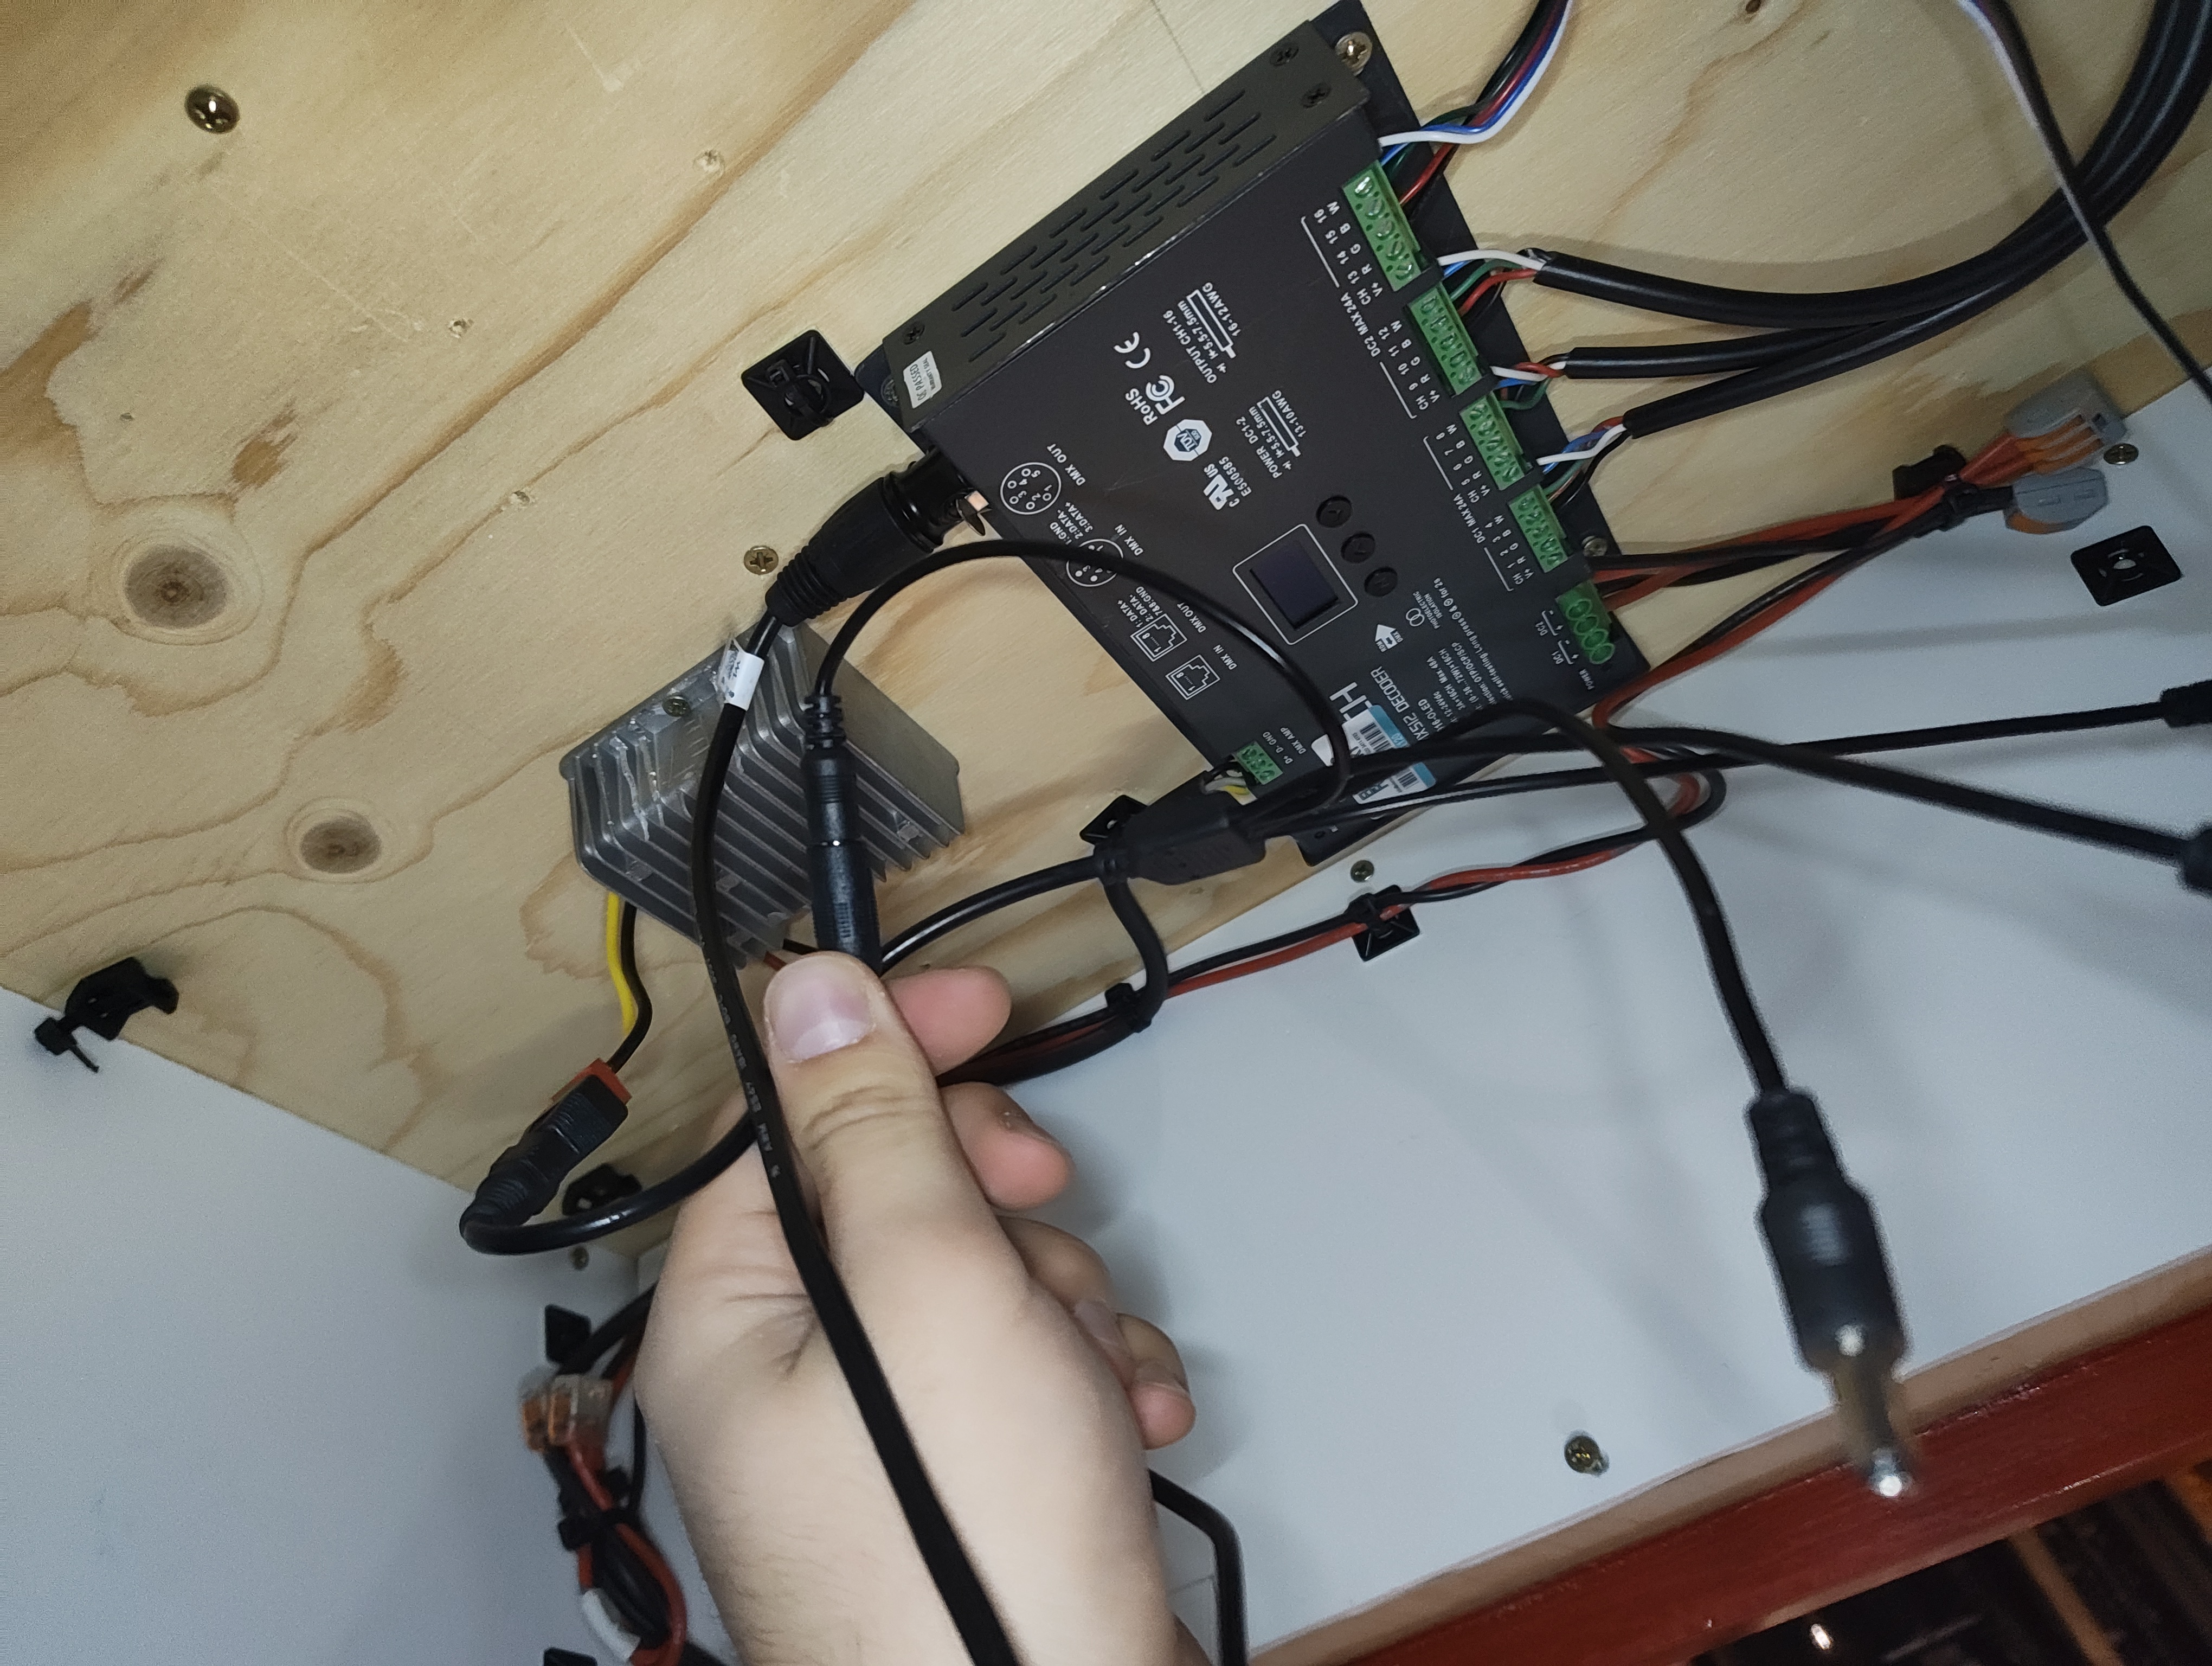
The upper section houses an LTECH LT-916-OLED decoder/dimmer driving the lightbox LEDs, with DMX passed through to two Gantom M510 spots.
Fixture Breakdown
The PhoneBox contains four separate lighting elements, each serving a different purpose:
Lightbox (Top Panel)
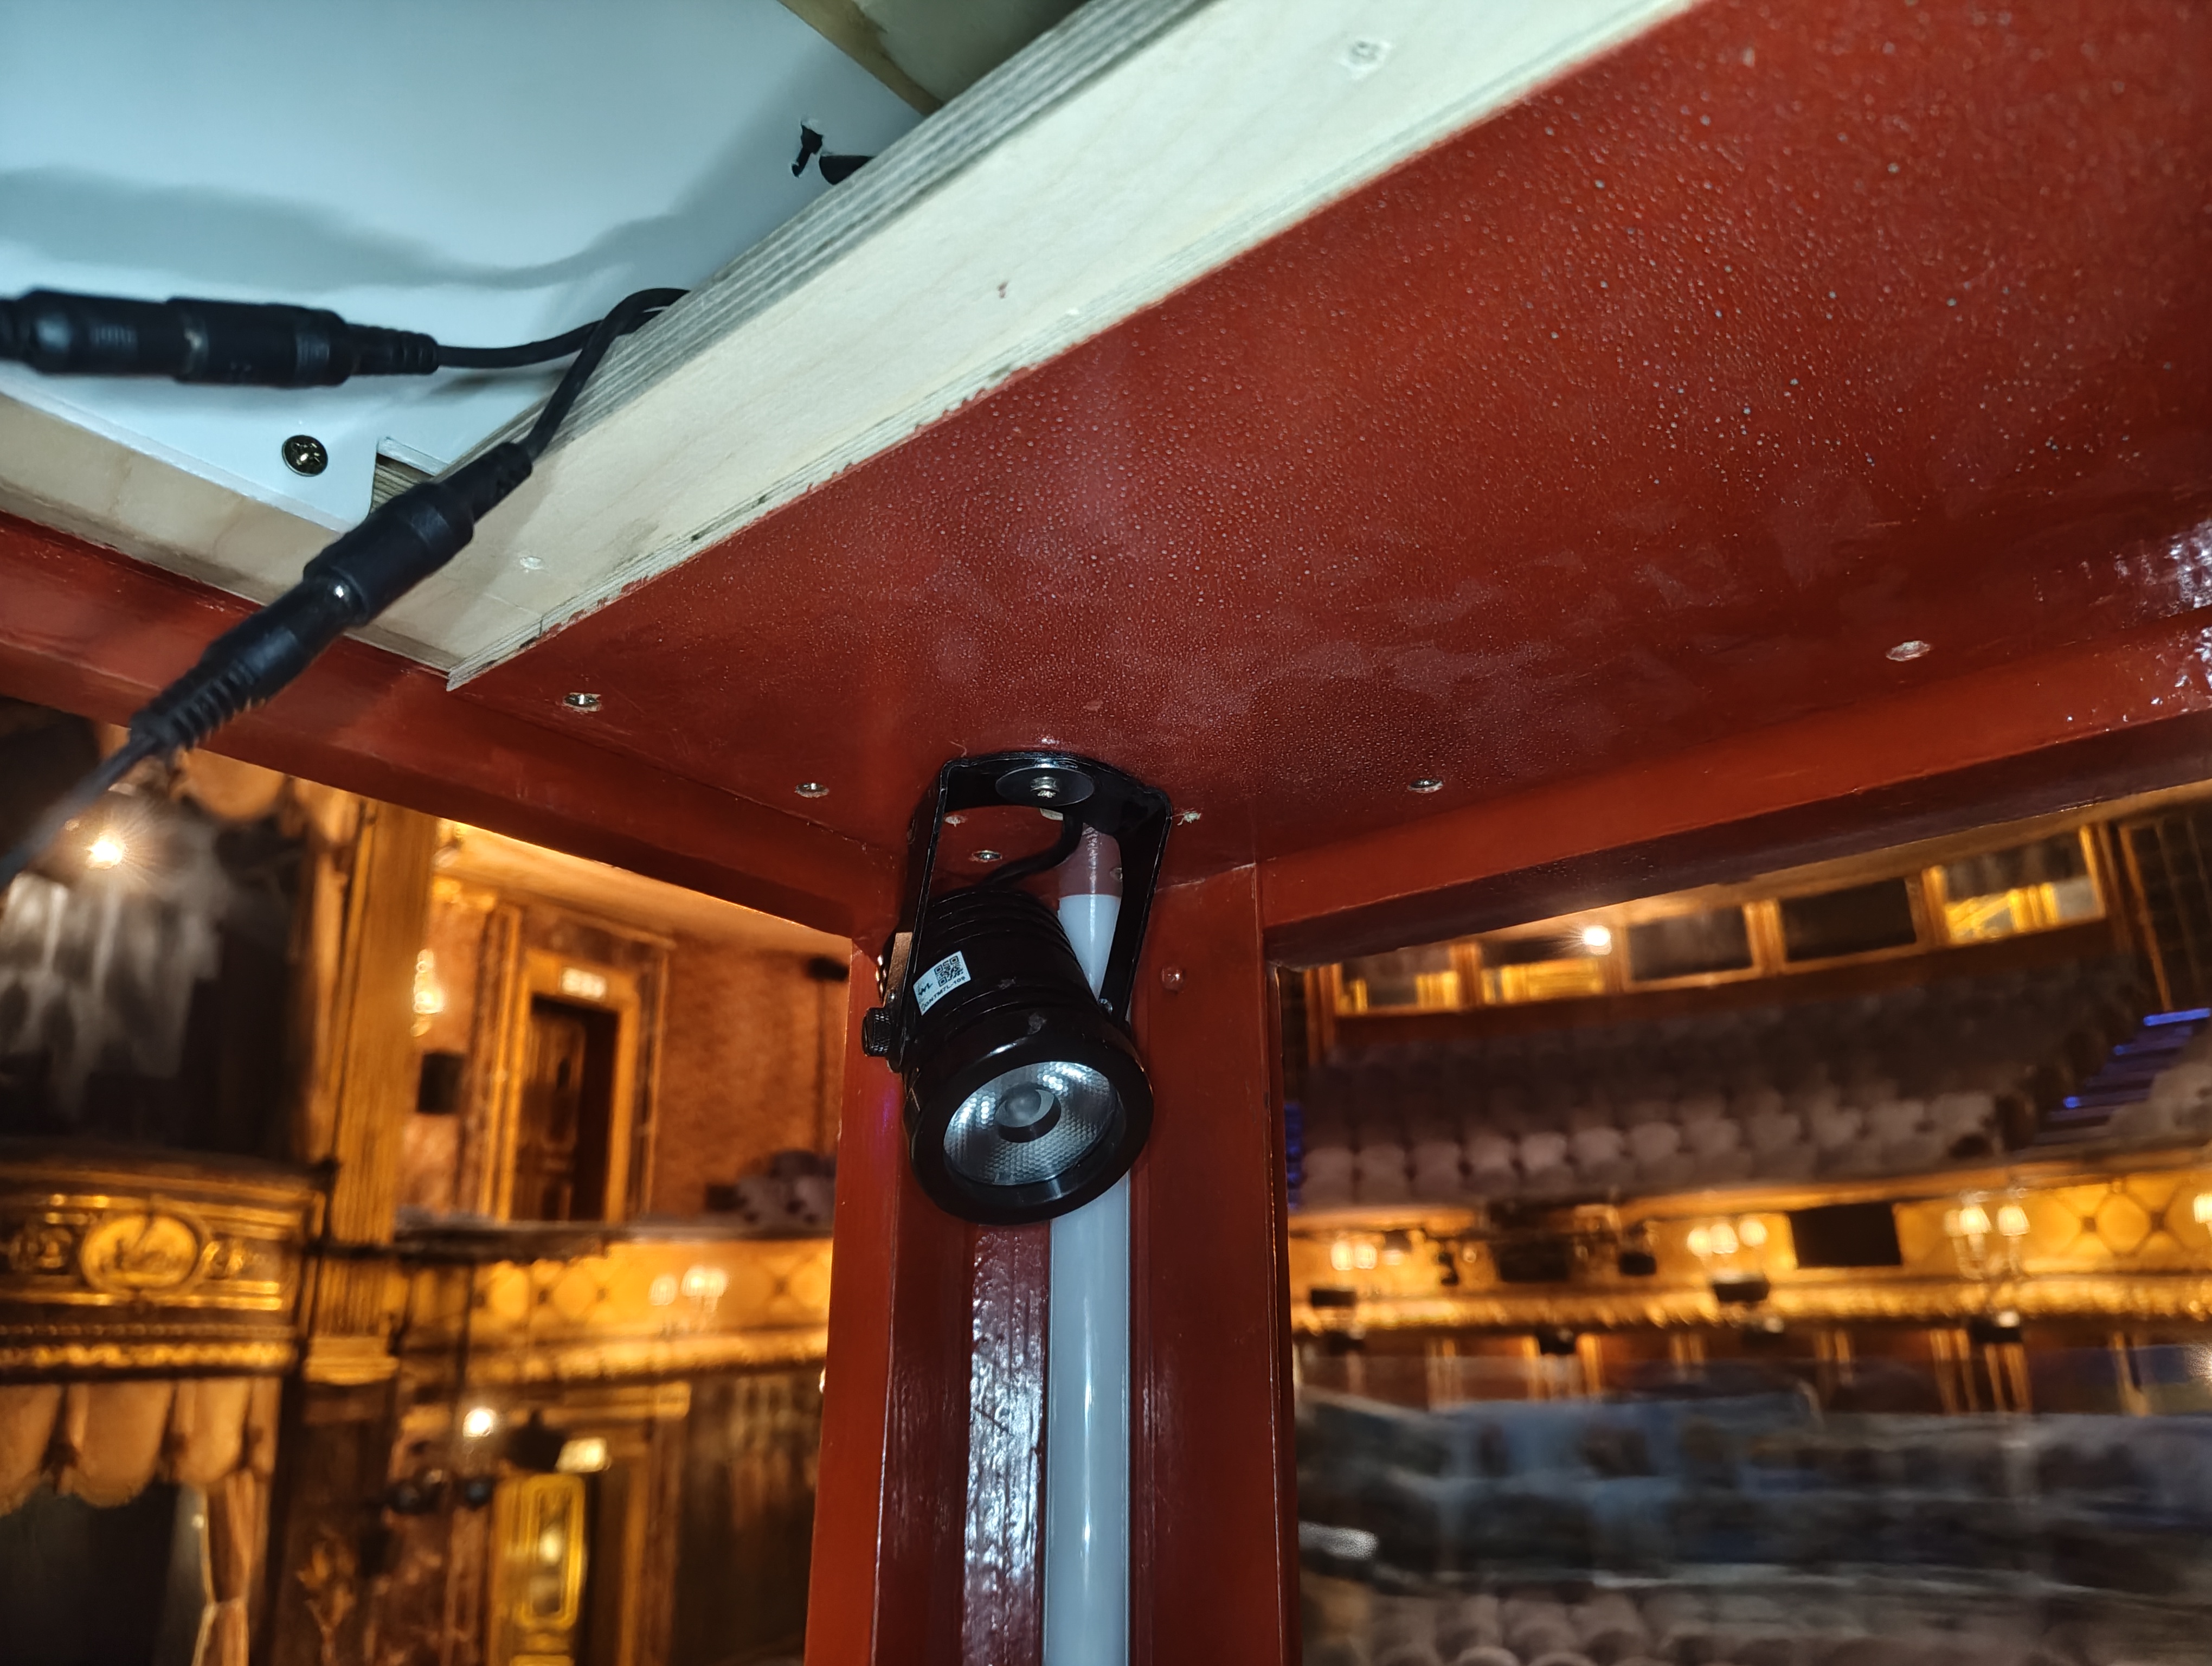
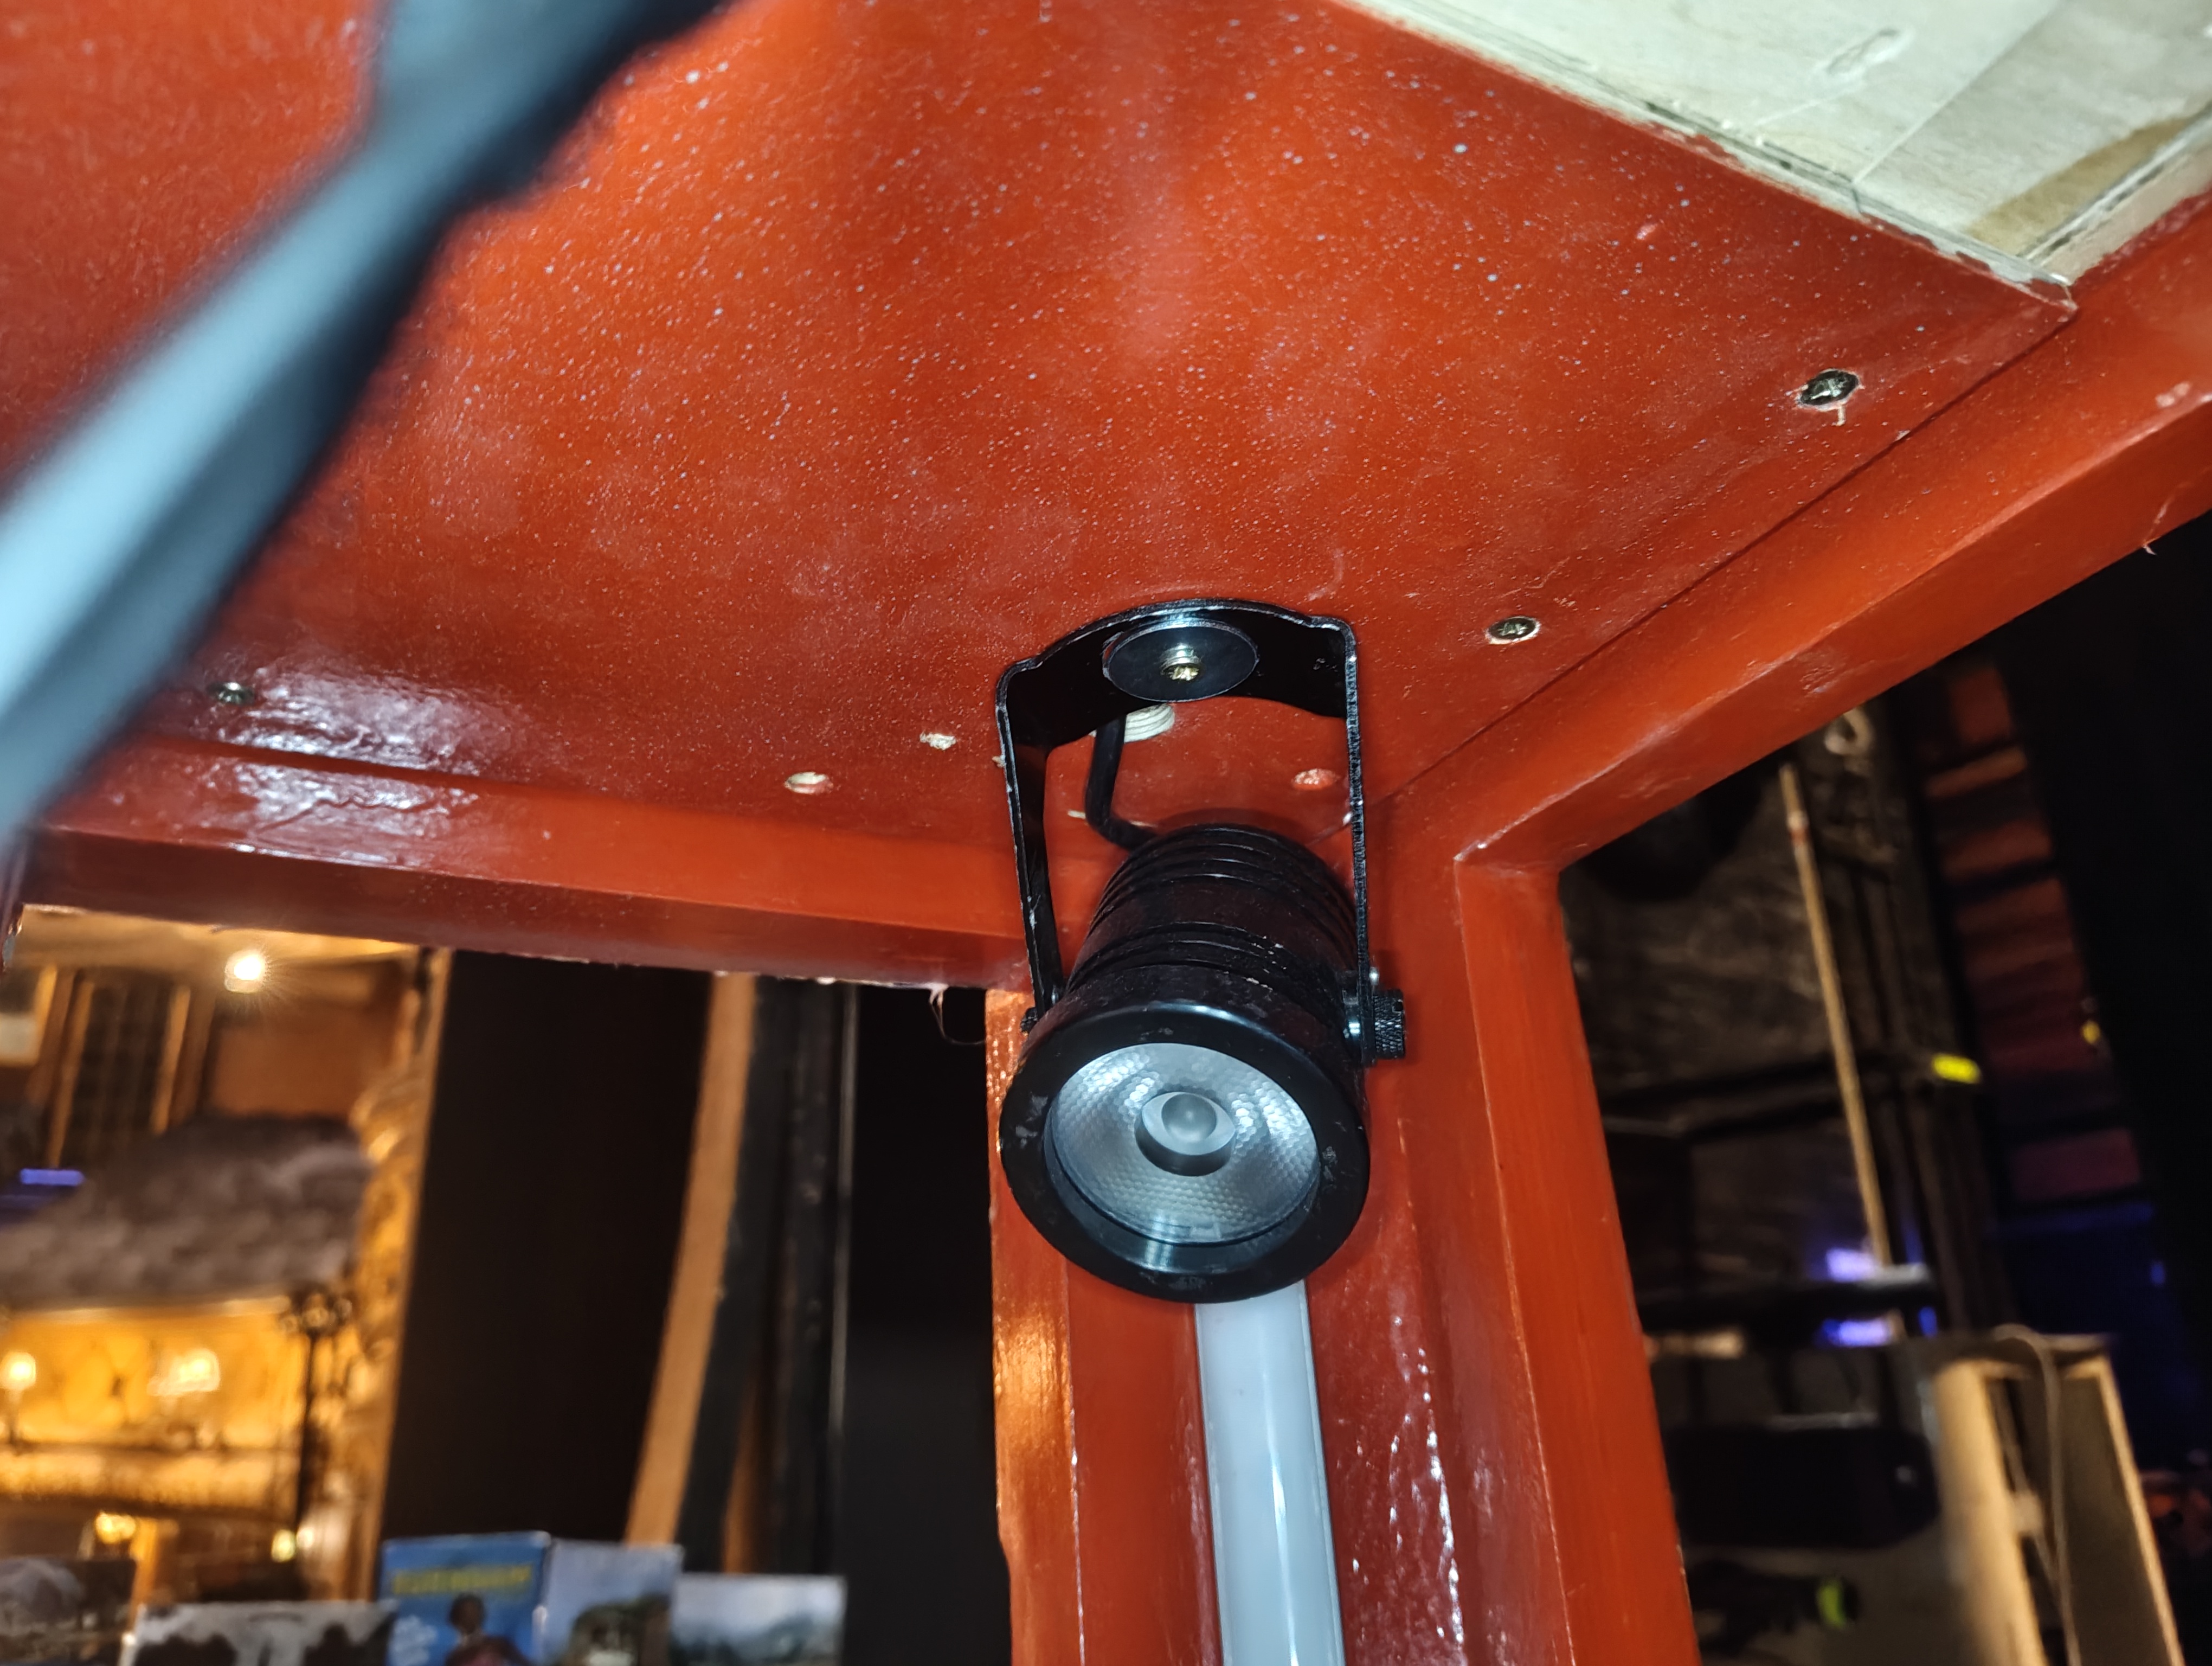
The main illuminated panel at the top of the phonebox — the classic red/white glowing sign. This is RGBW LED tape split across 3 cells, driven by the LTECH LT-916-OLED decoder. It provides the primary colour wash visible from the front and sides. This is the fixture that changes colour throughout the show (red, blue, white etc.).
Interior LED Strips
RGBW LED tape running inside the body of the phonebox, providing the internal glow visible through the glass panels. These are powered and dimmed directly by the Electric Foundry unit's 4-channel RGBW output — no separate decoder needed.
Bulkhead
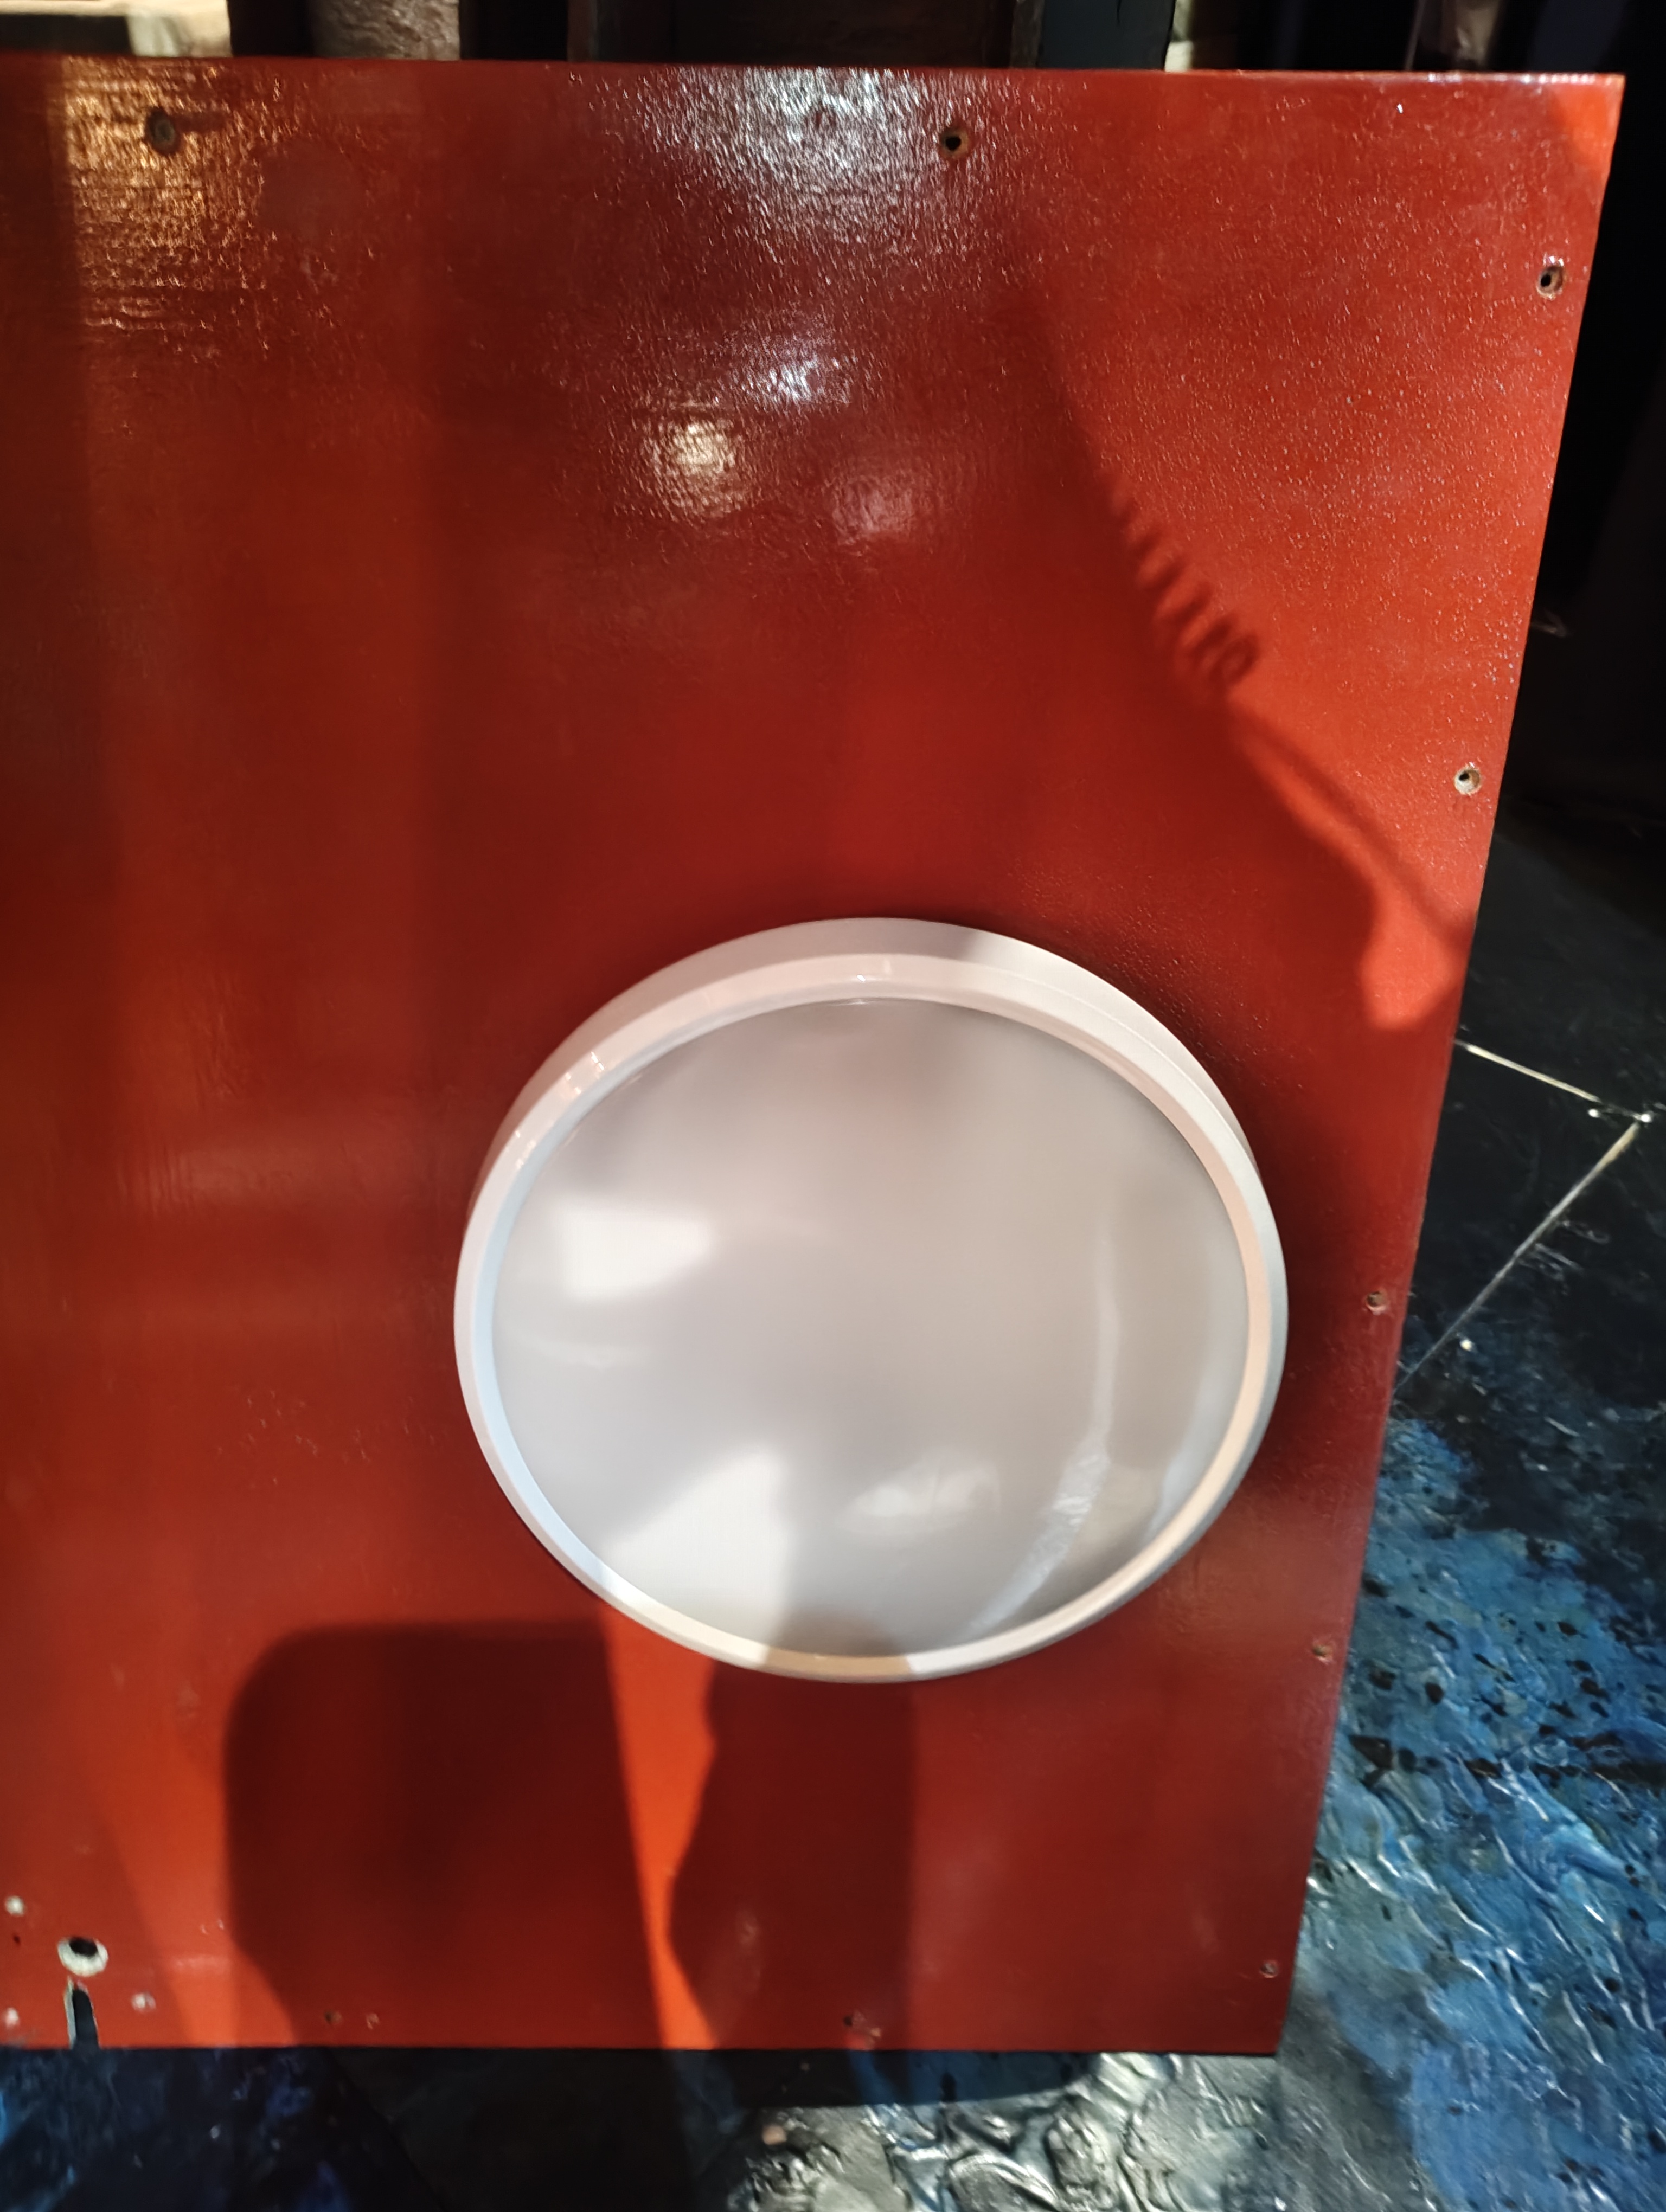
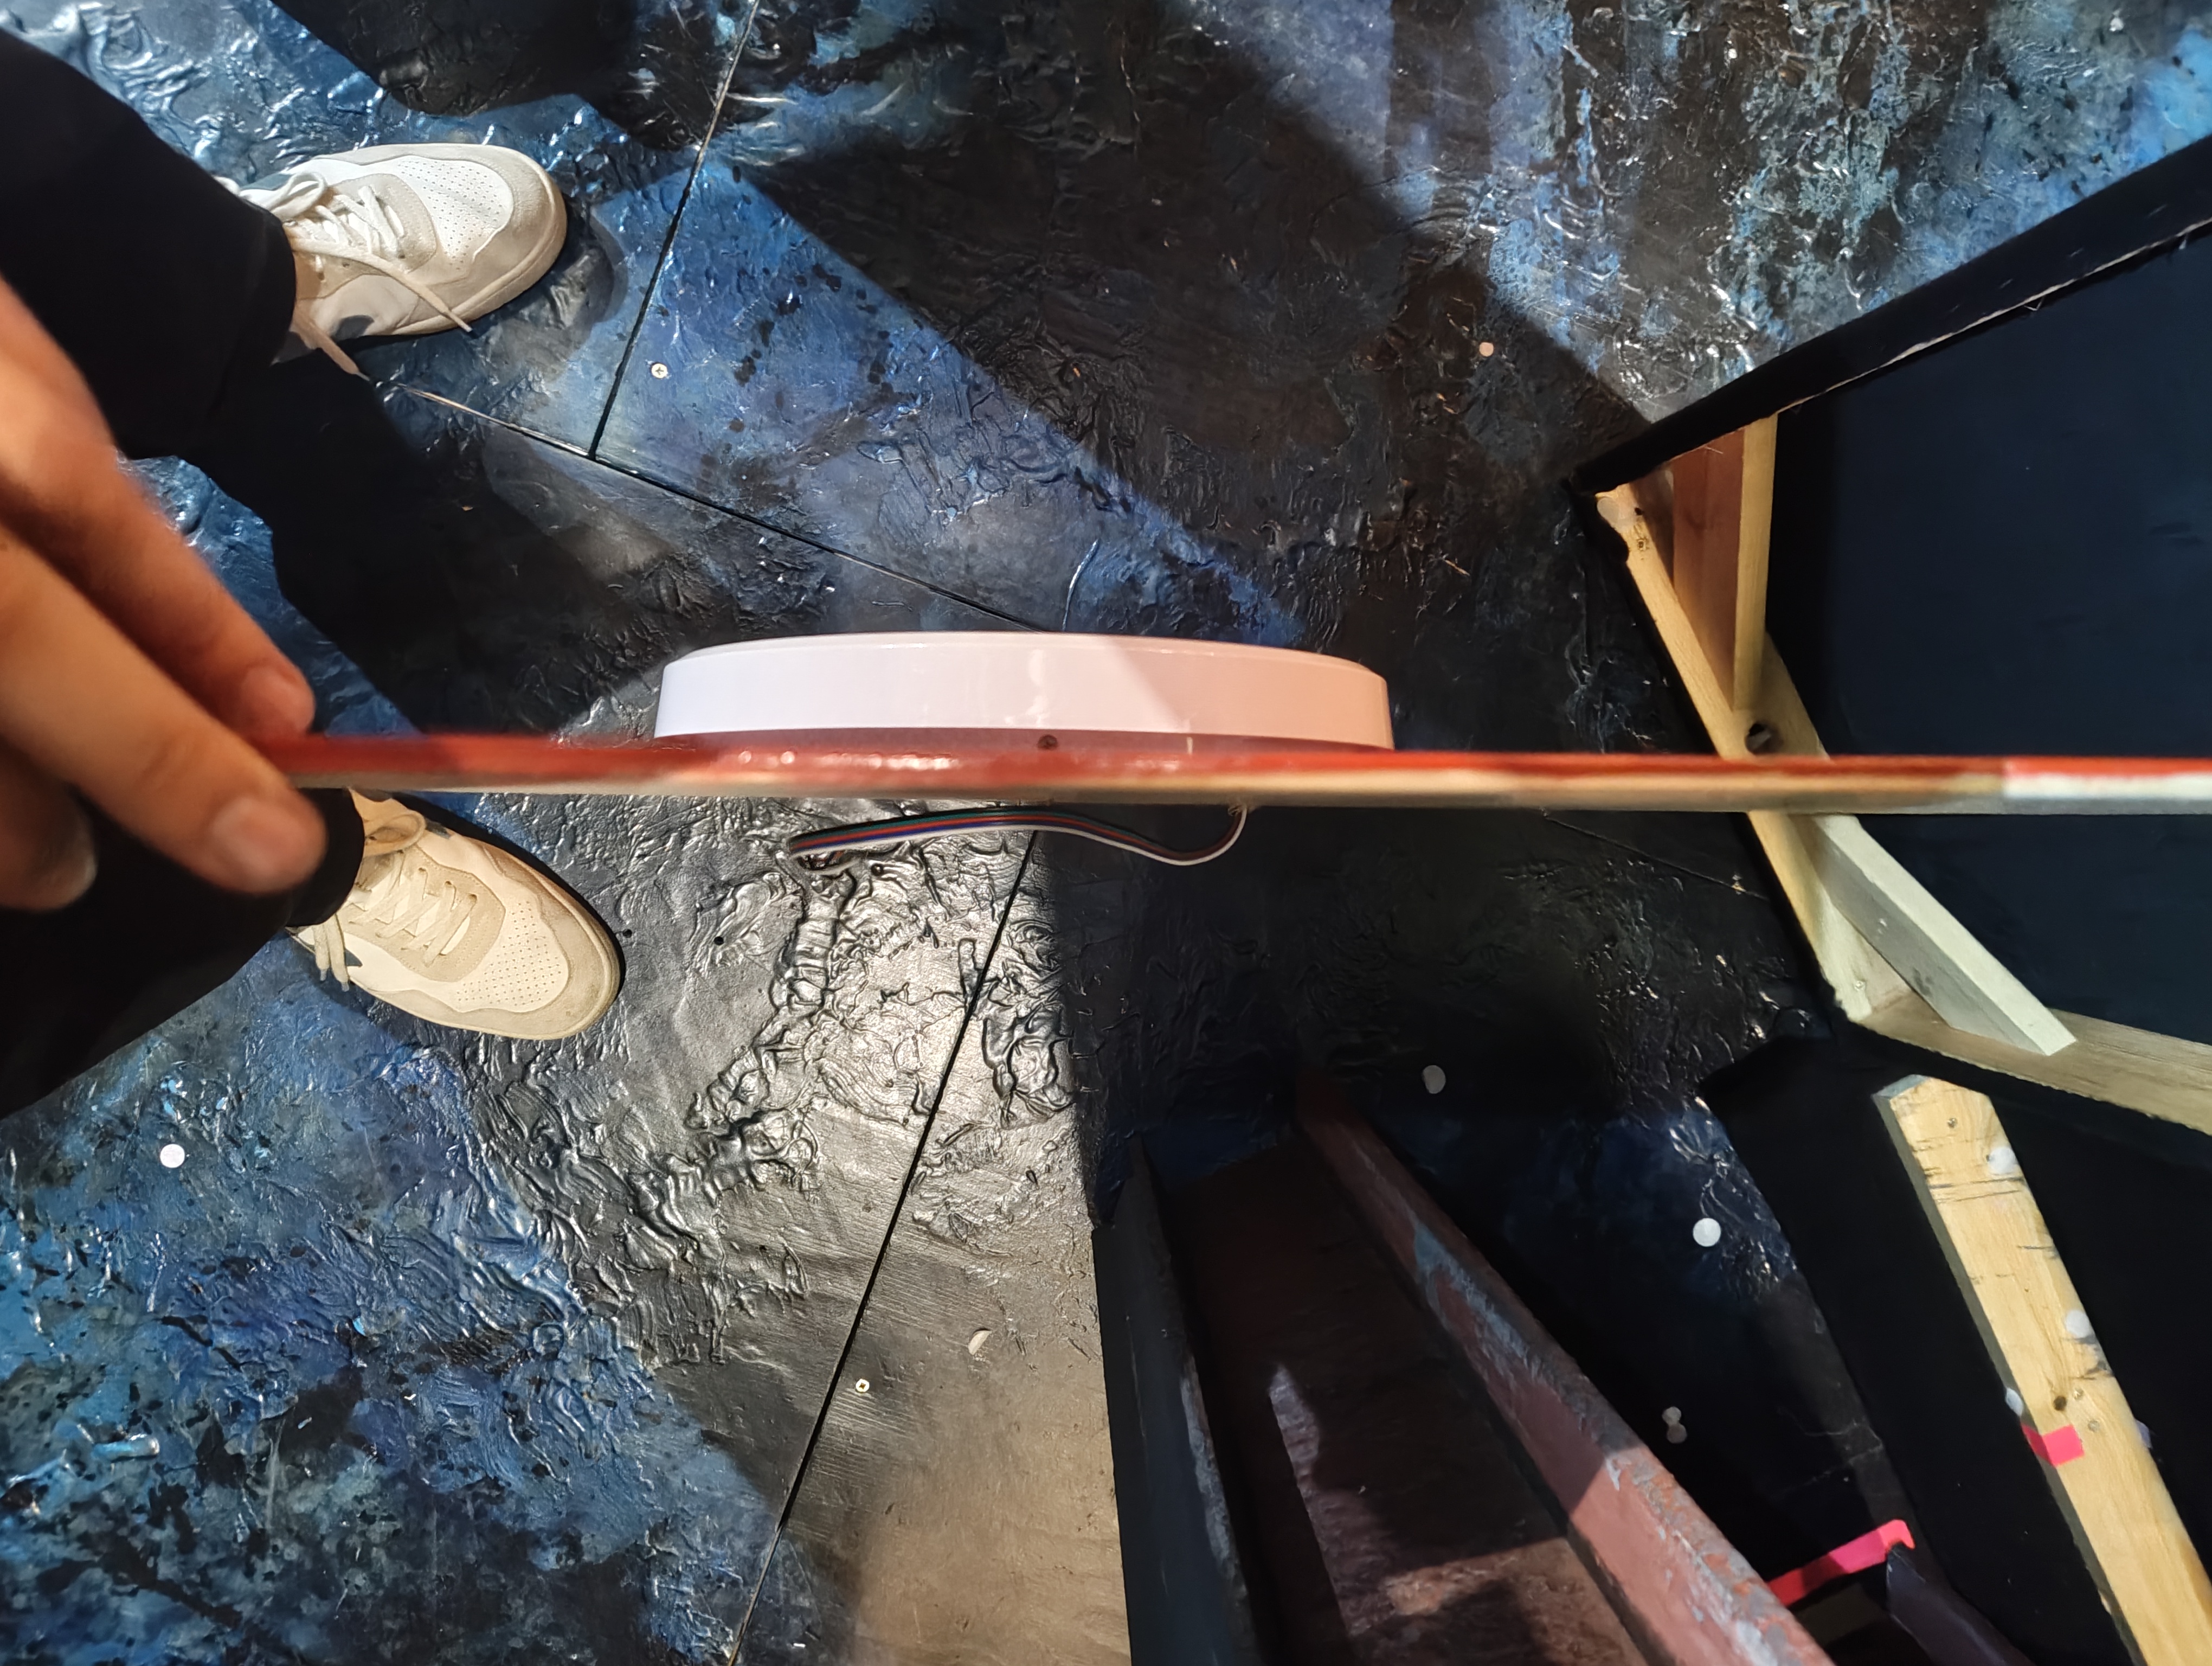
A small RGBW LED fixture inside the phonebox acting as an interior ceiling light. Adds to the internal illumination and helps sell the practical as a real phonebox.
Dome Light
The dome on top of the phonebox. Adds the finishing touch to the overall look of the practical.
Gantom Spots (×2)
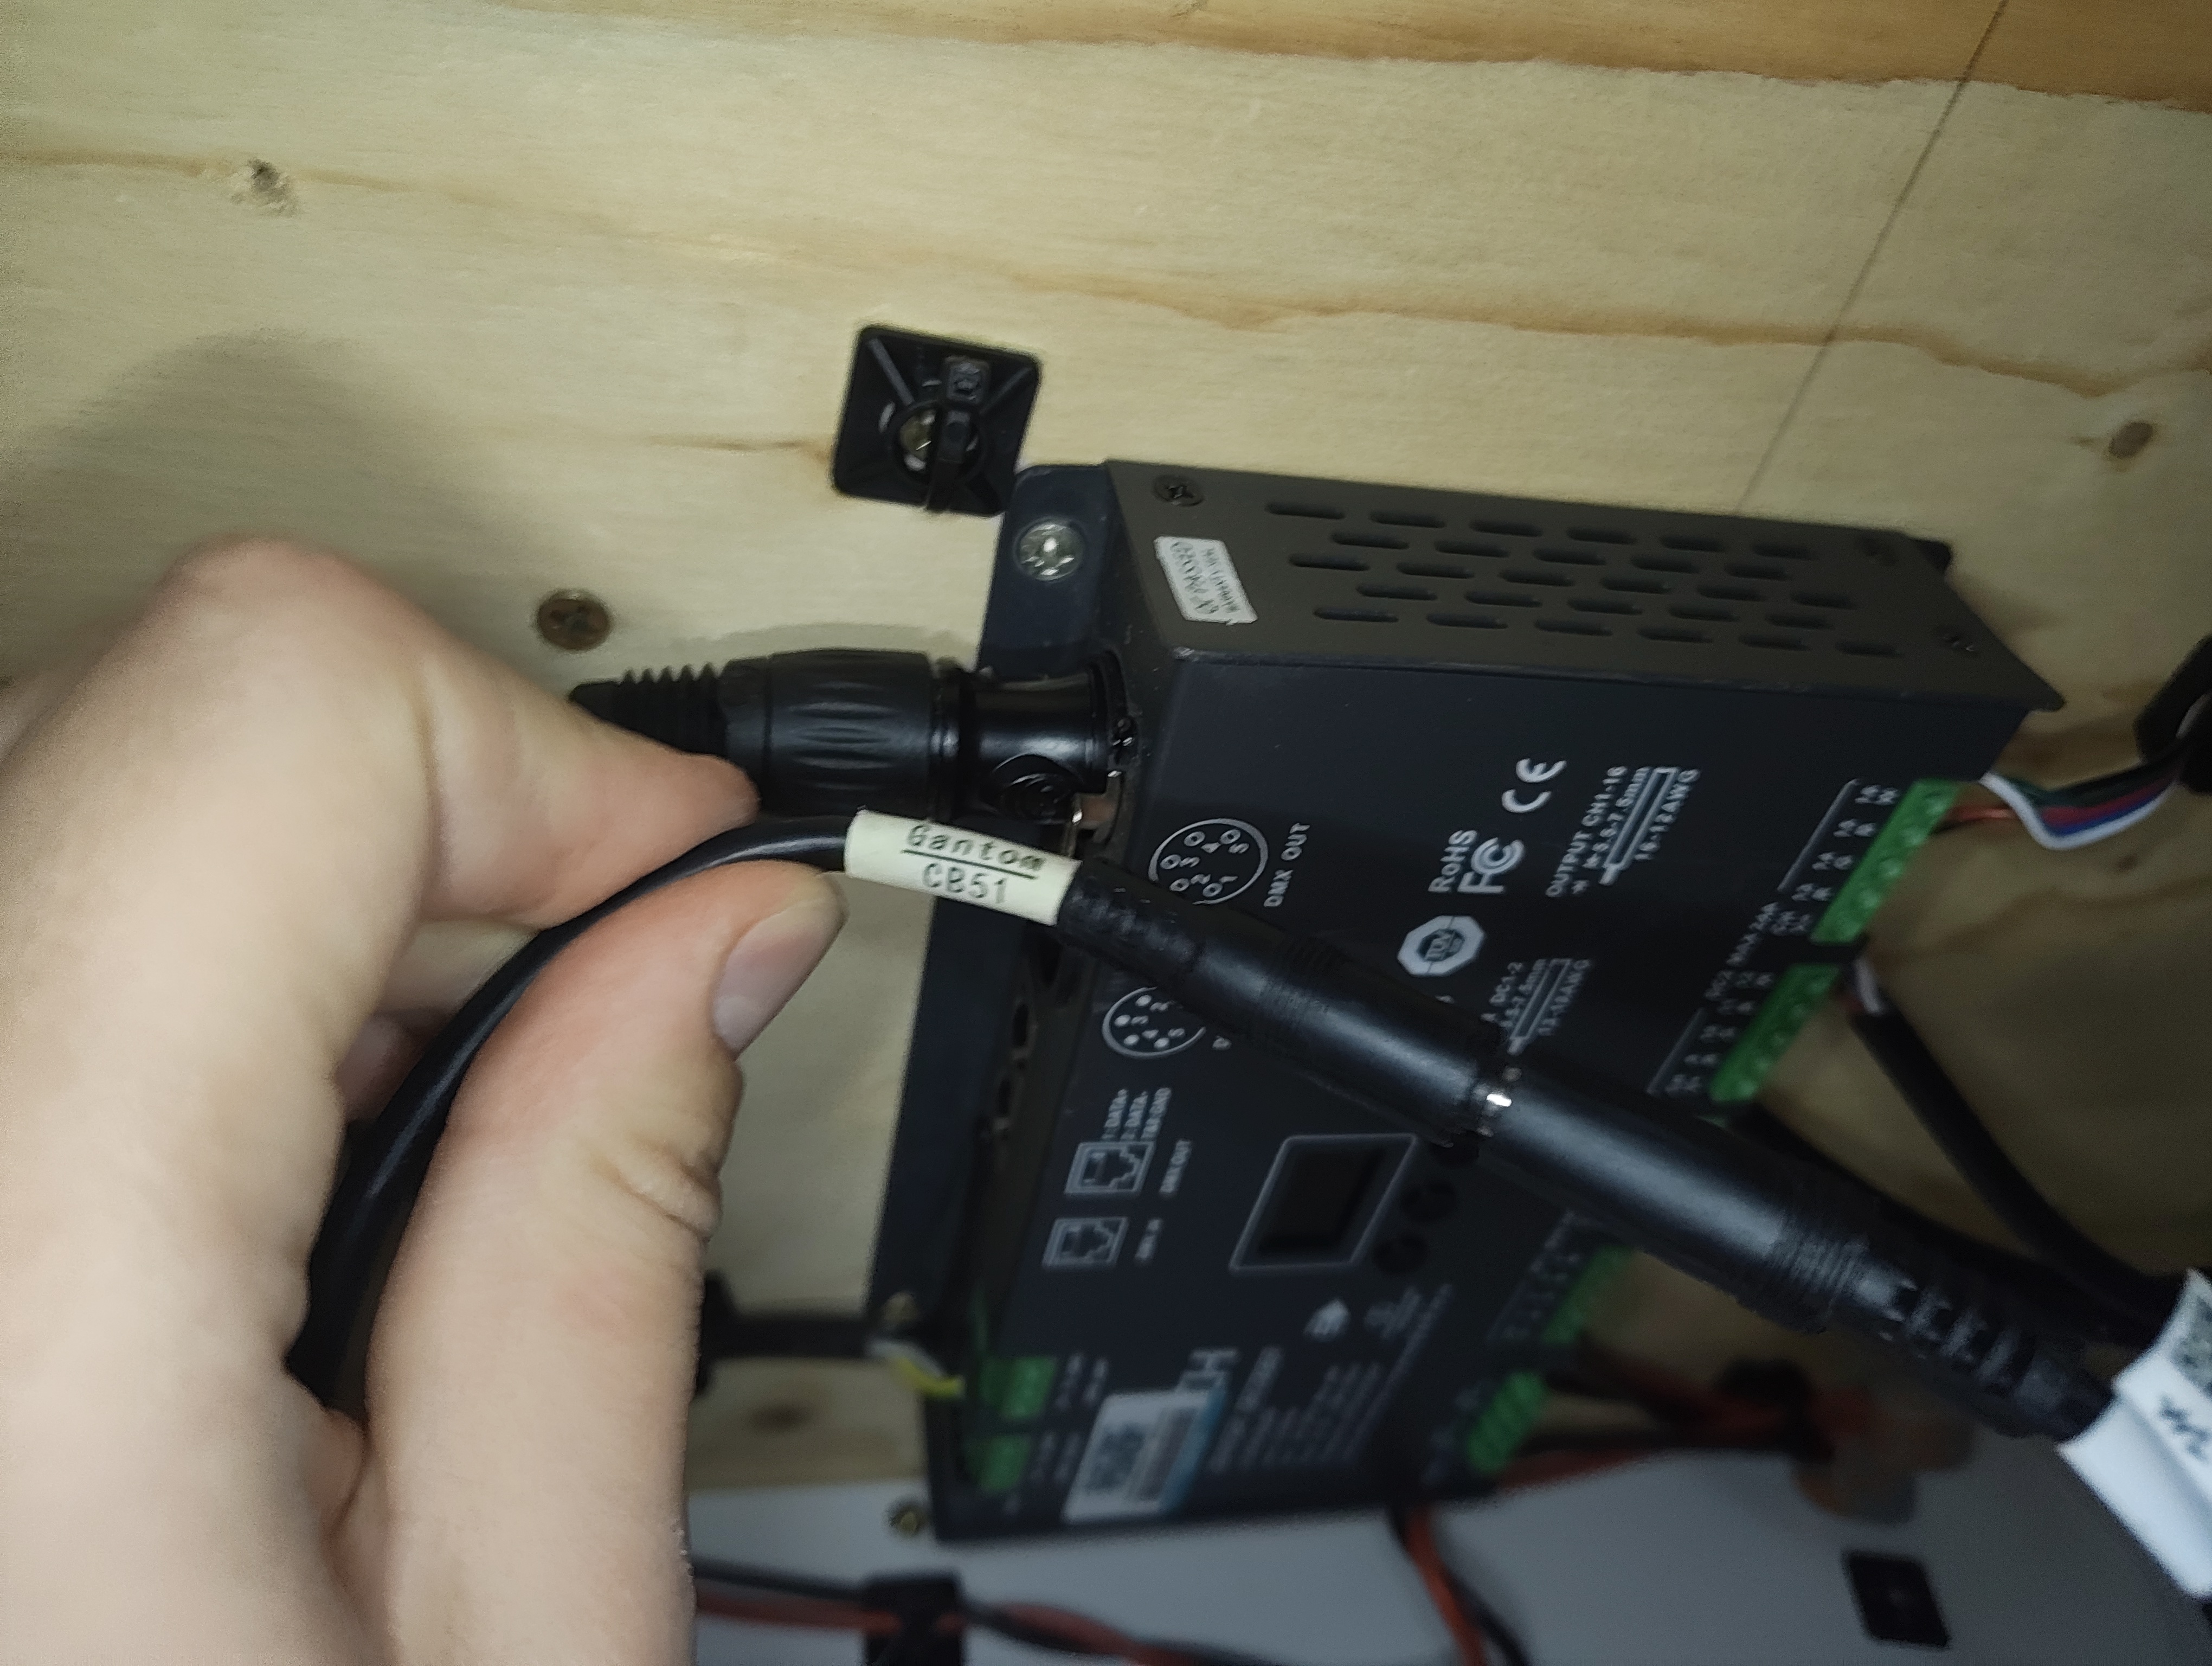
Two Gantom 7 M510 LED spots mounted in the upper section of the phonebox. These are narrow-beam spots used for focused lighting effects. They receive DMX via daisy-chain from the LTECH decoder's DMX thru output, and are powered from the same 10A fuse branch.
Channels & Addressing
- Gantom Spots
- Channels: 781–782
- Fixture Type: Gantom 7 M510
- Addresses:
- Ch 781: 14/101–107
- Ch 782: 14/108–114
- Parameters: 7 channel mode (per Gantom M510 profile)
- Lightbox
- Channel: 791
- Fixture Type: LED RGBW 16B (Generic)
- Addresses: 14/29–36, 14/37–44, 14/45–52 (3 cells)
- Parameters: Intensity, Red, Green, Blue, White (RGBW 16-bit) × 3 cells
- Interior LED Strip
- Channel: 792
- Fixture Type: LED RGBW 16B (Generic)
- Universe/Address: 14/21–28
- Parameters: Intensity, Red, Green, Blue, White (RGBW 16-bit)
- Bulkhead
- Channel: 793
- Fixture Type: LED RGBW 16B (Generic)
- Universe/Address: 14/53–60
- Parameters: Intensity, Red, Green, Blue, White (RGBW 16-bit)
Power & Control
| Power Source | 2× 12V 22Ah Lead Acid Batteries (24V system, in series) |
| DC-DC Converter | Victron Orion Isolated DC-DC Converter (24→12V) |
| Circuit Protection | 6-way blade fuse box (12V side) |
| Dimmer / CRMX Receiver | Electric Foundry CRMX 4ch Dimmer & Receiver (lower section) |
| DMX Decoder | LTECH LT-916-OLED (upper section) |
| DMX Source | CRMX Stardust Transmitter |
| Charger | Victron Blue Smart IP65 Charger 24V 8A (in-built 13A tail) |
Charger Warning
This Victron charger is a 24V 8A unit — it is not interchangeable with the 12V chargers used on other practicals (Sofa, Standard Lamp). Using the wrong charger will damage the batteries.
Charging Access
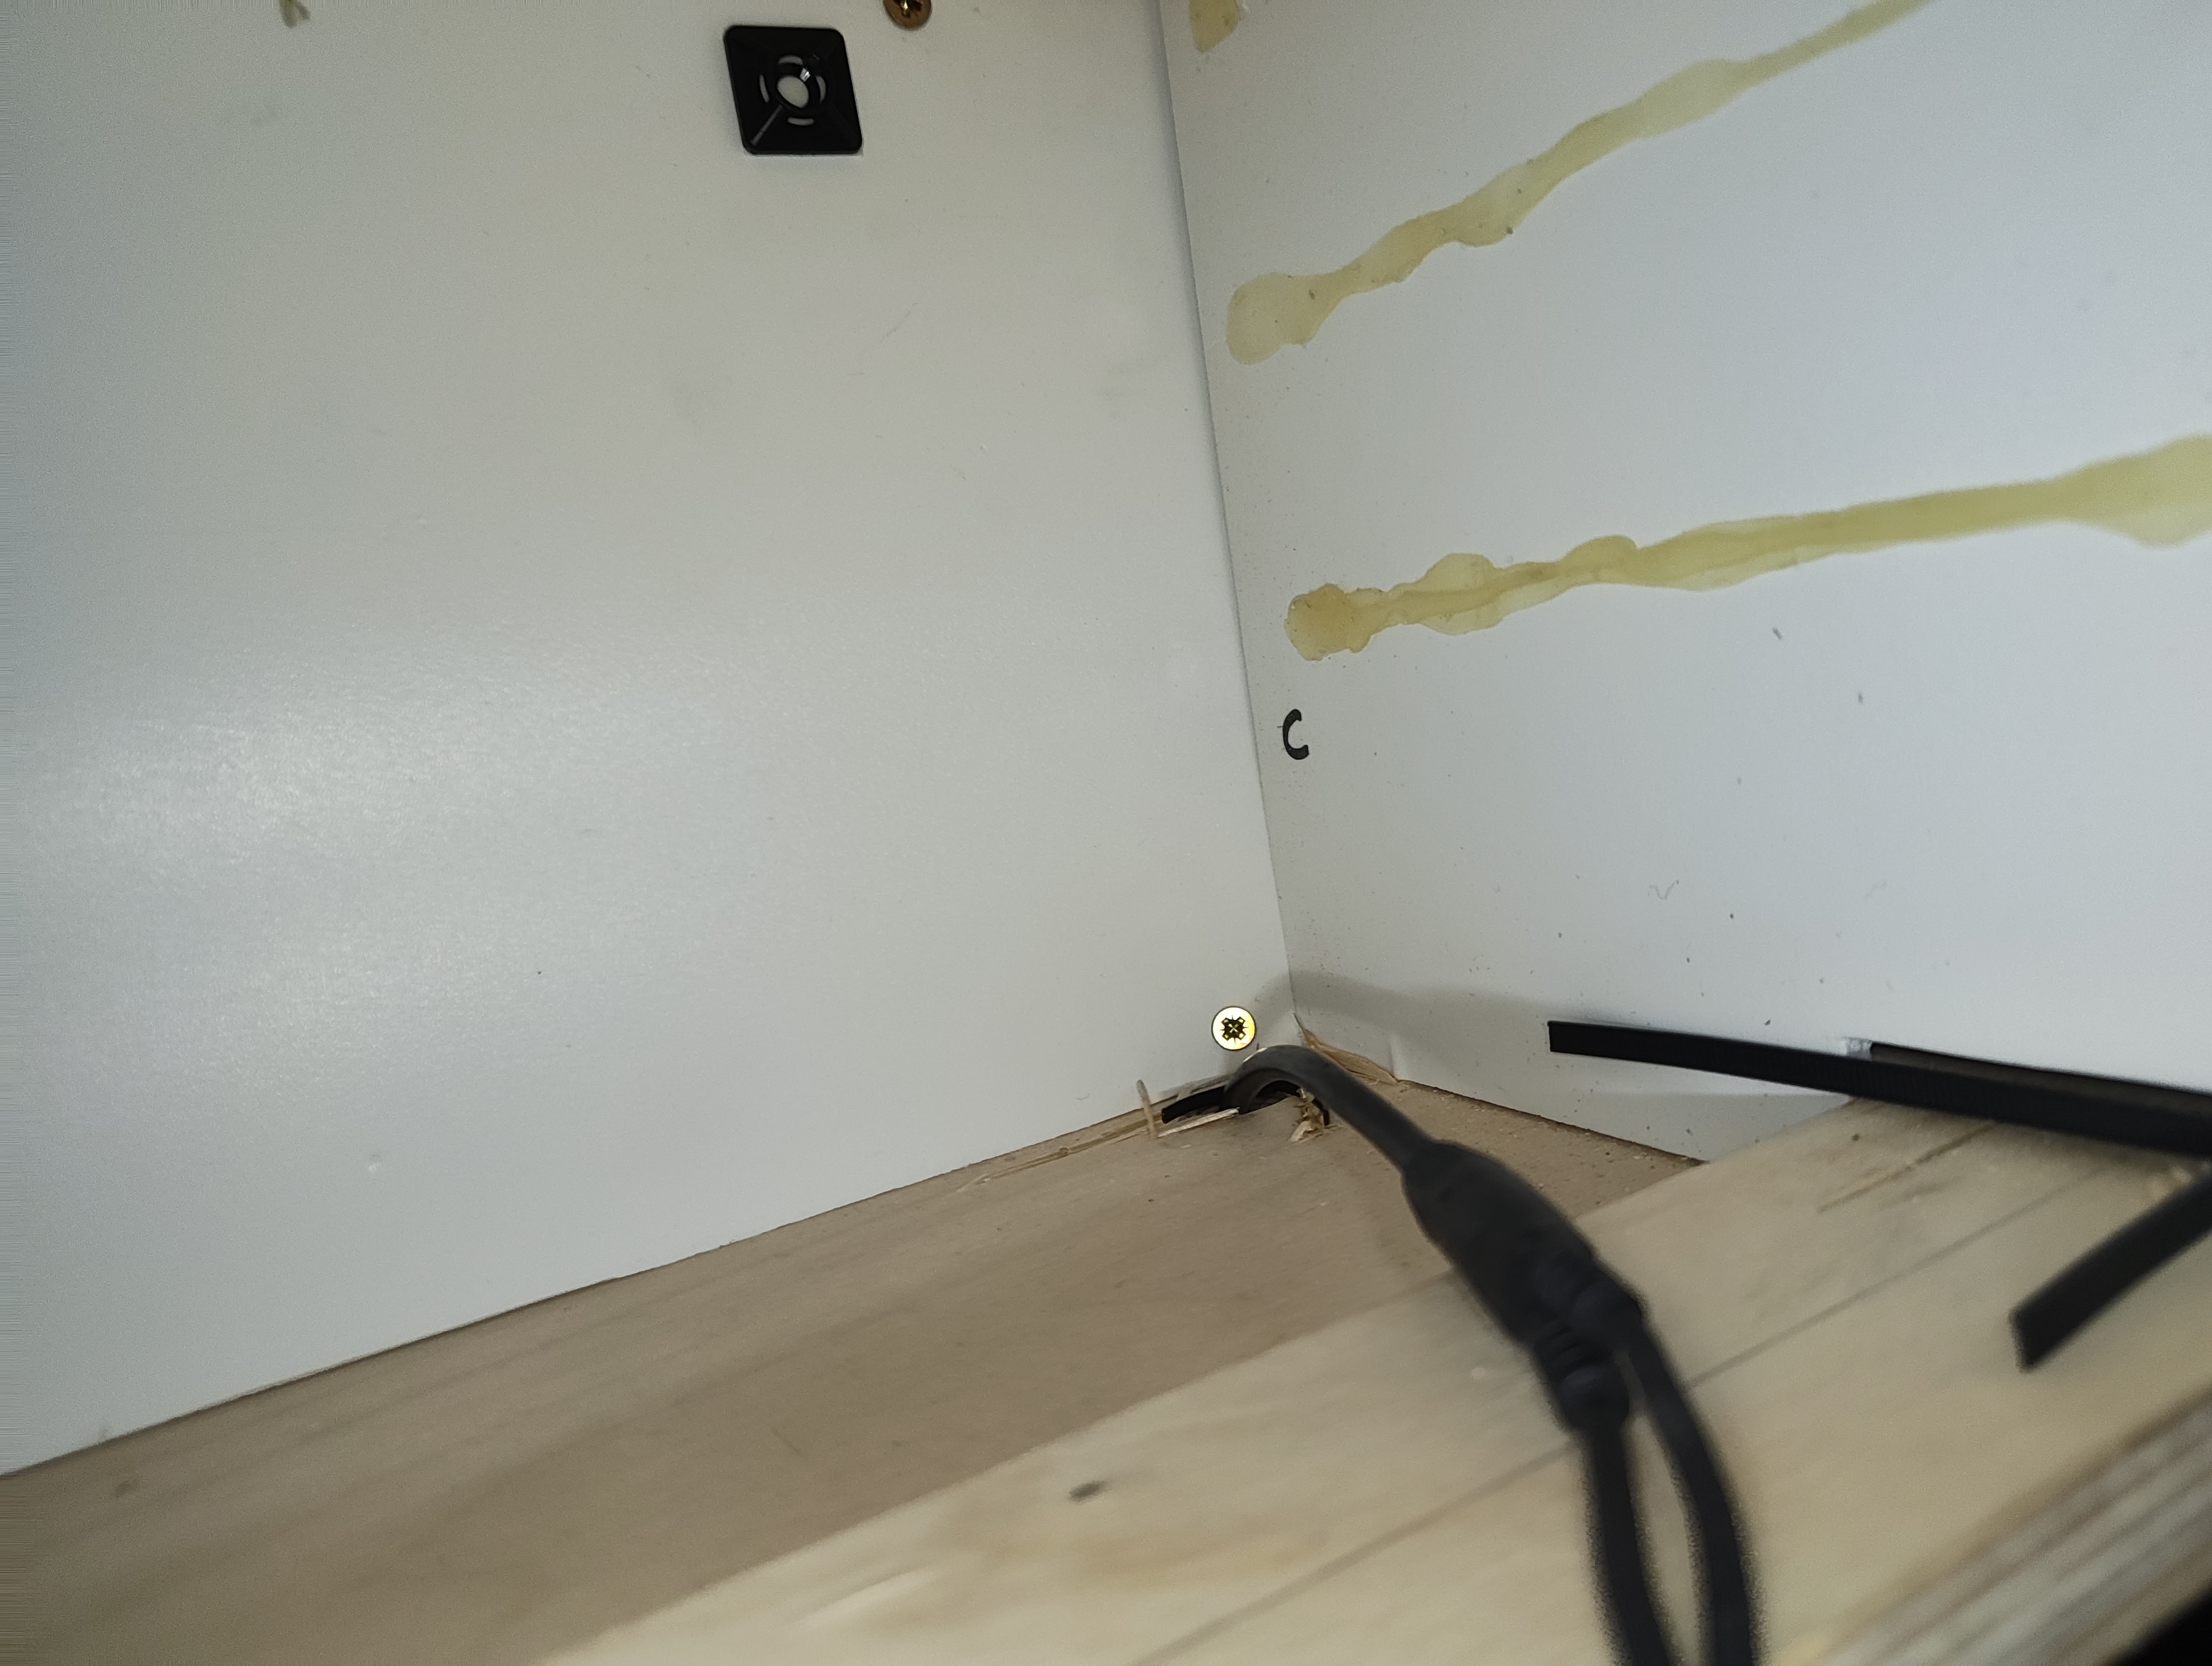
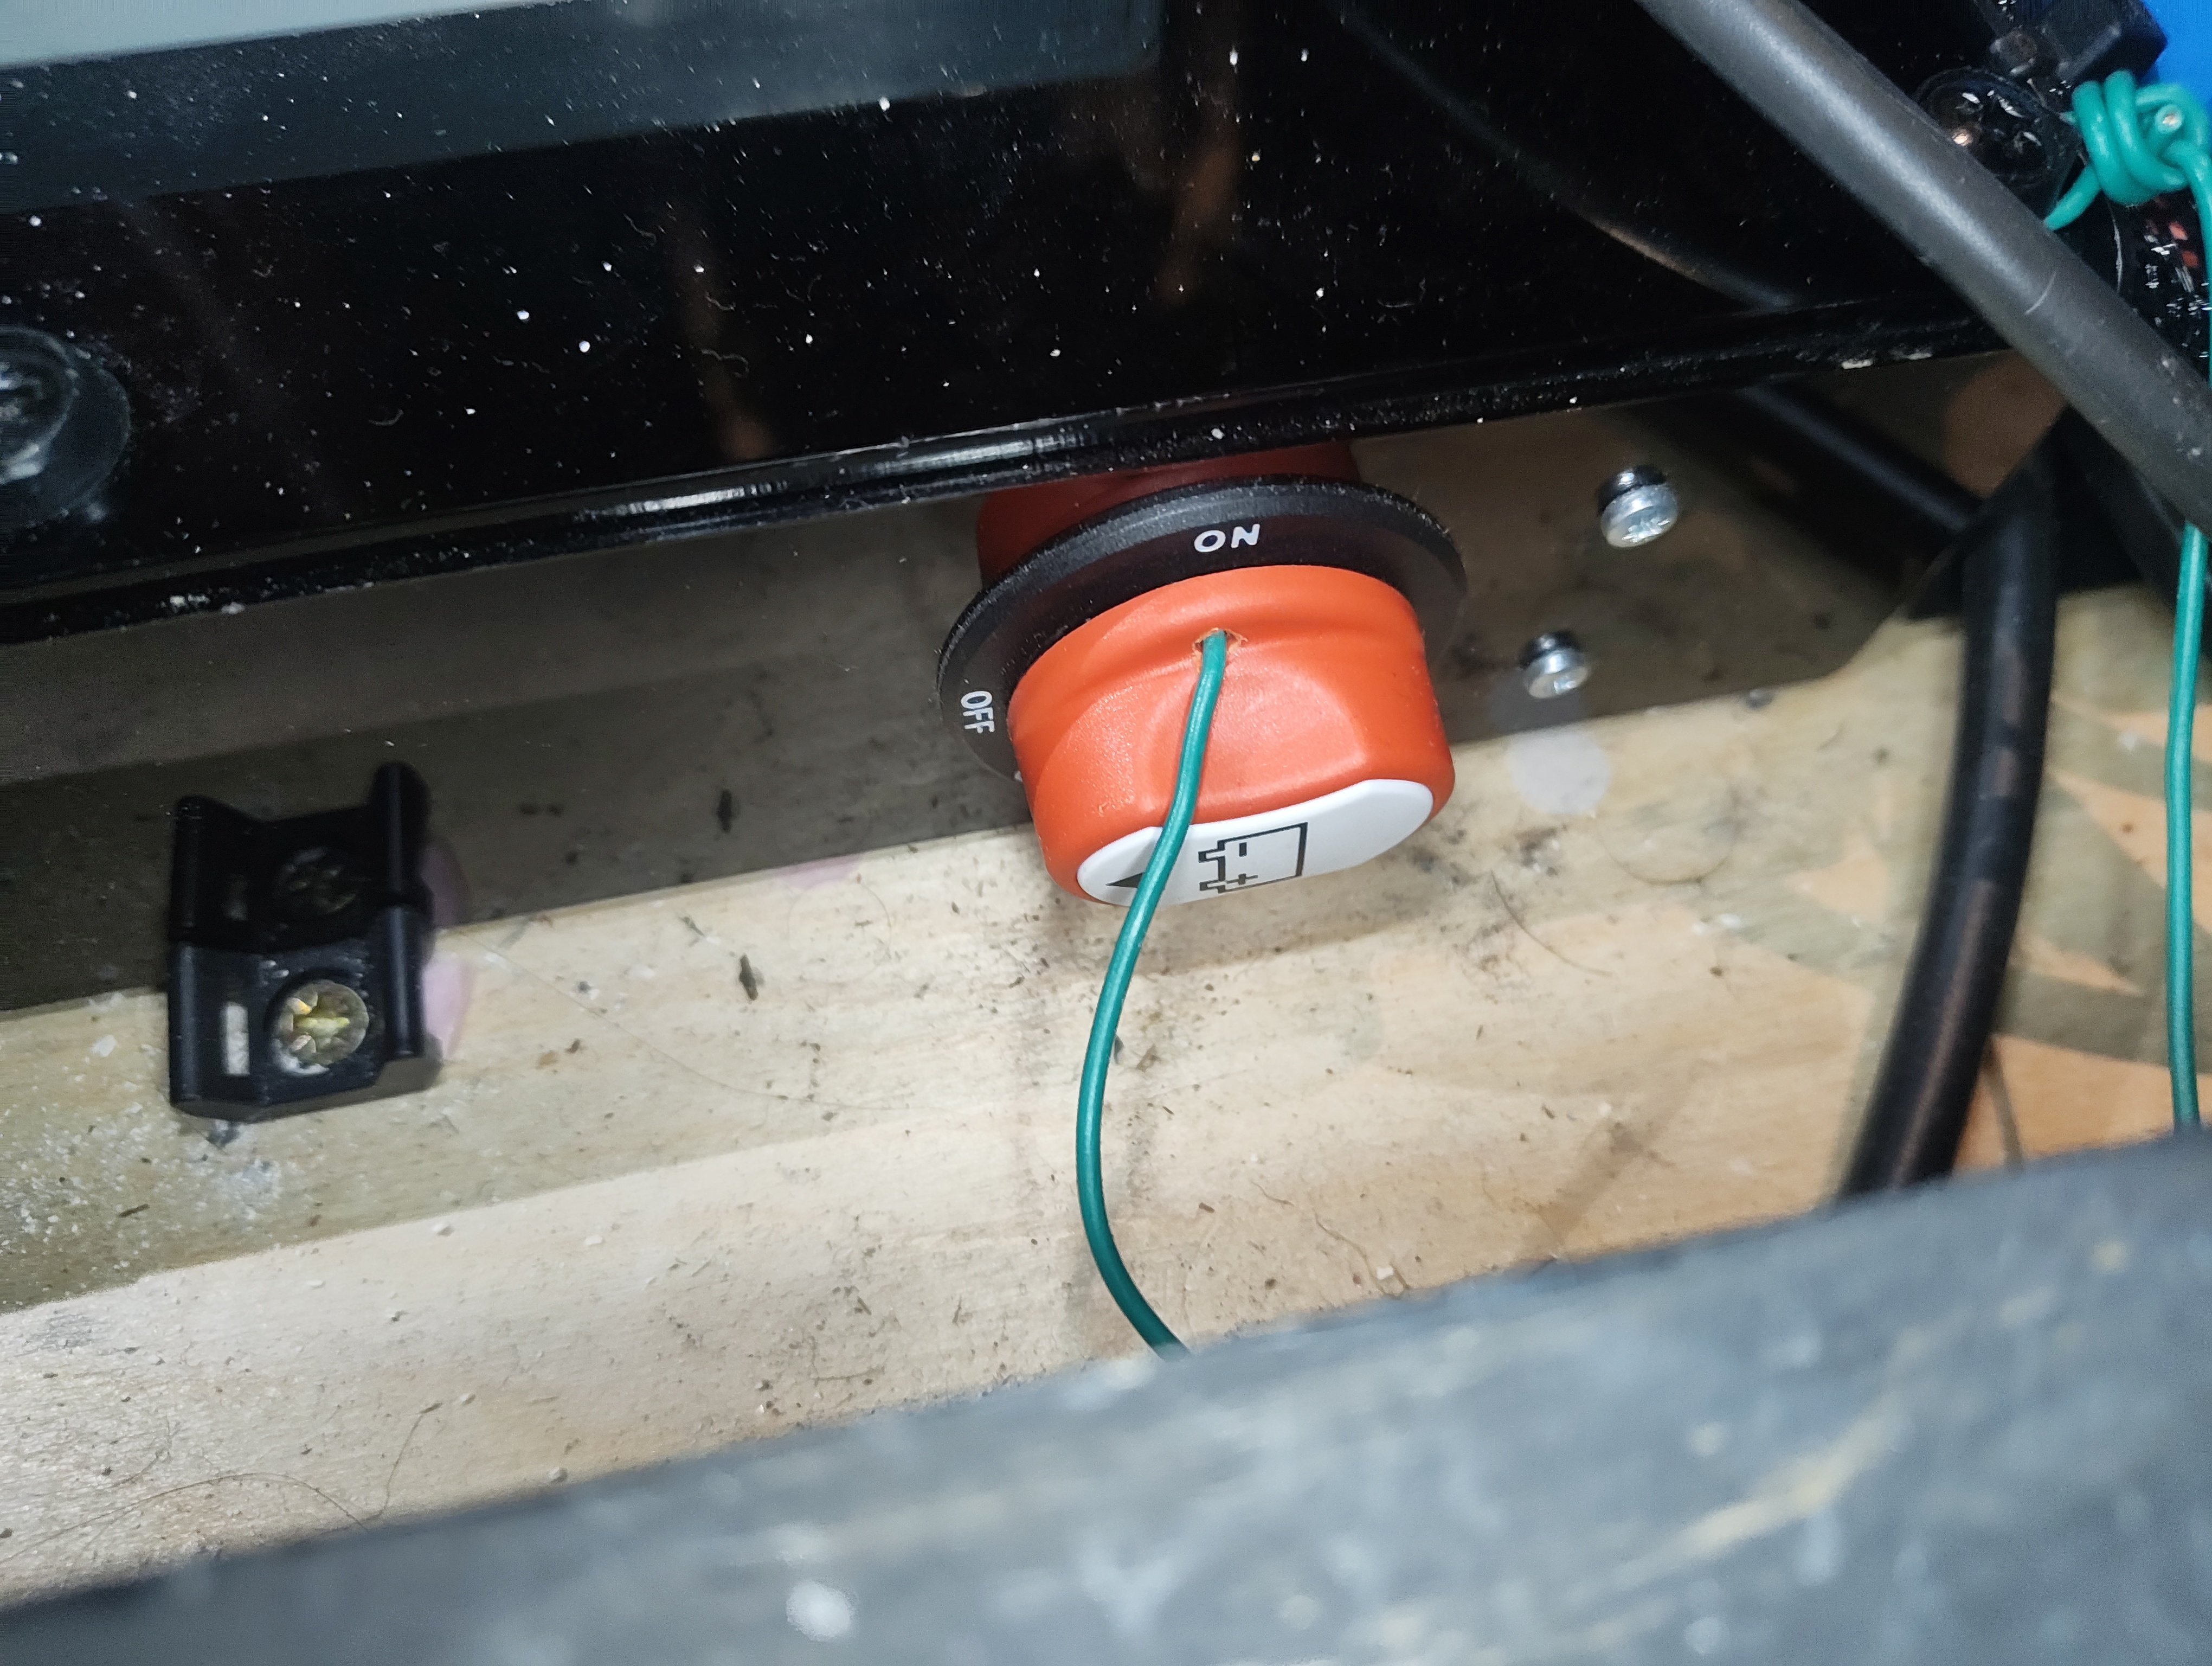
Charging tail and power switch are inside the bottom panel, accessed through a lid. Must be switched off and plugged up before flying out at the interval change.
Wiring
Power Flow
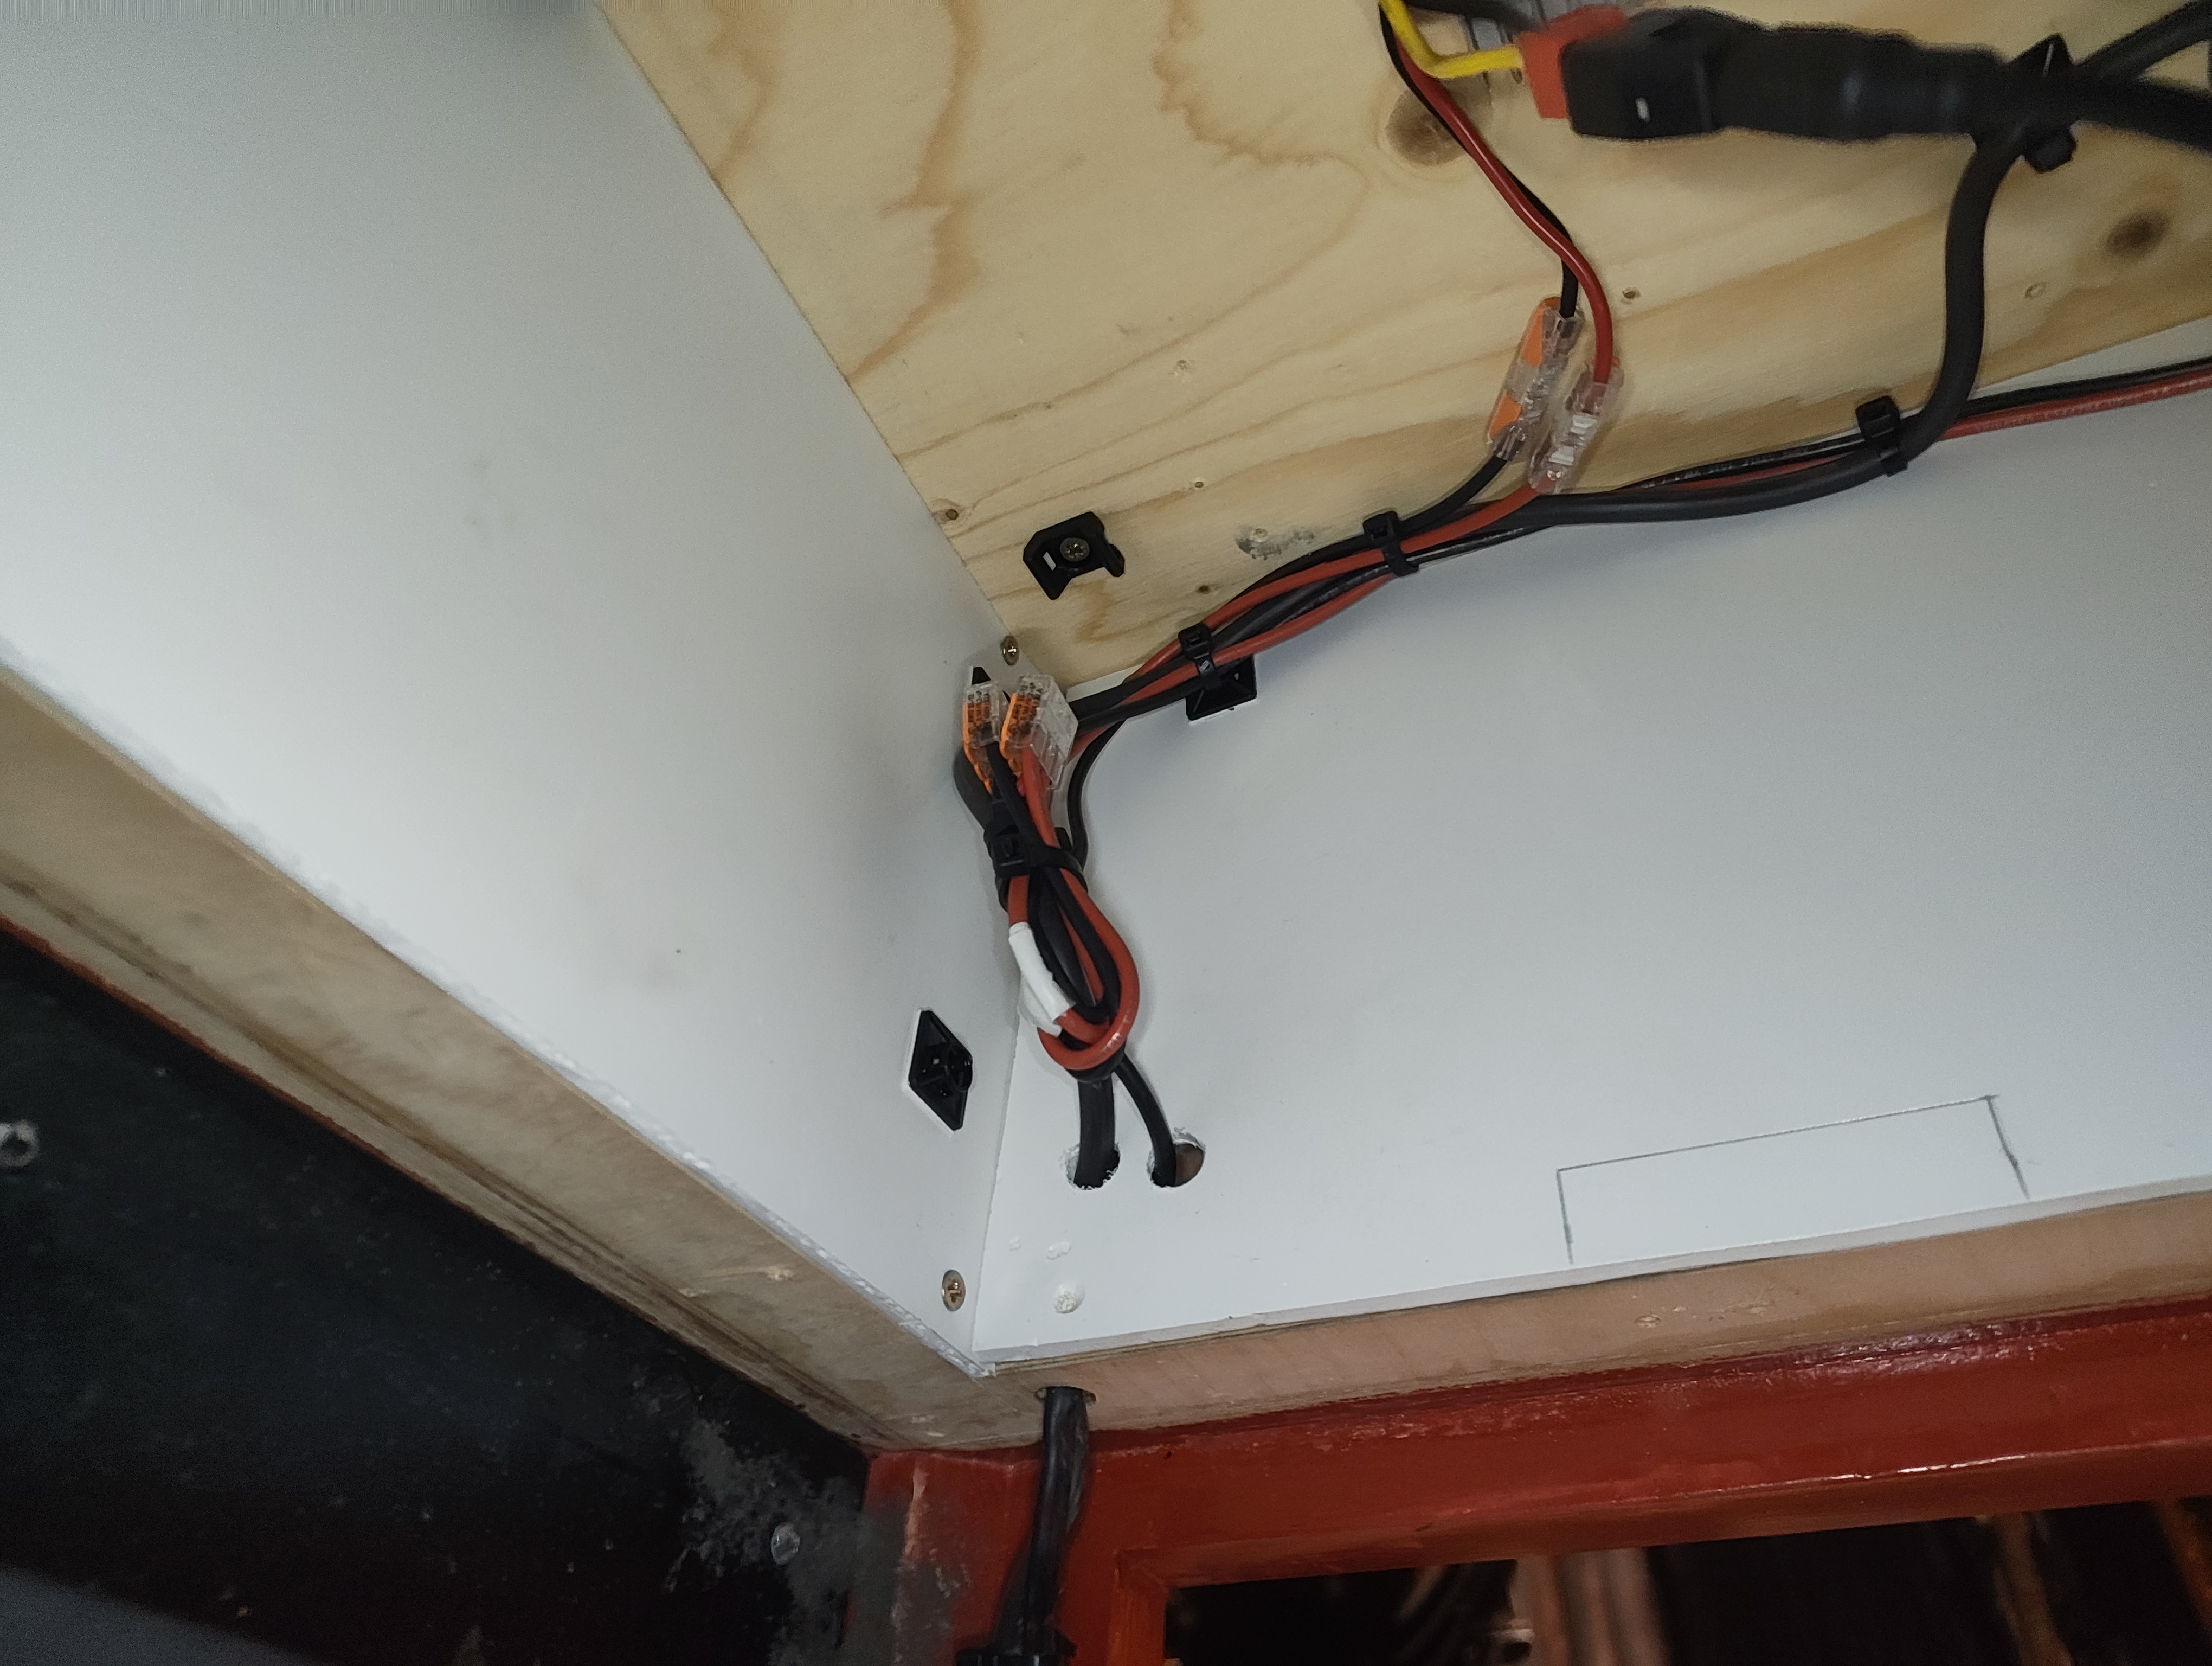
Power is supplied by two 12V 22Ah lead acid batteries wired in series to create a 24V supply. After the power cut-off switch (inside the base panel), the 24V feeds into a Victron Orion isolated DC-DC converter which steps it down to 12V.
The 12V output feeds into a 6-way blade fuse box for distribution:
- 10A fuse → Electric Foundry CRMX receiver & dimmer → powers and dims the interior LED strips, lightbox, and bulkhead
- 10A fuse → LTECH LT-916-OLED decoder & two Gantom M510 spots (in the upper section)
DMX
DMX is received wirelessly by the Electric Foundry unit via CRMX from the Stardust. The unit serves two roles:
- Direct dimming — the 4-channel RGBW dimmer output drives the interior LED strips
- DMX output — a 3-pin phoenix connector on the side passes DMX to the upper section
In the upper section, the DMX feeds into the LTECH LT-916-OLED decoder which drives the lightbox LEDs. DMX is then daisy-chained through to the two Gantom M510 spots.
Images
Key Views
All Reference Photos (click to expand)
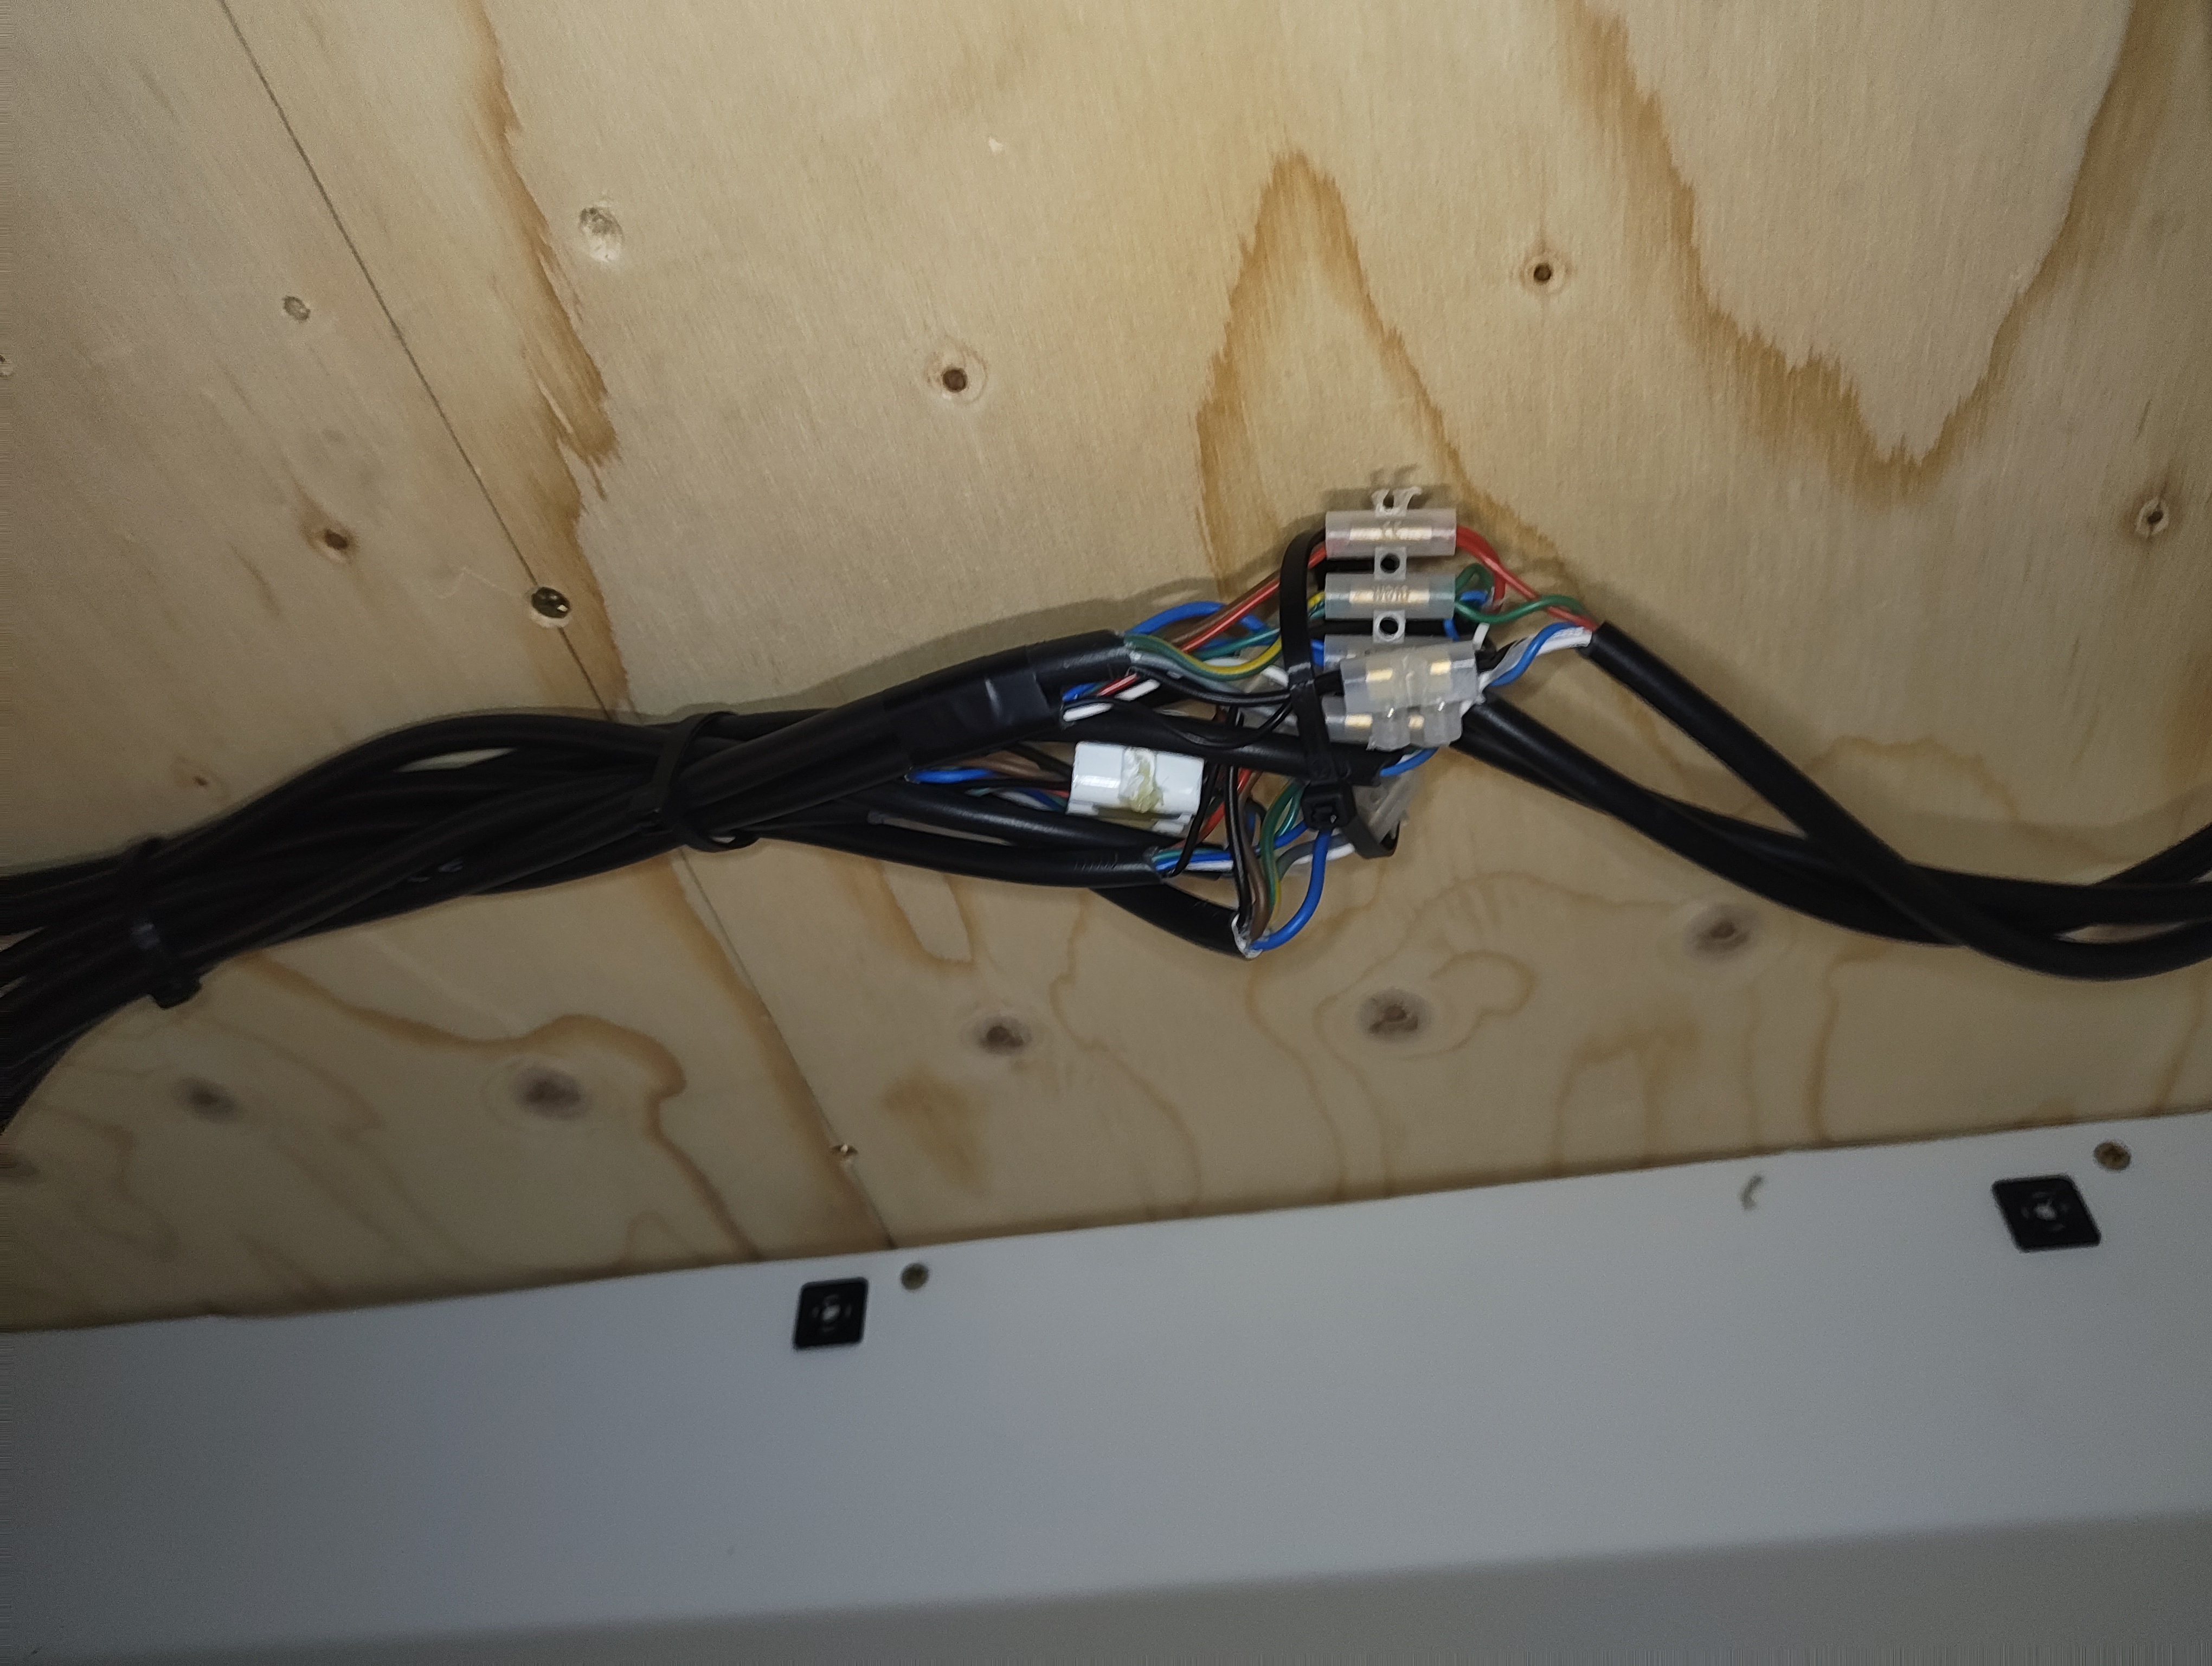
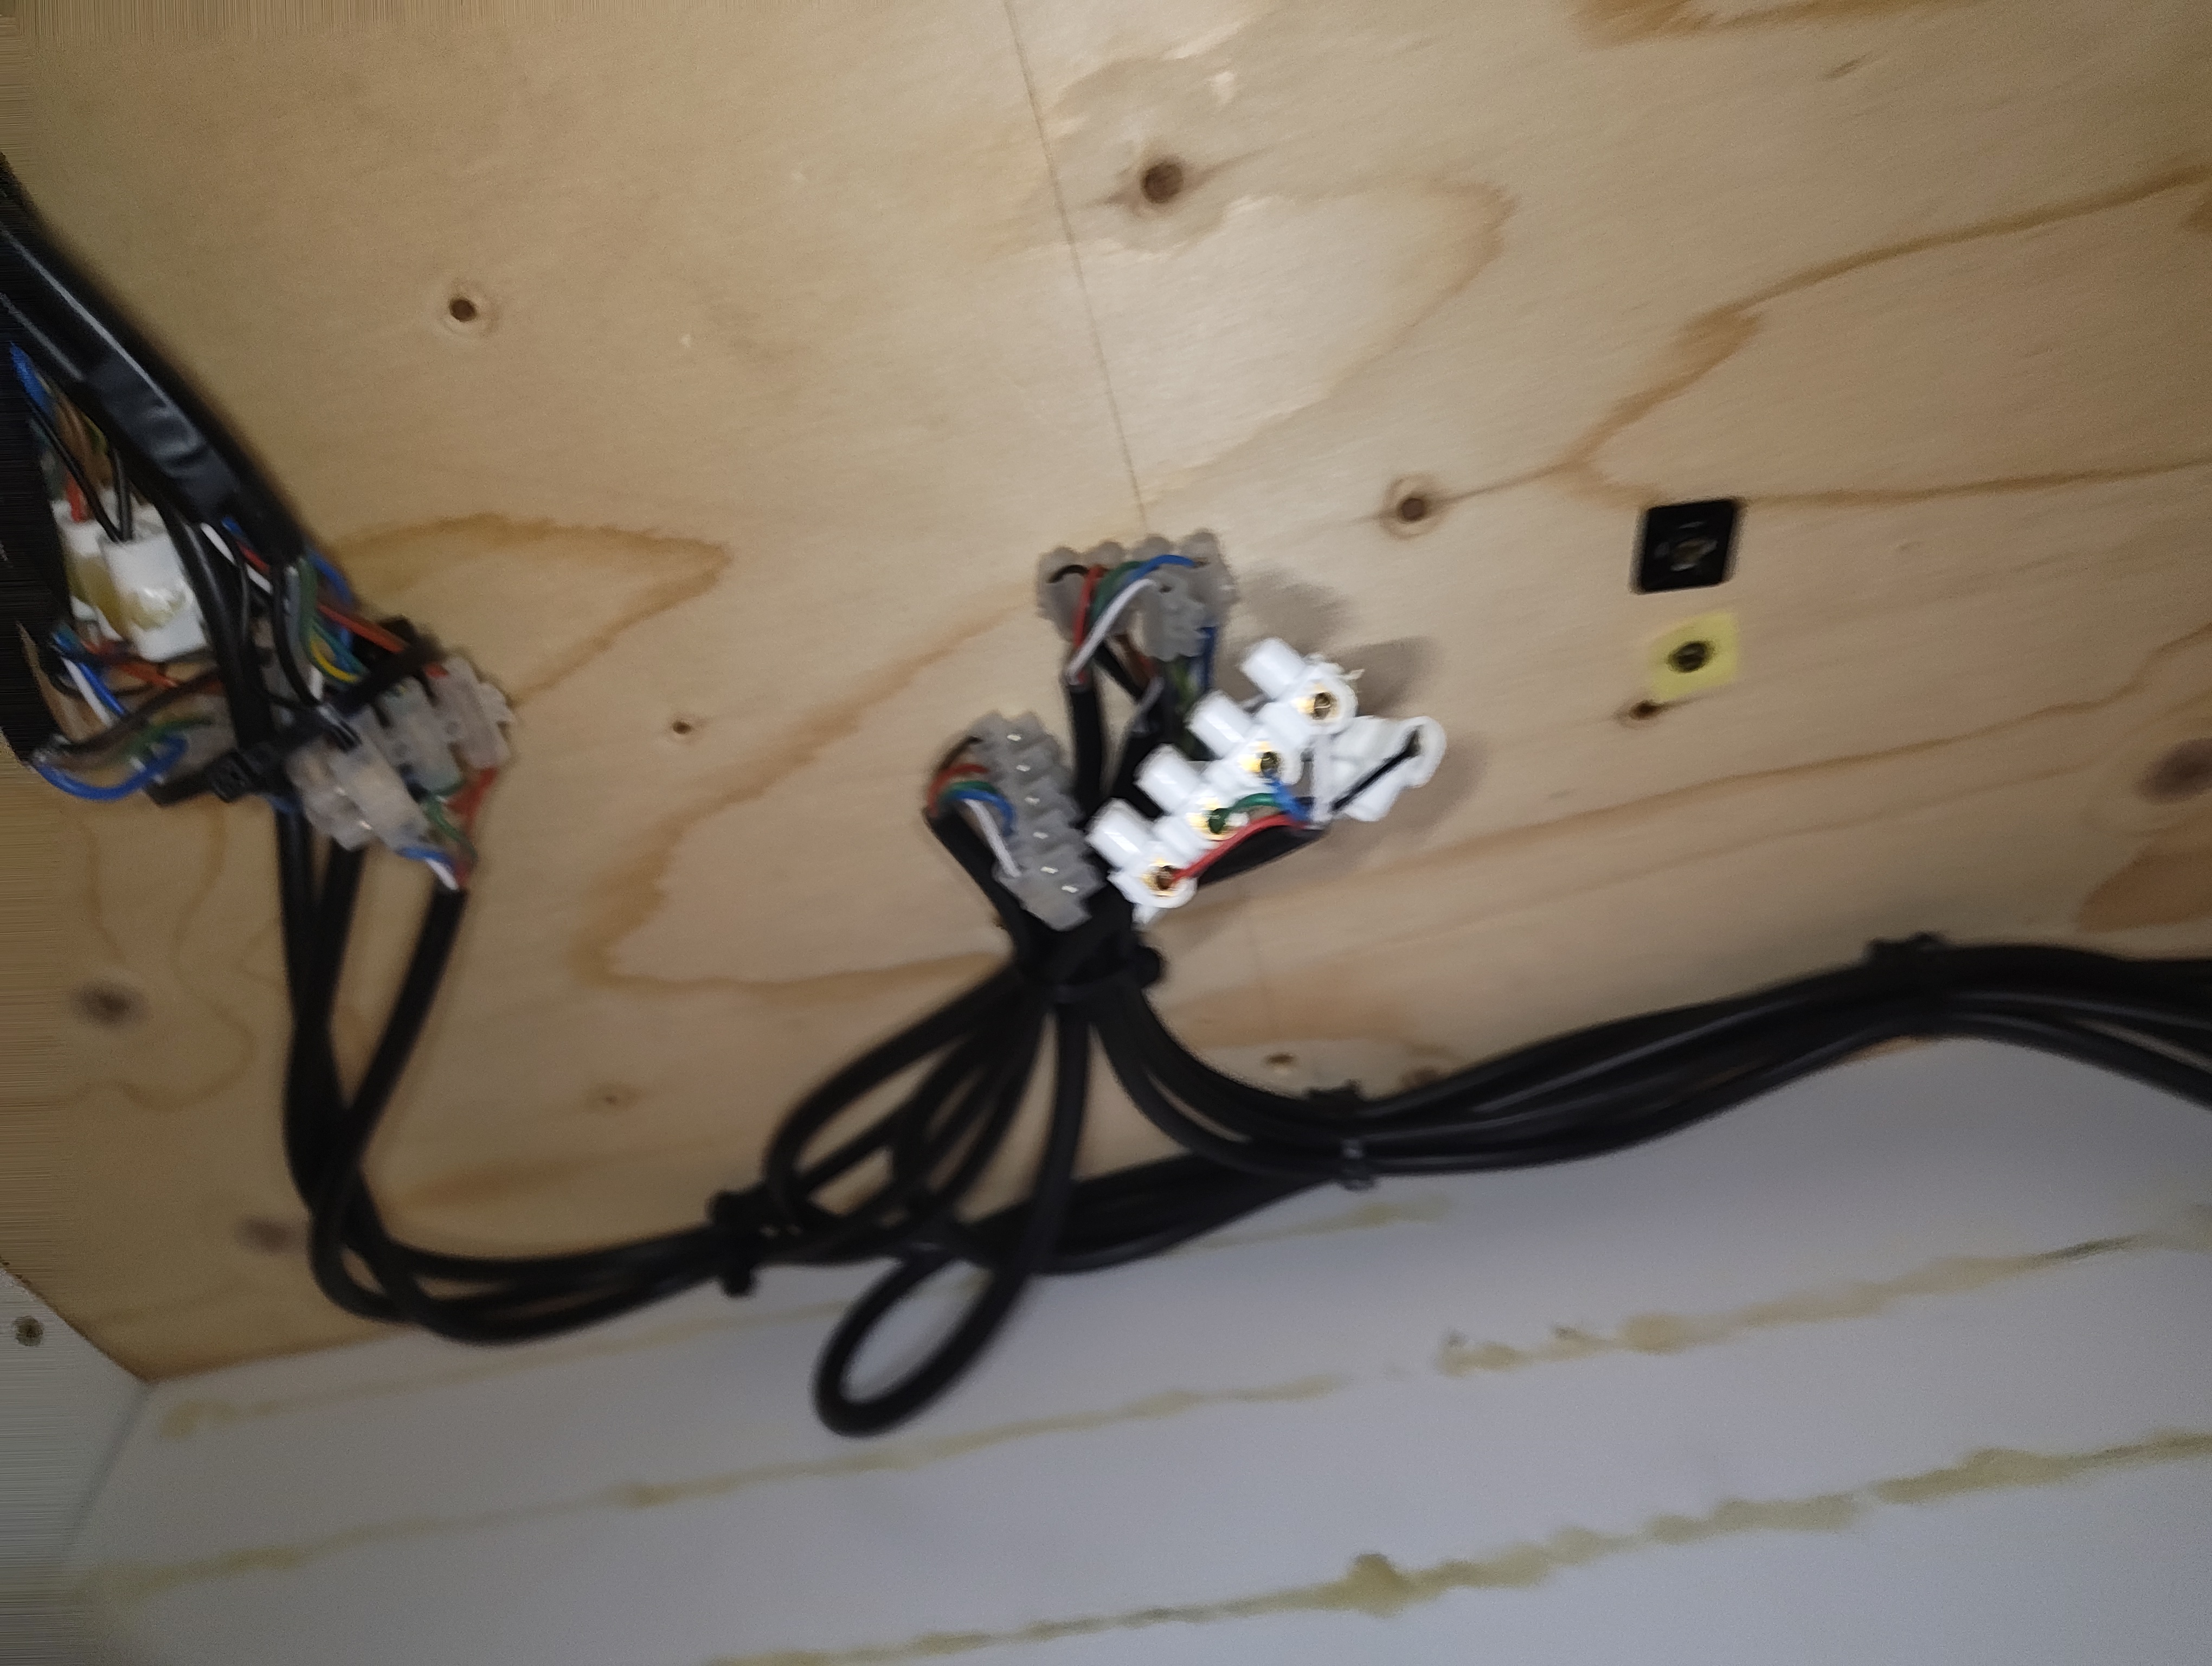
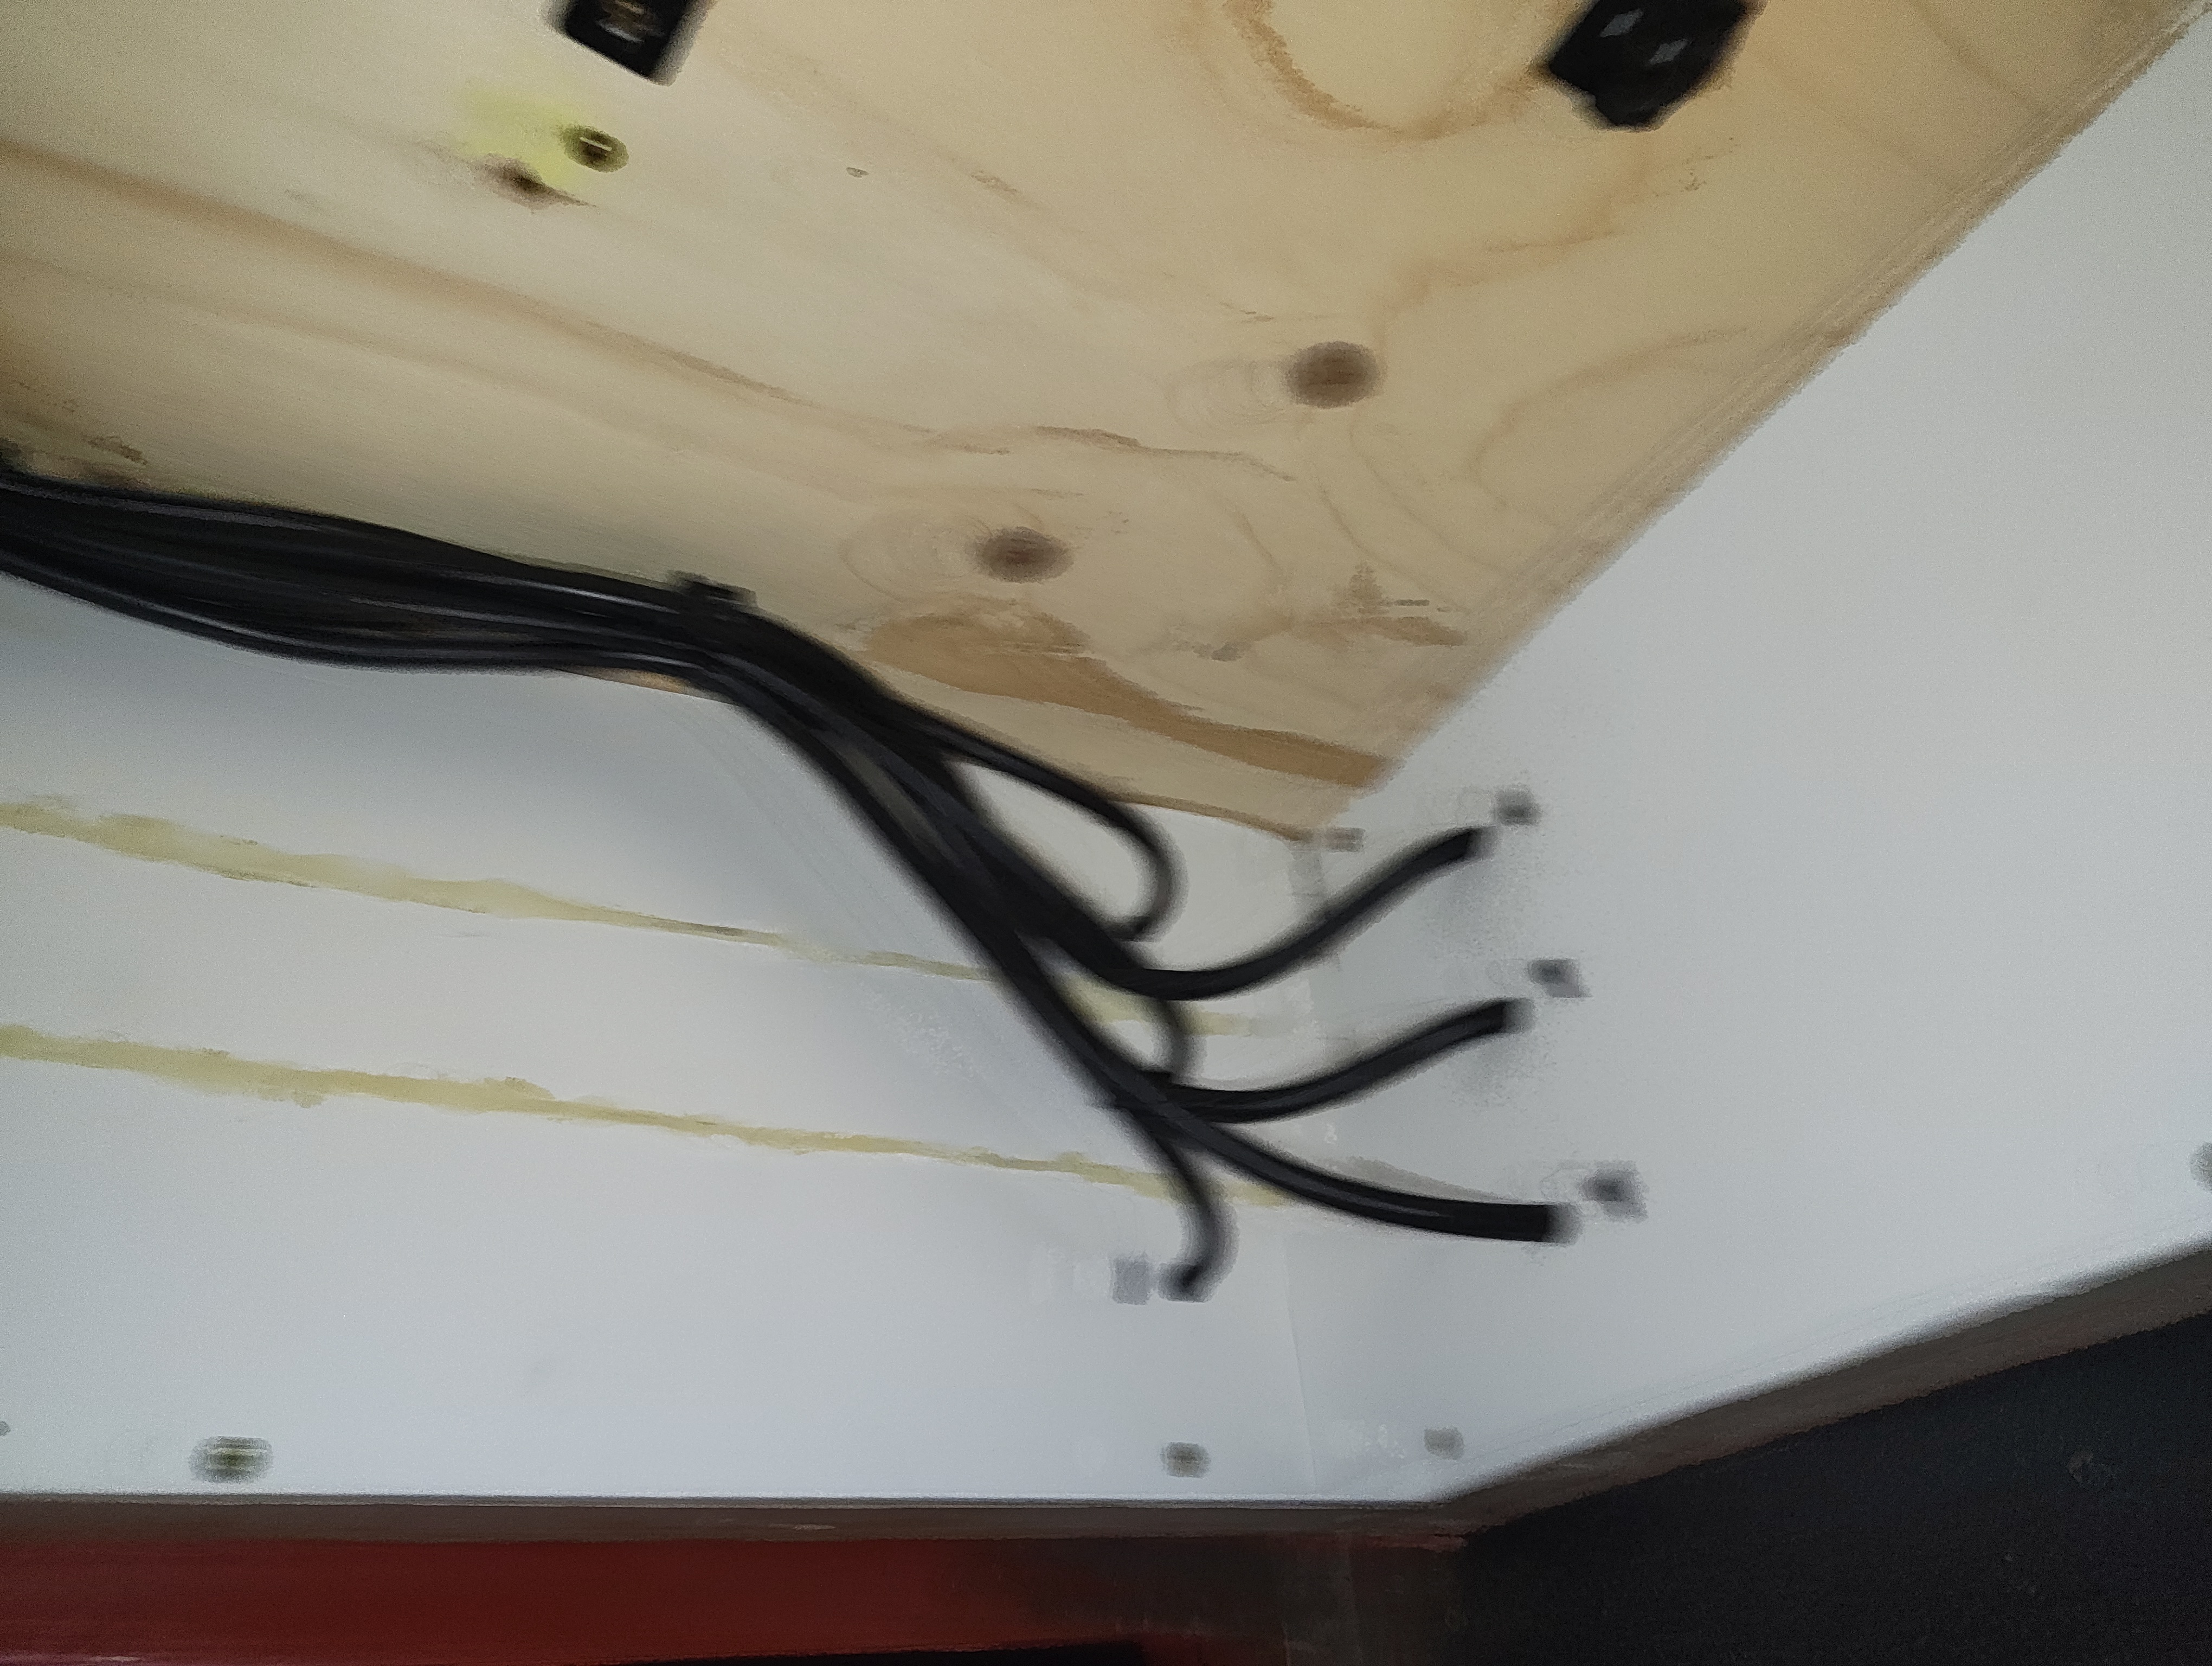
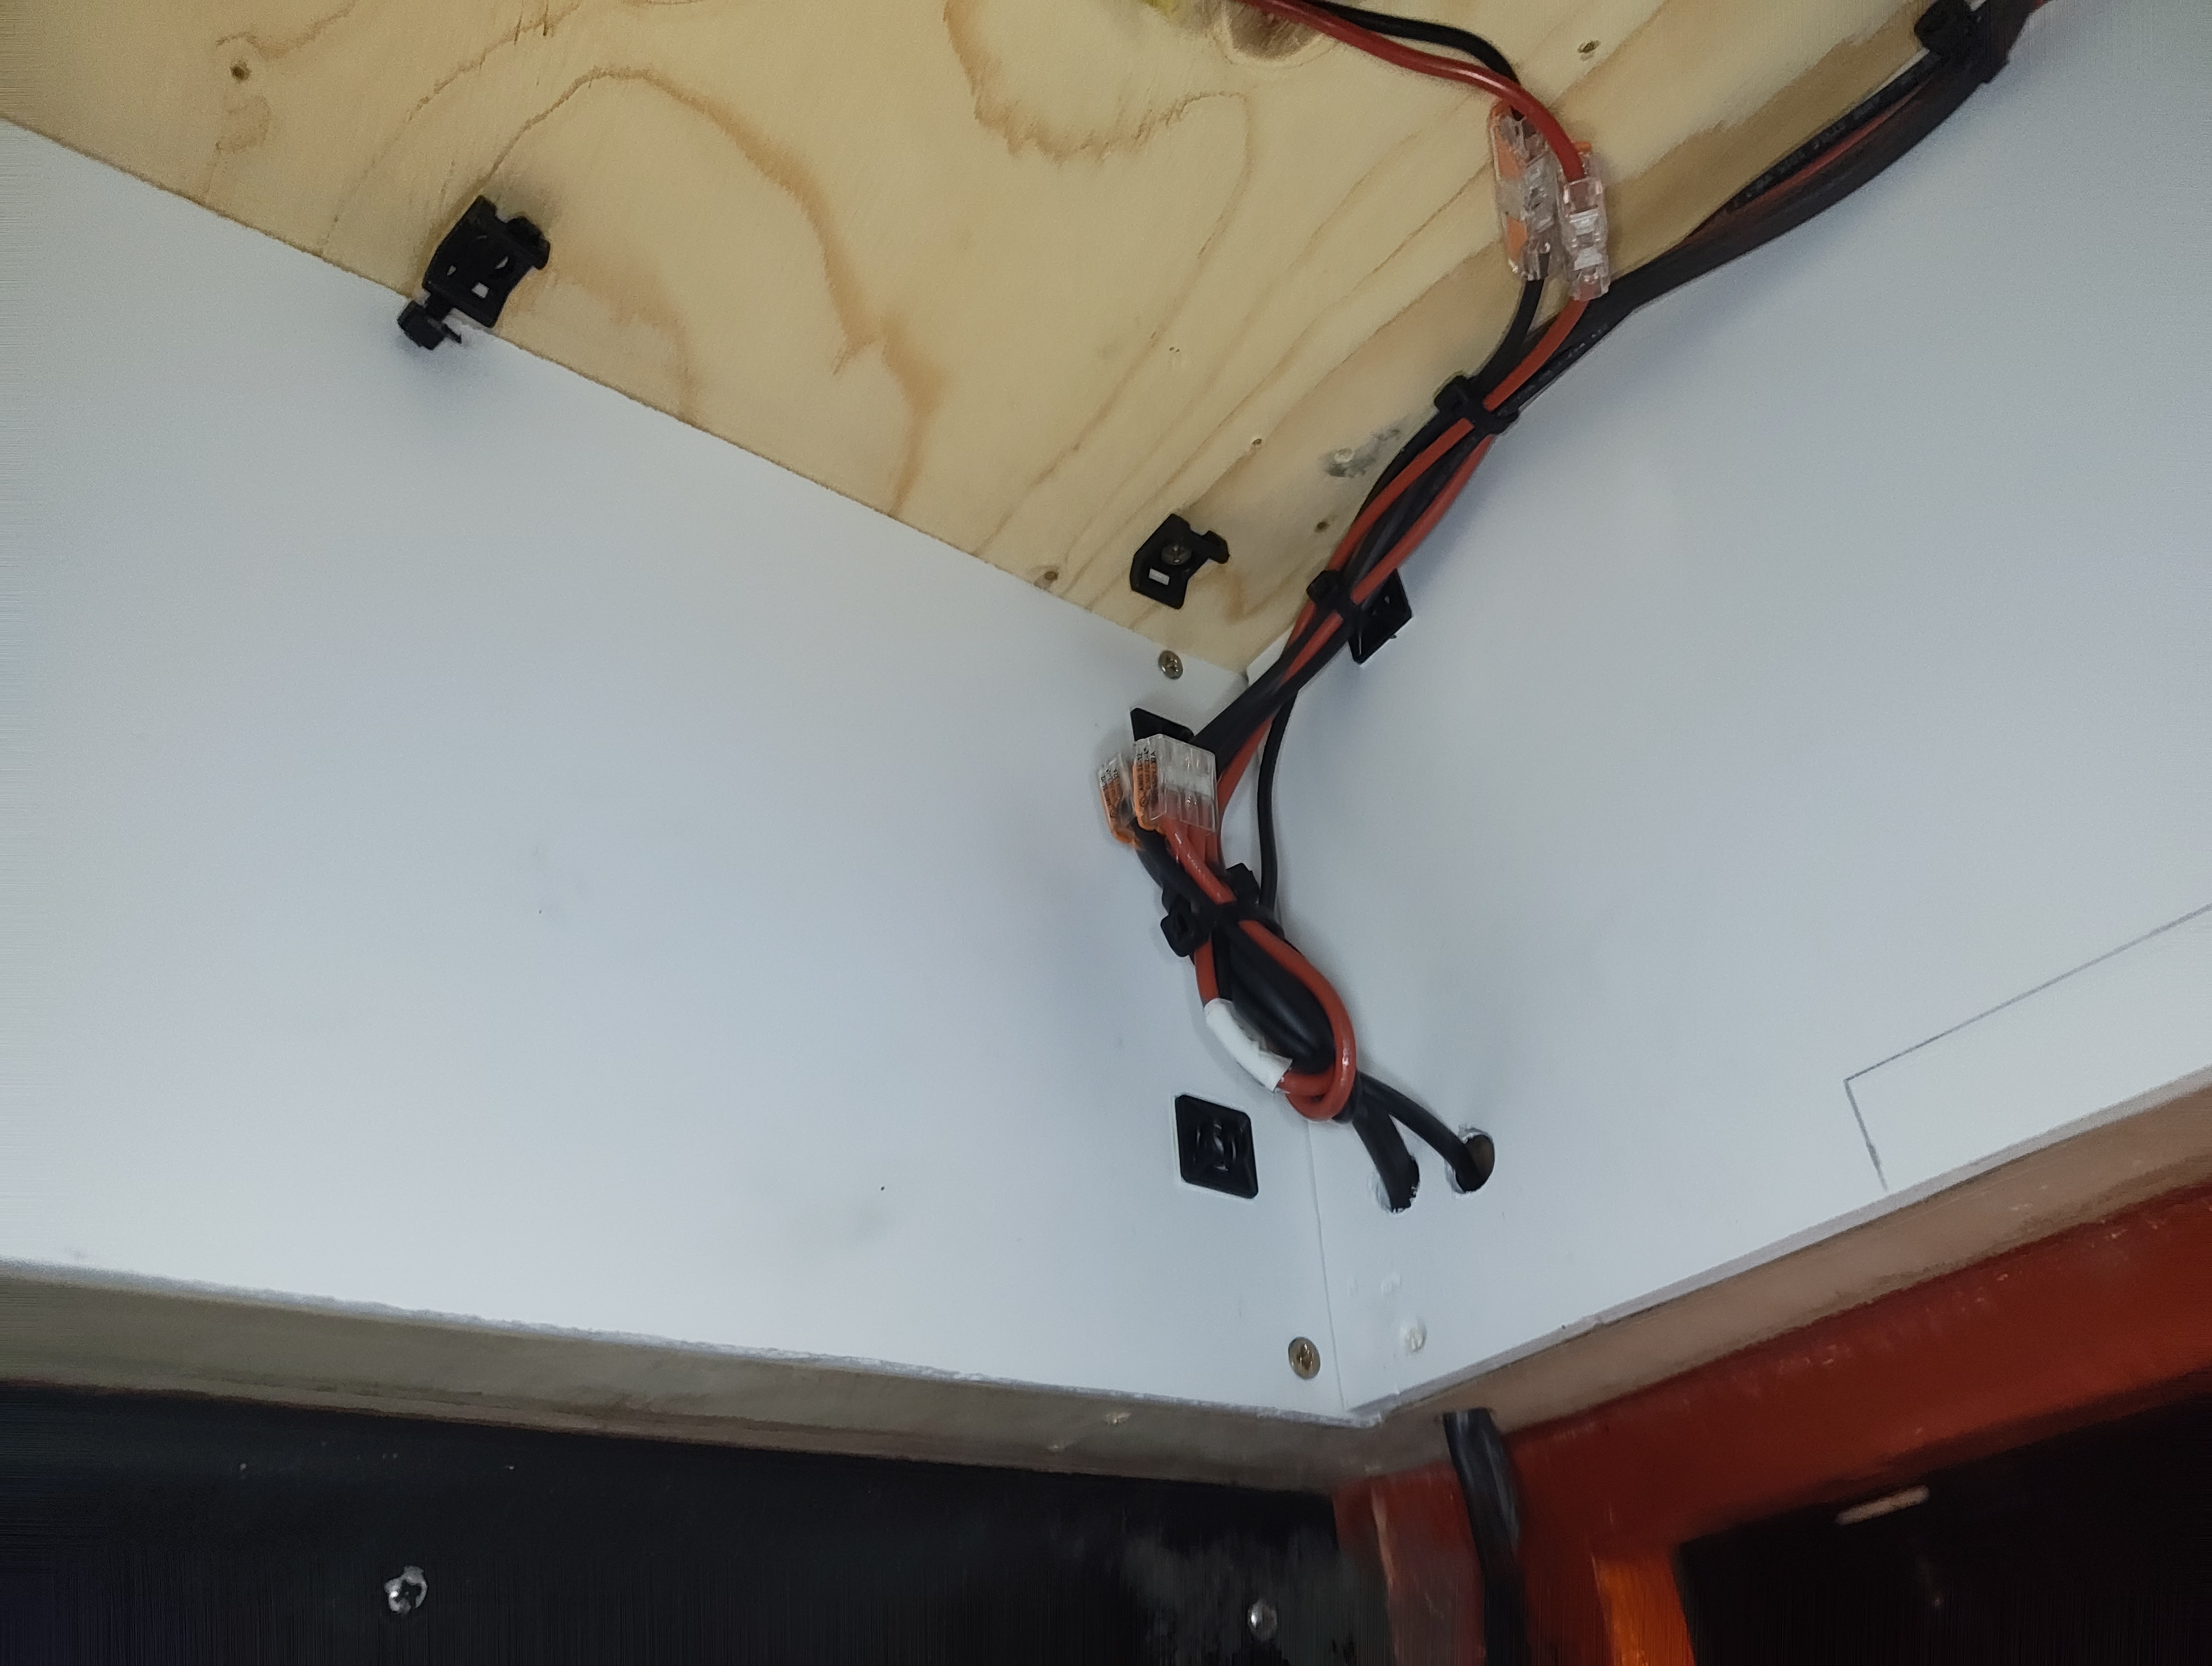
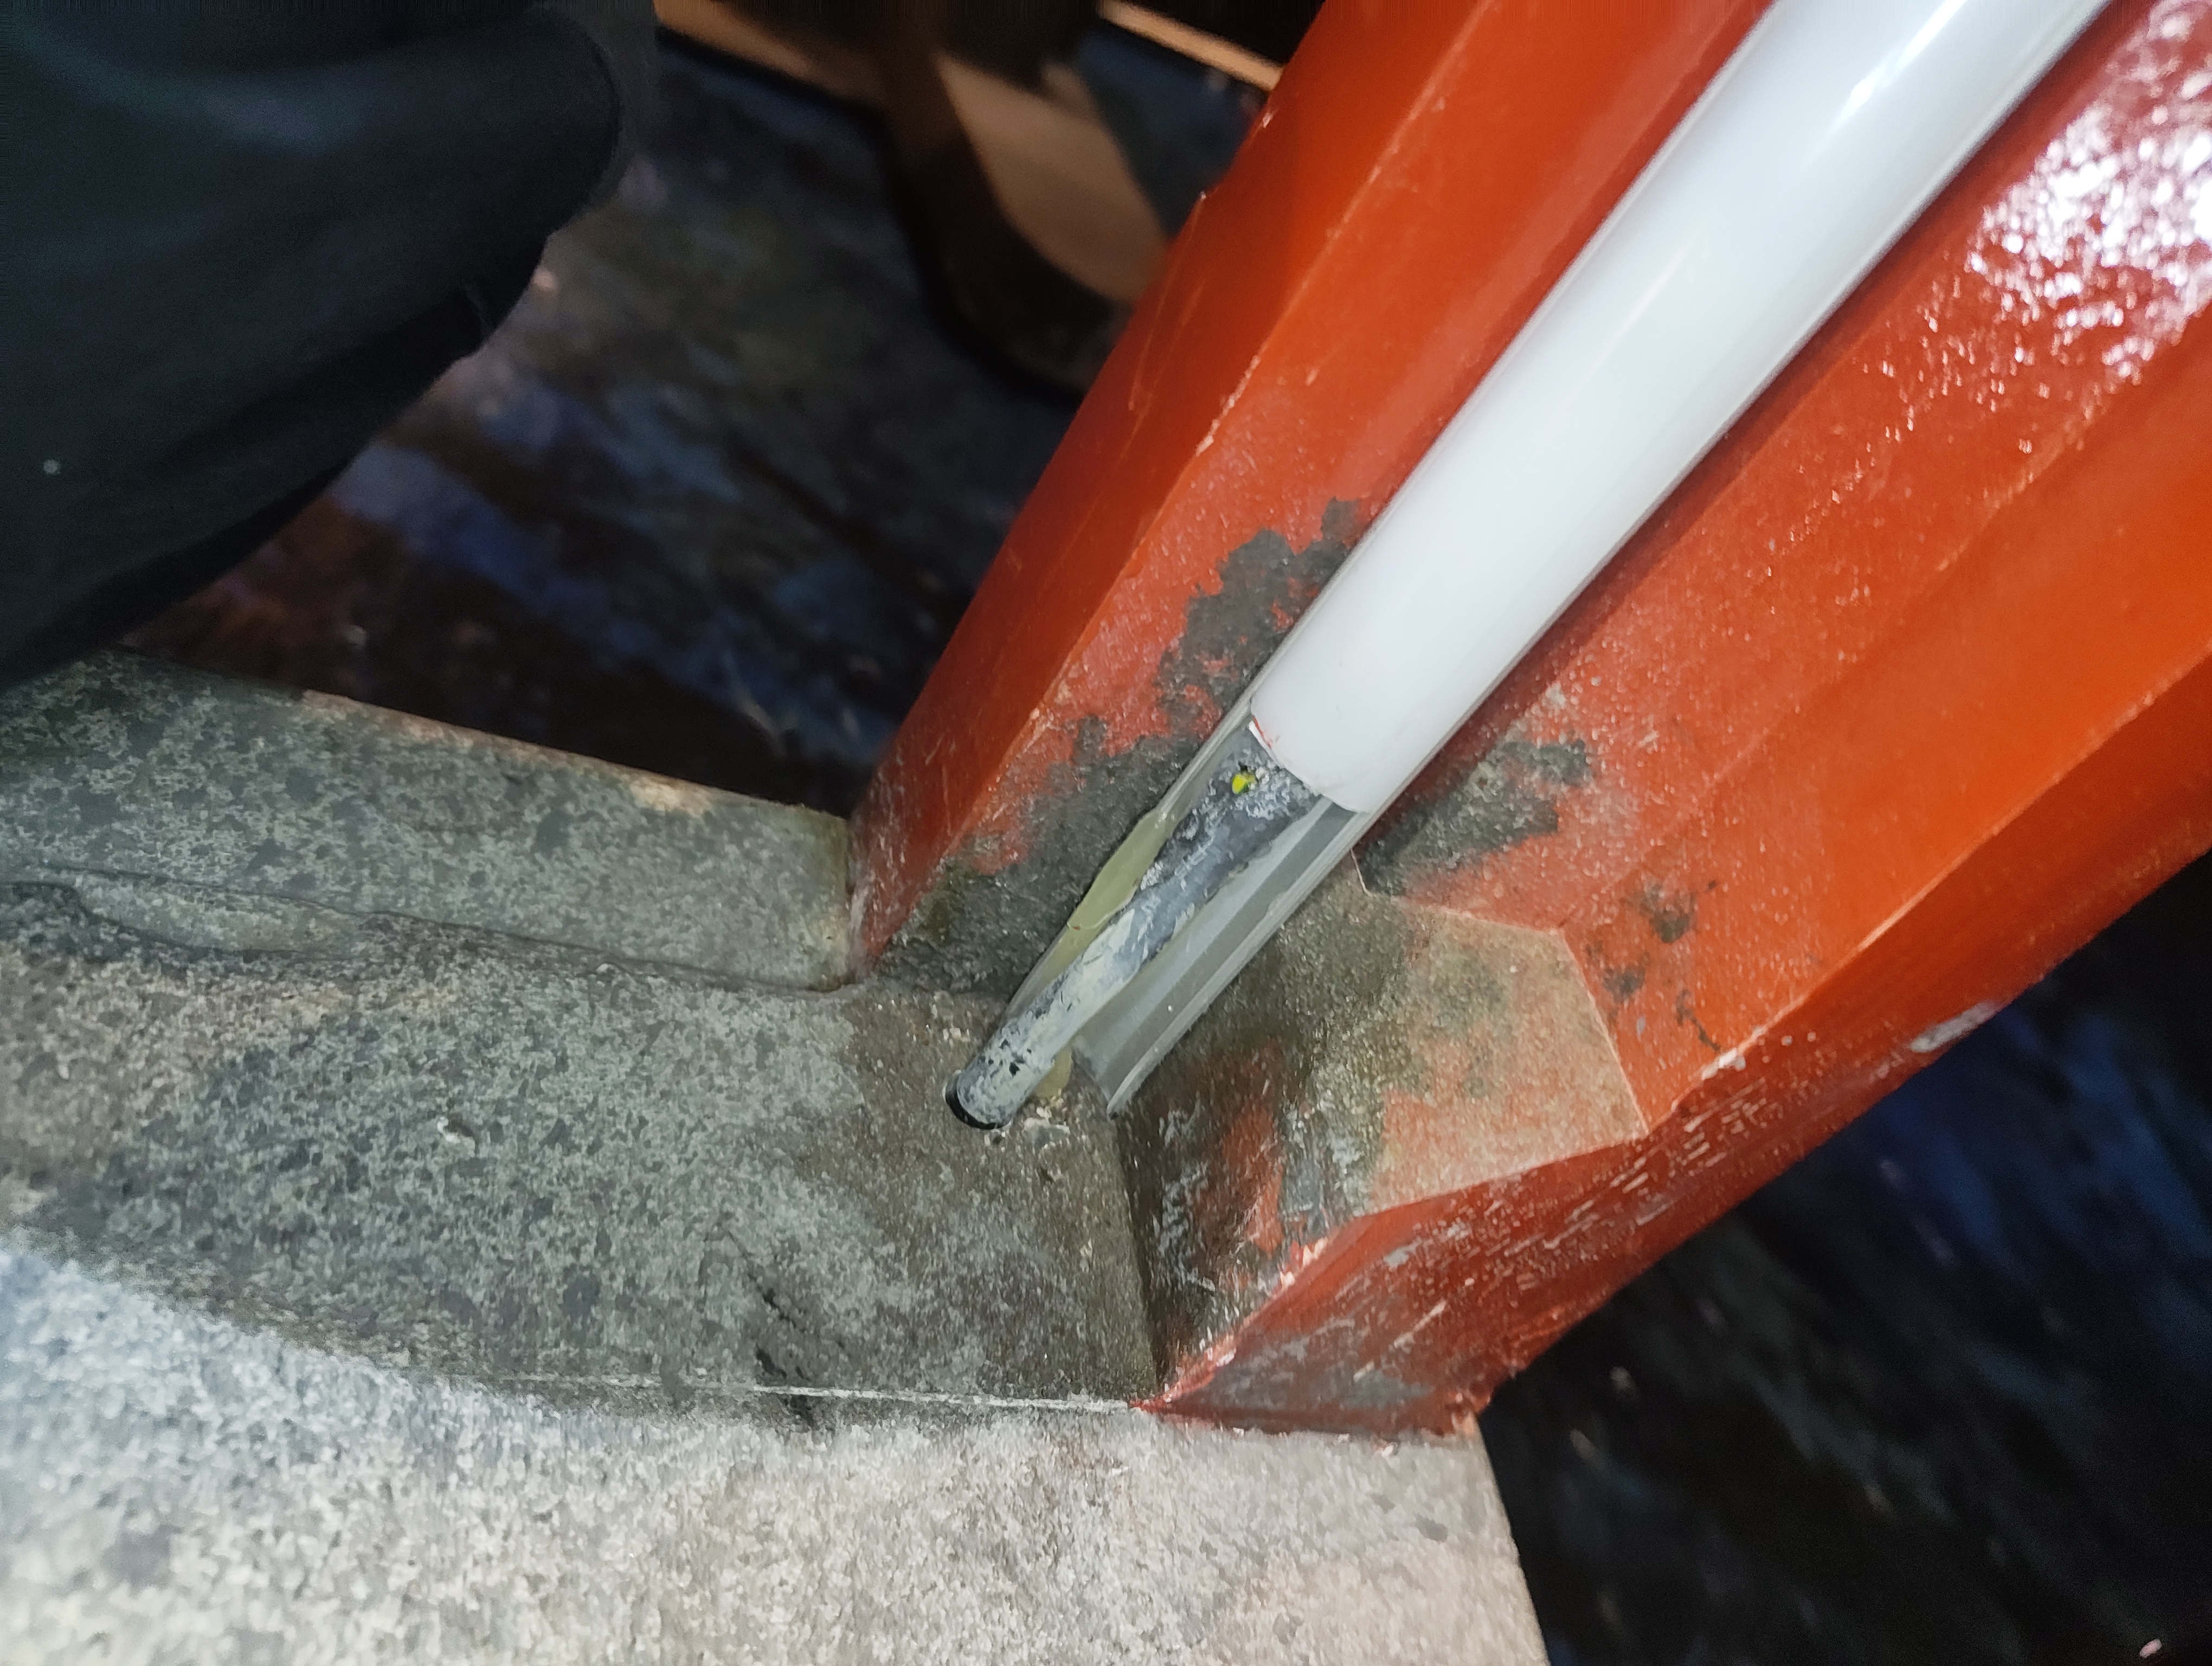
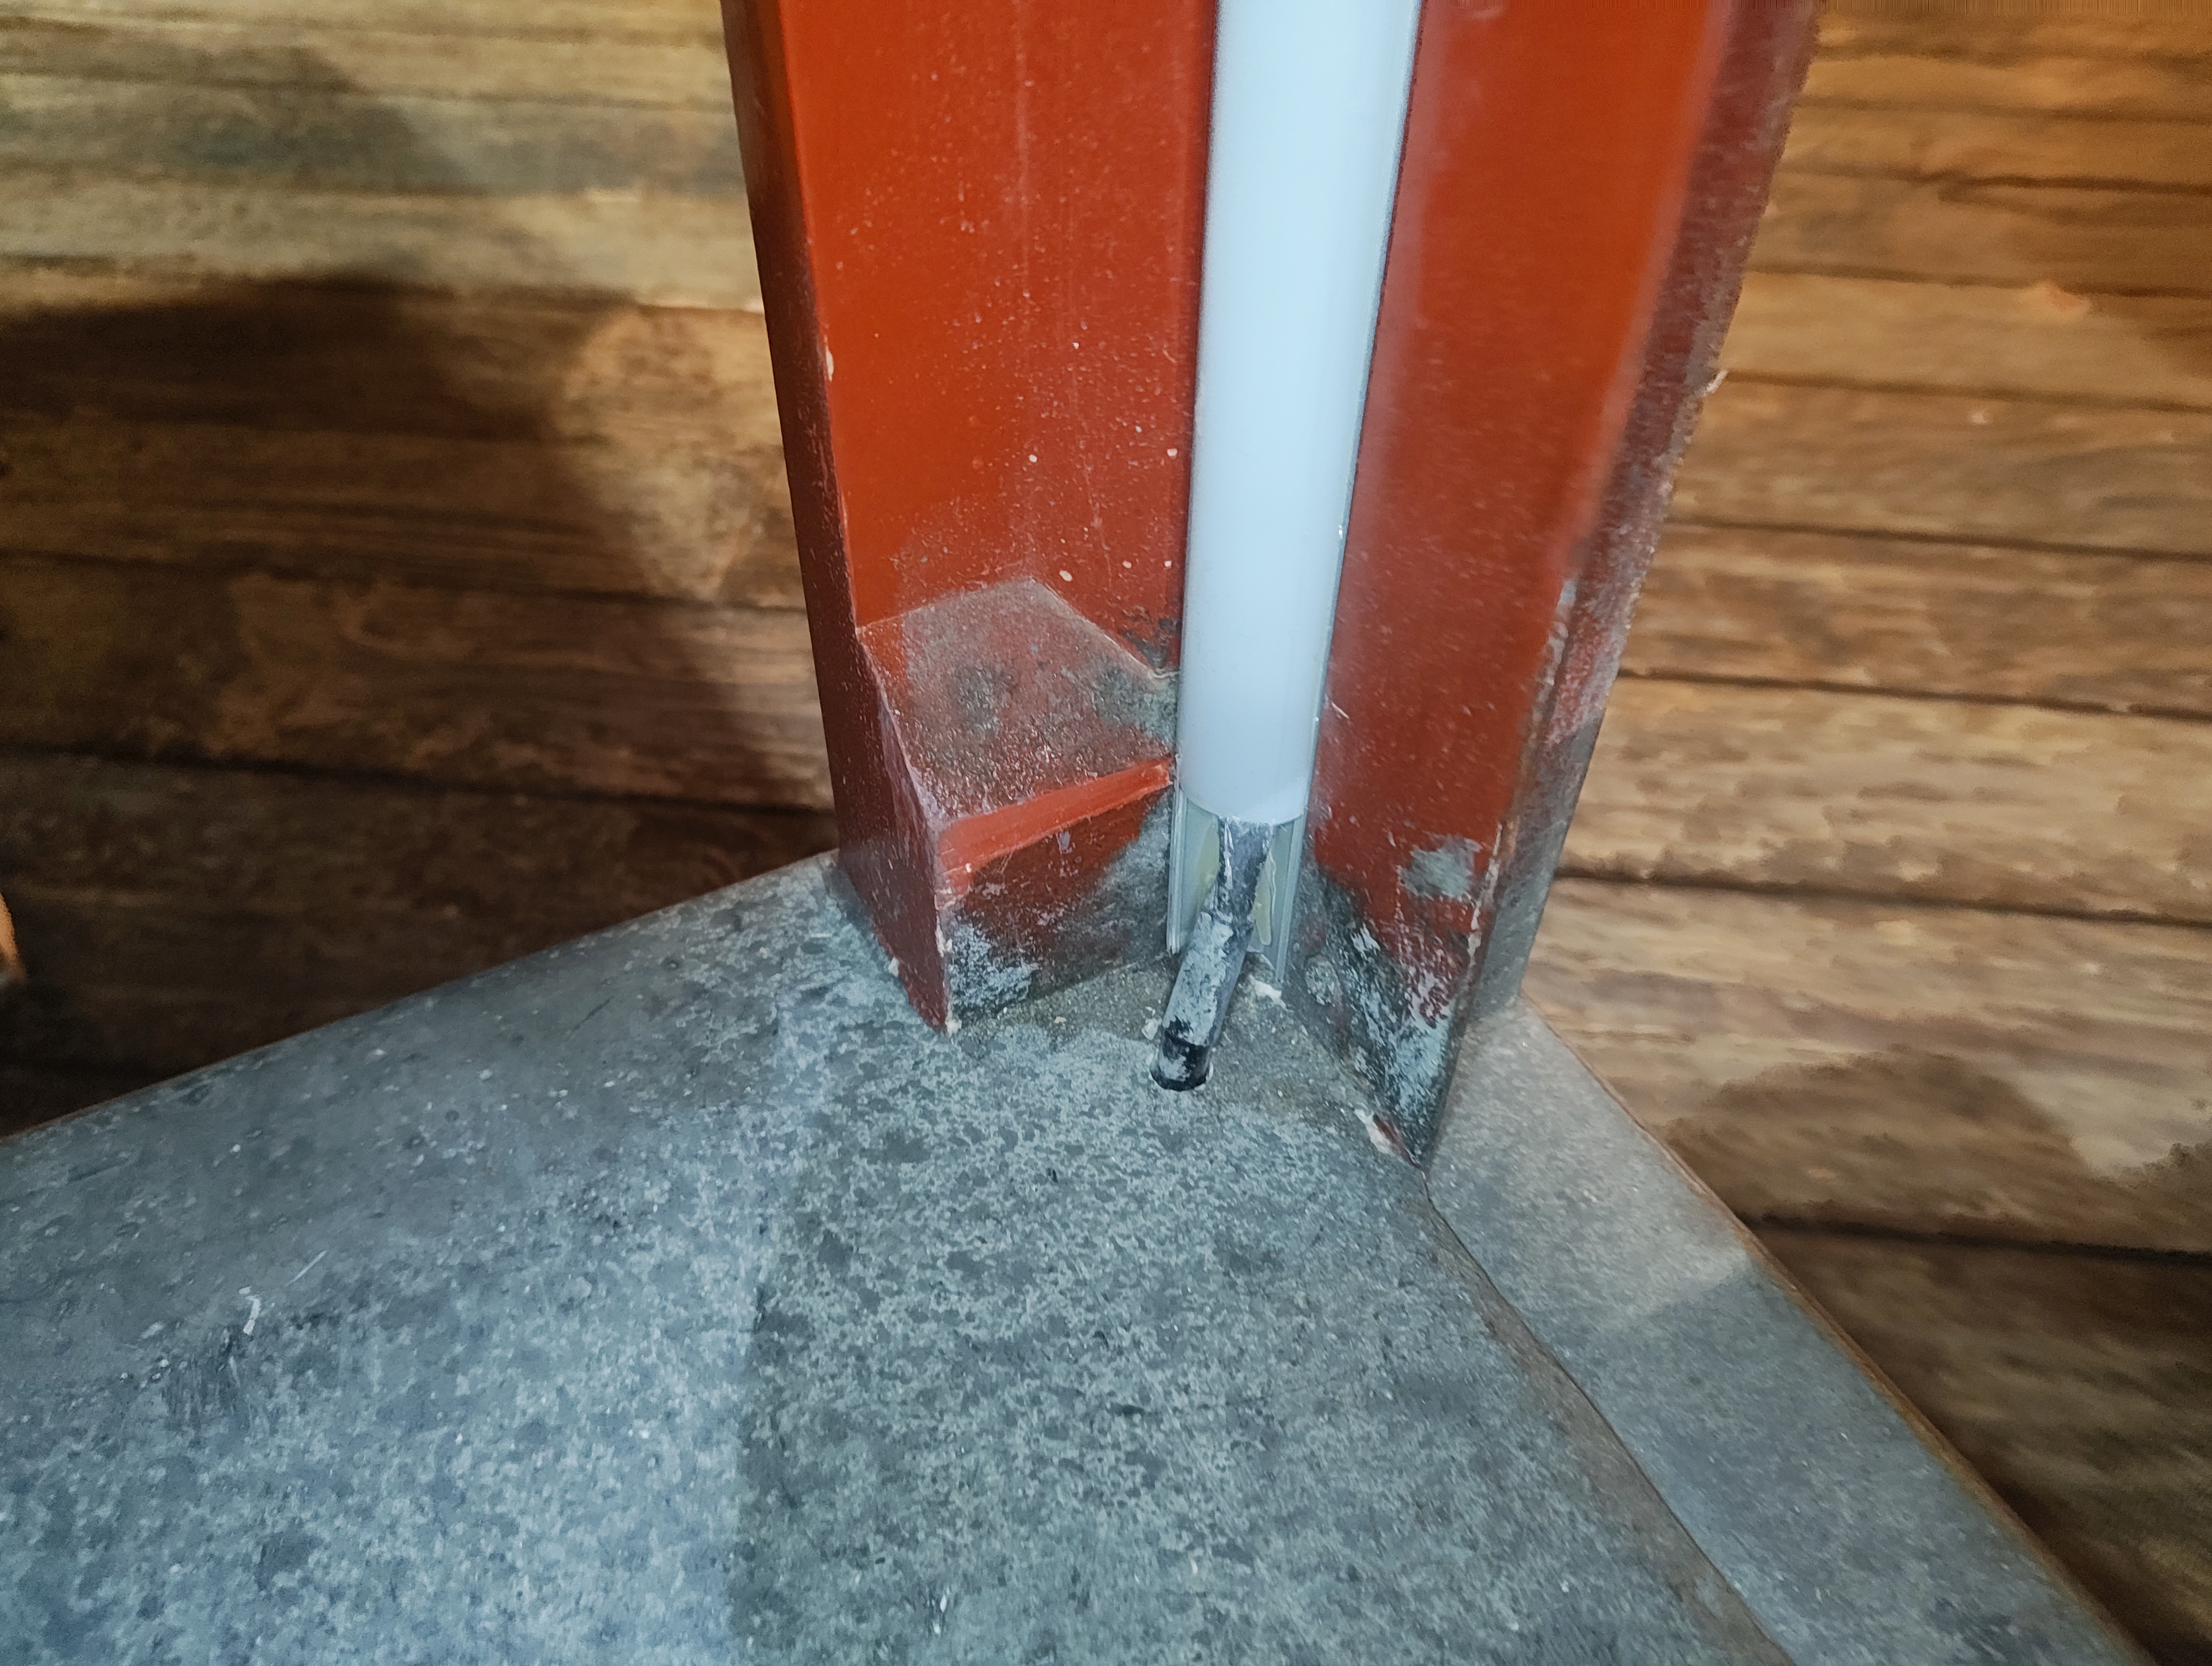
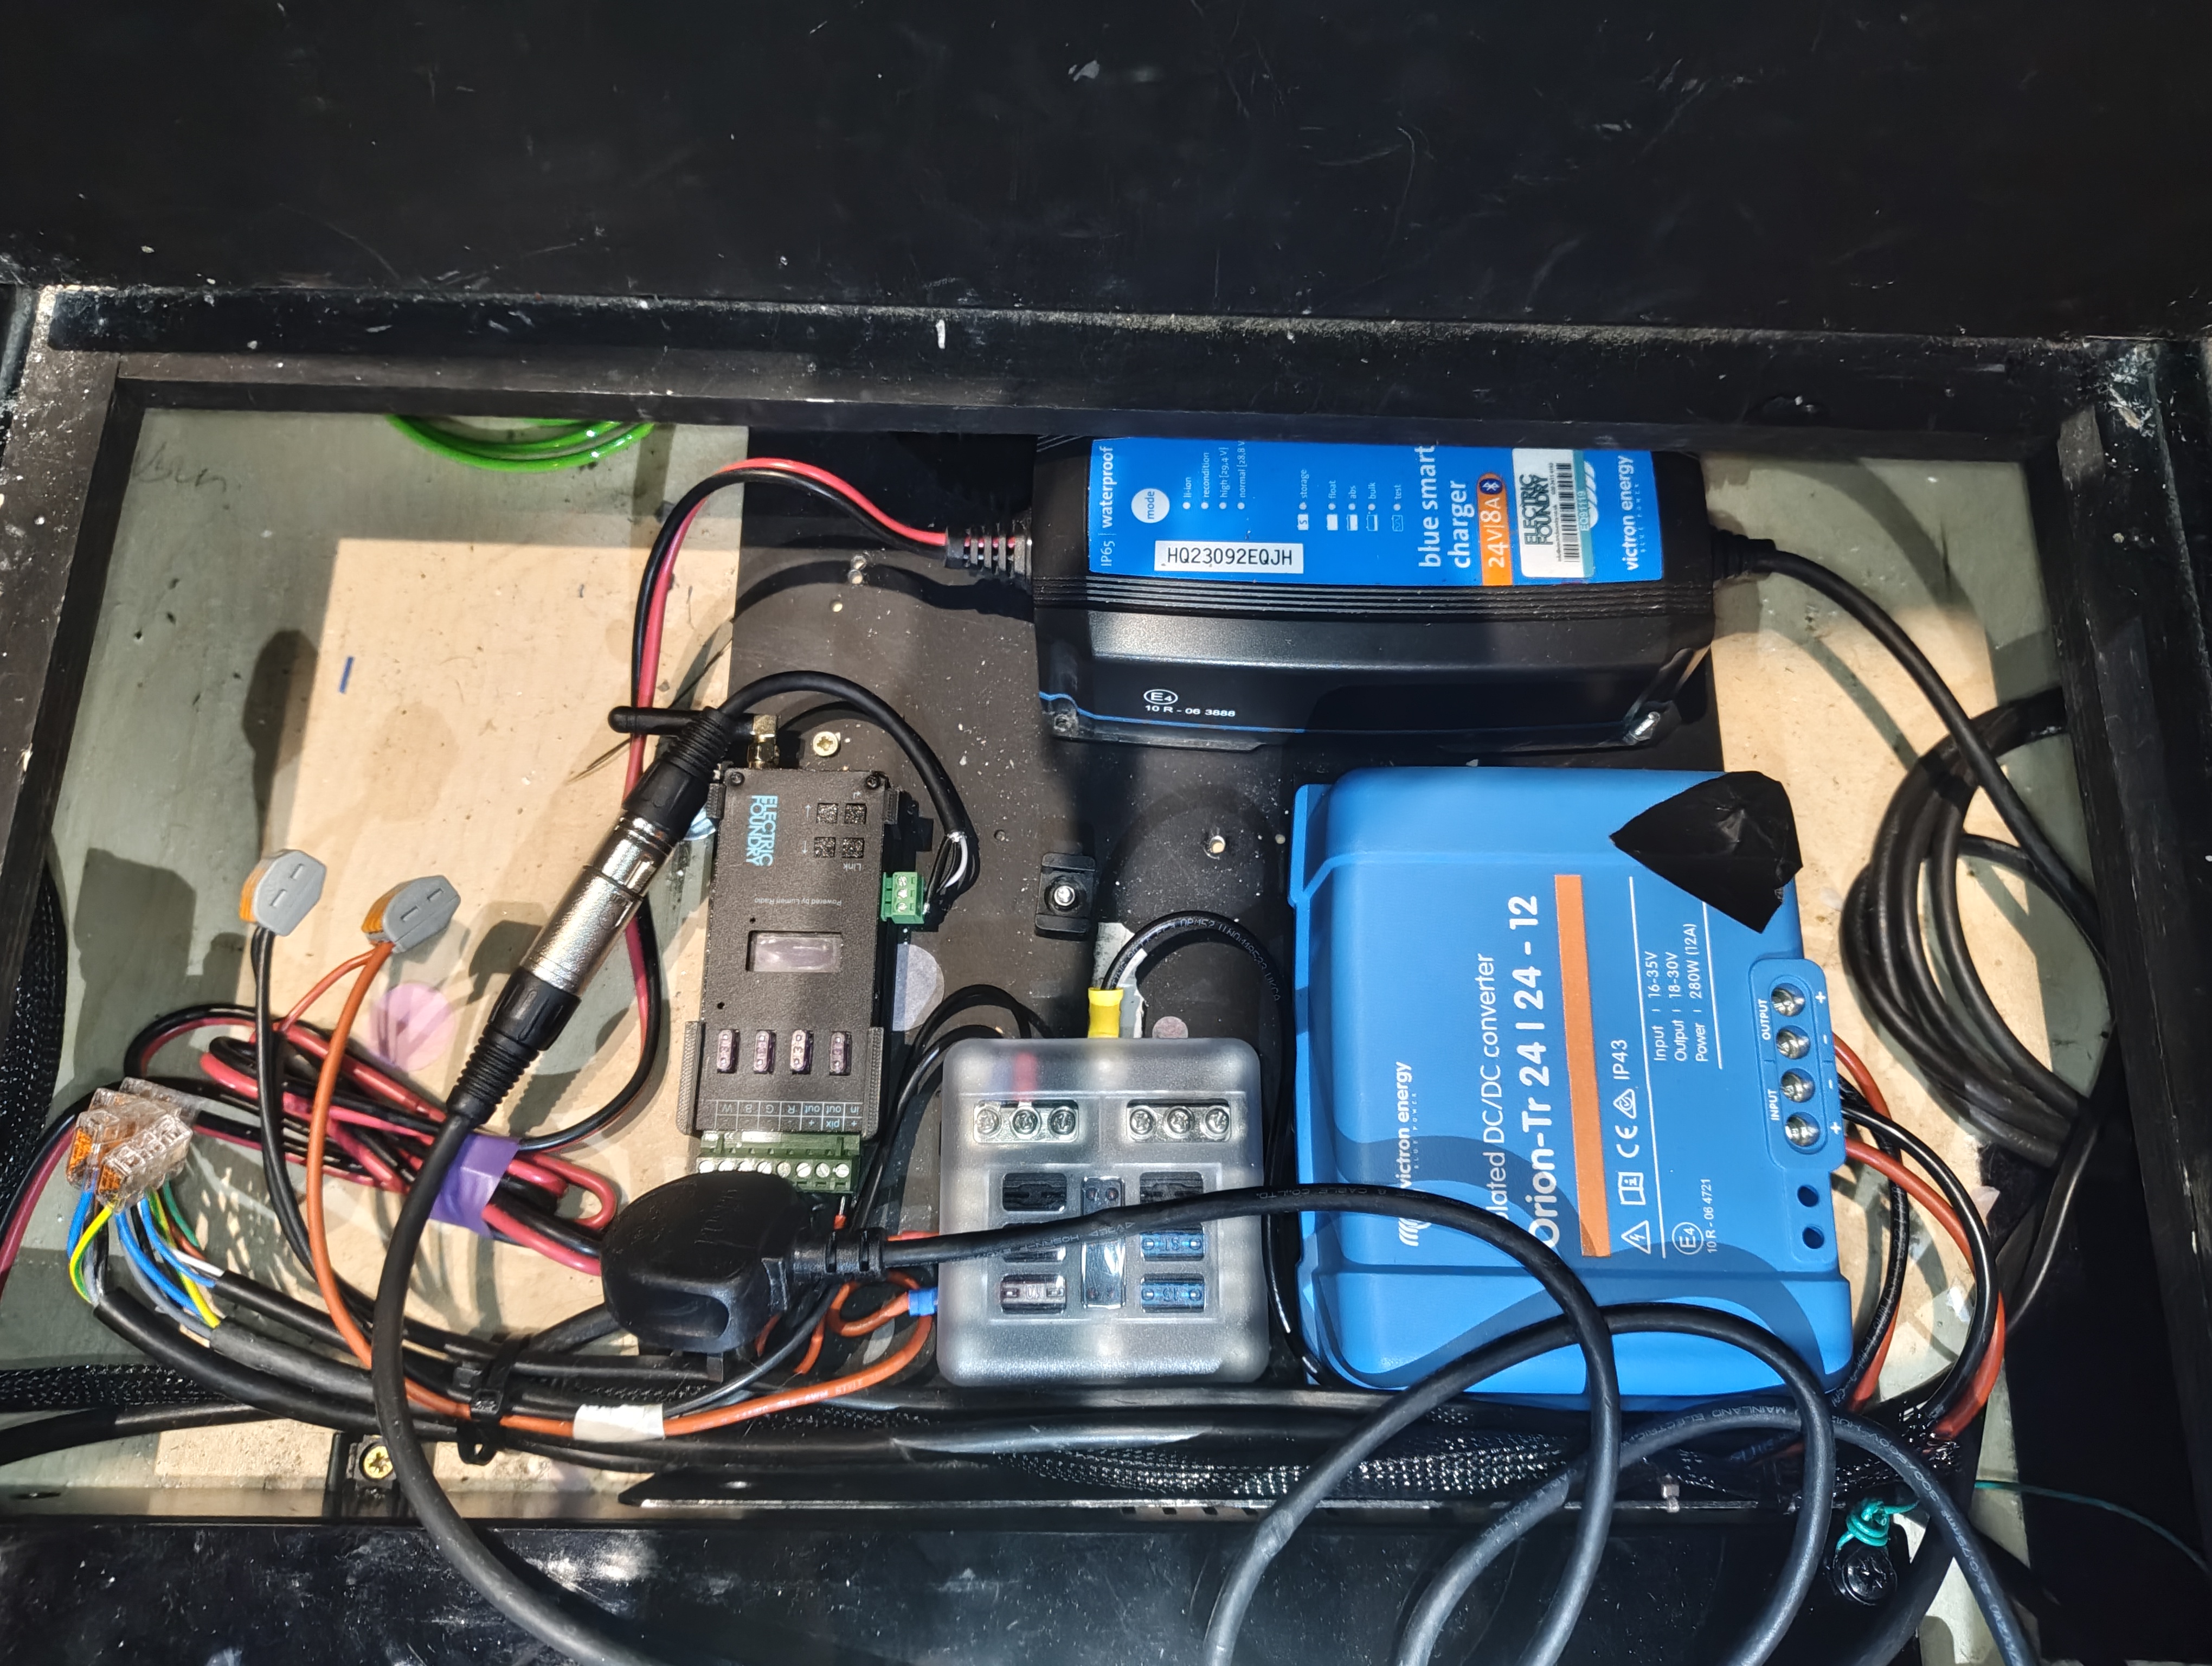
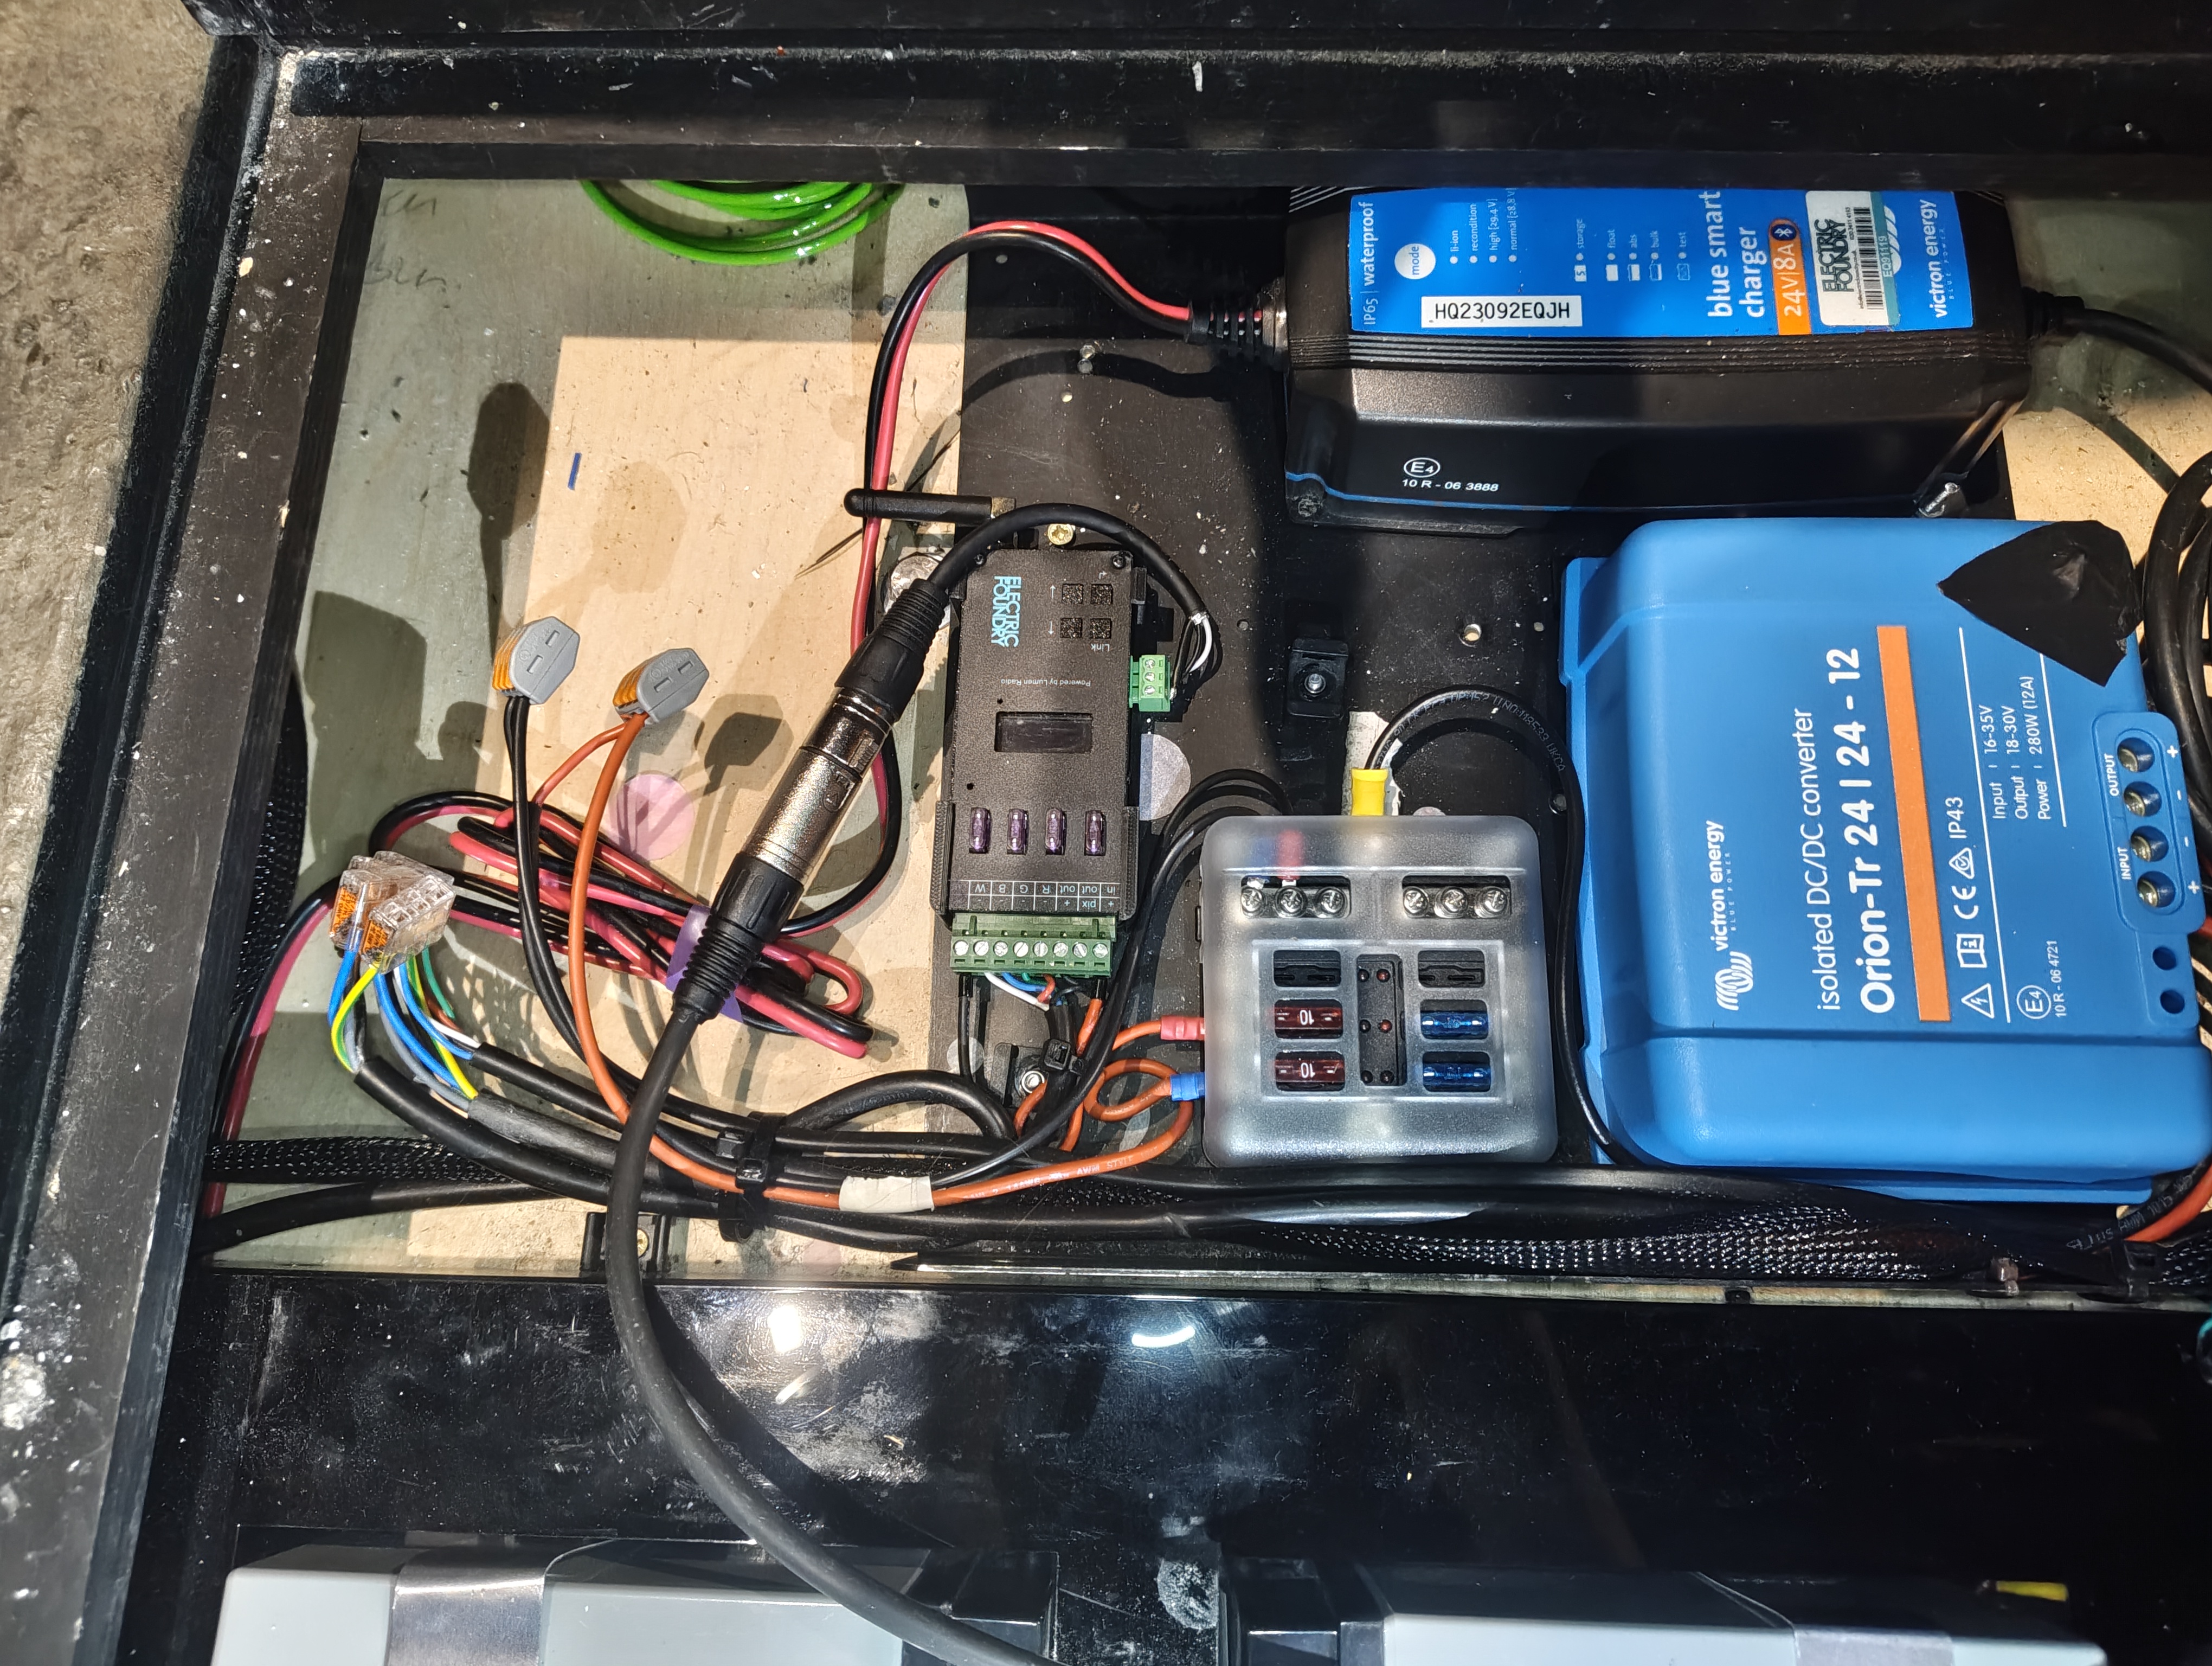
Components List
| Component | Detail |
|---|---|
| Batteries | 2× 12V 22Ah Lead Acid (in series = 24V) |
| DC-DC Converter | Victron Orion Isolated DC-DC (24→12V) |
| CRMX Receiver / Dimmer | Electric Foundry combo unit (4ch RGBW + DMX out) |
| DMX Decoder | LTECH LT-916-OLED |
| Gantom Spots | 2× Gantom 7 M510 |
| Fuse Box | 6-way blade fuse box |
| Charger | Victron Blue Smart IP65 24V 8A |
Usage
The PhoneBox is used throughout the show in multiple scenes.
Troubleshooting
- No lights at all:
- Check power switch inside base panel
- Check battery charge — charge overnight with the 24V charger
- Check fuse box for blown fuses
- Interior LEDs not working but Gantoms are fine:
- Check Electric Foundry unit — is it powered and receiving CRMX?
- Check 10A fuse on the EF branch
- Gantoms not working but interior LEDs are fine:
- Check 10A fuse on the LTECH branch
- Check DMX phoenix connector from EF unit to upper section
- Check LTECH decoder is powered and receiving DMX
- Lightbox colours wrong:
- Check LTECH decoder DMX address
- Check DMX cable between EF unit and LTECH
PDFs & Manuals
Garage Counter
Overview
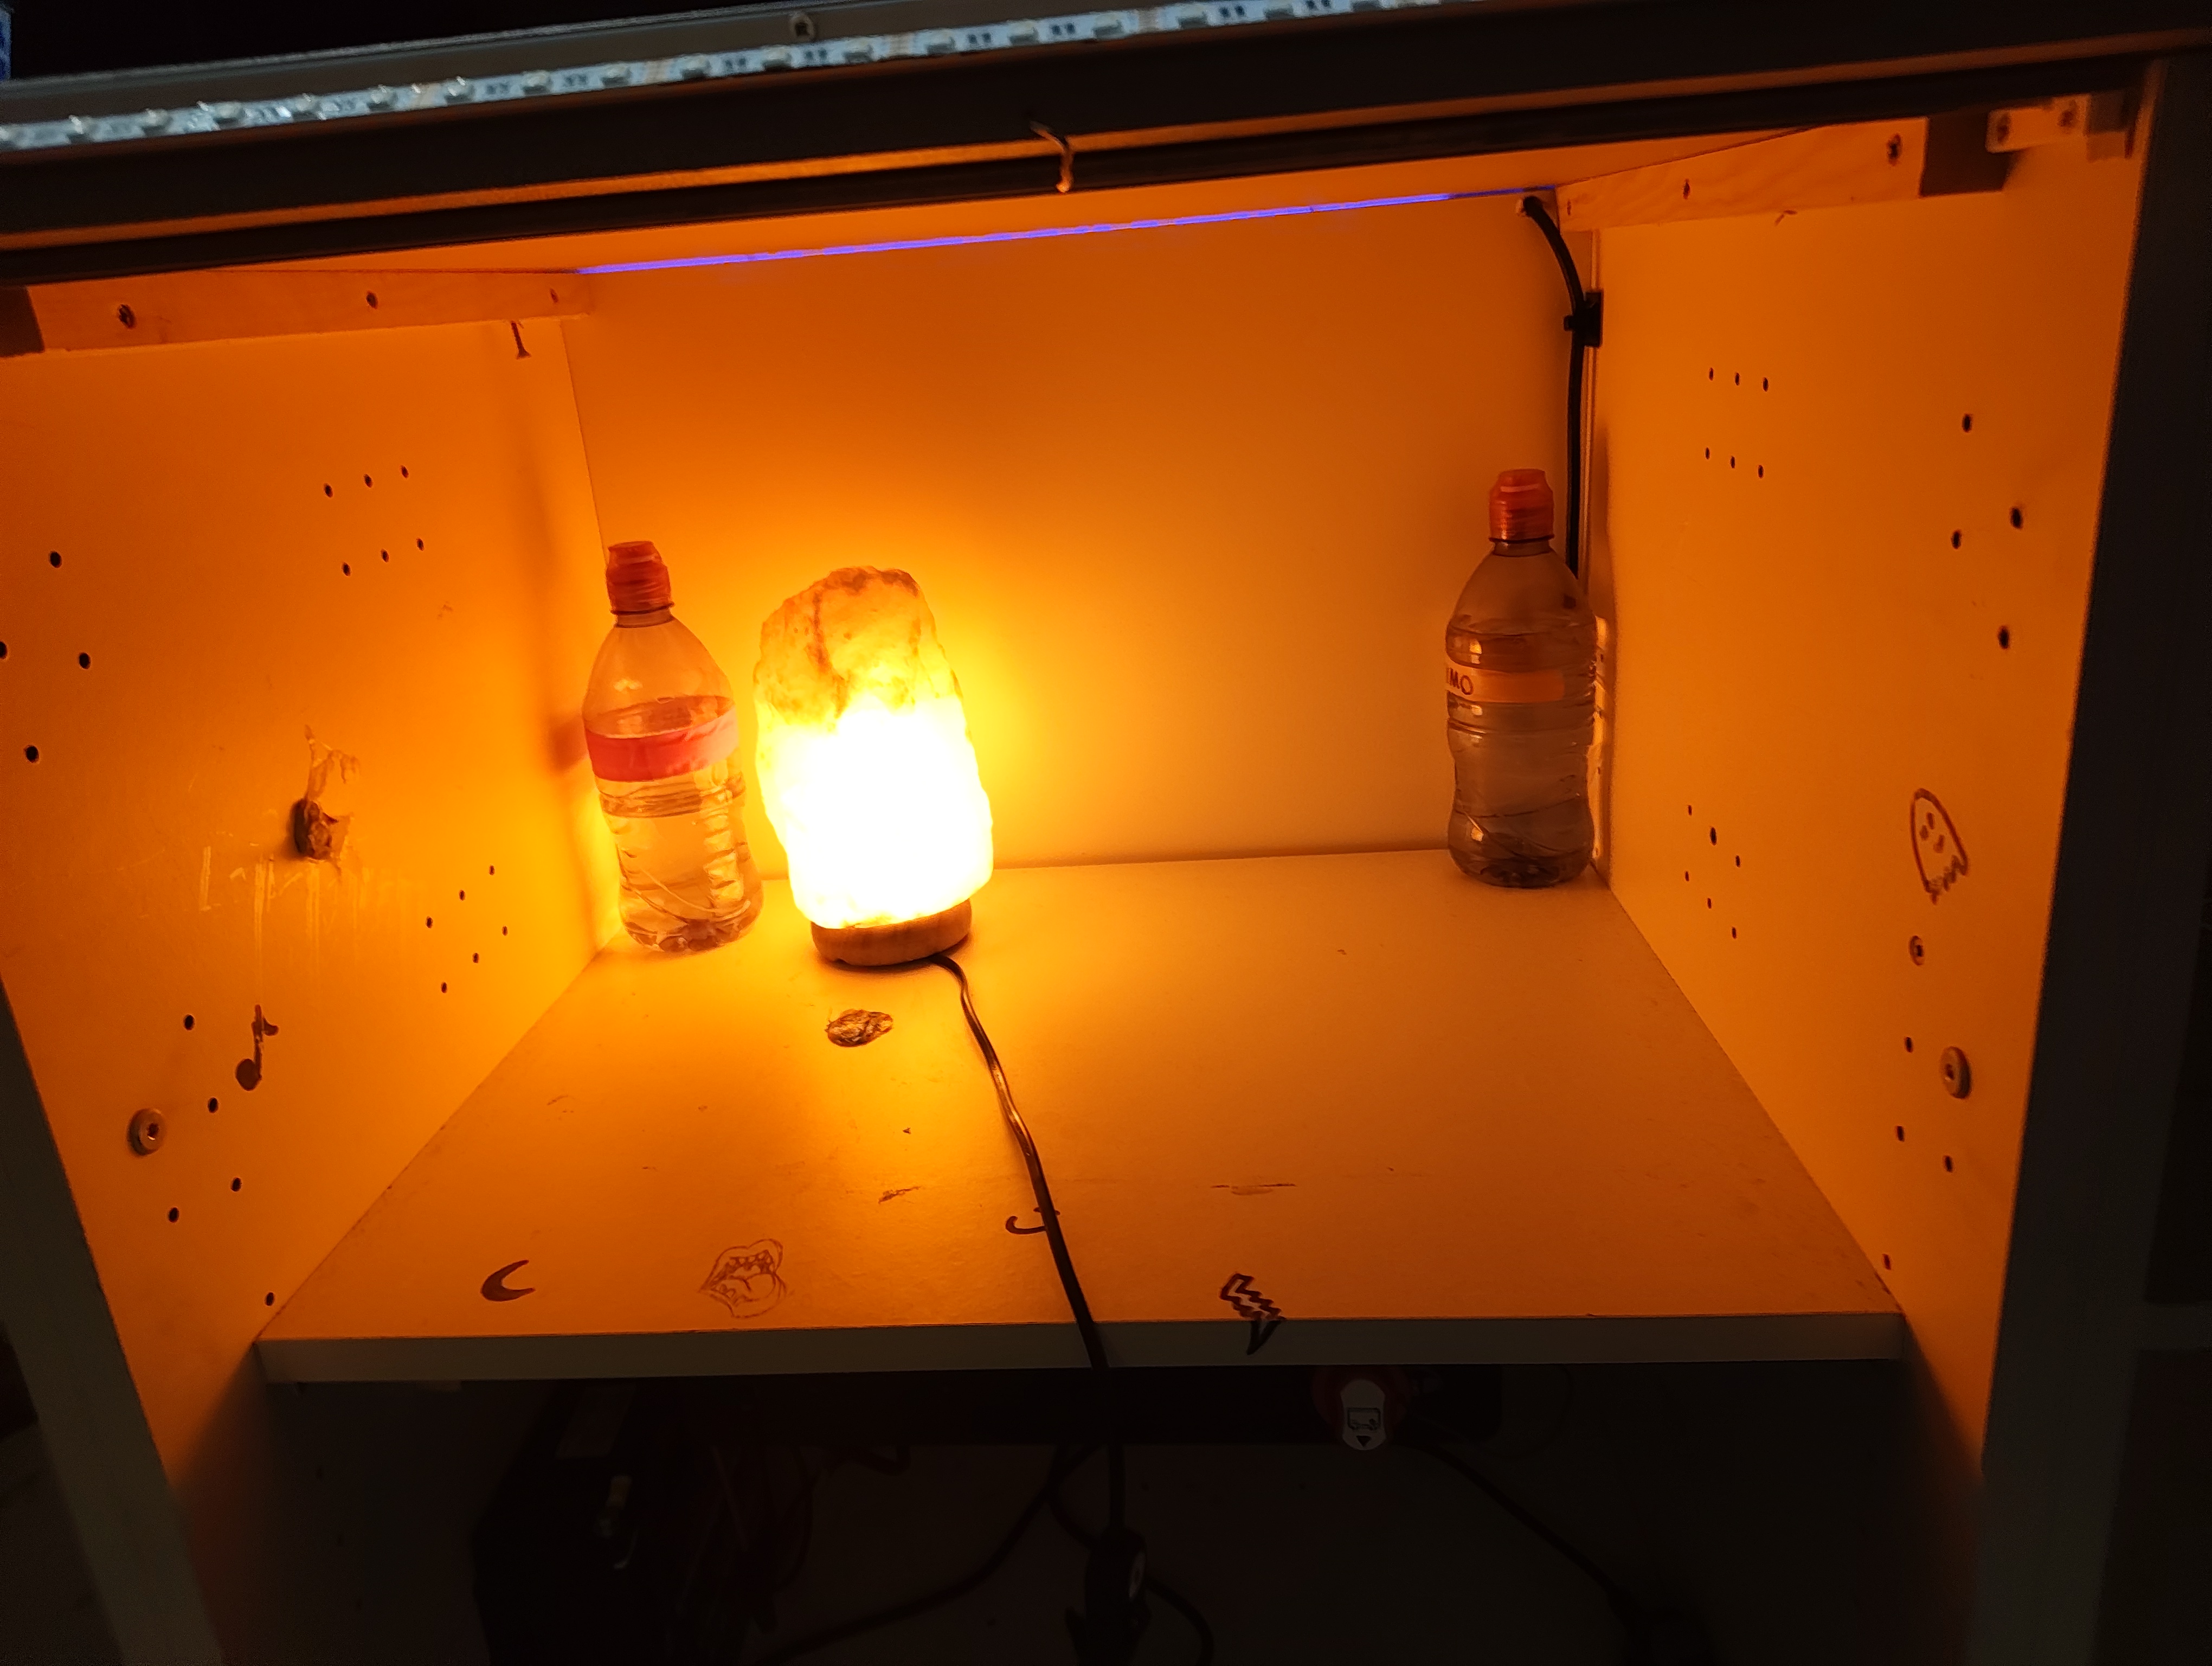
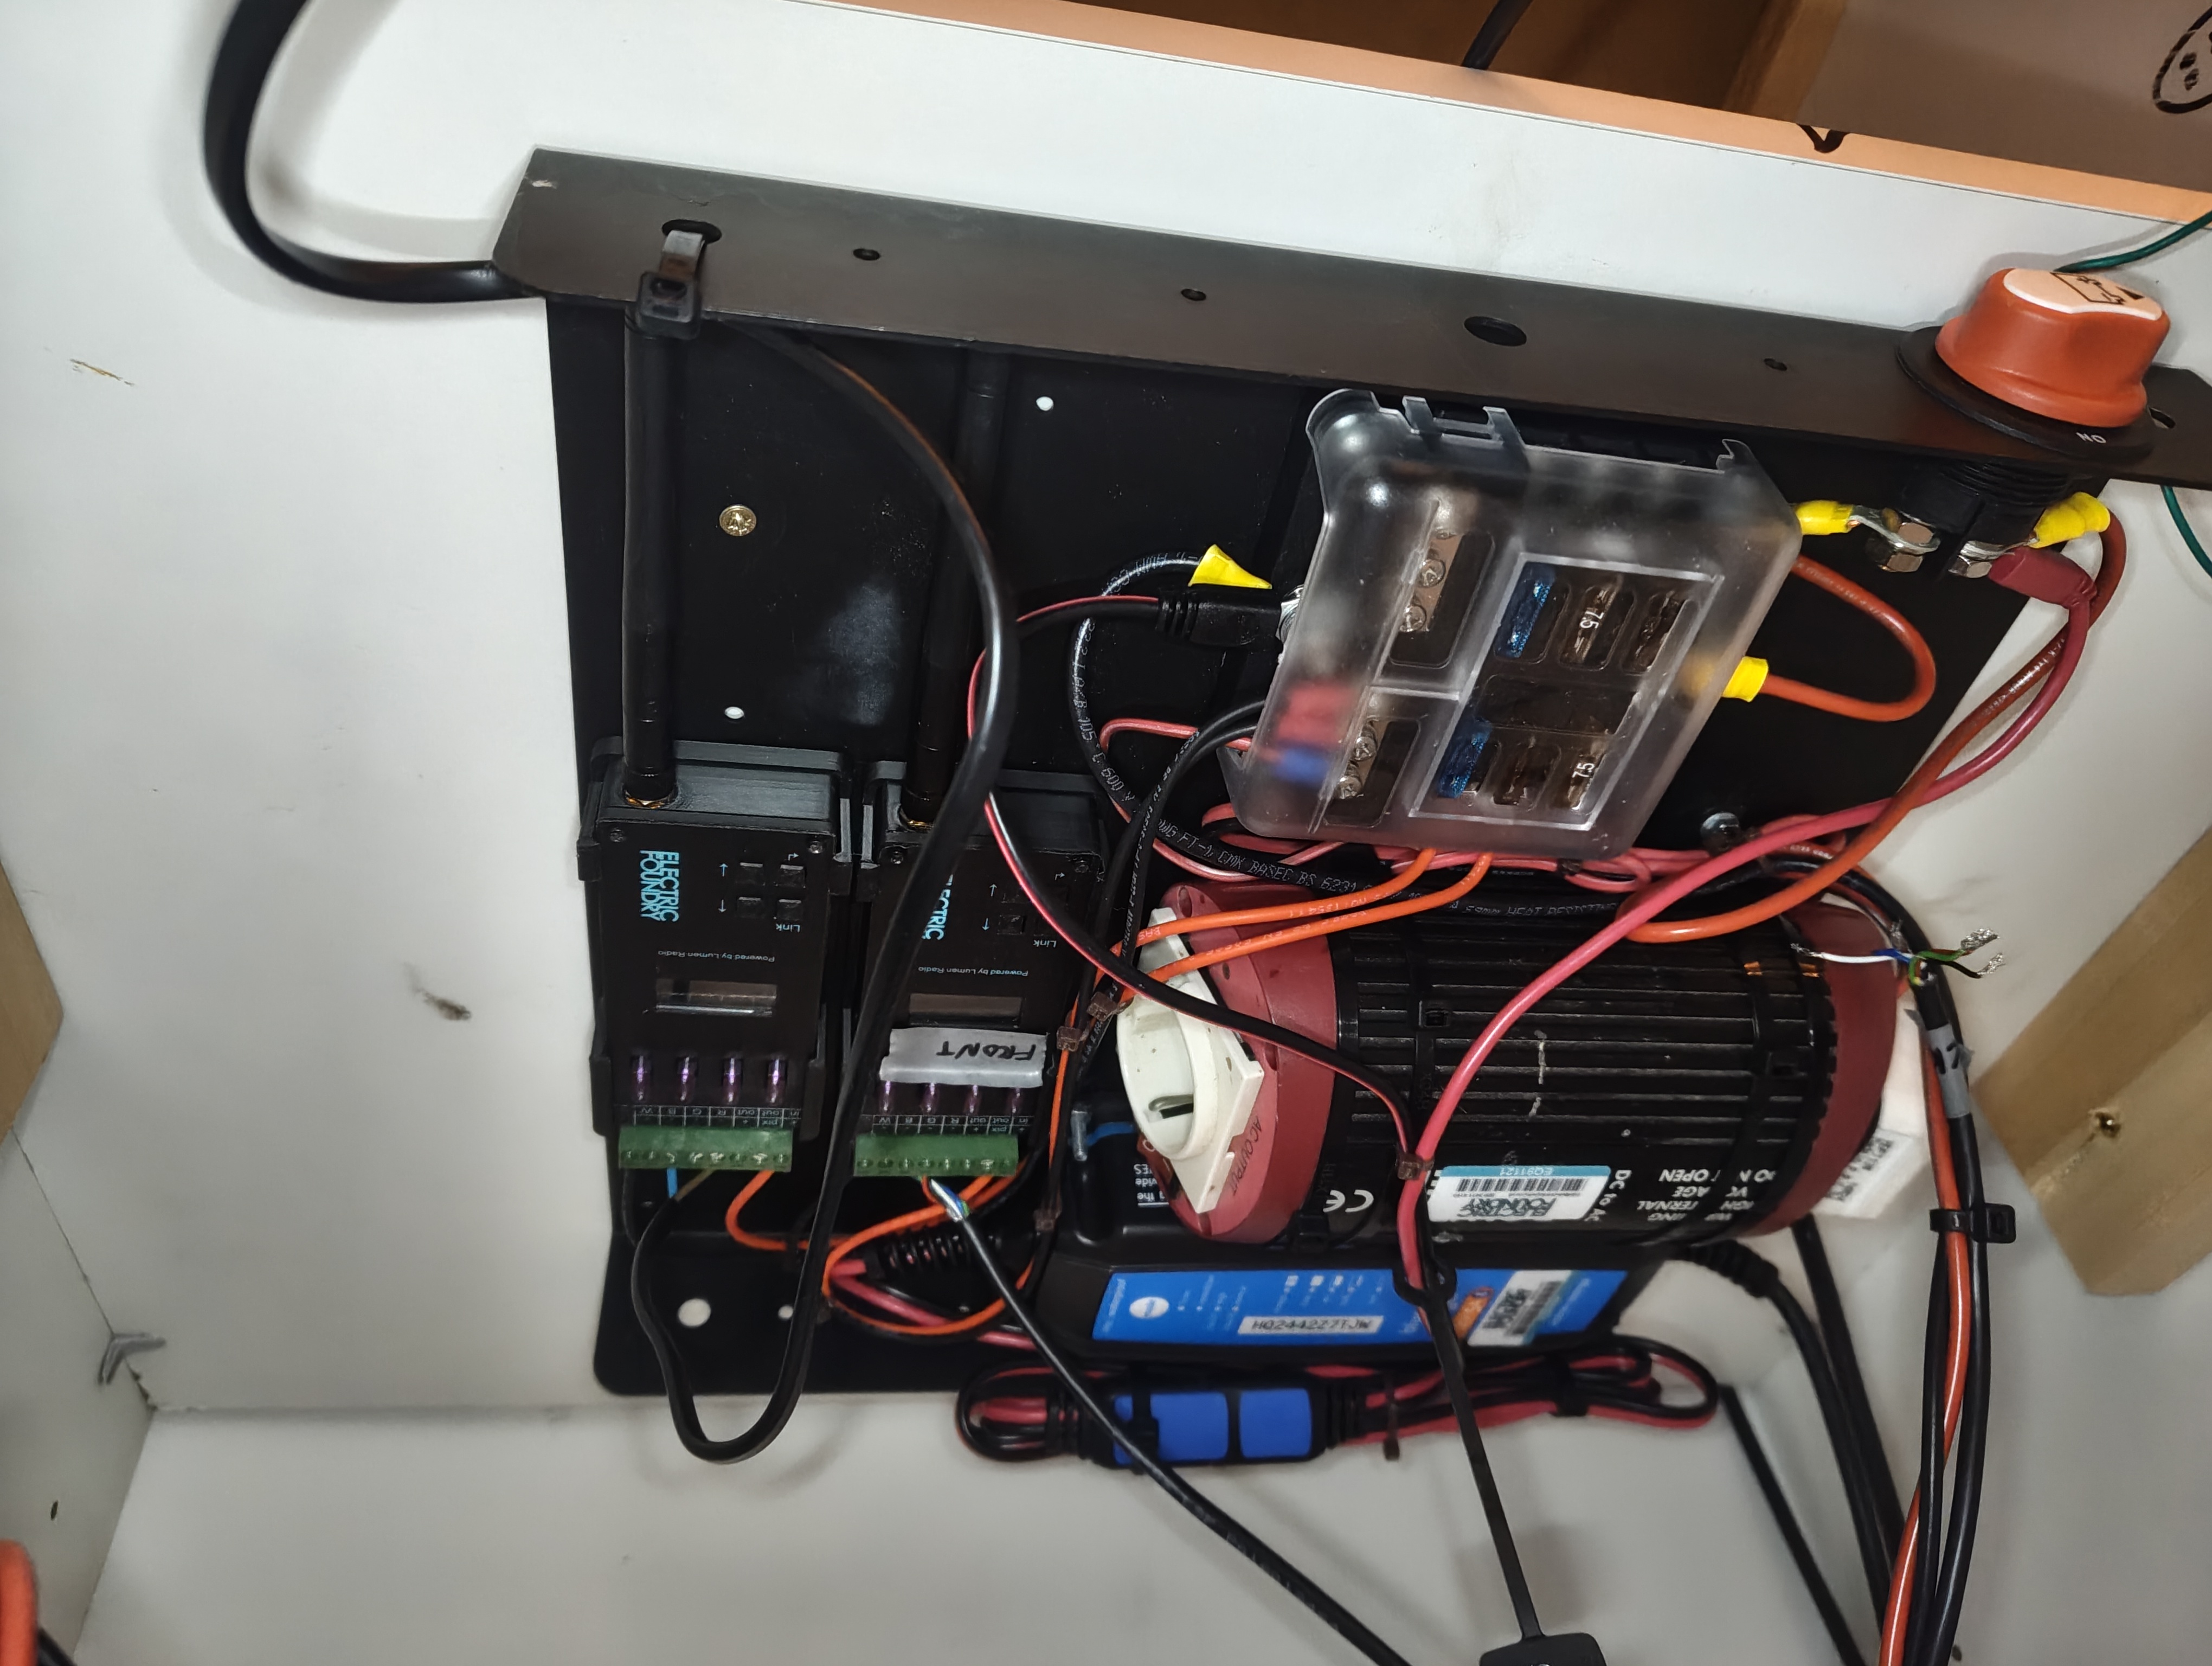
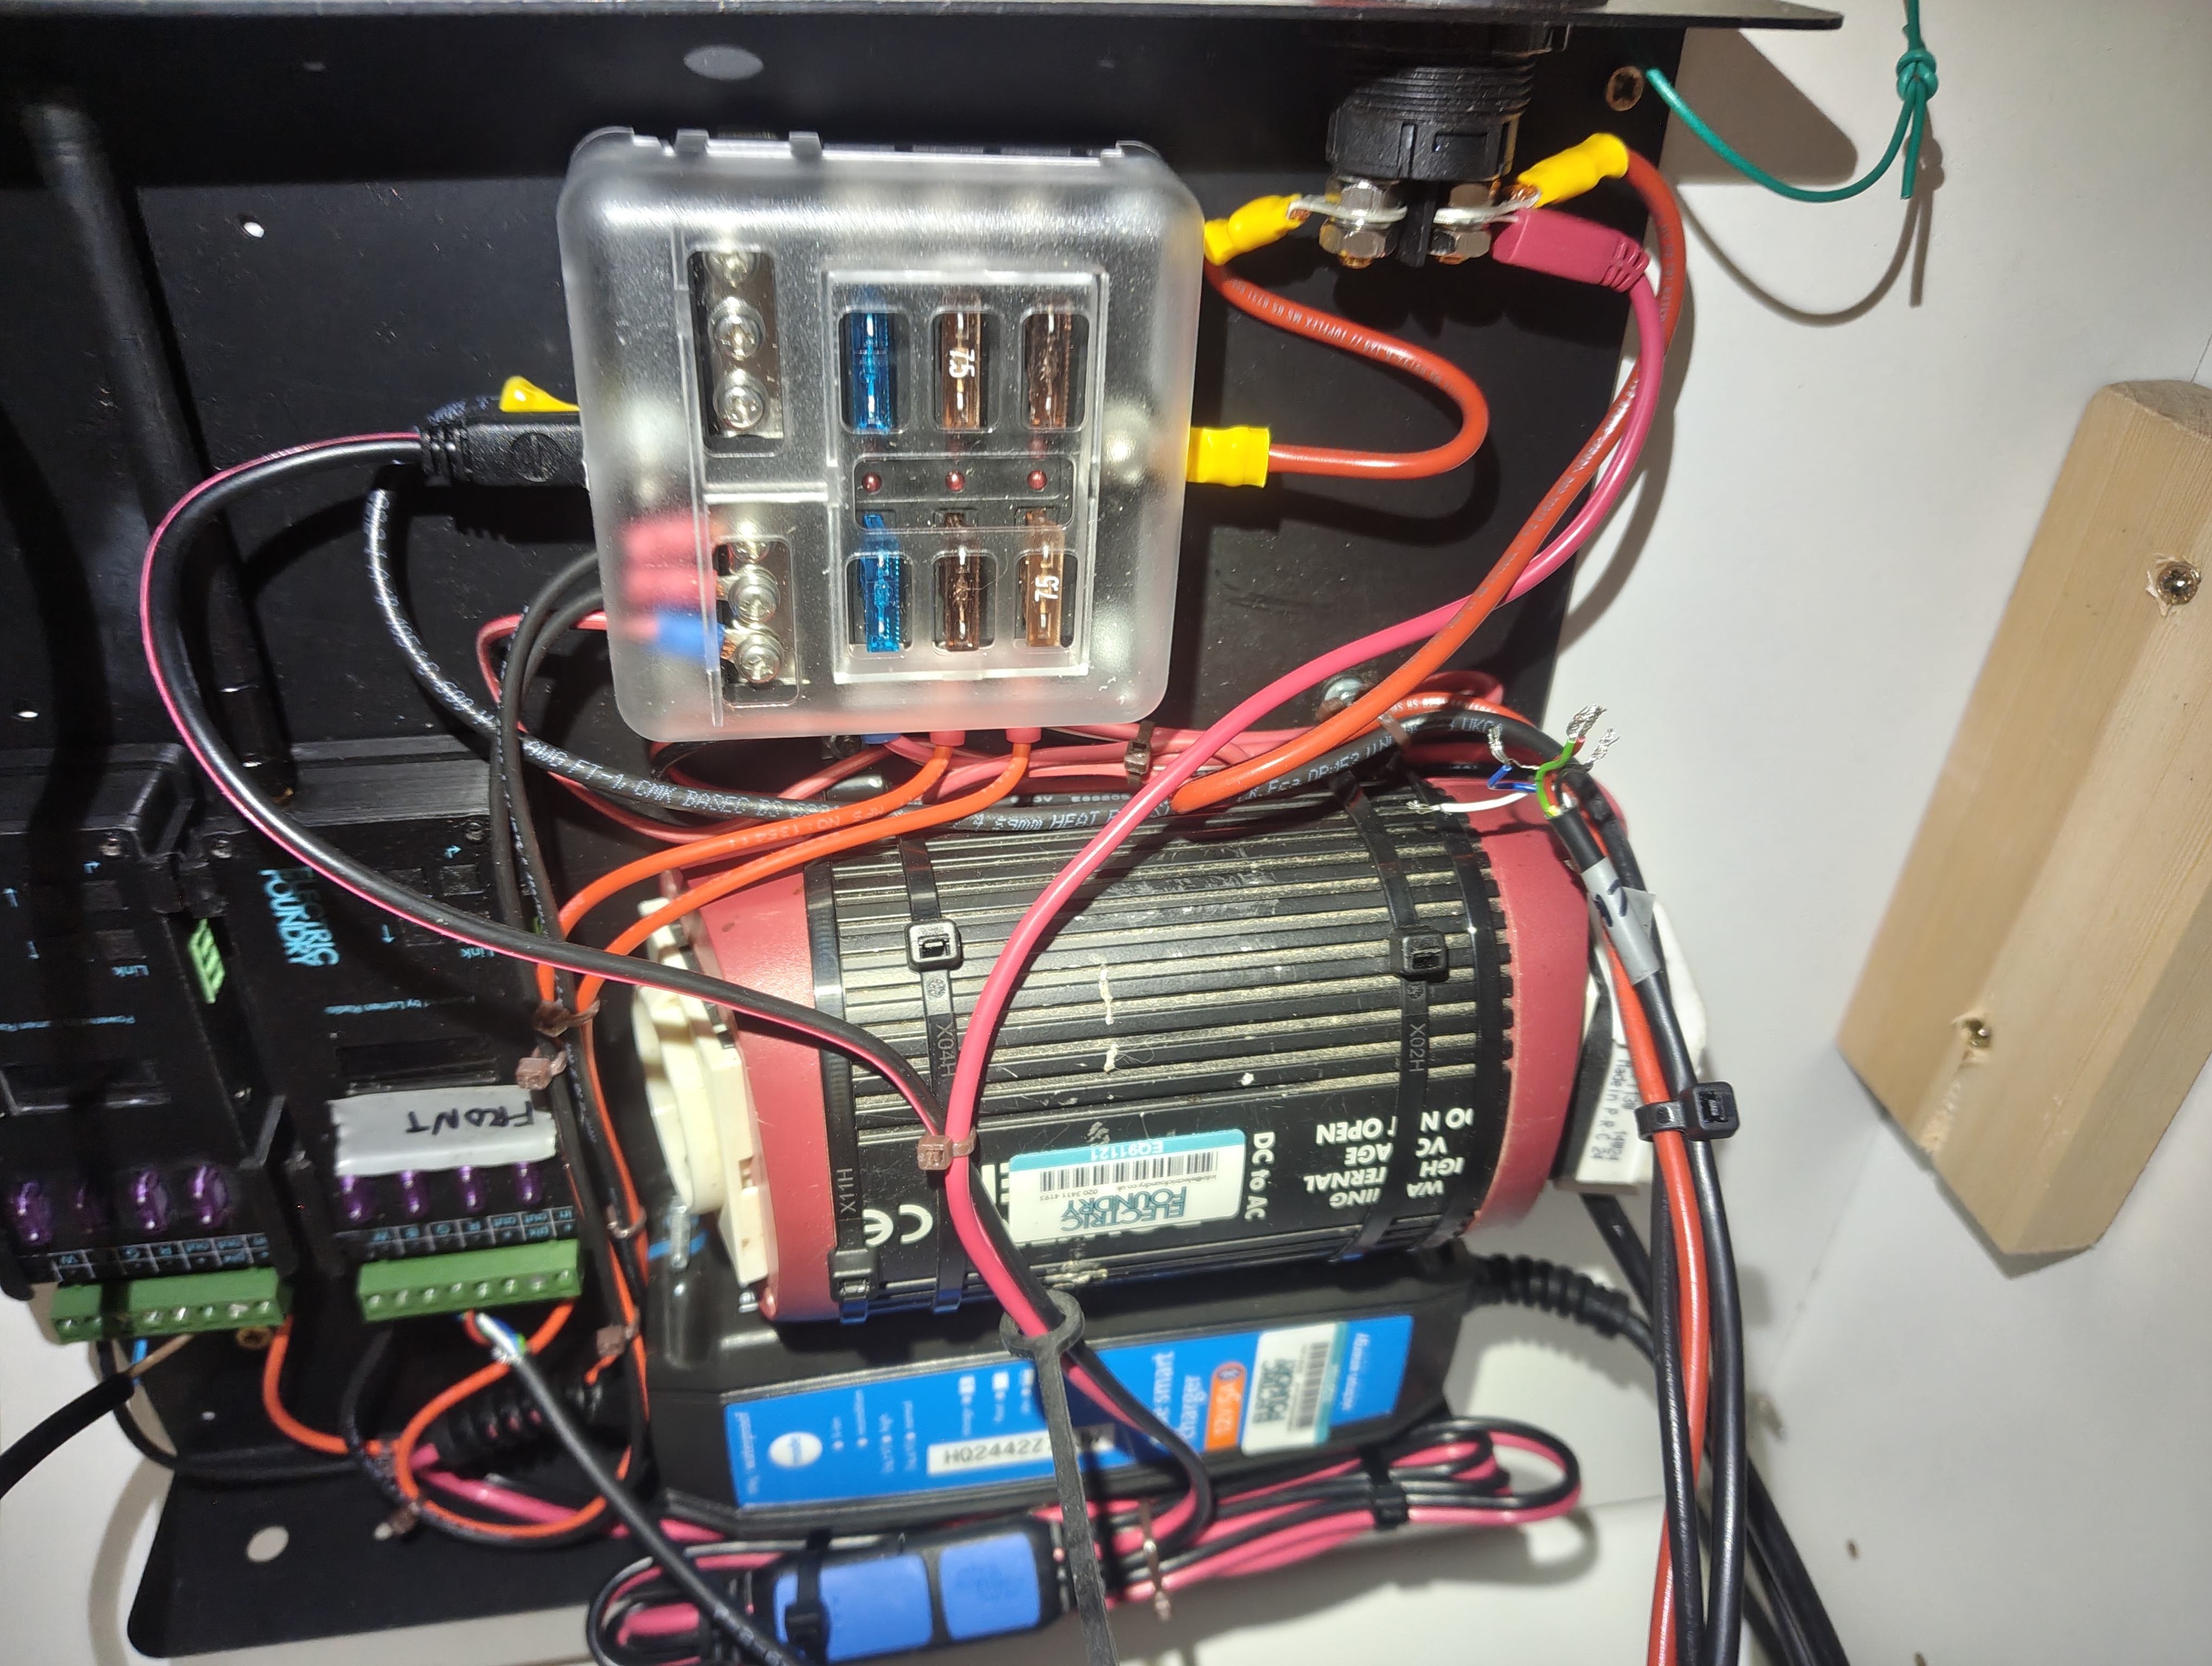
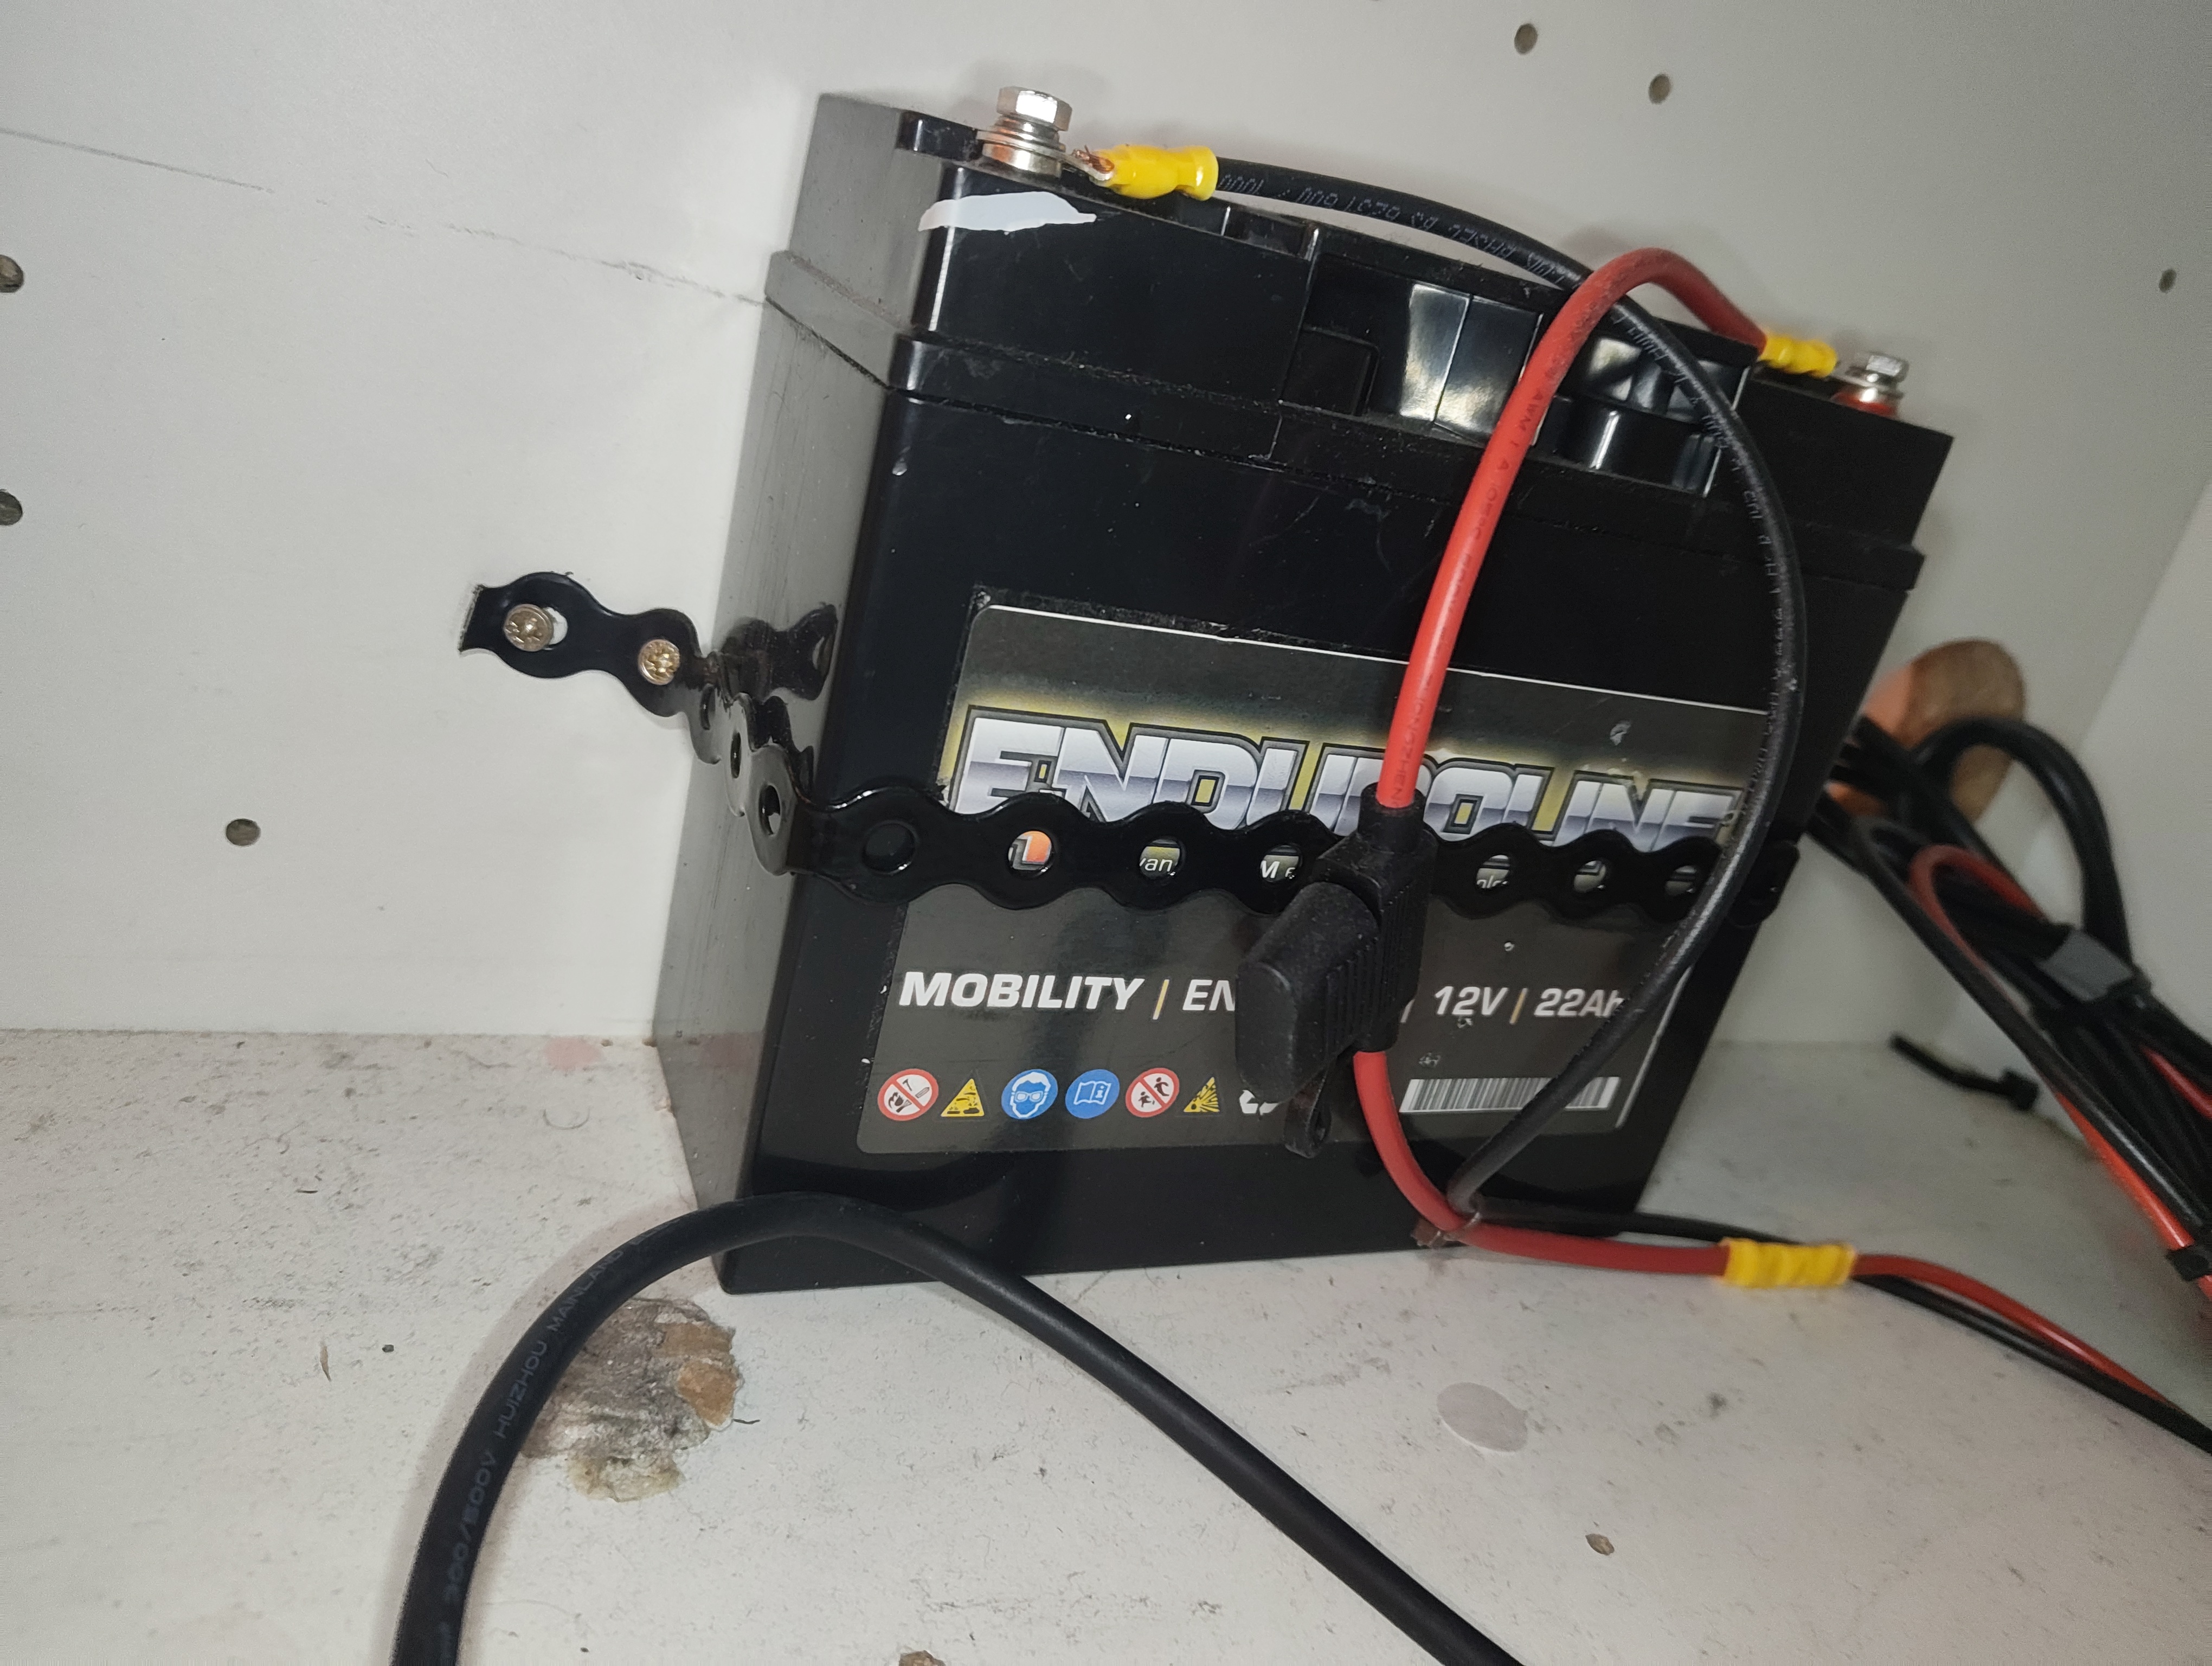
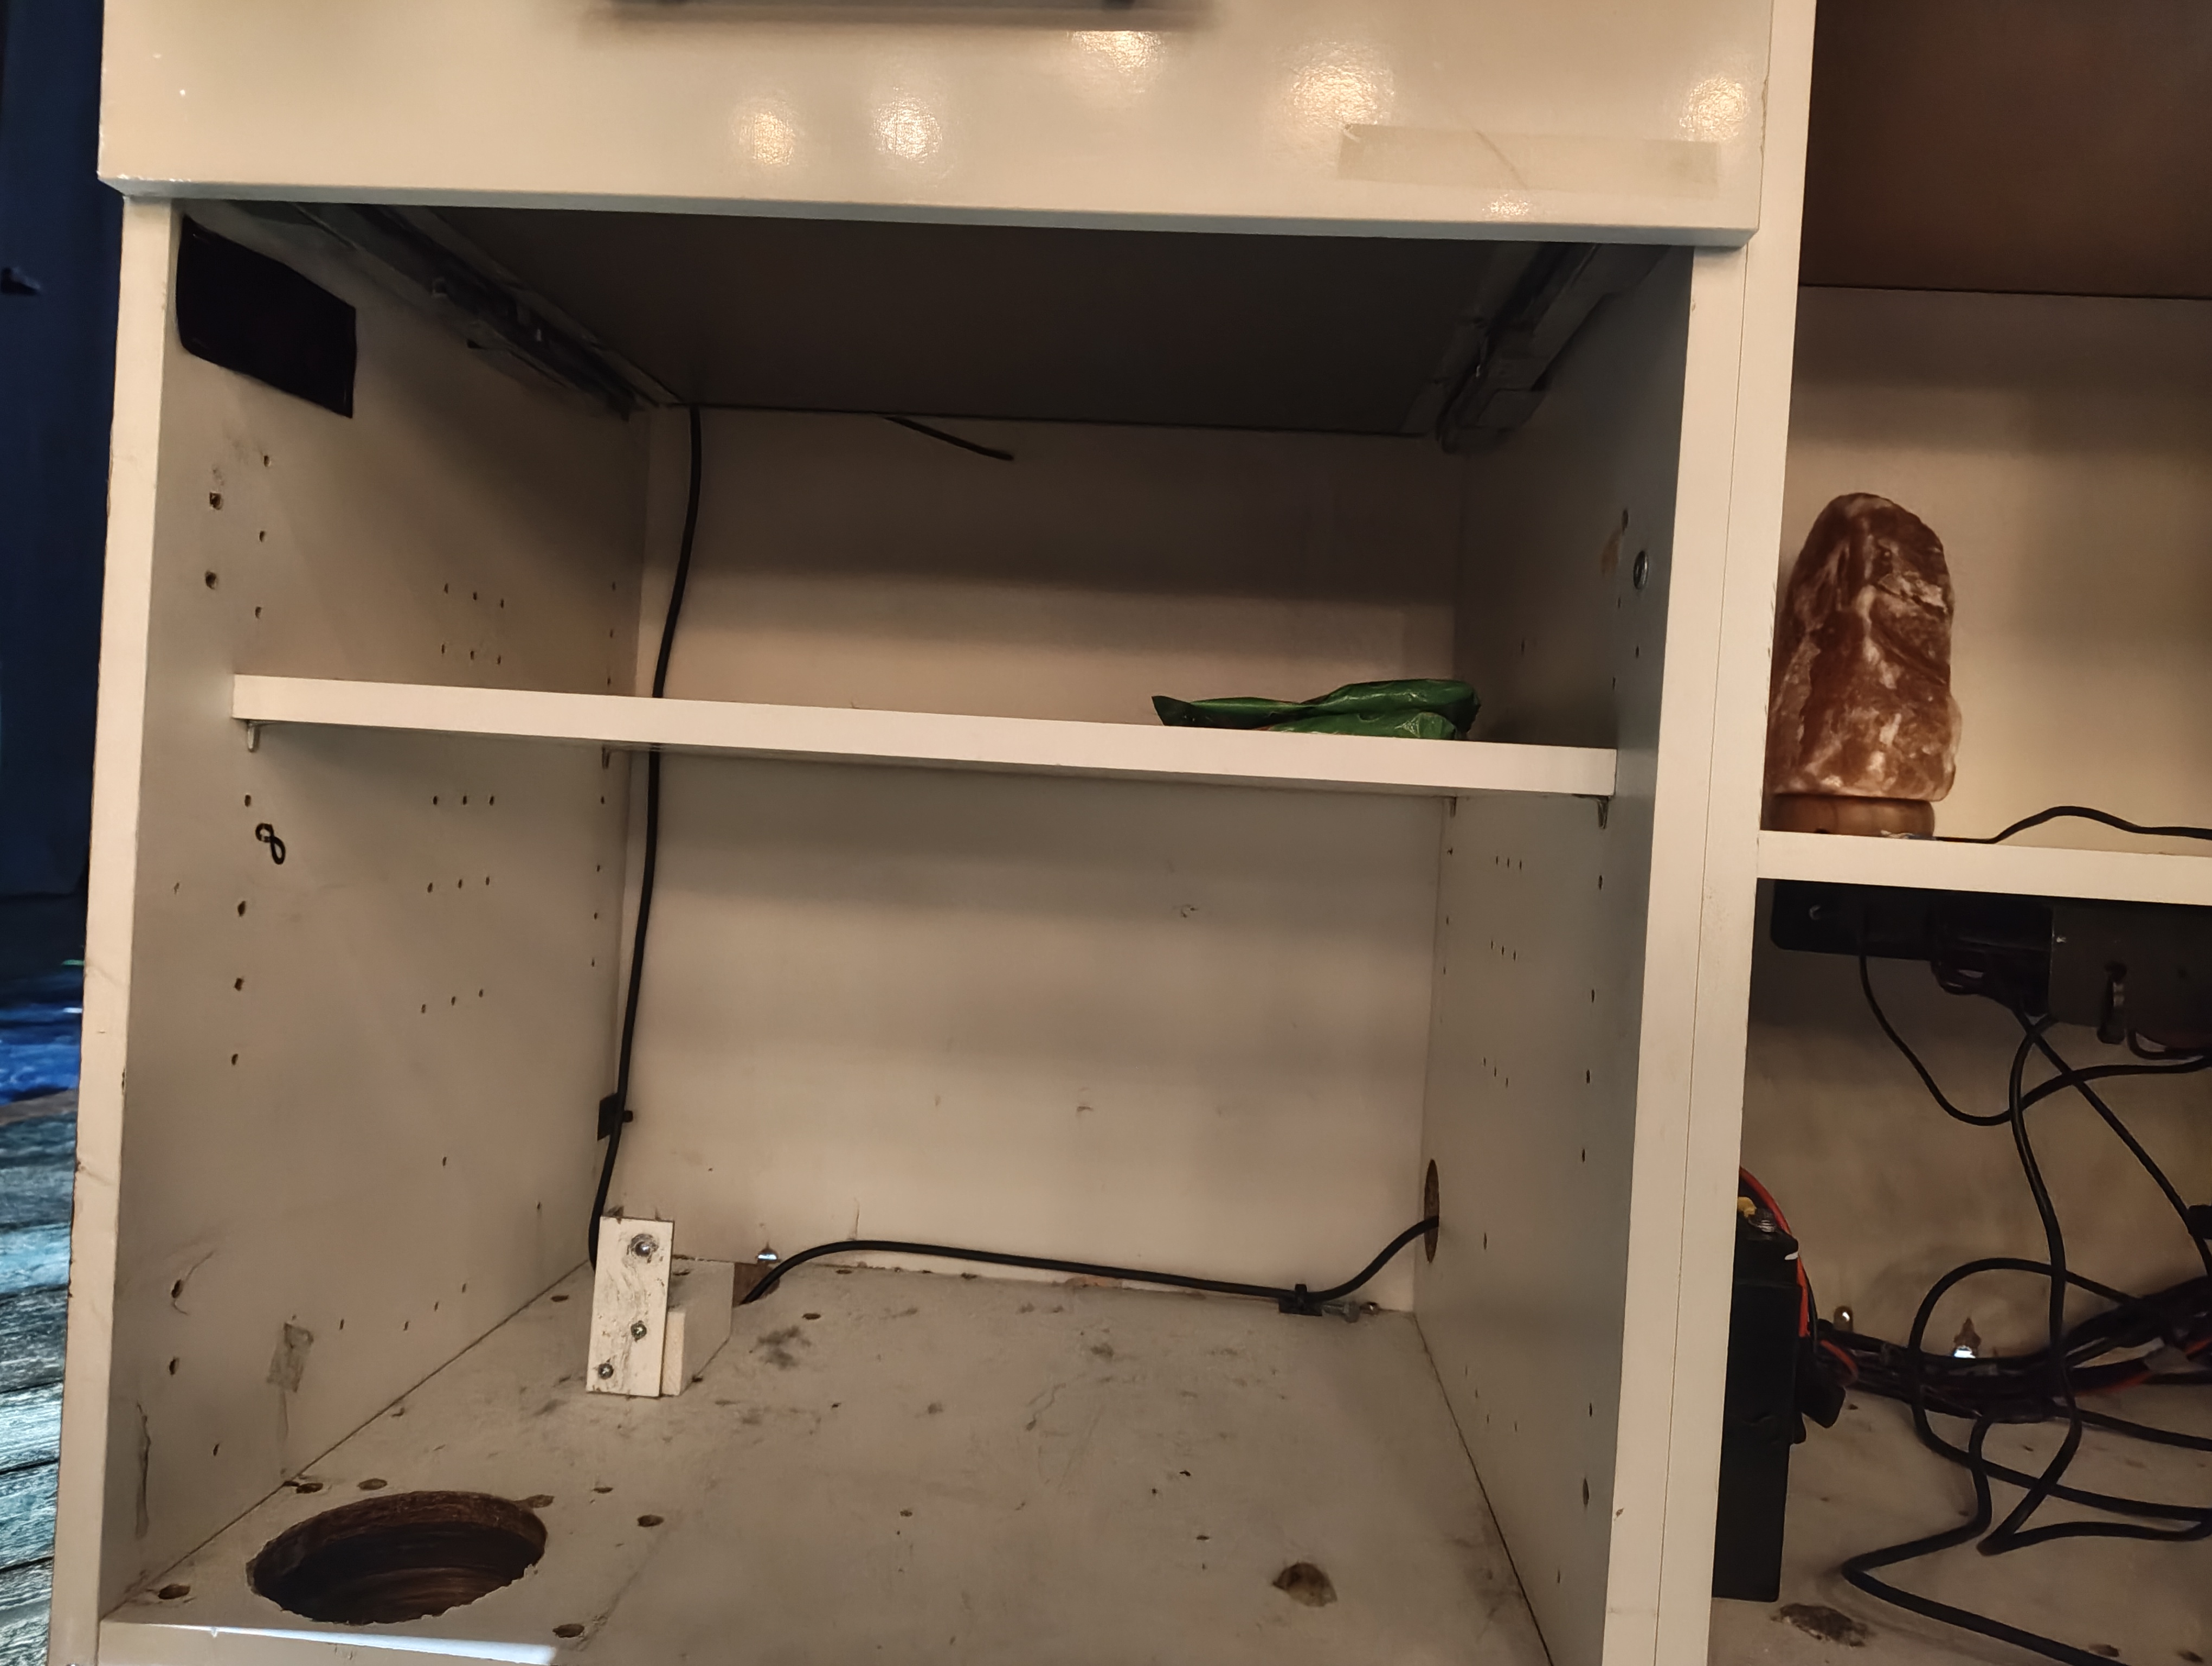
The Garage Counter is a rolling set piece representing a shop counter. It contains two separately controlled lighting elements (RGBW LED backlight tape and a salt lamp), plus a 230V system for powering props. The unit runs off a 12V 22Ah lead acid battery with a built-in Victron charger.
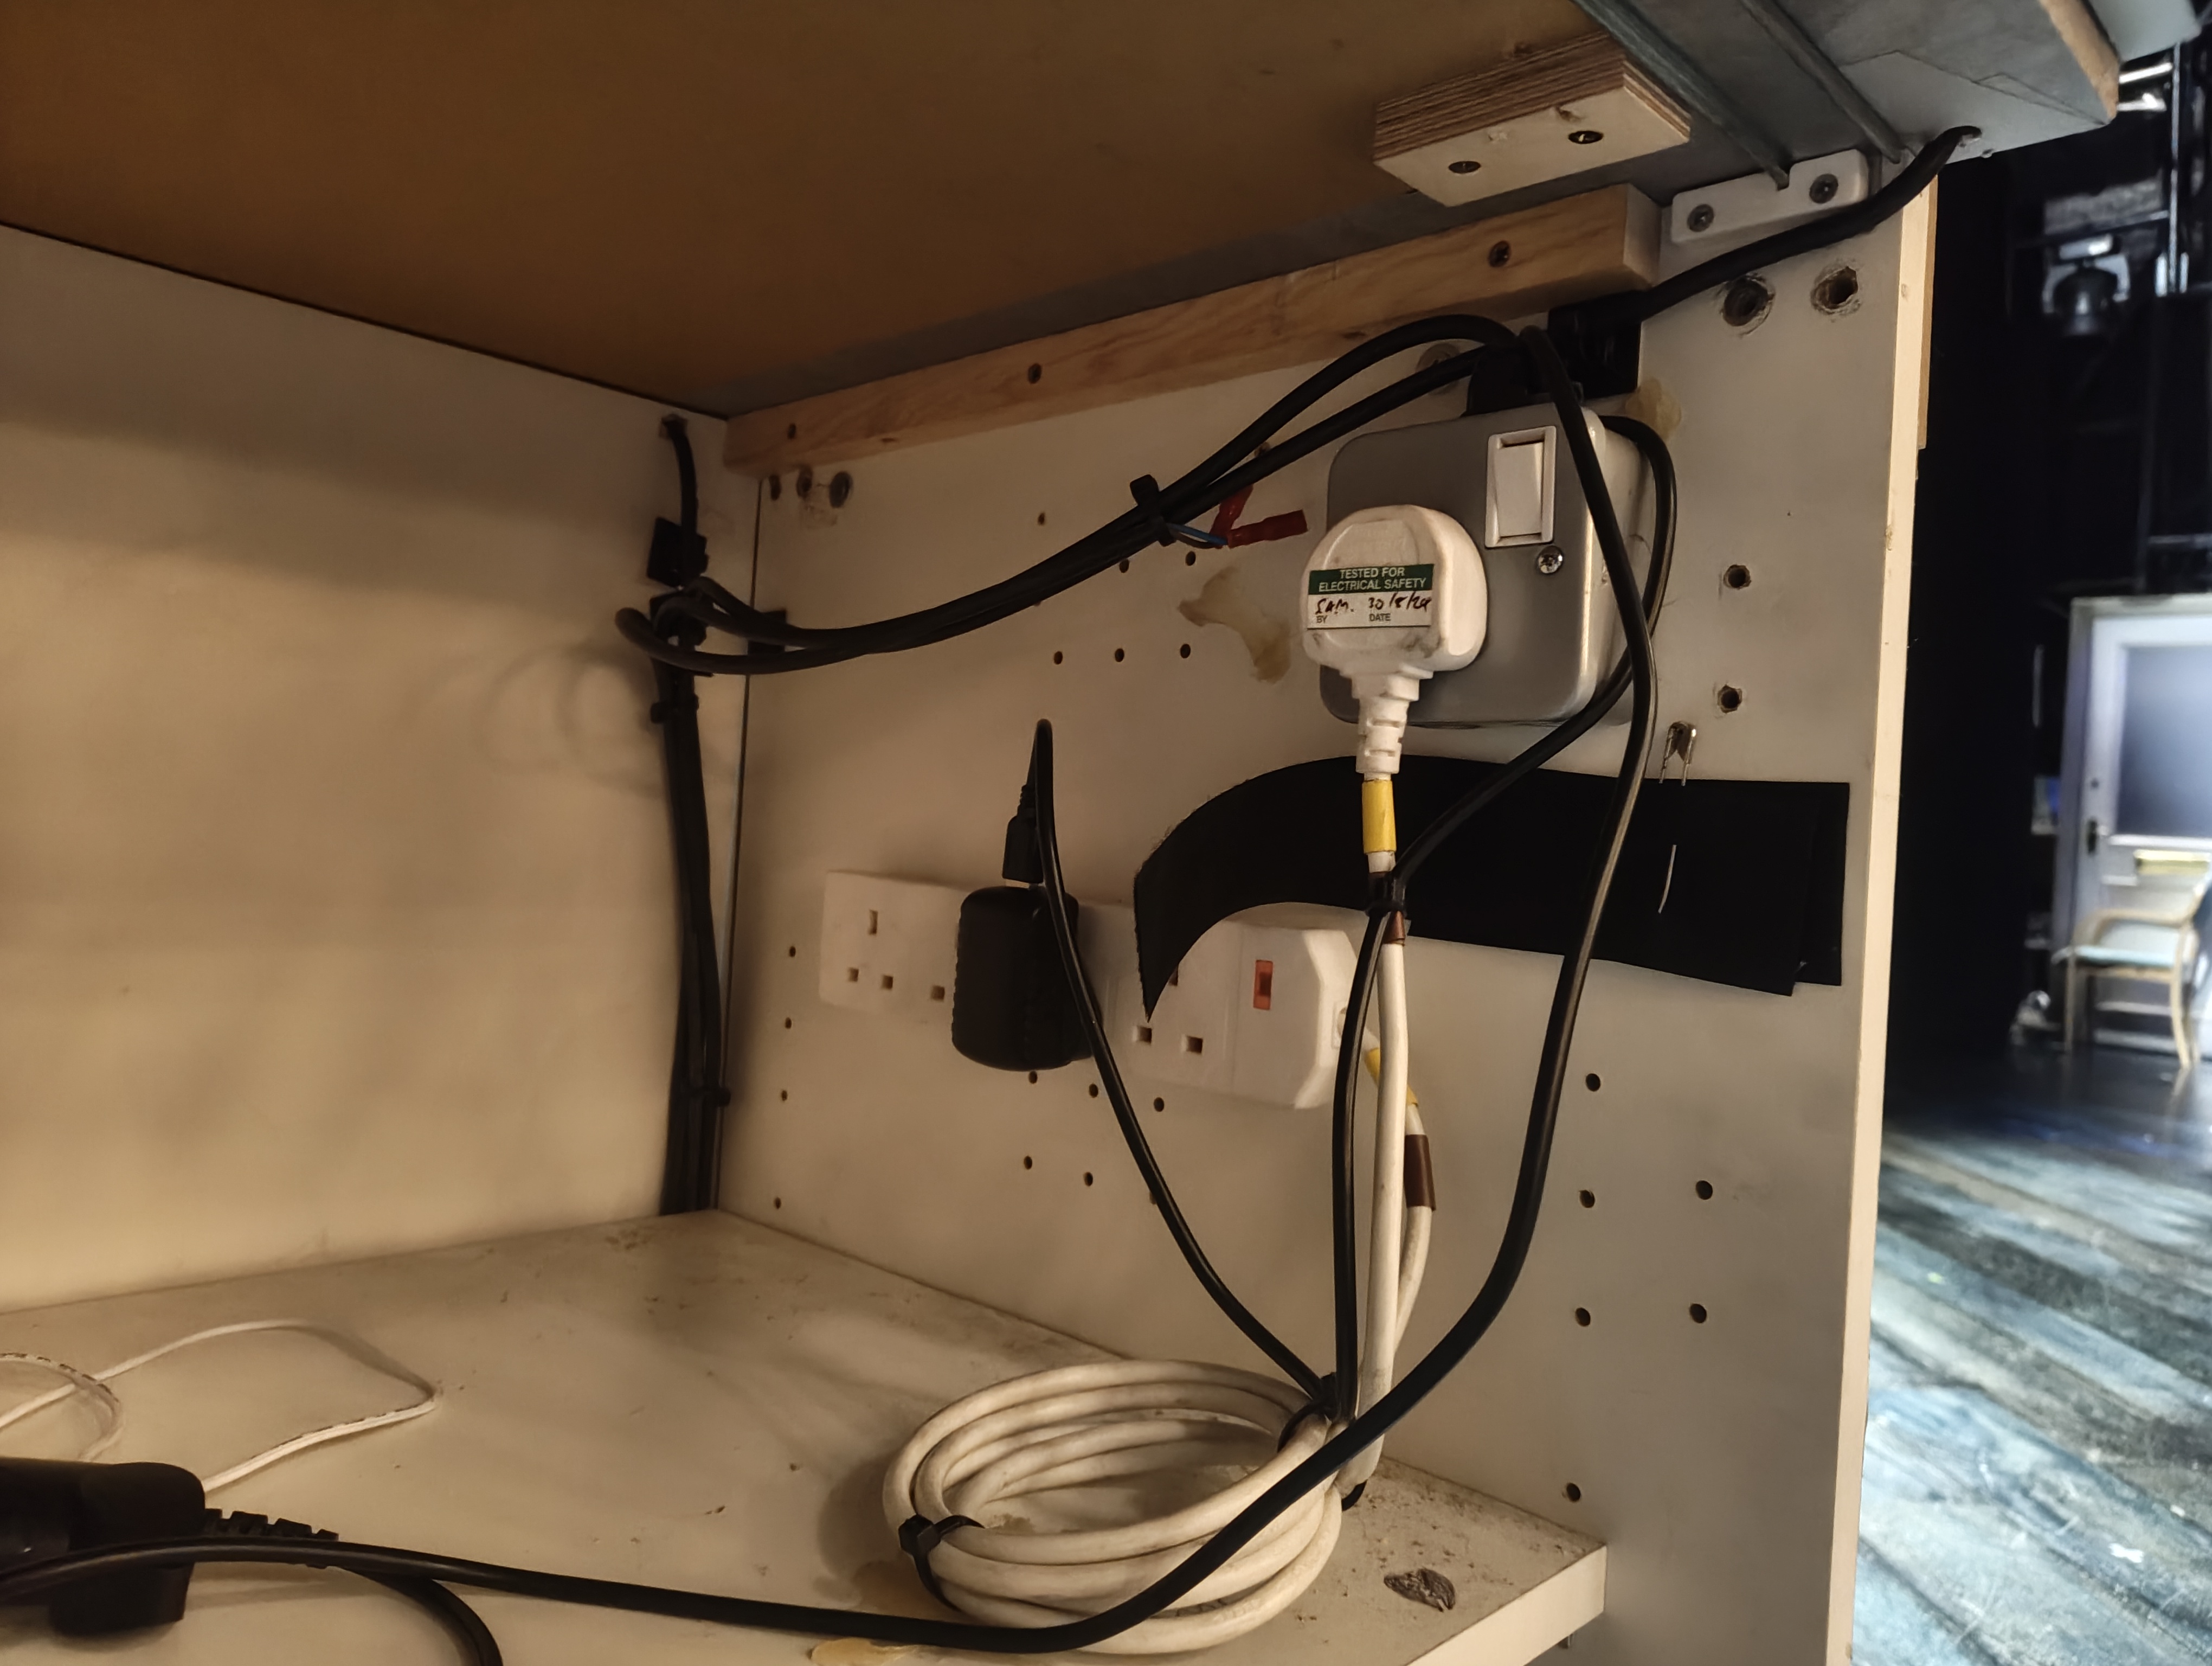
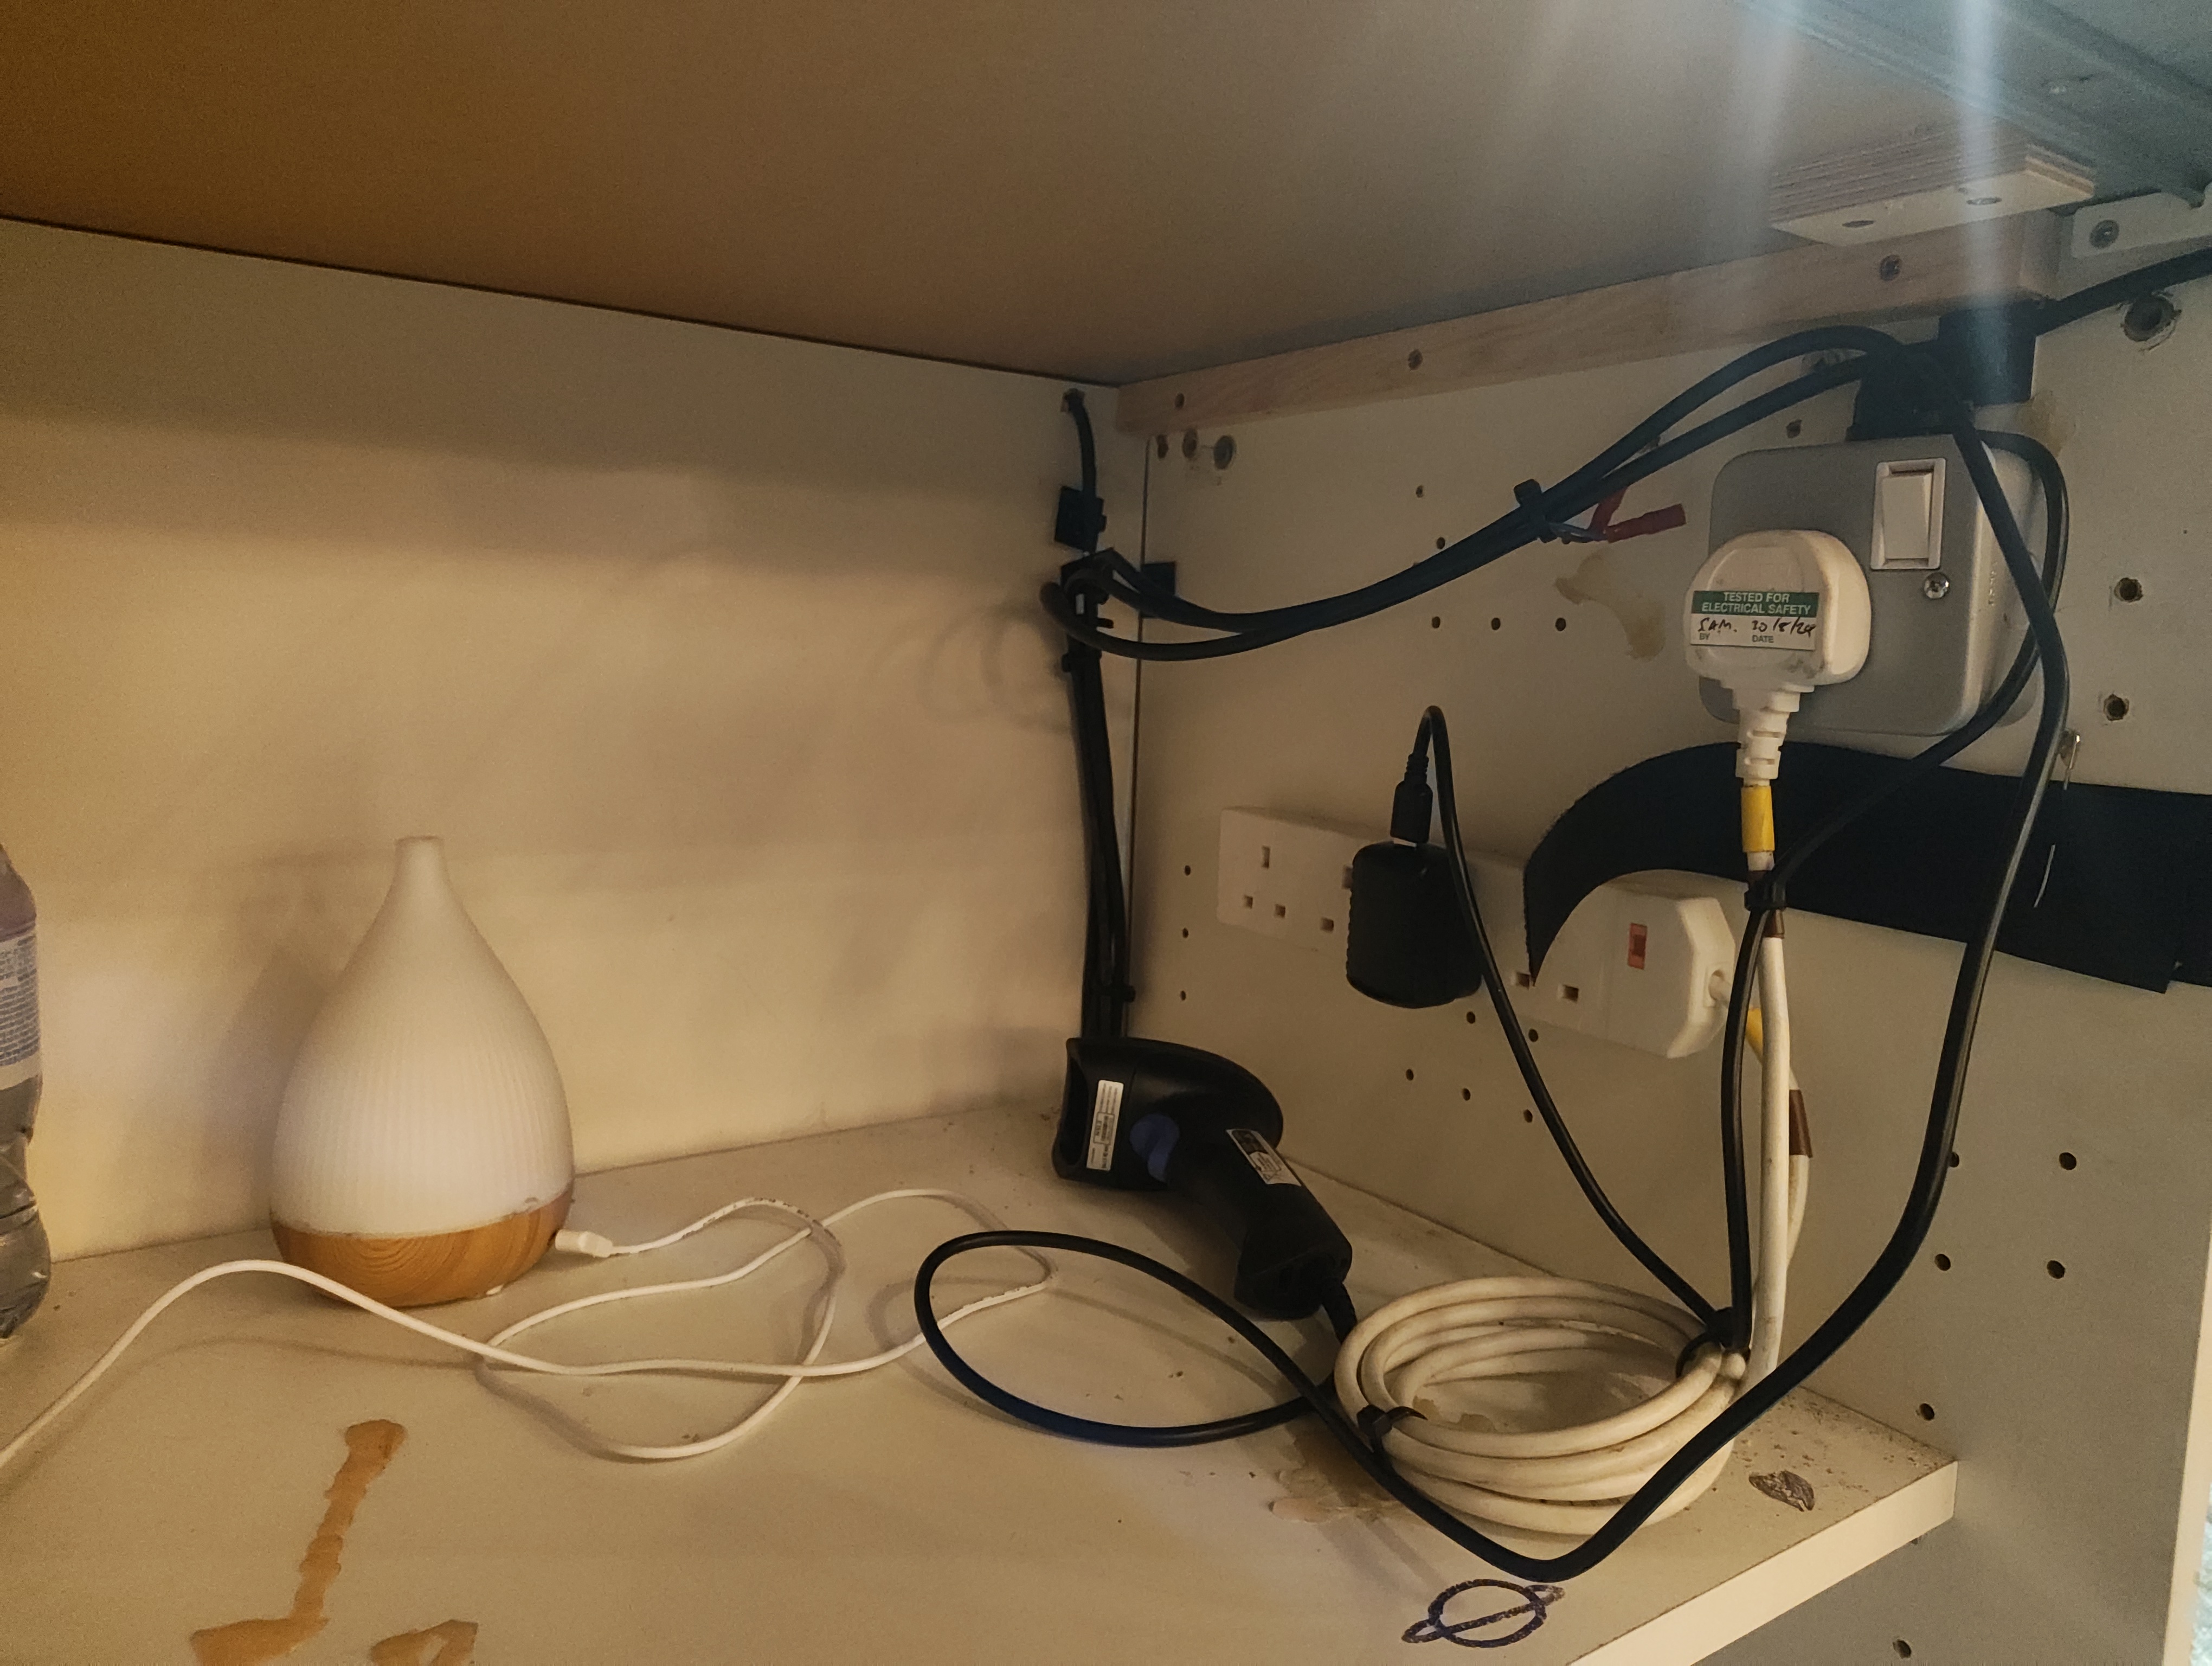
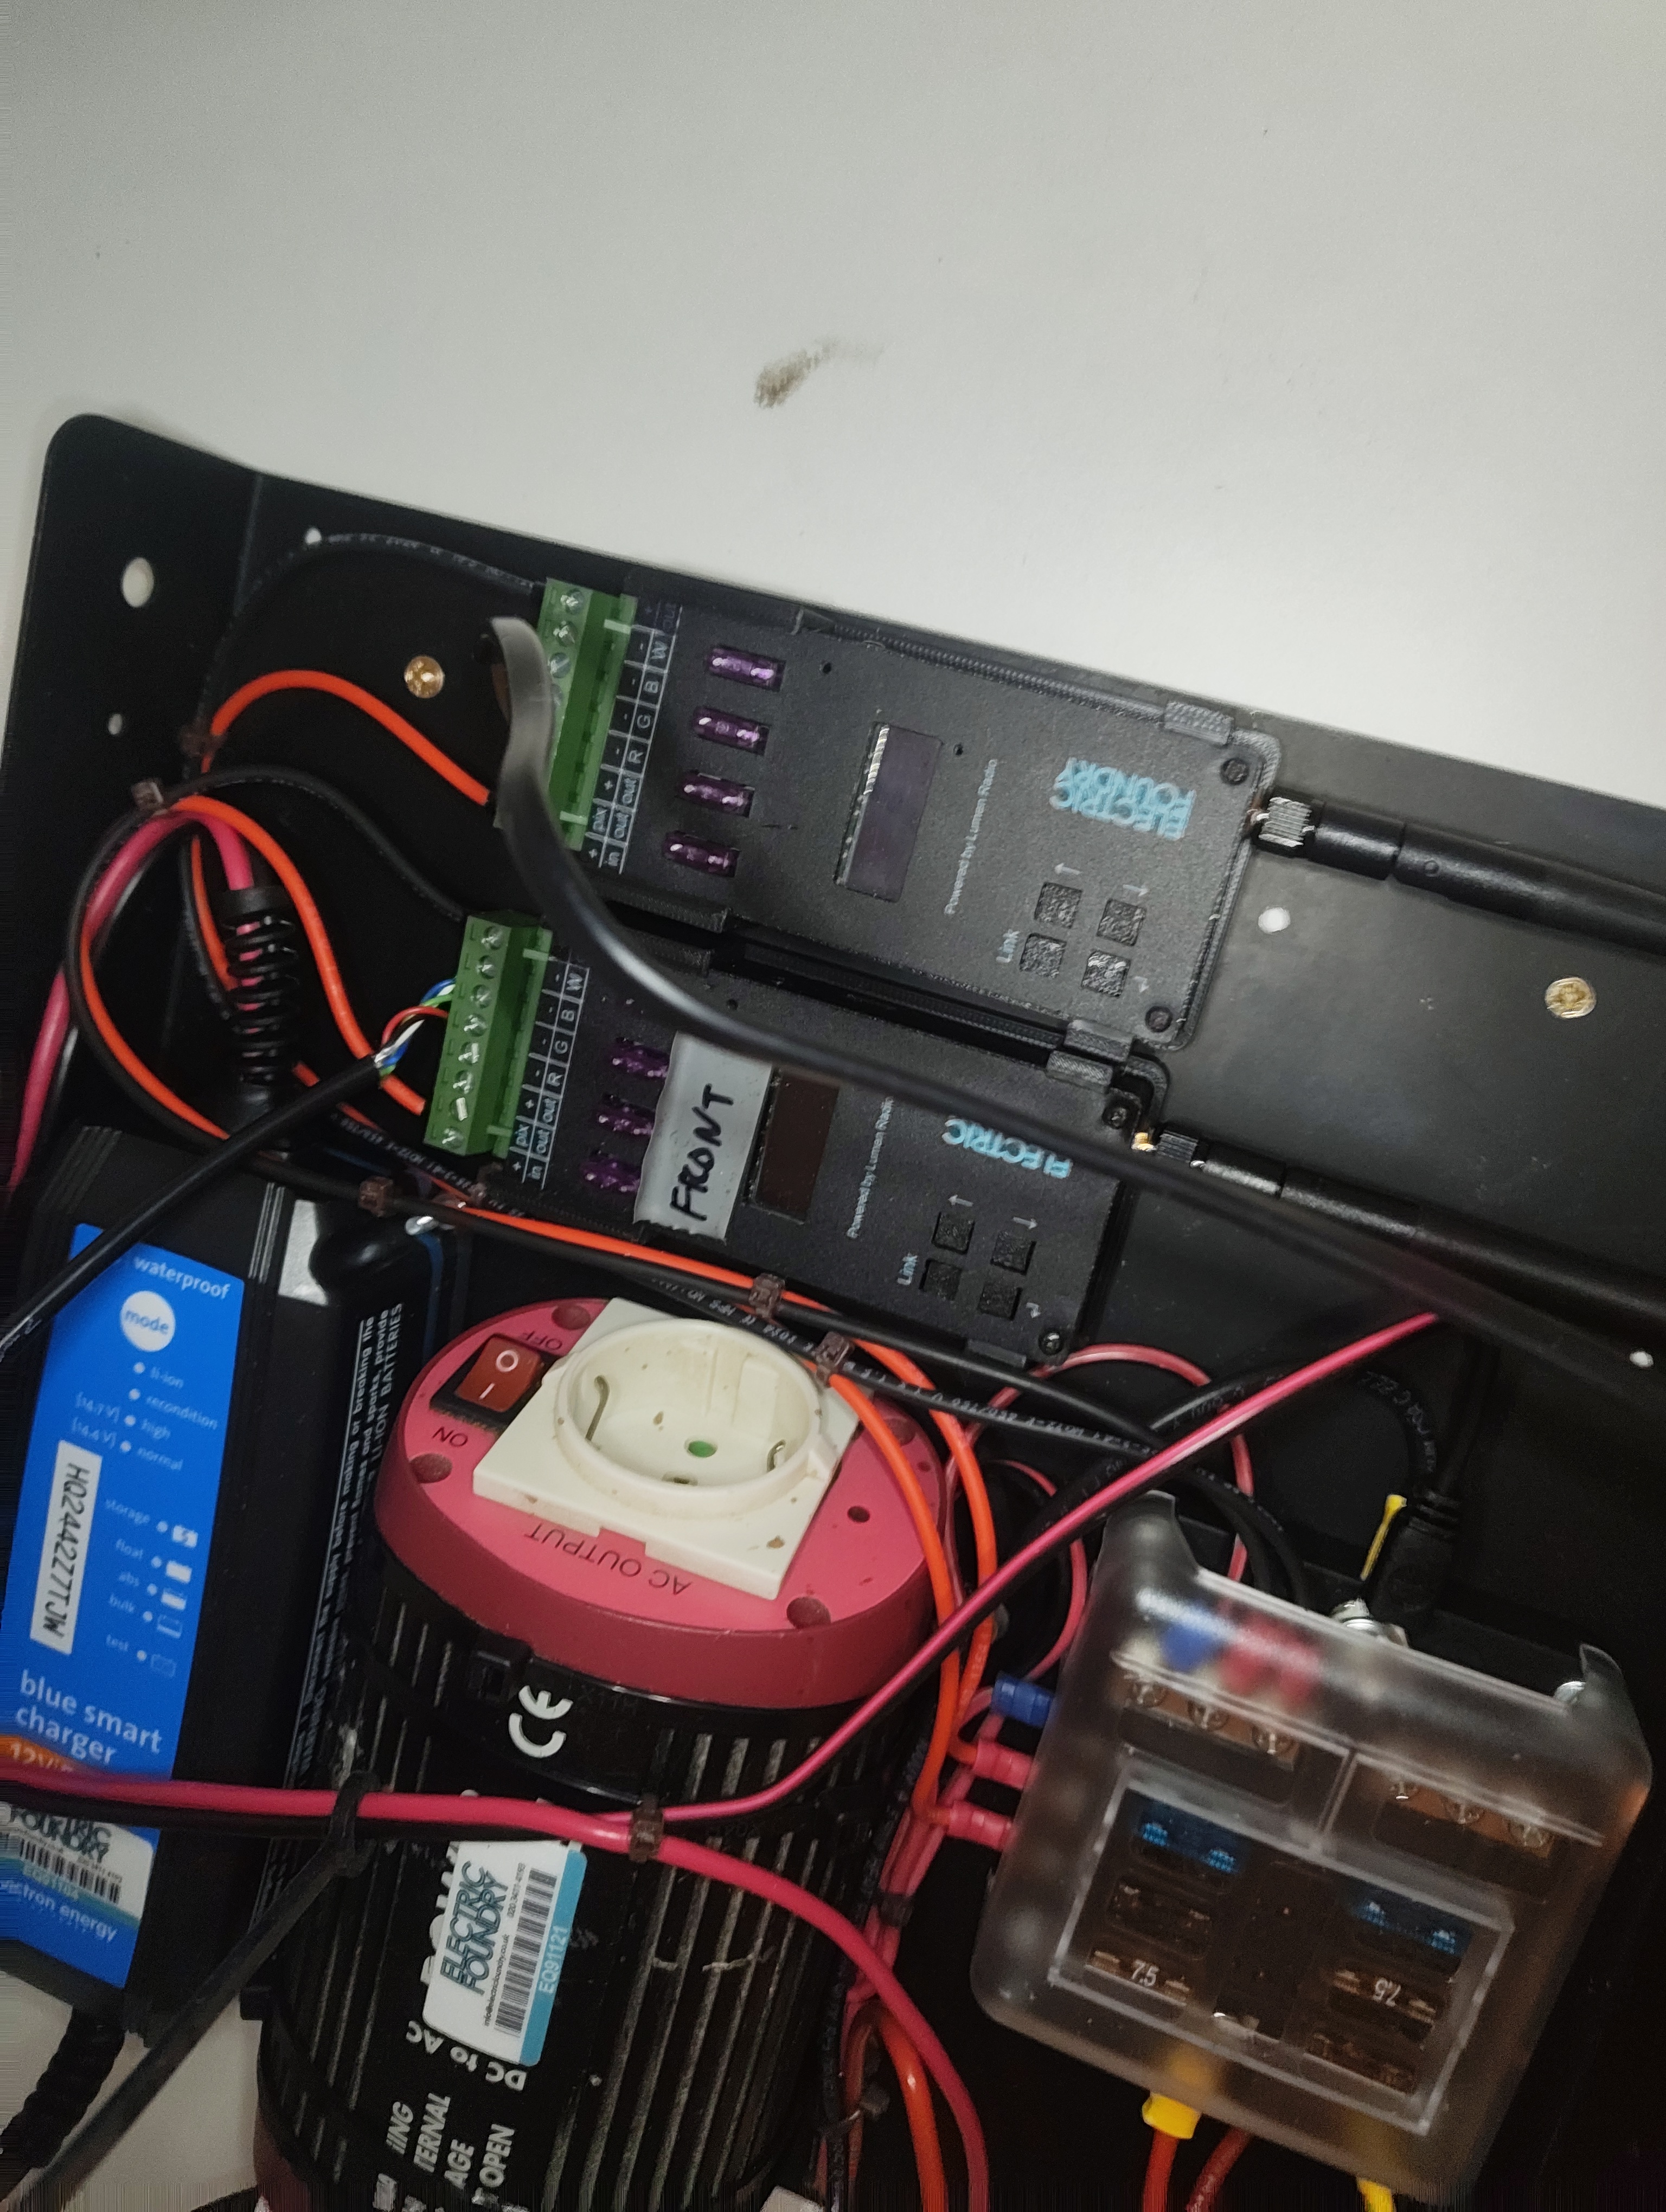
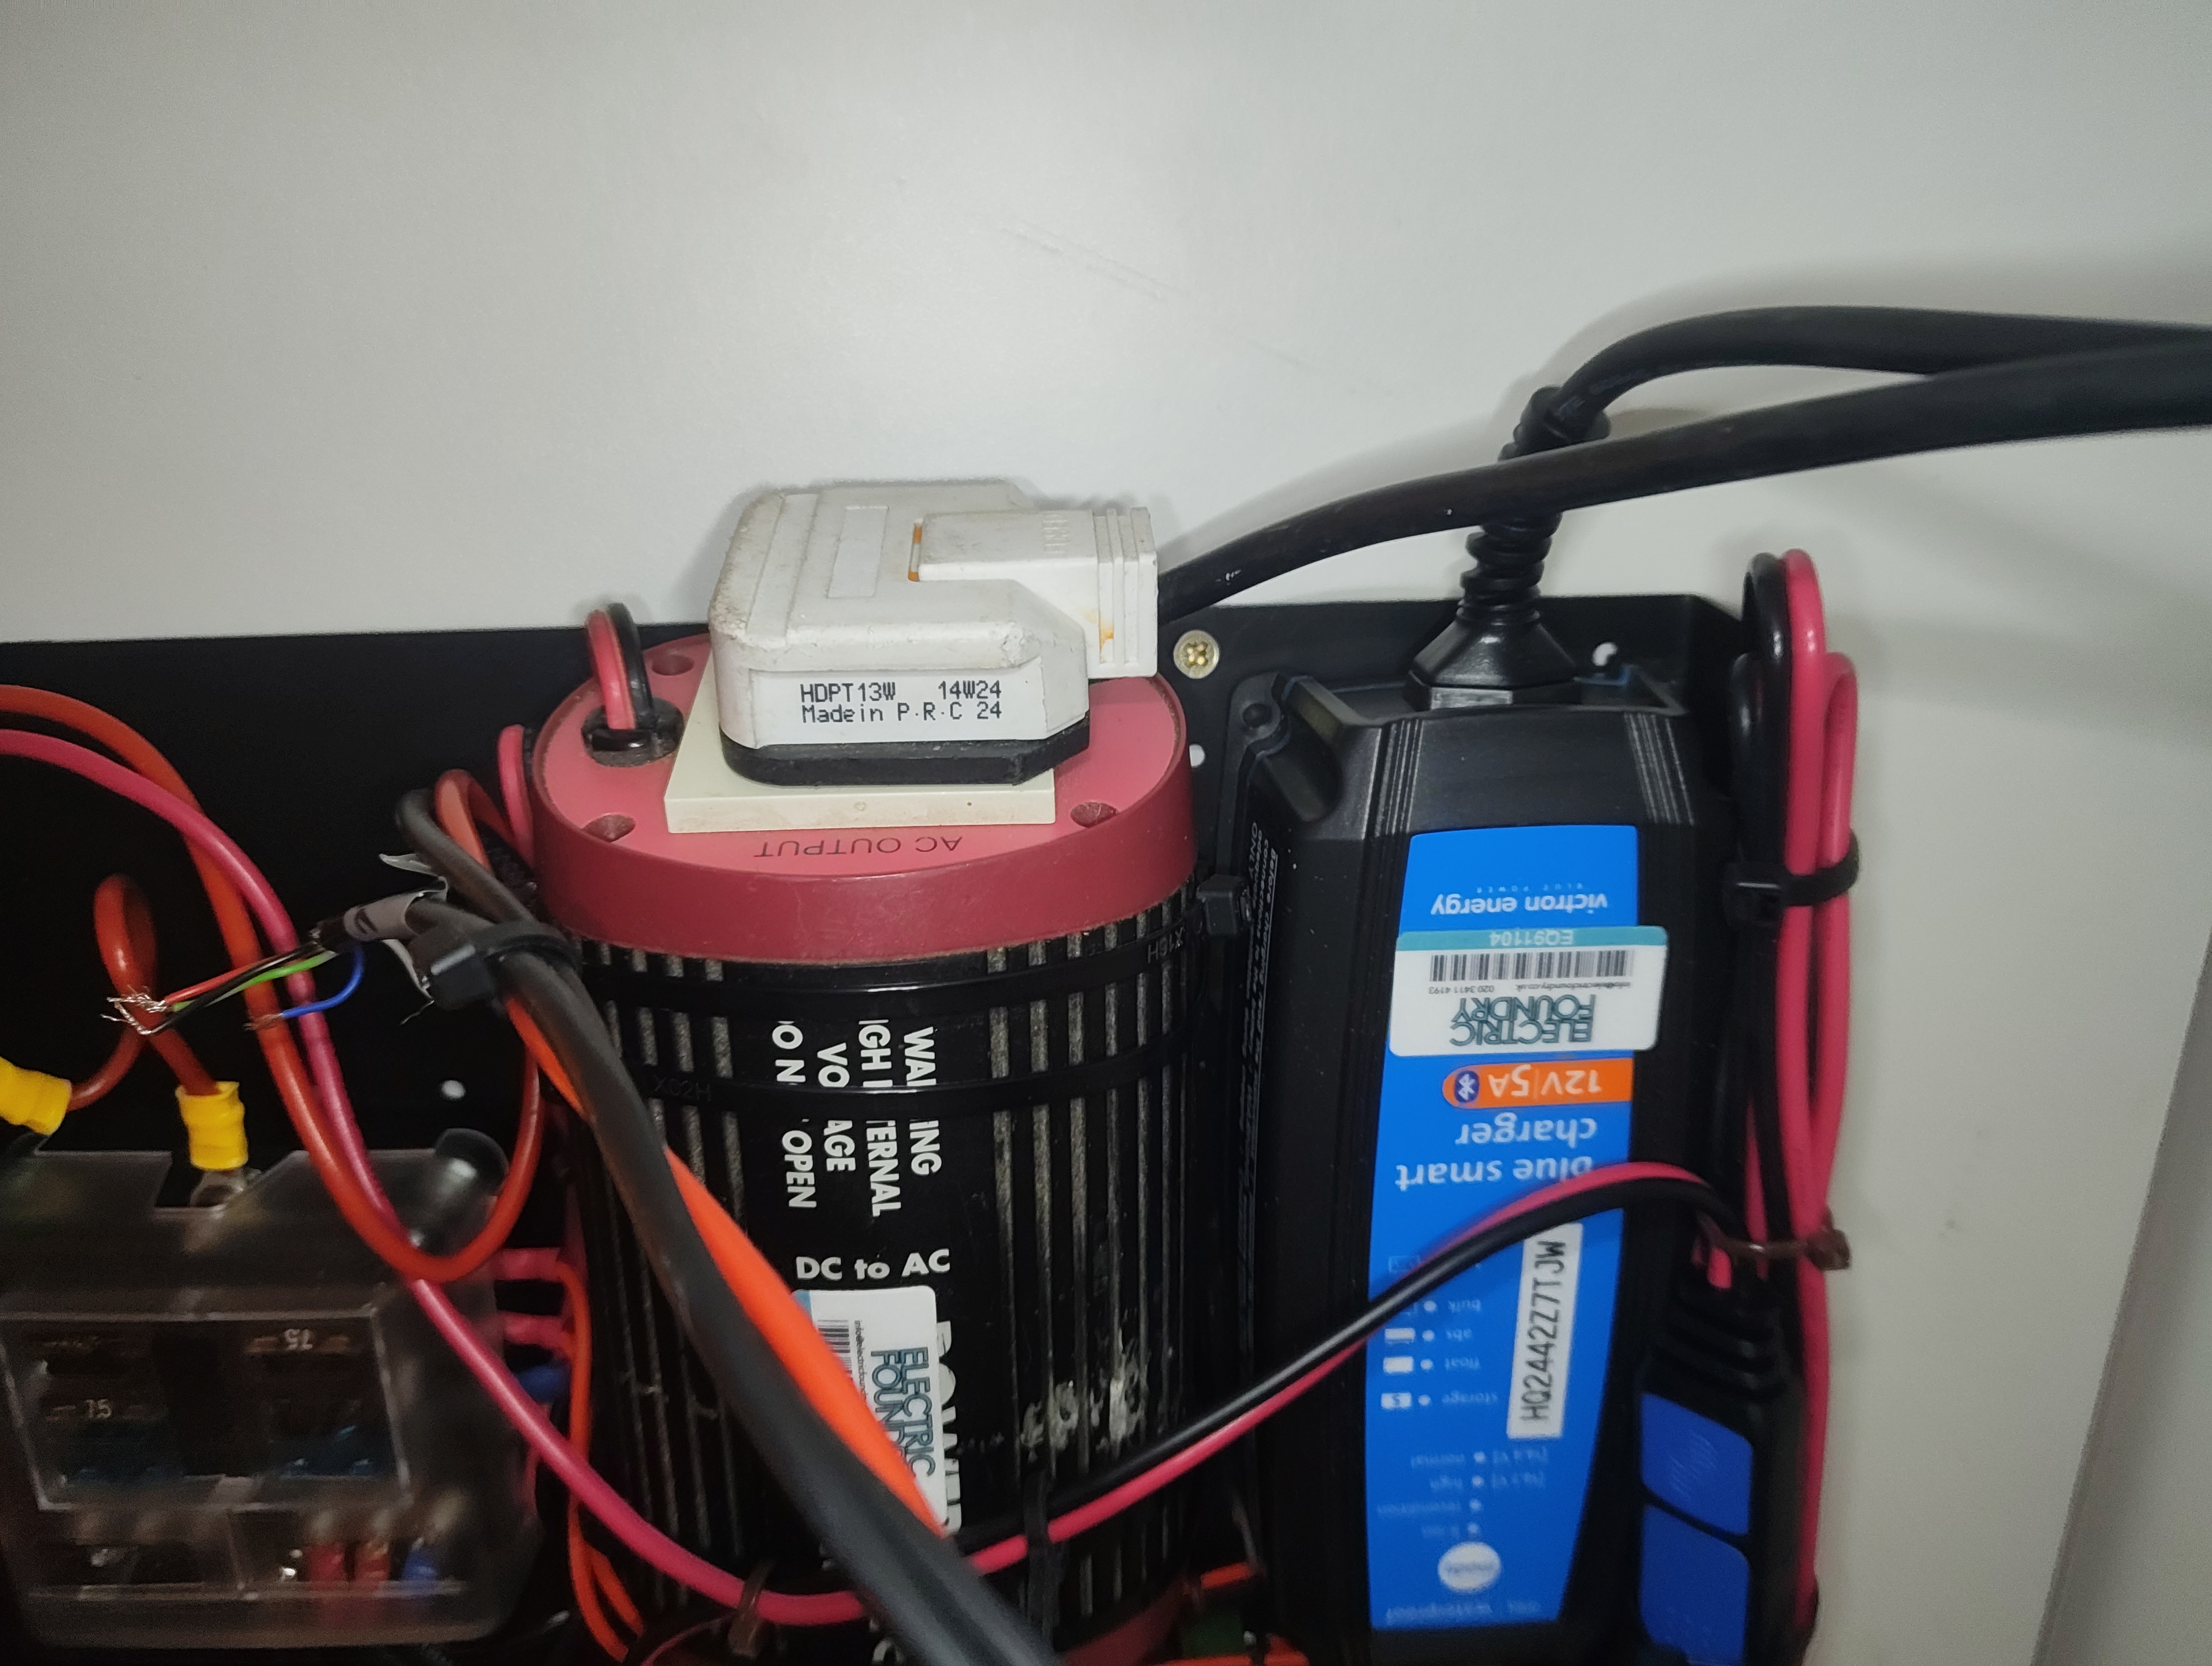
Two Electric Foundry CRMX receiver/dimmer combo units handle the lighting — one for the LED tape and one for the salt lamp. A DC-to-AC inverter provides 230V to a double socket which powers a prop till machine and a USB transformer for an oil diffuser.
Fixture Breakdown
Crisp Wall LED (Backlight)
RGBW LED tape mounted along the top of the counter as a backlight. Driven by Electric Foundry unit 1 using all 4 channels (RGBW).
Salt Lamp
A salt lamp sitting on the counter shelf. It uses warm LED tape wrapped in CTO gel to create the warm glow. Driven by a single channel on Electric Foundry unit 2, with an inline switch for manual on/off.
Prop Till Machine
A 230V prop till powered via the DC-to-AC inverter and double socket. Not DMX controlled — it is simply powered on when the inverter is running.
Oil Diffuser
A USB-powered oil diffuser plugged into a USB transformer on the 230V double socket. Not DMX controlled.
Channels & Addressing
- Crisp Wall LED
- Channel: 771
- Fixture Type: LED RGBW 16B (Generic)
- Universe/Address: 14/71–78
- Parameters: Intensity, Red, Green, Blue, White (RGBW 16-bit)
- Salt Lamp
- Channel: 772
- Fixture Type: Dimmer 16B (Generic)
- Universe/Address: 14/85–86
- Parameters: Intensity (16-bit dimmer, single channel)
Power & Control
| Power Source | Enduroline 12V 22Ah Lead Acid Battery |
| Circuit Protection | 6-way blade fuse box |
| CRMX Receiver / Dimmer 1 | Electric Foundry combo unit (LED tape — RGBW) |
| CRMX Receiver / Dimmer 2 | Electric Foundry combo unit (Salt Lamp — 1ch dim) |
| DC-to-AC Inverter | 12V DC → 230V AC (powers prop till + USB diffuser) |
| DMX Source | CRMX Stardust Transmitter |
| Charger | Victron Blue Smart IP65 12V 5A (built-in) |
230V System
The counter contains a live 230V double socket powered by the inverter. Take care when working inside the counter — ensure the battery is disconnected or the inverter is off before accessing the 230V wiring.
Wiring
Power Flow
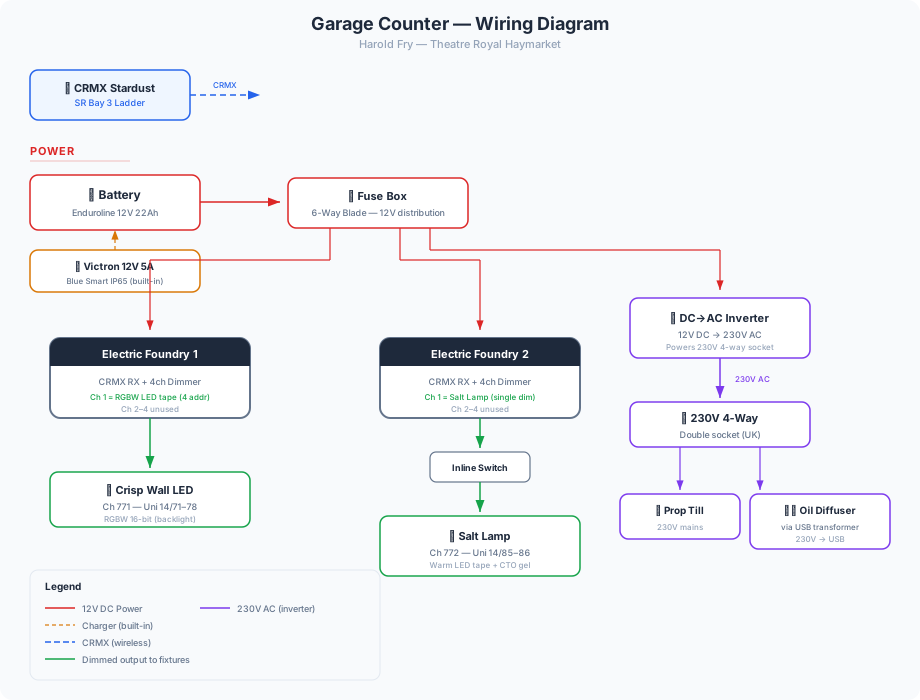
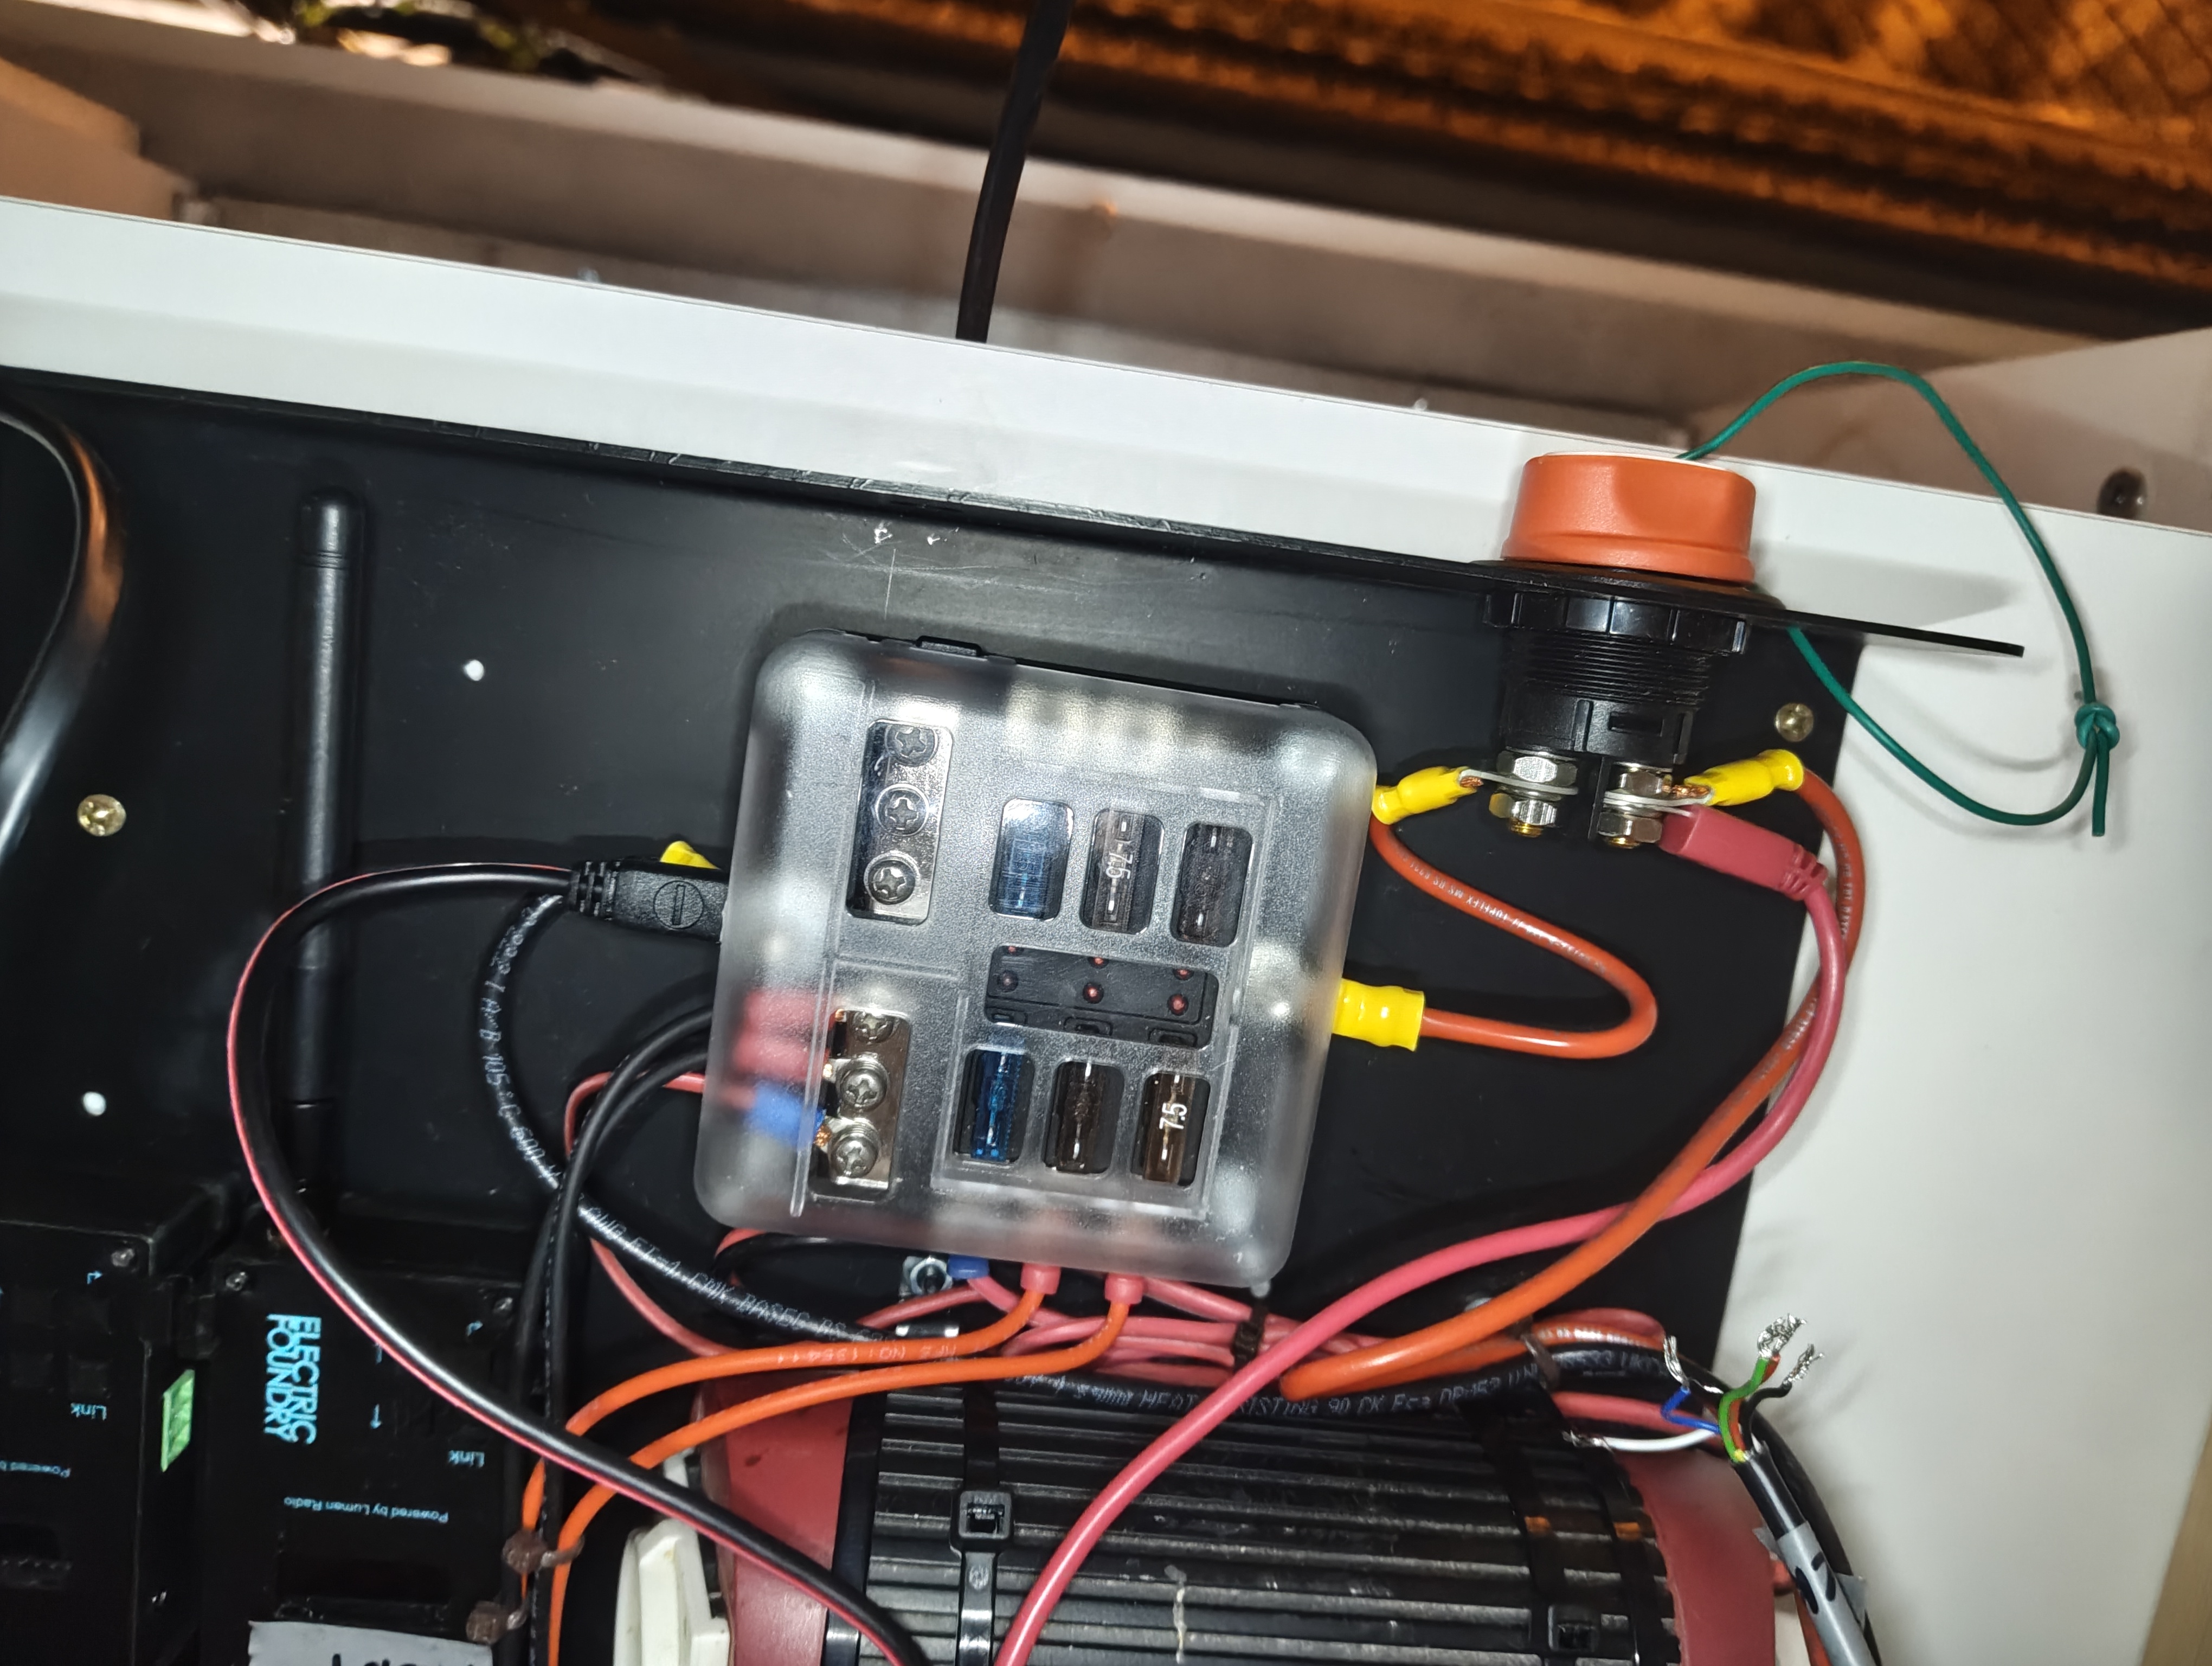
The Enduroline 12V 22Ah battery feeds into a 6-way blade fuse box for distribution. The fuse box feeds three branches:
- Electric Foundry Unit 1 → RGBW dimming for the Crisp Wall LED backlight tape
- Electric Foundry Unit 2 → Single channel dimming for the Salt Lamp (via inline switch)
- DC-to-AC Inverter → Converts 12V DC to 230V AC → powers a double socket with the prop till and USB transformer (for oil diffuser)
Both Electric Foundry units receive CRMX wirelessly from the Stardust transmitter.
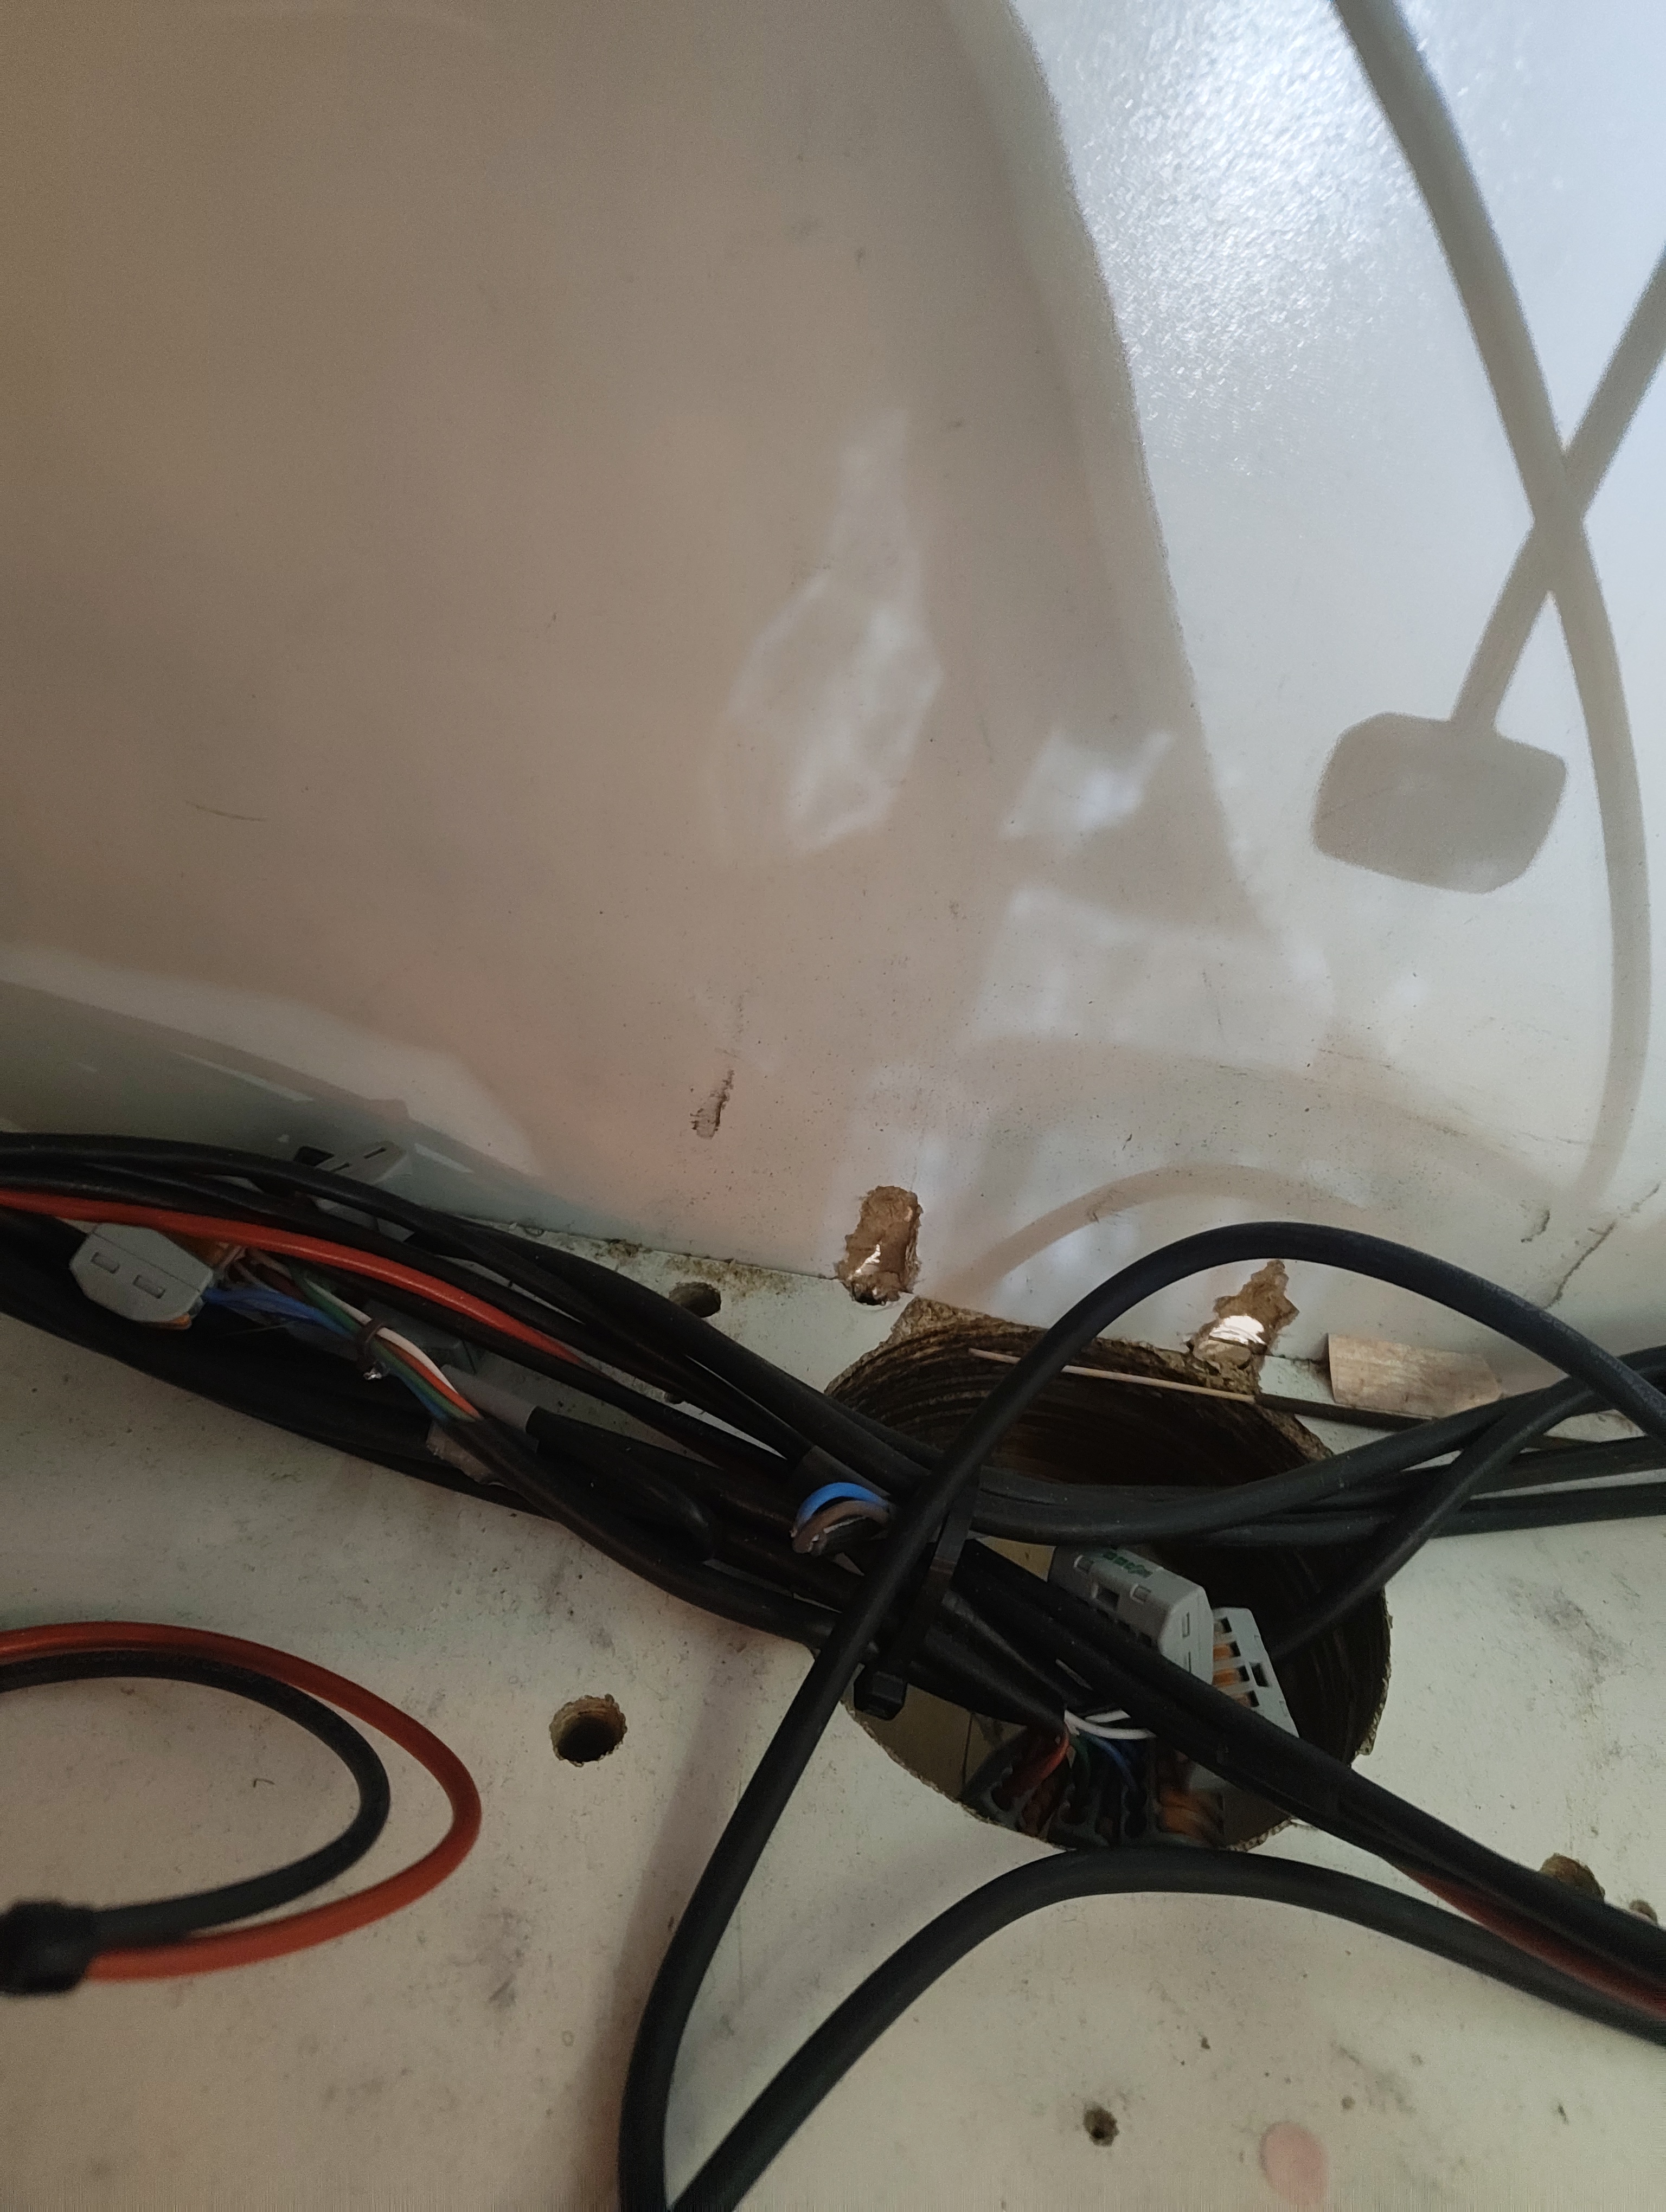
Salt Lamp
The salt lamp has an inline switch between the Electric Foundry unit and the lamp itself. This allows the lamp to be manually switched off without affecting DMX control — useful for pre-show checks or if the lamp needs to be dark for a scene change.
230V Props
The inverter runs whenever the battery has charge and the system is on. The 230V double socket powers the prop till machine and a USB transformer for the oil diffuser. These are not DMX controlled.
Images
Key Views
All Reference Photos (click to expand)
Components List
| Component | Detail |
|---|---|
| Battery | Enduroline 12V 22Ah Lead Acid |
| Fuse Box | 6-way blade fuse box |
| CRMX Receiver / Dimmer 1 | Electric Foundry combo (LED tape RGBW) |
| CRMX Receiver / Dimmer 2 | Electric Foundry combo (Salt Lamp 1ch) |
| DC-to-AC Inverter | 12V DC → 230V AC |
| Charger | Victron Blue Smart IP65 12V 5A (built-in) |
| Salt Lamp | Warm LED tape + CTO gel |
| Inline Switch | On salt lamp output |
Usage
The Garage Counter is used during the garage/shop scenes.
Troubleshooting
- LED tape not working:
- Check Electric Foundry unit 1 is powered and CRMX linked
- Check fuse on the EF1 branch
- Salt lamp not working:
- Check the inline switch is on
- Check Electric Foundry unit 2 is powered and CRMX linked
- Check fuse on the EF2 branch
- Till / diffuser not working:
- Check the inverter is running (it has its own on/off switch)
- Check 230V socket — are plugs seated properly?
- Check fuse on the inverter branch
- Nothing working at all:
- Check battery charge — plug in Victron charger overnight
Sofa Headlights
Overview
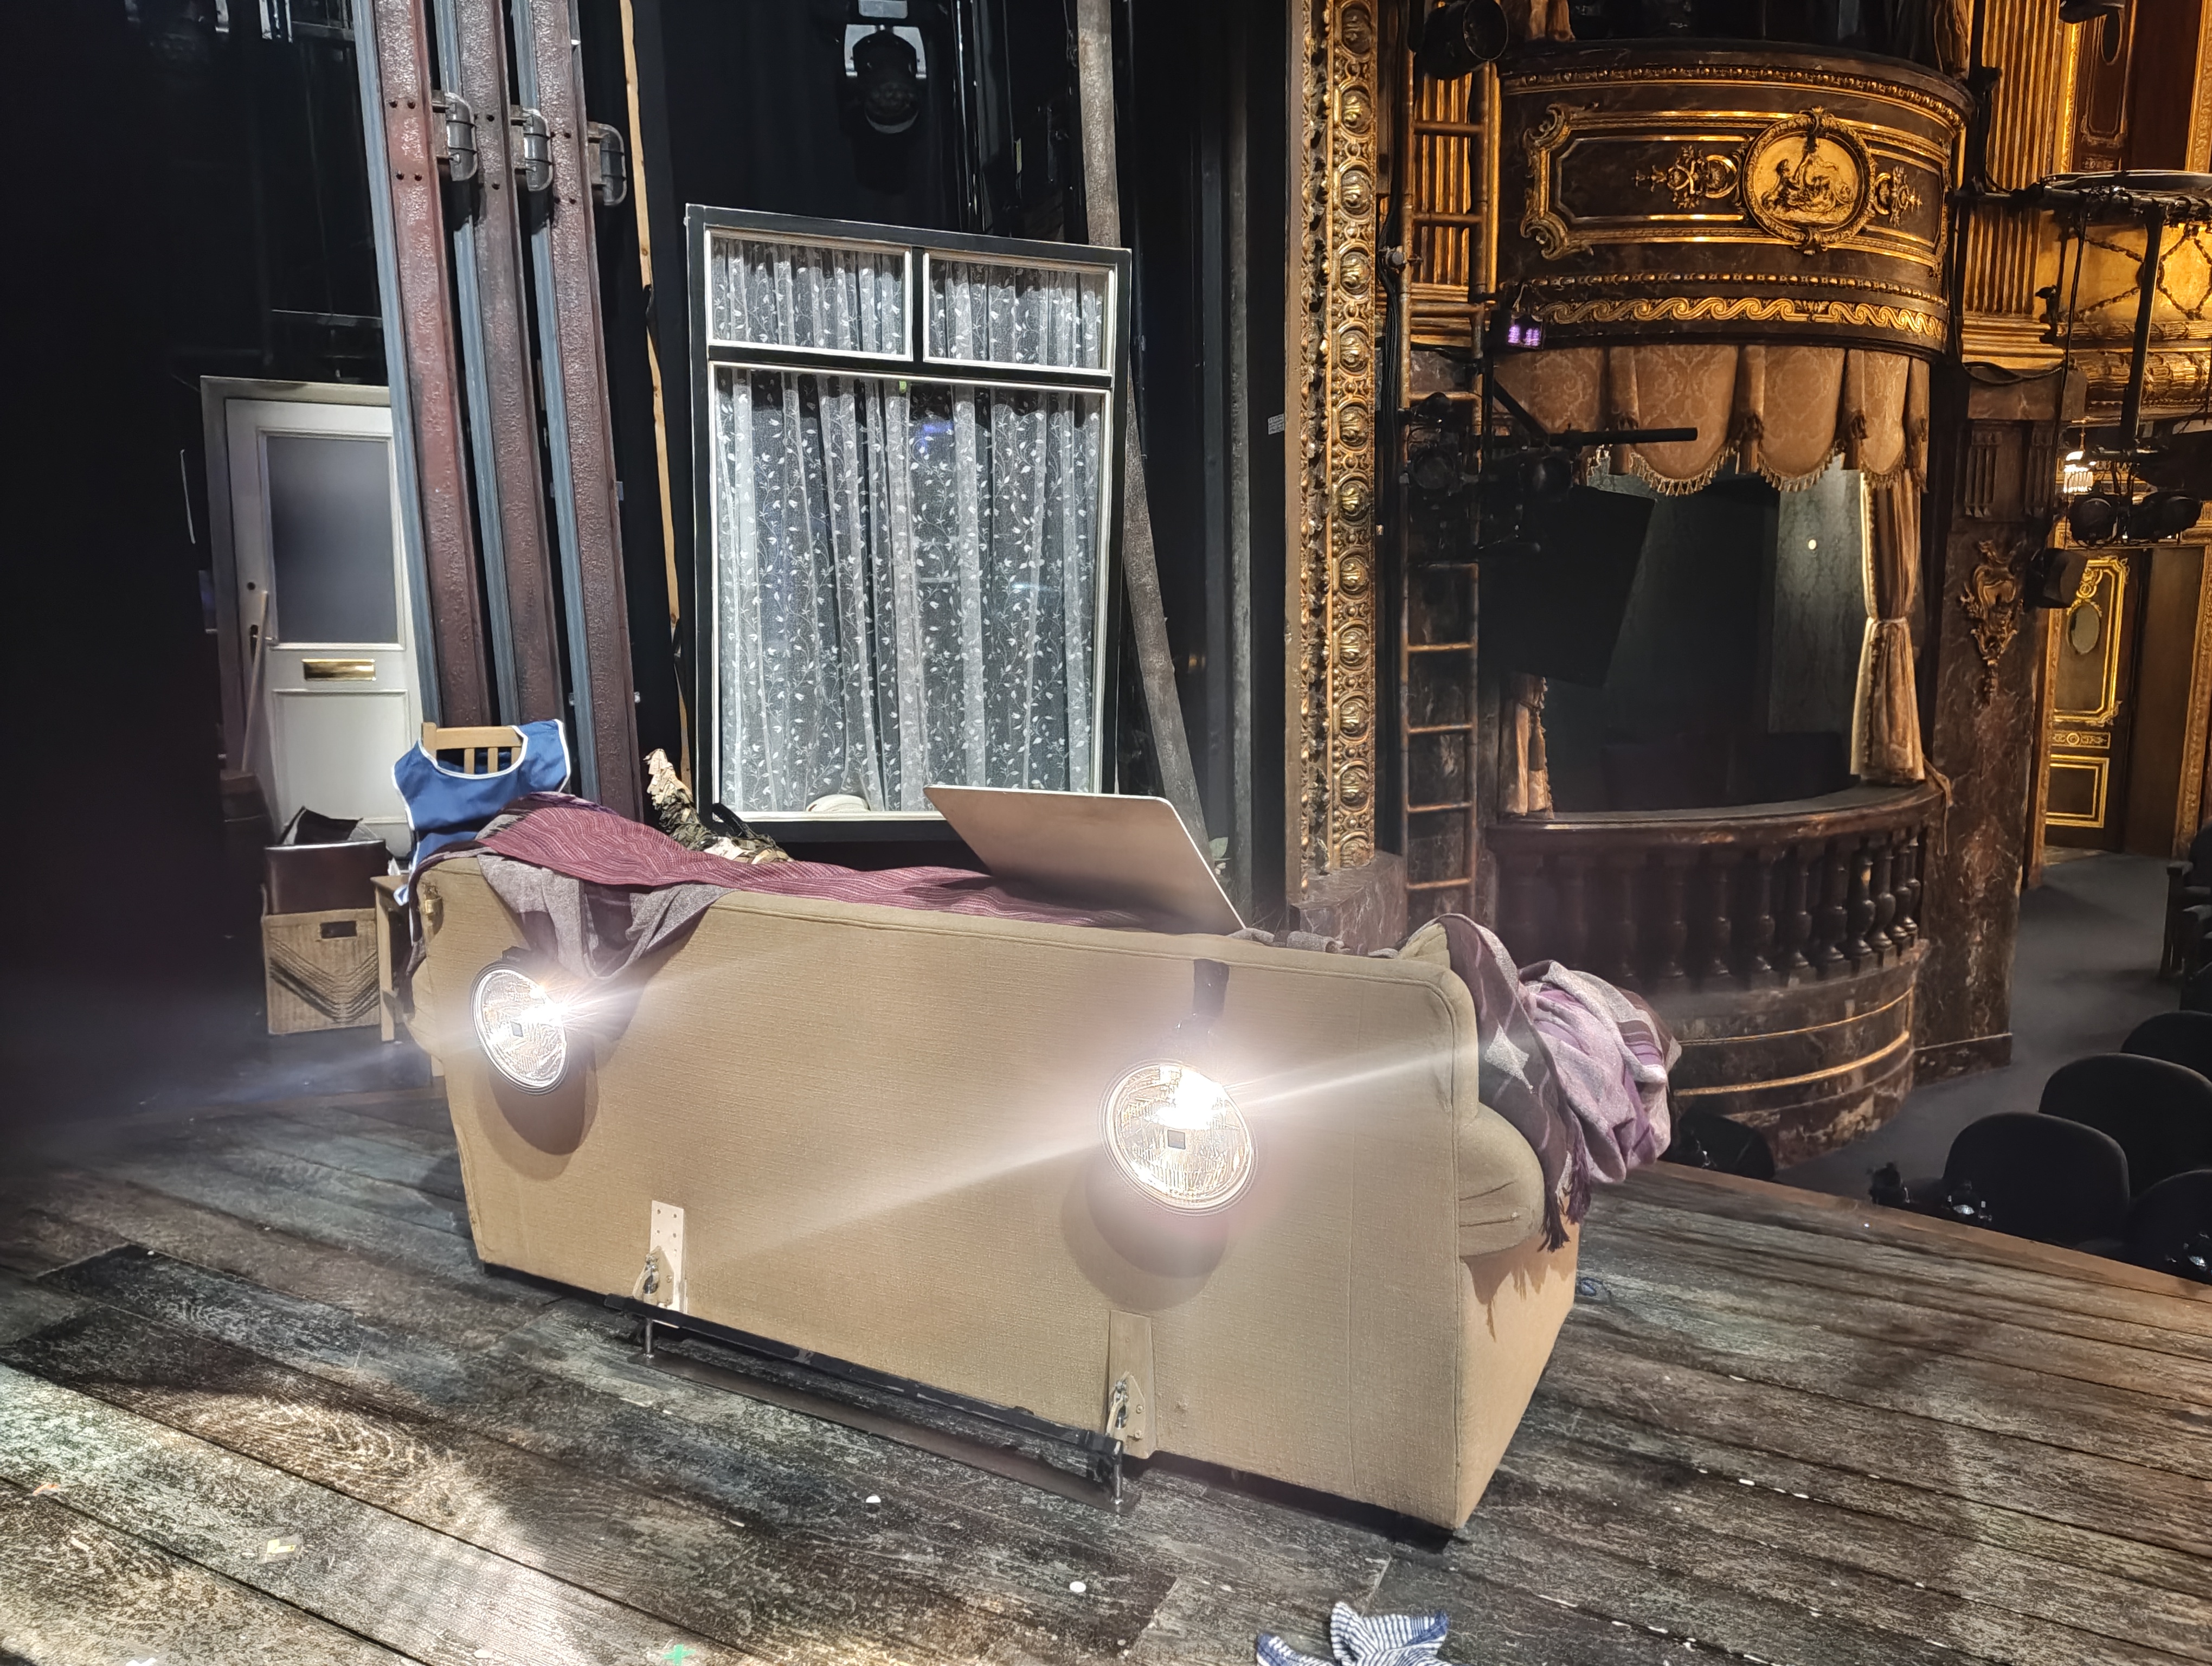
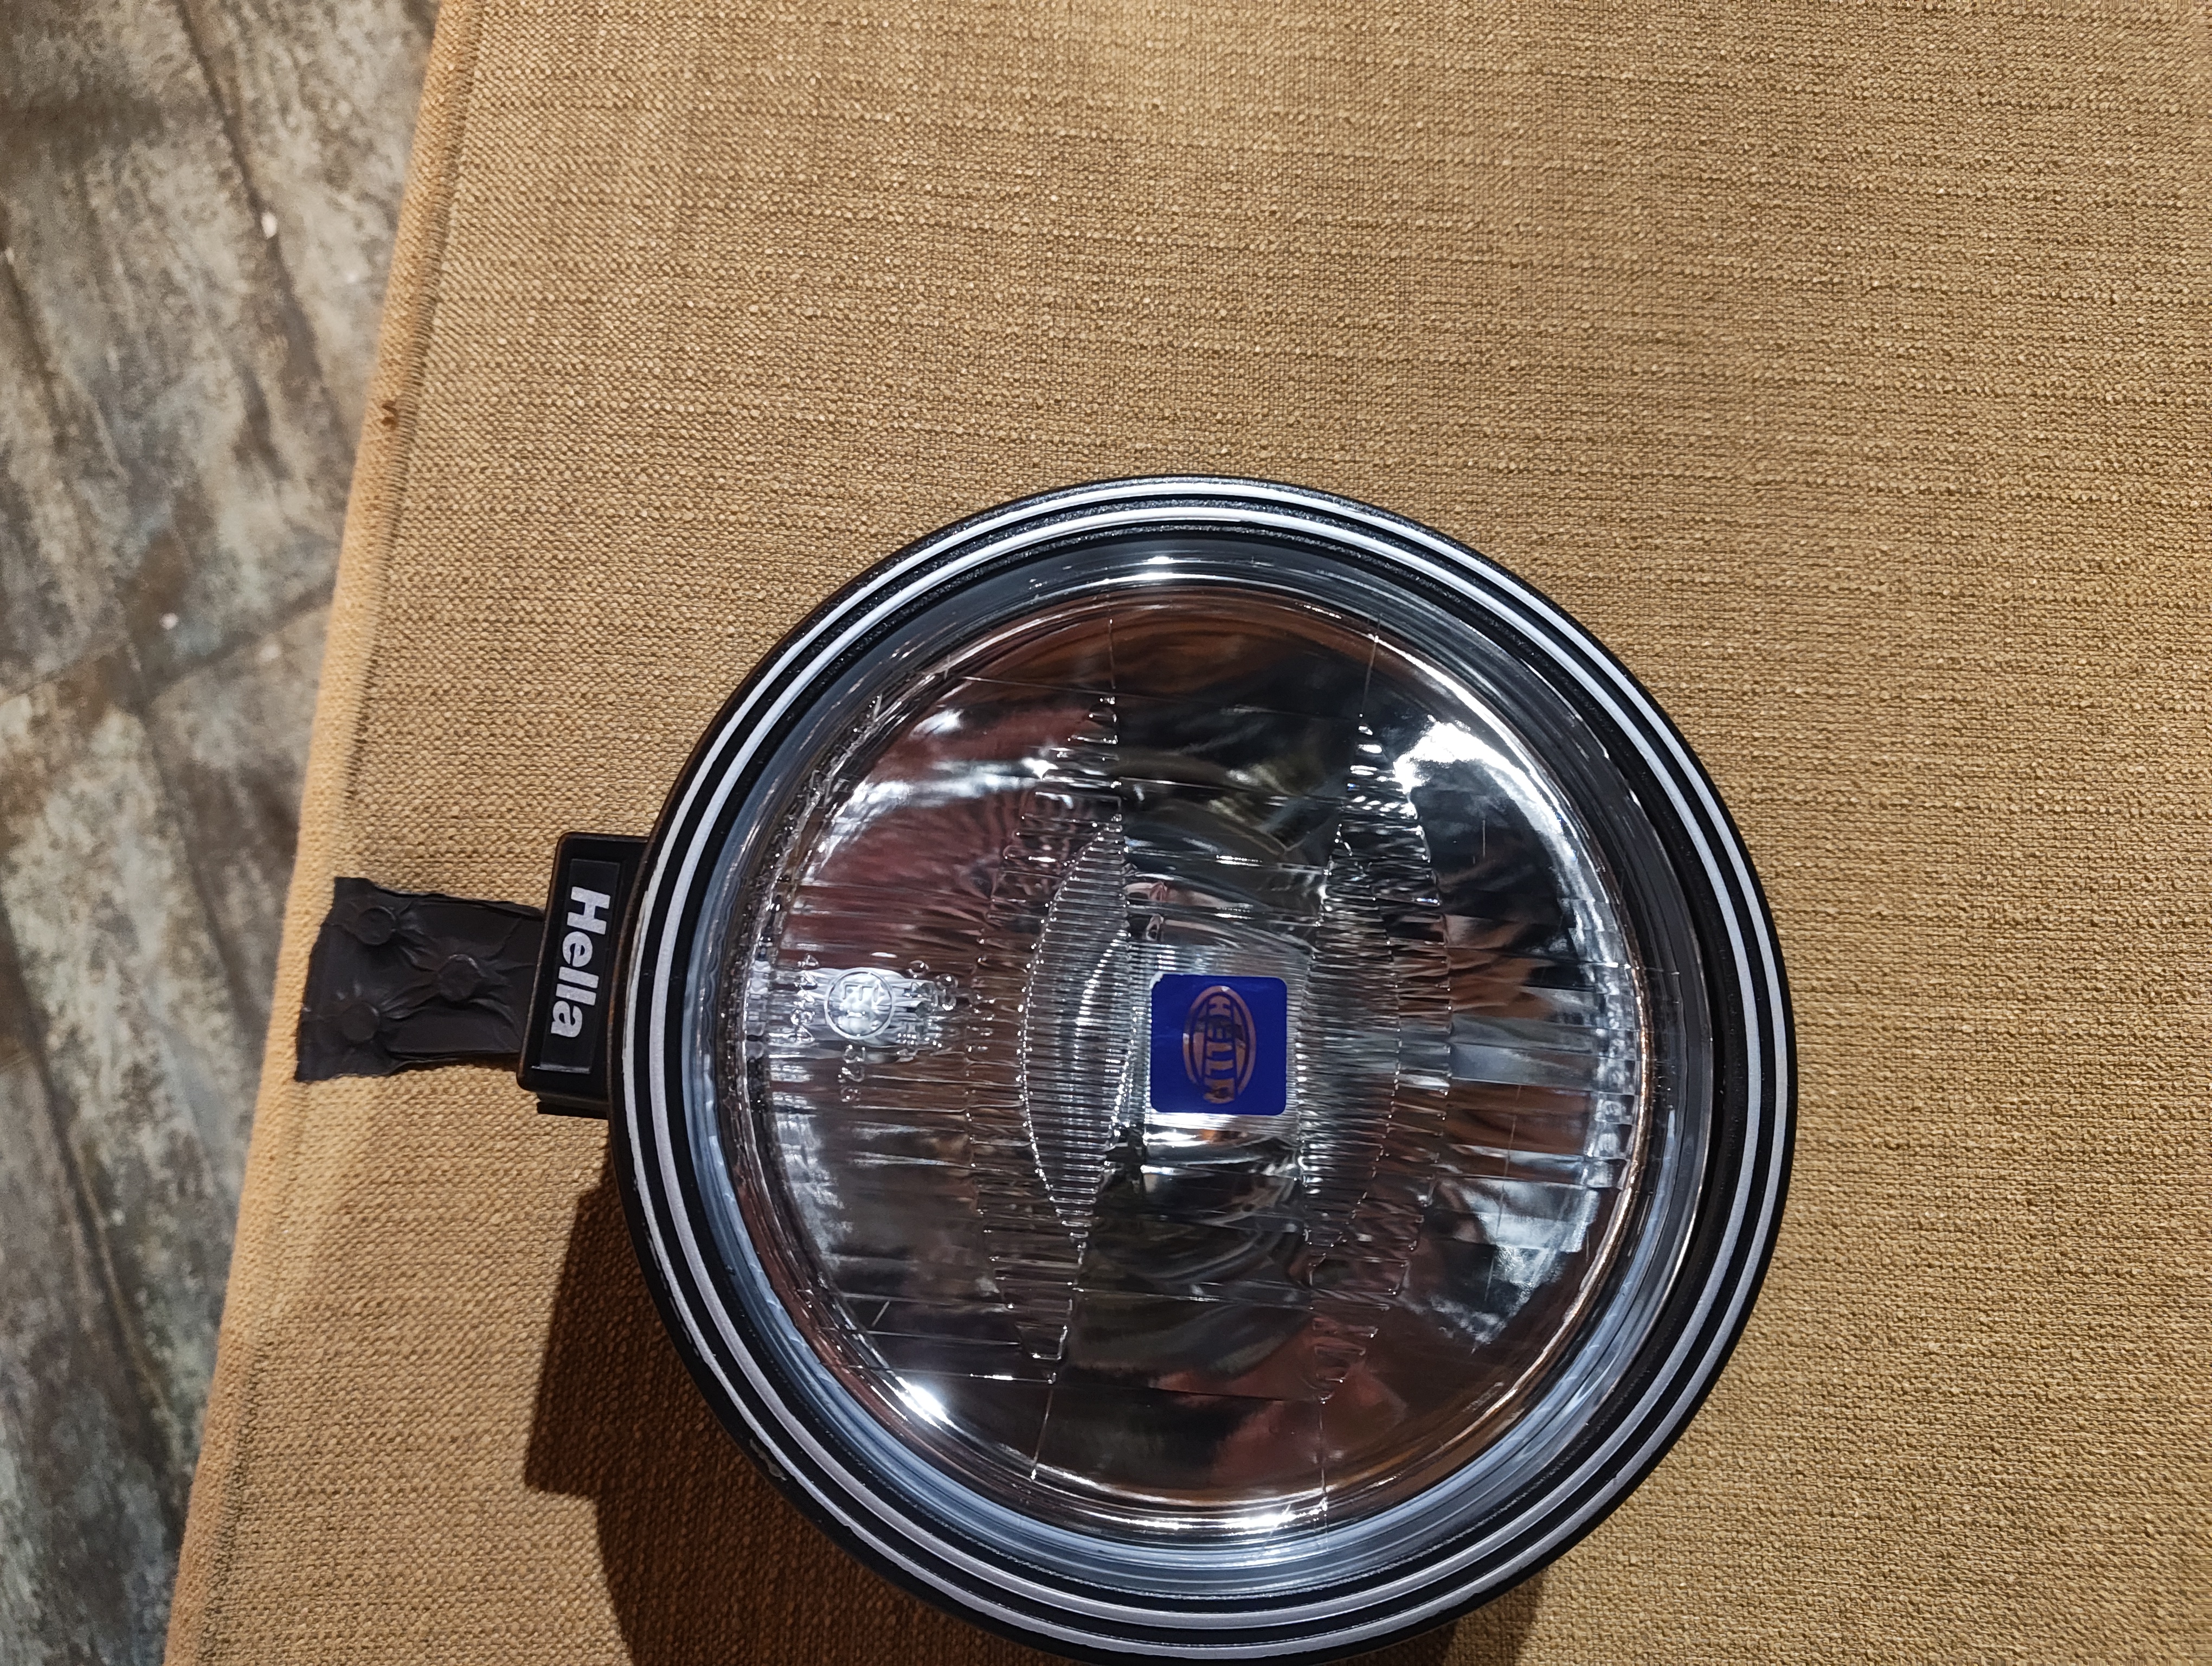
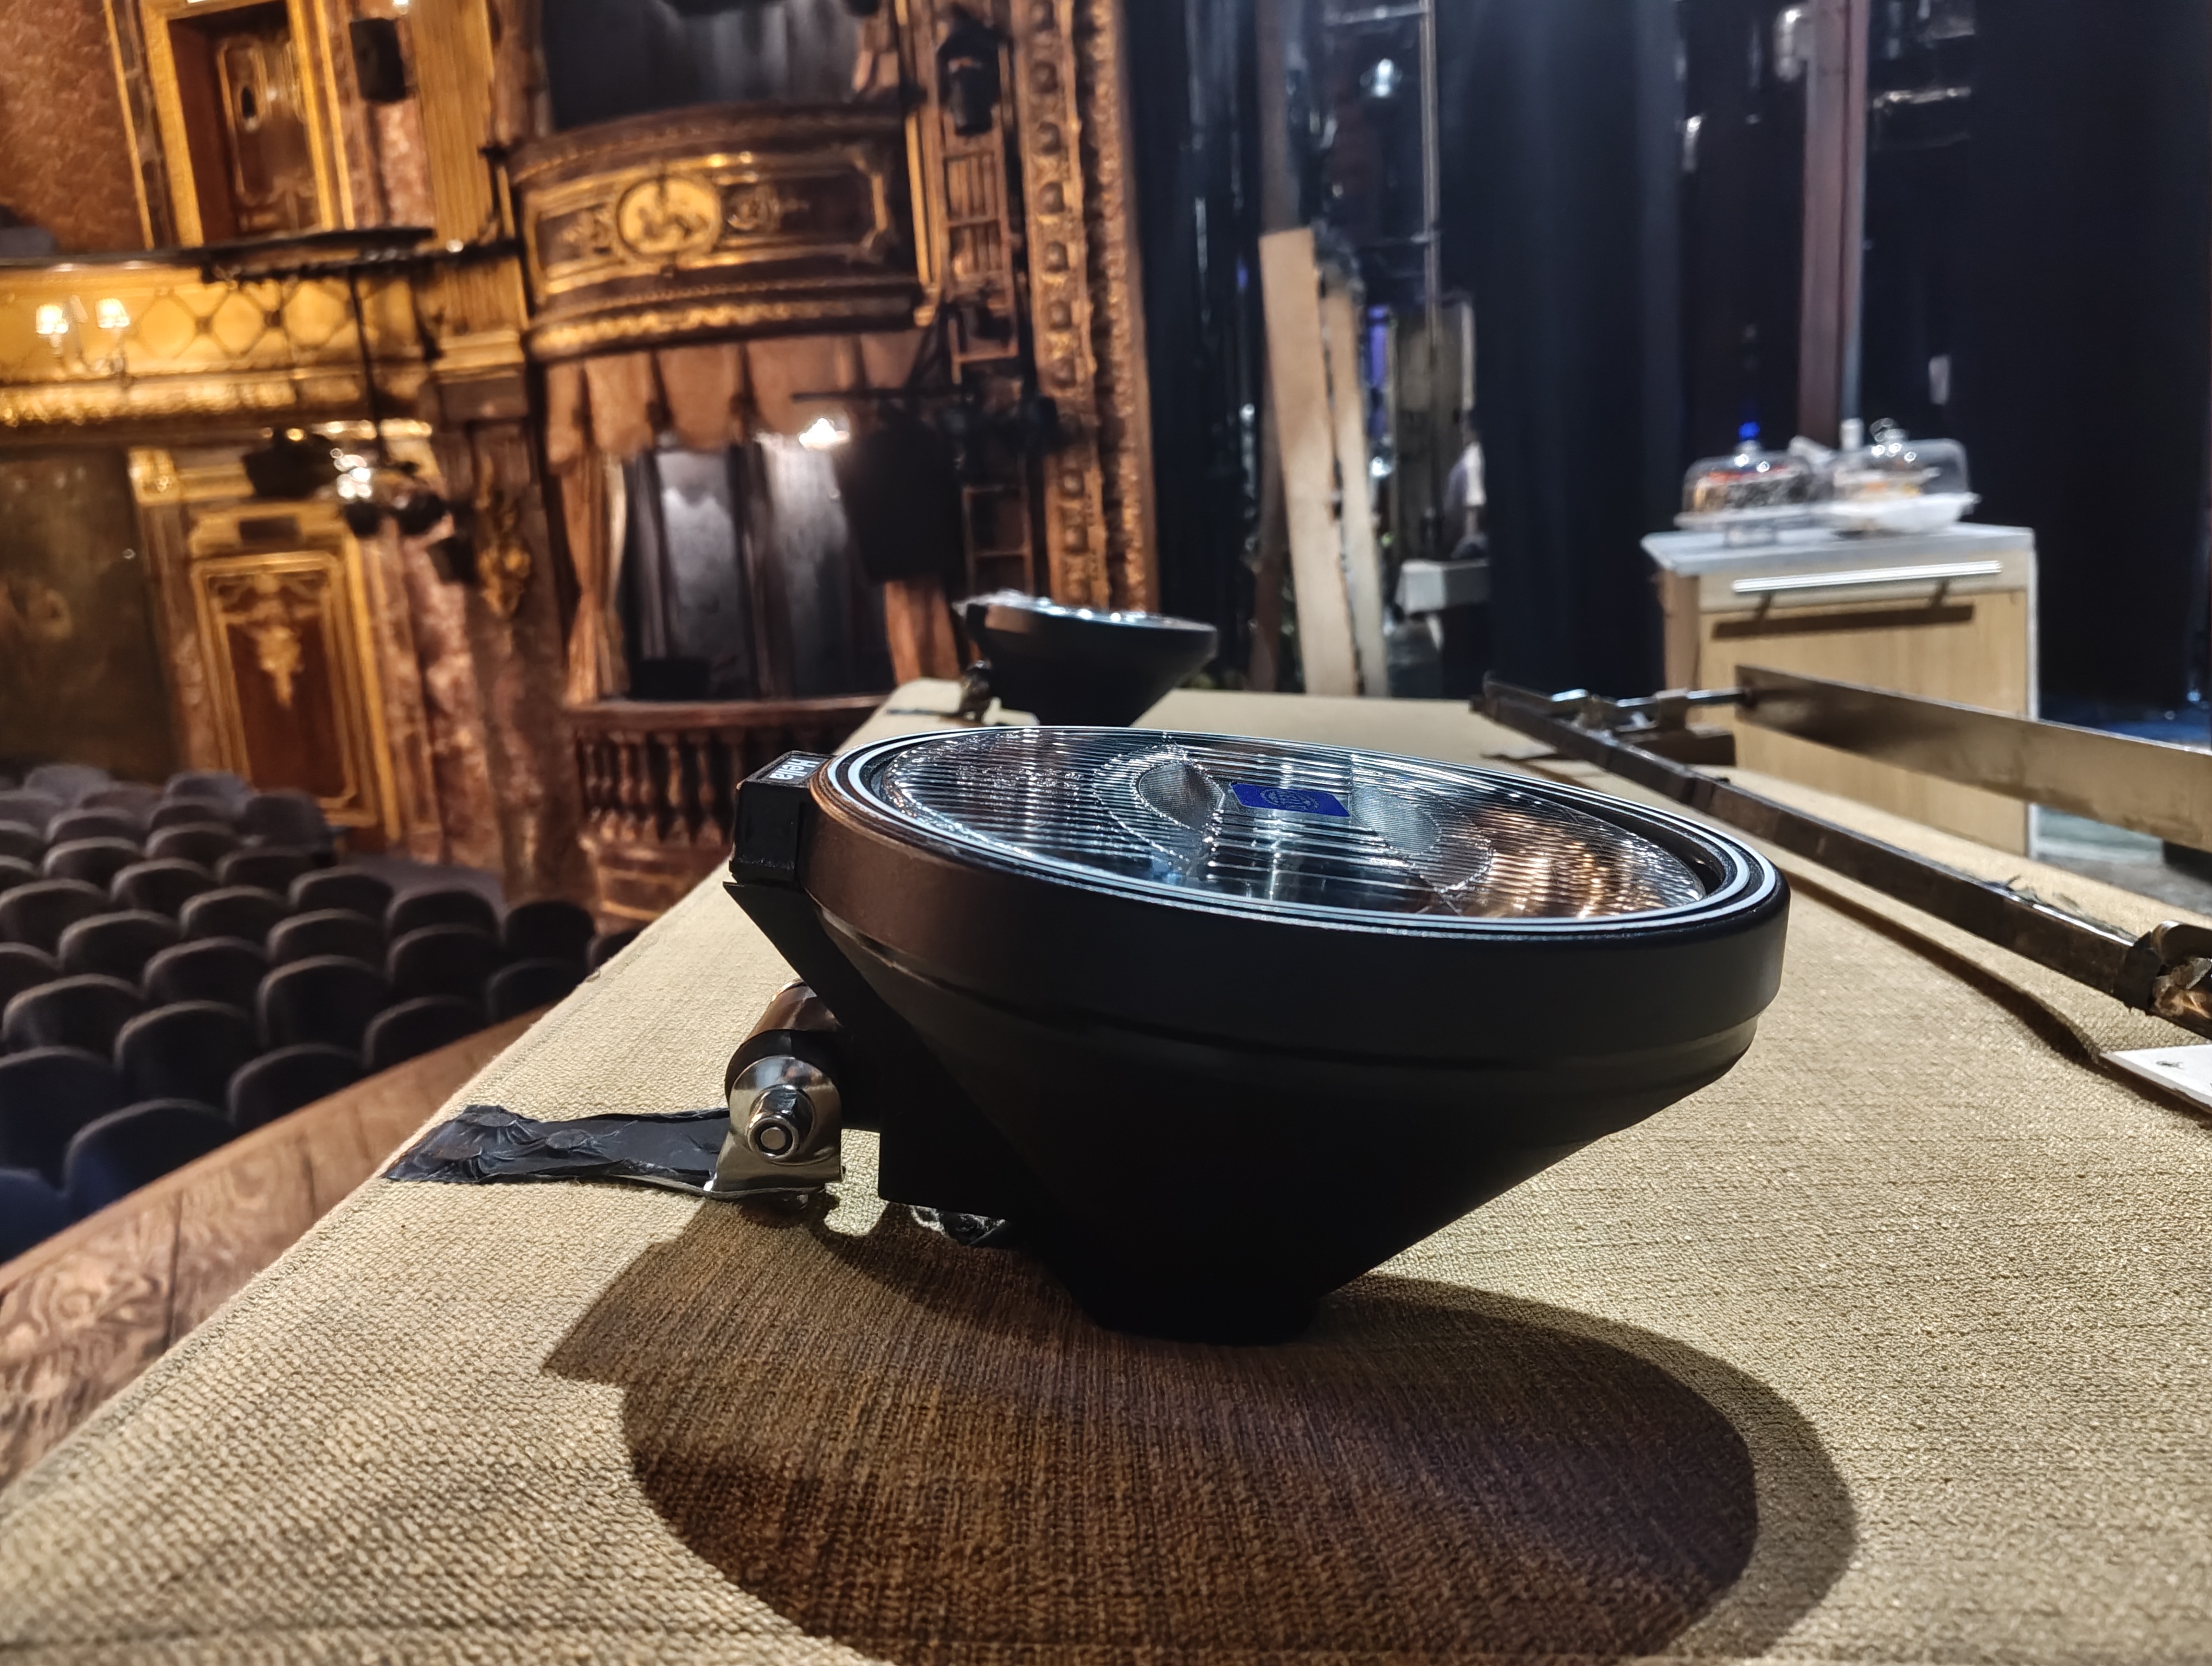
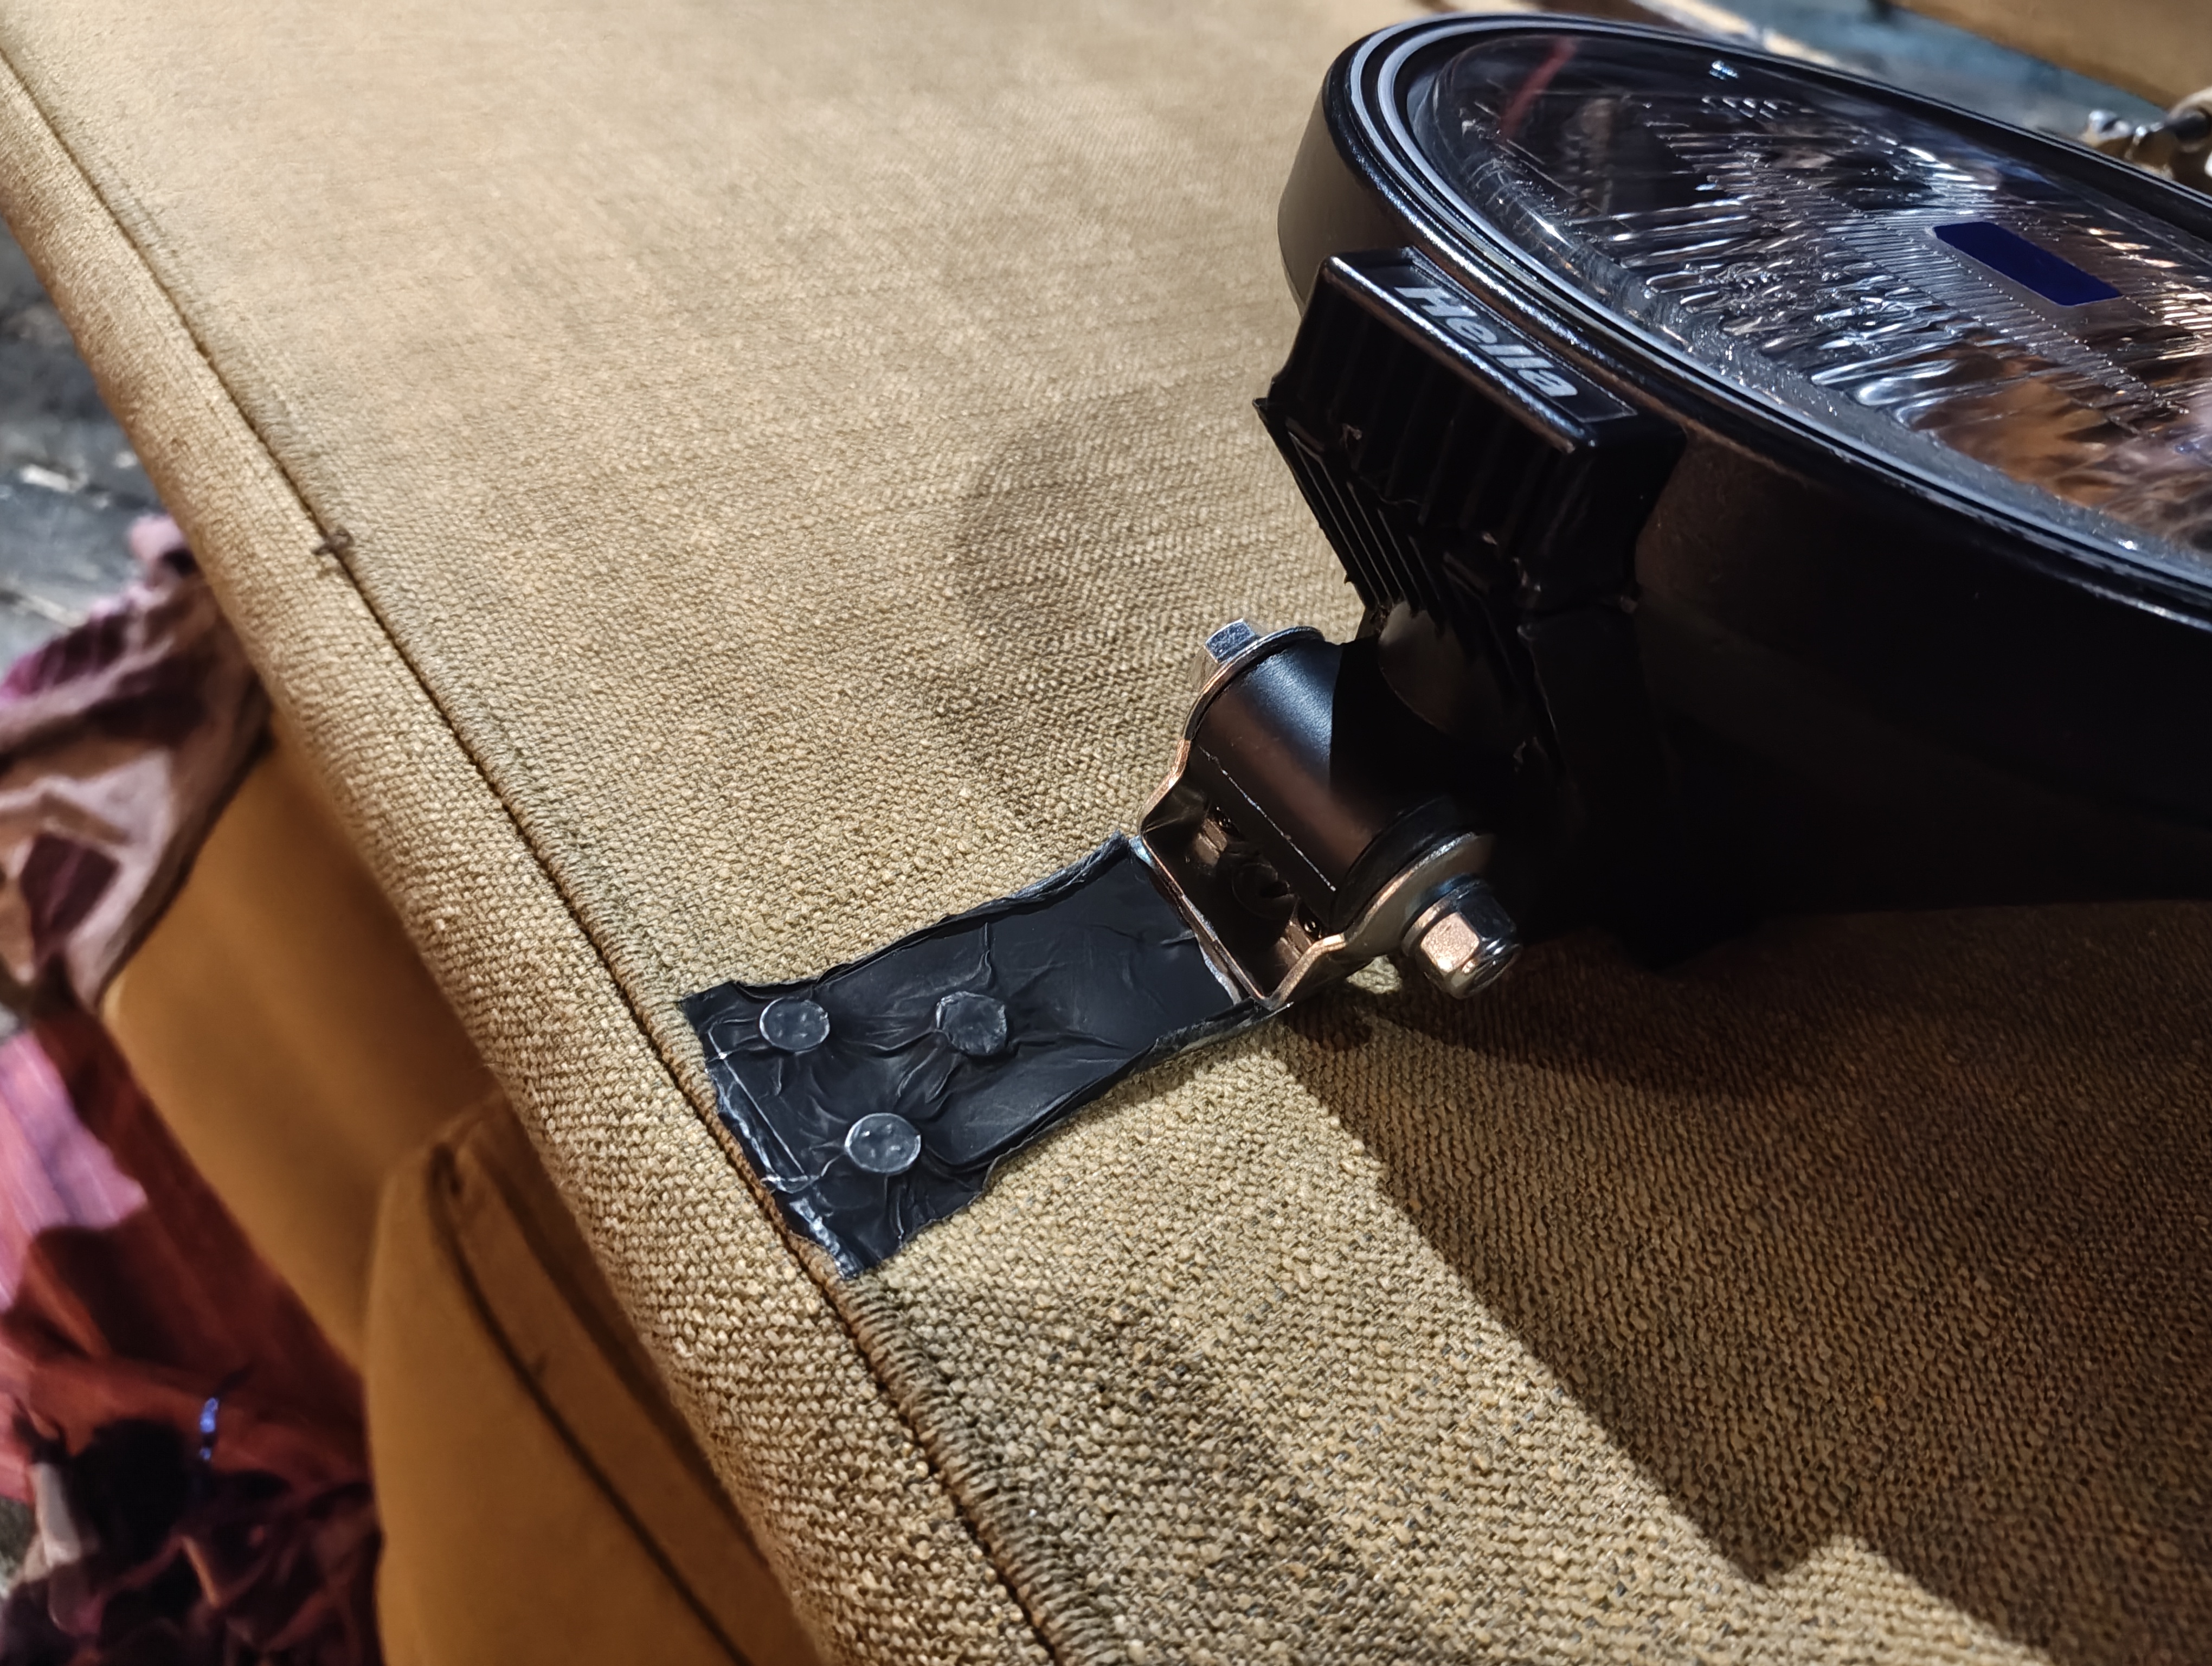
Two car headlights on the back of a rolling sofa, used to emulate a car during the motorway sequence just before Martina's house. The practical is only used in Act 1 — it is flown out for Act 2 where it is plugged up on charge and switched off.
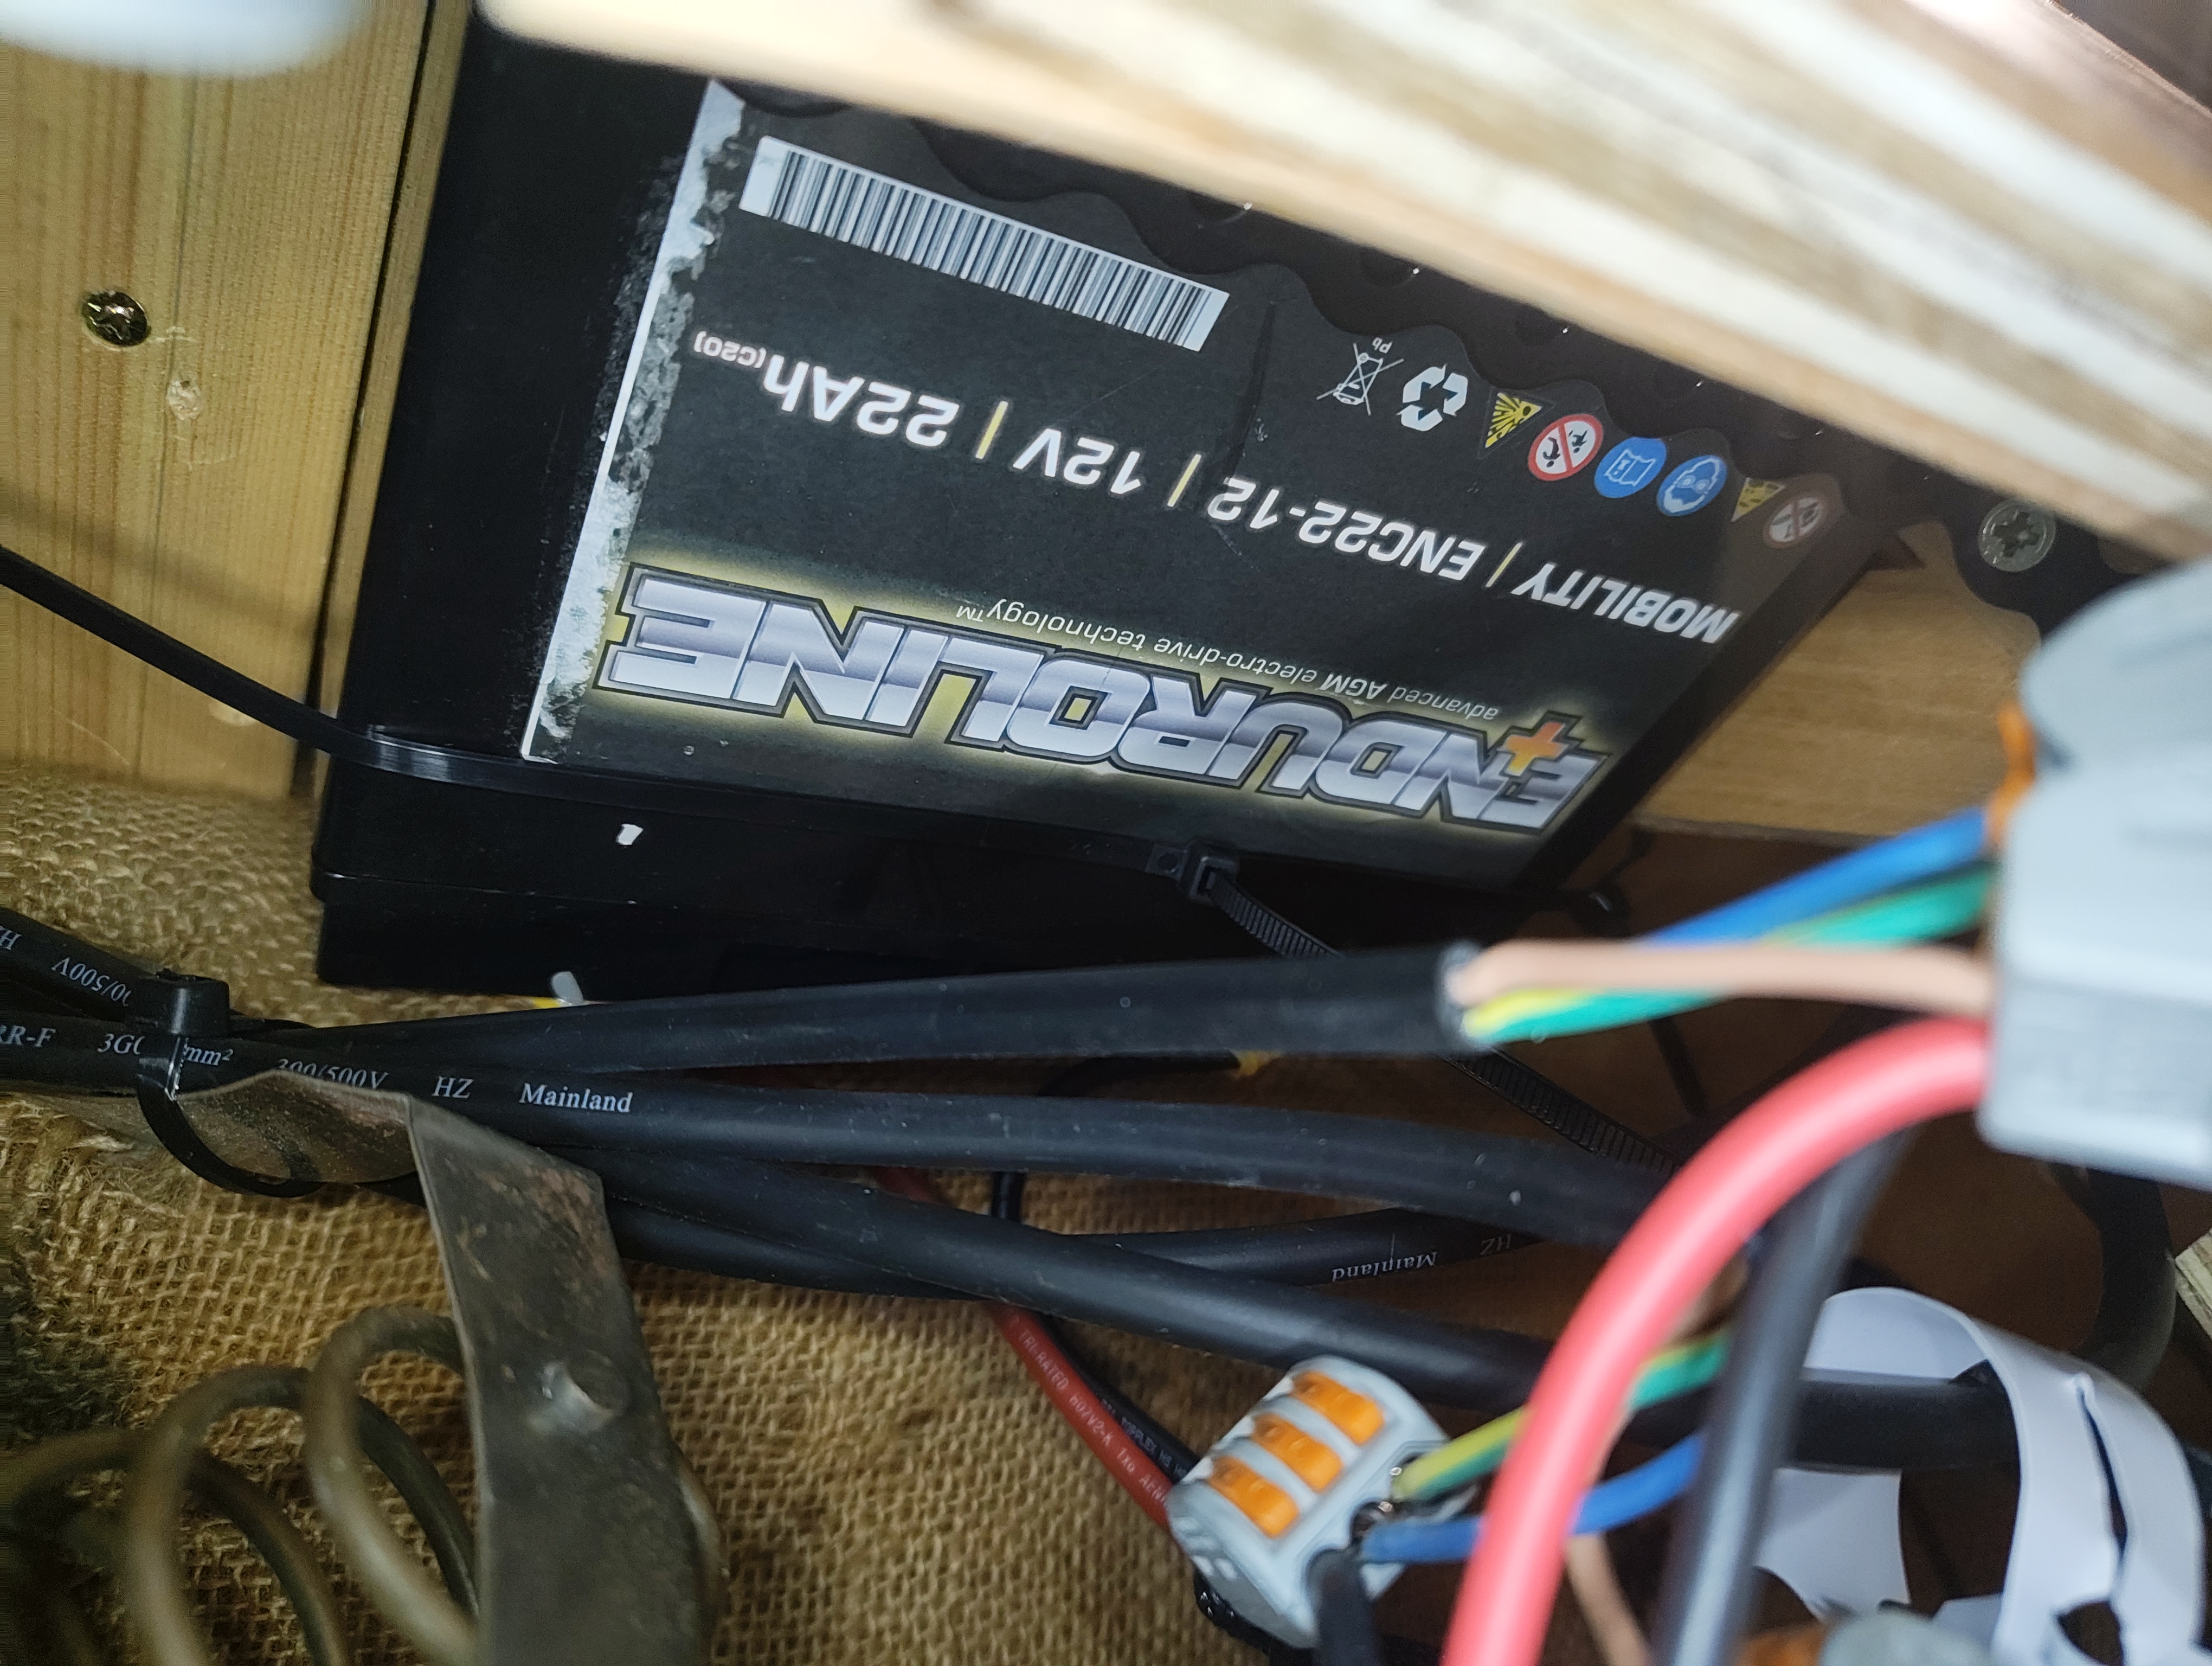
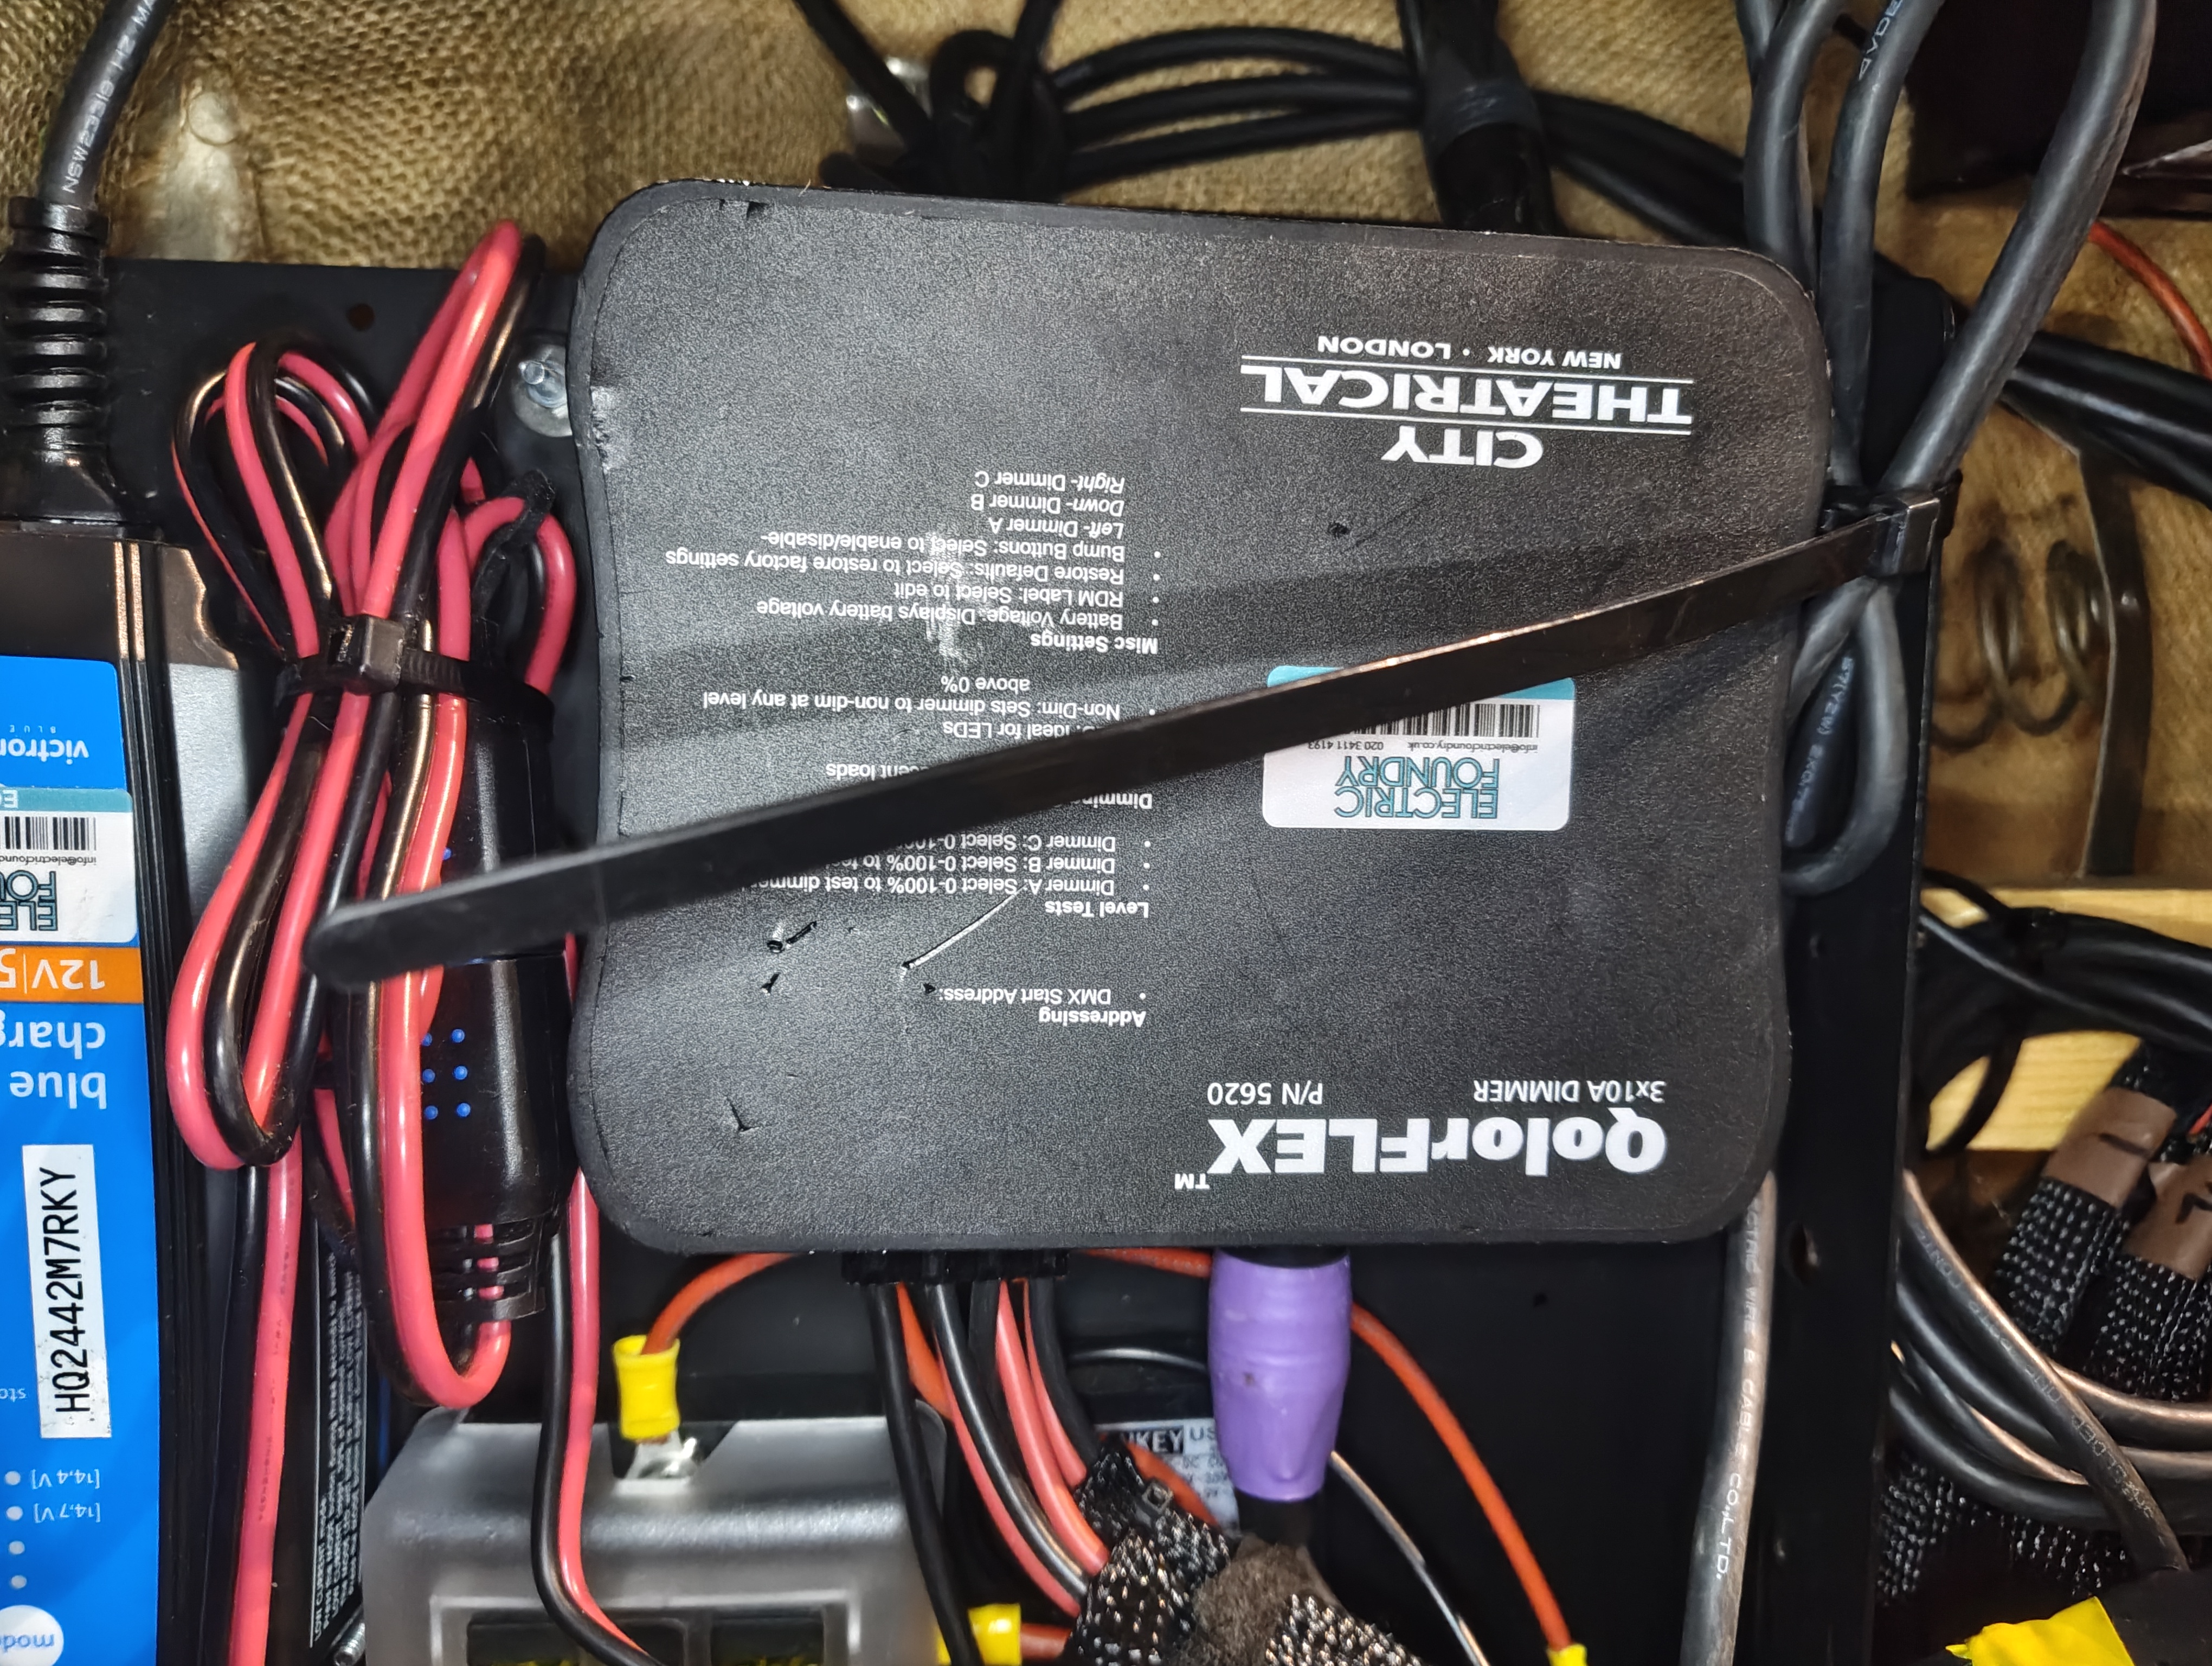
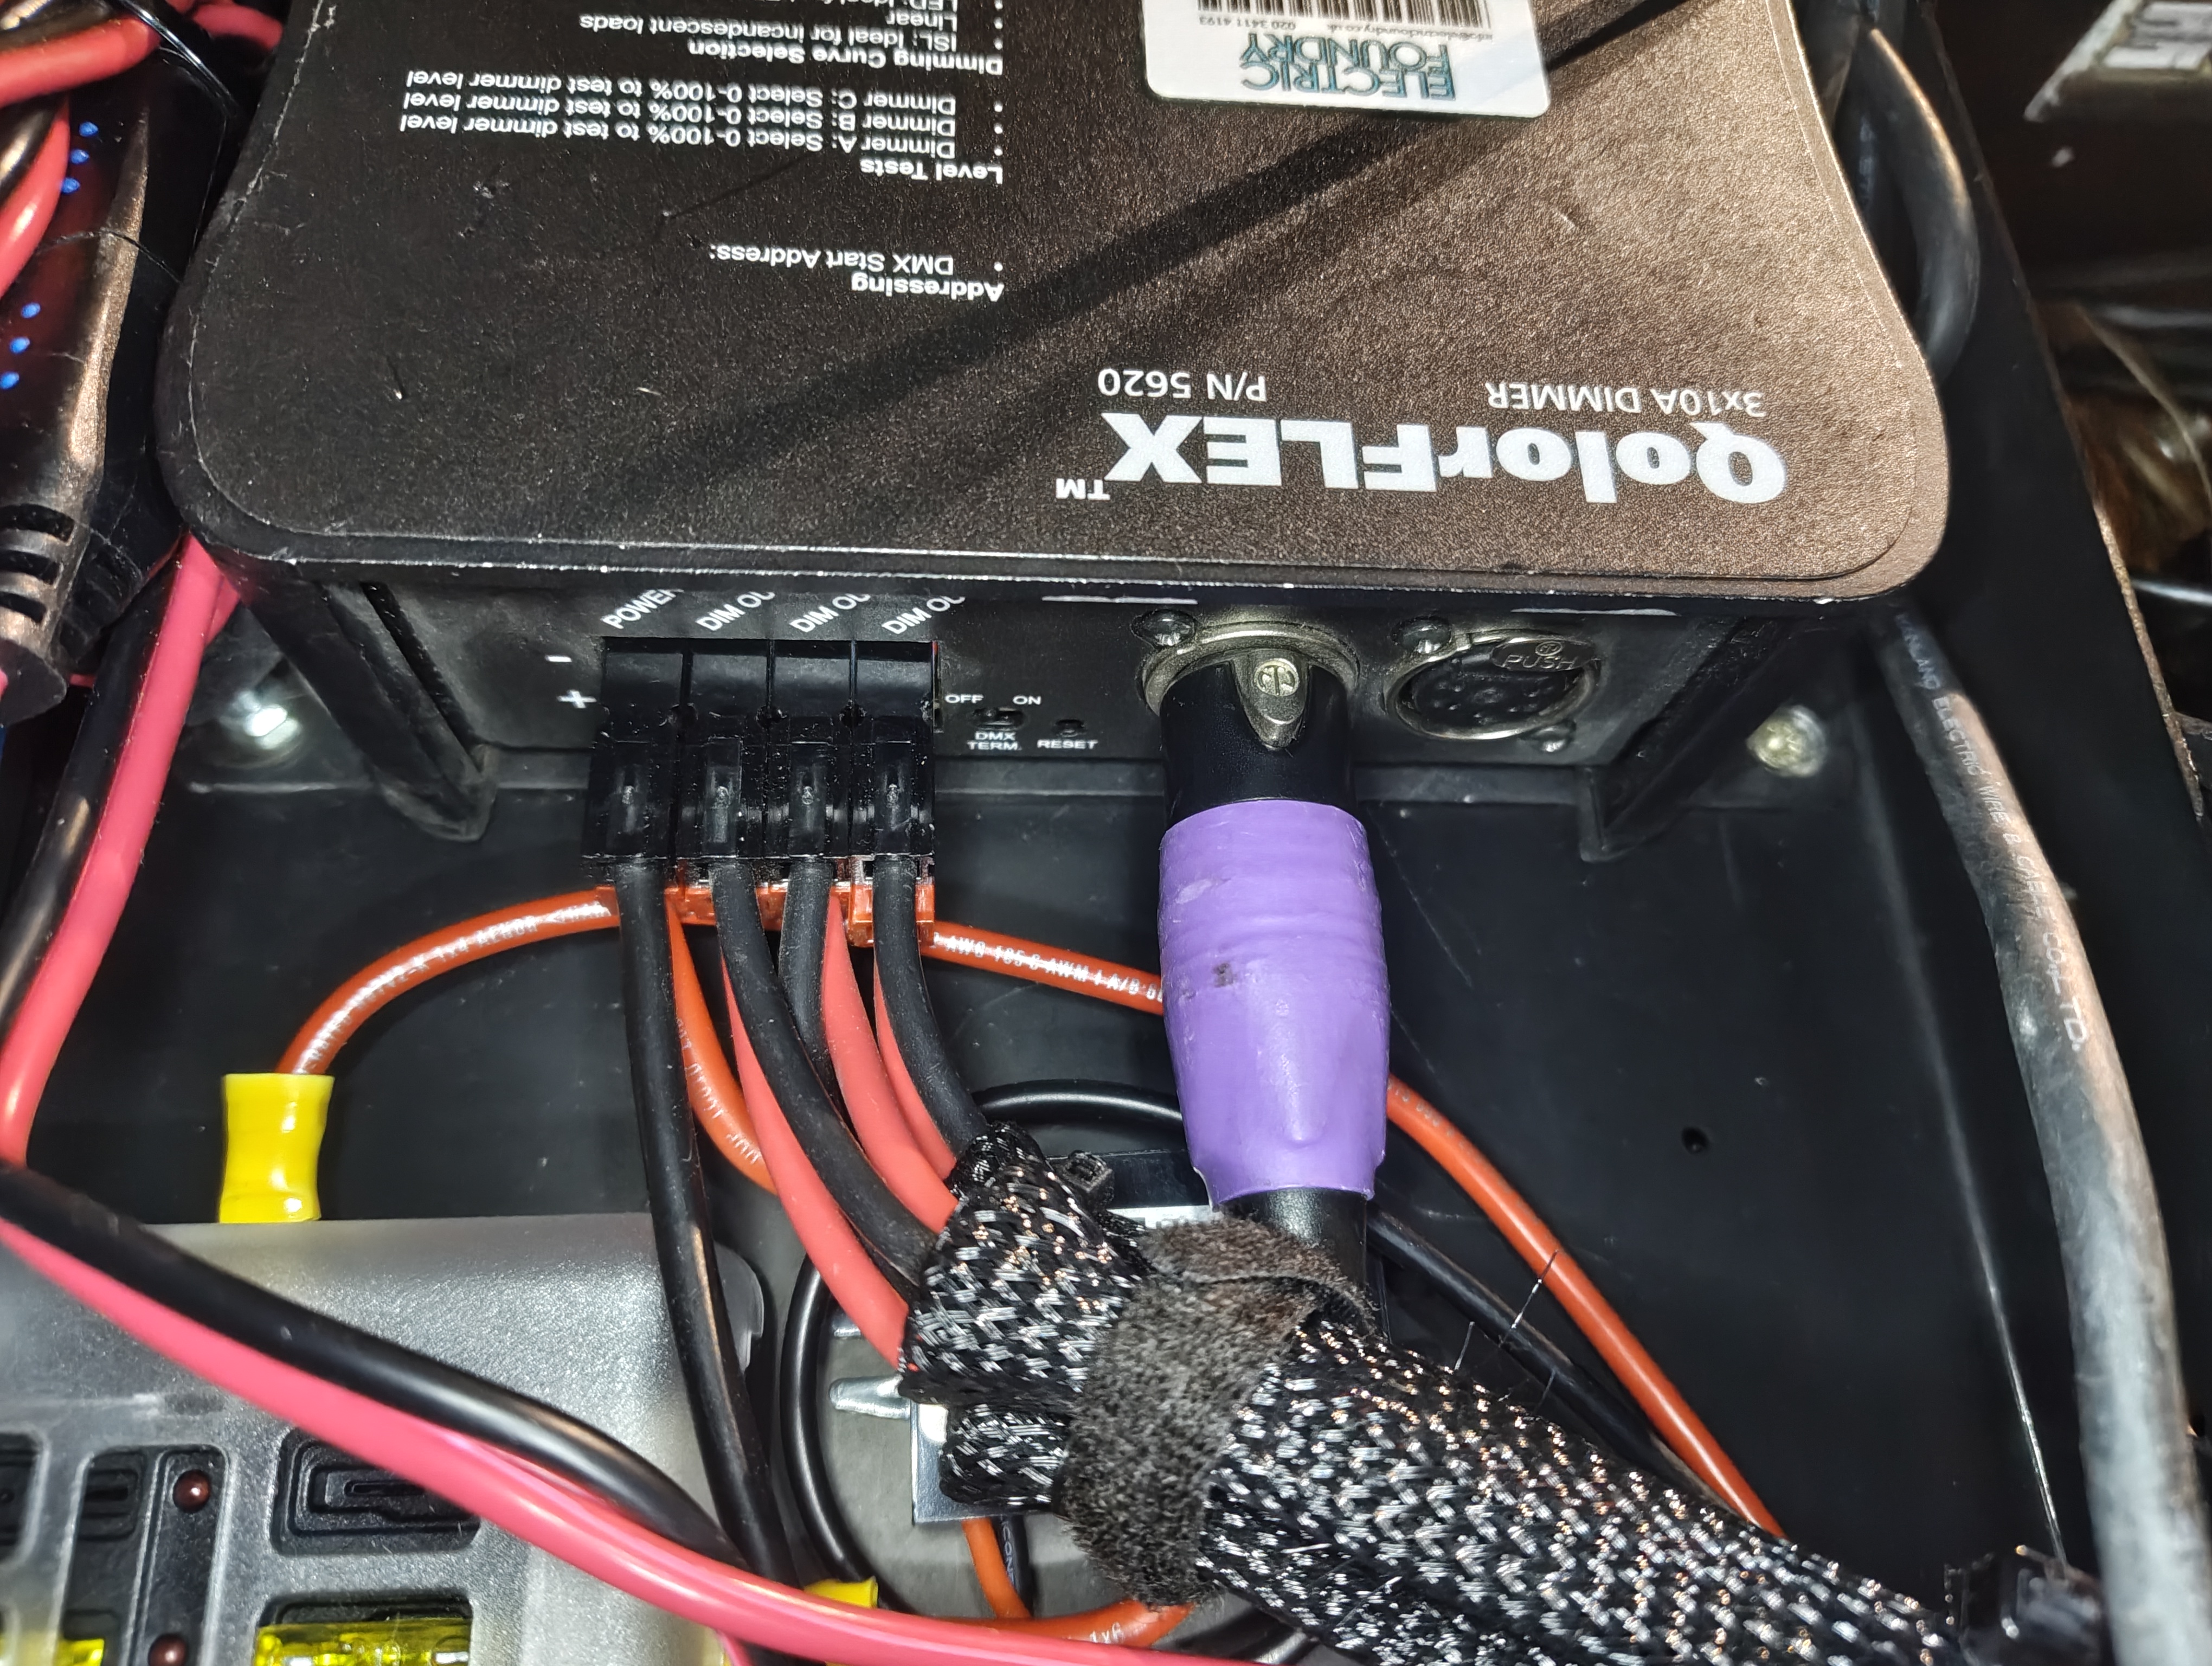
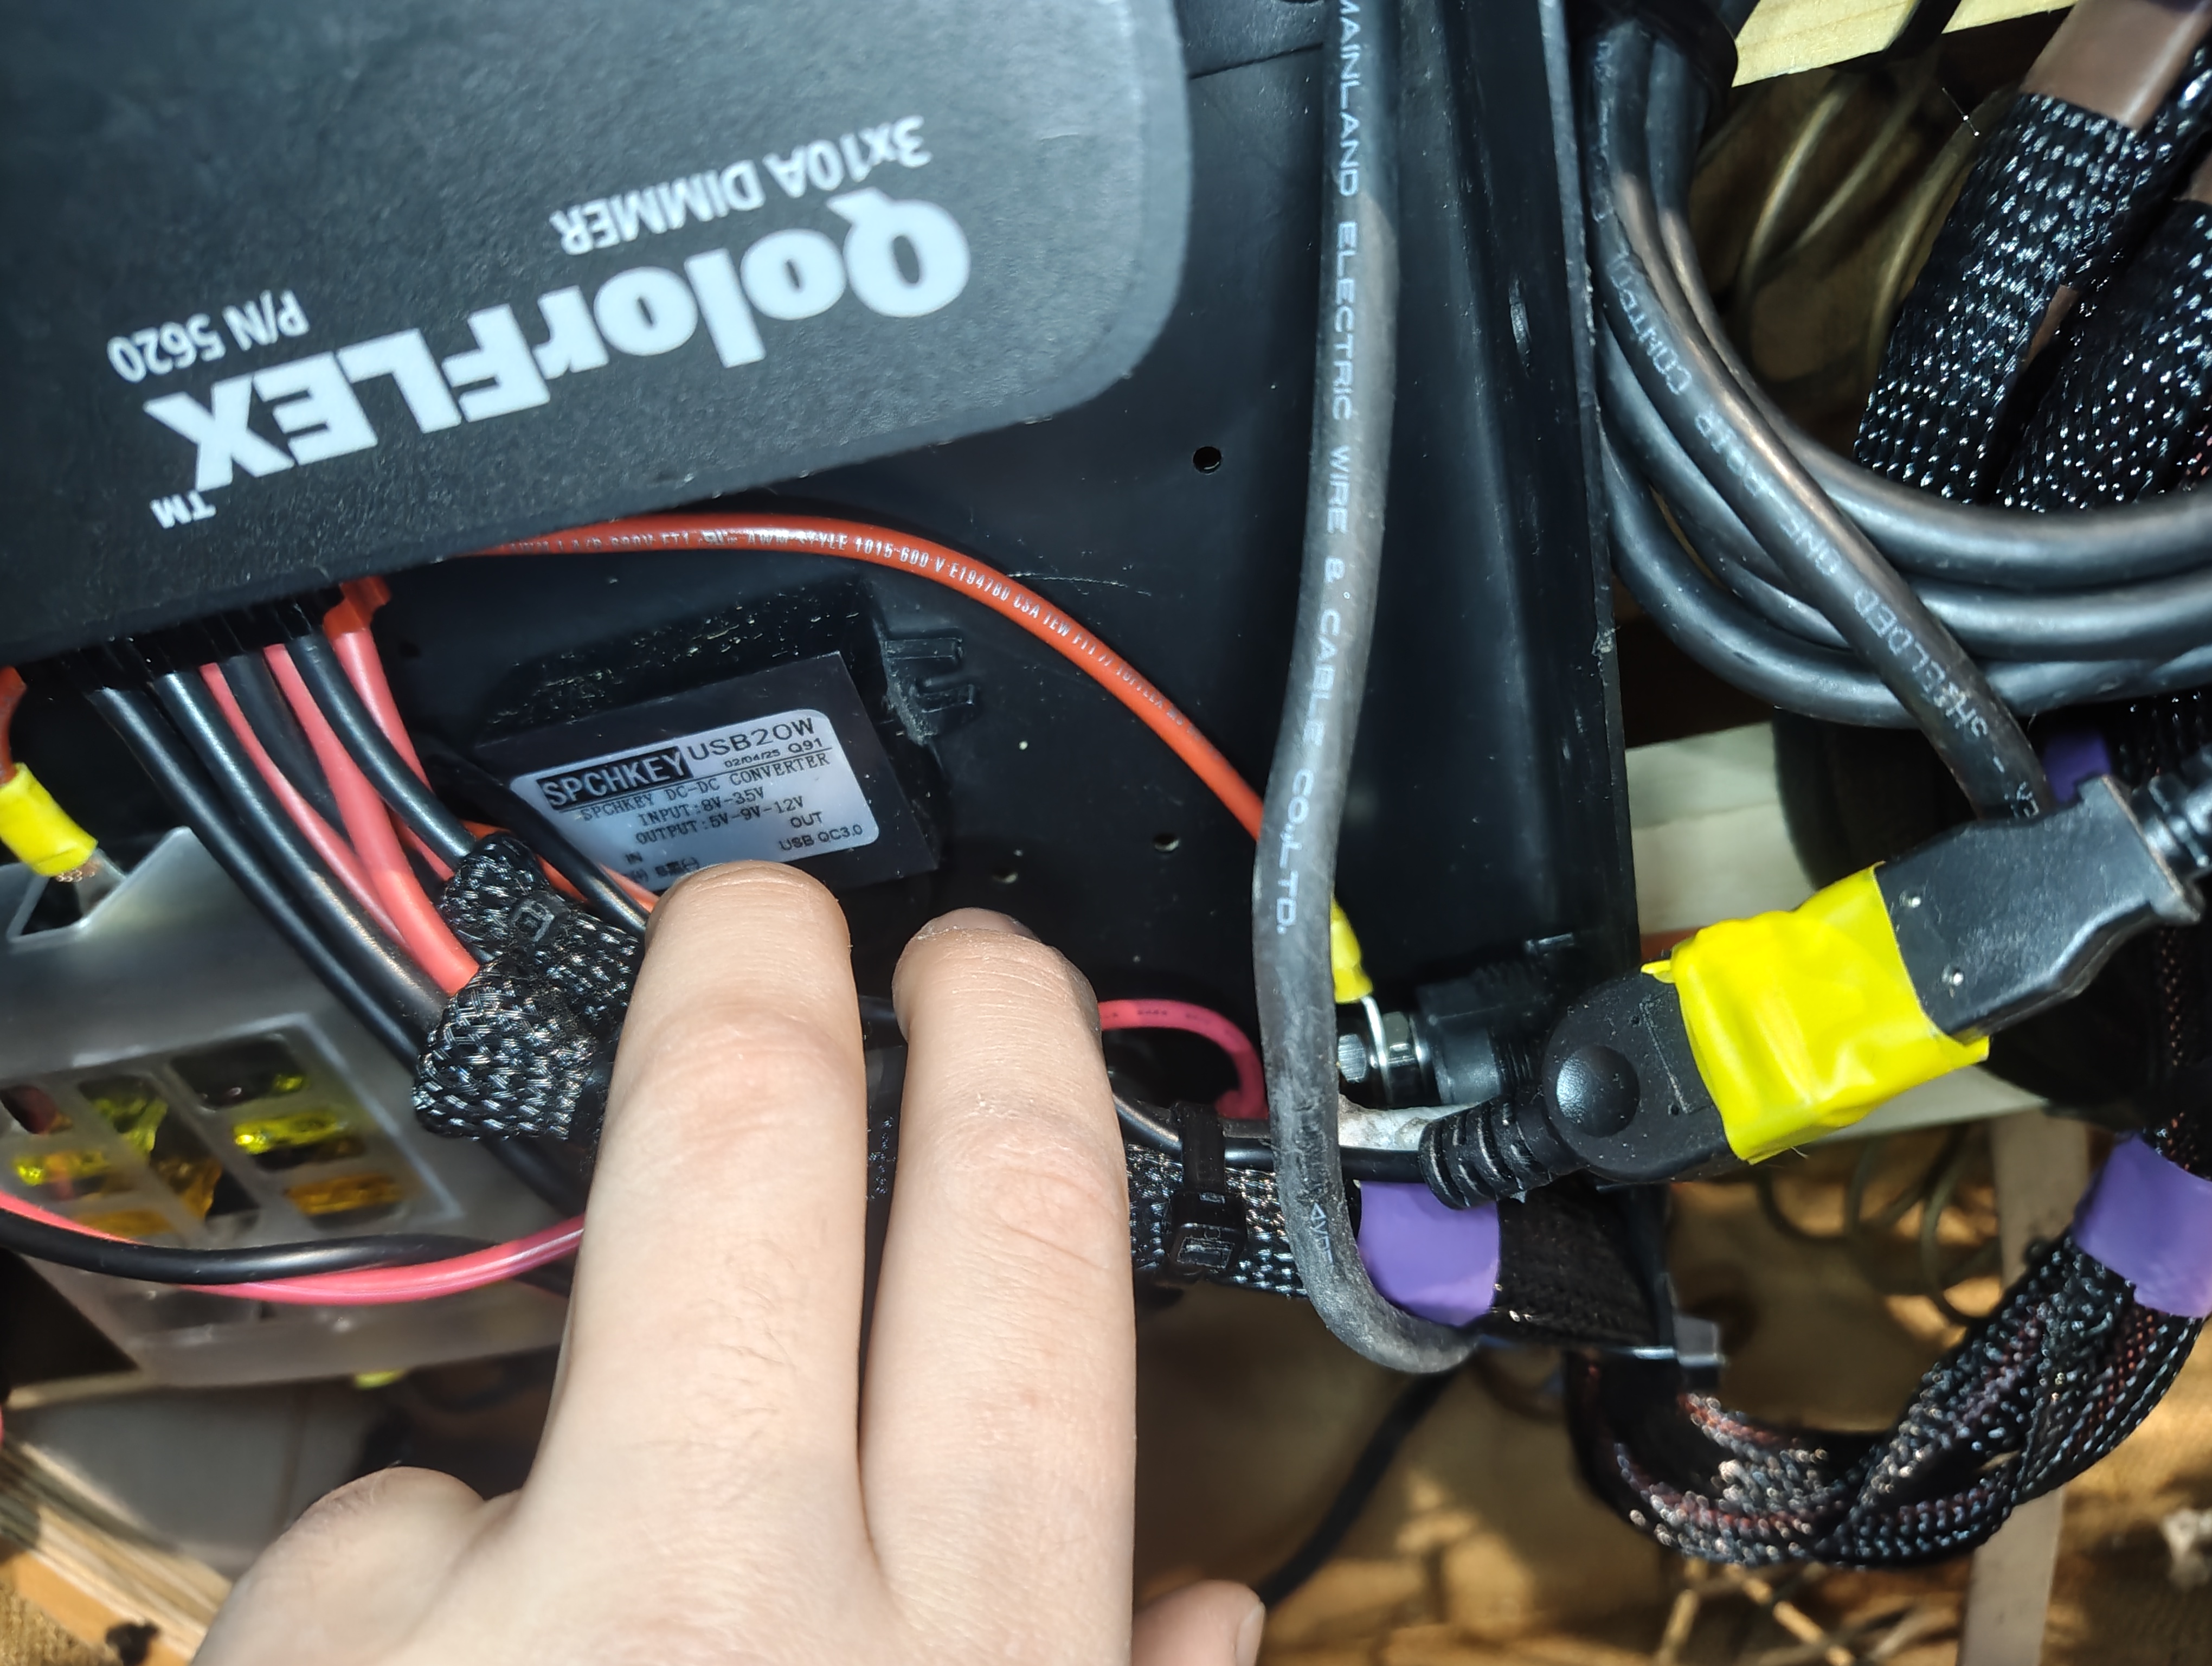
Internally it is powered off a 12V 22Ah lead acid battery, charged with a Victron 13 amp charger. Dimming is done by a City Theatrical QolorFlex dimmer, with CRMX received by a LumenRadio Moonlite.
Channels & Addressing
- Channels: 841–842
- Fixture Type: Dimmer
- Universe: 14
- Addresses:
- Ch 841: 14/1 (Headlight 1)
- Ch 842: 14/2 (Headlight 2)
- Label: MARTINA - HEADLIGHT
- Parameters: Intensity only (single channel dimmer per headlight)
Power & Control
| Power Source | Enduroline 12V 22Ah Lead Acid Battery |
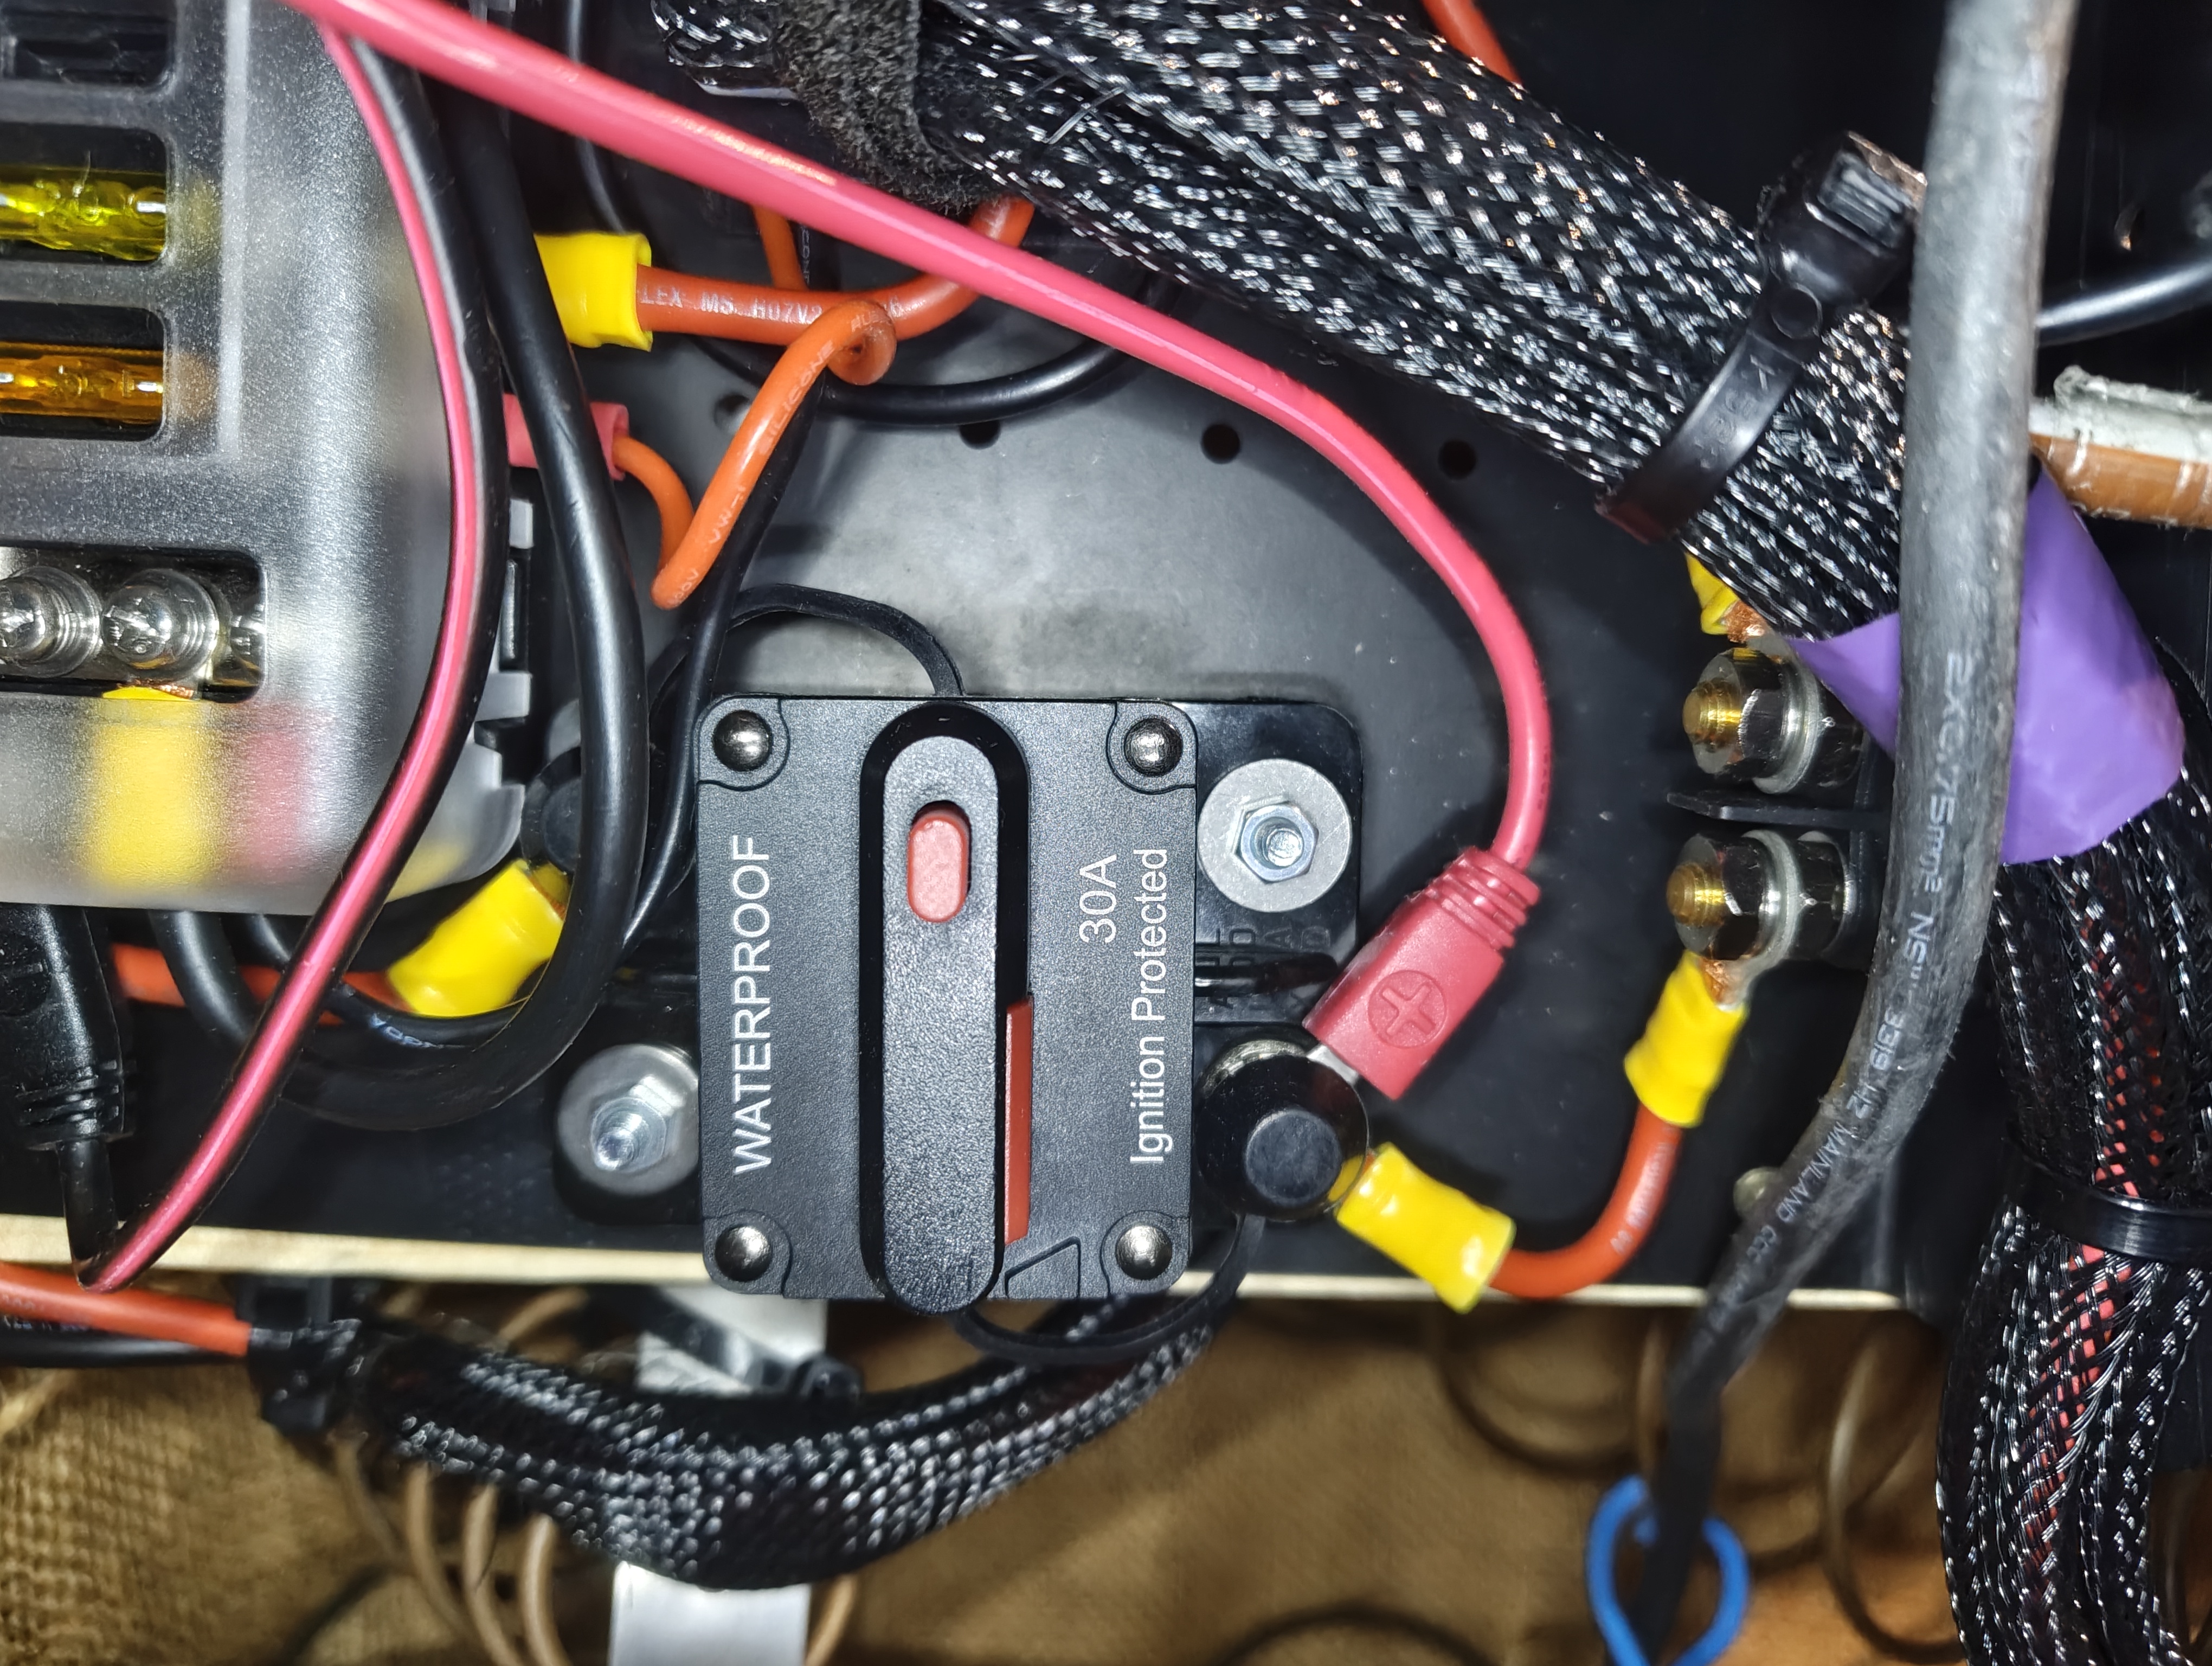
| Circuit Protection | 30A inline circuit breaker → 6-way blade fuse box |
| Dimmer | City Theatrical QolorFLEX® 3x10A Dimmer (Legacy Product) |
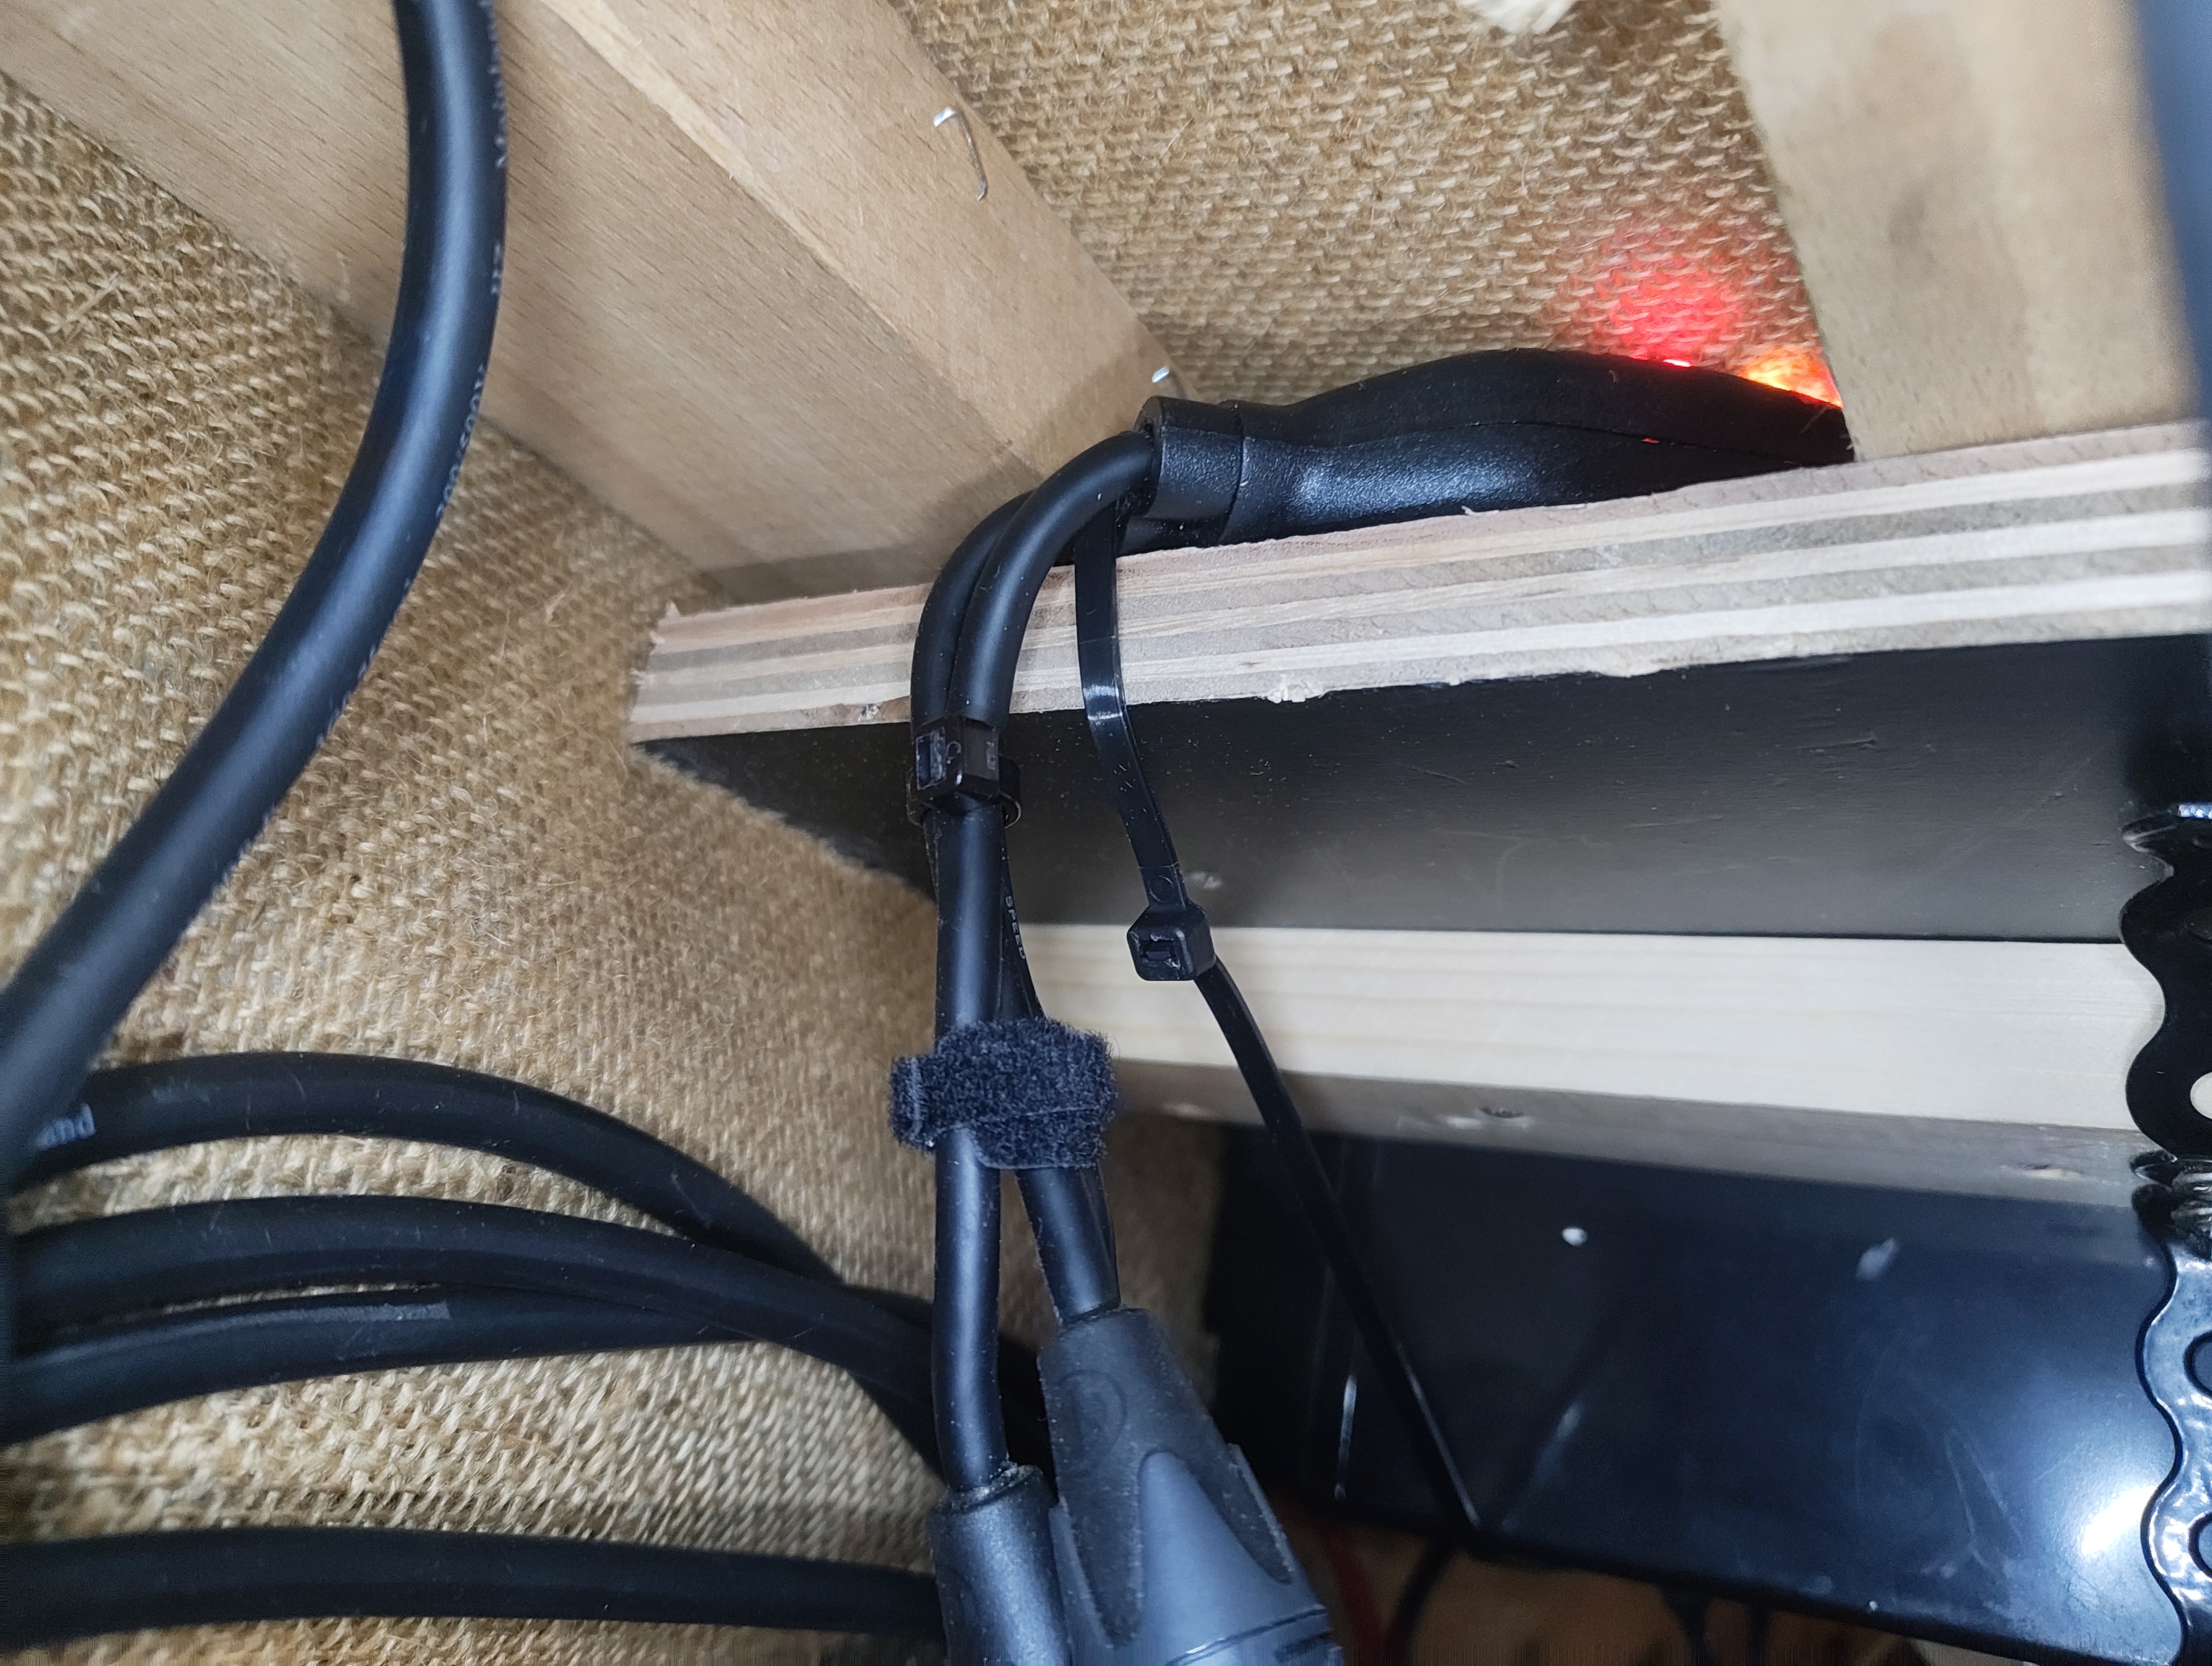
| DMX Source | LumenRadio Moonlite CRMX Receiver |
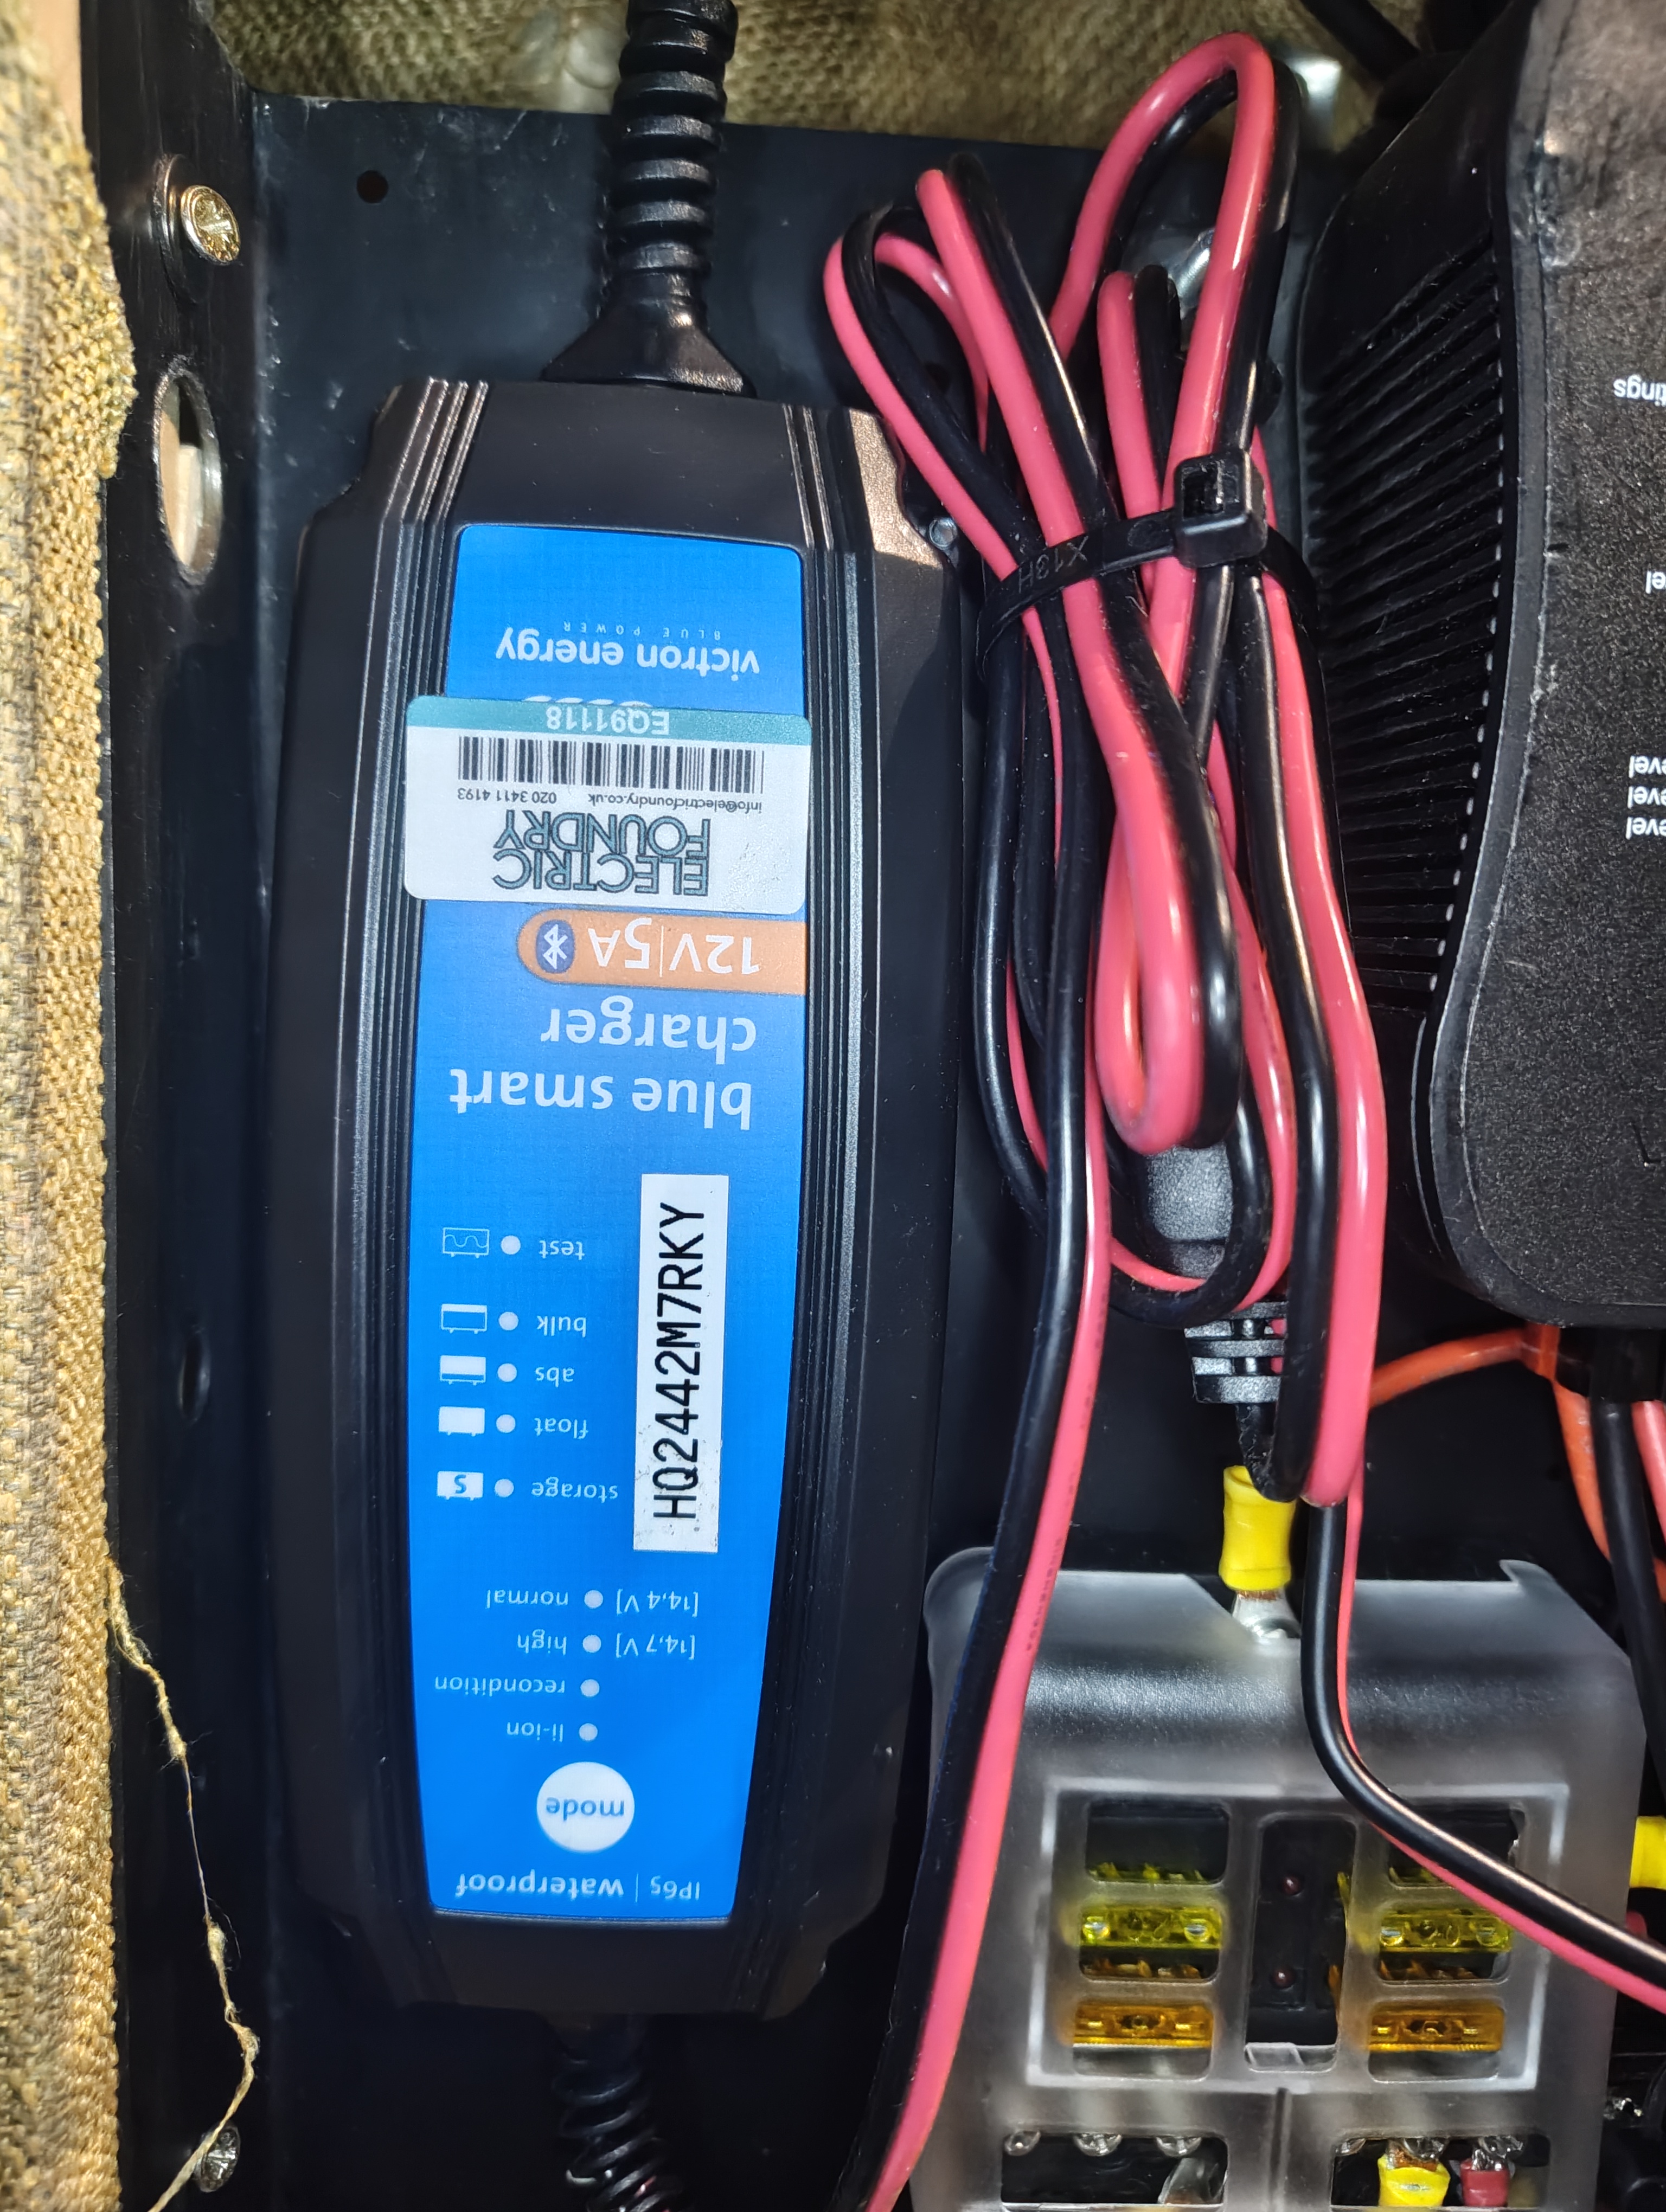
| Charger | Victron Blue Smart IP65 Charger 12V 5A (in-built 13A tail) |
Charging Access
Charging tail and power switch are only accessible from the underside of the sofa — must be accessed when sofa is flown out in the storage cage.
Wiring
Power Flow
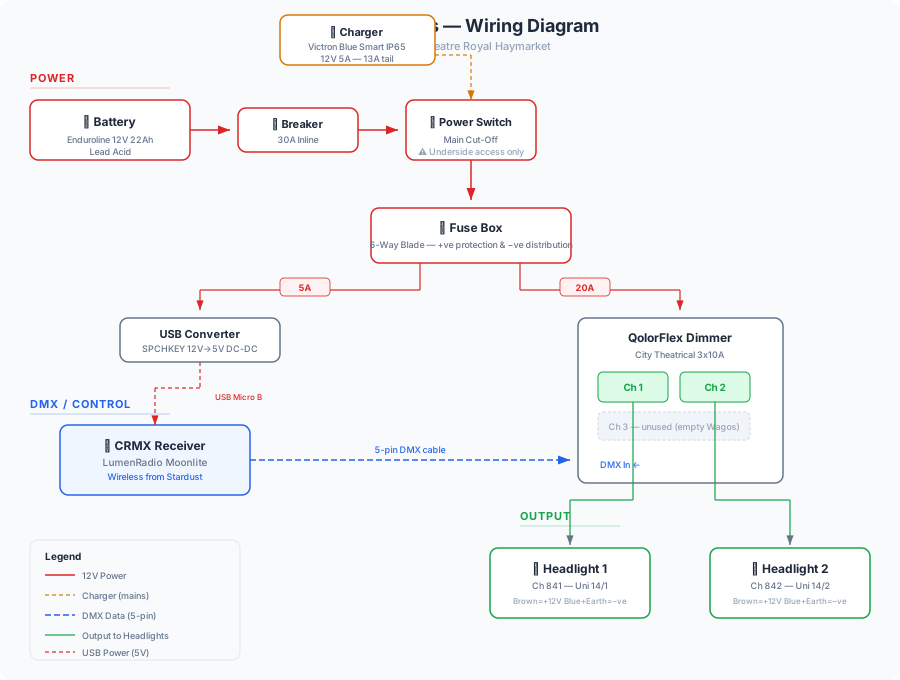
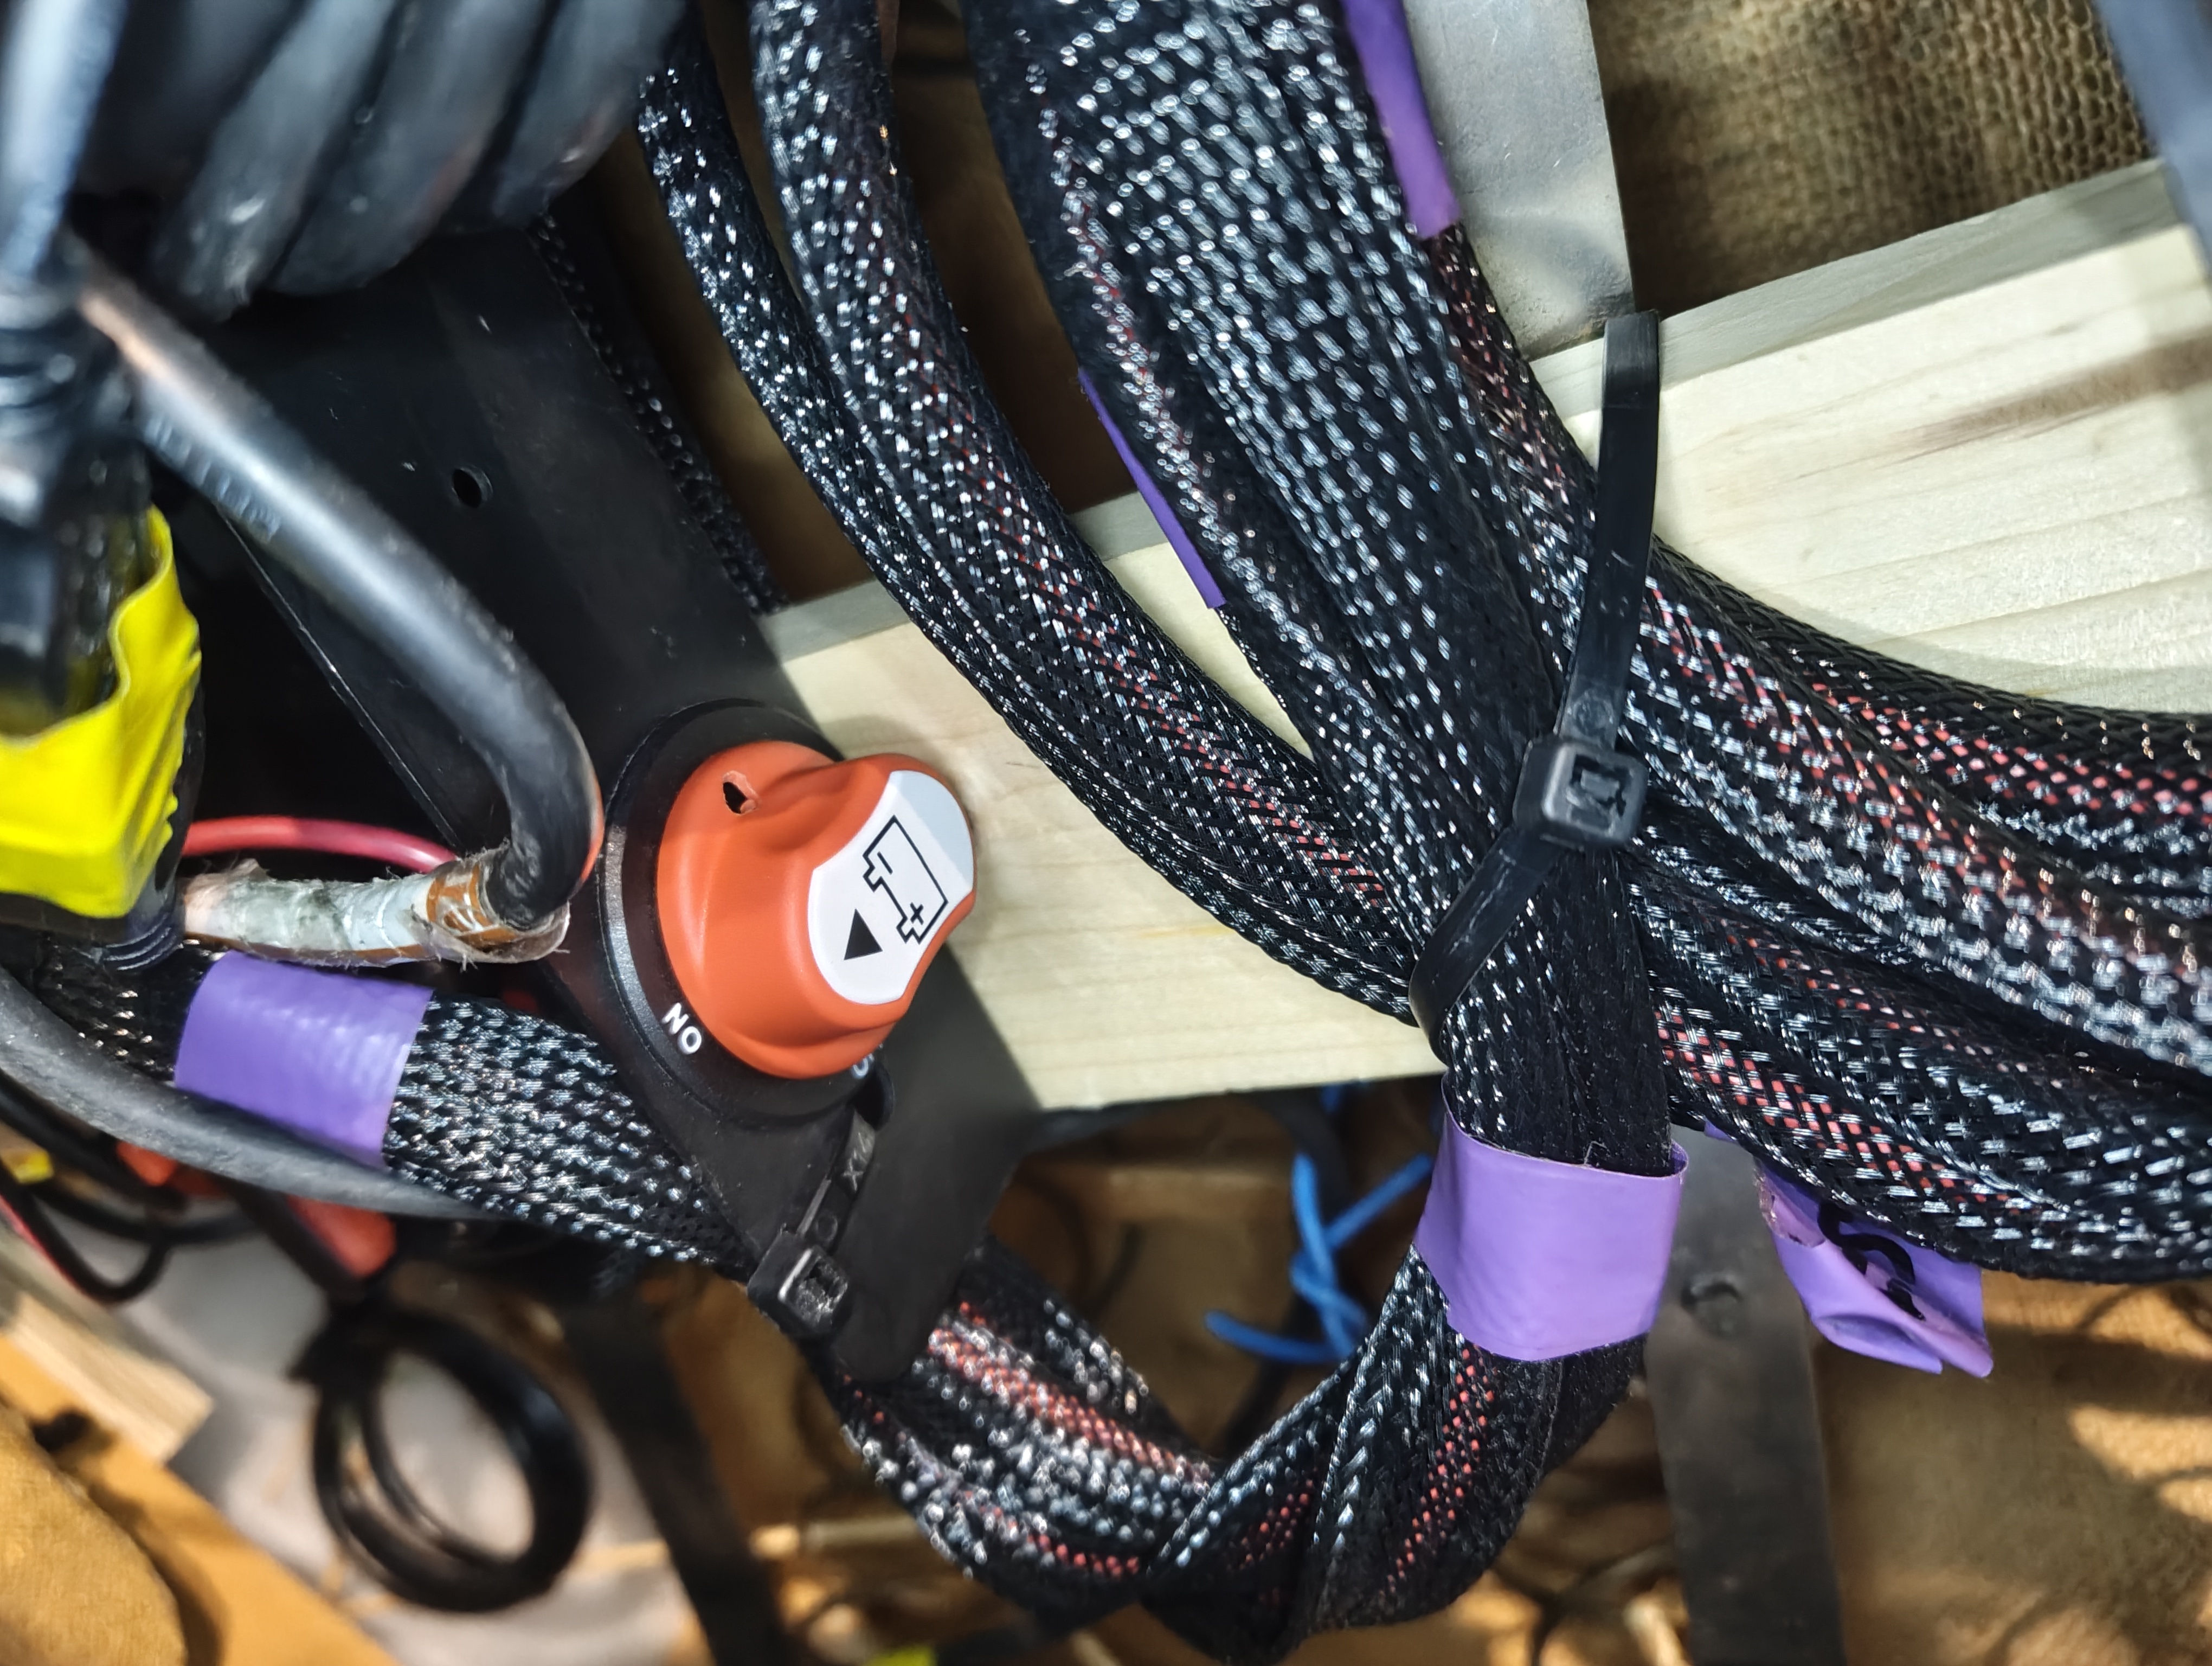
Power is supplied by the Enduroline 12V 22Ah lead acid battery, protected by a 30A inline circuit breaker straight from the battery. After the breaker there is the main power cut-off switch — this is also where the Victron charger feeds into the battery.
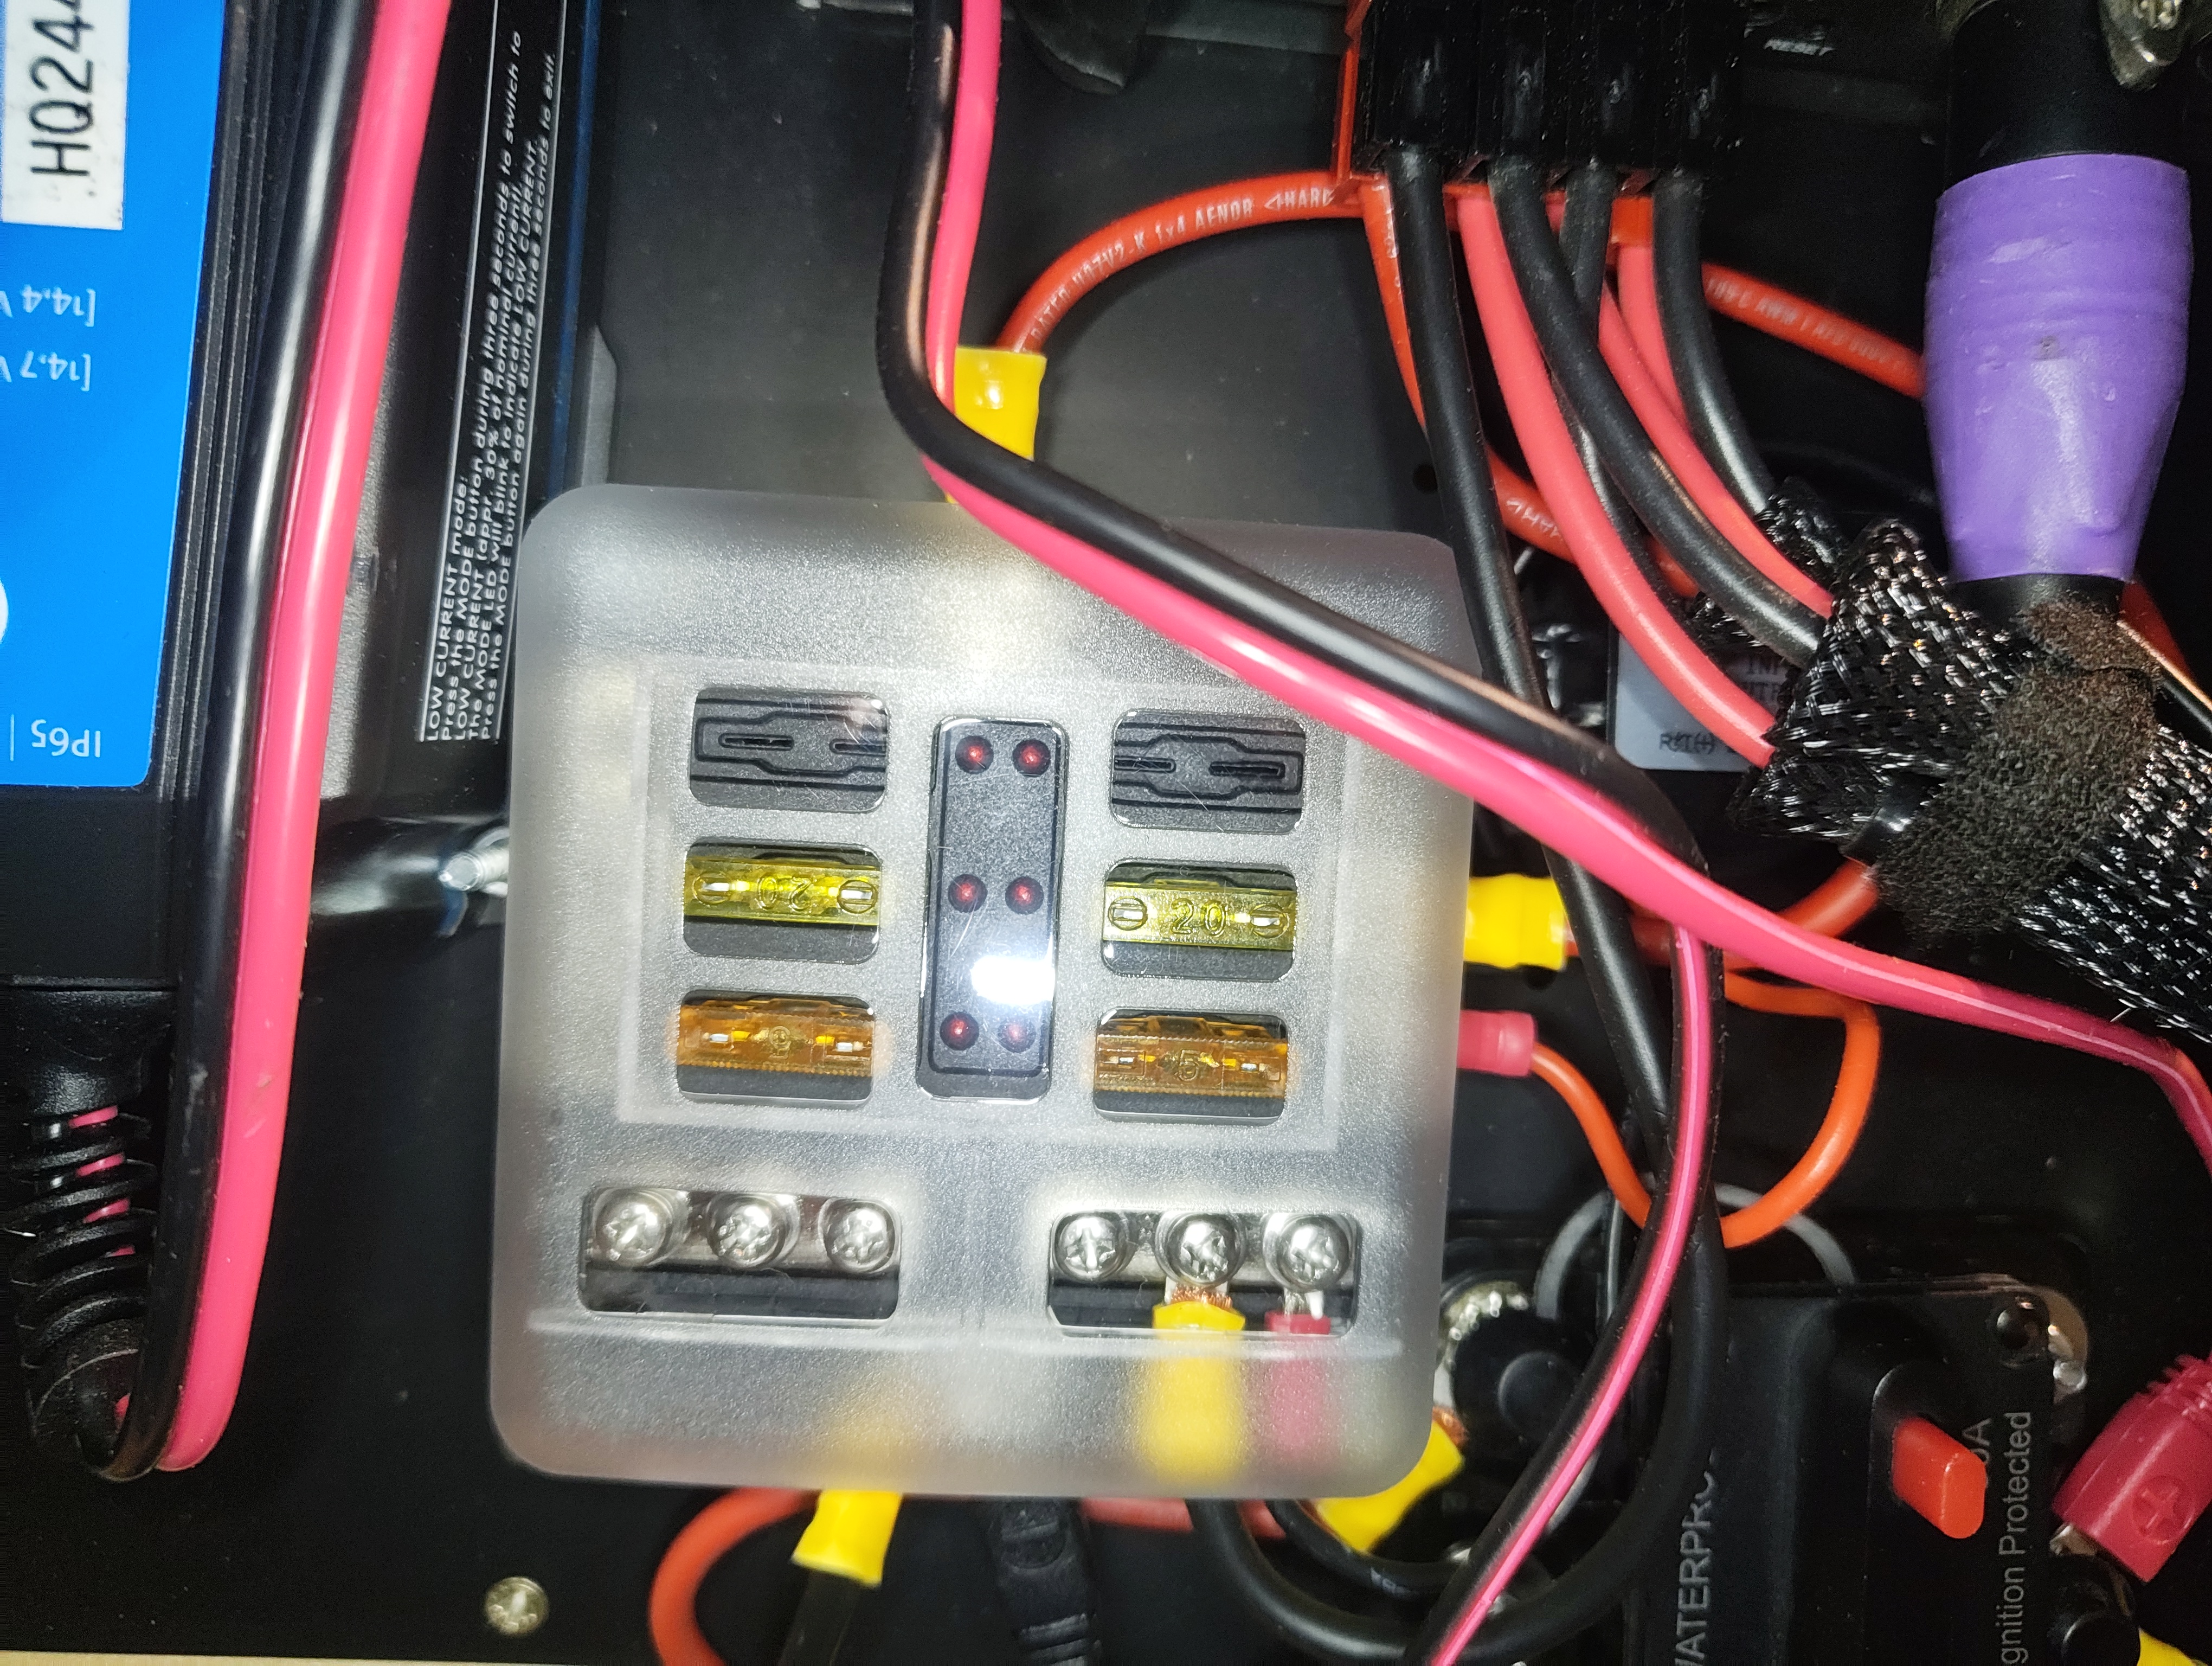
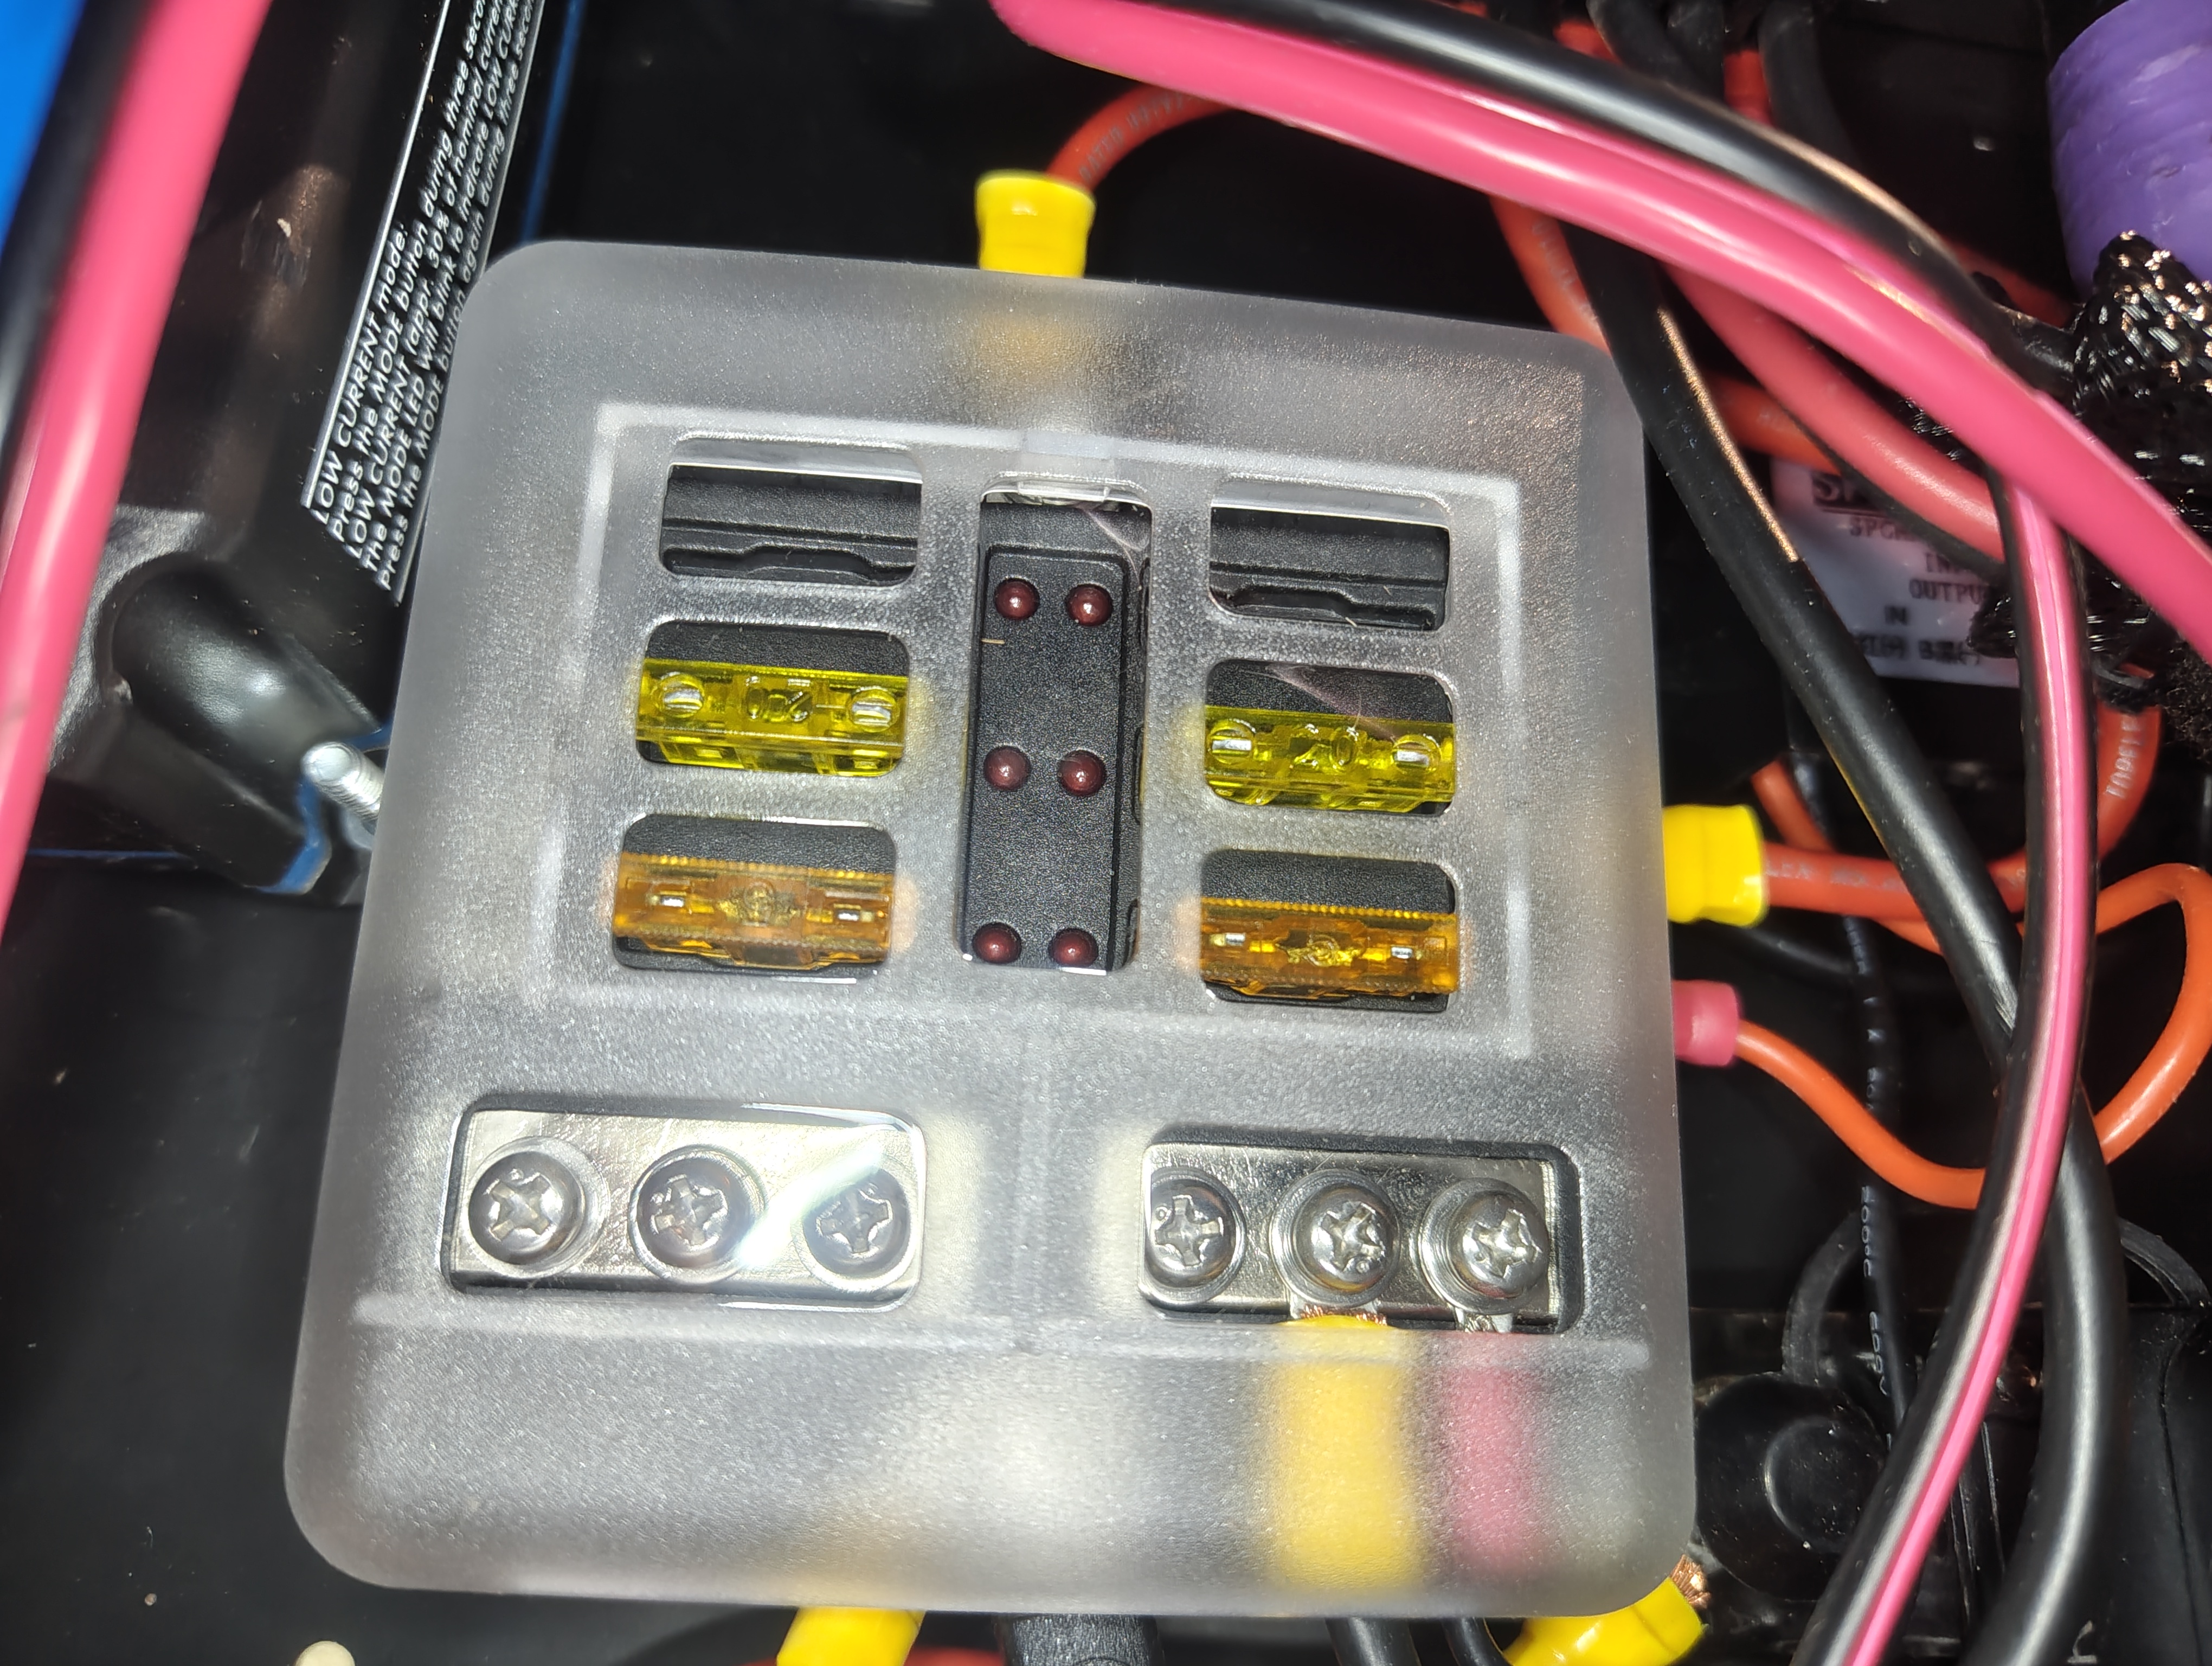
Following the switch is a 6-way blade fuse box used for positive line protection and negative distribution:
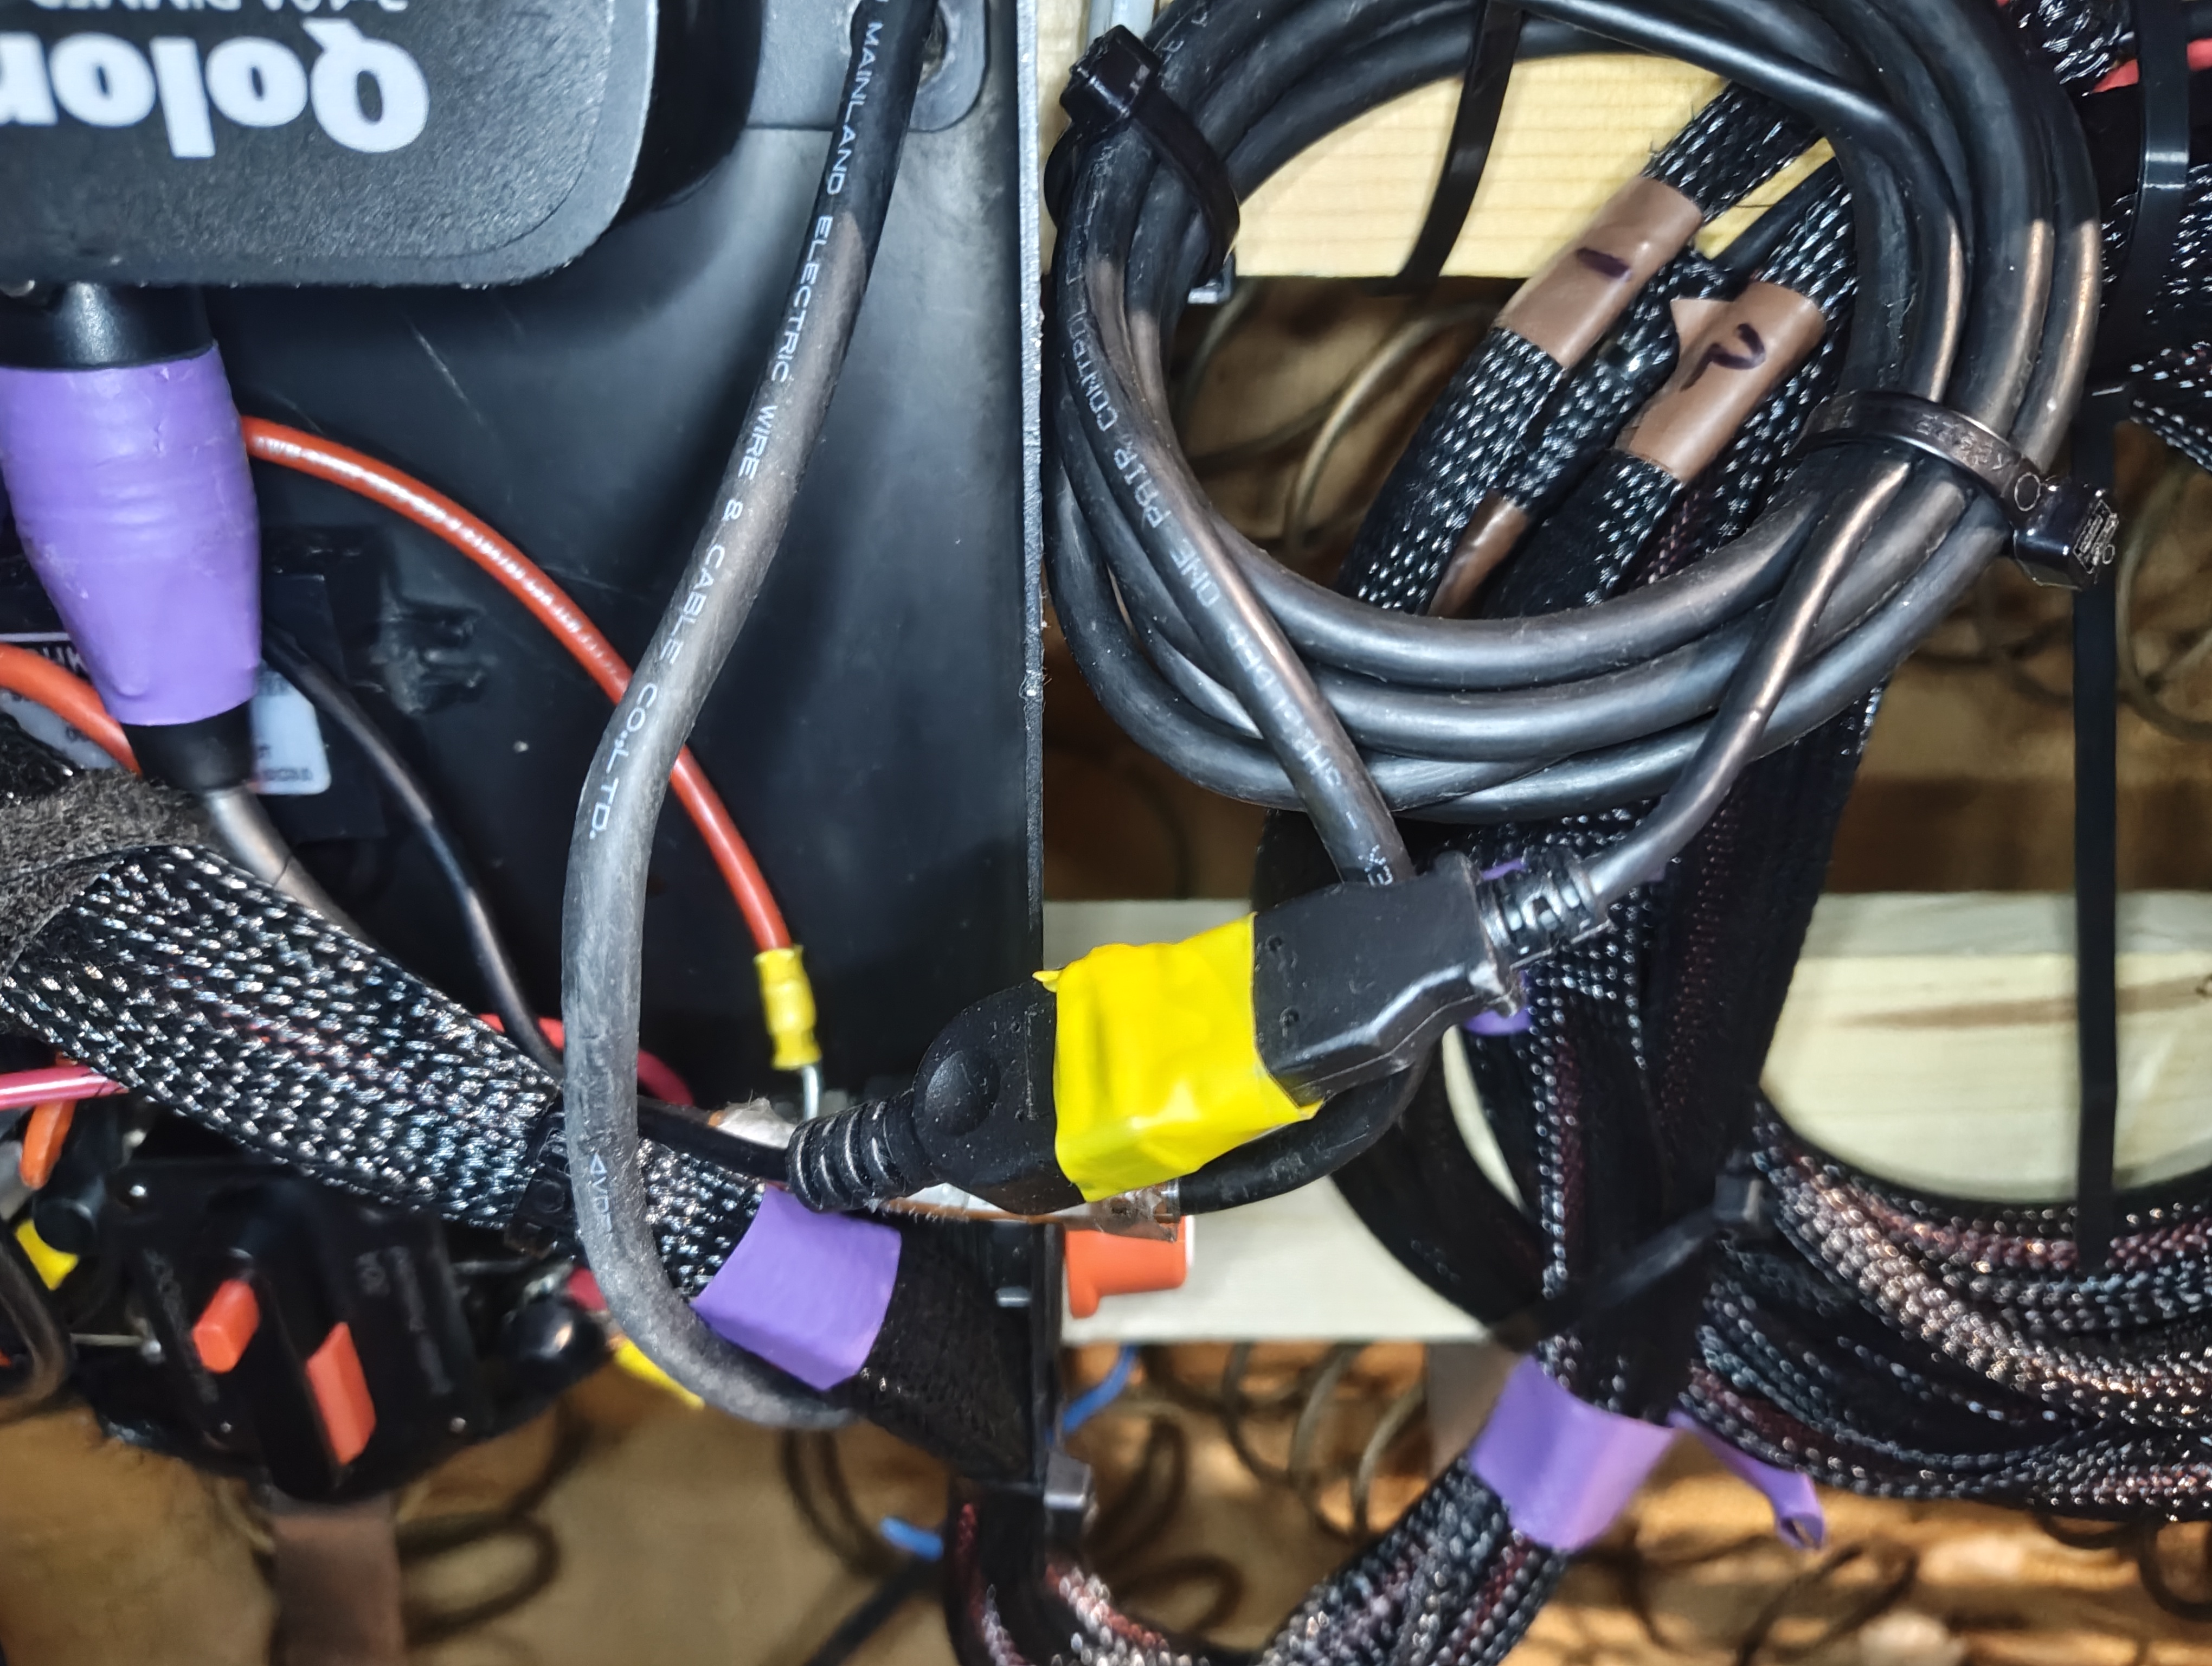
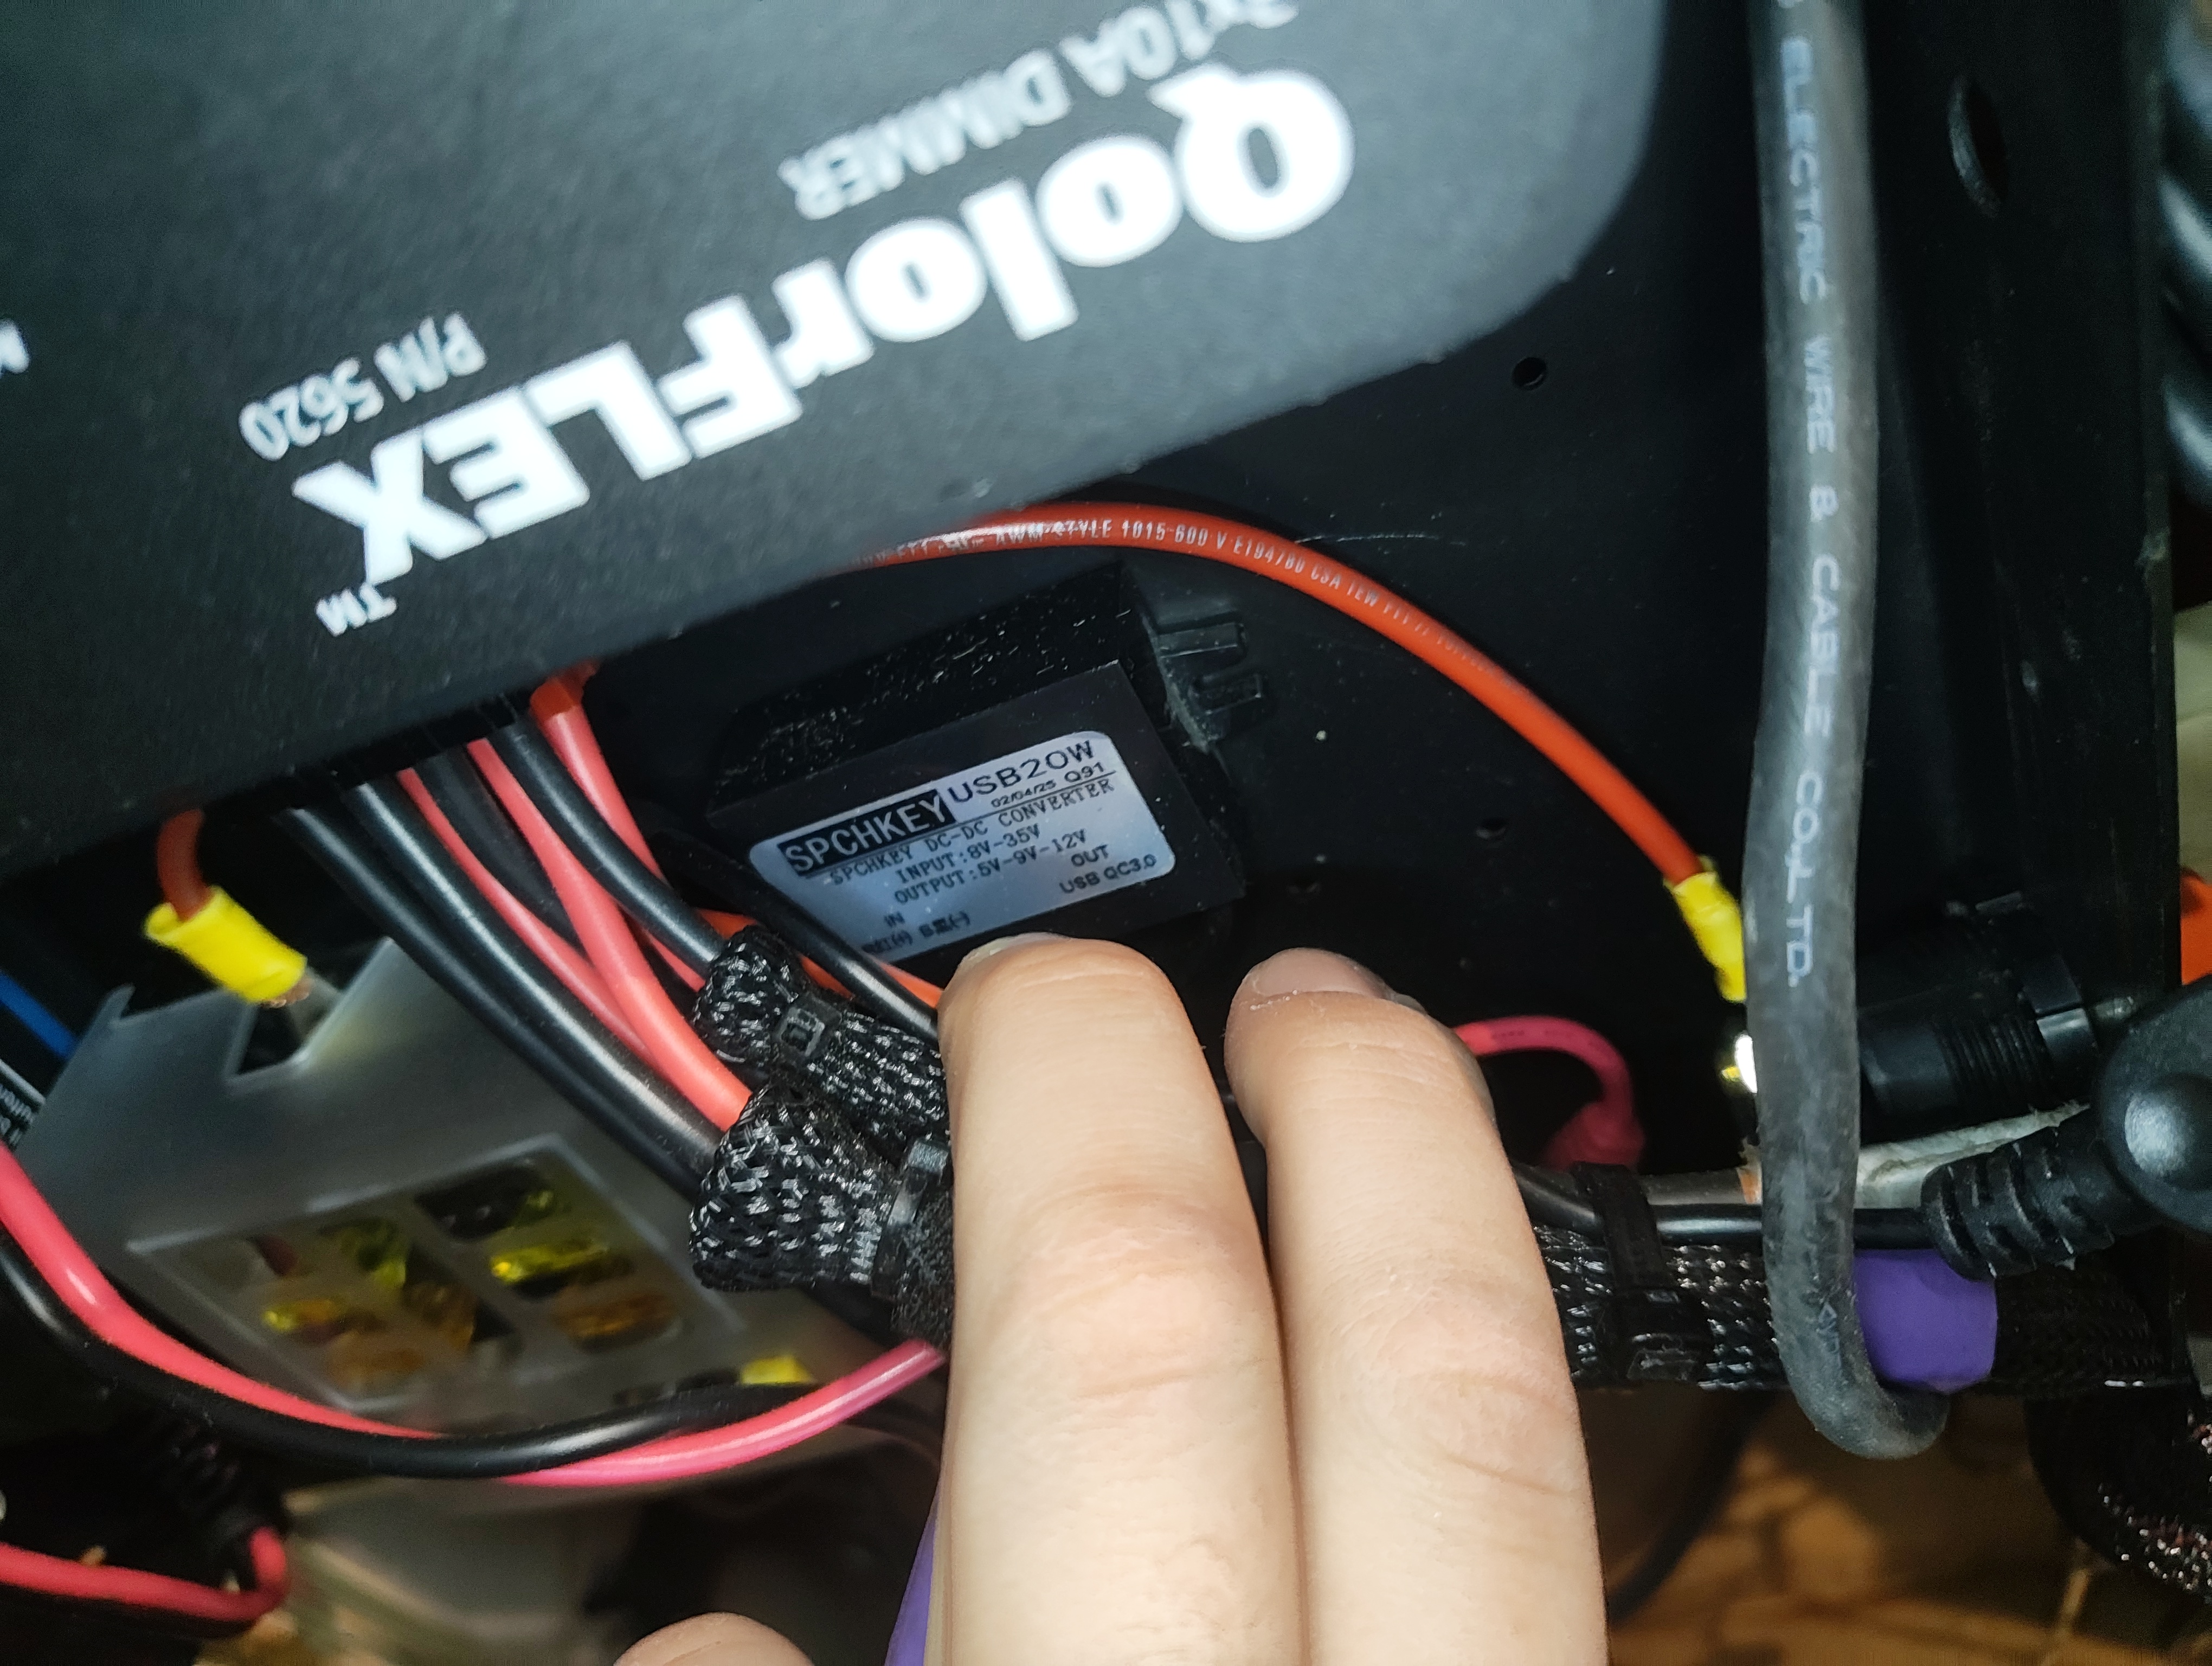
- 5A fuse → 12V to 5V USB step-down converter → charges the LumenRadio Moonlite (mounted slightly further away for less interference)
- 20A fuse → QolorFlex 3x10A dimmer → both headlights on separate dimmer outputs
Headlight Wiring
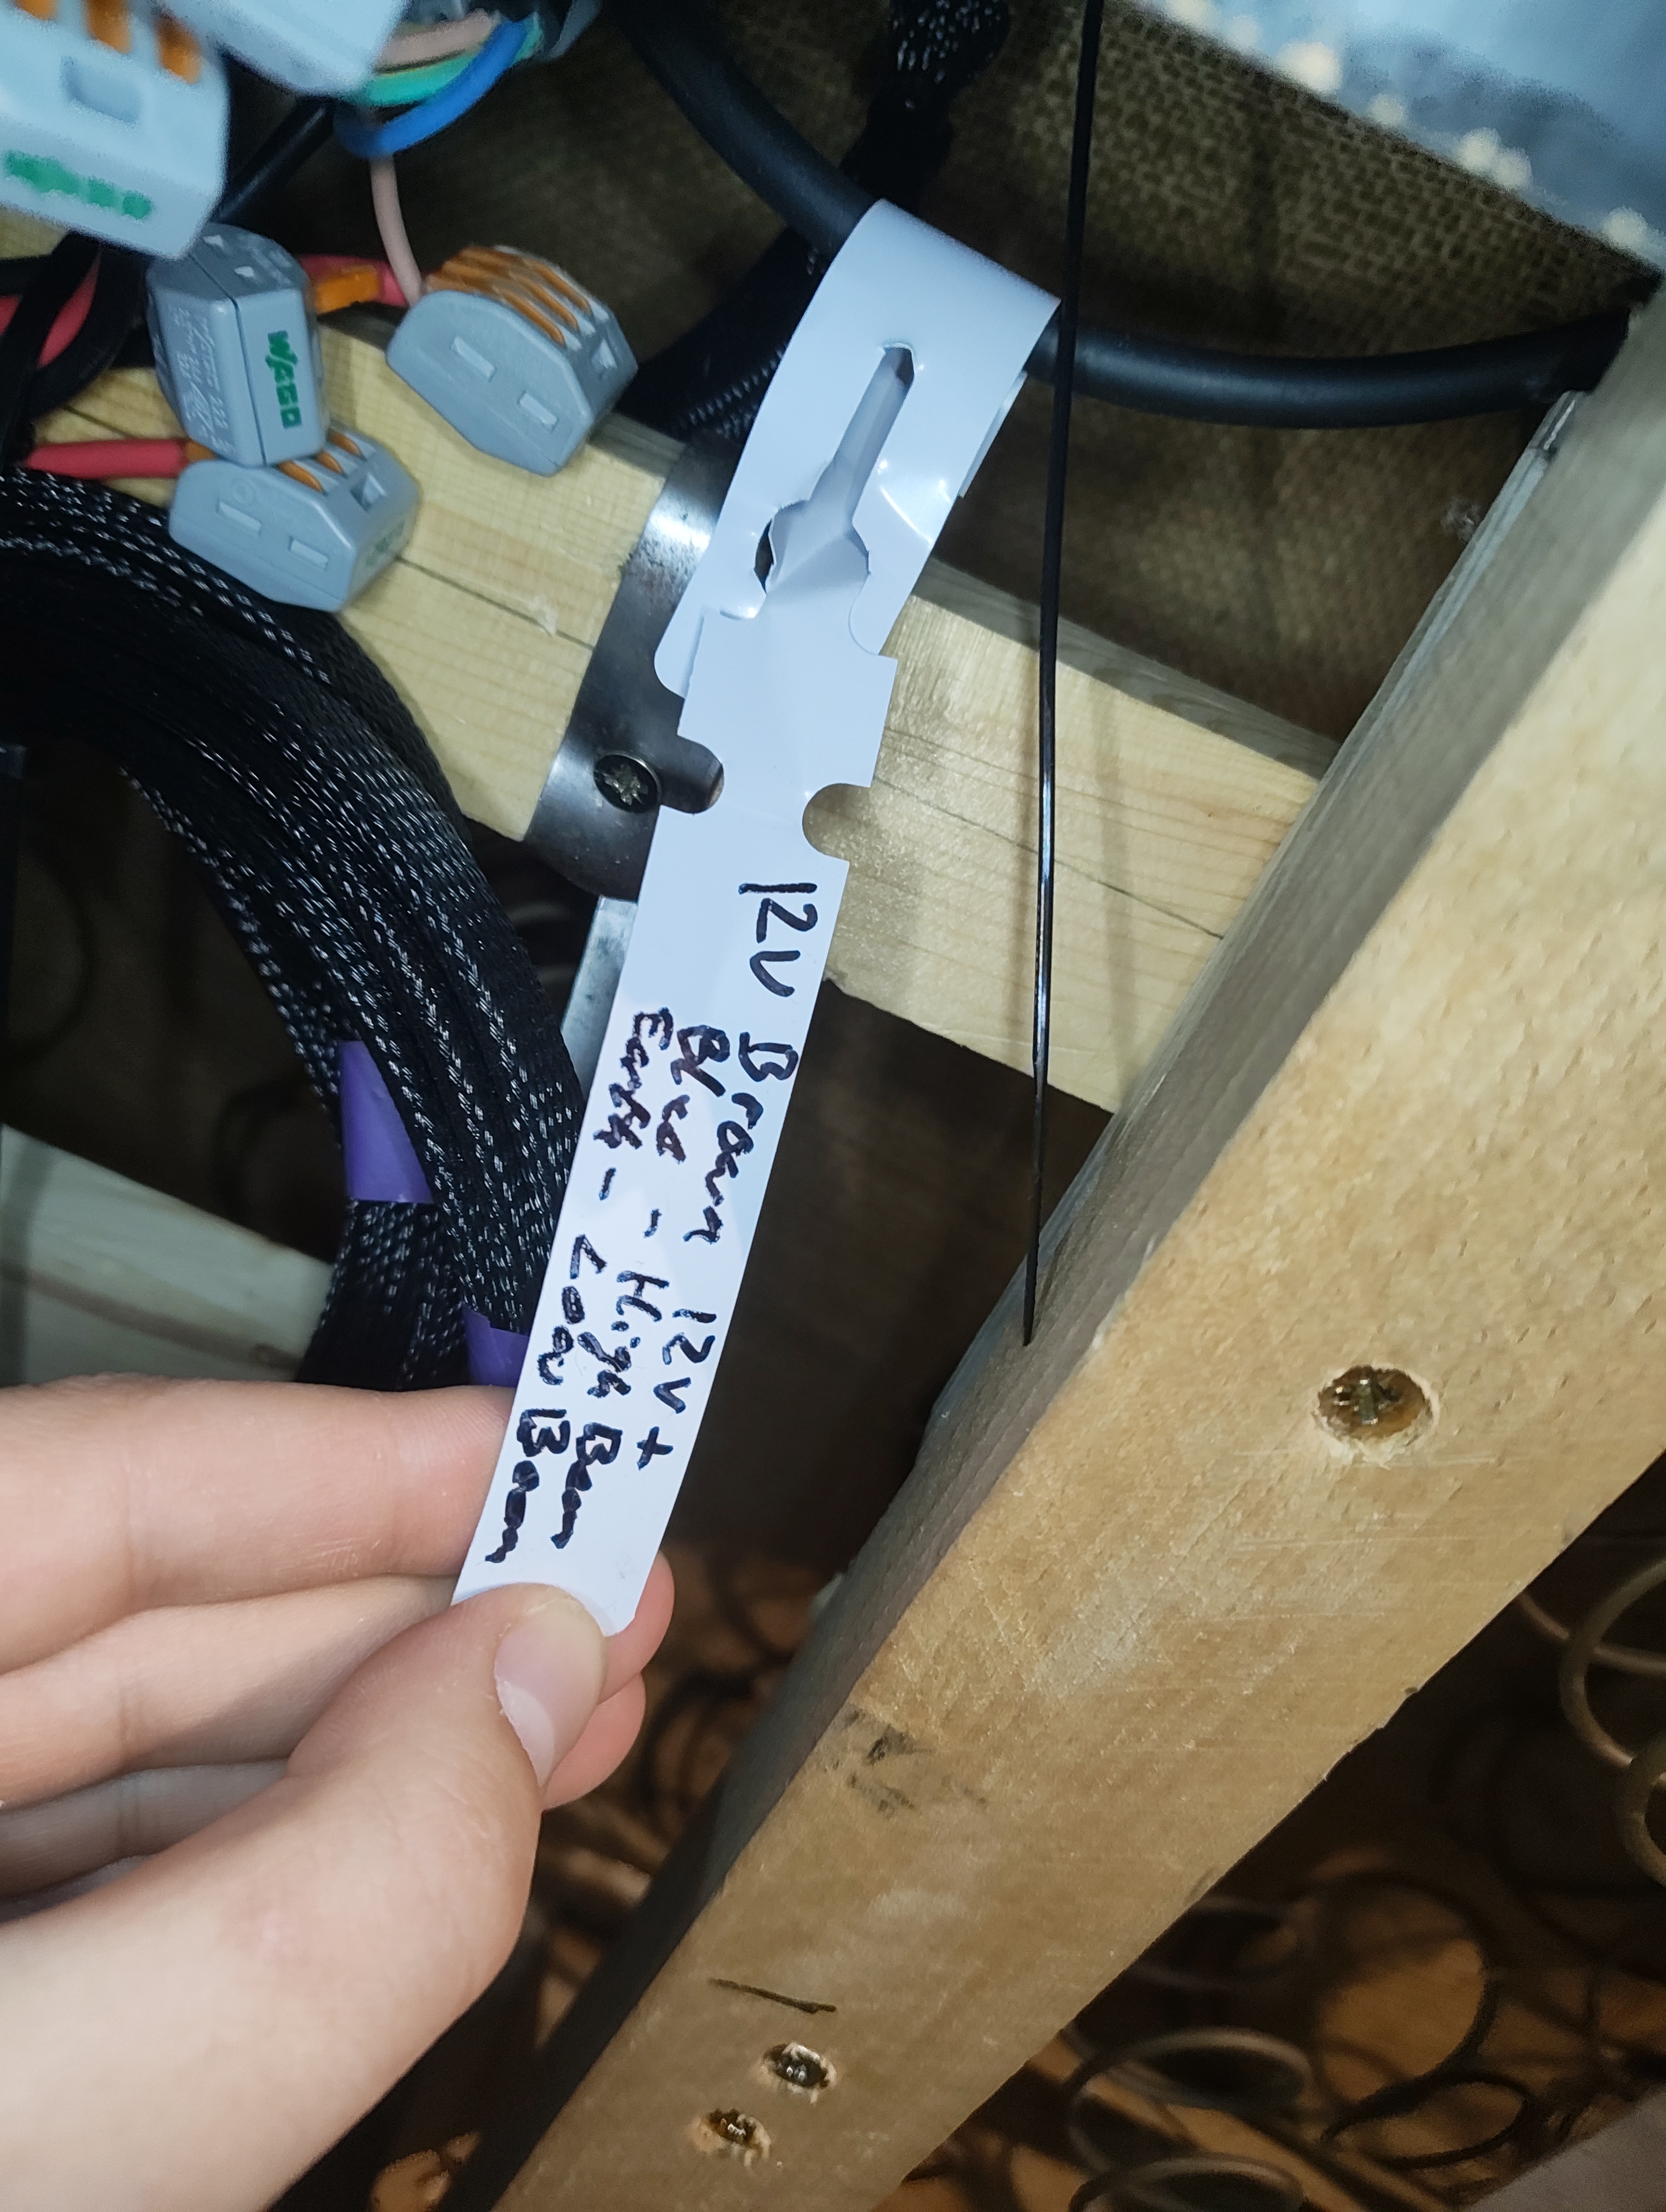
Each headlight has a 3-core cable: Brown = +12V, Blue = high beam, Earth = low beam. Brown connects to the dimmer's positive; blue and earth are connected together to the dimmer's negative.
Tip
The third dimmer output on the QolorFlex has cables plugged in but is not connected to any load — they terminate in empty Wagos.
DMX
Data to the QolorFlex dimmer is supplied by the LumenRadio Moonlite receiver via its built-in 5-pin DMX output, extended with a standard DMX cable into the dimmer's input.
Tip
The Moonlite is charged permanently via the in-built 12V to 5V USB converter — no need to disconnect it.
Images
Key Views
All Reference Photos (click to expand)
Components List
| Component | Detail |
|---|---|
| Battery | Enduroline 12V 22Ah Lead Acid |
| Dimmer | City Theatrical QolorFLEX® 3x10A (Legacy) |
| CRMX Receiver | LumenRadio Moonlite |
| Fuse Box | 6-way blade fuse box |
| USB Converter | SPCHKEY USB20W 12V to 5V DC-DC step-down |
| Charger | Victron Blue Smart IP65 12V 5A |
Usage
Used to simulate a car before Martina's house as car headlights (approx 10 seconds).
PDFs & Manuals
Brazier
Overview
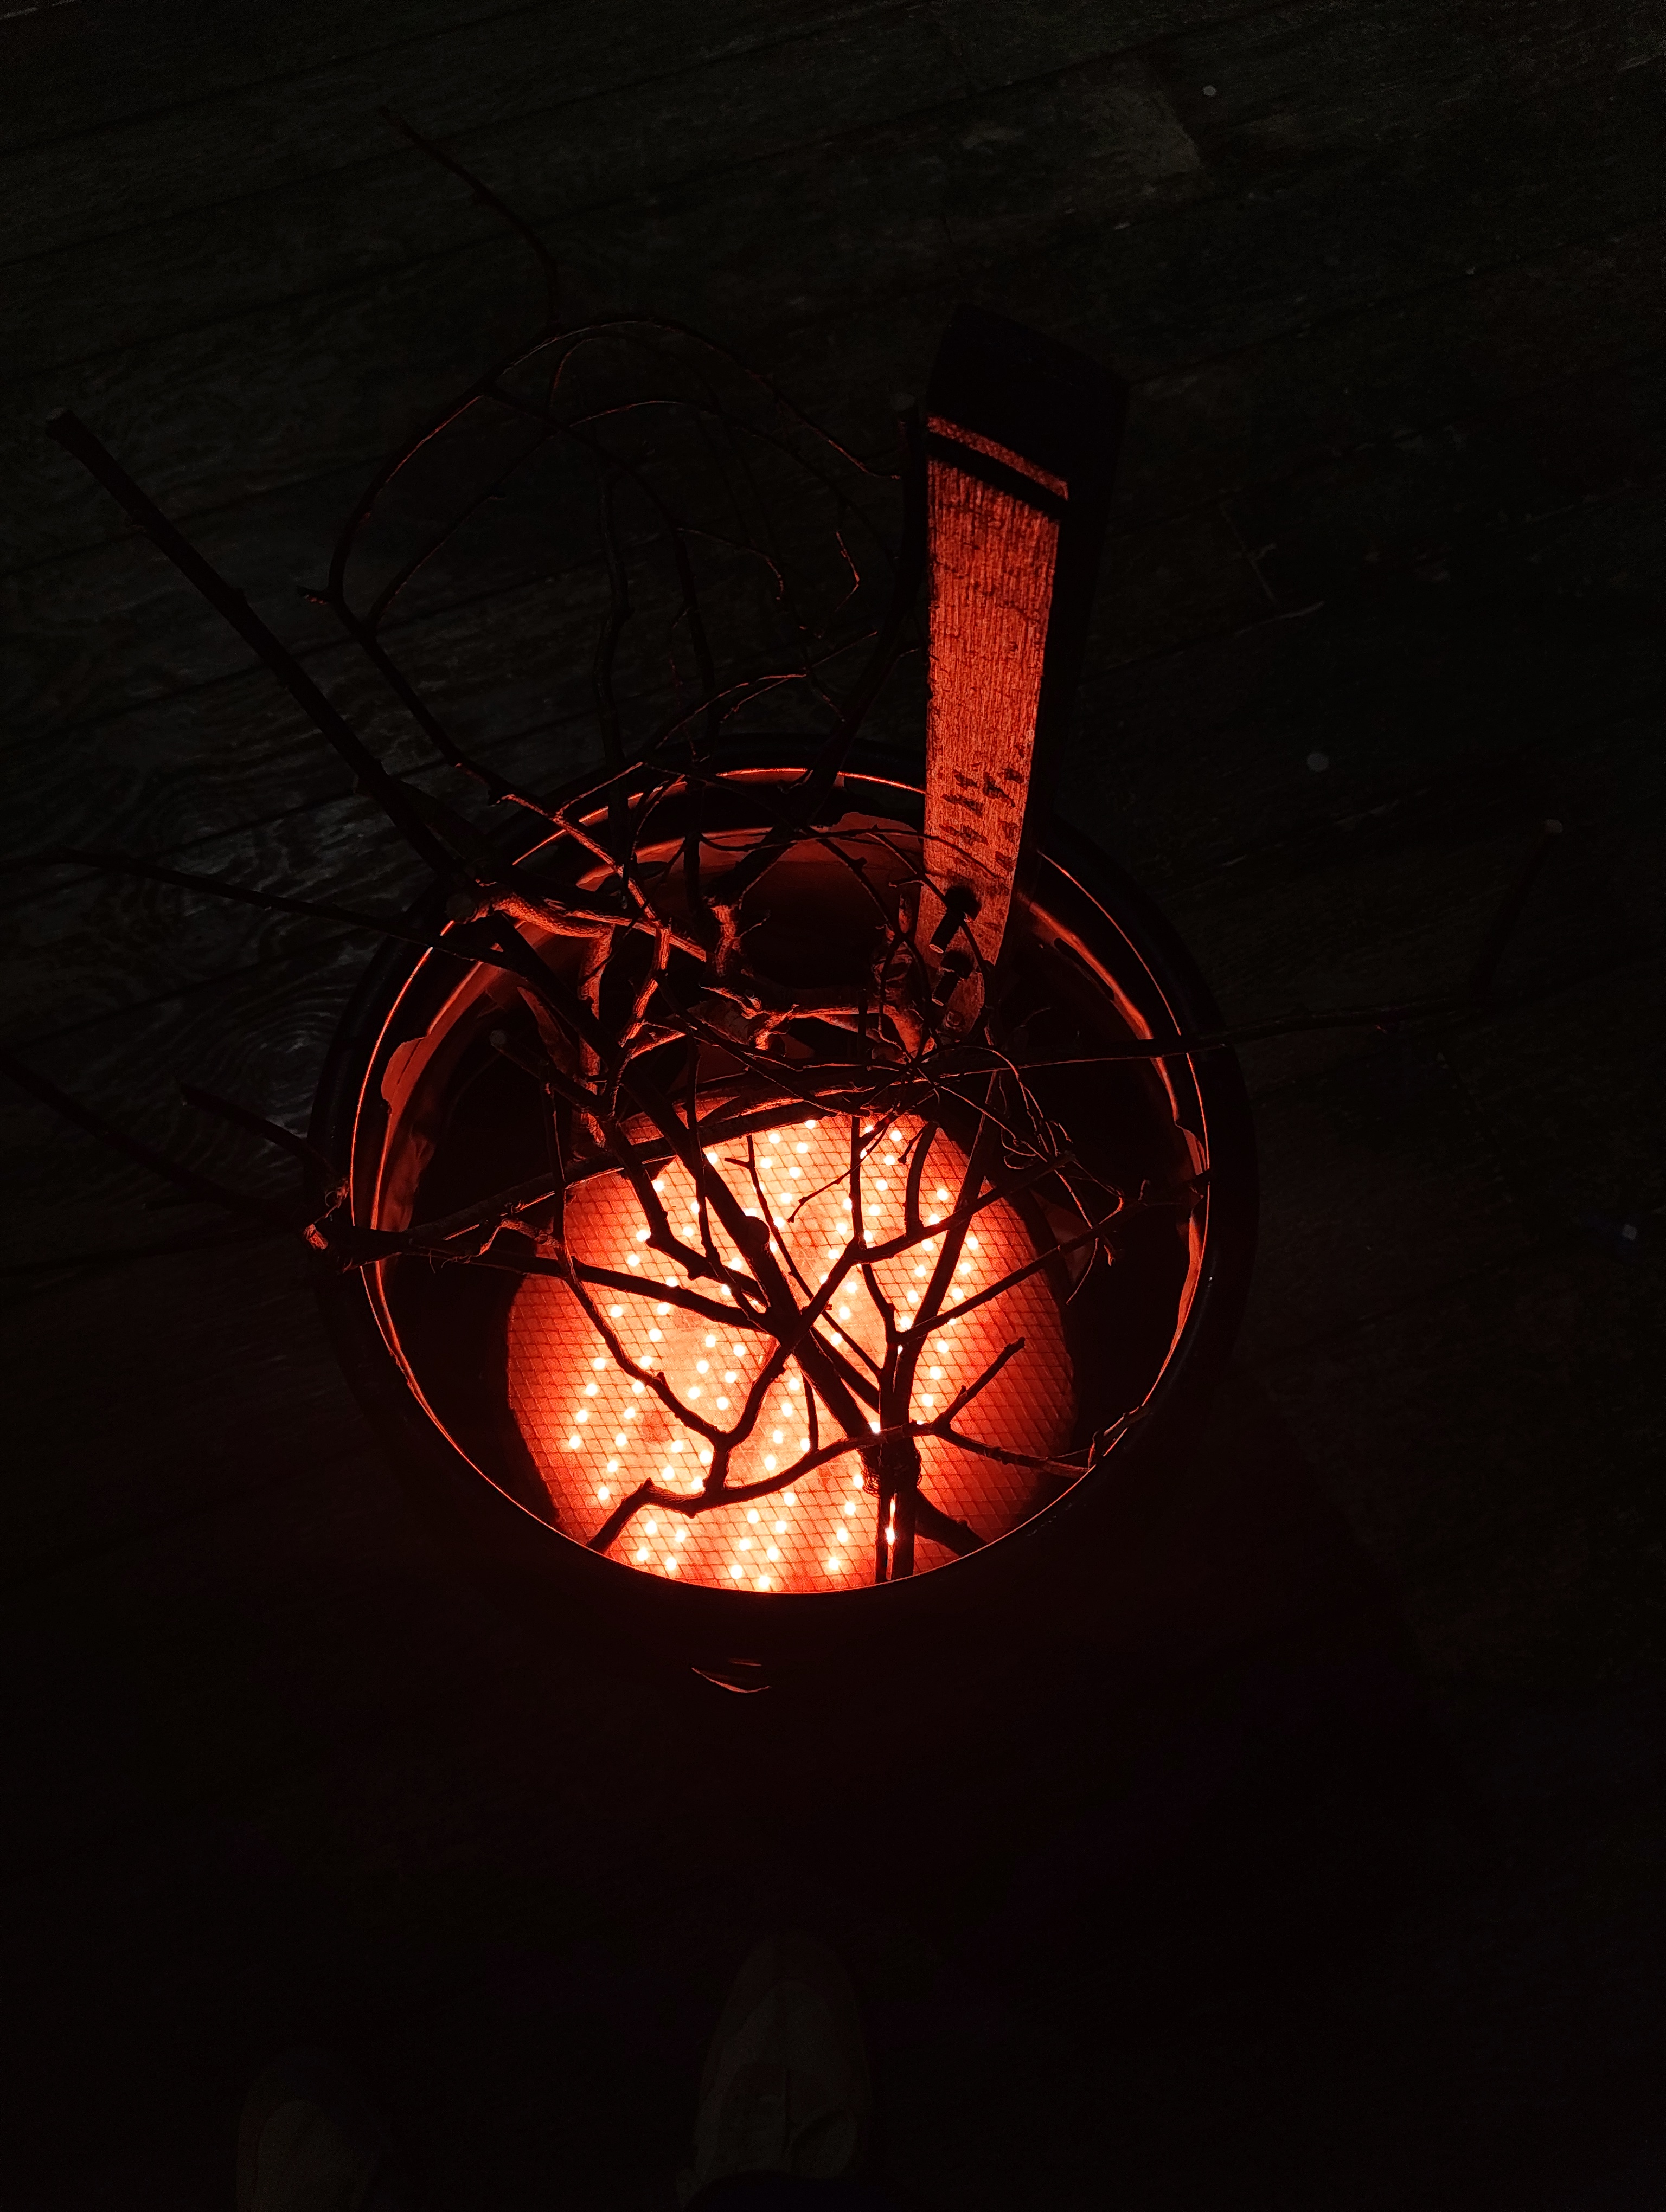
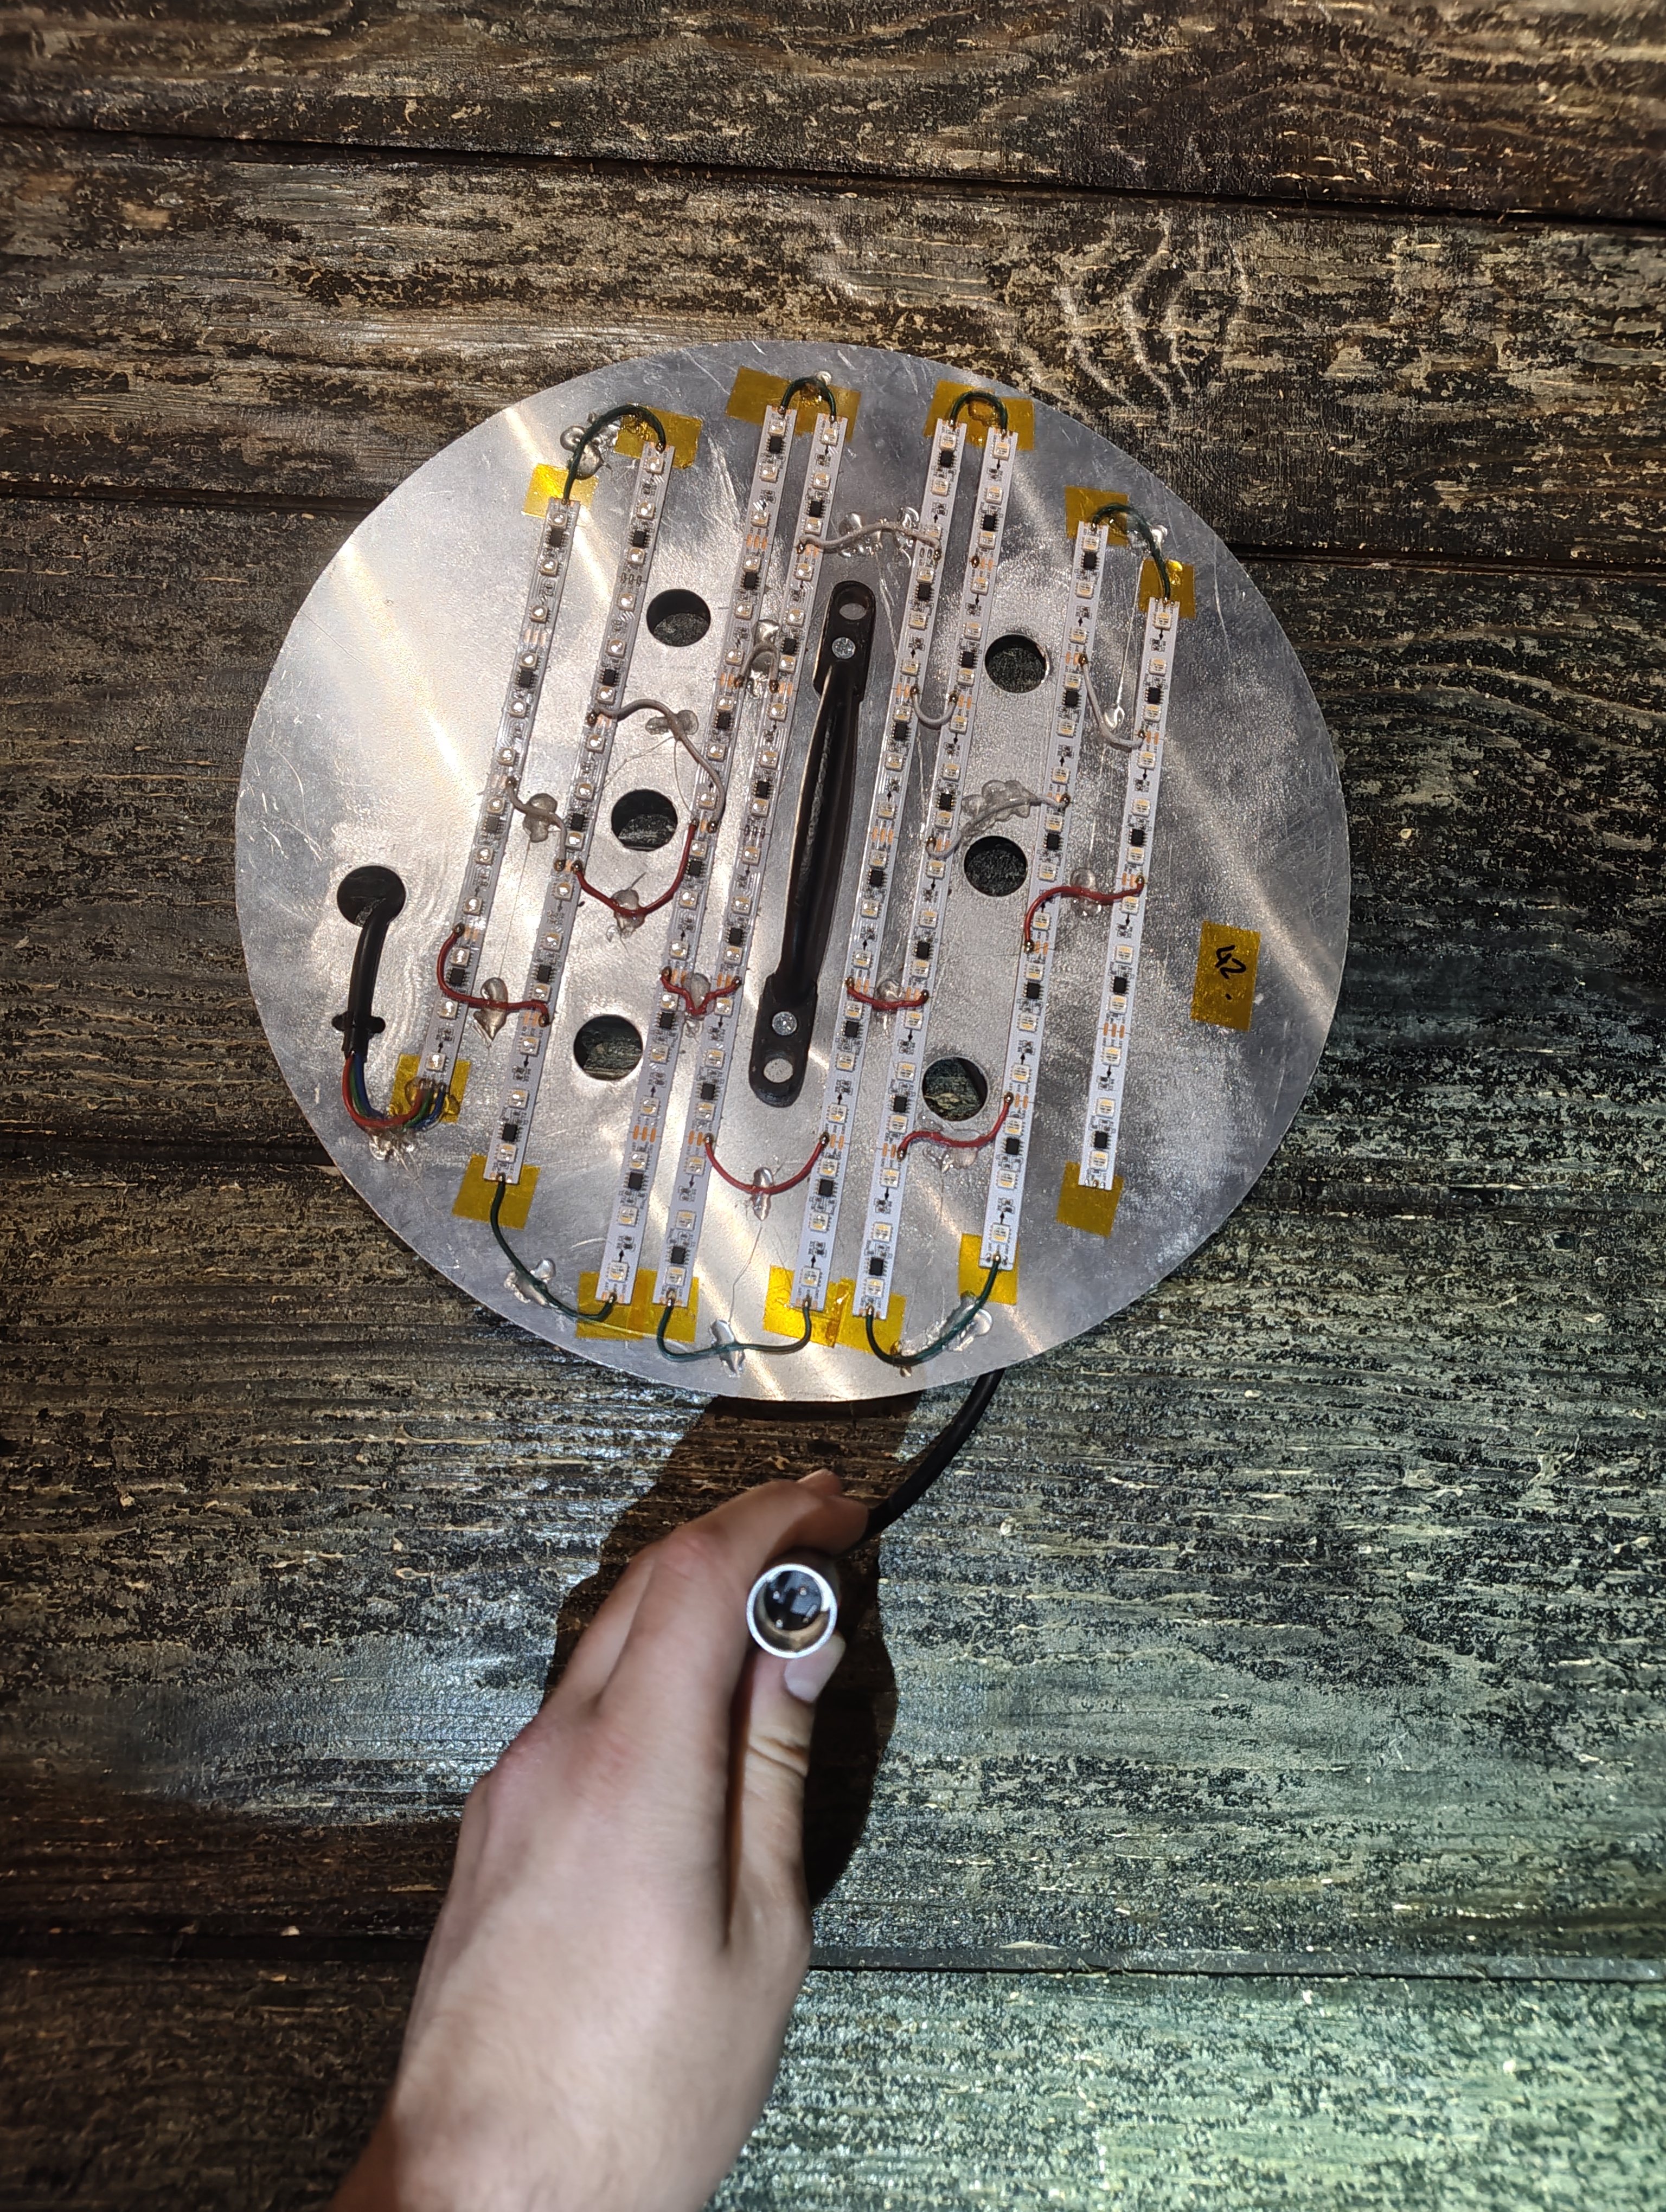
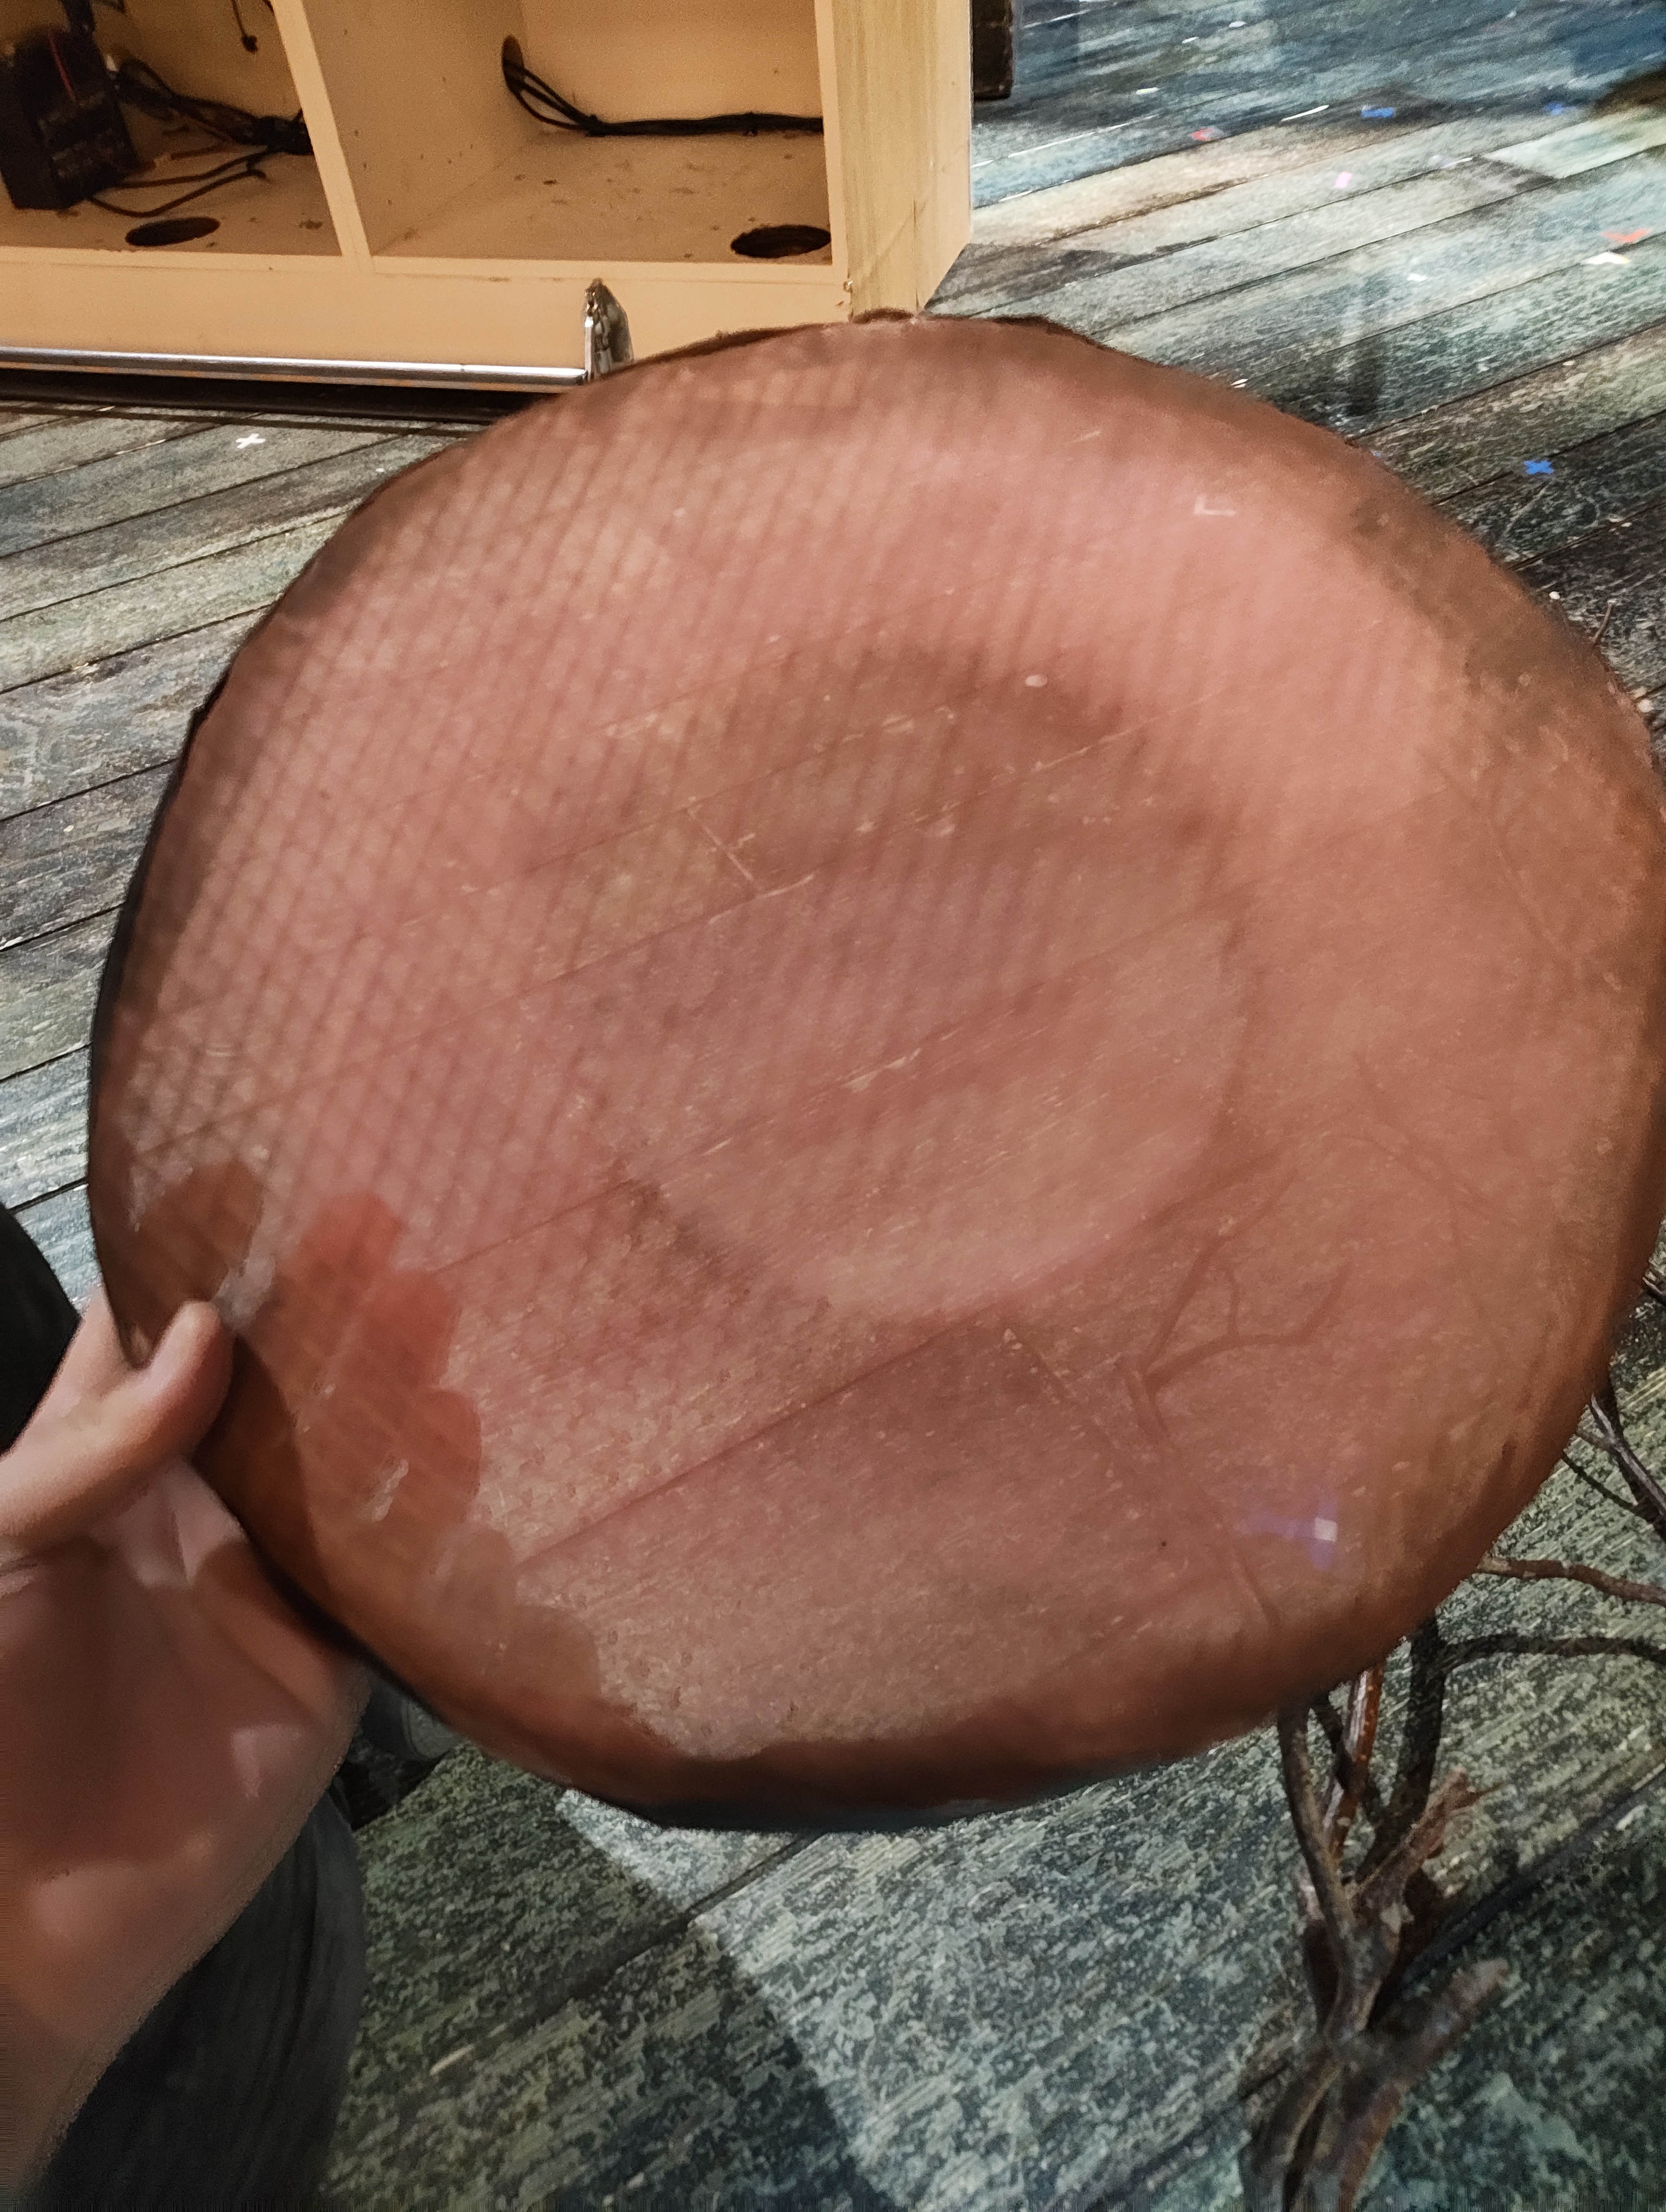
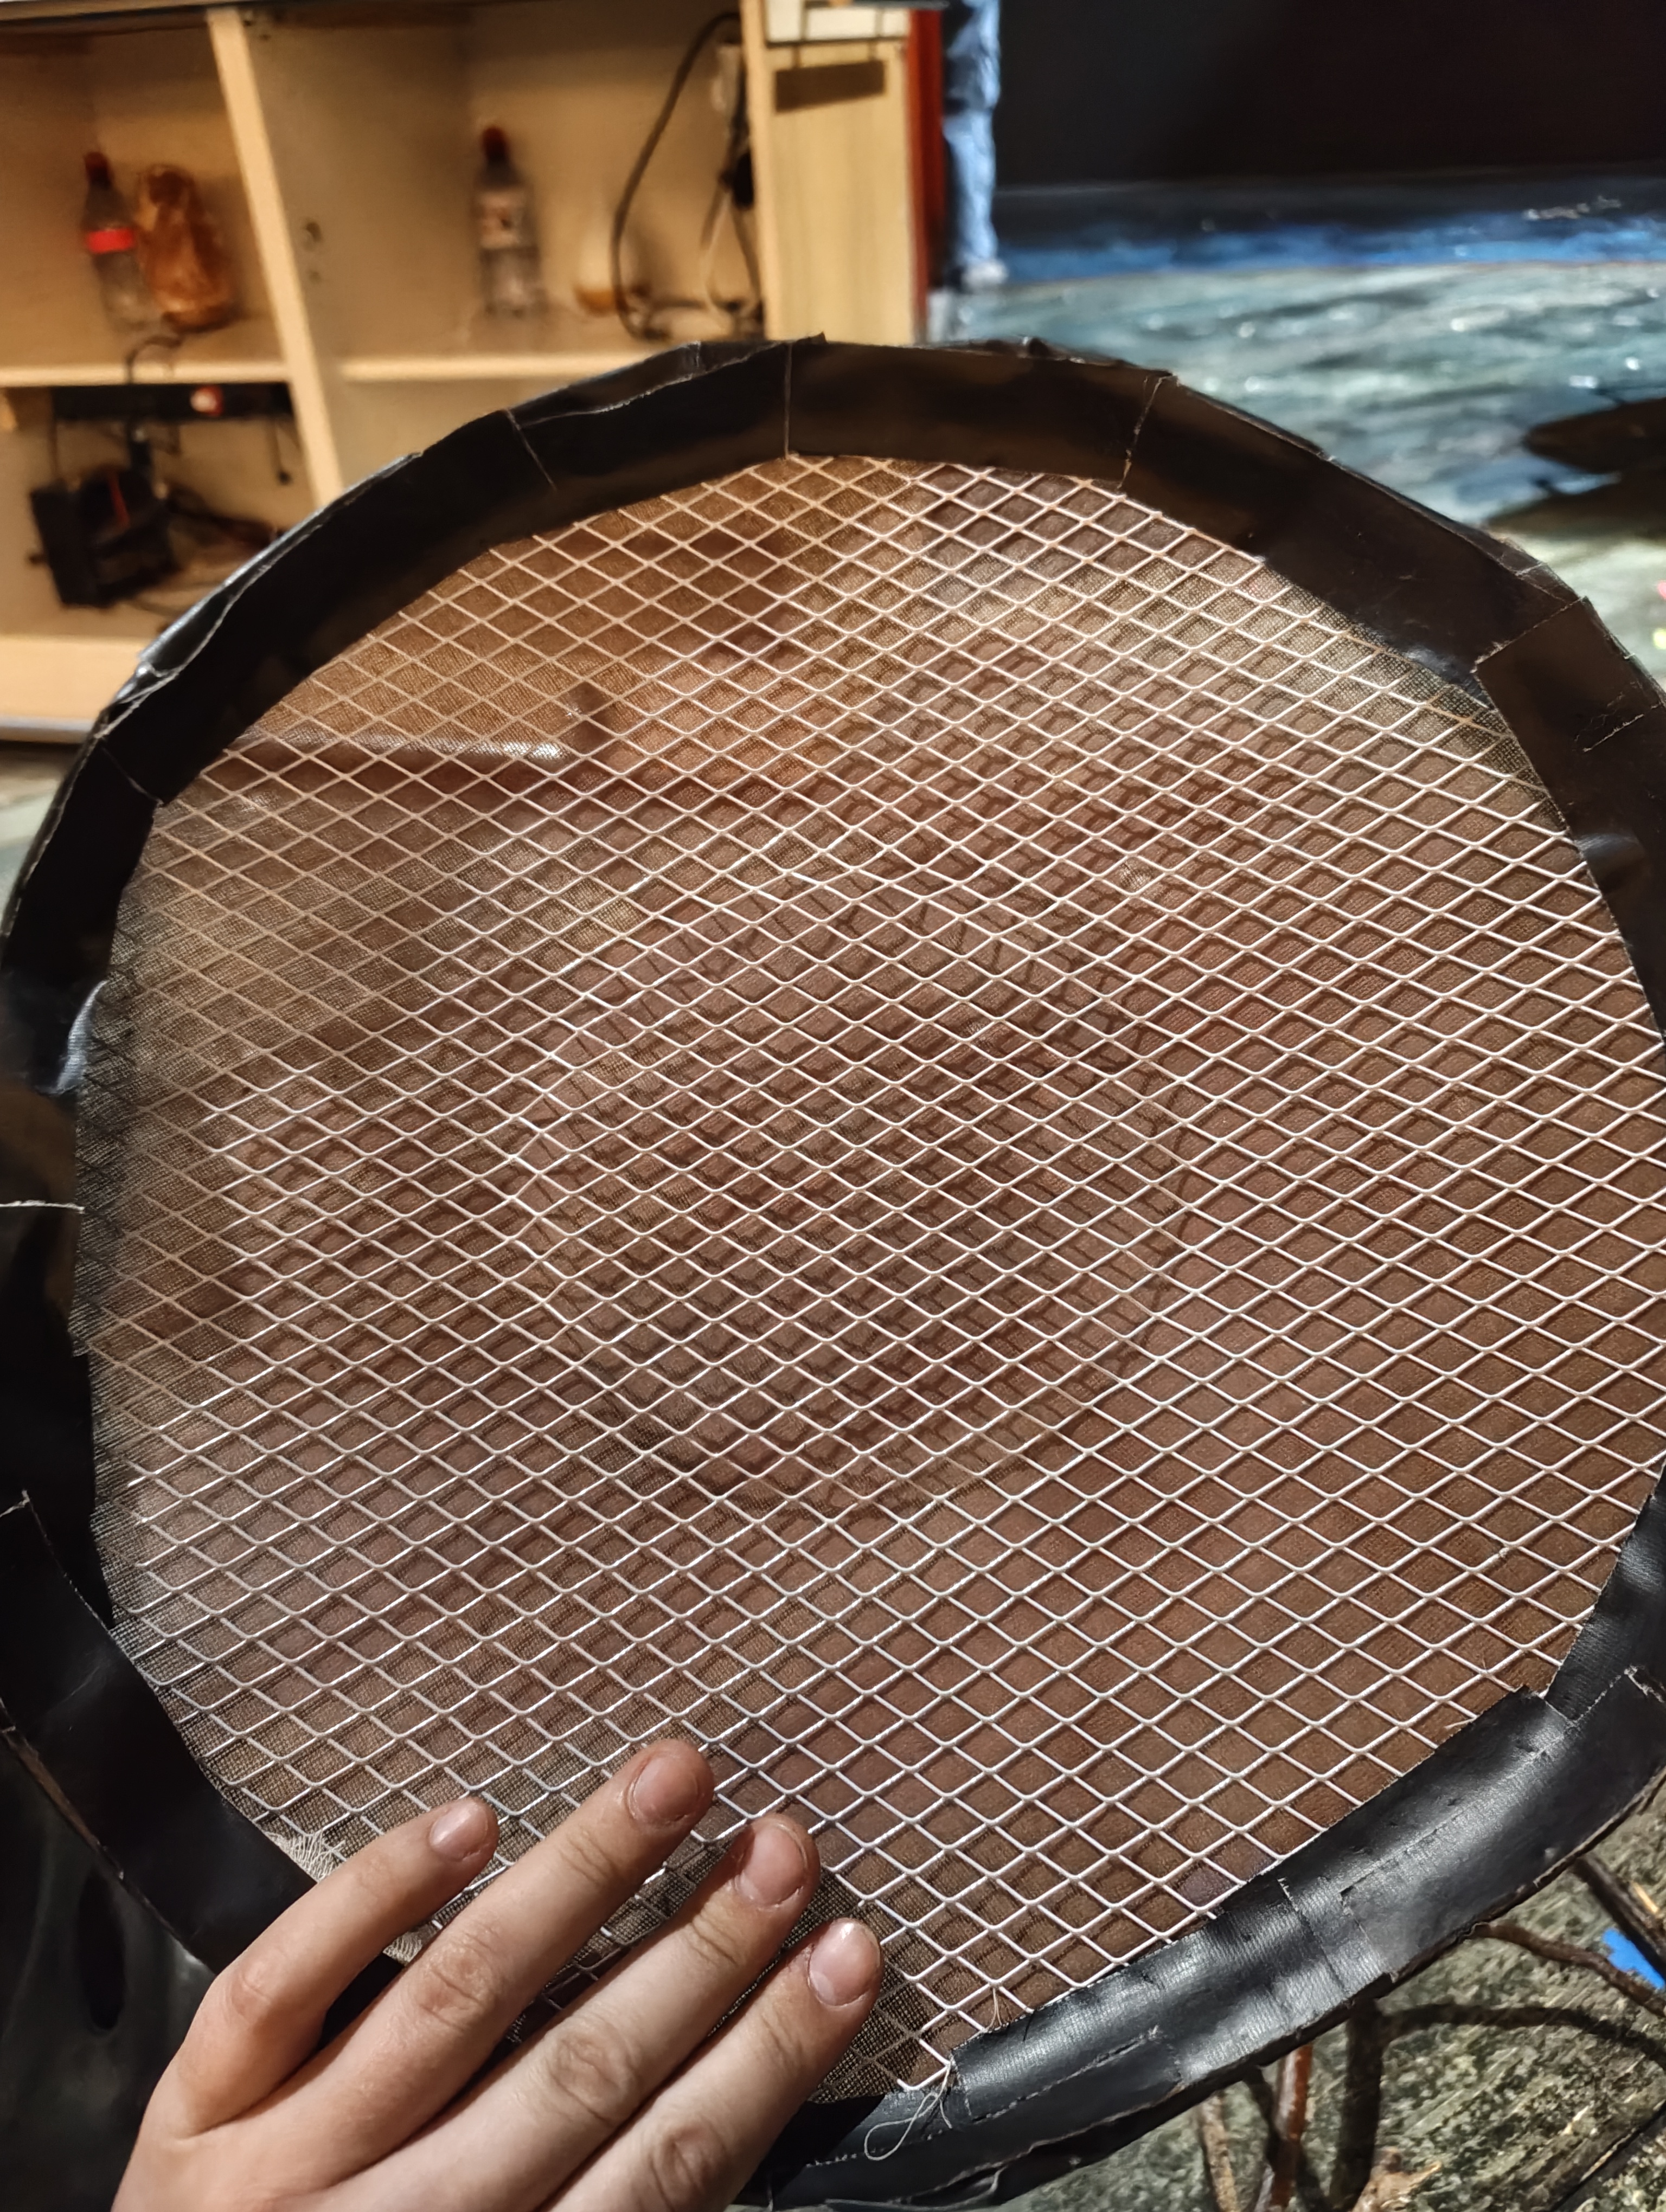
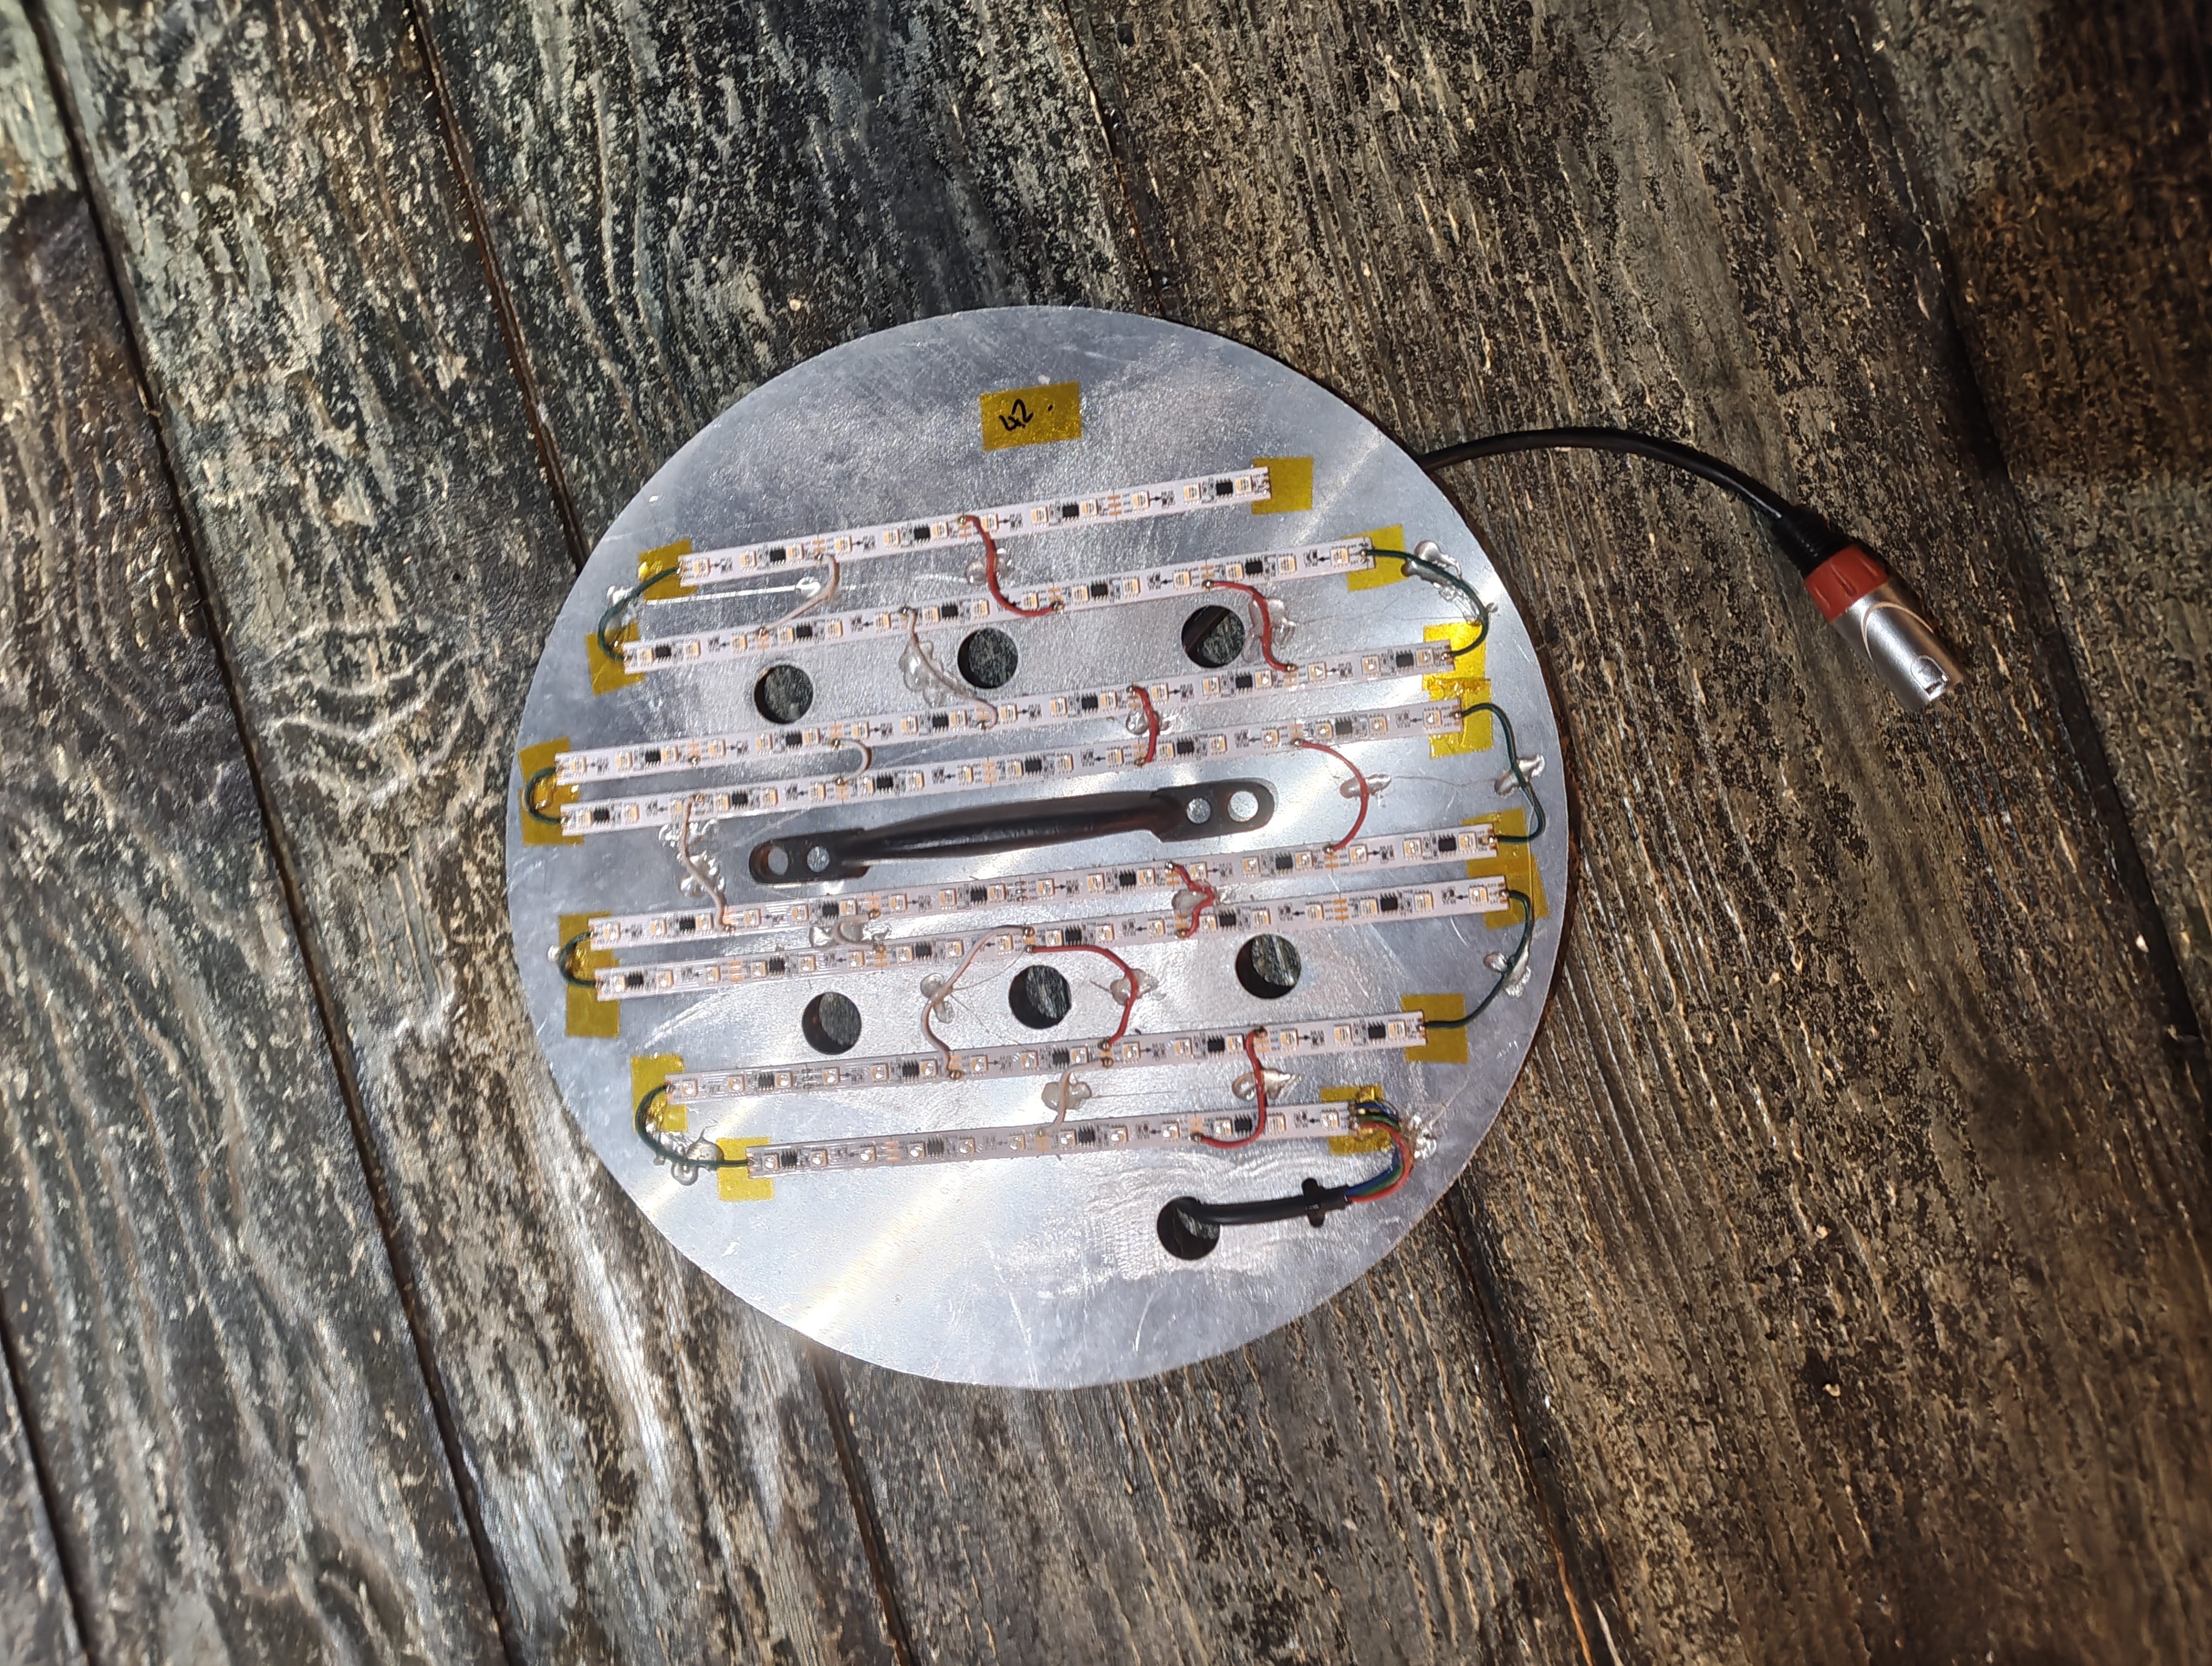
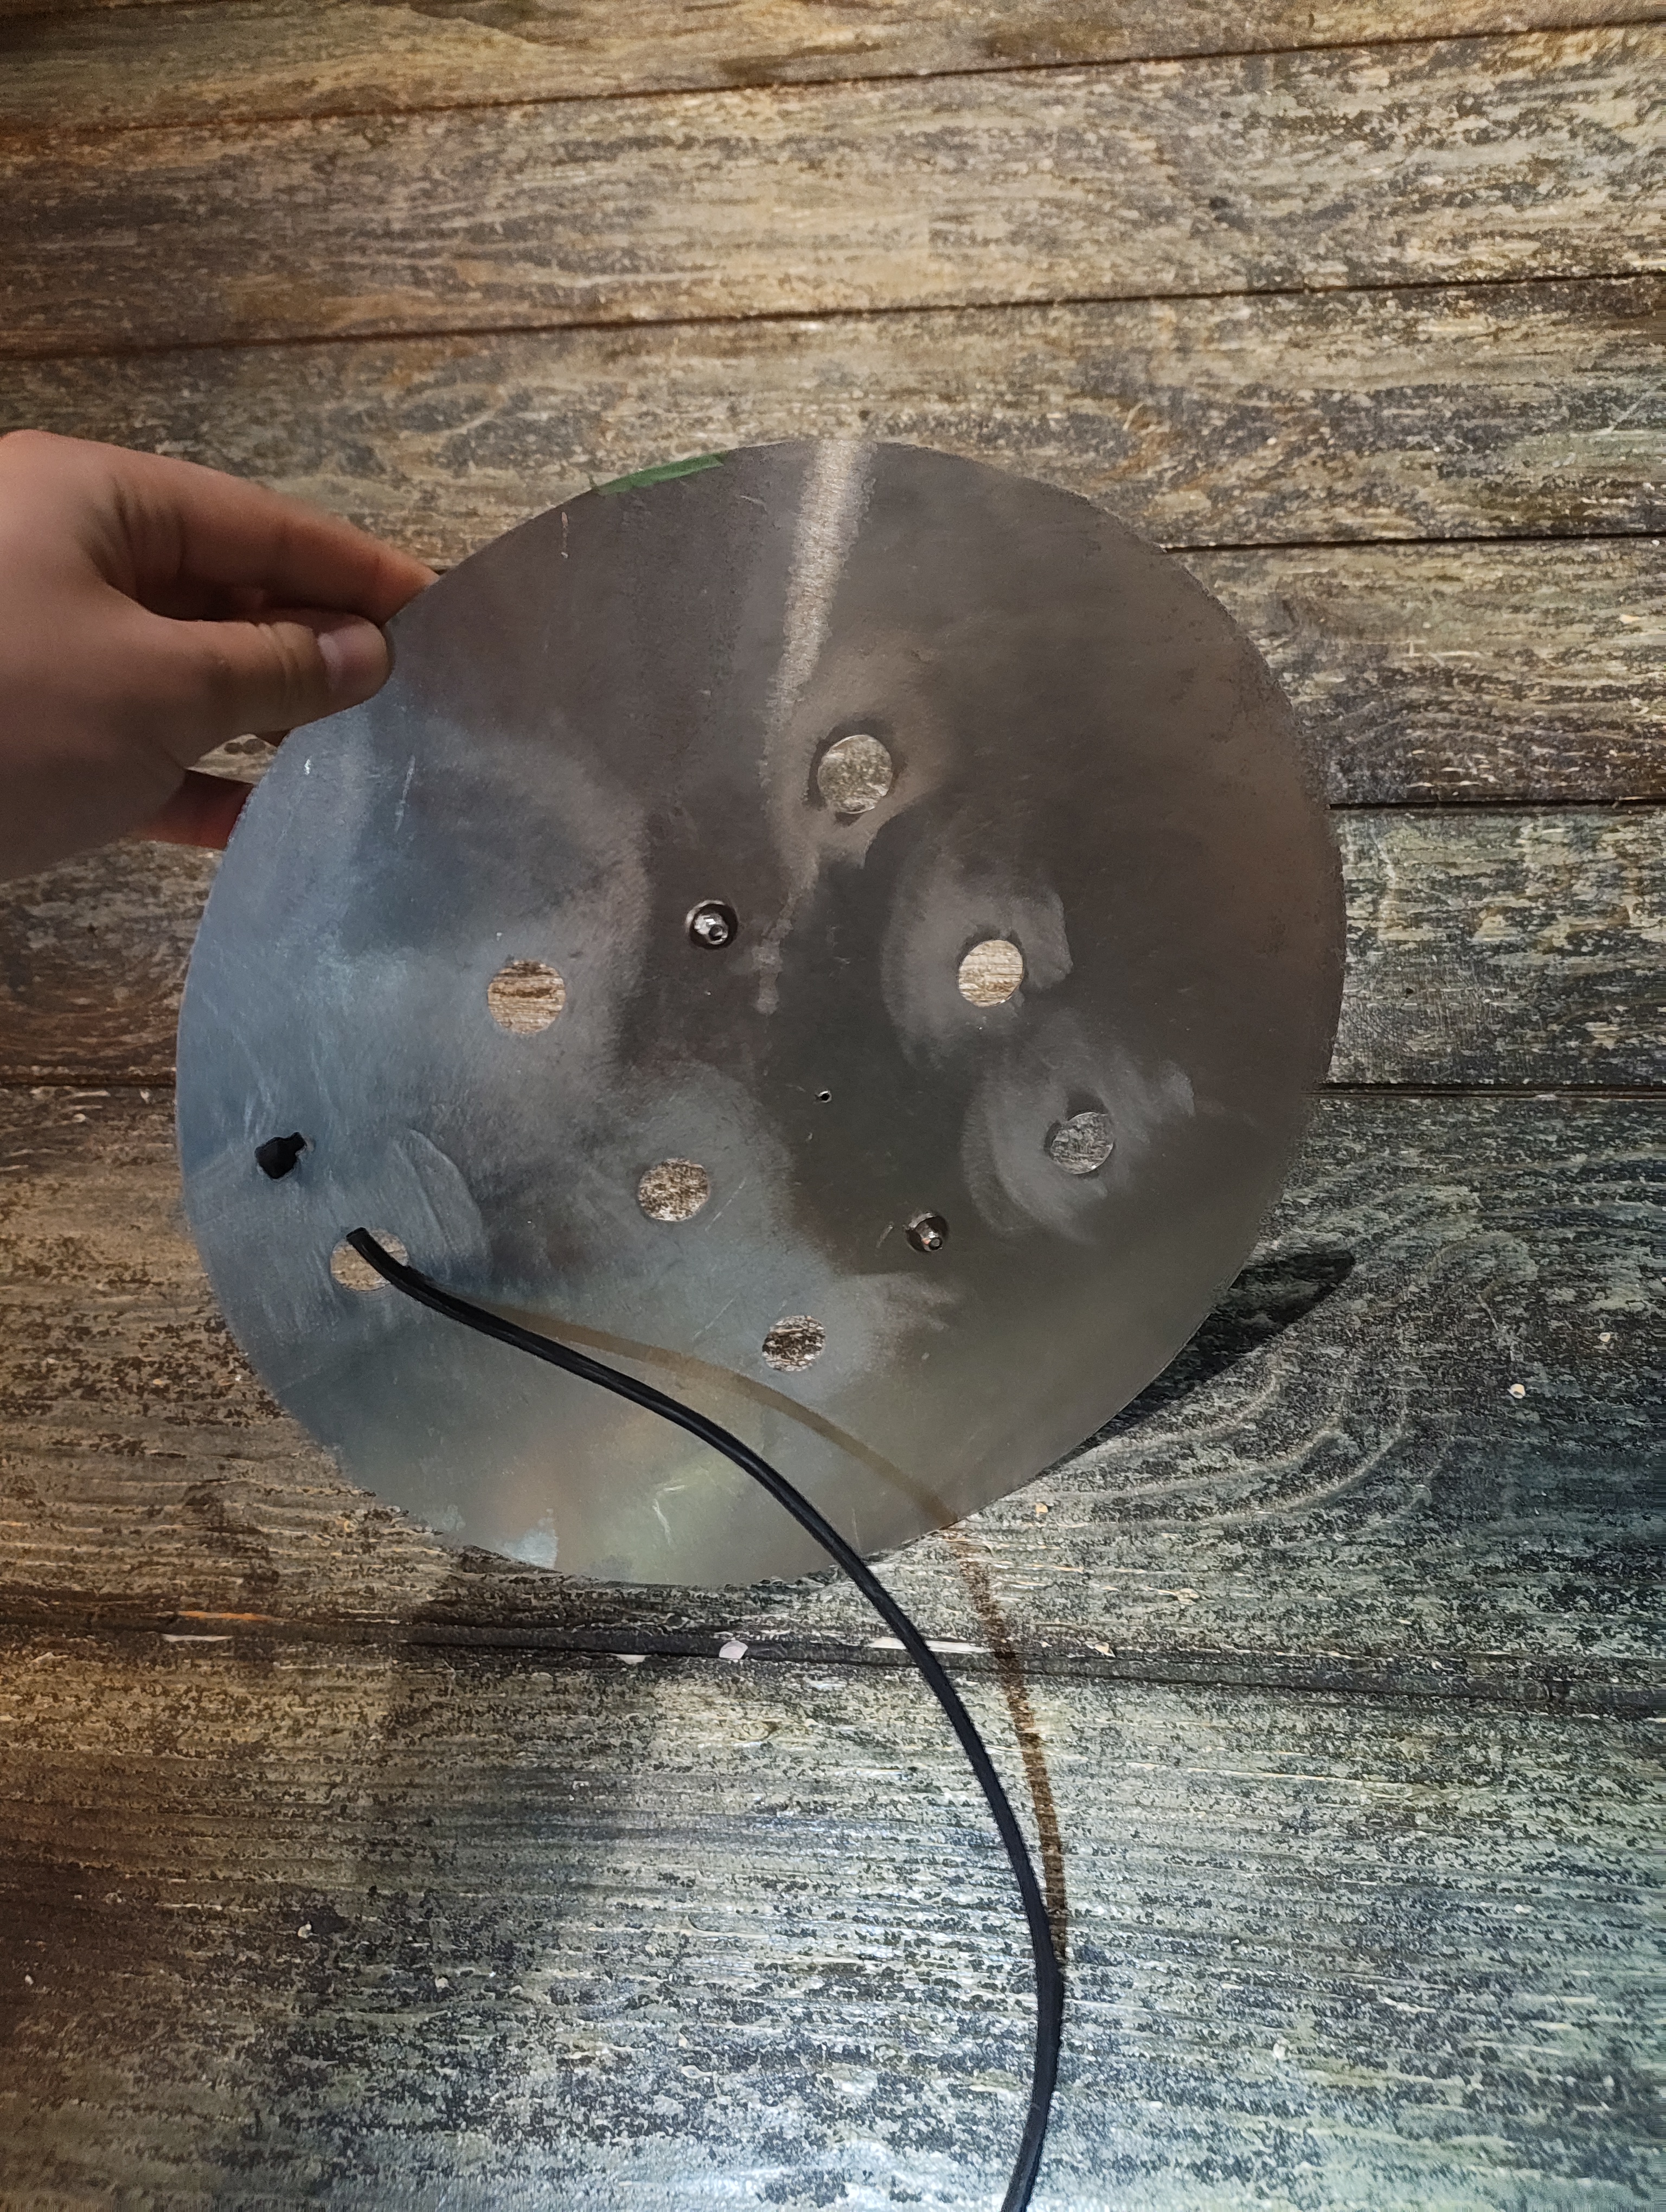
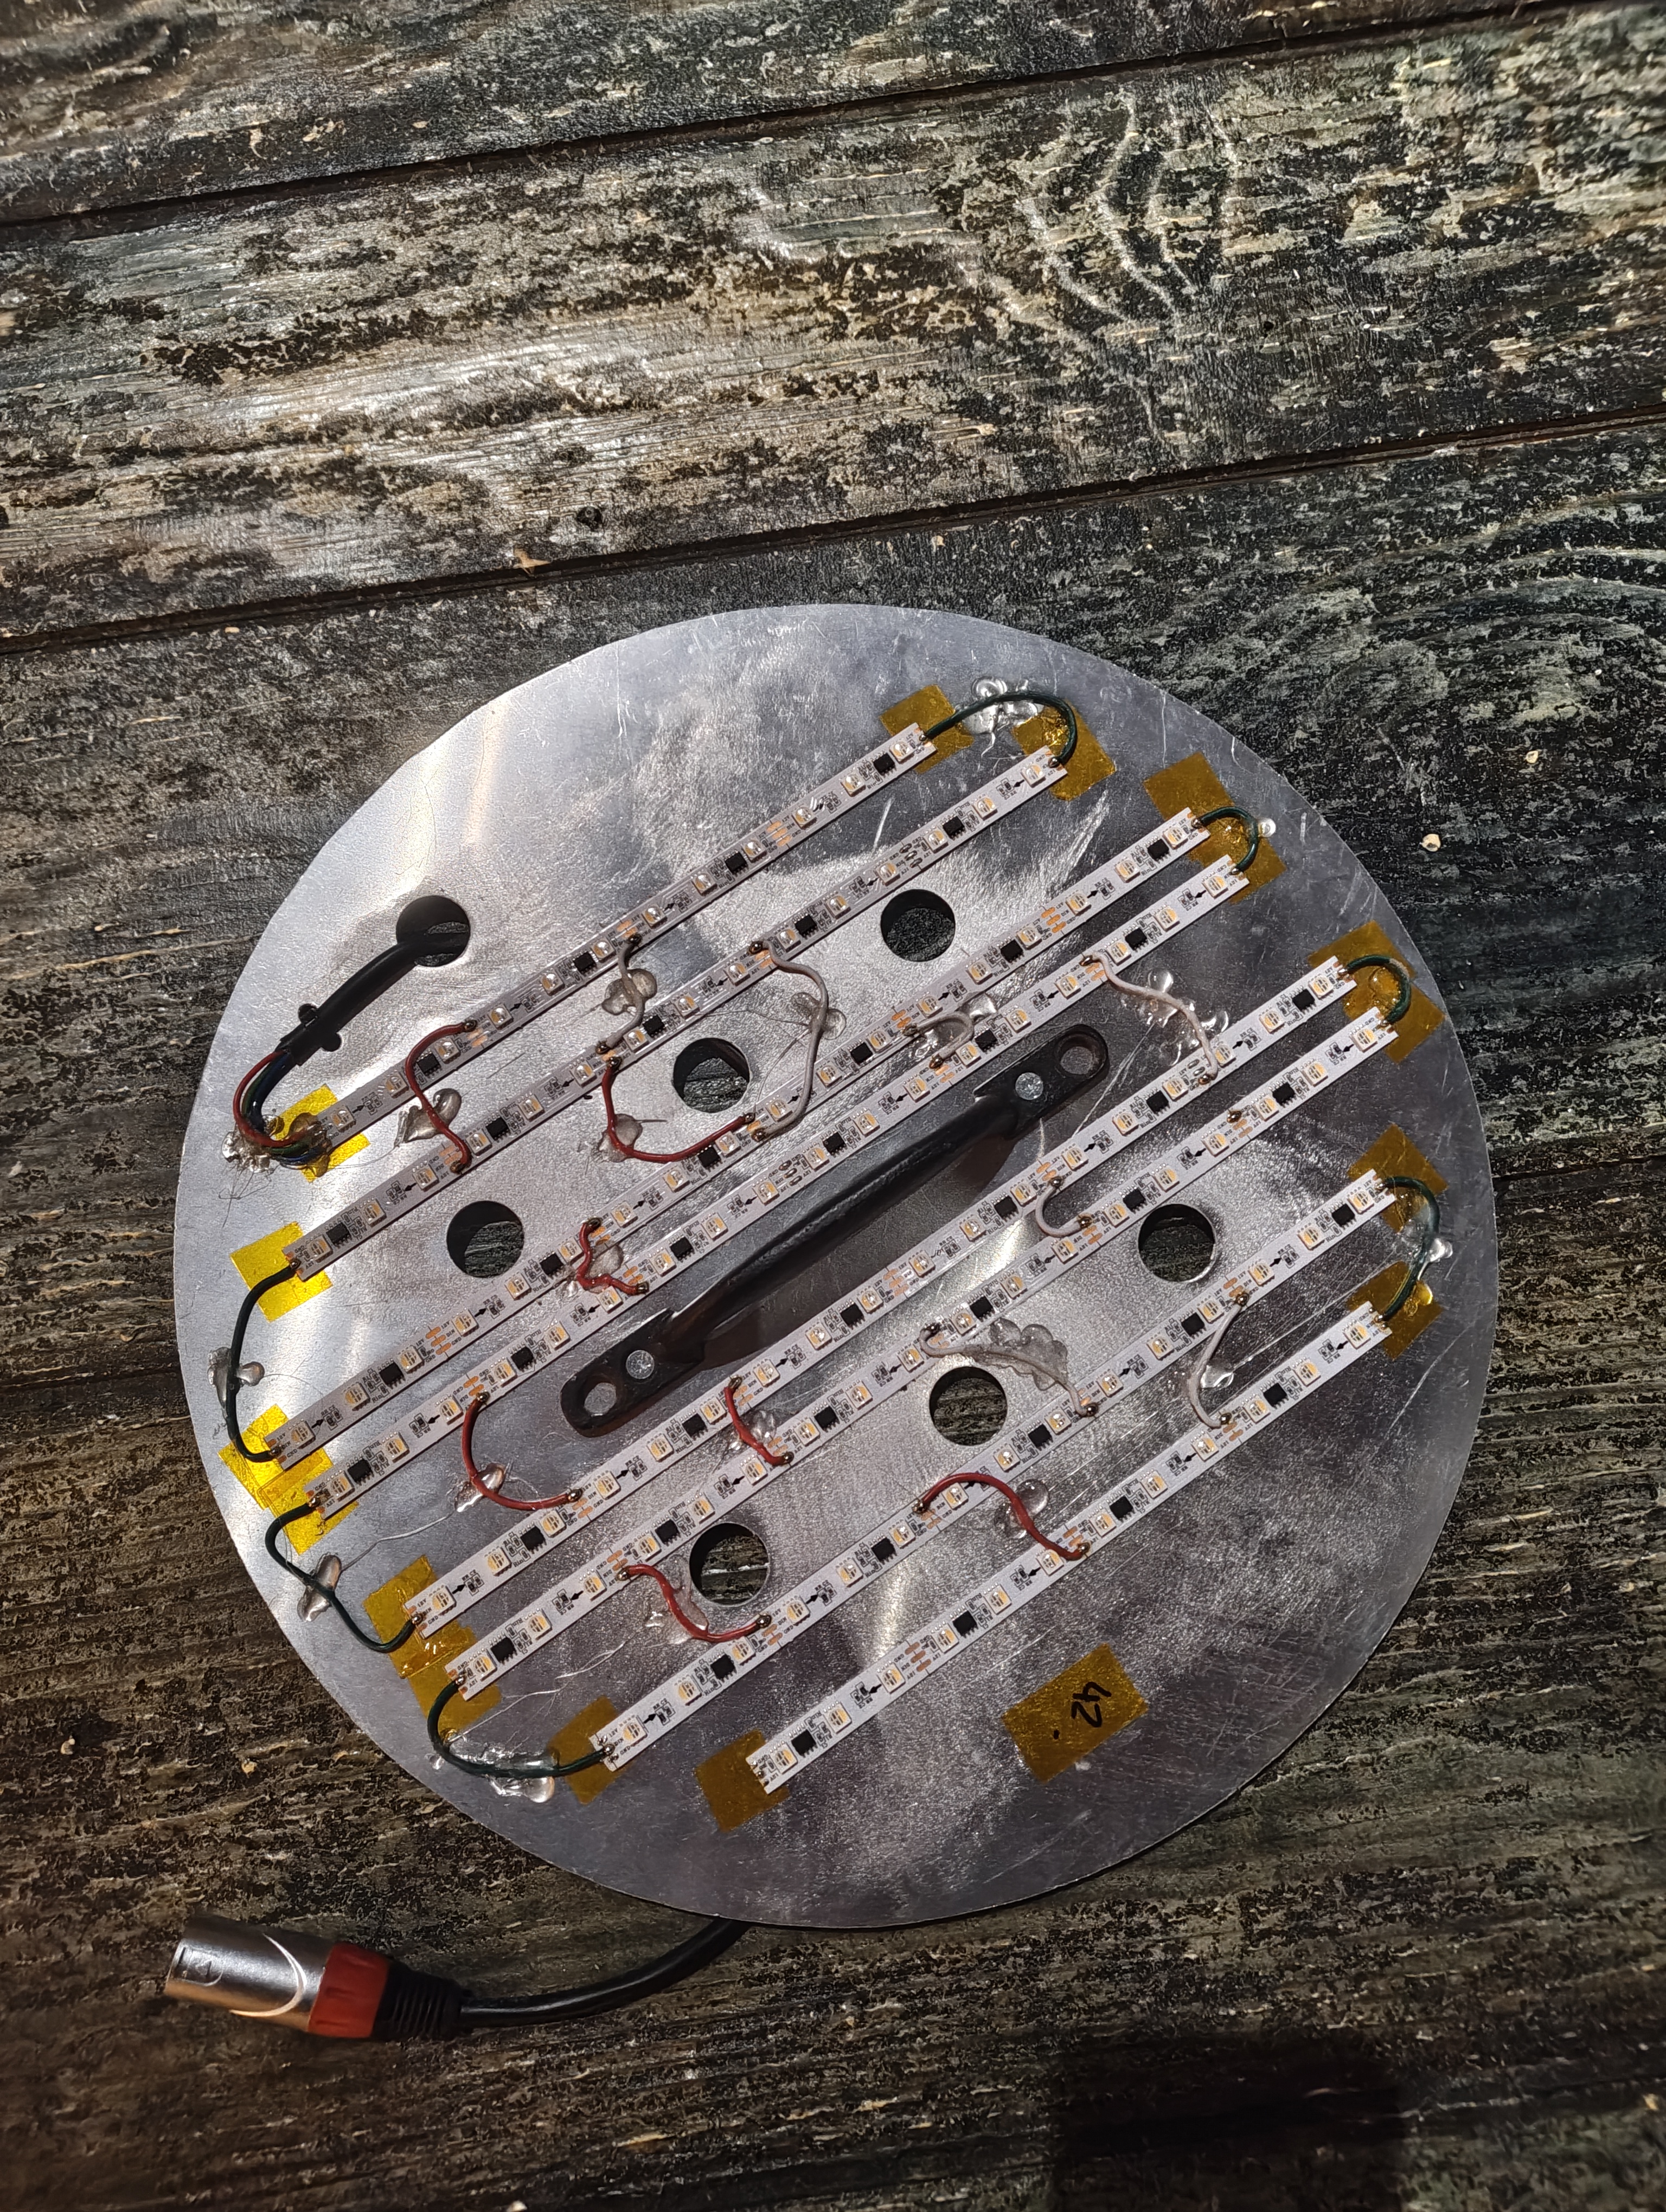
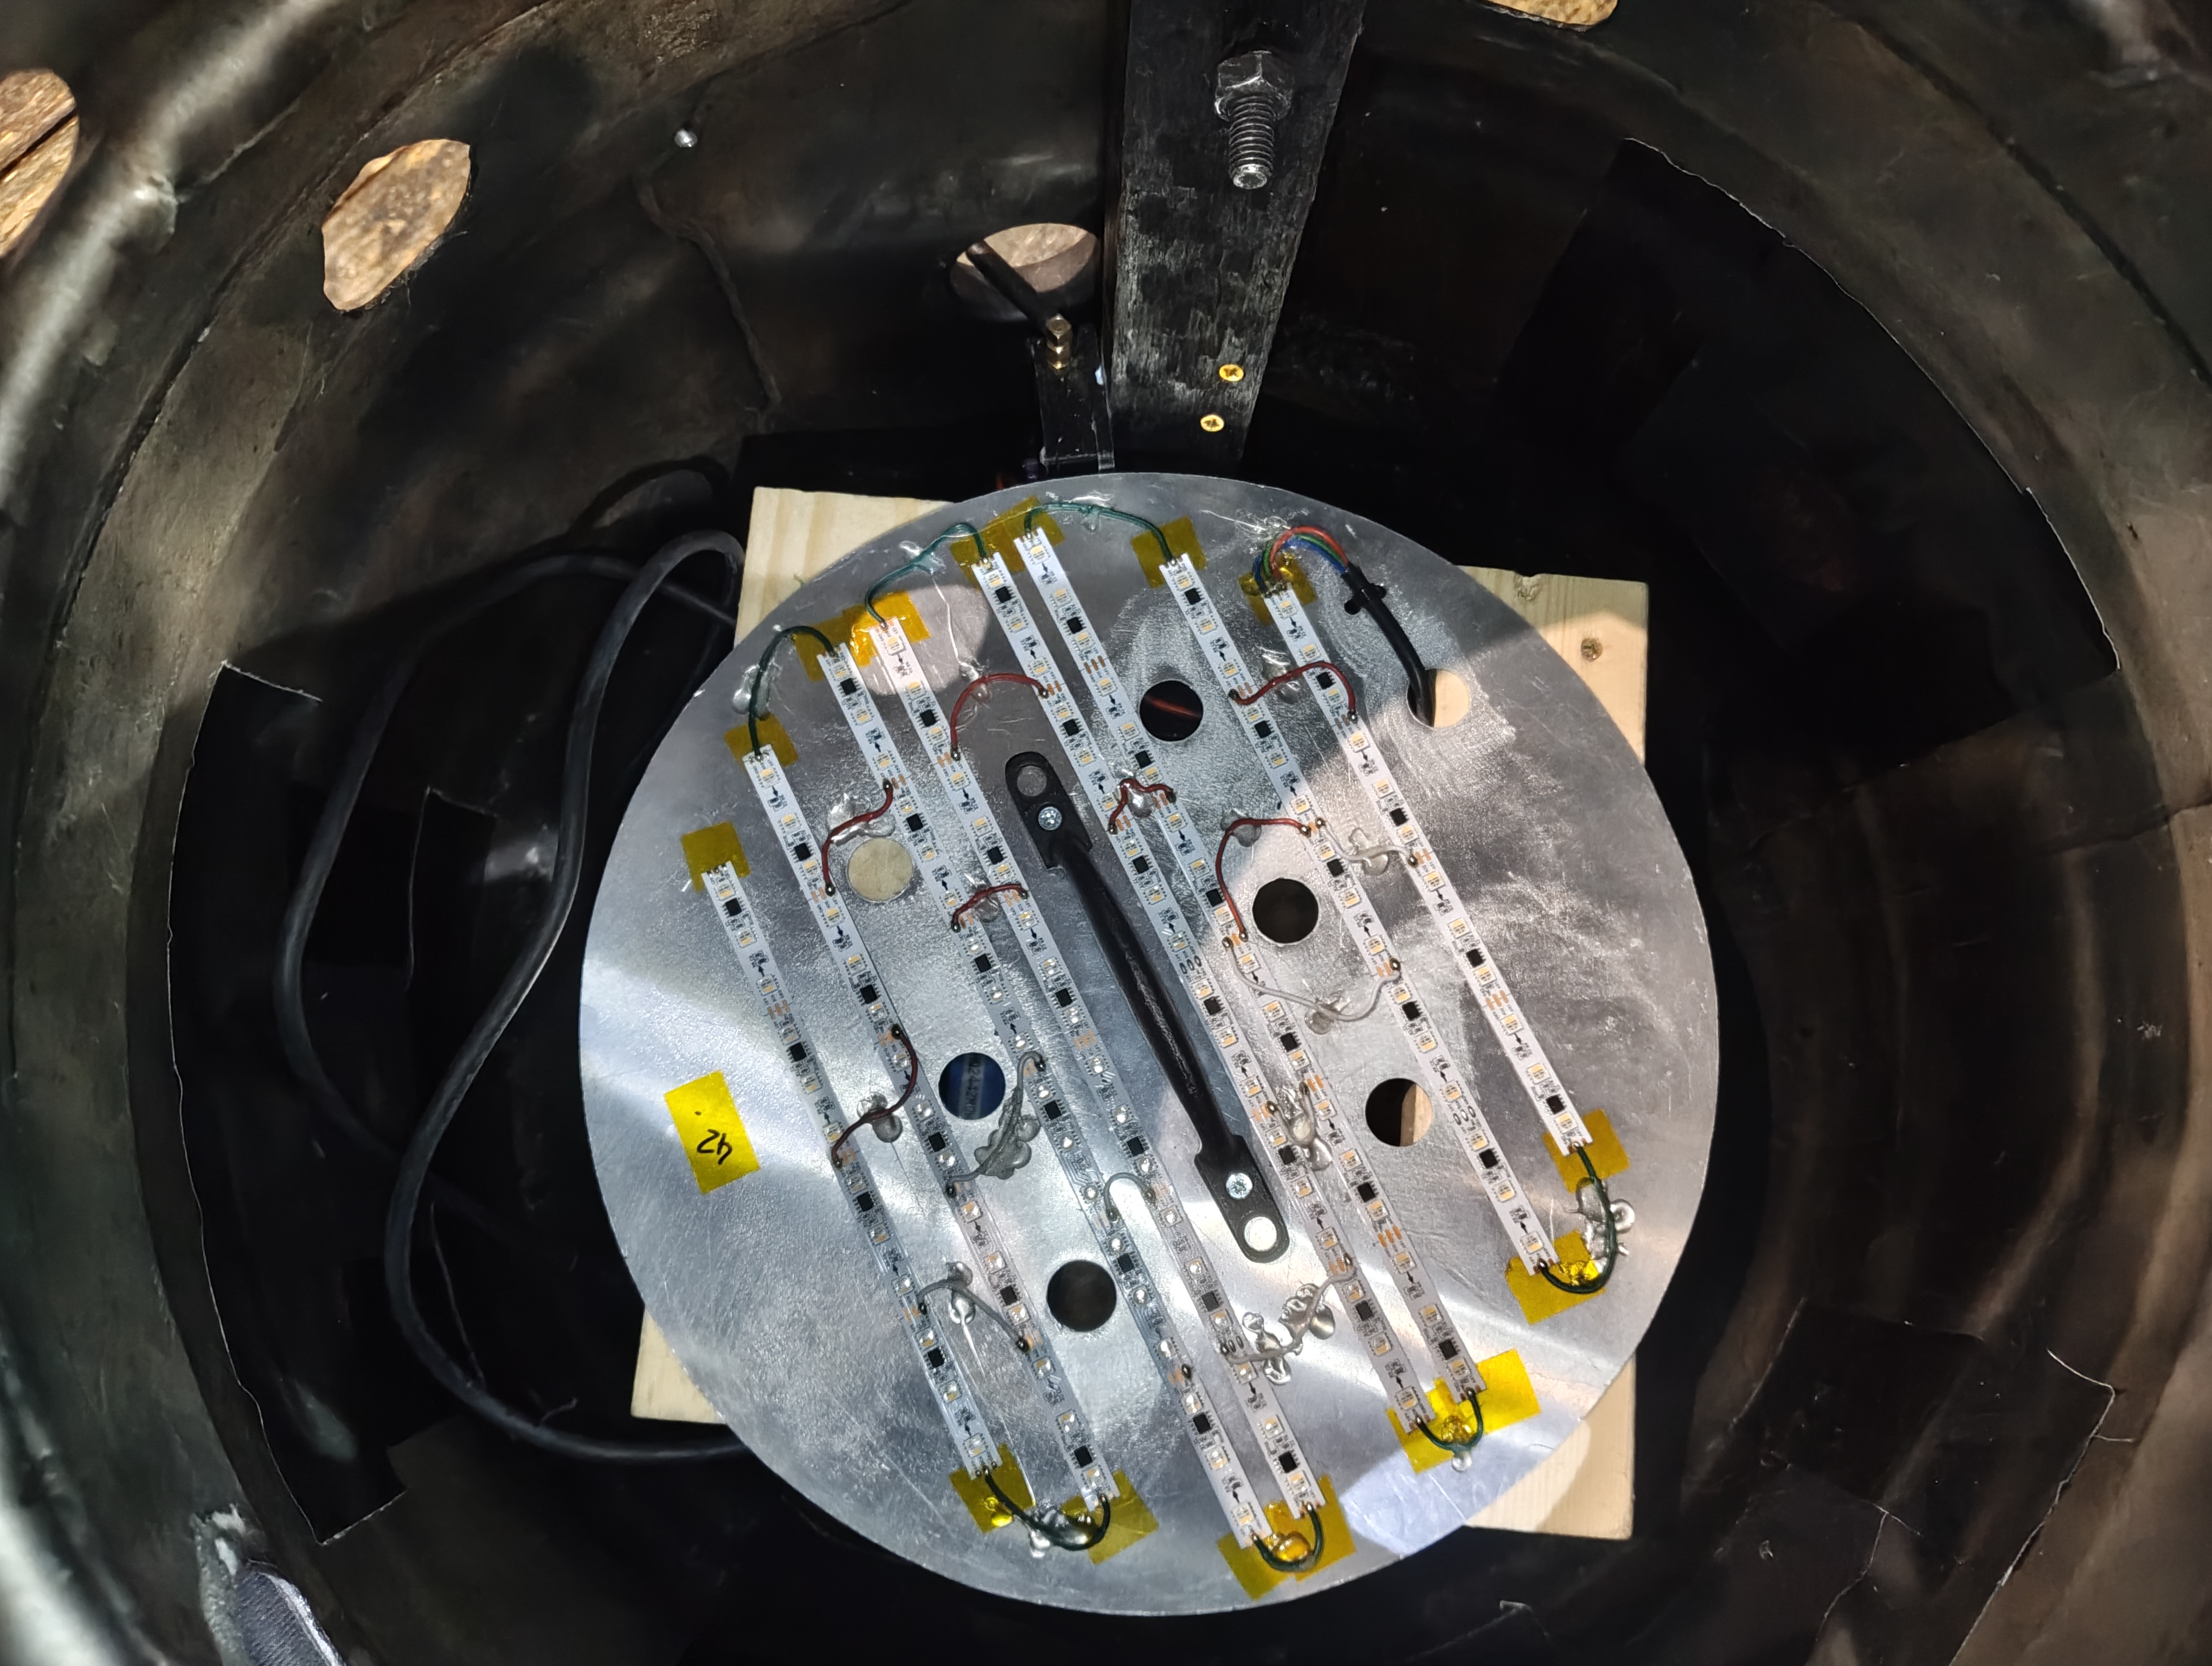
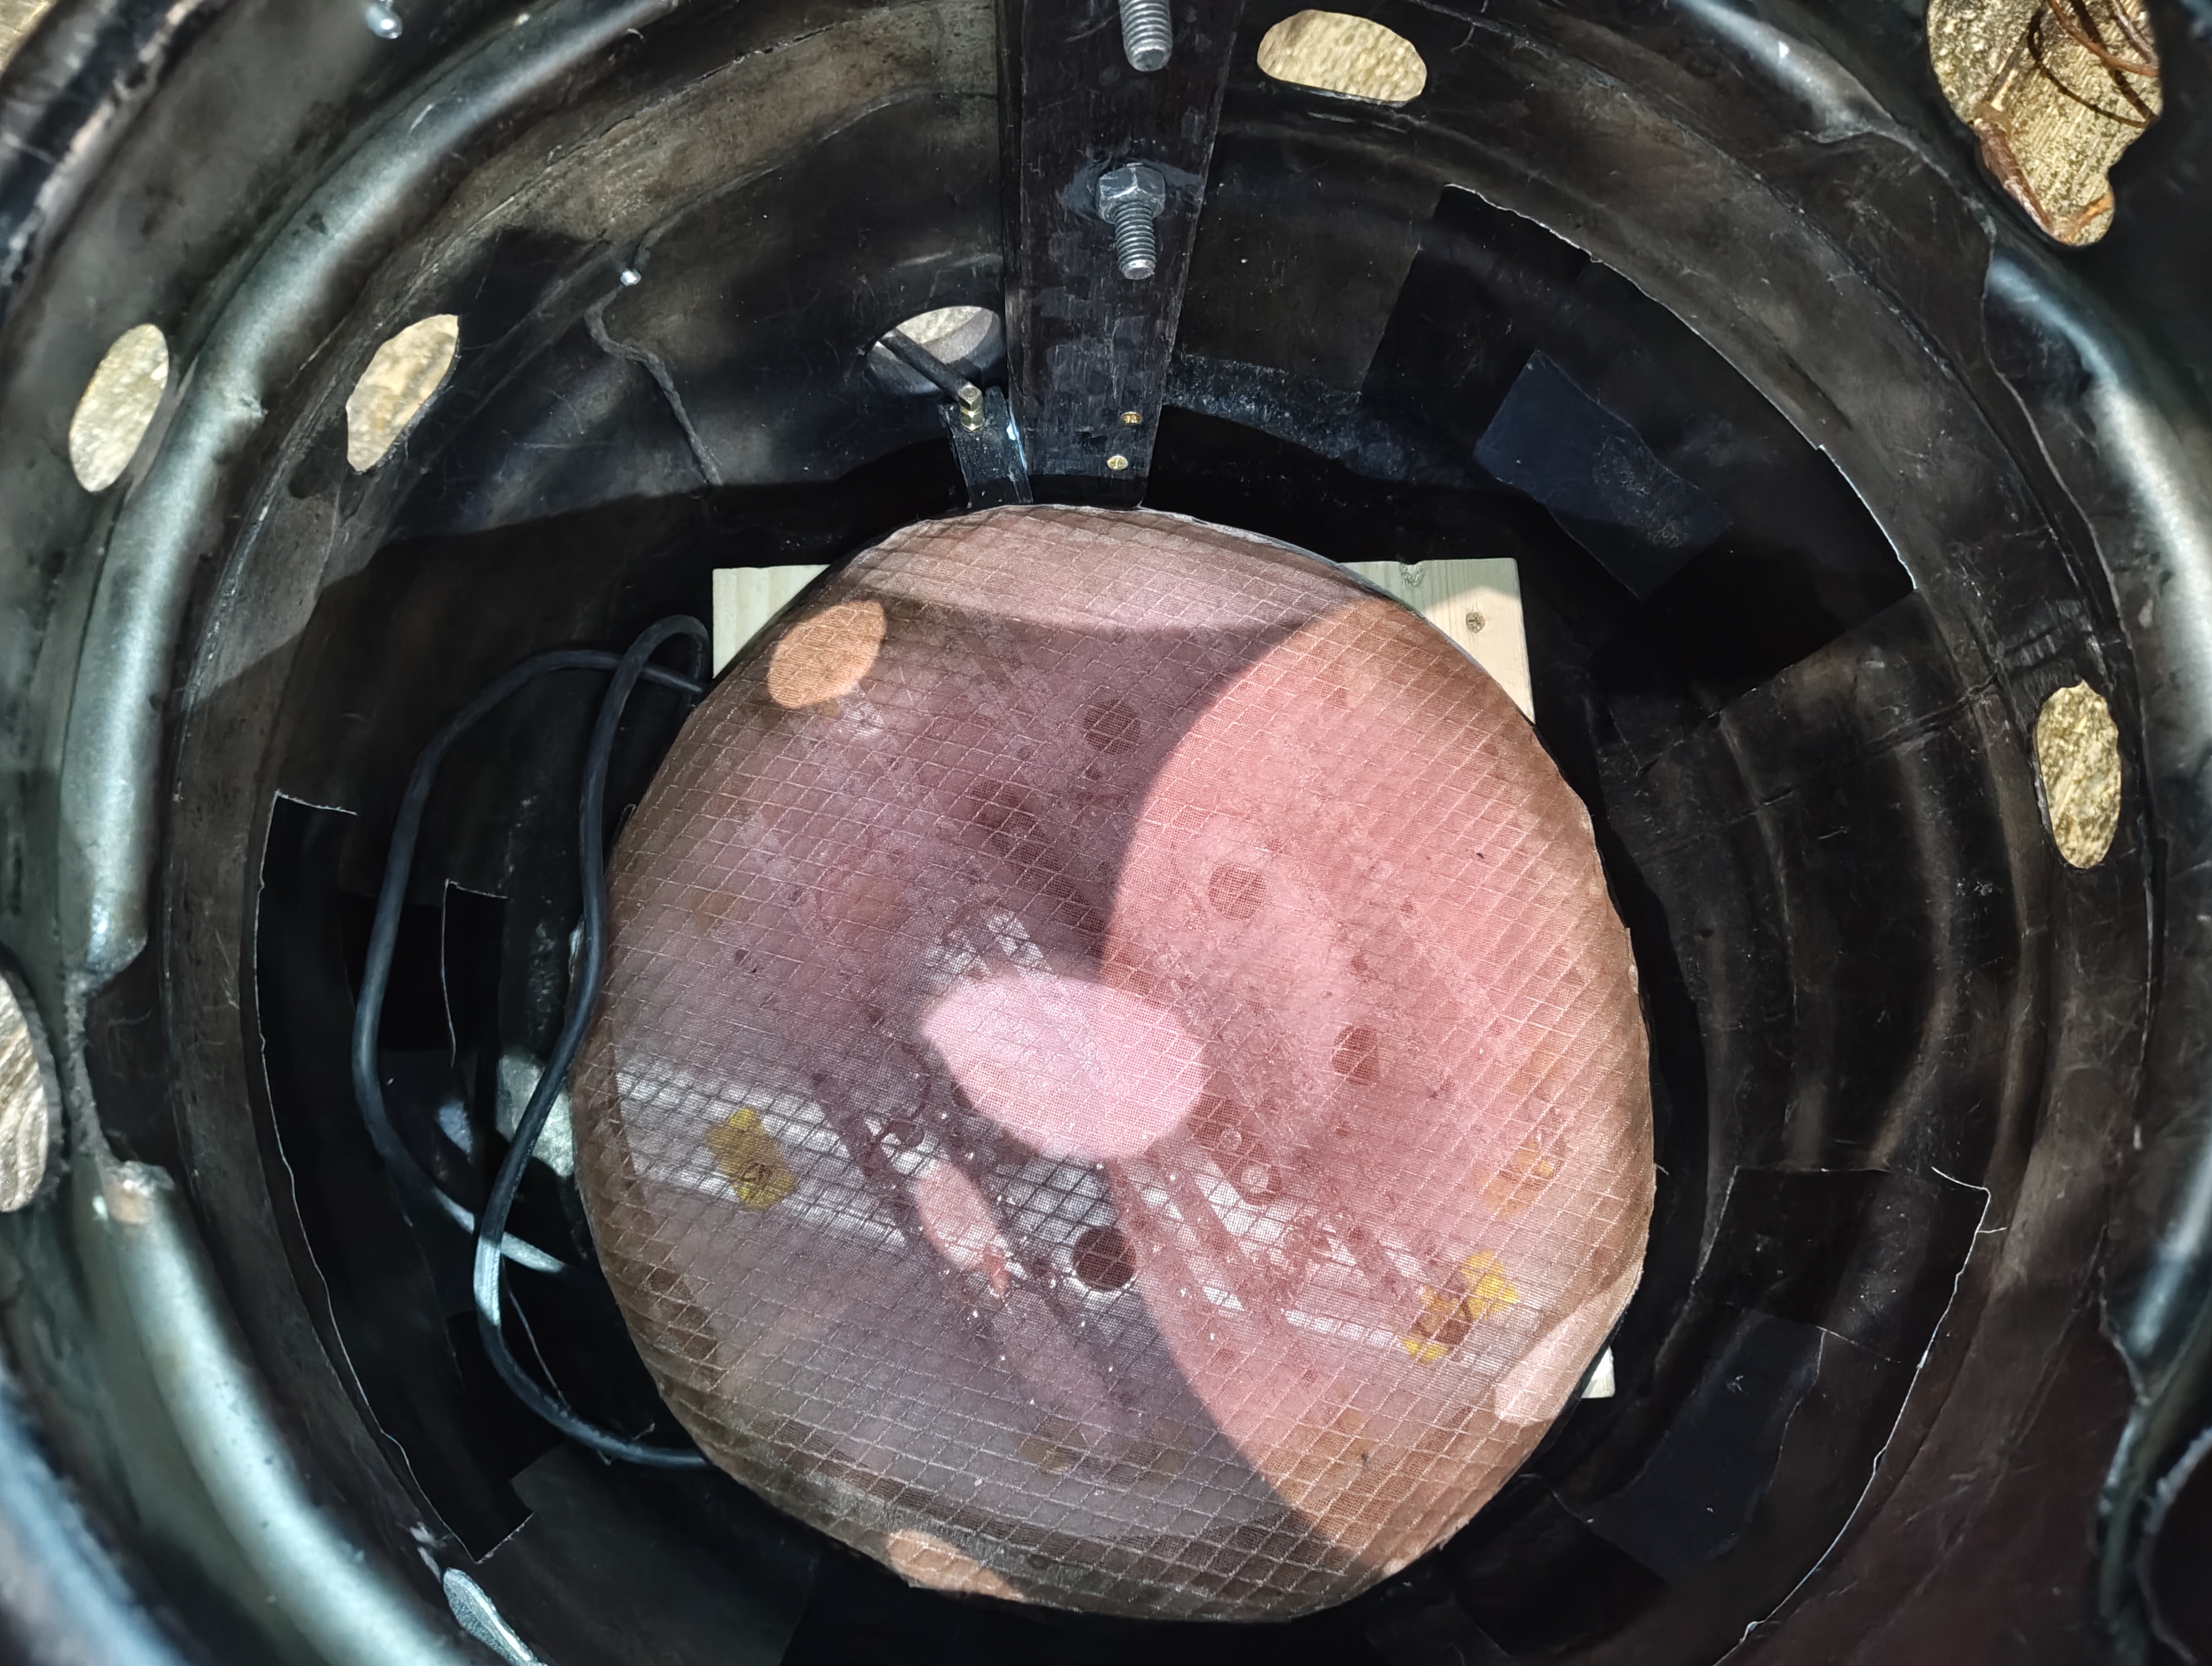
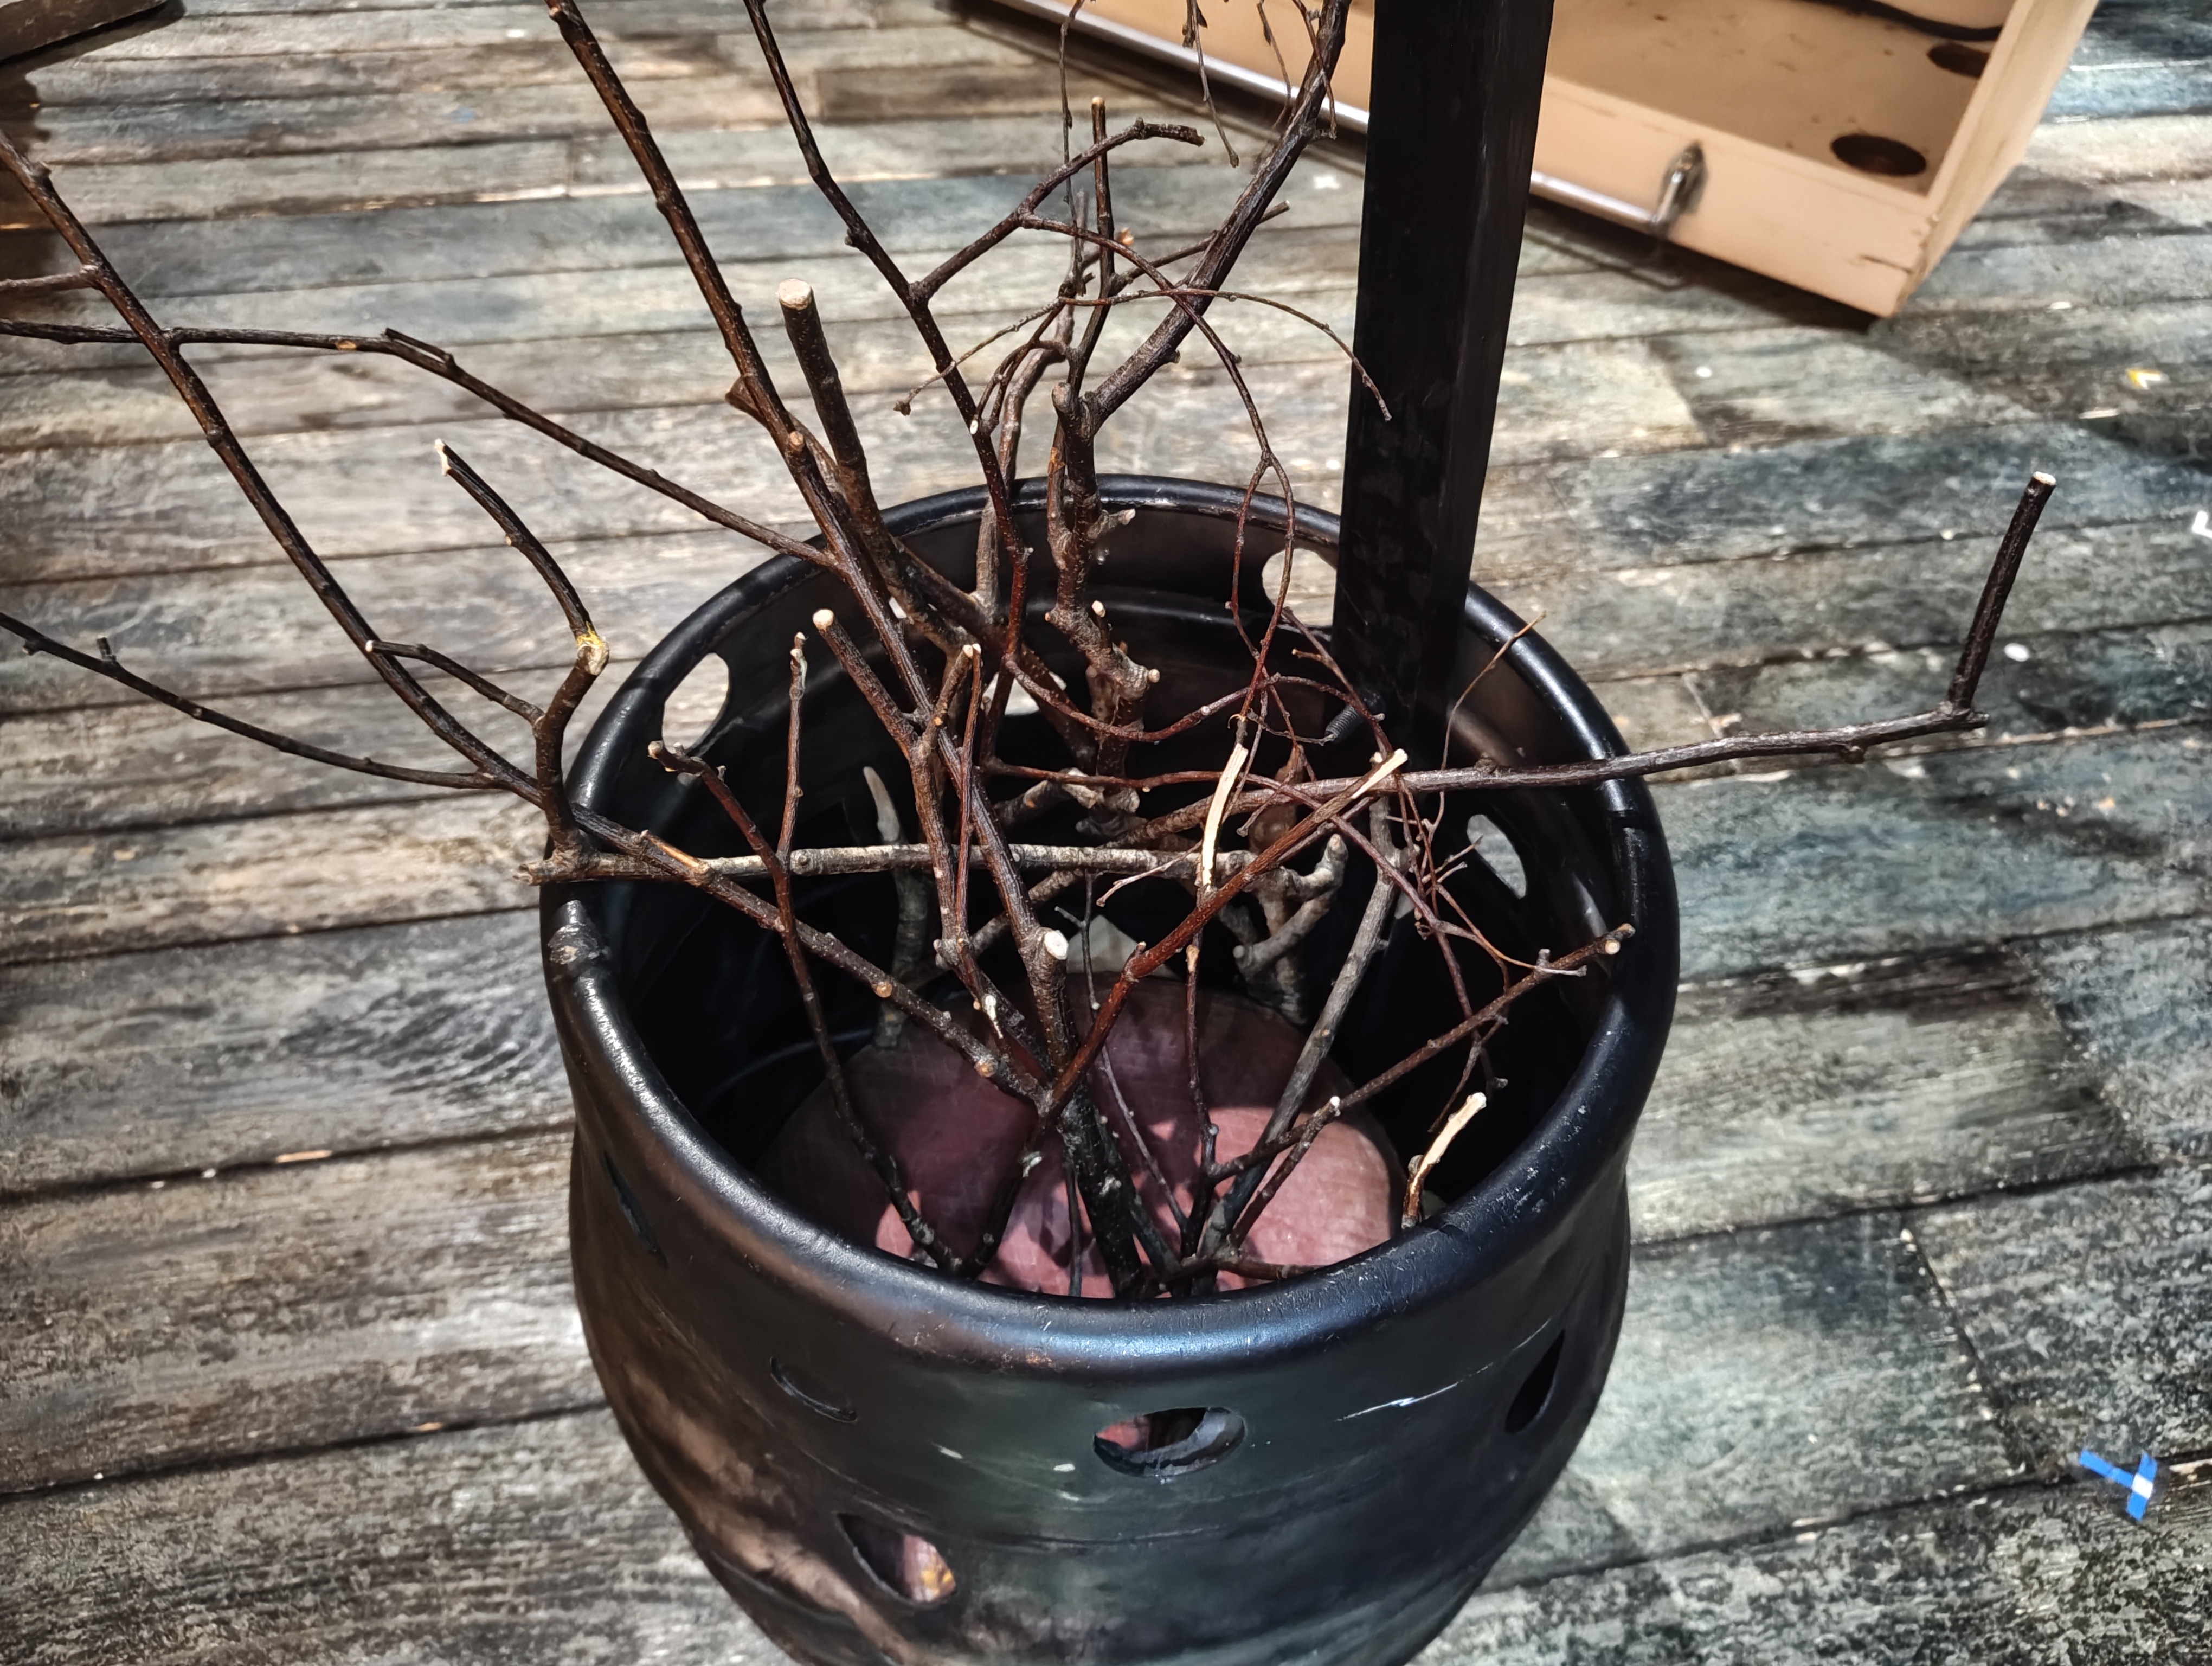
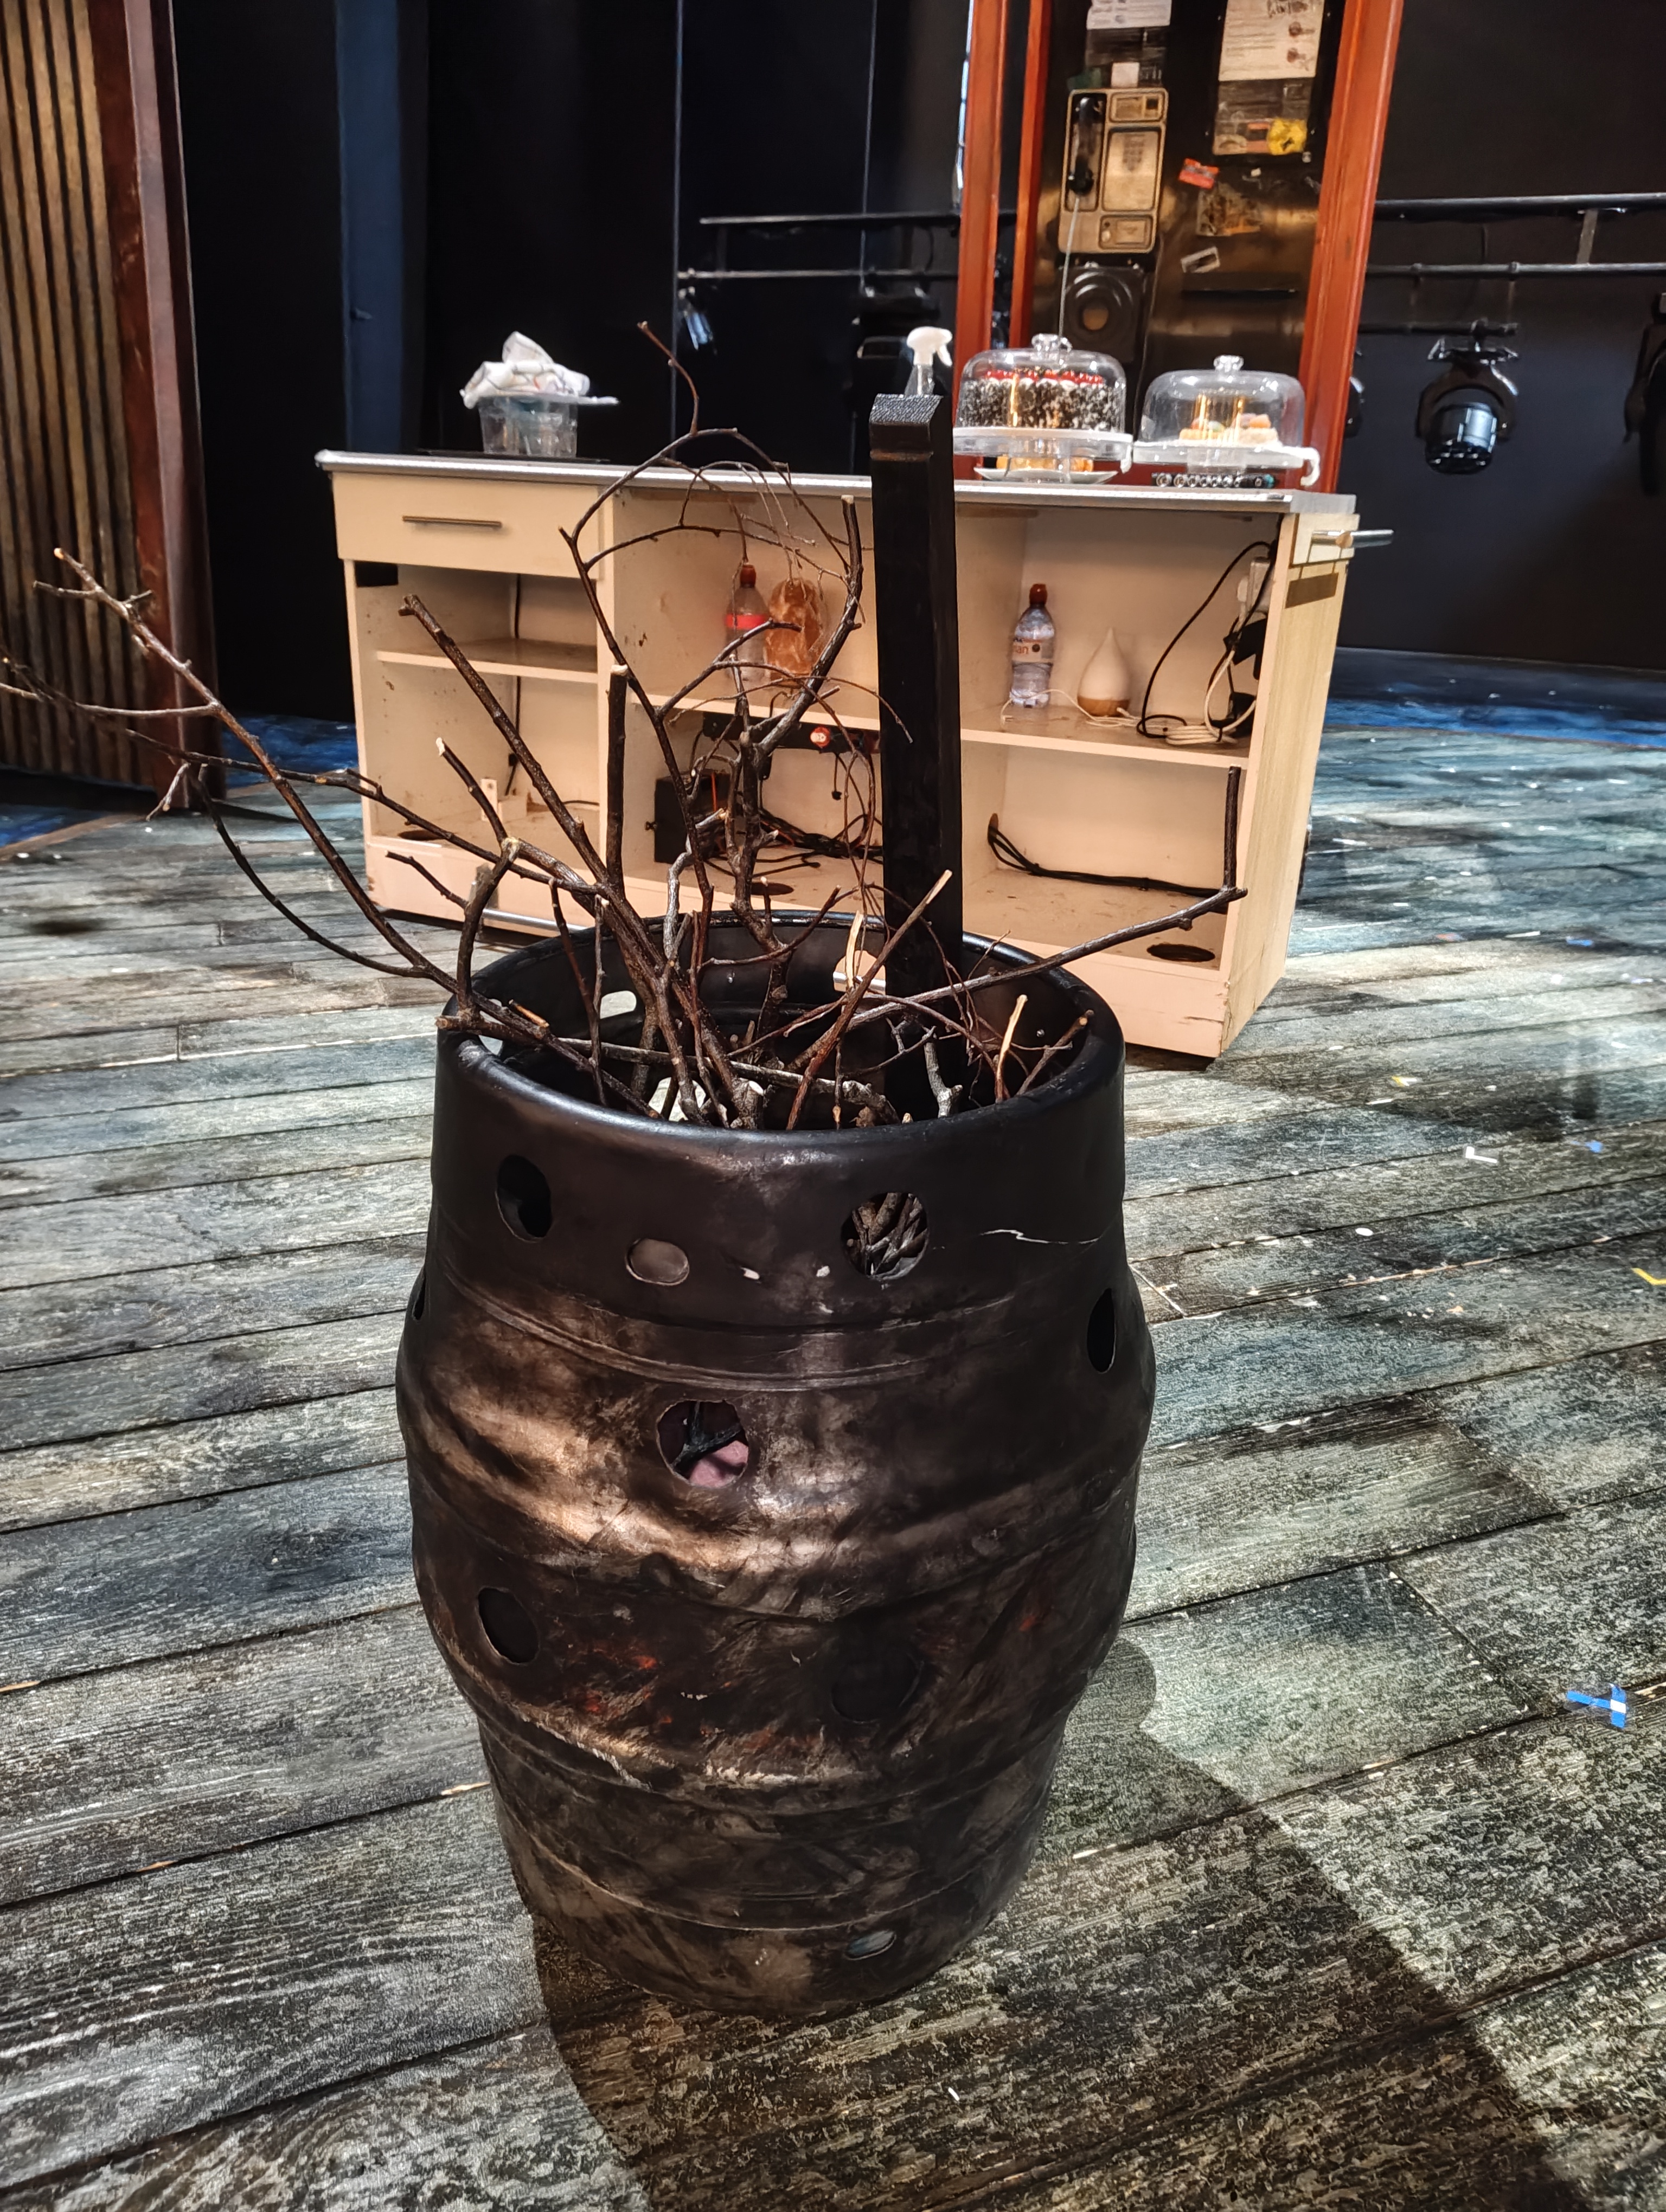
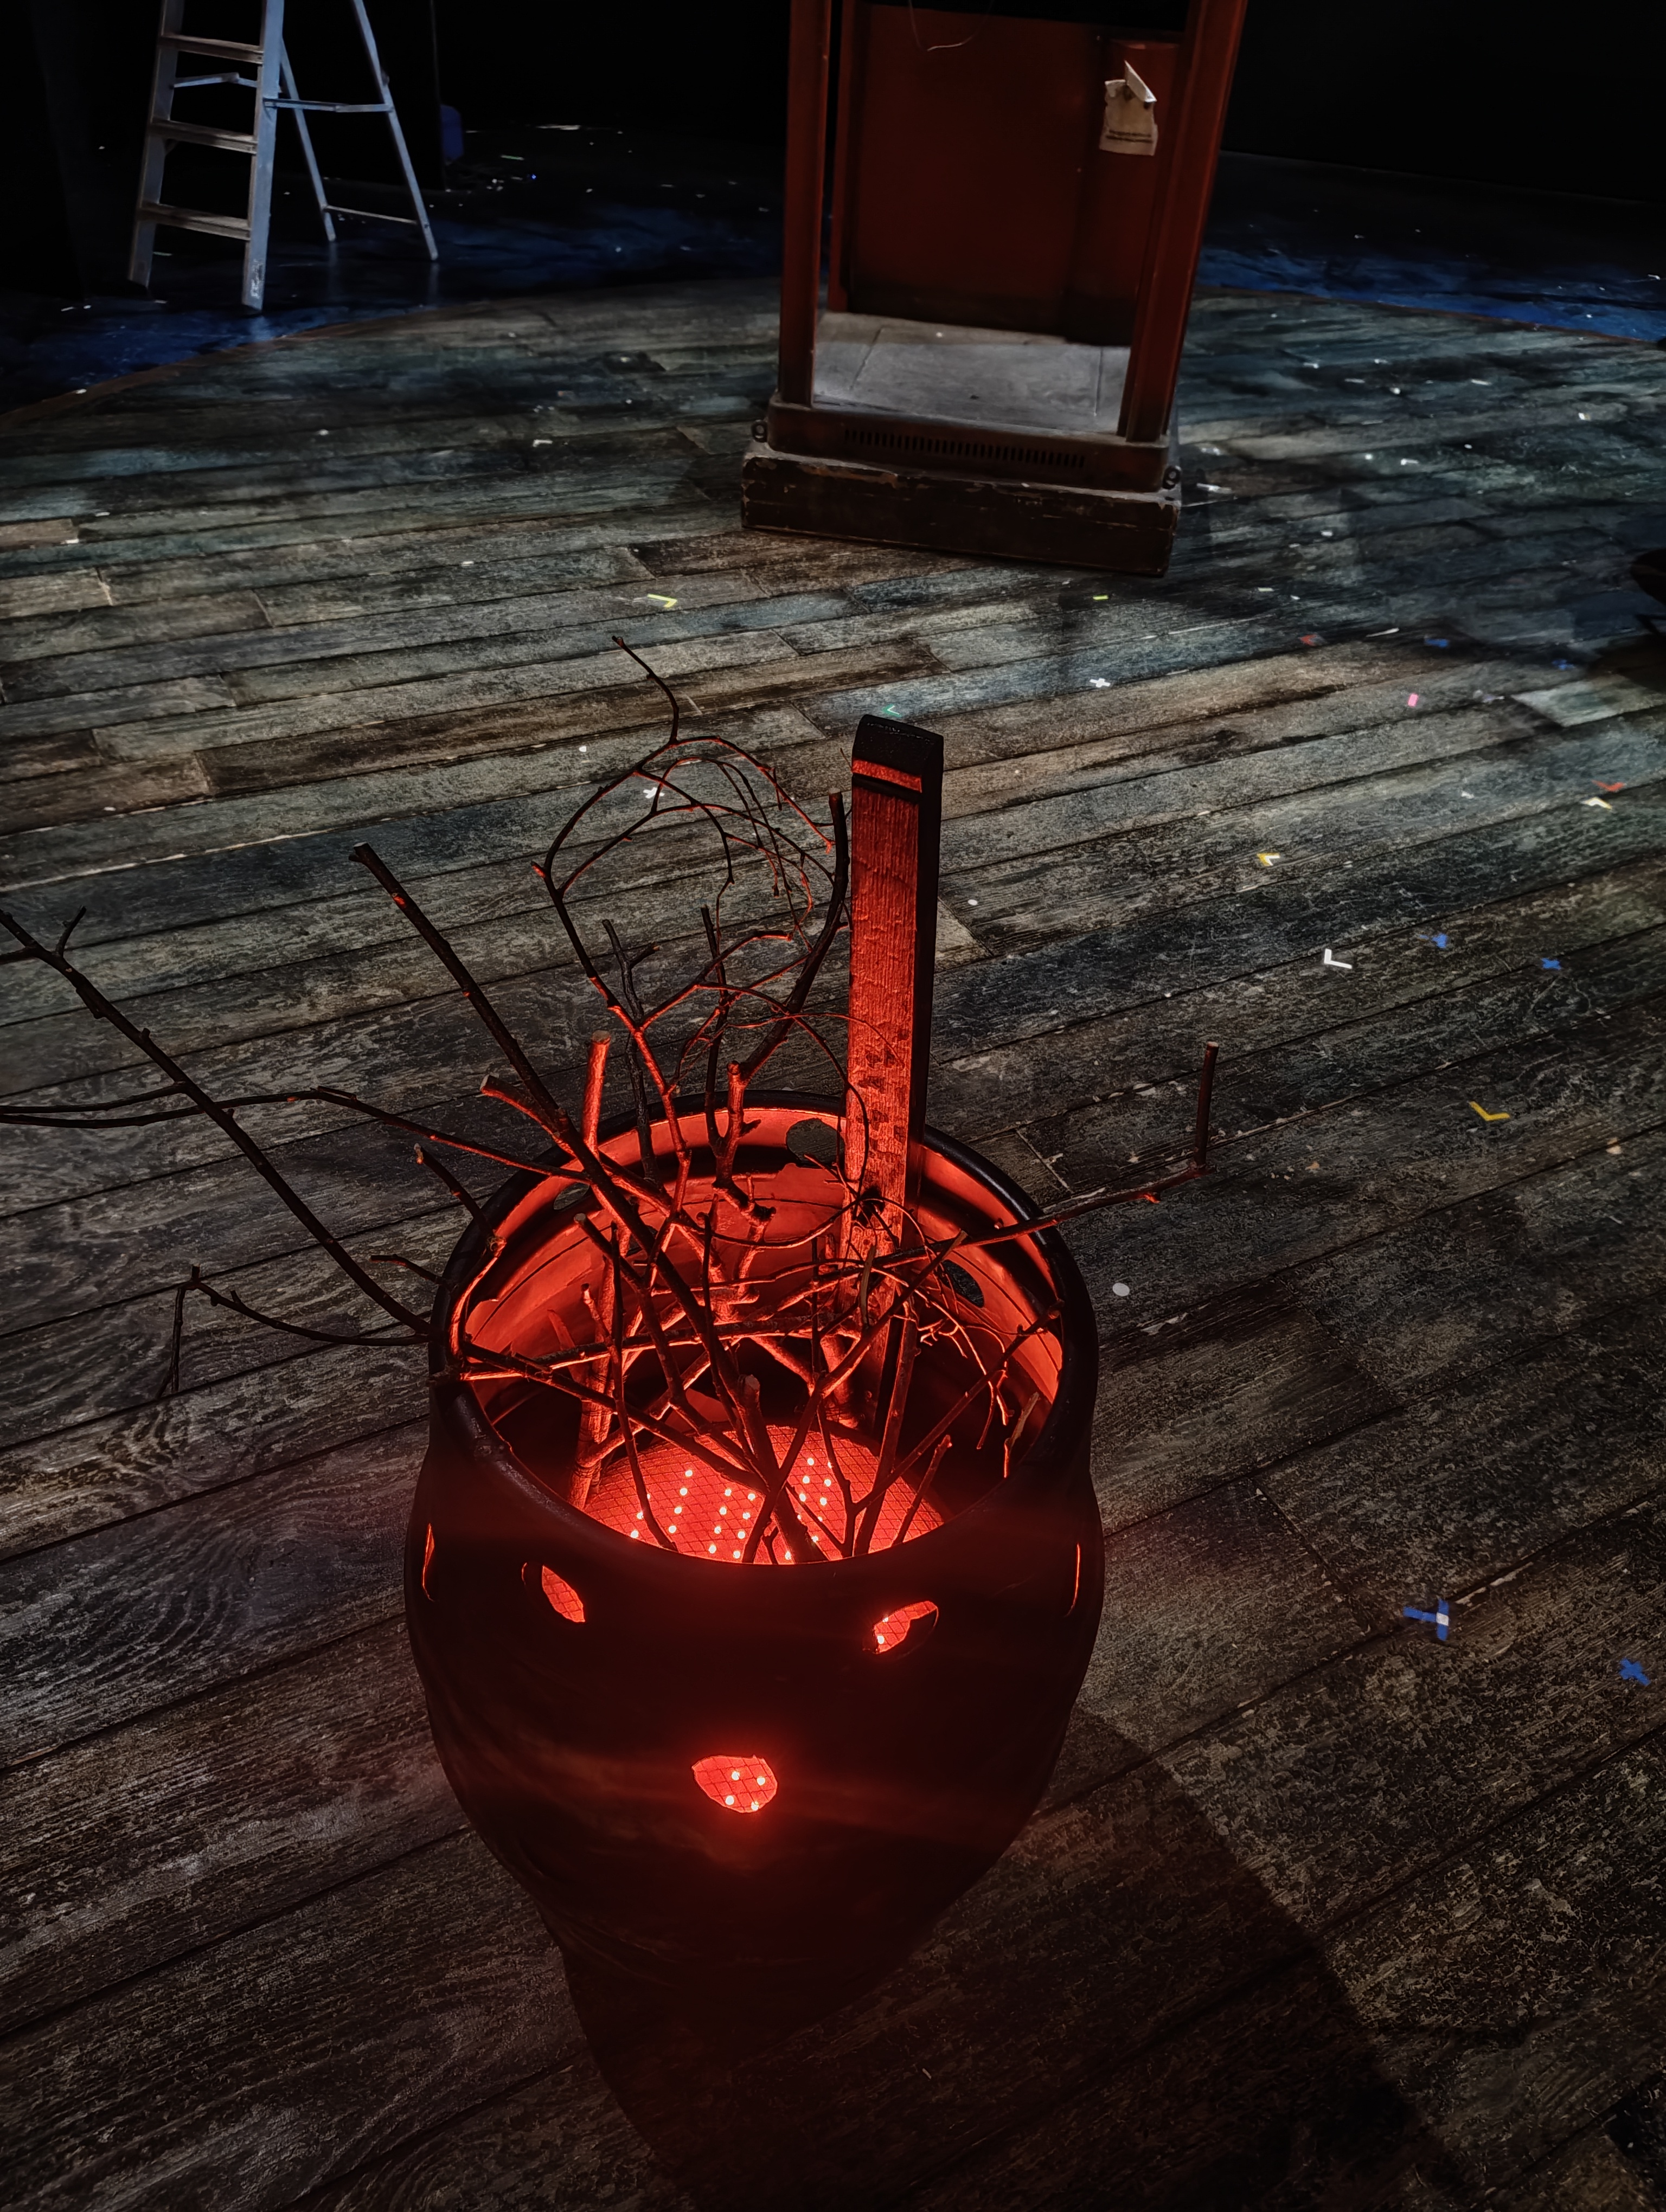
The Brazier is a metal barrel fire effect practical. It contains a circular aluminium LED panel with RGBW pixel tape mounted in strips, covered with diffusion. The panel has a split down the middle to make it easier to remove for maintenance. Prop sticks sit on top of the panel inside the barrel to complete the fire effect.
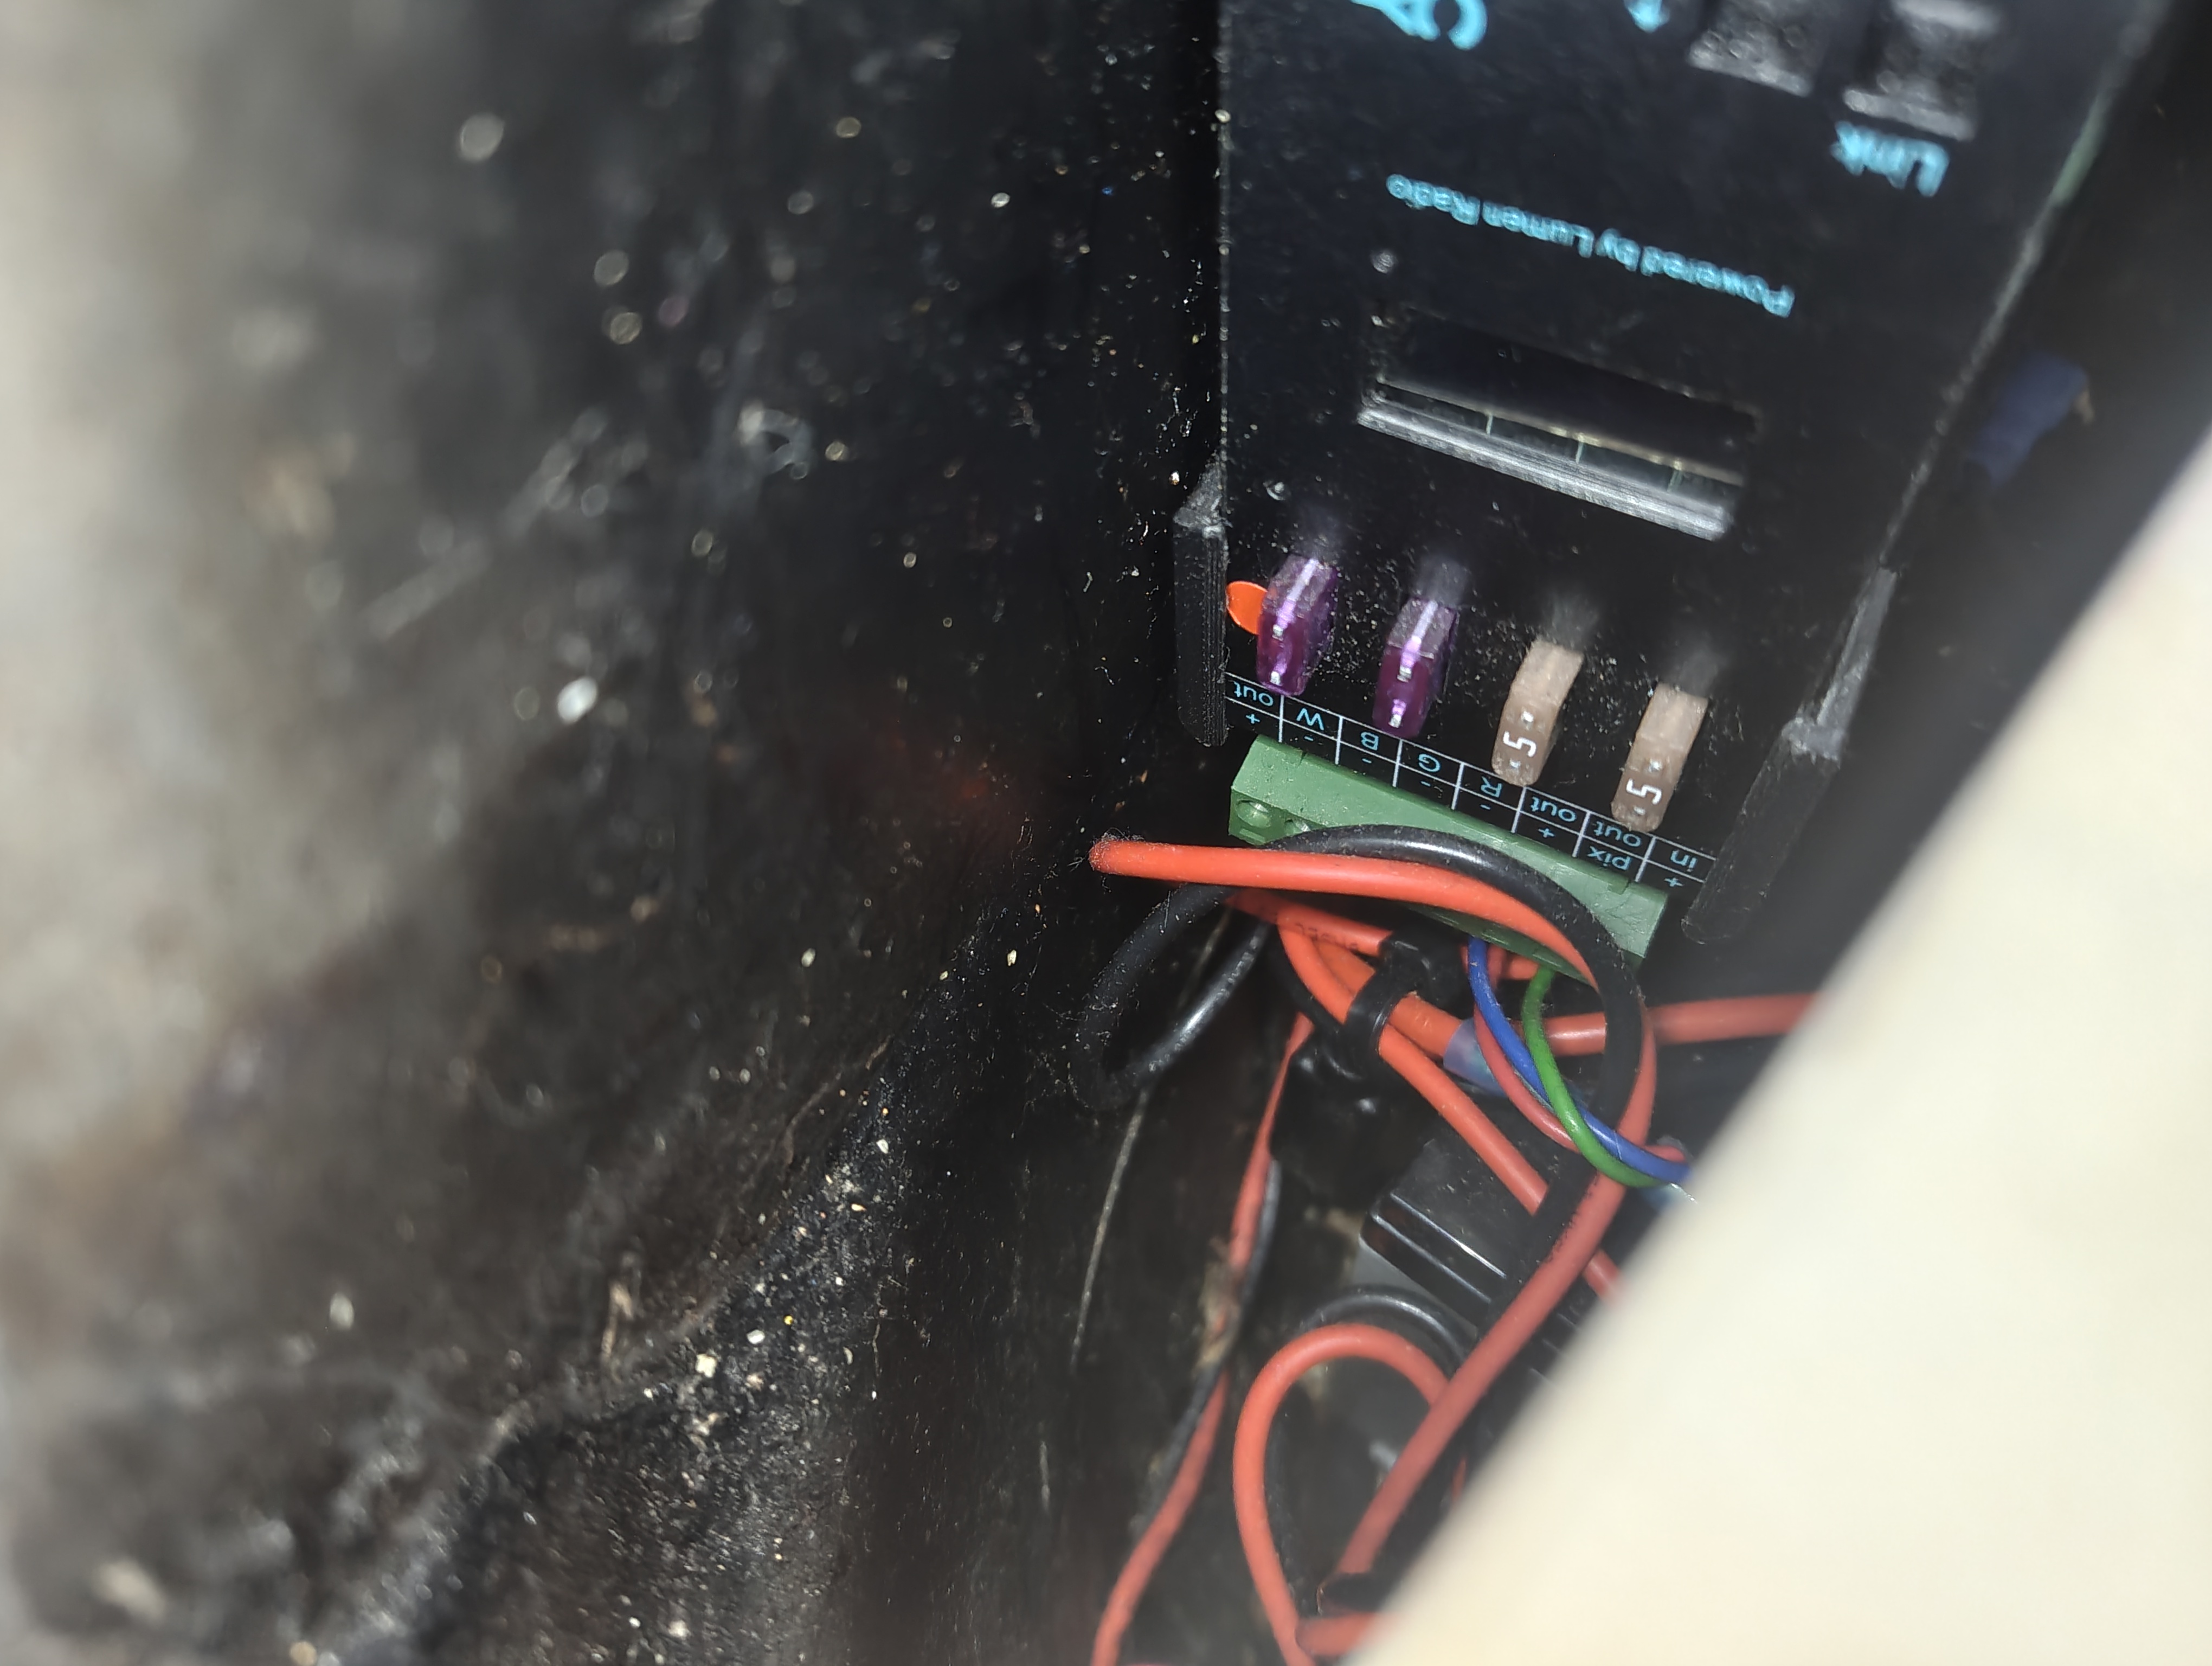
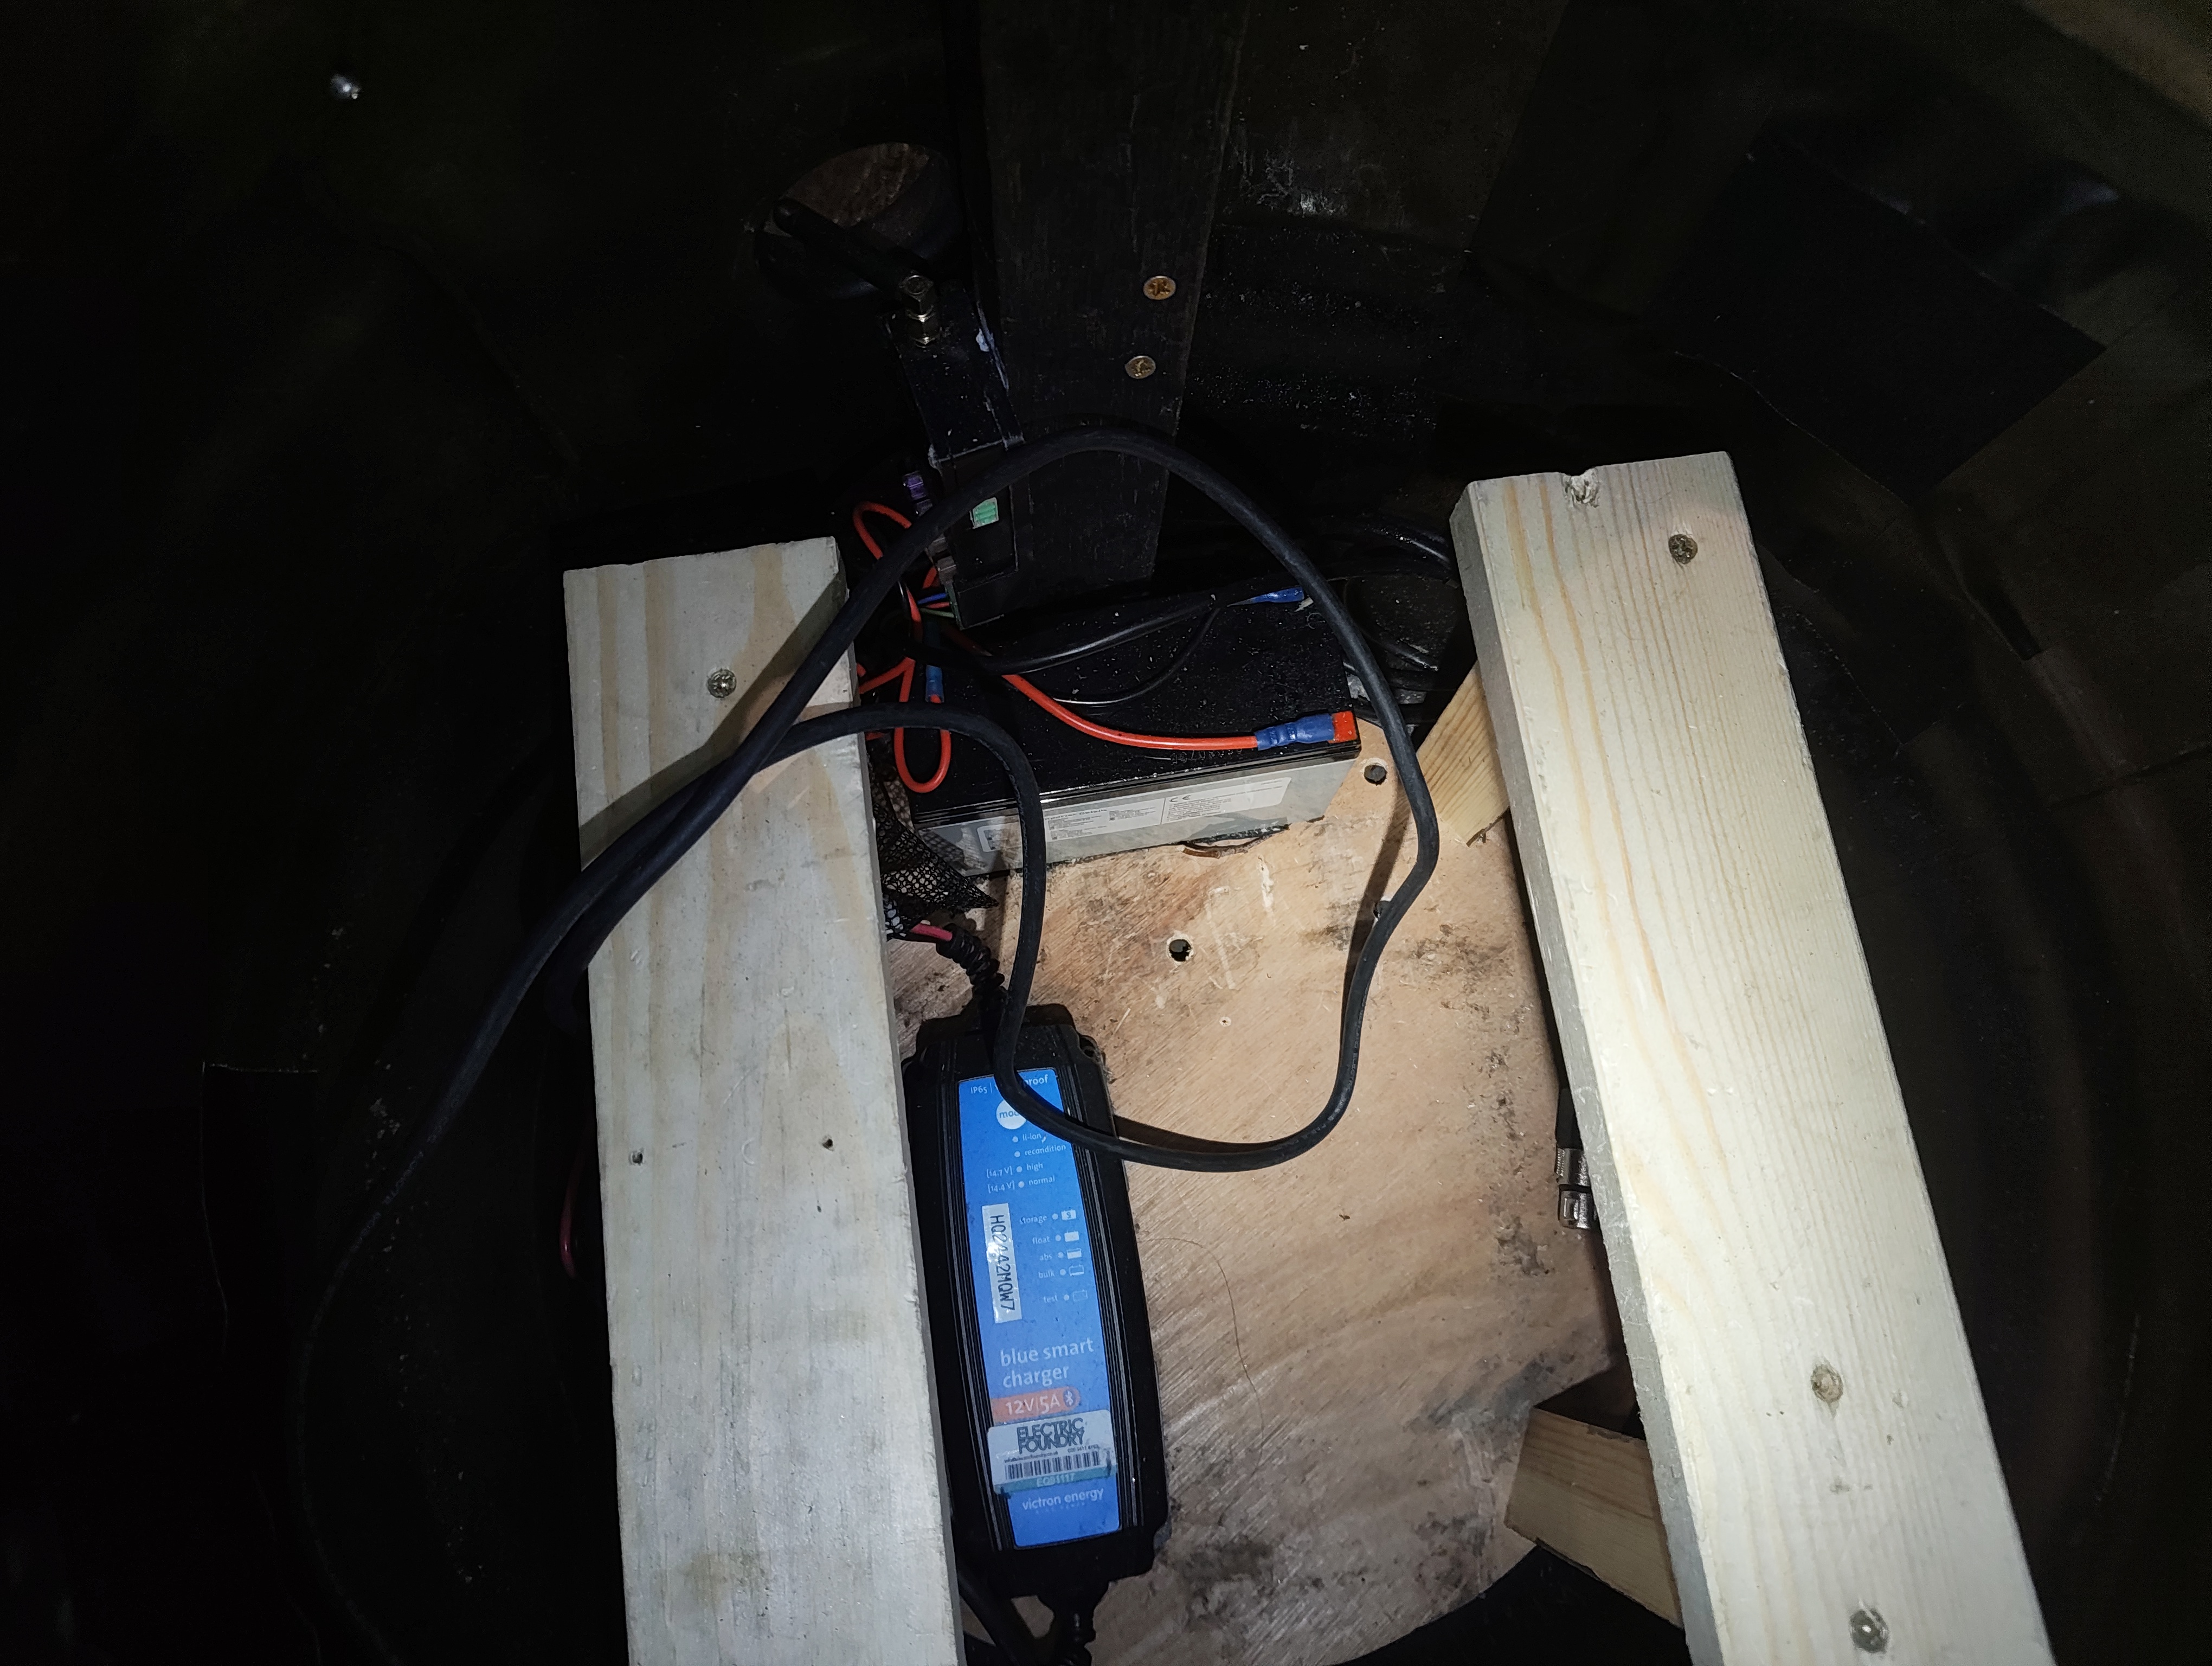
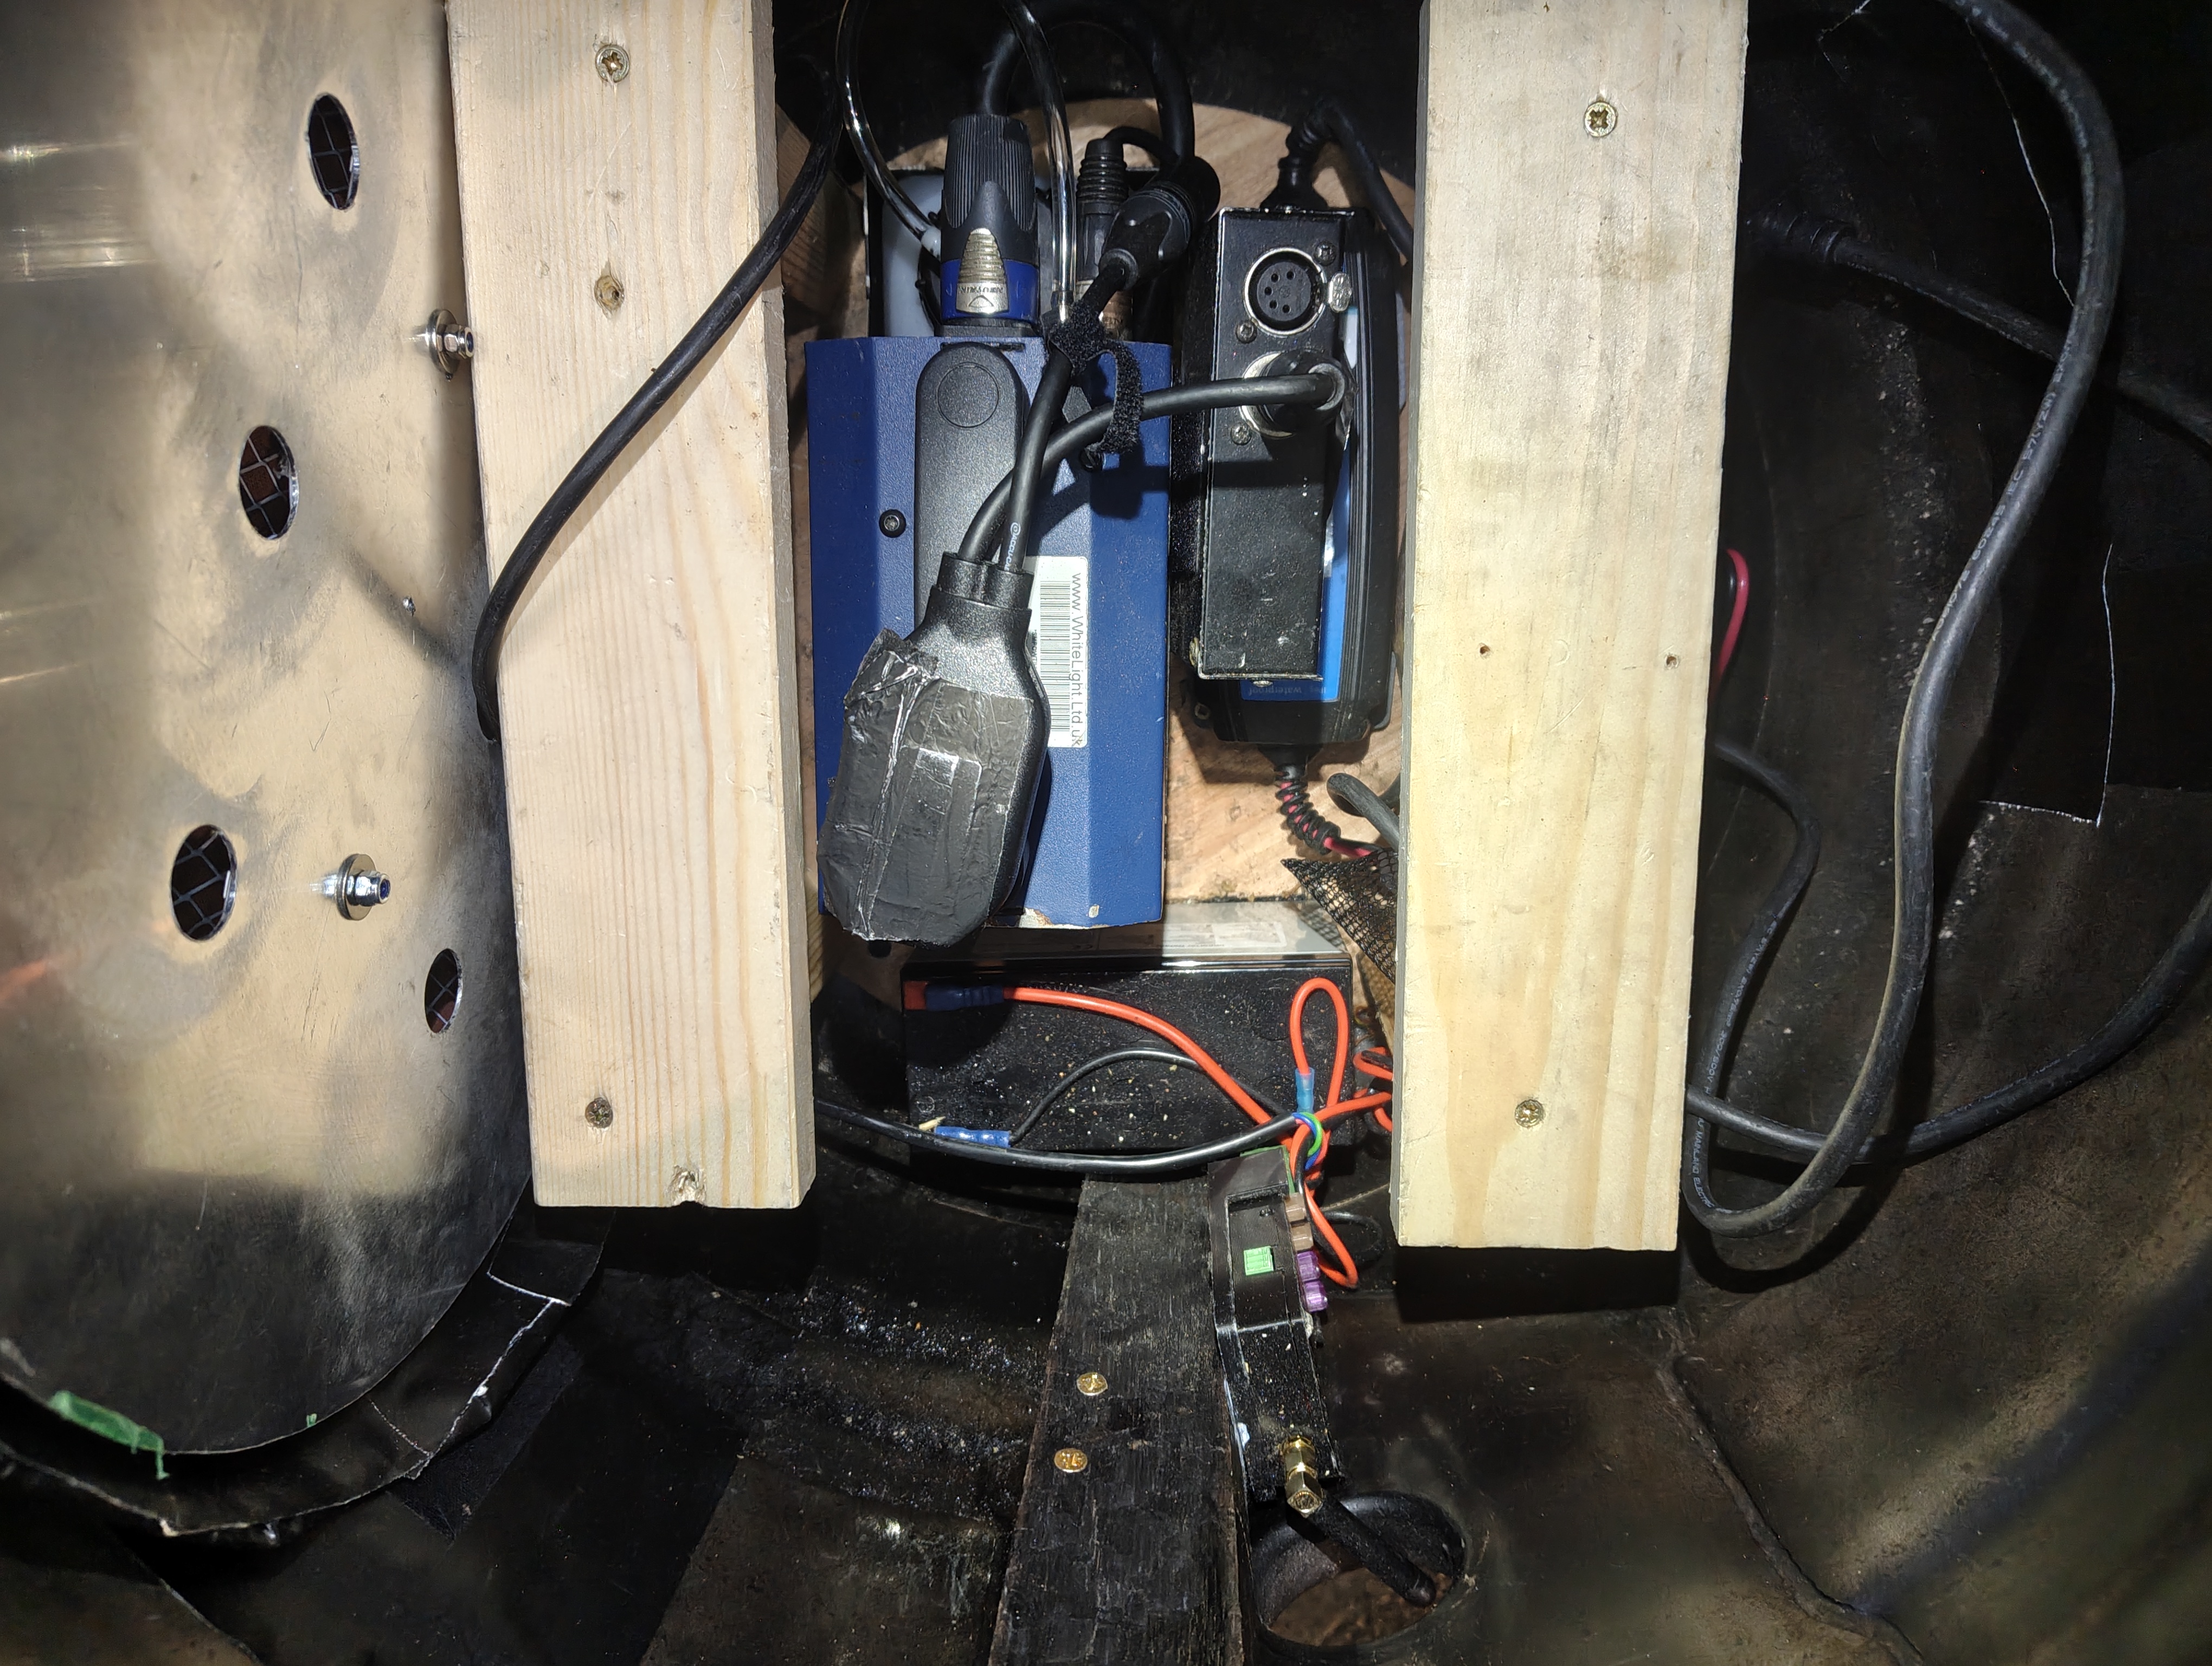
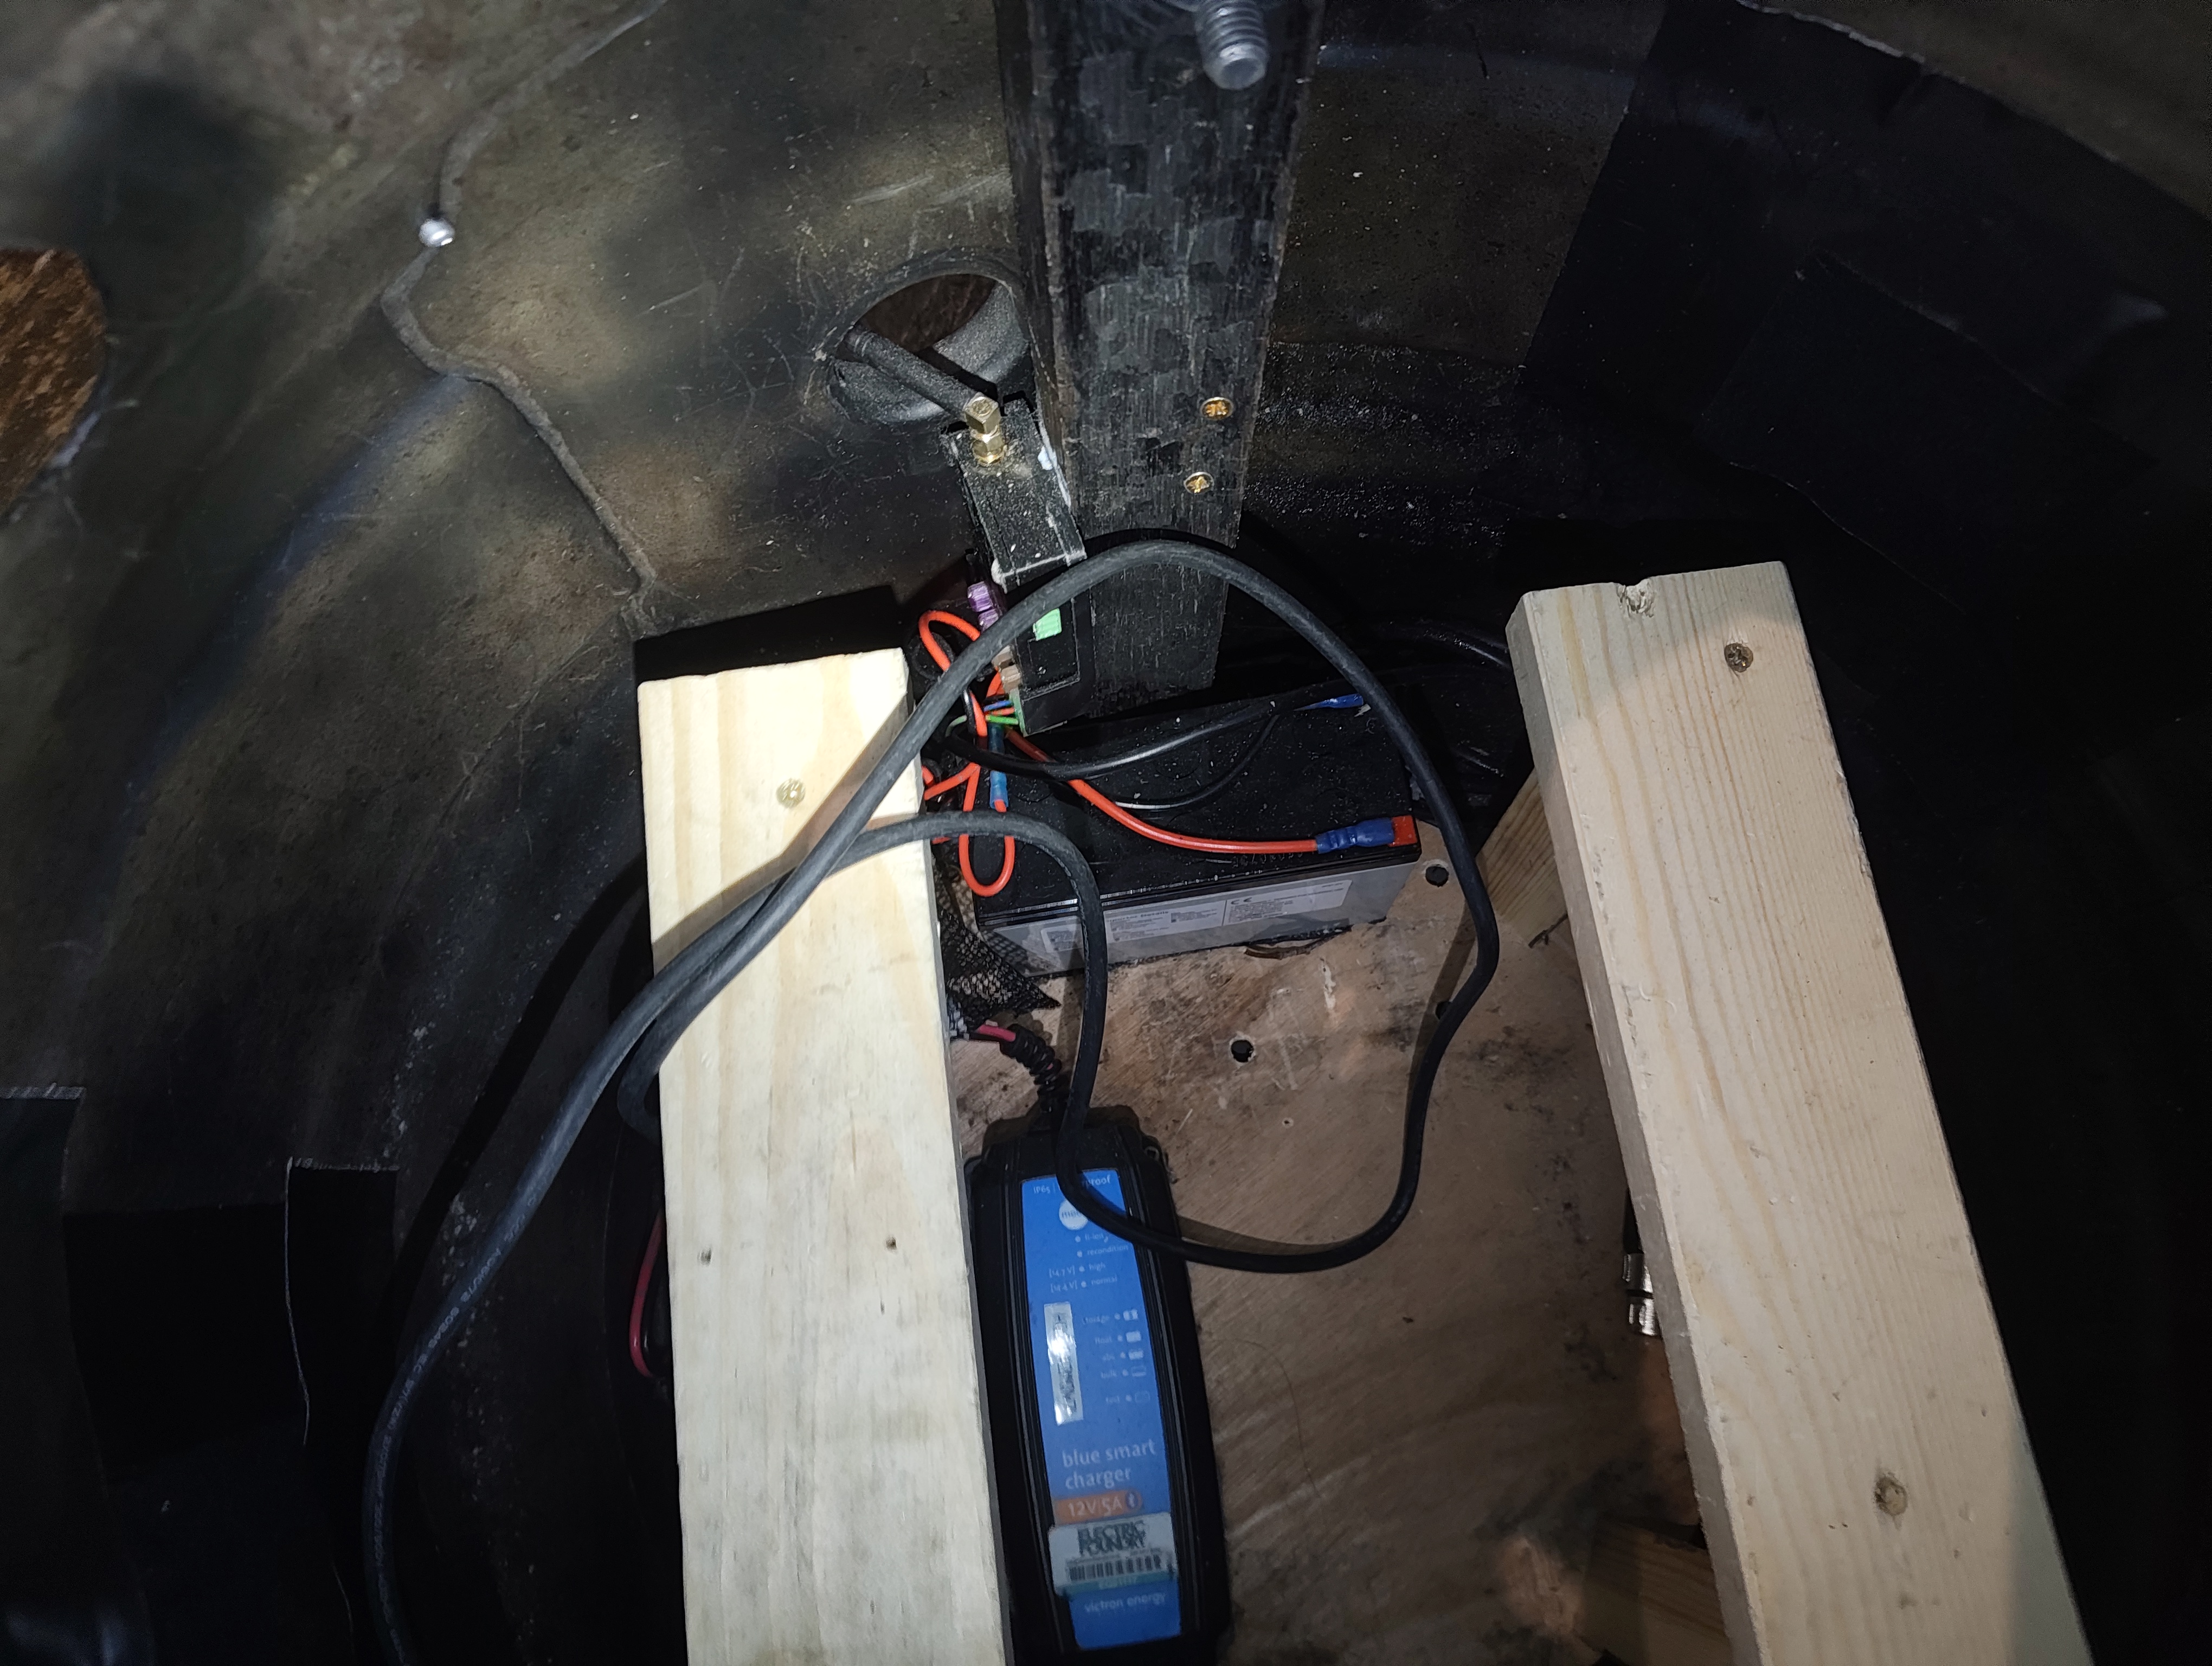
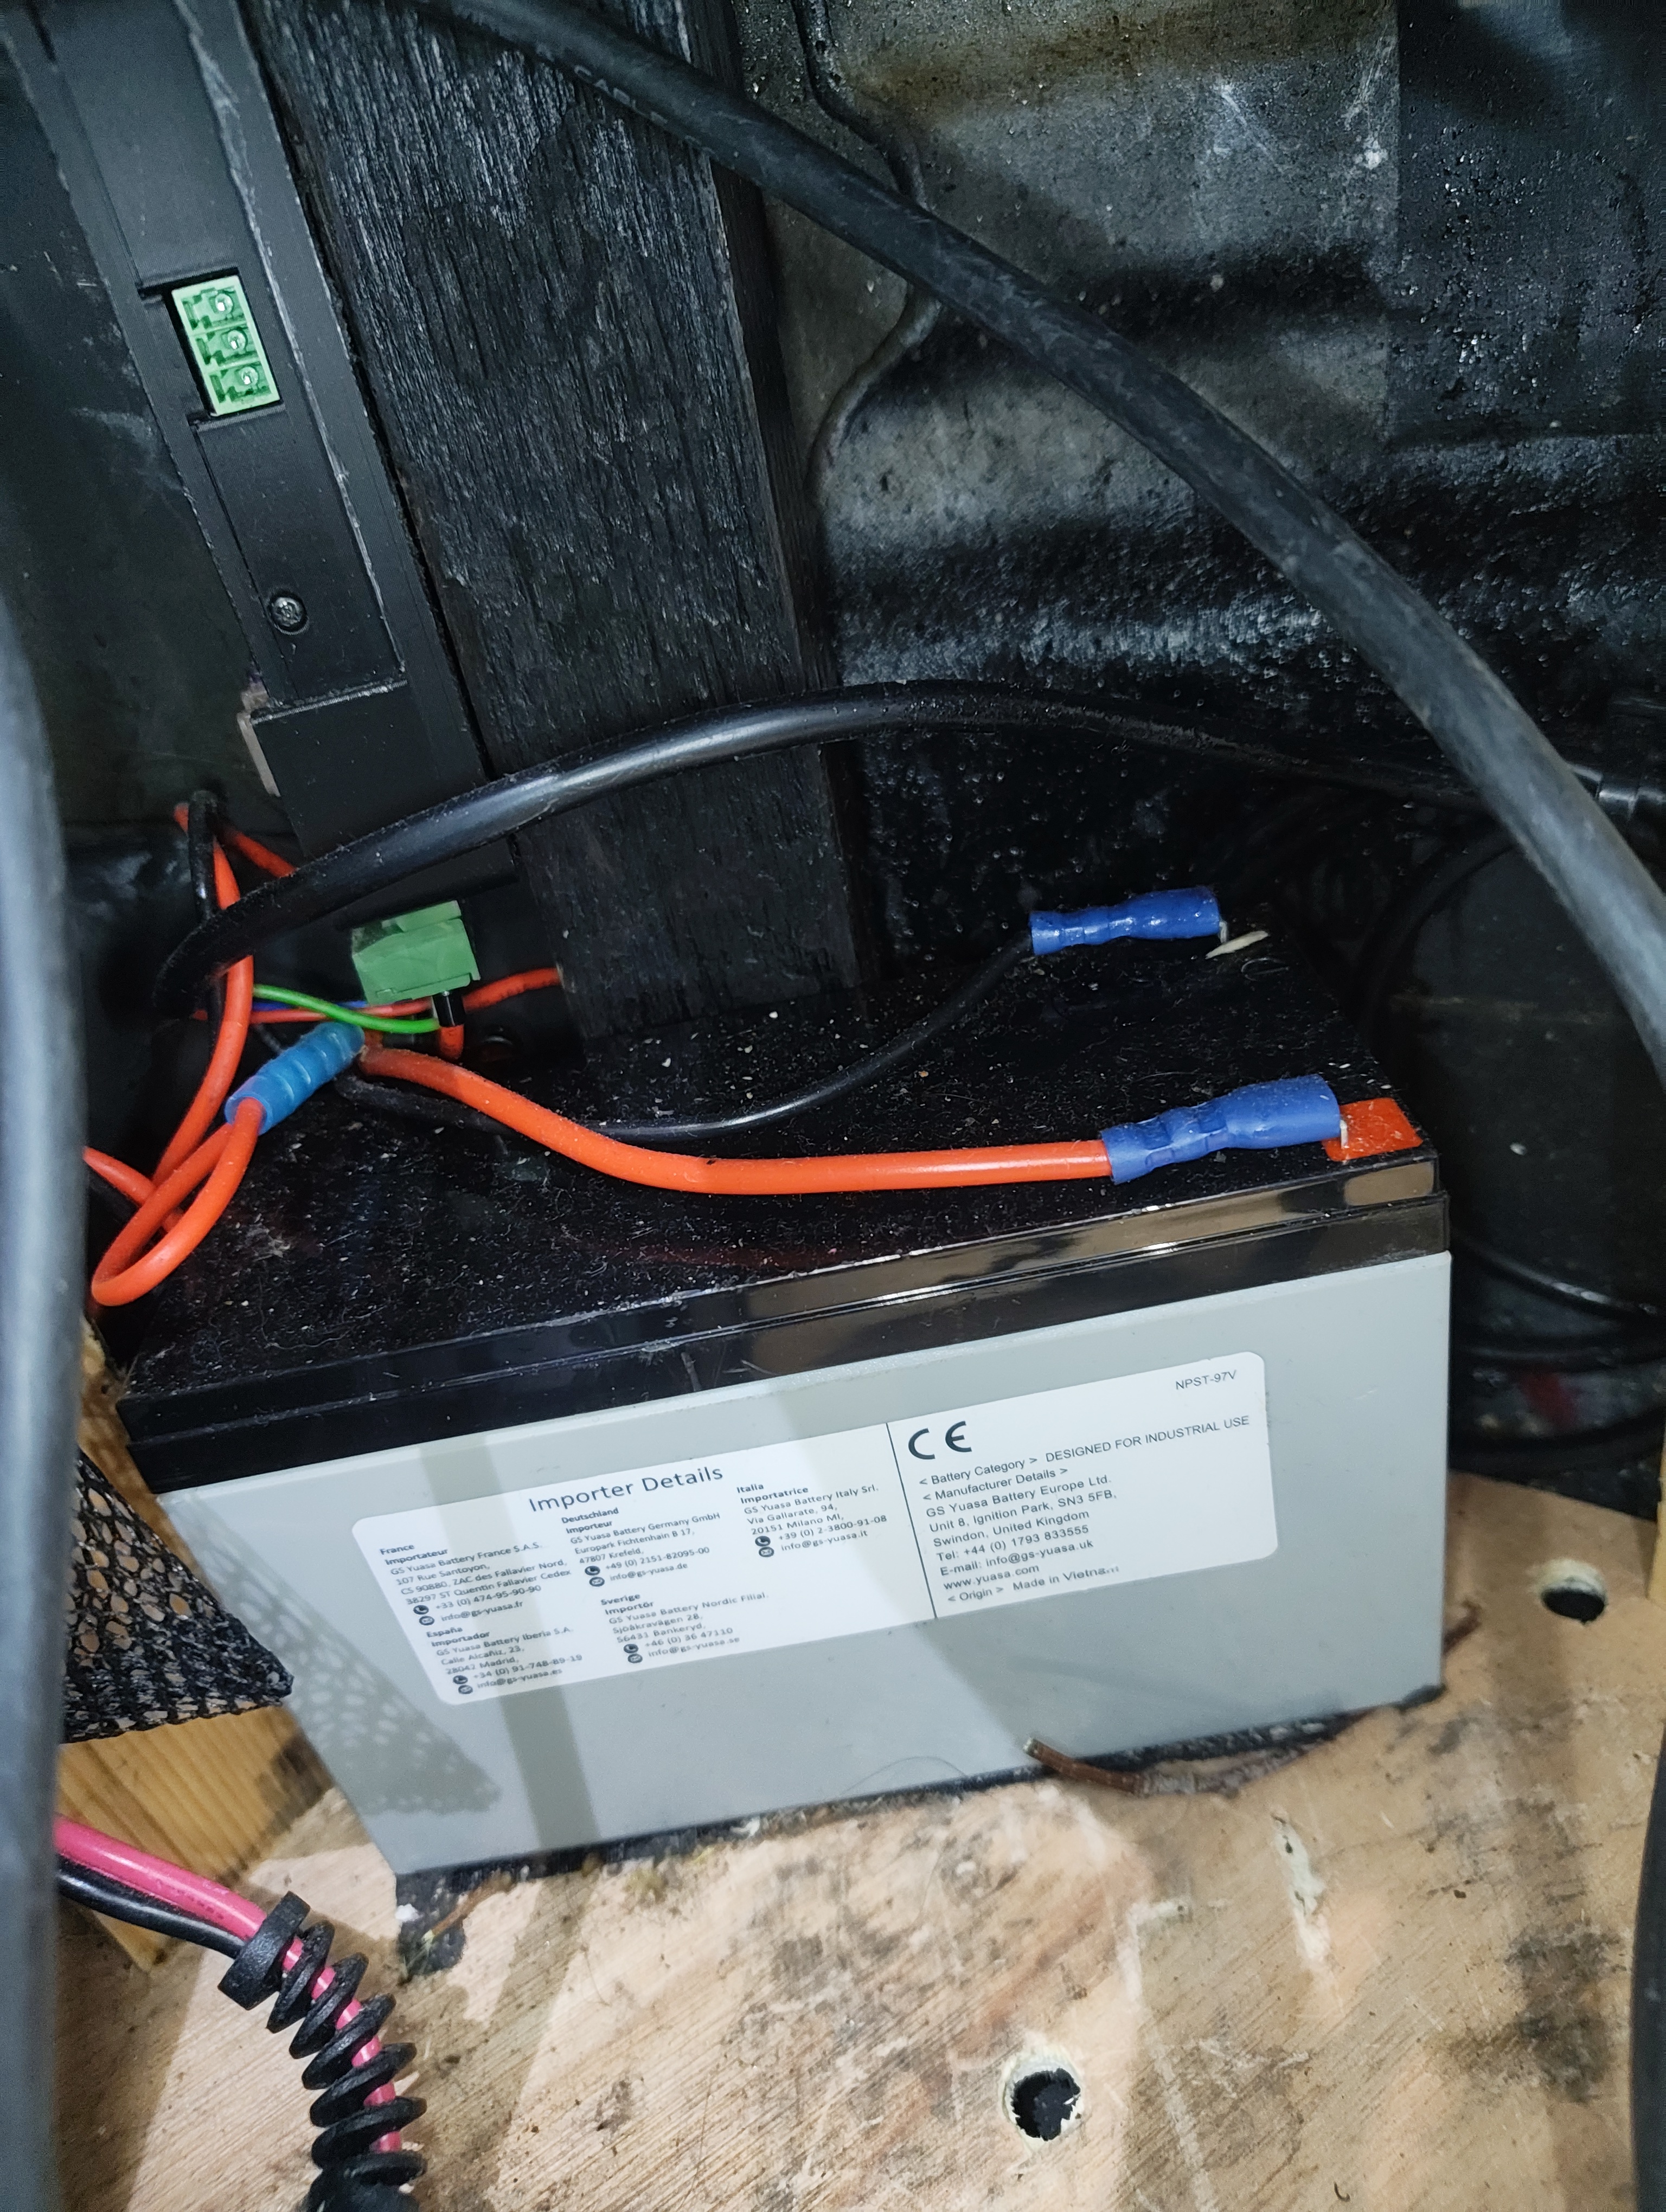
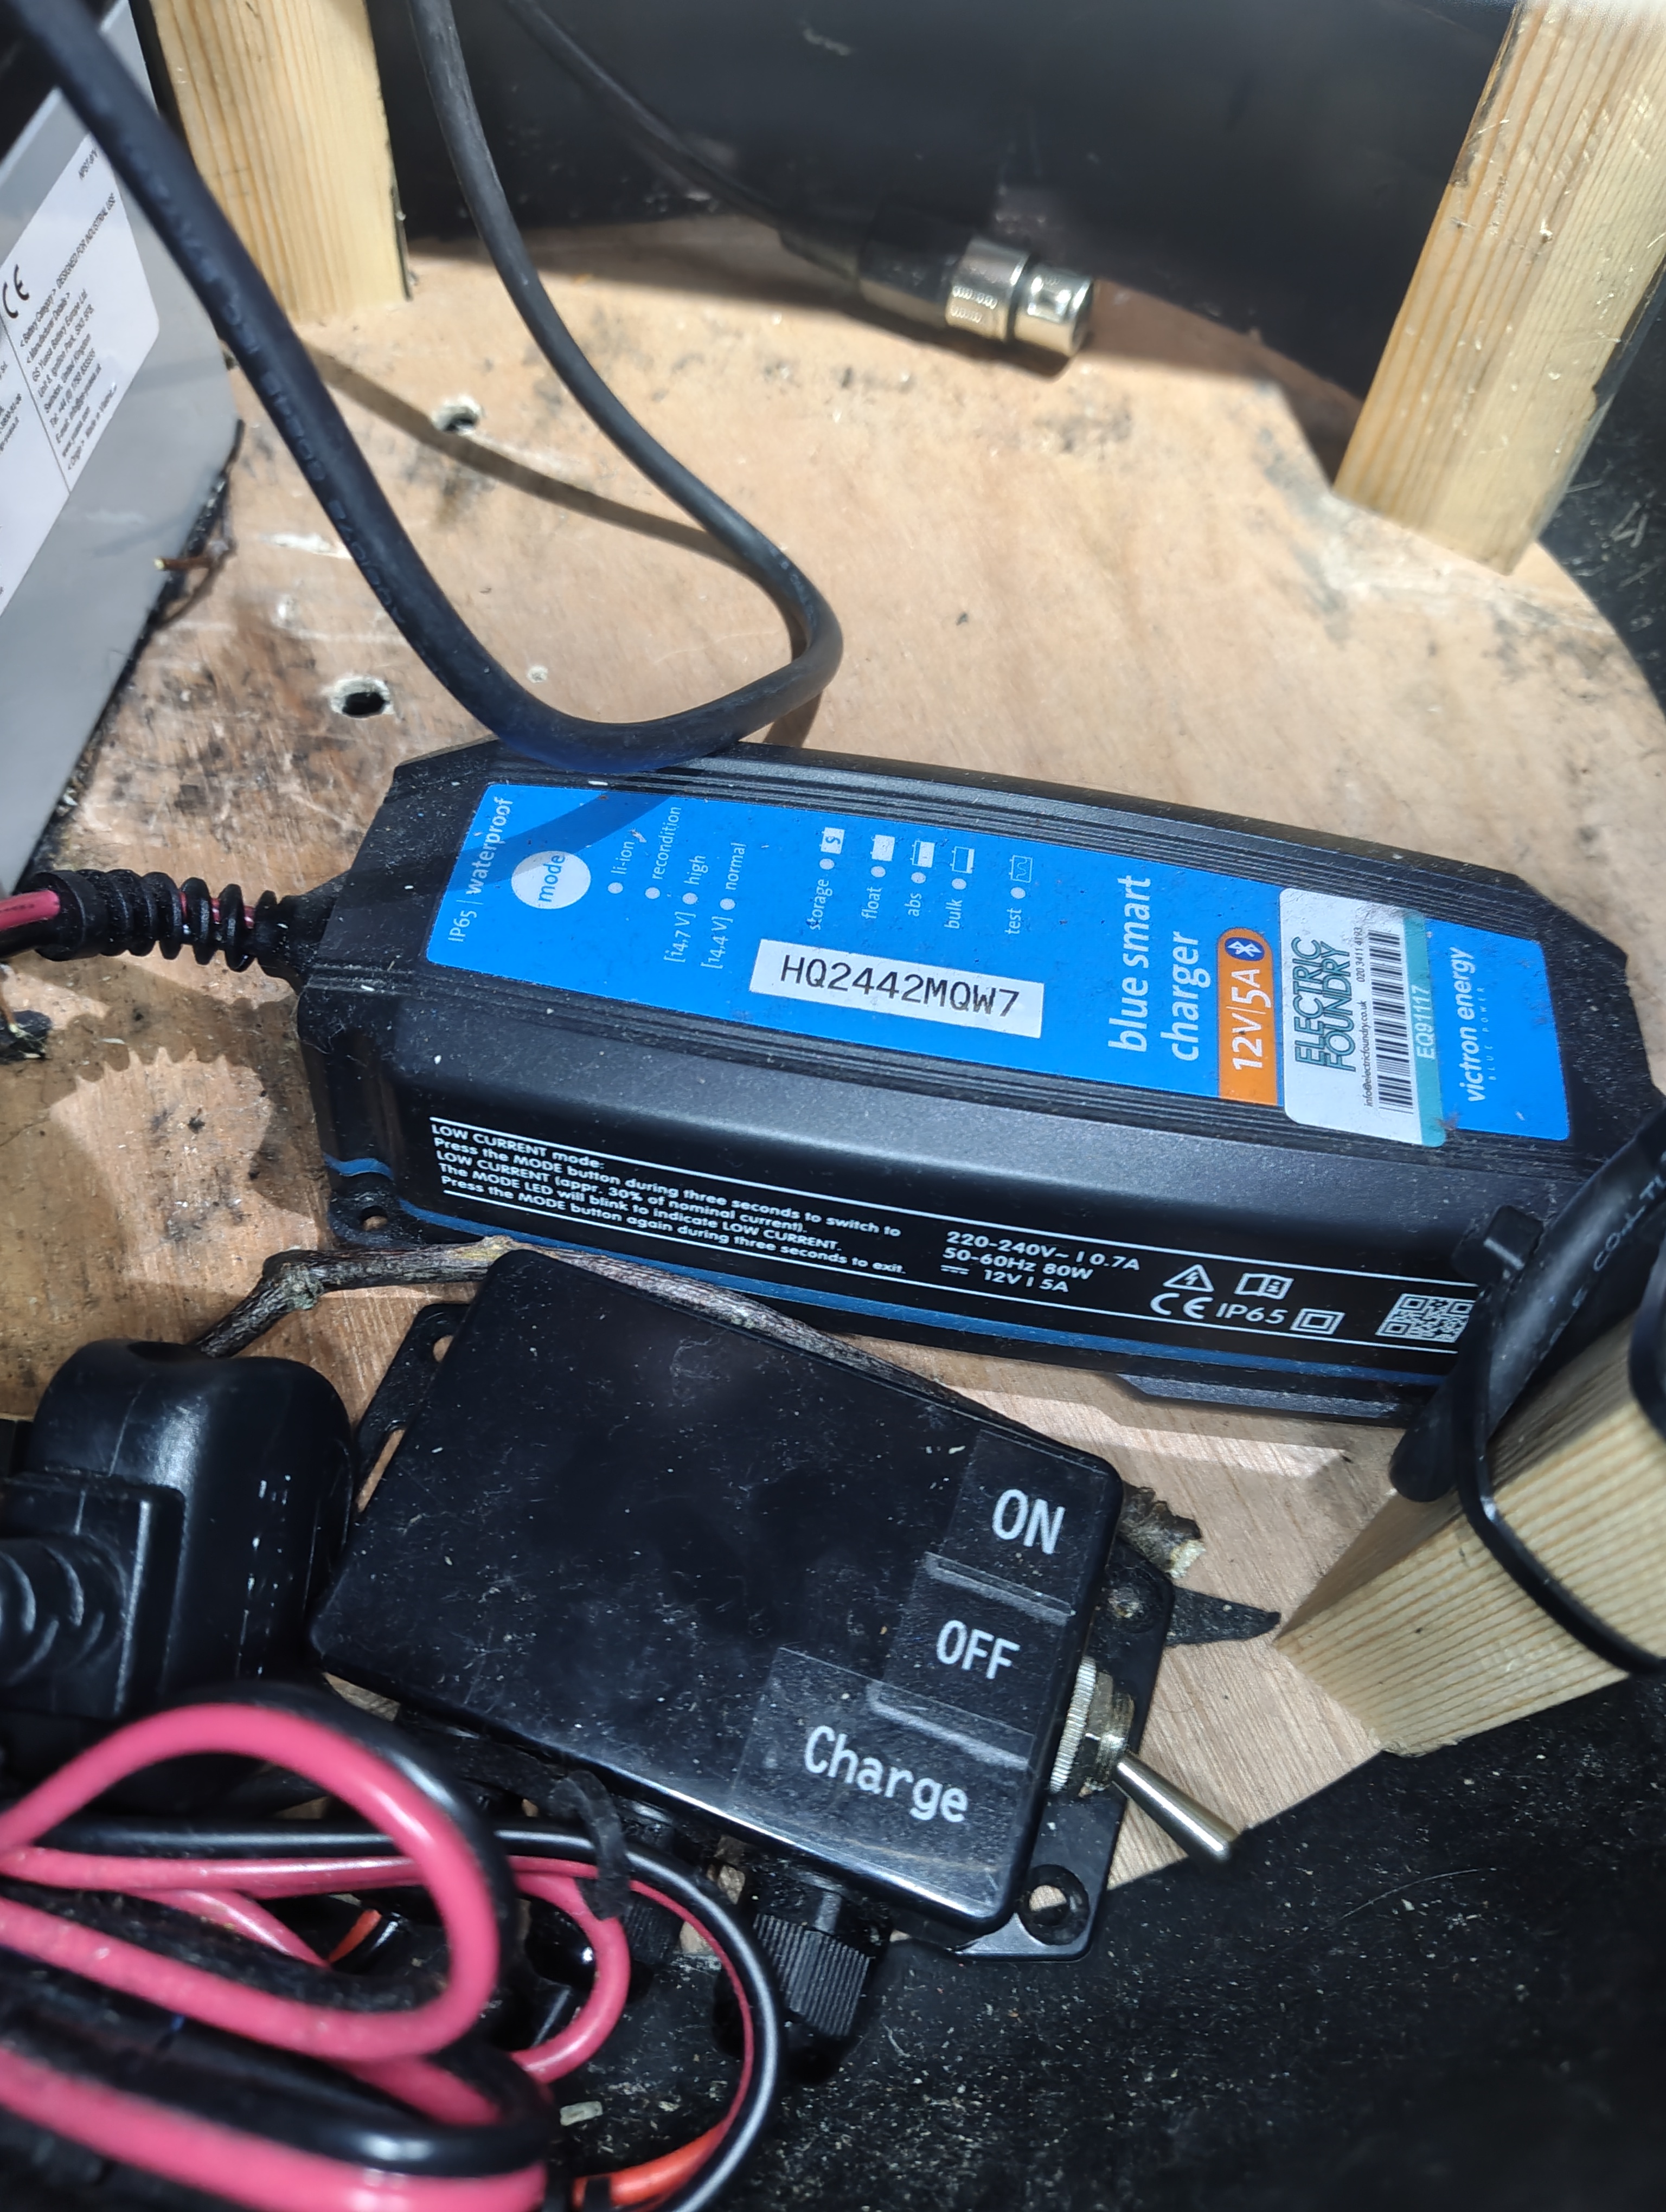
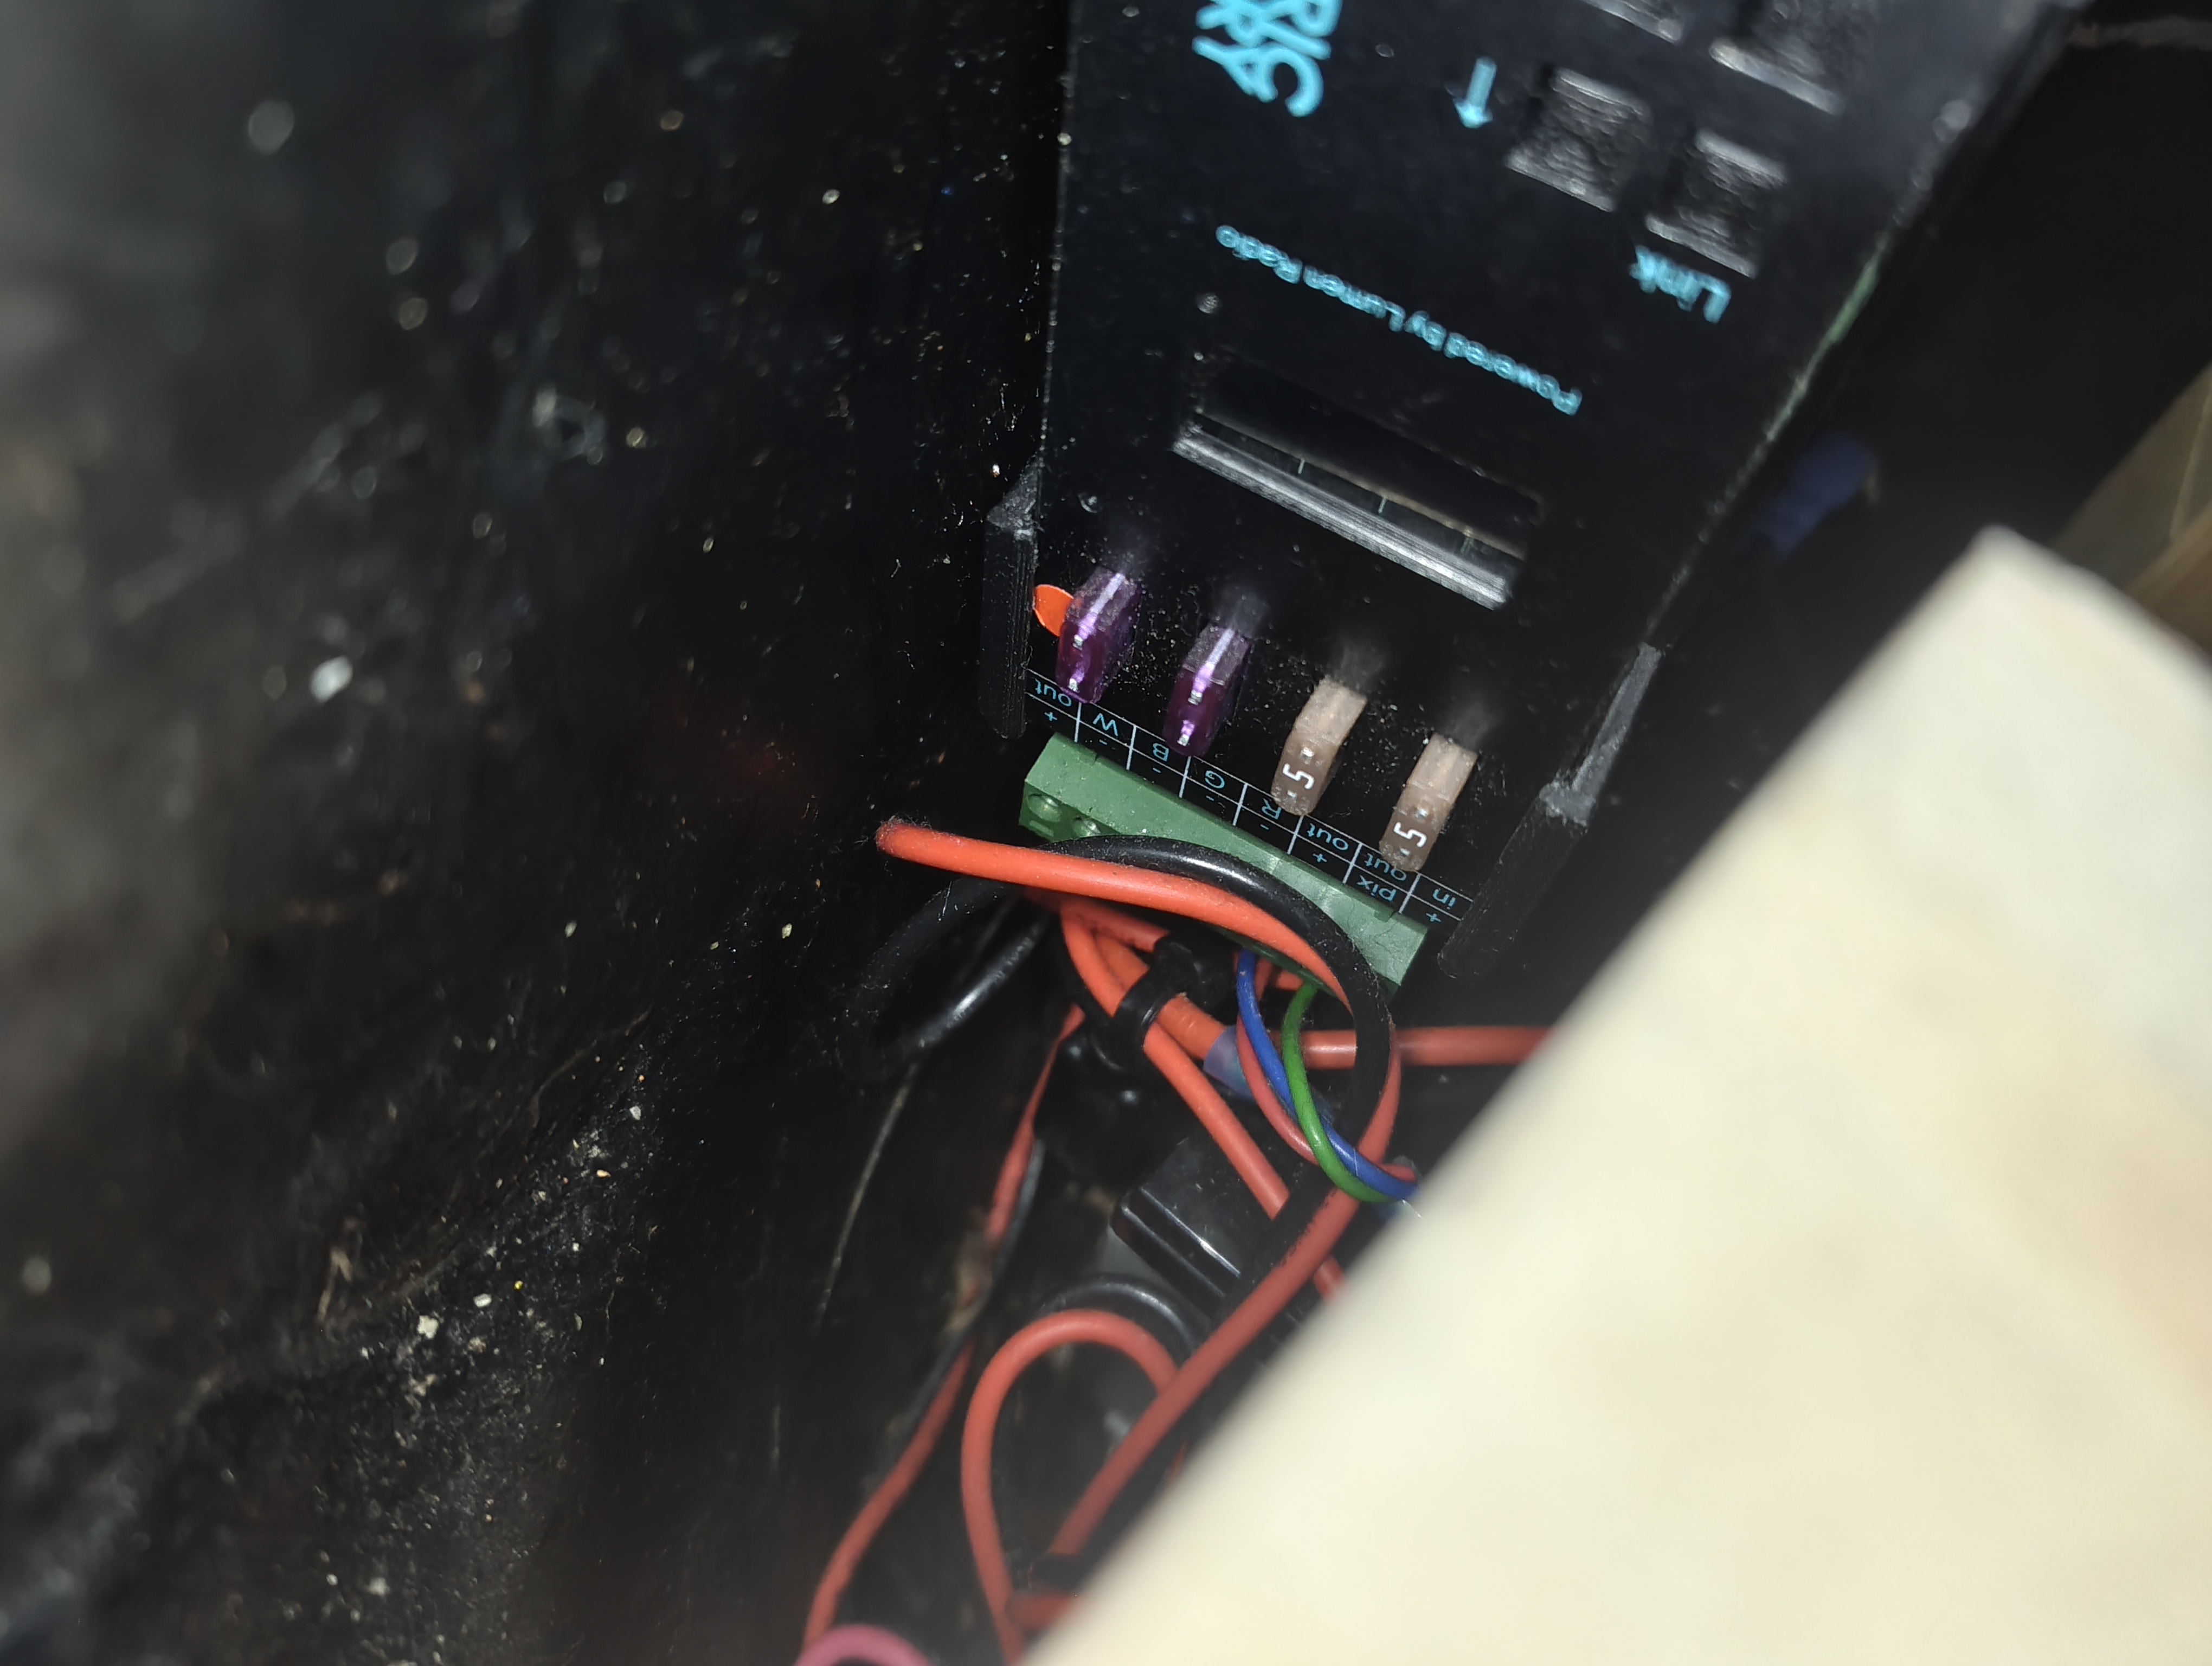
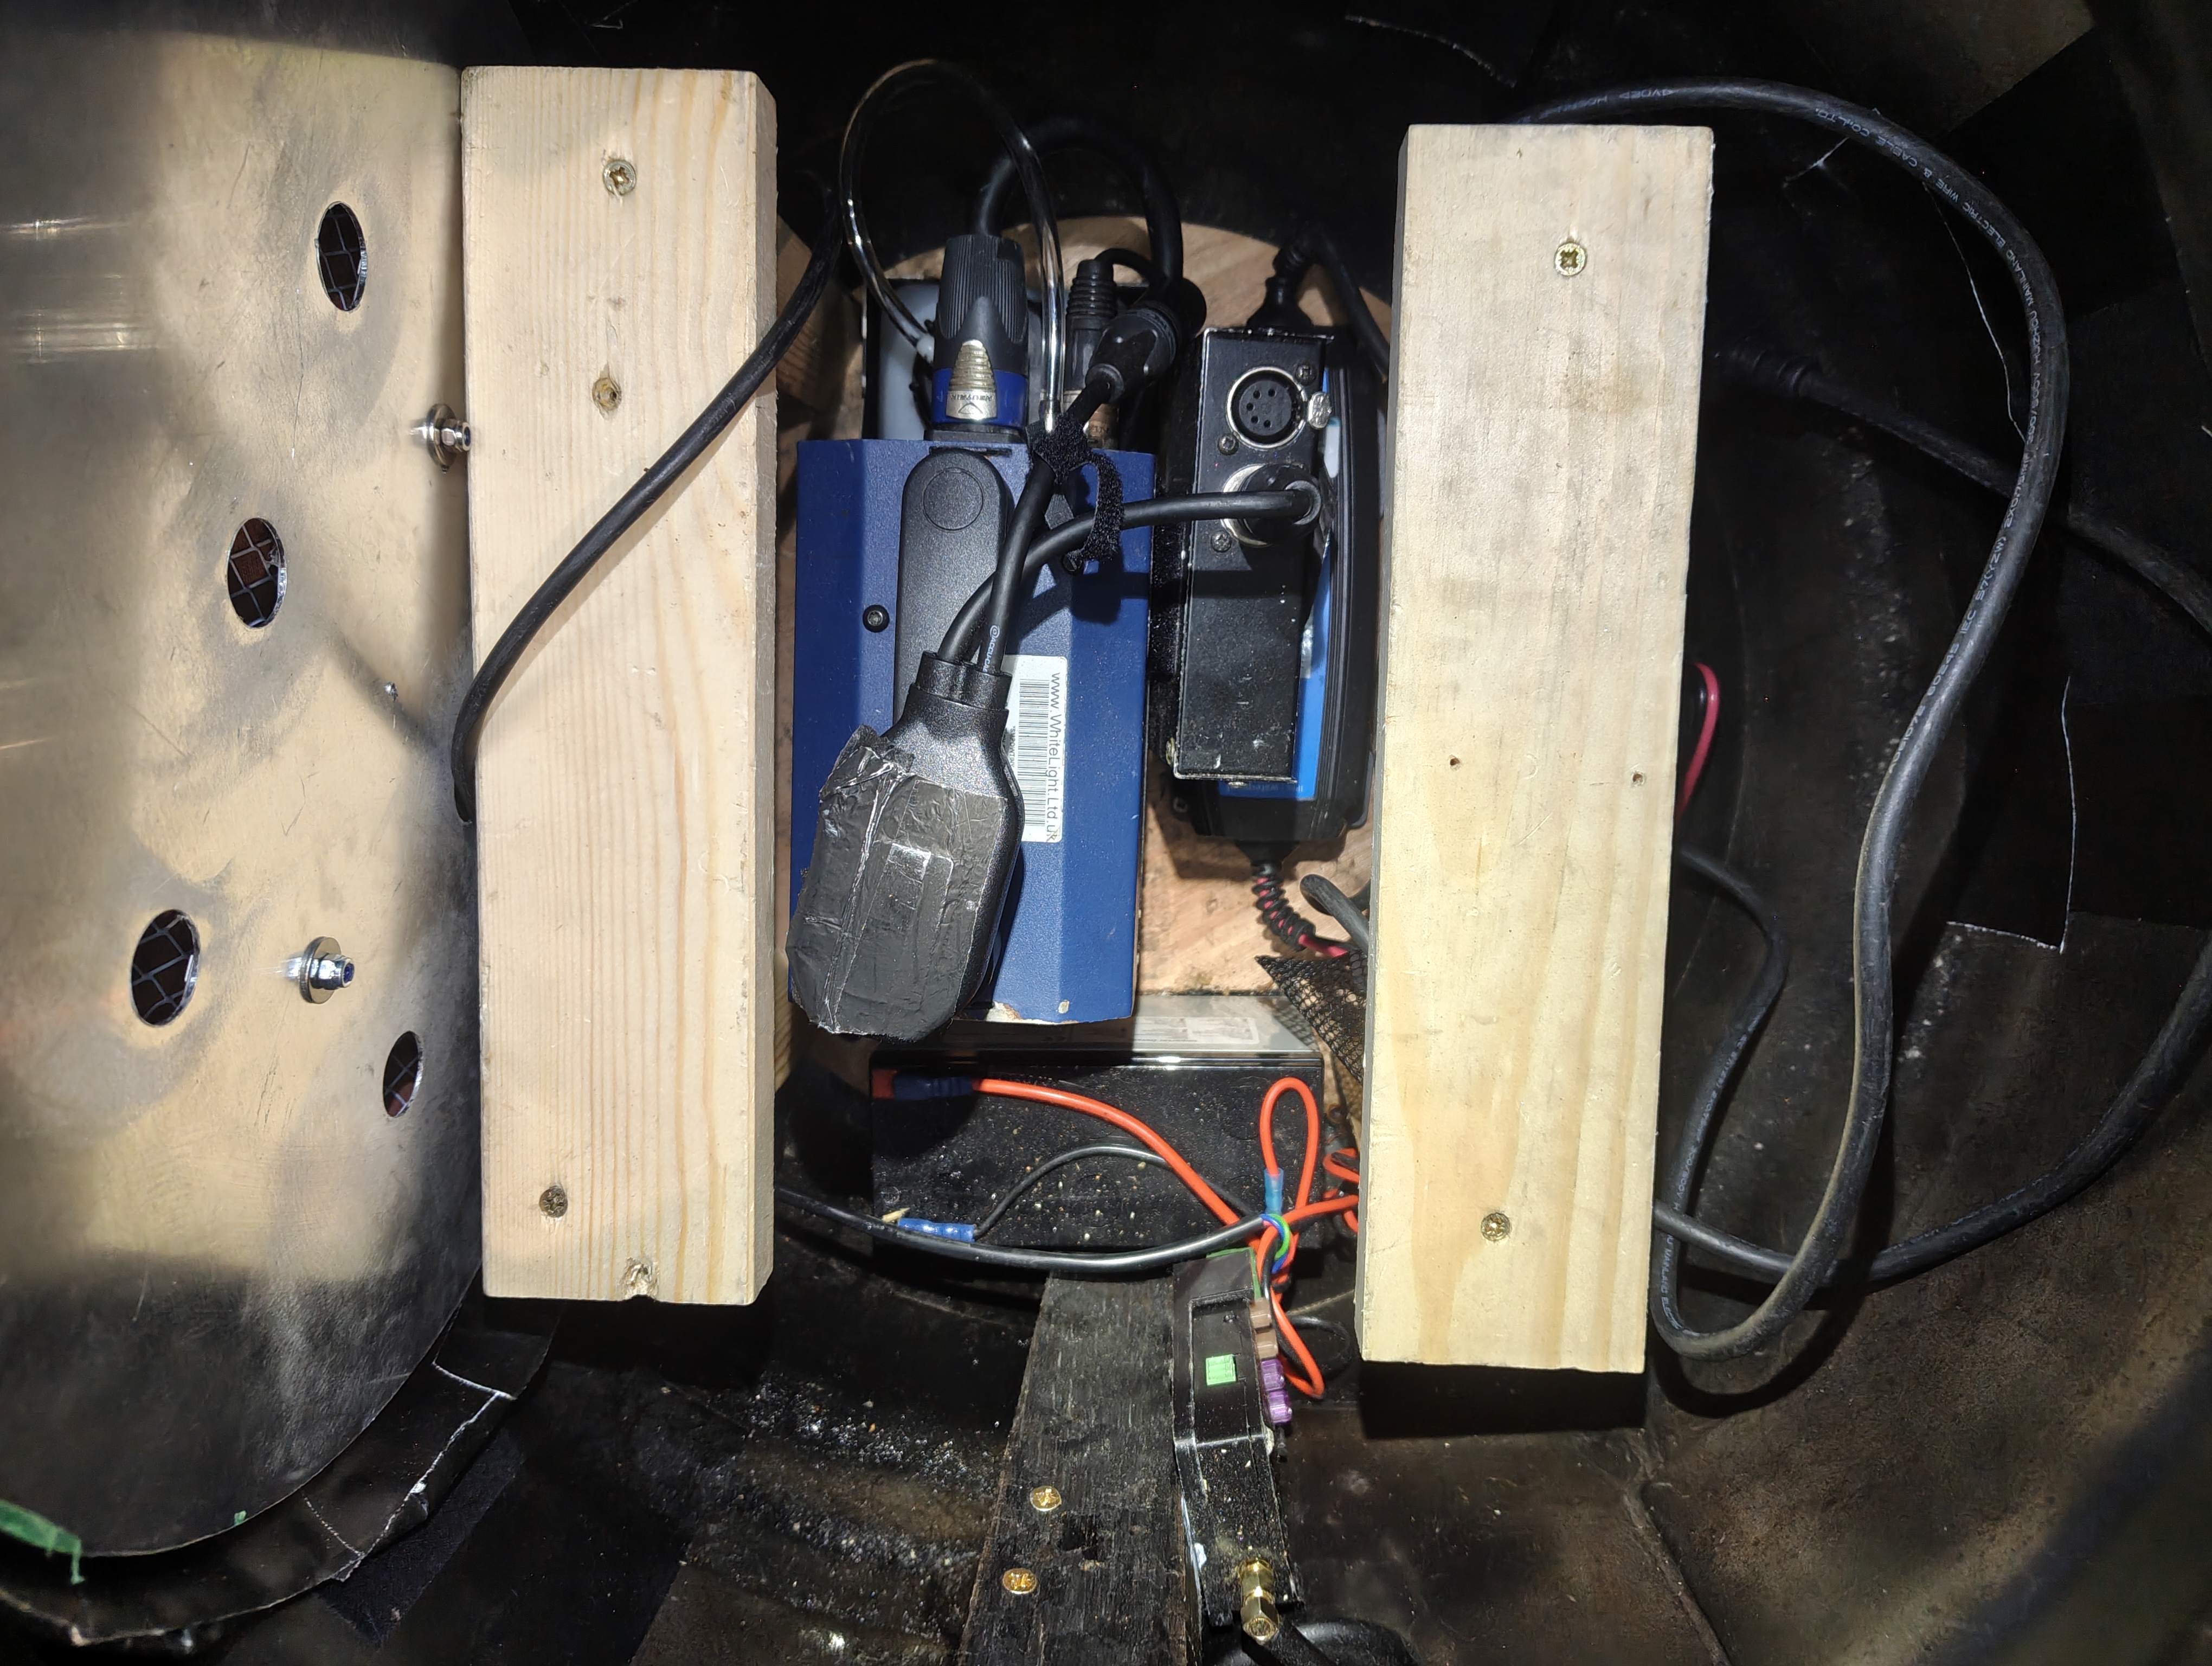
The barrel base houses an Electric Foundry CRMX receiver and pixel driver, a 12V lead acid battery, a Victron charger, and a 3-way rocker switch. The Roaming Power Tiny is placed inside the barrel during the show to add smoke to the fire effect.
Fixture Breakdown
LED Pixel Panel
A circular aluminium plate with RGBW pixel tape mounted in parallel strips. Each pixel is individually addressable, allowing the console to create a flickering fire effect across the panel. The panel is covered with diffusion and has holes for airflow. It splits in half for easier maintenance access.
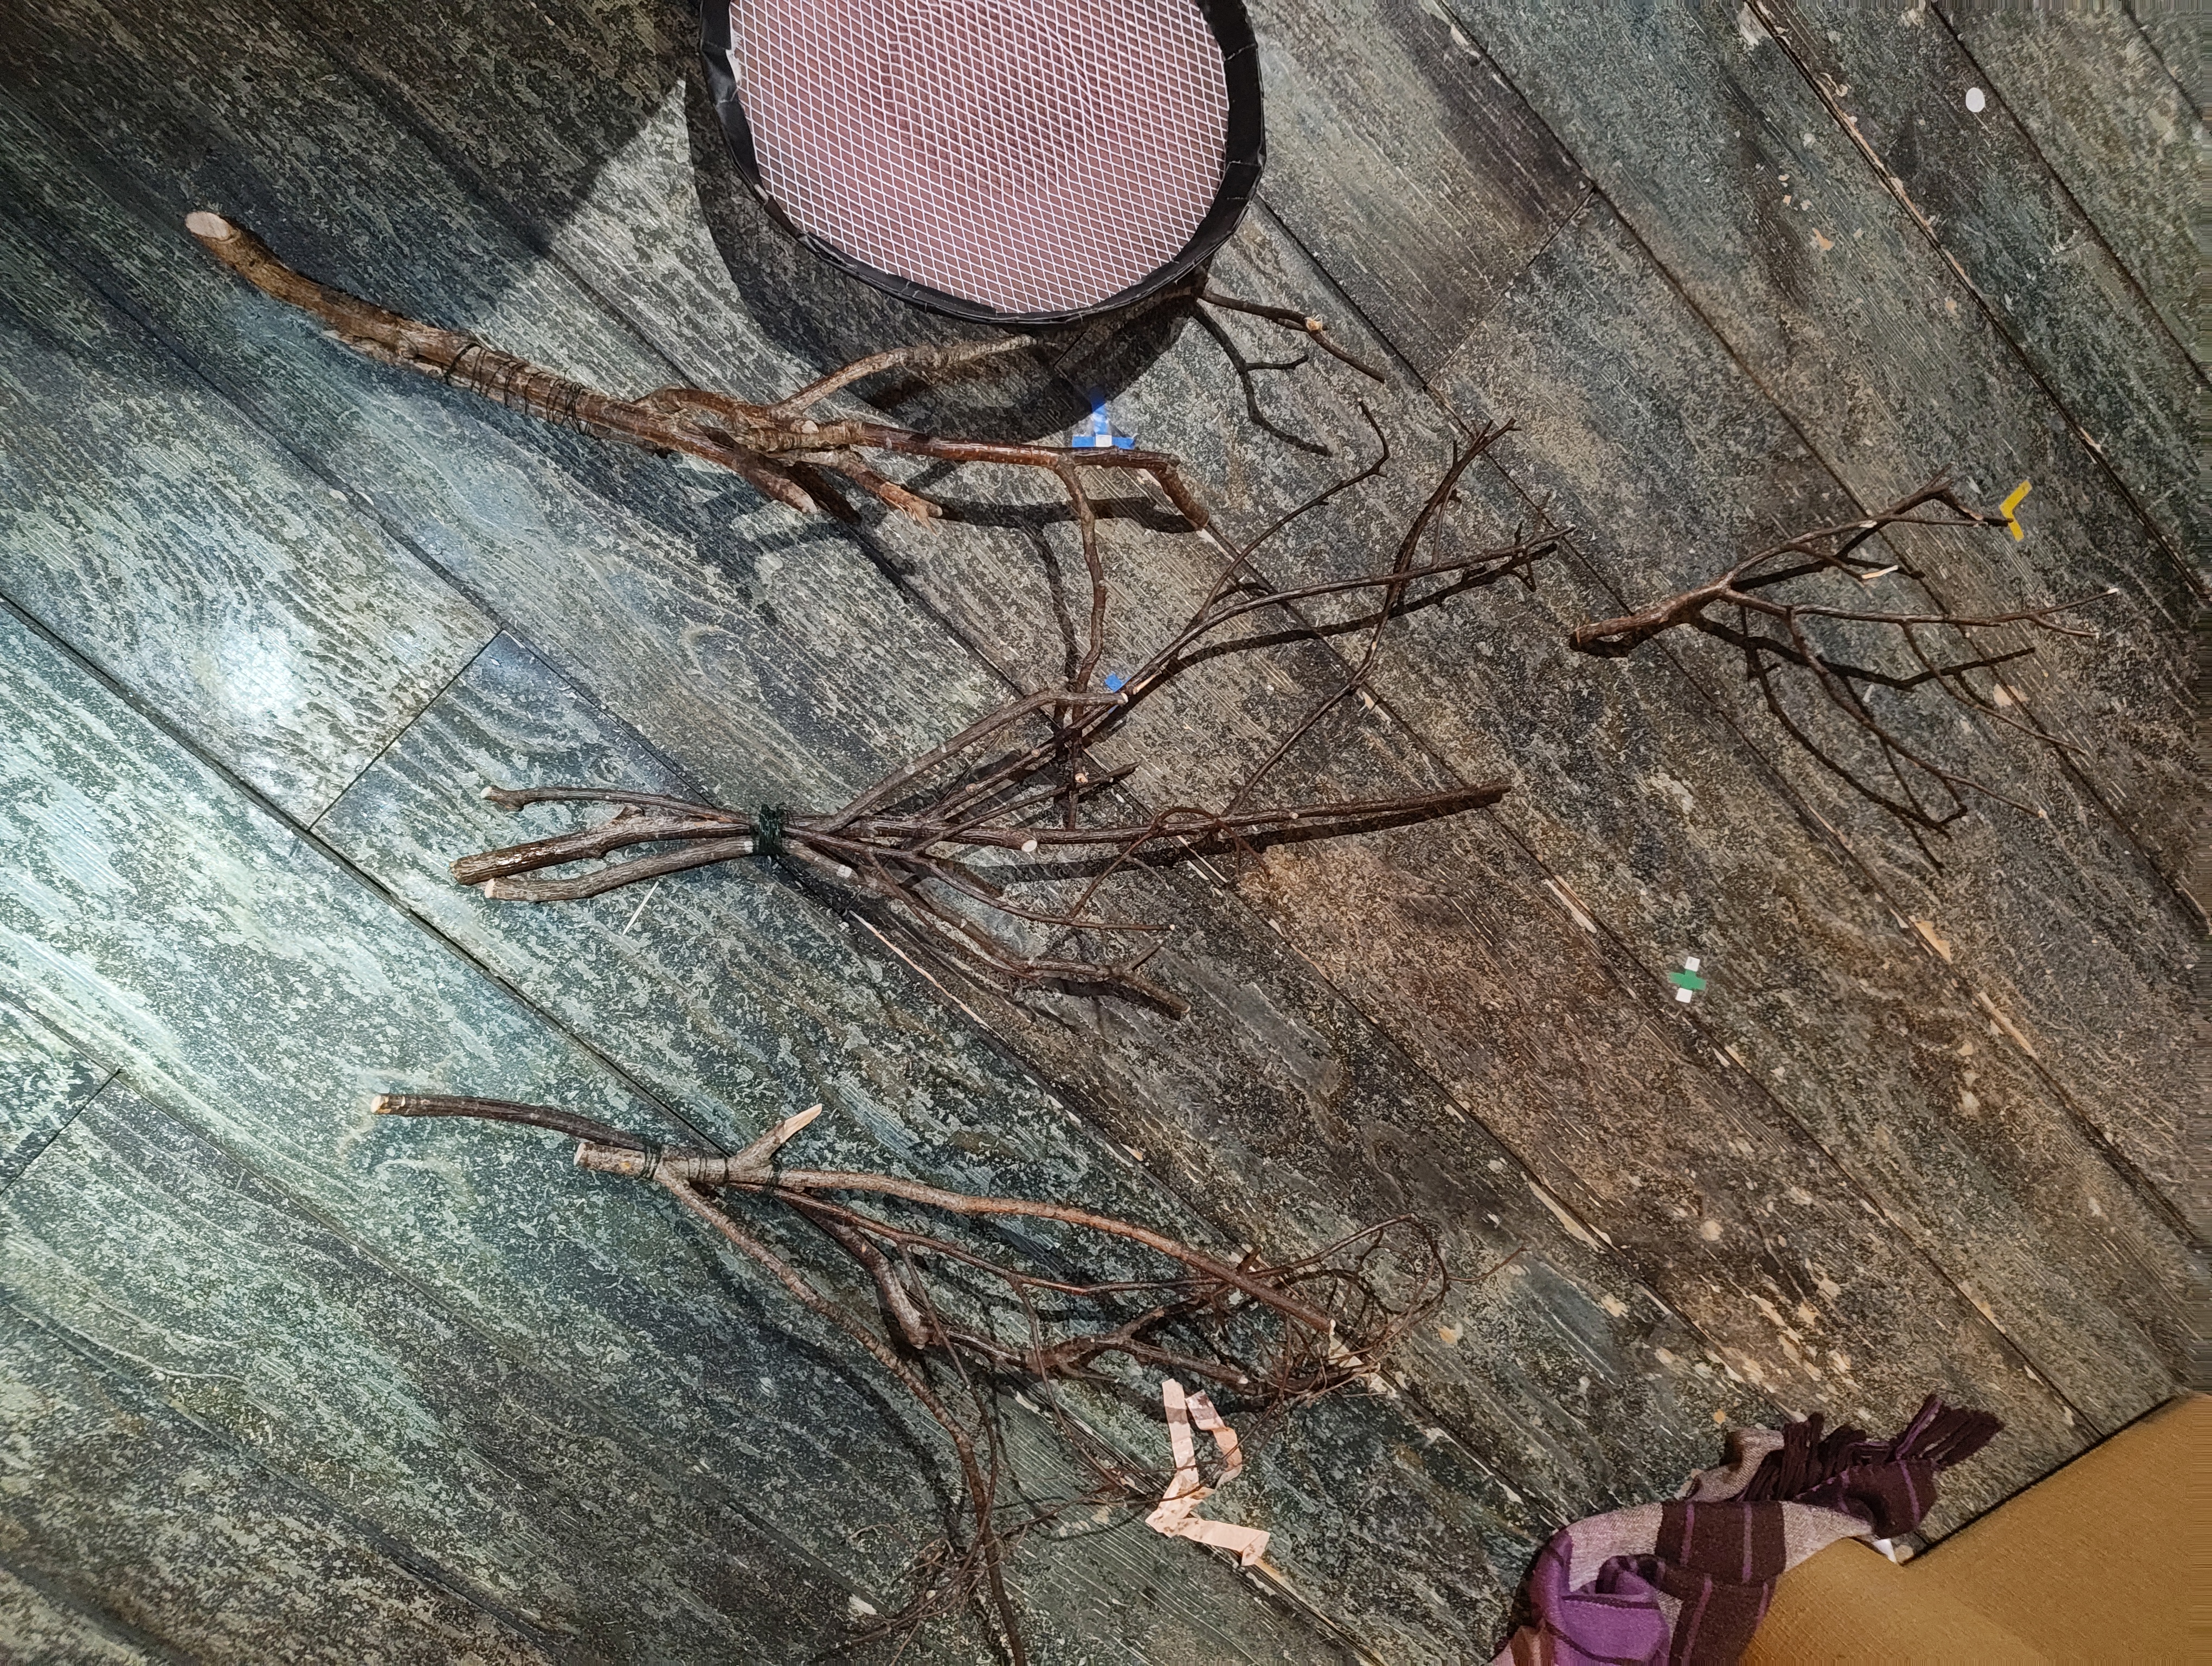
Prop Sticks
Decorative branches/sticks placed on top of the LED panel inside the barrel. These cast shadows through the diffusion to enhance the fire effect.
Smoke (Roaming Power Tiny)
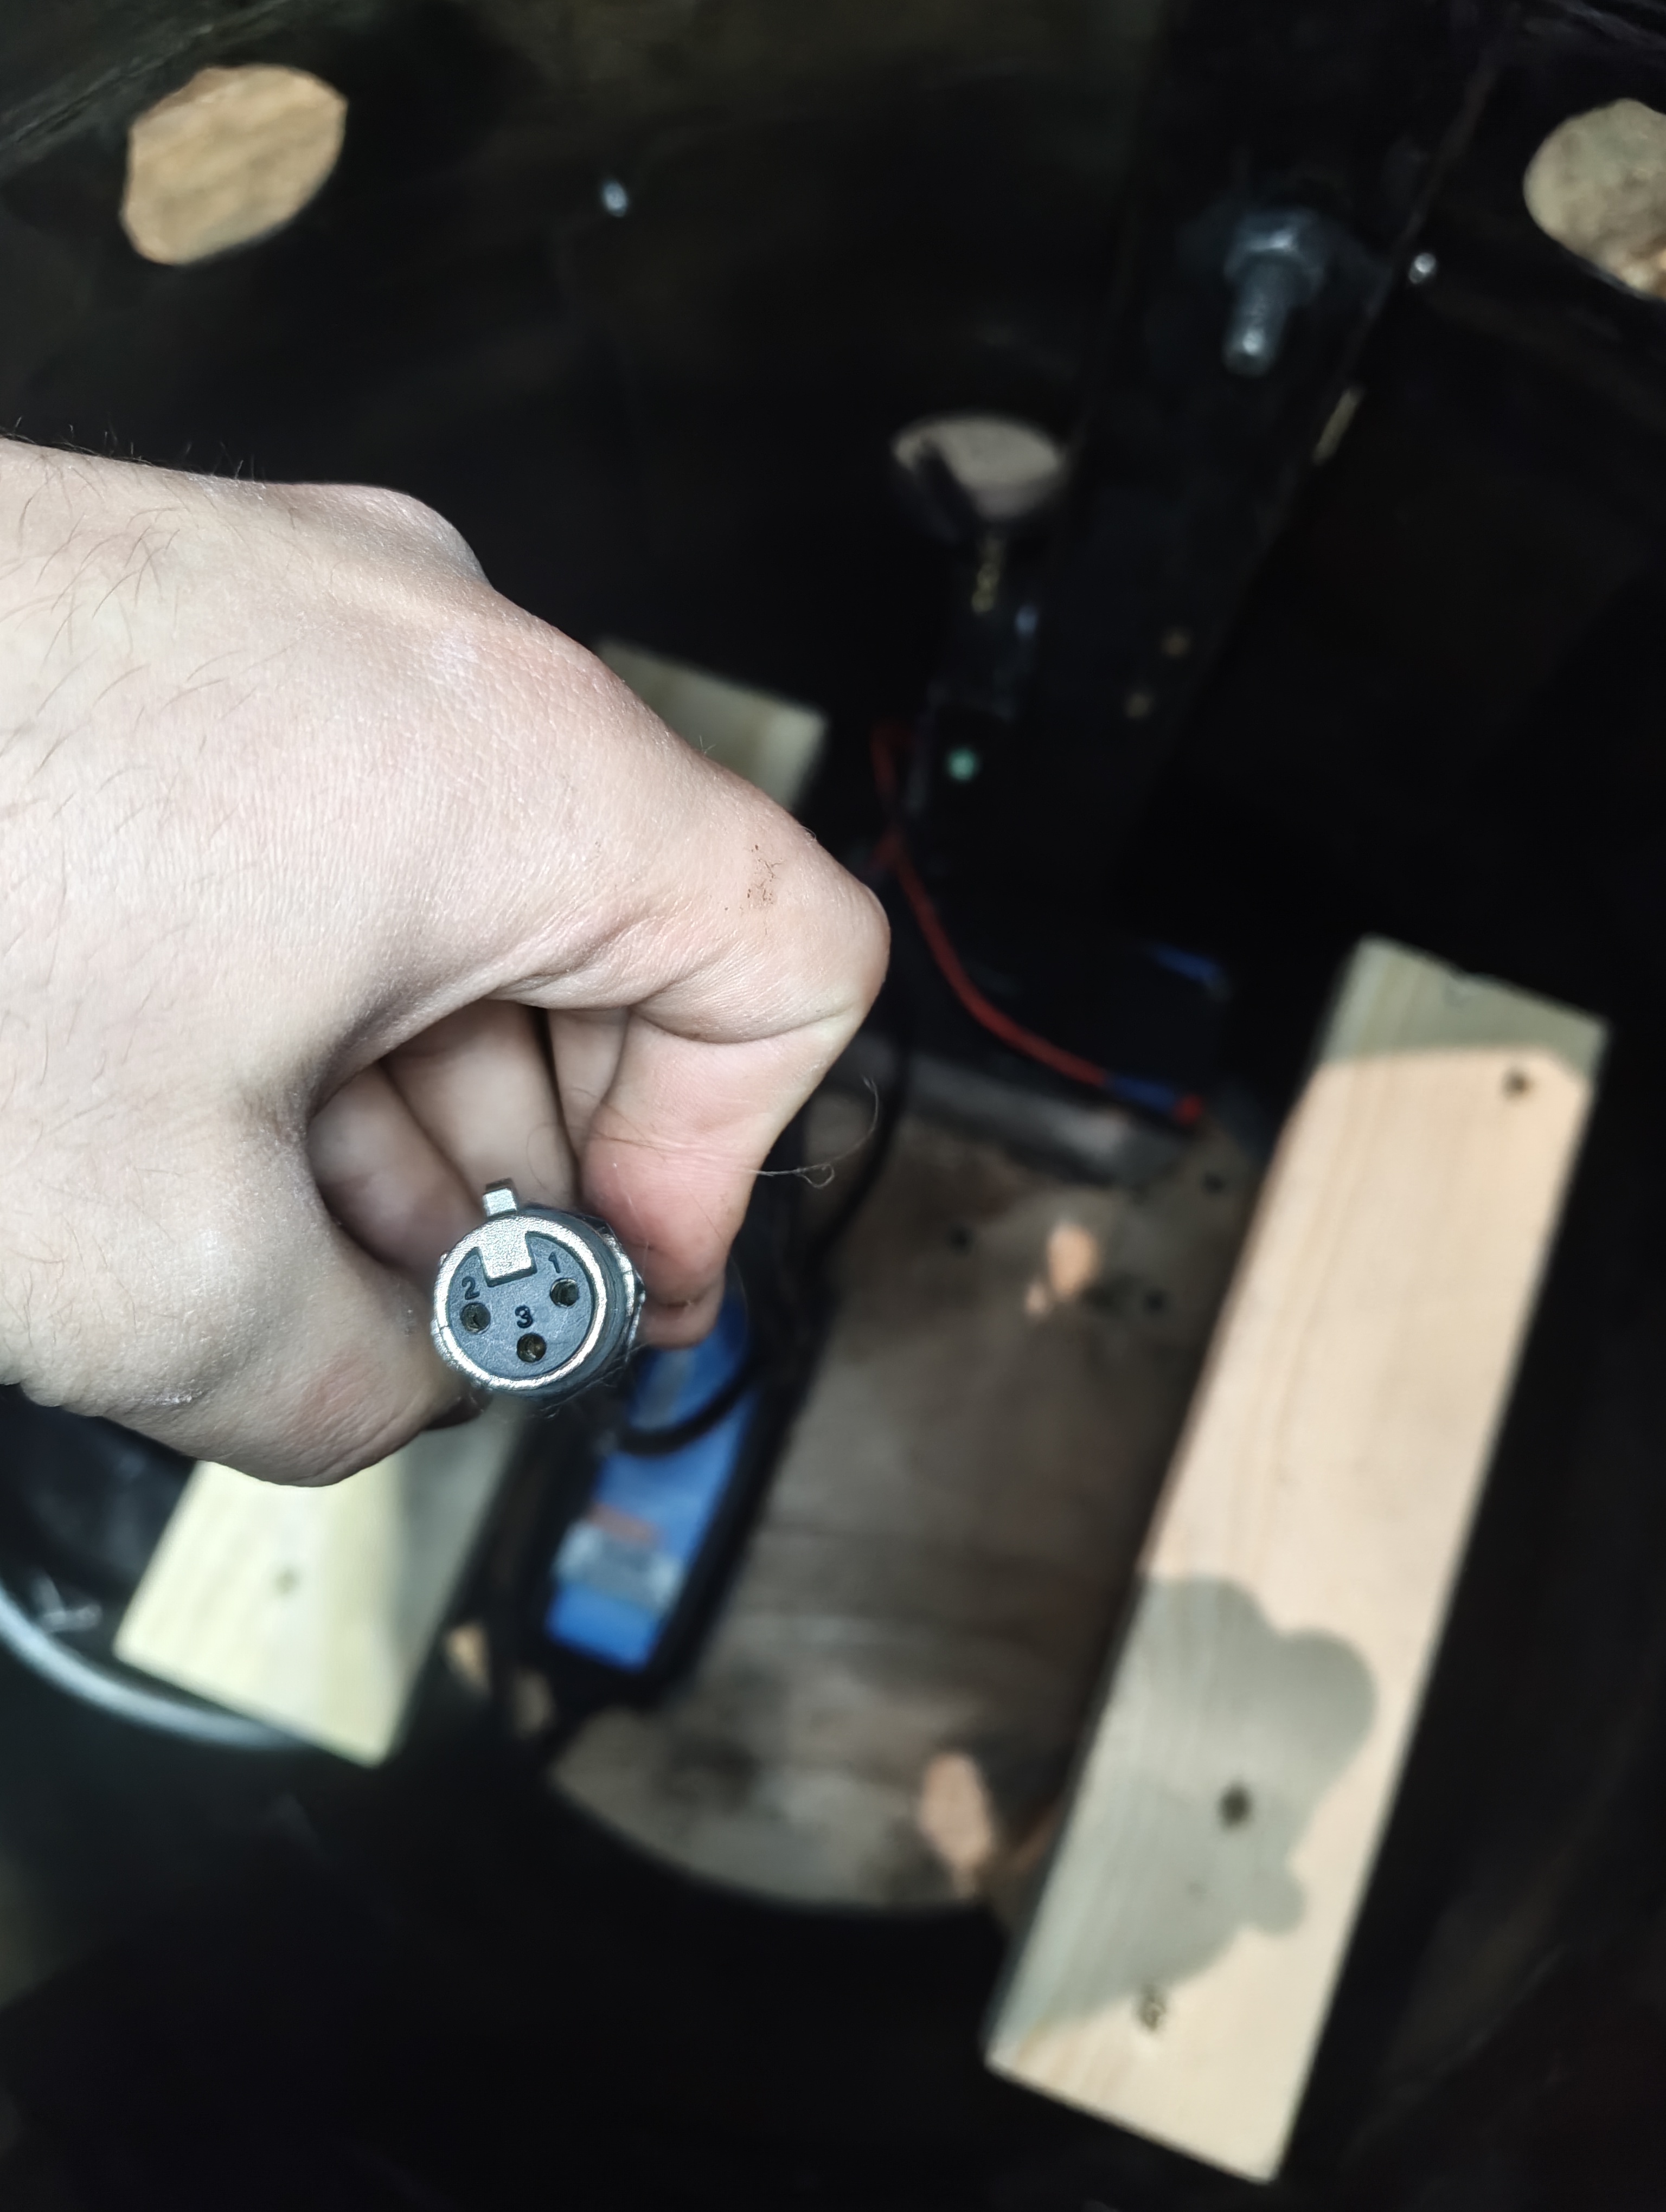
The Roaming Power Tiny mini fog machine is placed inside the barrel during the show. It connects to the Electric Foundry unit via a 3-pin XLR socket inside the barrel. The smoke rises through the sticks and diffusion panel for a realistic fire effect.
Channels & Addressing
- Fire Effect (Pixel Panel)
- Channel: 881
- Fixture Type: Fire_Keg_MC (custom pixel profile)
- Universe: 15
- Addresses: 15/1–168 (42 pixels × 4 addresses each for R, G, B, W)
- Parameters: RGBW pixel tape — individually addressable pixels with flicker effect. Each pixel uses 4 DMX addresses (Red, Green, Blue, White).
- Power Tiny Smoke
- See Roaming Power Tiny for smoke channel (Ch 952, Uni 14/145–155)
Power & Control
| Power Source | 12V Lead Acid Battery |
| Pixel Driver / CRMX Receiver | Electric Foundry CRMX unit |
| DMX Source | CRMX Stardust Transmitter |
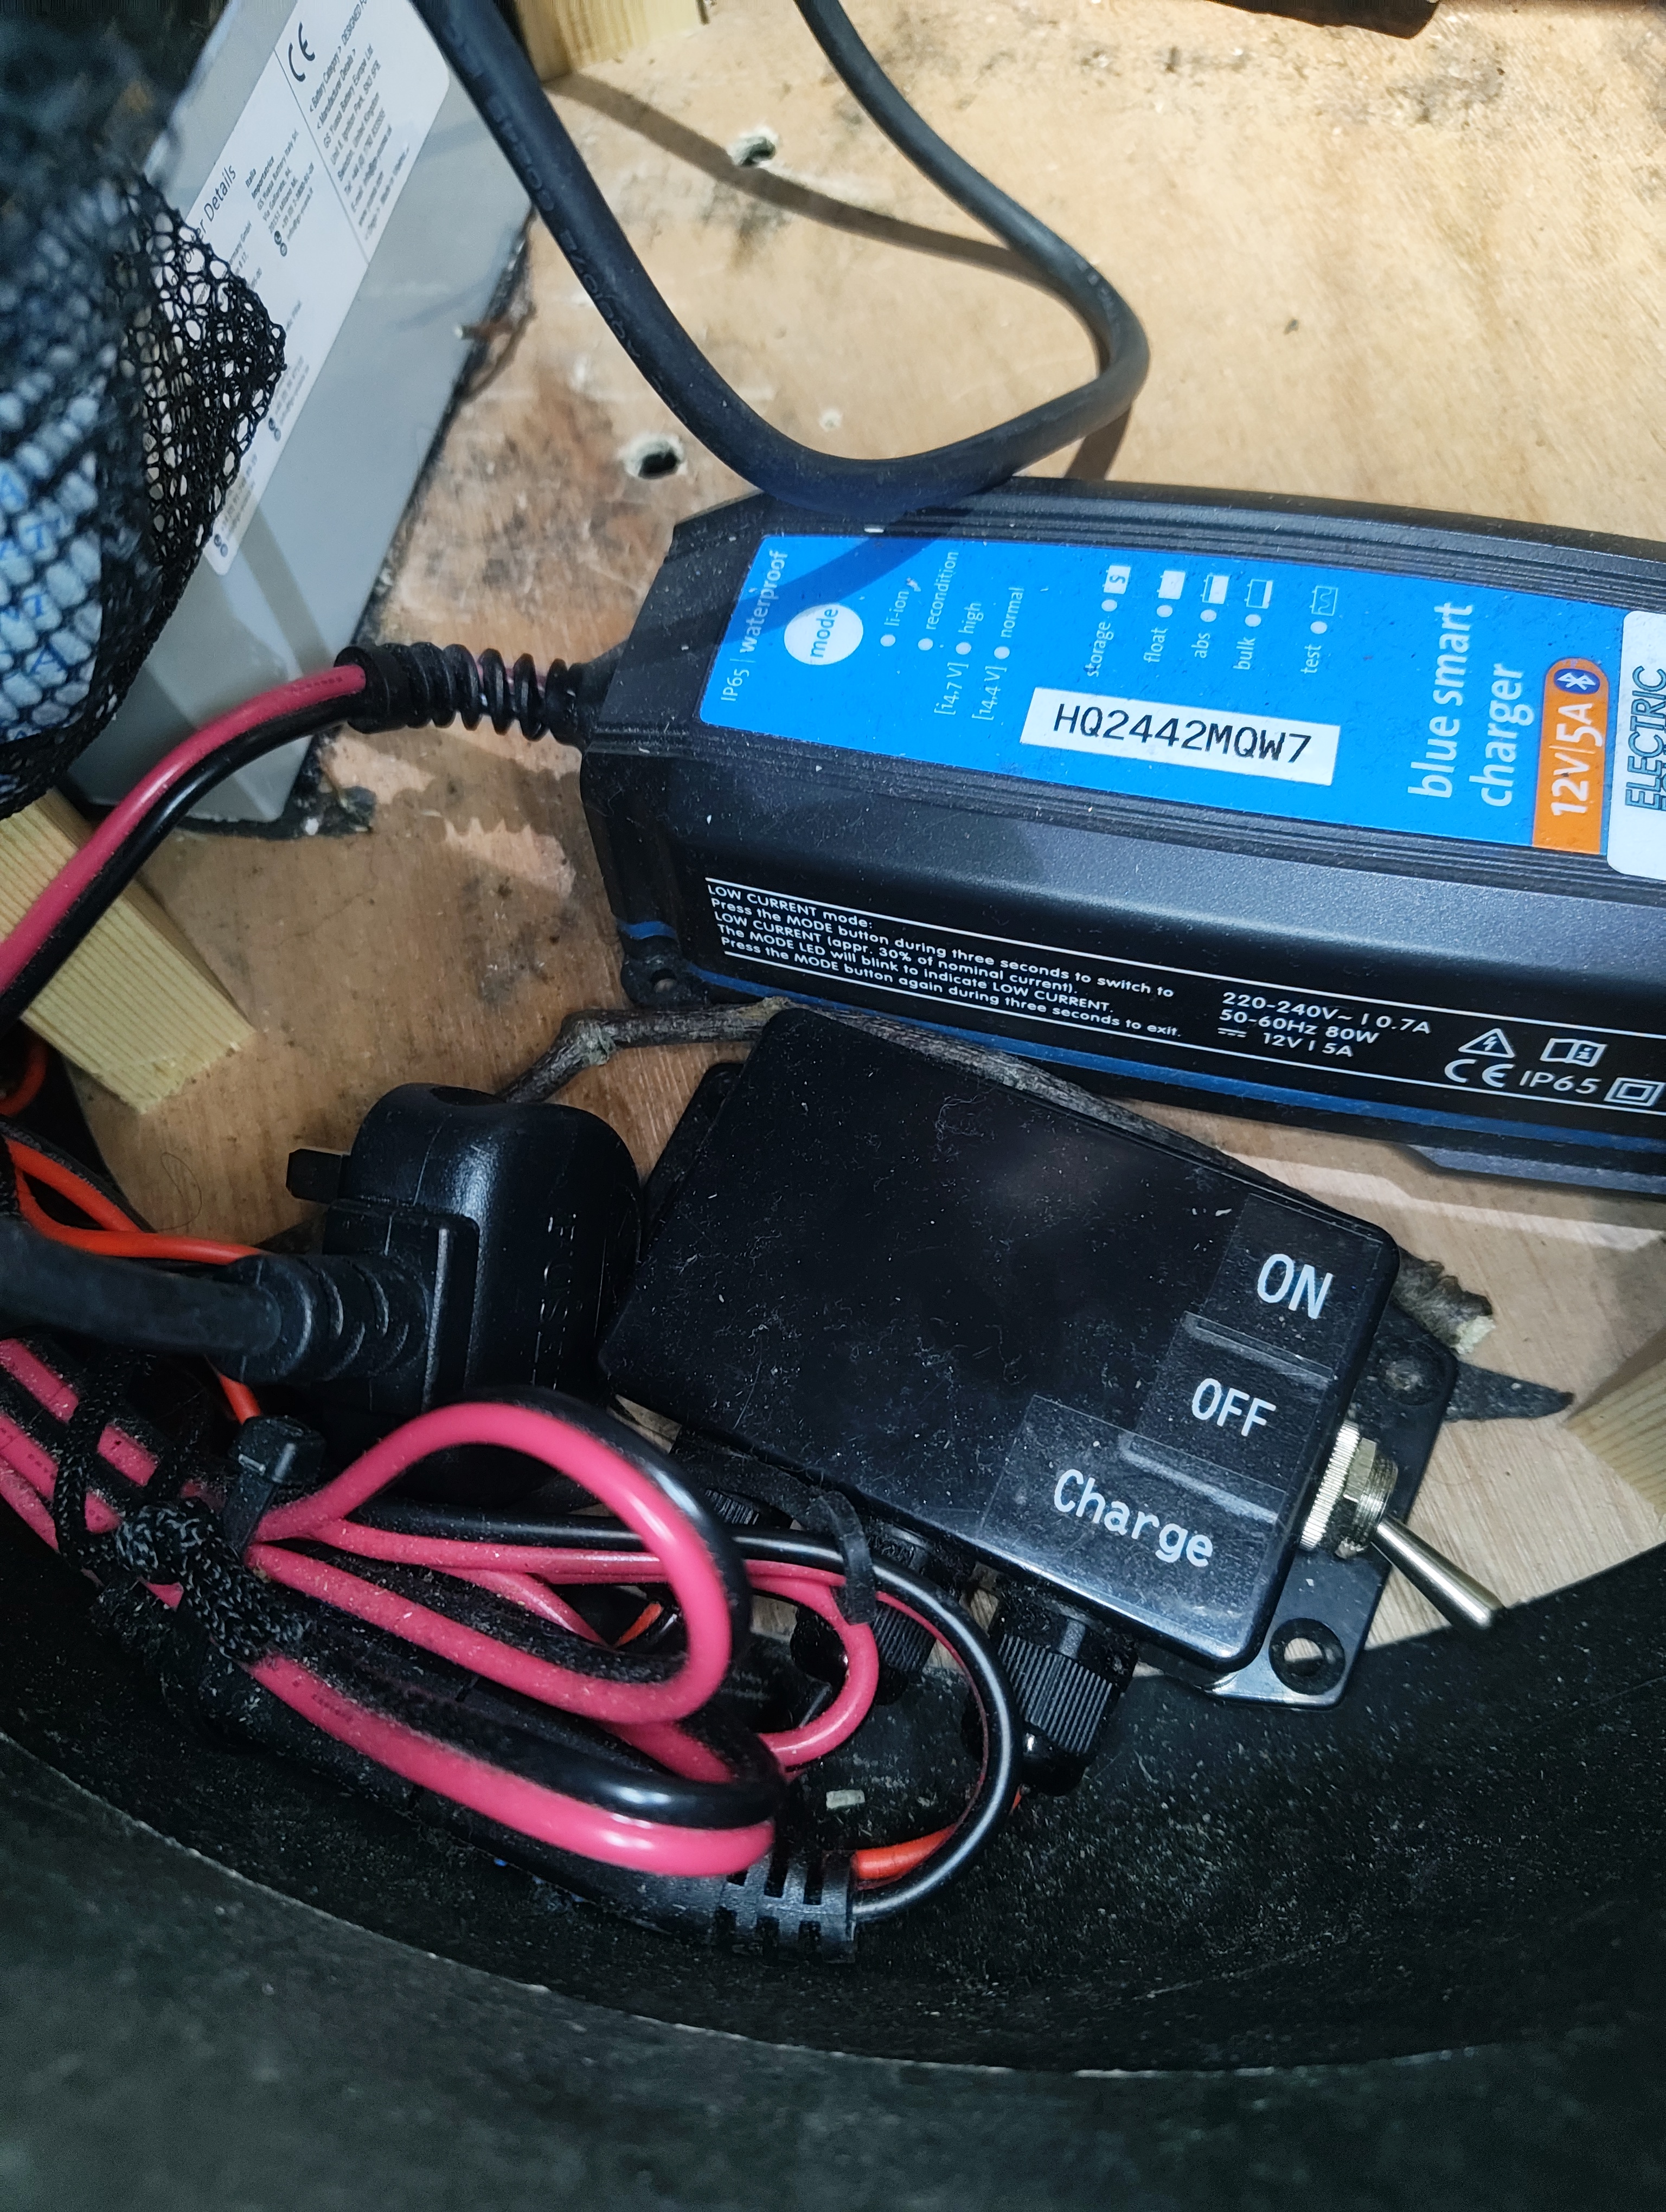
| Power Switch | Inline 3-way rocker: Off / On / Charge |
| Charger | Victron Blue Smart IP65 12V 5A (built-in) |
| Power Tiny Connection | 3-pin XLR socket inside barrel |
CRMX Antenna
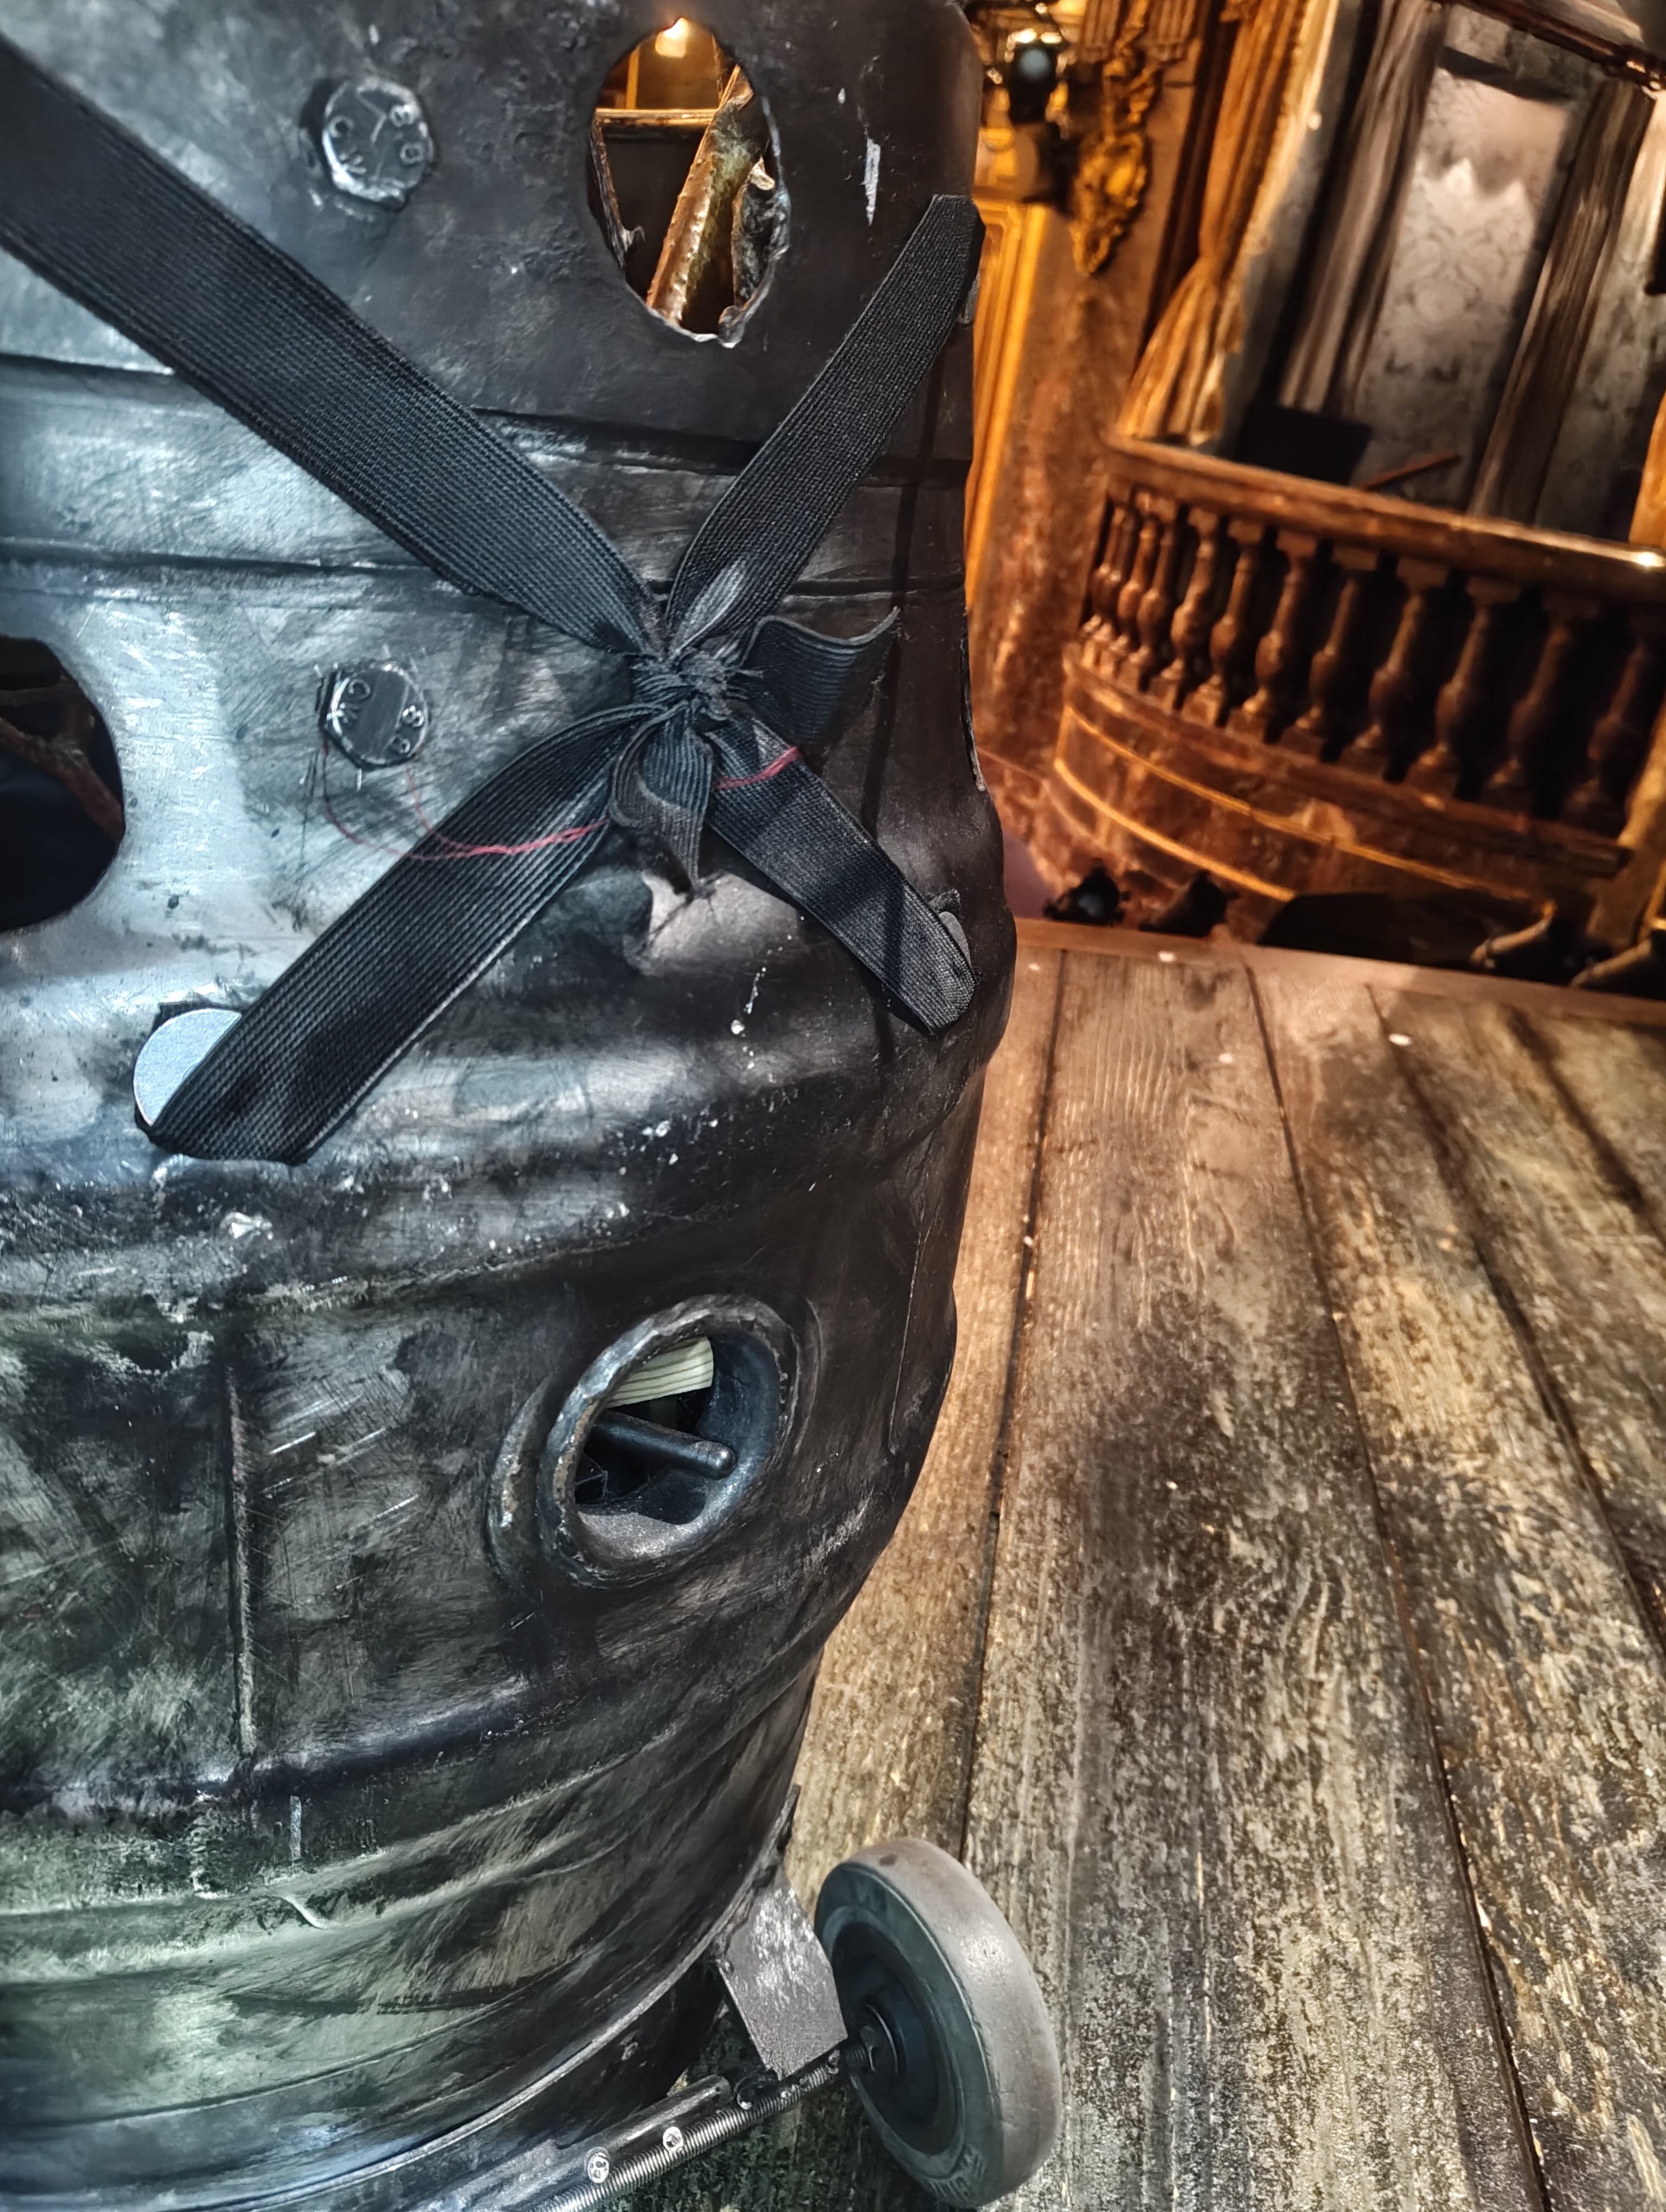
The Electric Foundry unit's CRMX antenna must poke out through the hole in the barrel for reliable signal reception. If the antenna is tucked inside the metal barrel it will lose CRMX link.
Charging
The Victron charger is built into the barrel base. Set the rocker switch to Charge position and plug in the 13A tail overnight.
Wiring
Power Flow
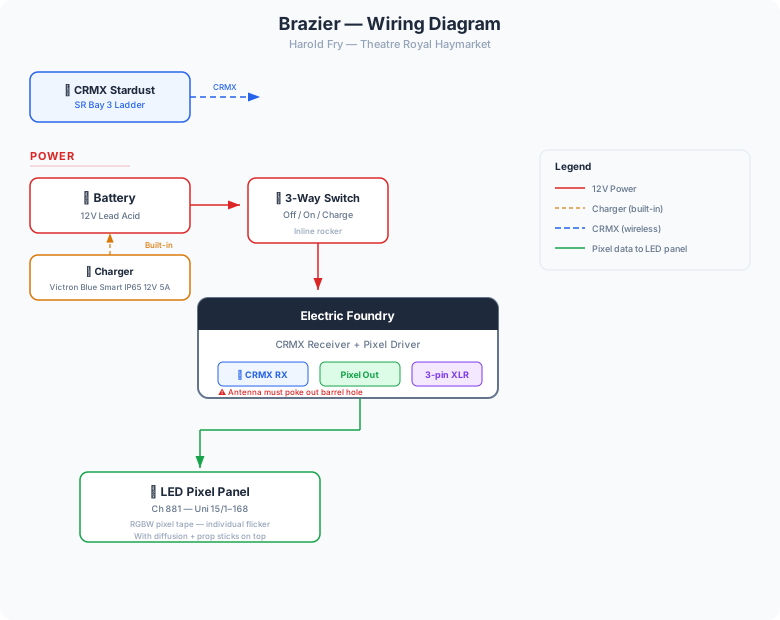
The 12V lead acid battery connects through a 3-way inline rocker switch (Off / On / Charge). In the On position, 12V feeds the Electric Foundry unit which drives the pixel tape panel. The Victron charger is built into the base and connects when the switch is in the Charge position.
Pixel Data
The Electric Foundry unit receives CRMX wirelessly from the Stardust and drives the RGBW pixel tape directly. Each pixel is individually addressable across Universe 15, addresses 1–168, allowing the console to create realistic flickering fire patterns.
Power Tiny Connection
A 3-pin XLR socket inside the barrel provides the connection point for the Roaming Power Tiny when it is placed in the barrel. The Power Tiny receives its own DMX via its attached Moonlite/DMXit — the XLR here provides the analogue control signal.
Images
Key Views
All Reference Photos (click to expand)
Components List
| Component | Detail |
|---|---|
| LED Panel | RGBW pixel tape on circular aluminium plate (split) |
| CRMX Receiver / Pixel Driver | Electric Foundry combo unit |
| Battery | 12V Lead Acid |
| Power Switch | Inline 3-way rocker (Off / On / Charge) |
| Charger | Victron Blue Smart IP65 12V 5A (built-in) |
| Smoke | Roaming Power Tiny (separate unit, placed in barrel) |
| Props | Decorative sticks / branches |
Usage
The Brazier is used to emulate a campfire. The LED pixel panel creates the flickering fire glow while the Power Tiny adds smoke rising through the sticks.
Scenes
- Campfire / Pilgrim's Trail scenes
Maintenance
- Check: LED panel diffusion for damage or discolouration from heat/smoke residue
- Check: Pixel tape adhesion on the aluminium plate
- Check: CRMX antenna is poking out the barrel hole before each show
- Check: Battery charge — switch to Charge position and plug in overnight
- Check: 3-pin XLR socket inside barrel is clean and free of smoke residue
Panel Access
The LED panel splits in half for easier removal and maintenance. Lift the sticks out first, then separate the two halves of the panel.
Troubleshooting
- No fire effect:
- Check rocker switch is in On position
- Check battery charge level
- Check CRMX antenna is out of the barrel hole
- Weak or patchy fire effect:
- Check pixel tape connections on the panel — some strips may have come loose
- Check for smoke residue on the diffusion — clean if needed
- No smoke:
- Check the Power Tiny is placed in the barrel and connected via XLR
- See Power Tiny troubleshooting
Rave Trolley
Overview
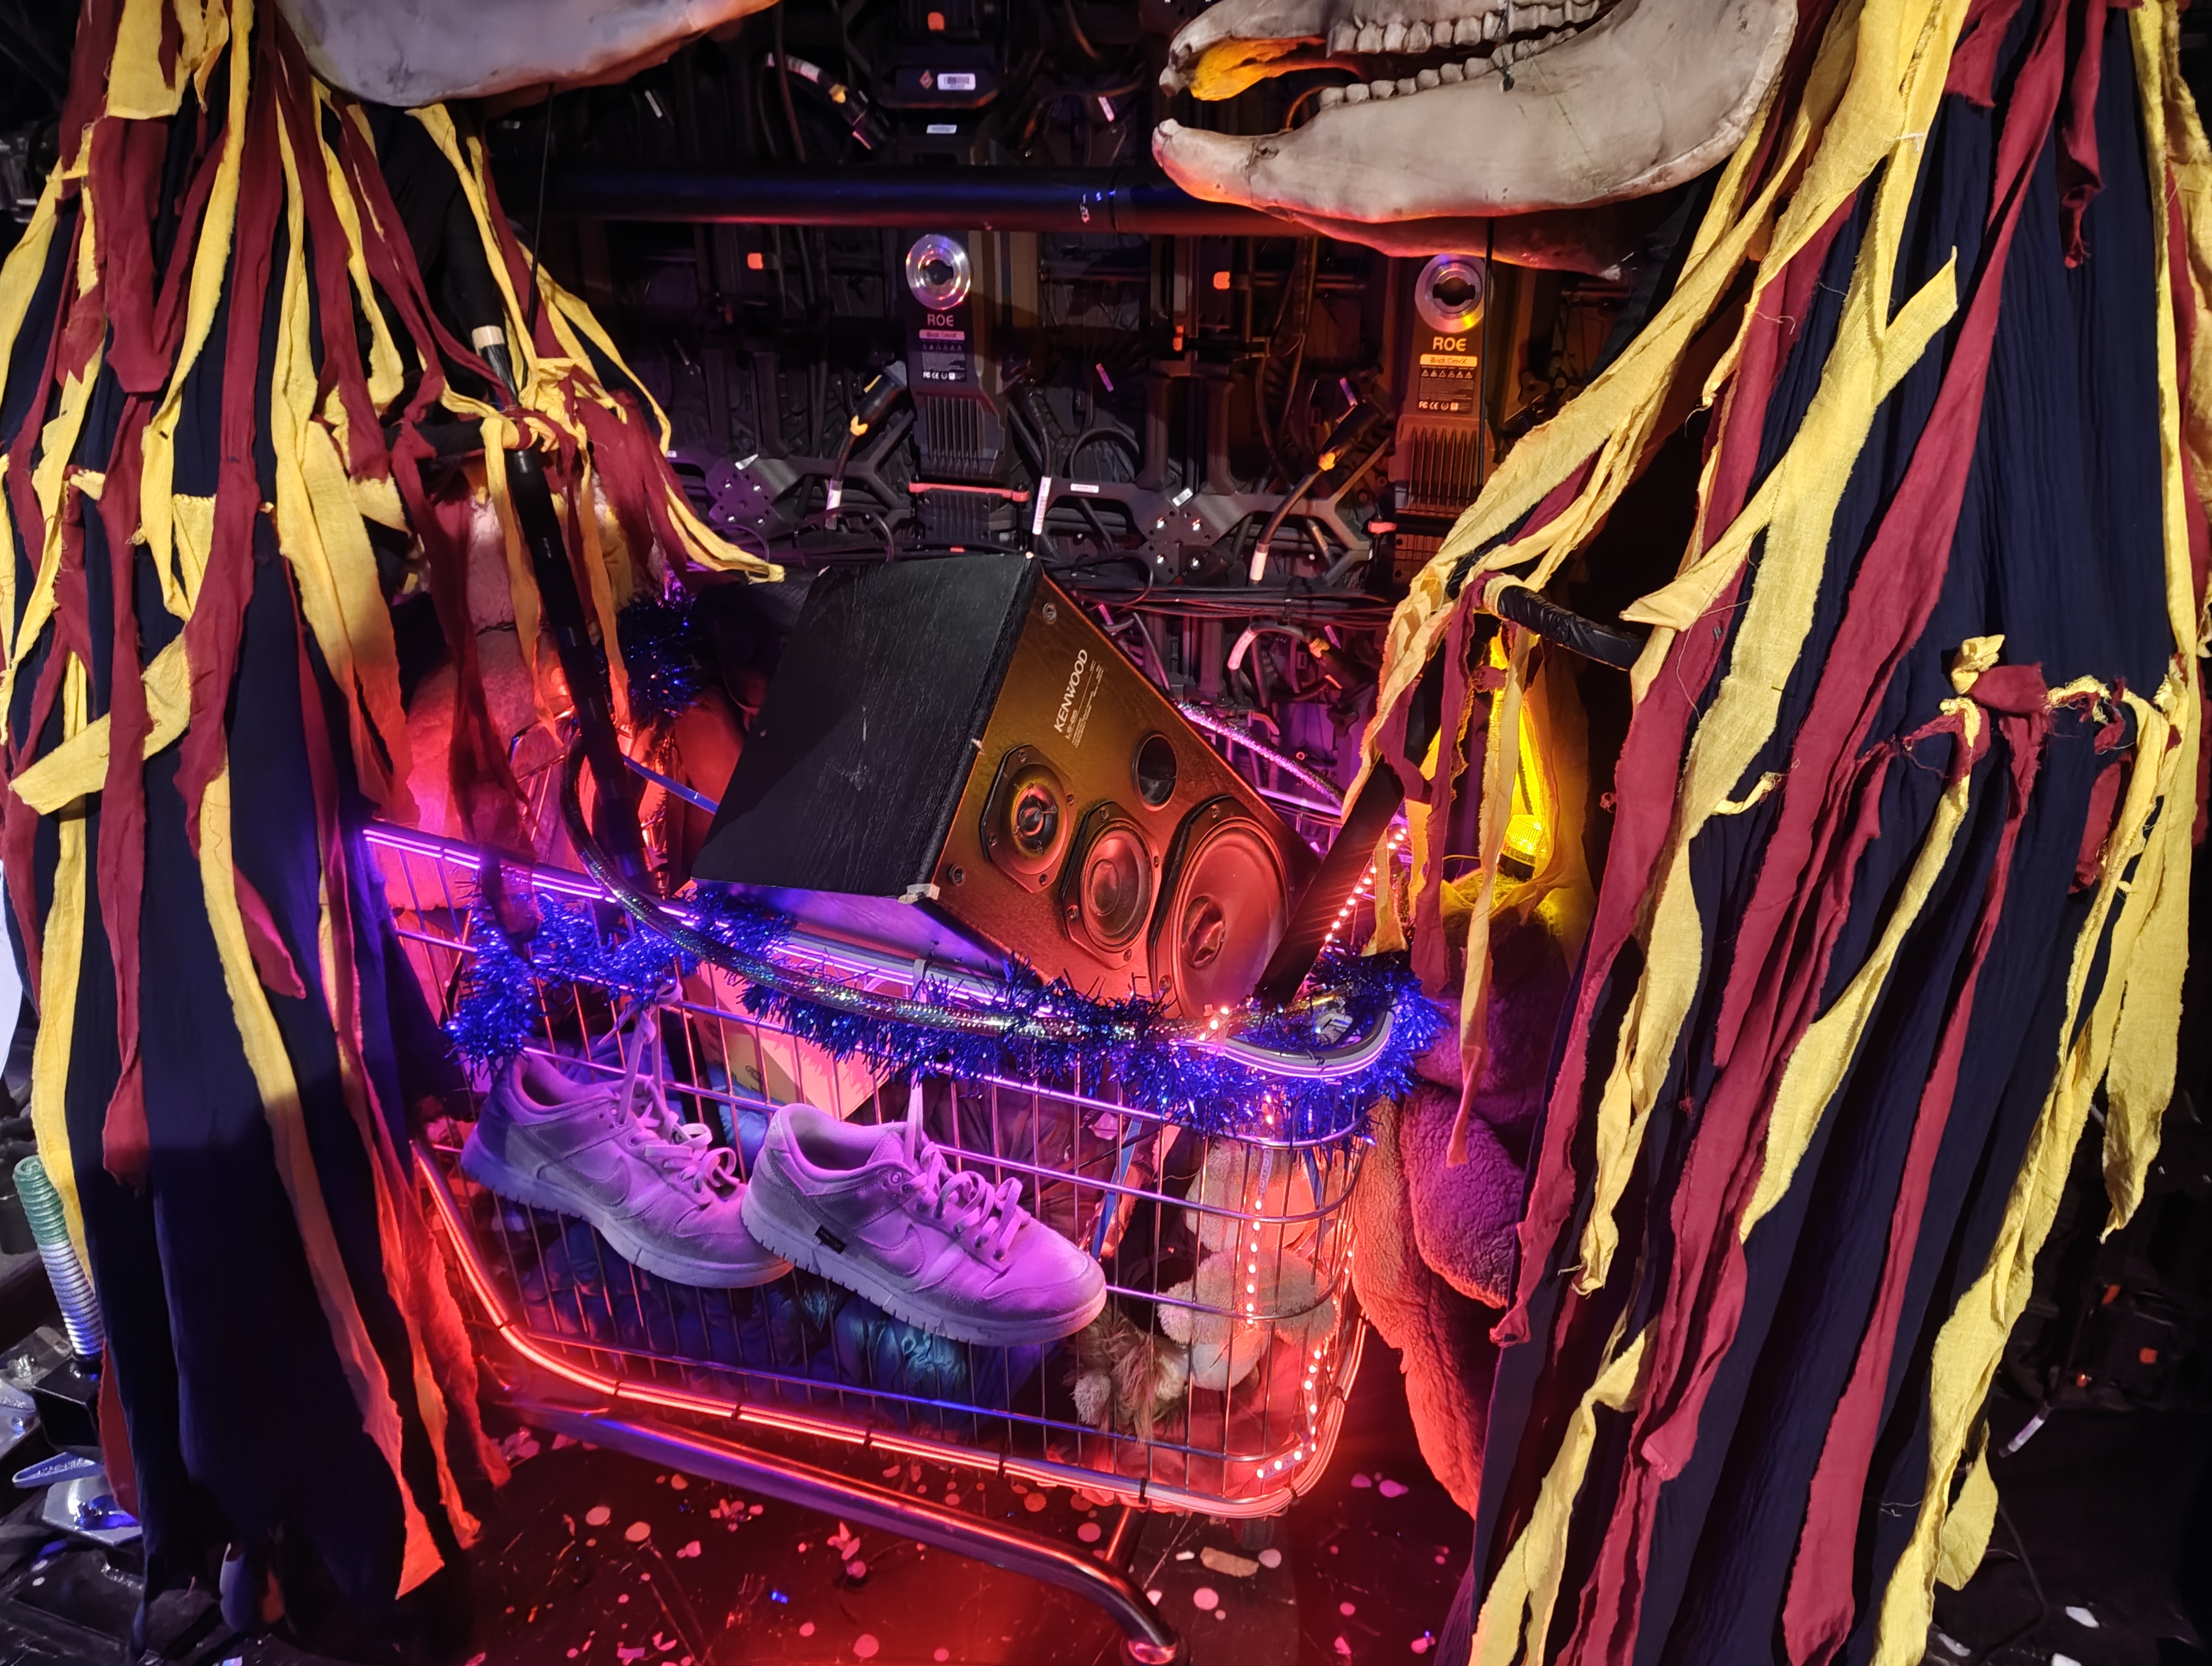
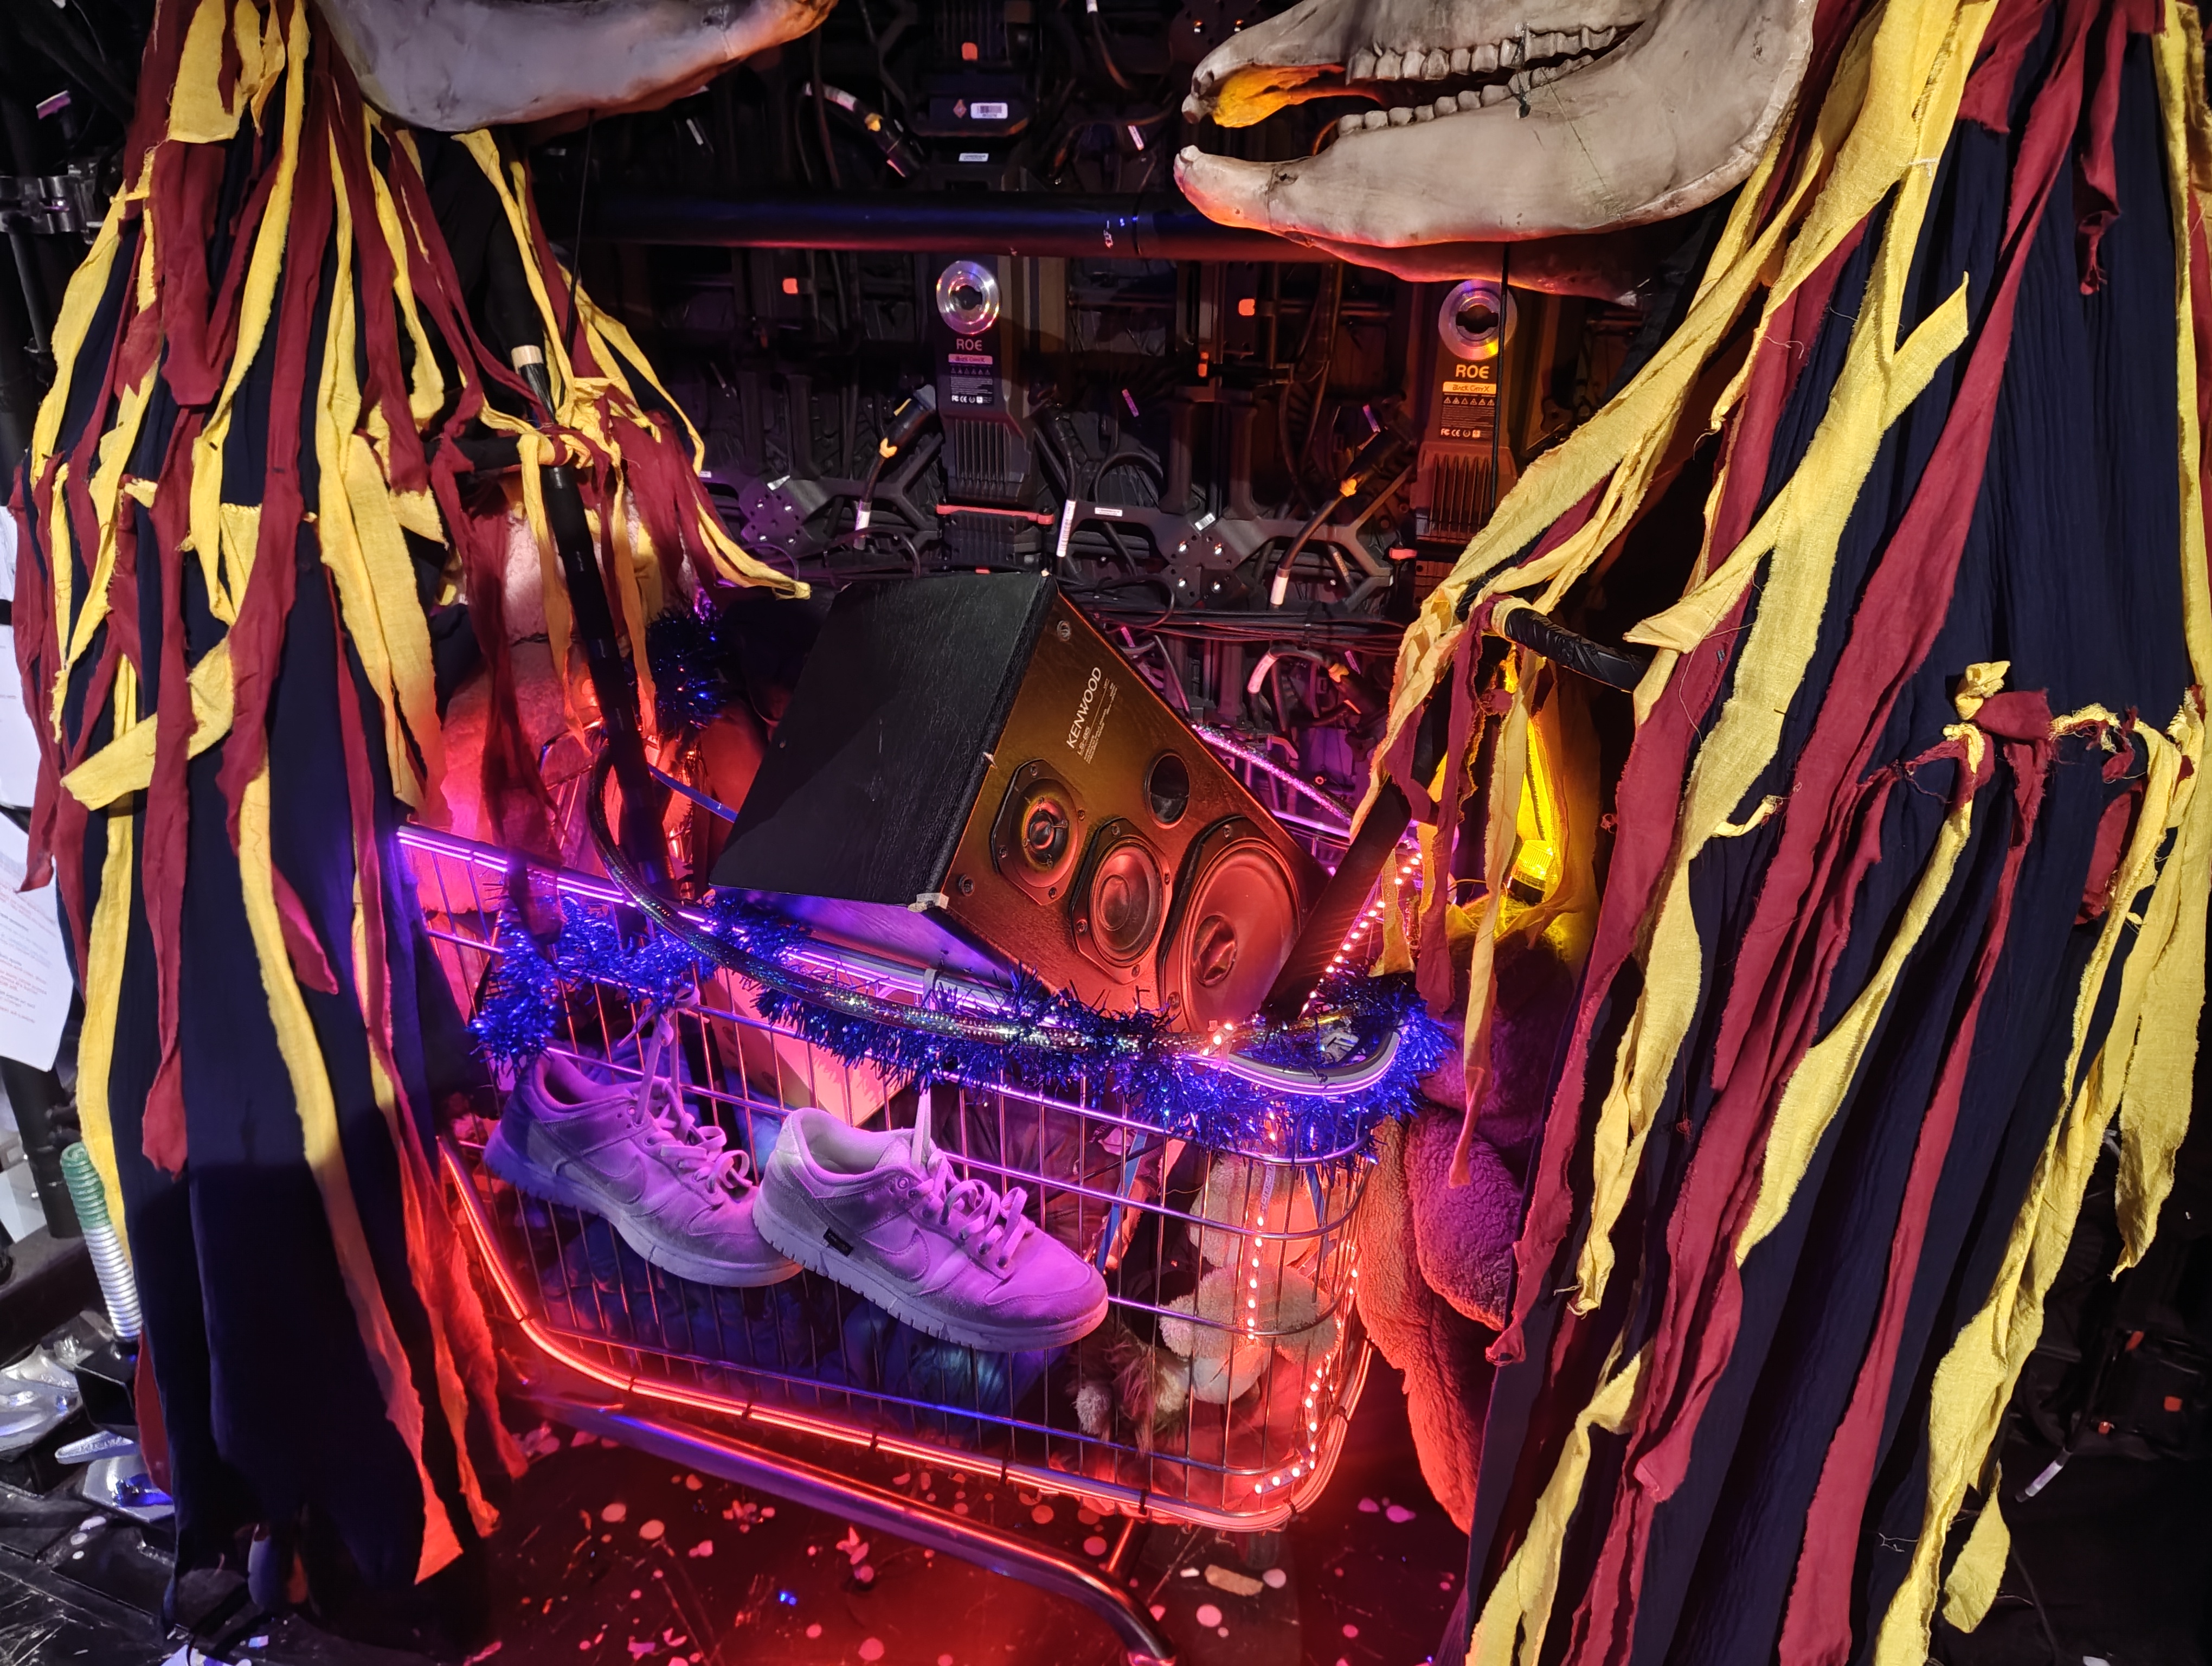
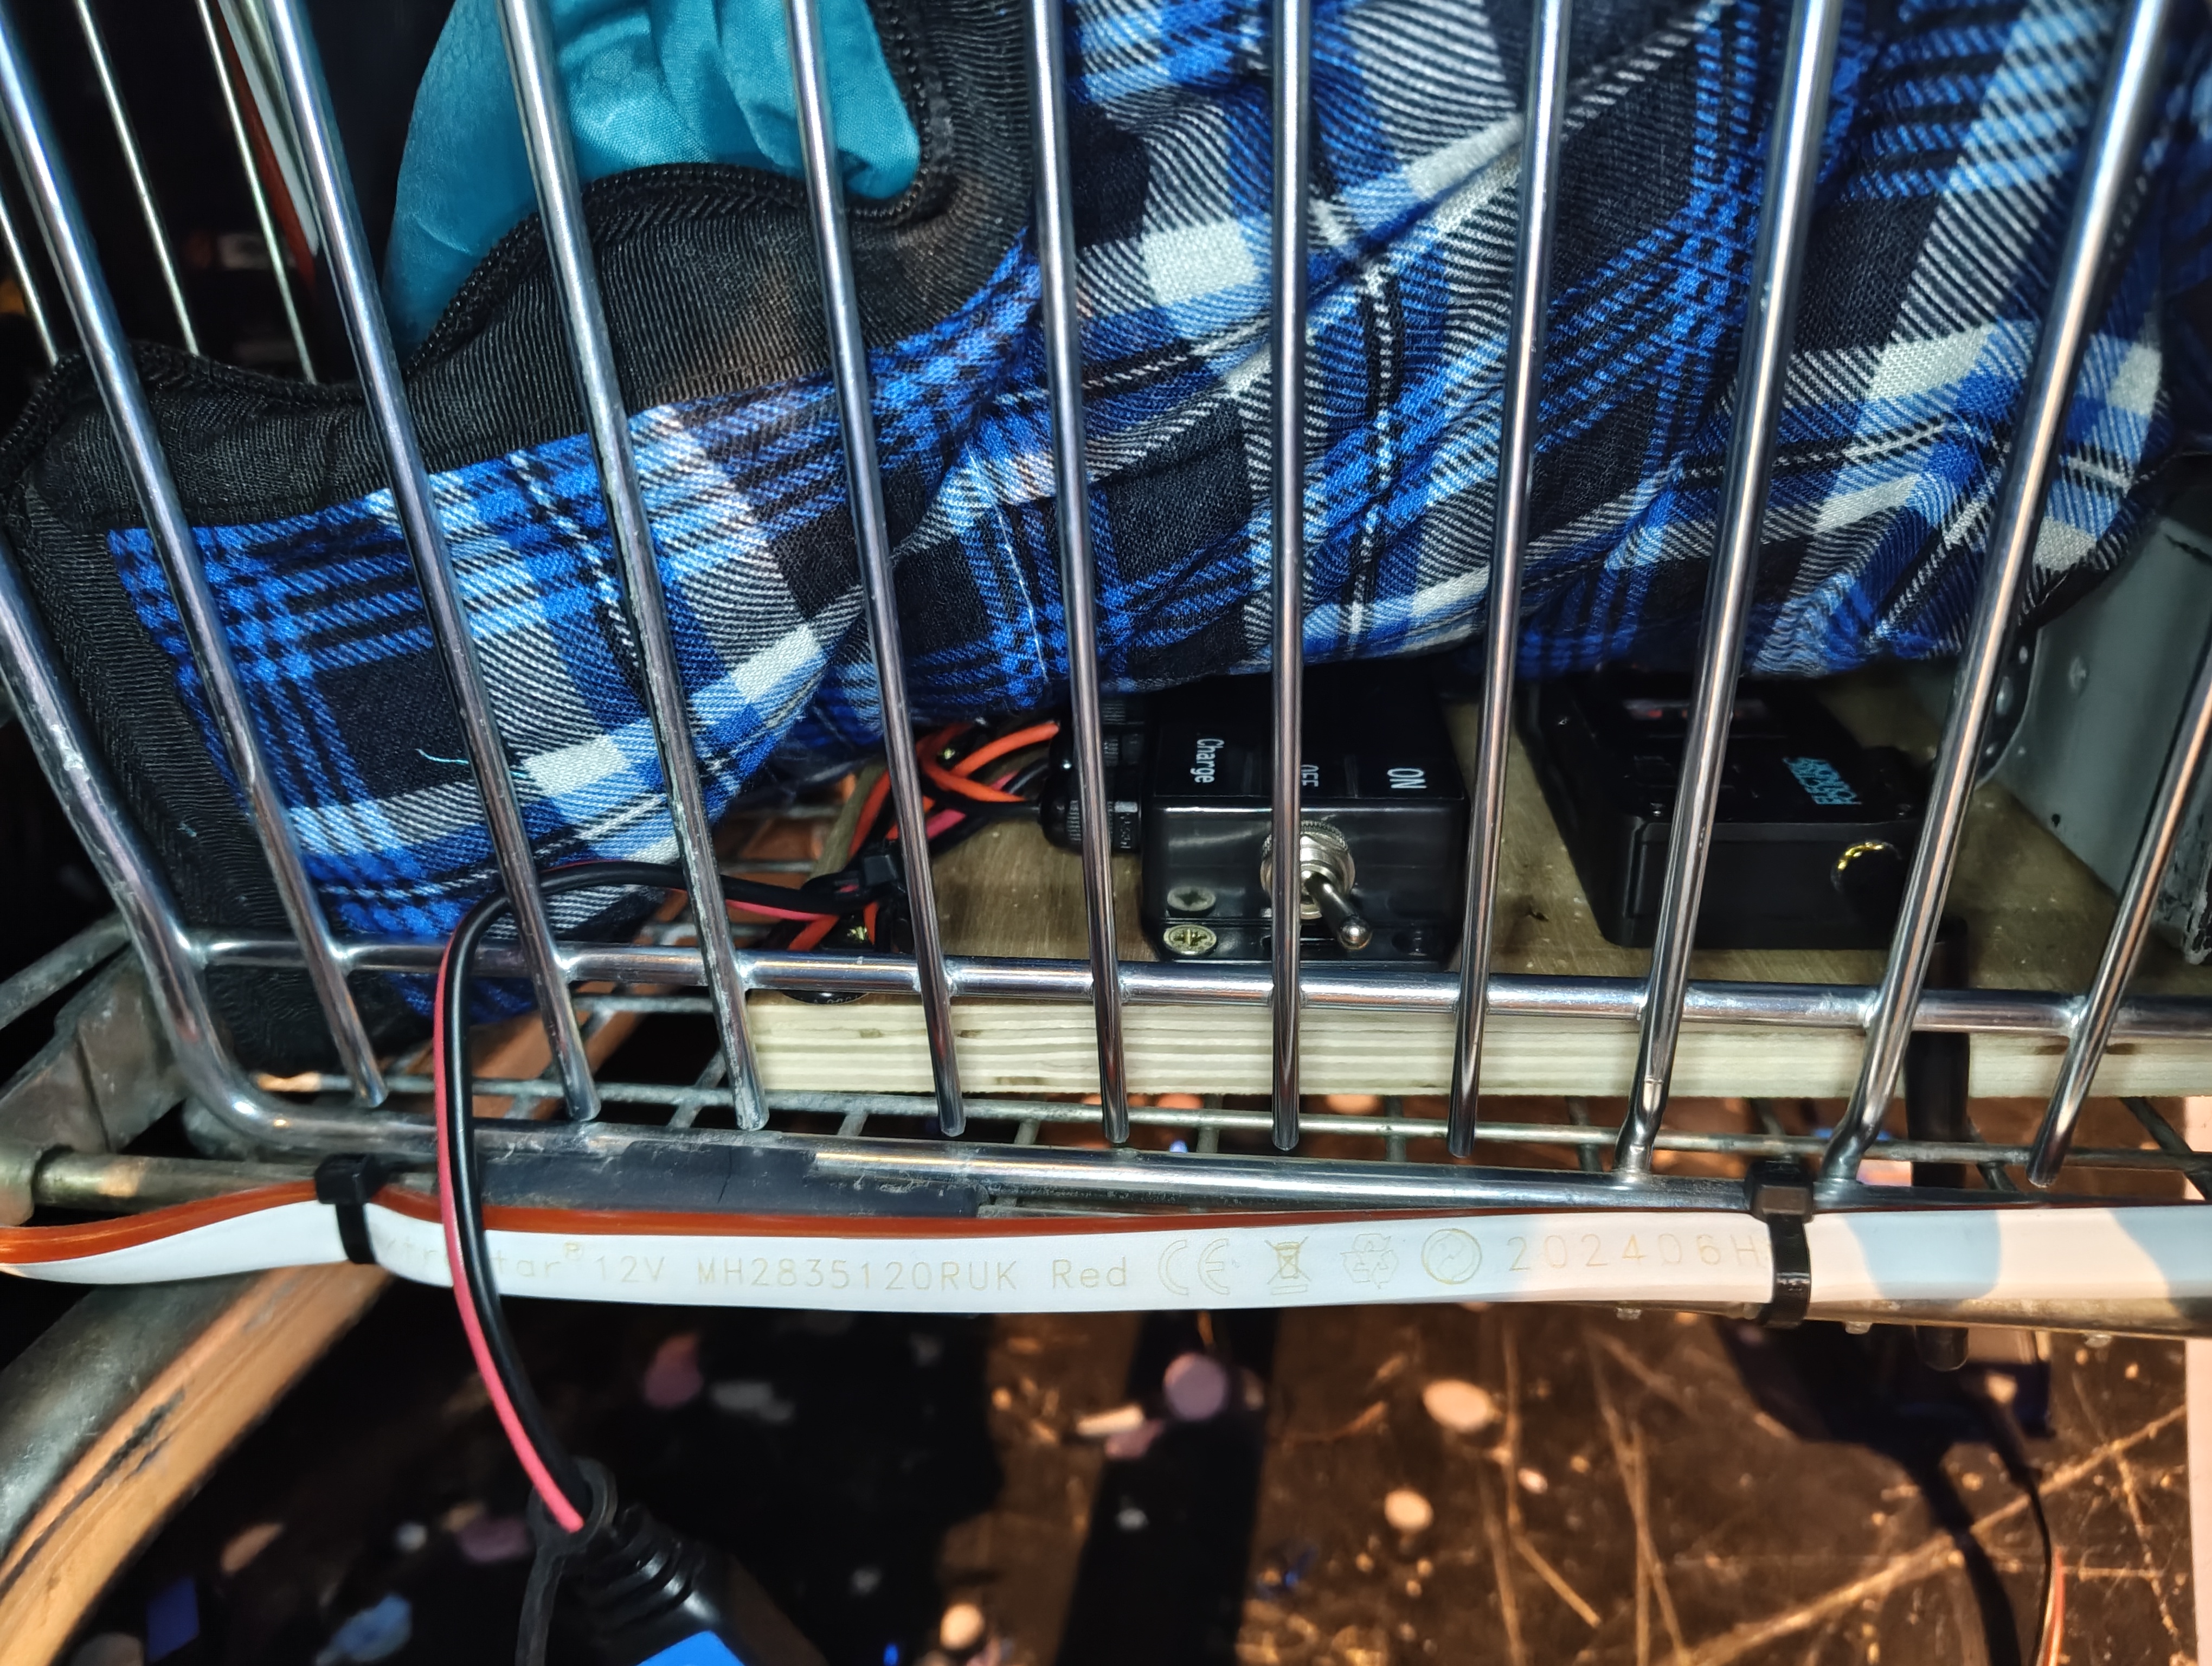
The Rave Trolley is a shopping trolley dressed with streamers, tinsel, a Kenwood speaker, trainers, a teddy bear, and various other props. It contains four separately controlled lighting elements powered by a single 12V lead acid battery and controlled wirelessly via an Electric Foundry CRMX receiver and 4-channel dimmer combo unit.
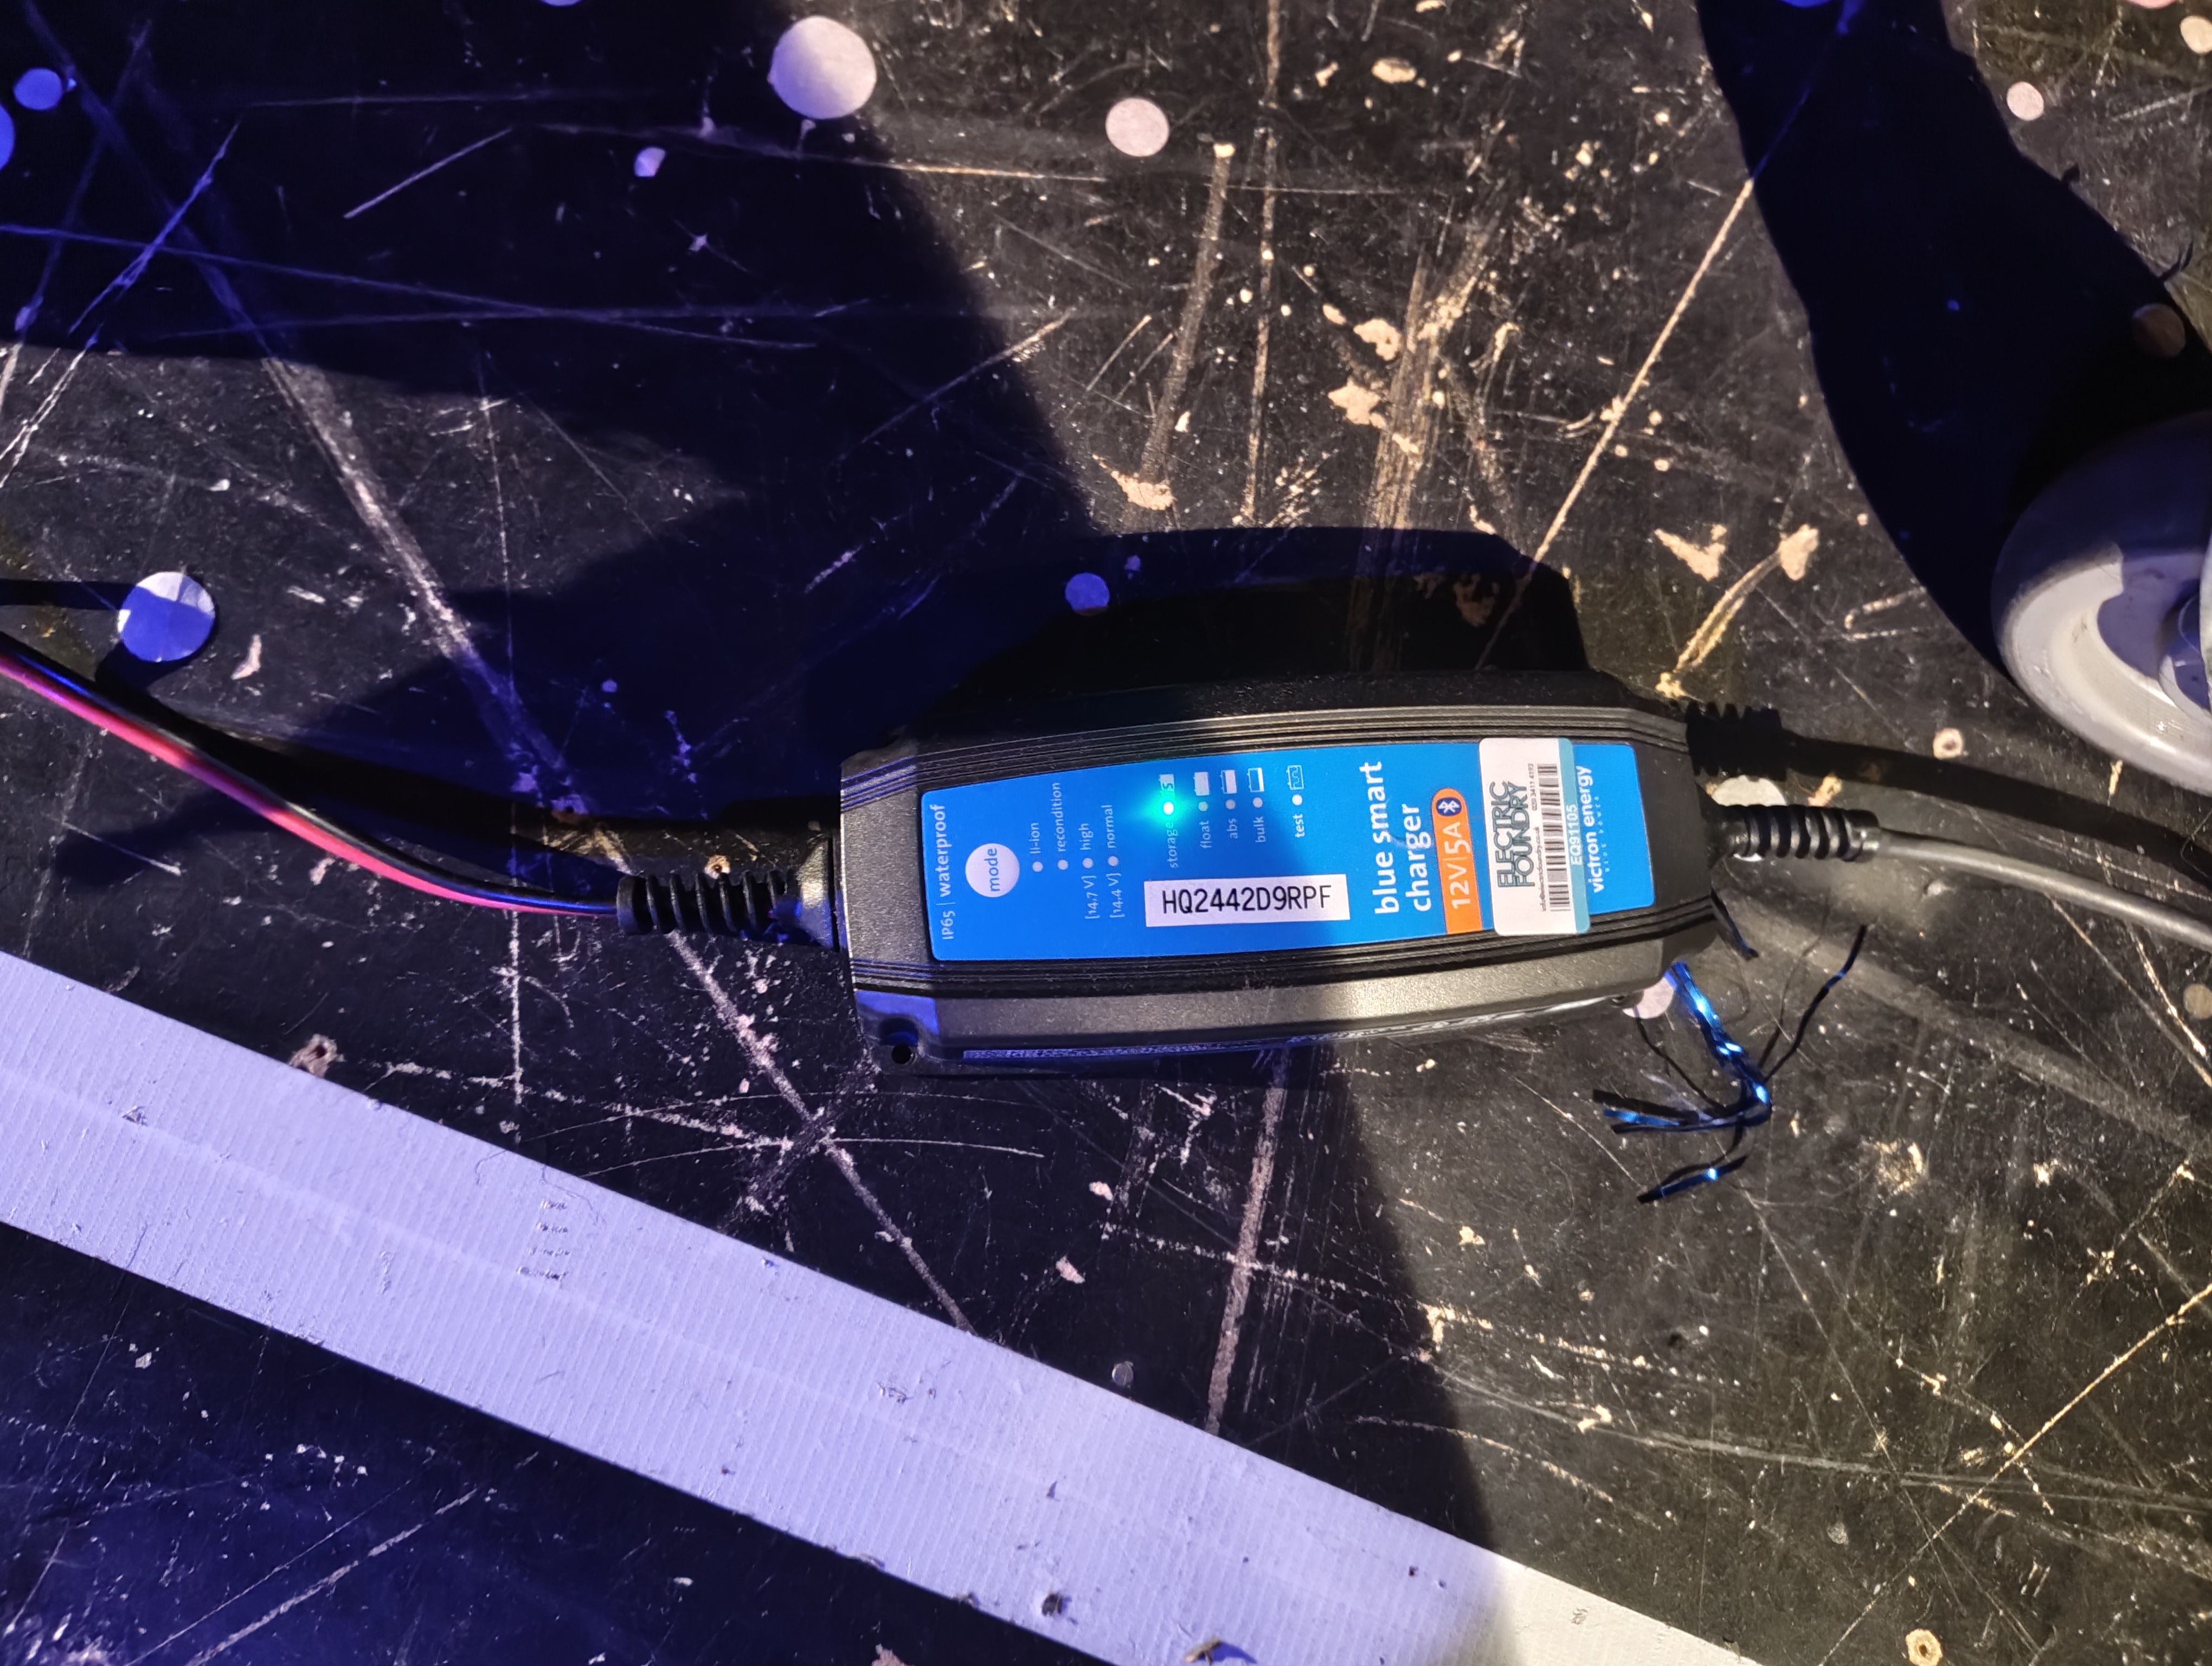
The trolley has a 3-way inline rocker switch with Off, On, and Charge positions. The charger is not built in — it connects via a quick-connect to the battery for overnight charging.
Fixture Breakdown
The Rave Trolley contains four lighting elements, each on its own dimmer channel:
Top Neon
LED strip running along the top edge of the trolley basket. Provides the main upper glow visible from the front.
Lower Neon
LED strip running along the lower edge of the trolley. Adds depth and fills the bottom of the basket with light.
LED Tape
12V red LED tape (MH2835120RUK) wrapped around the trolley frame. Provides the red wash visible through and around the props.
Beacon
A strobing beacon mounted on the teddy bear's head. This is a non-dim channel (on/off only) — it either strobes or it doesn't.
Channels & Addressing
- Top Neon
- Channel: 871
- Fixture Type: Dimmer 16B (custom)
- Universe/Address: 14/87–88
- Parameters: Intensity (16-bit dimmer)
- Lower Neon
- Channel: 872
- Fixture Type: Dimmer 16B (custom)
- Universe/Address: 14/89–90
- Parameters: Intensity (16-bit dimmer)
- LED Tape
- Channel: 873
- Fixture Type: Dimmer 16B (custom)
- Universe/Address: 14/91–92
- Parameters: Intensity (16-bit dimmer)
- Beacon
- Channel: 874
- Fixture Type: Non_Dim 16B (custom)
- Universe/Address: 14/93–94
- Parameters: On/Off (non-dim, 16-bit)
Power & Control
| Power Source | 12V 22Ah Lead Acid Battery |
| Dimmer / CRMX Receiver | Electric Foundry CRMX 4ch Dimmer & Receiver |
| DMX Source | CRMX Stardust Transmitter |
| Power Switch | Inline 3-way rocker: Off / On / Charge |
| Charger | Victron Blue Smart IP65 12V 5A (external, quick connect) |
Charging
The charger is not built in — it connects via a quick-connect to the battery. Set the rocker switch to the Charge position before connecting the charger. The charger is the same 12V 5A model used on other practicals.
Wiring
Power Flow
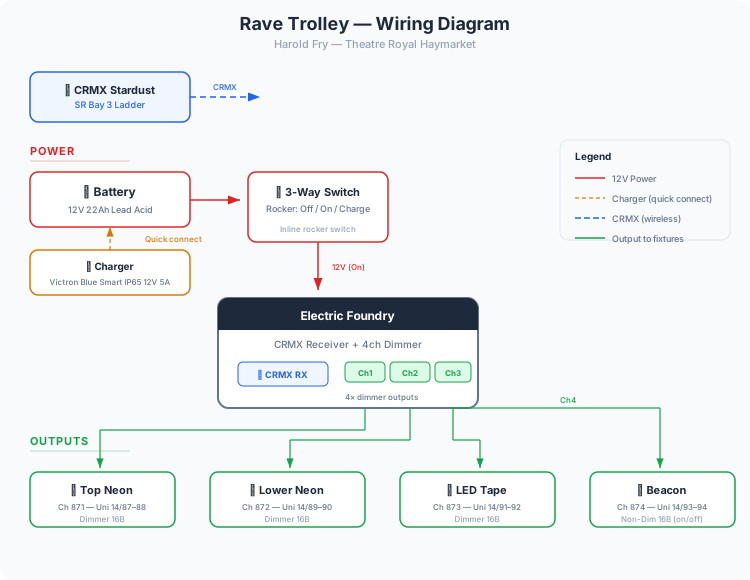
The 12V 22Ah lead acid battery connects through a 3-way inline rocker switch. In the On position, 12V is fed to the Electric Foundry unit which powers all four lighting outputs via its 4-channel dimmer. In the Charge position, the quick-connect is live for the external Victron charger.
The Electric Foundry unit receives CRMX wirelessly from the Stardust and dims each of the four outputs independently:
- Ch 1 → Top Neon (dimmed)
- Ch 2 → Lower Neon (dimmed)
- Ch 3 → LED Tape (dimmed)
- Ch 4 → Beacon (on/off strobe)
Images
Key Views
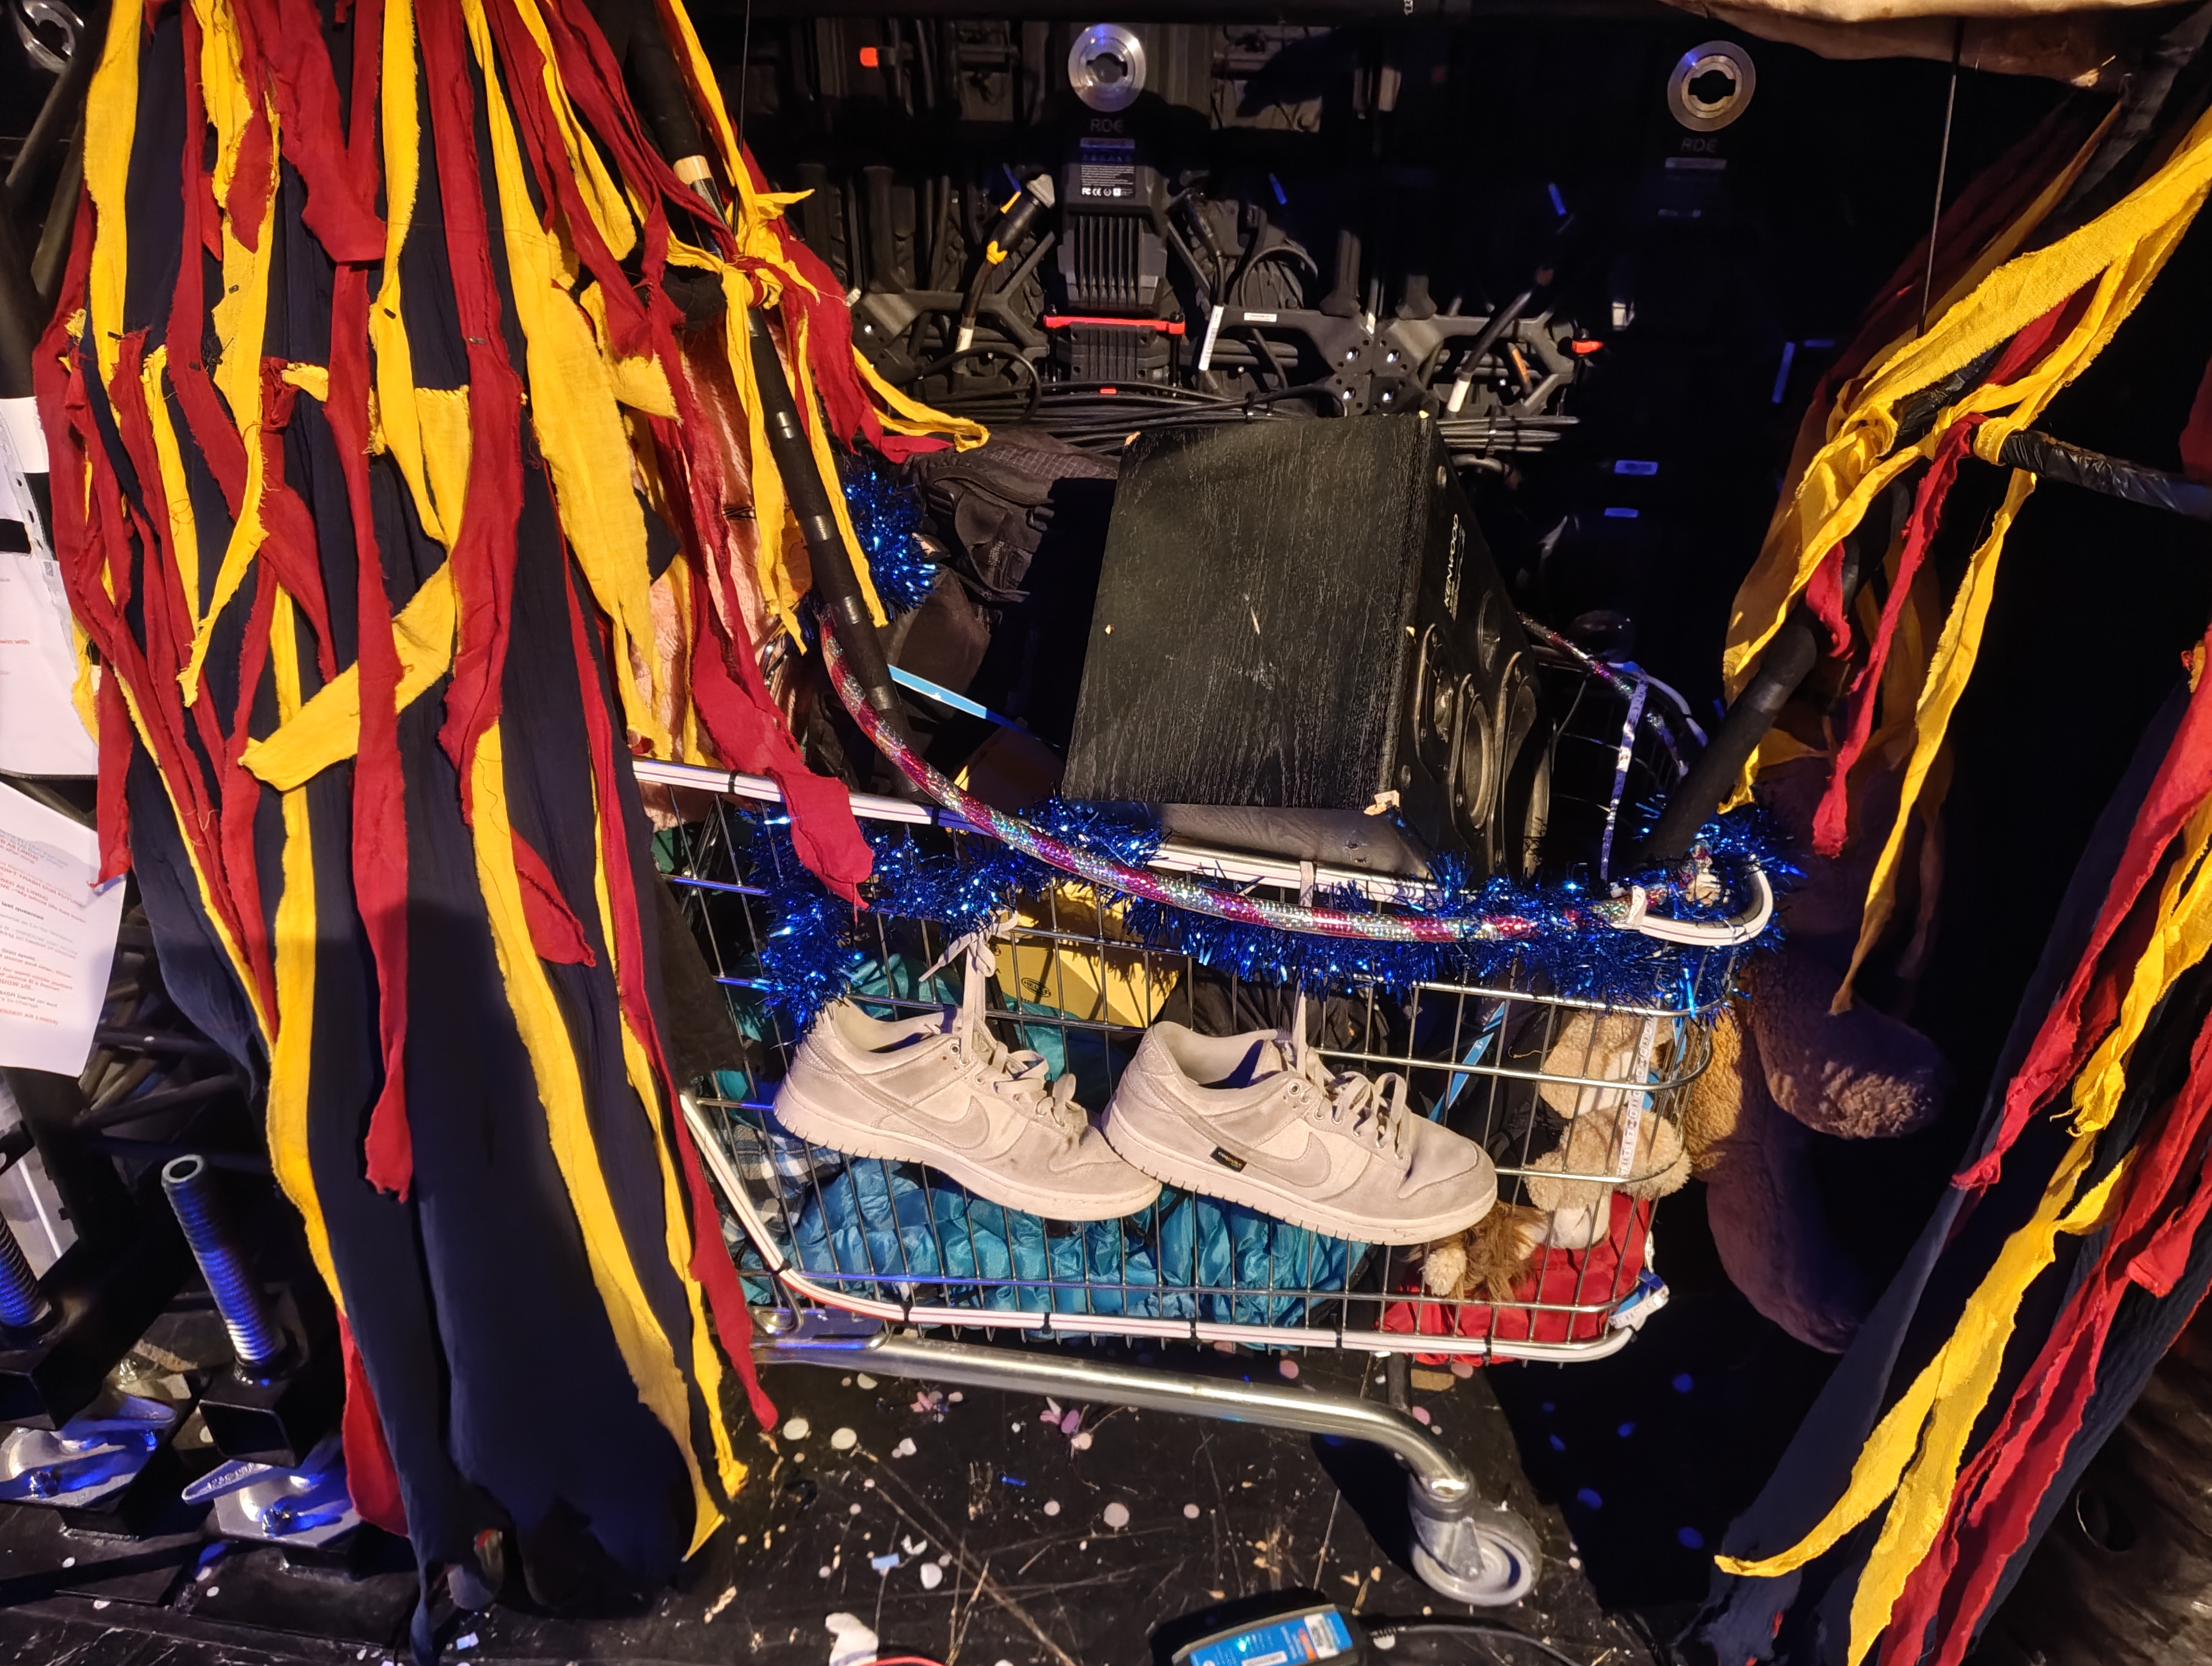
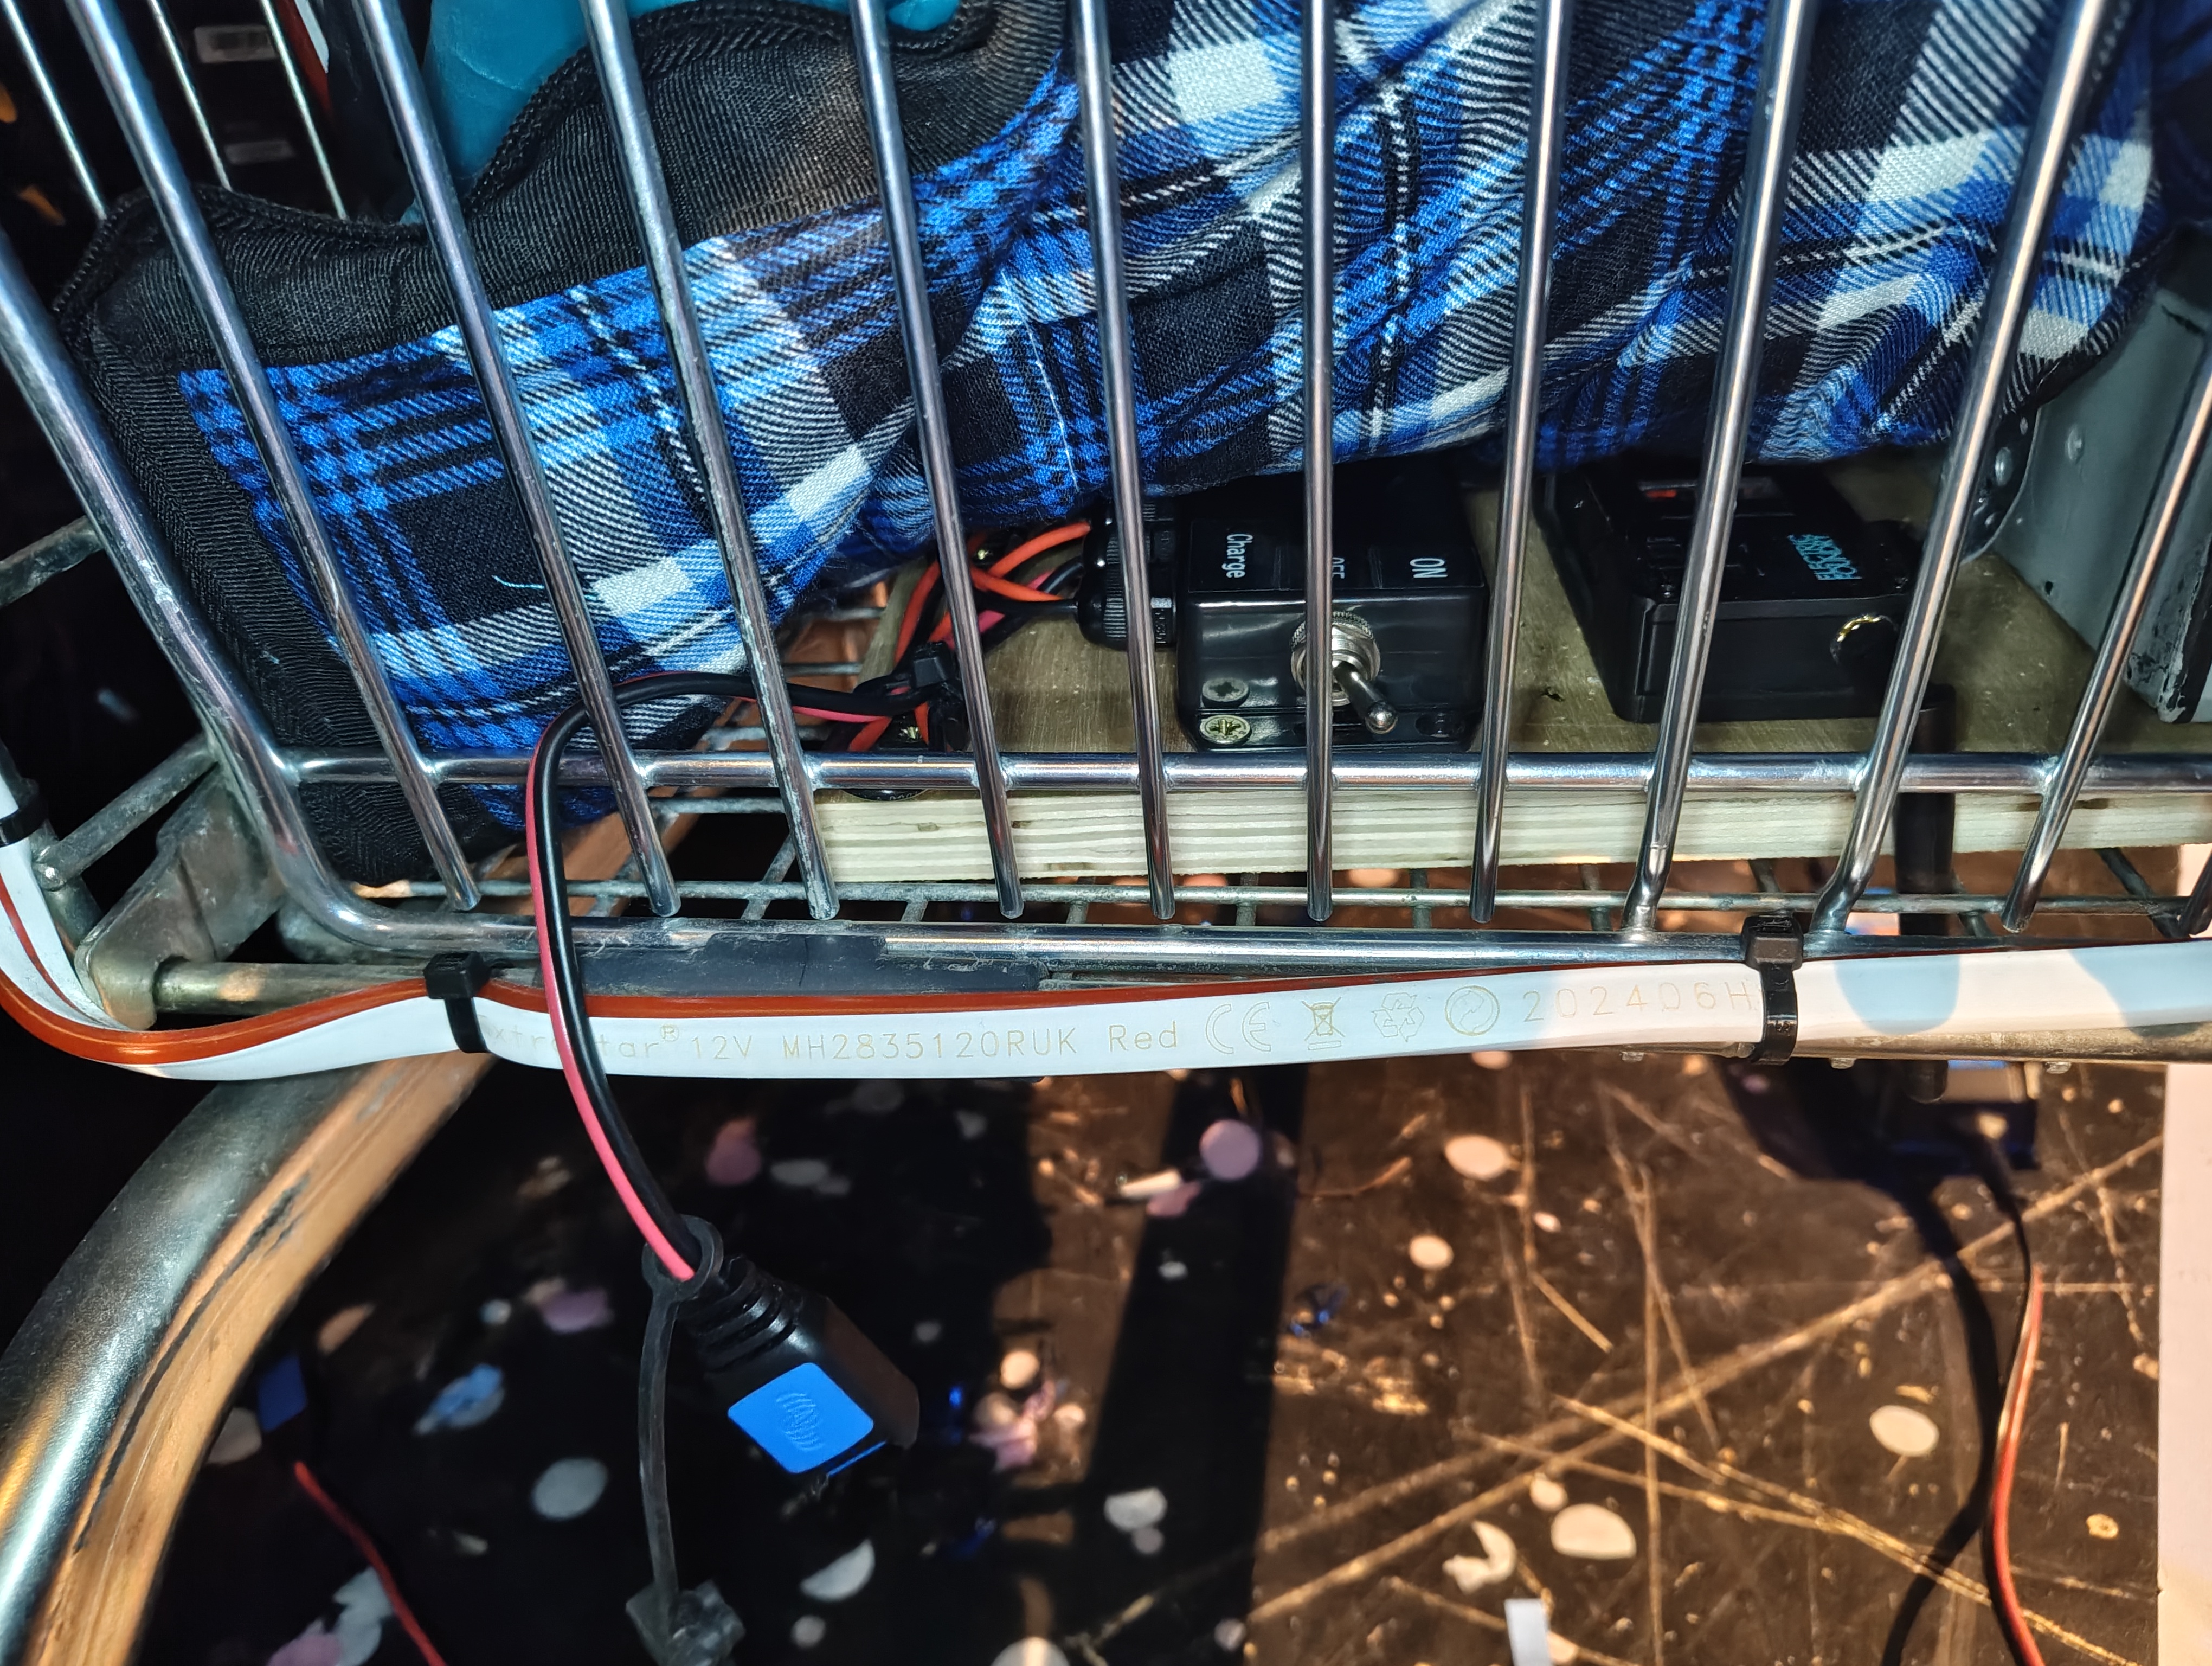
All Reference Photos (click to expand)
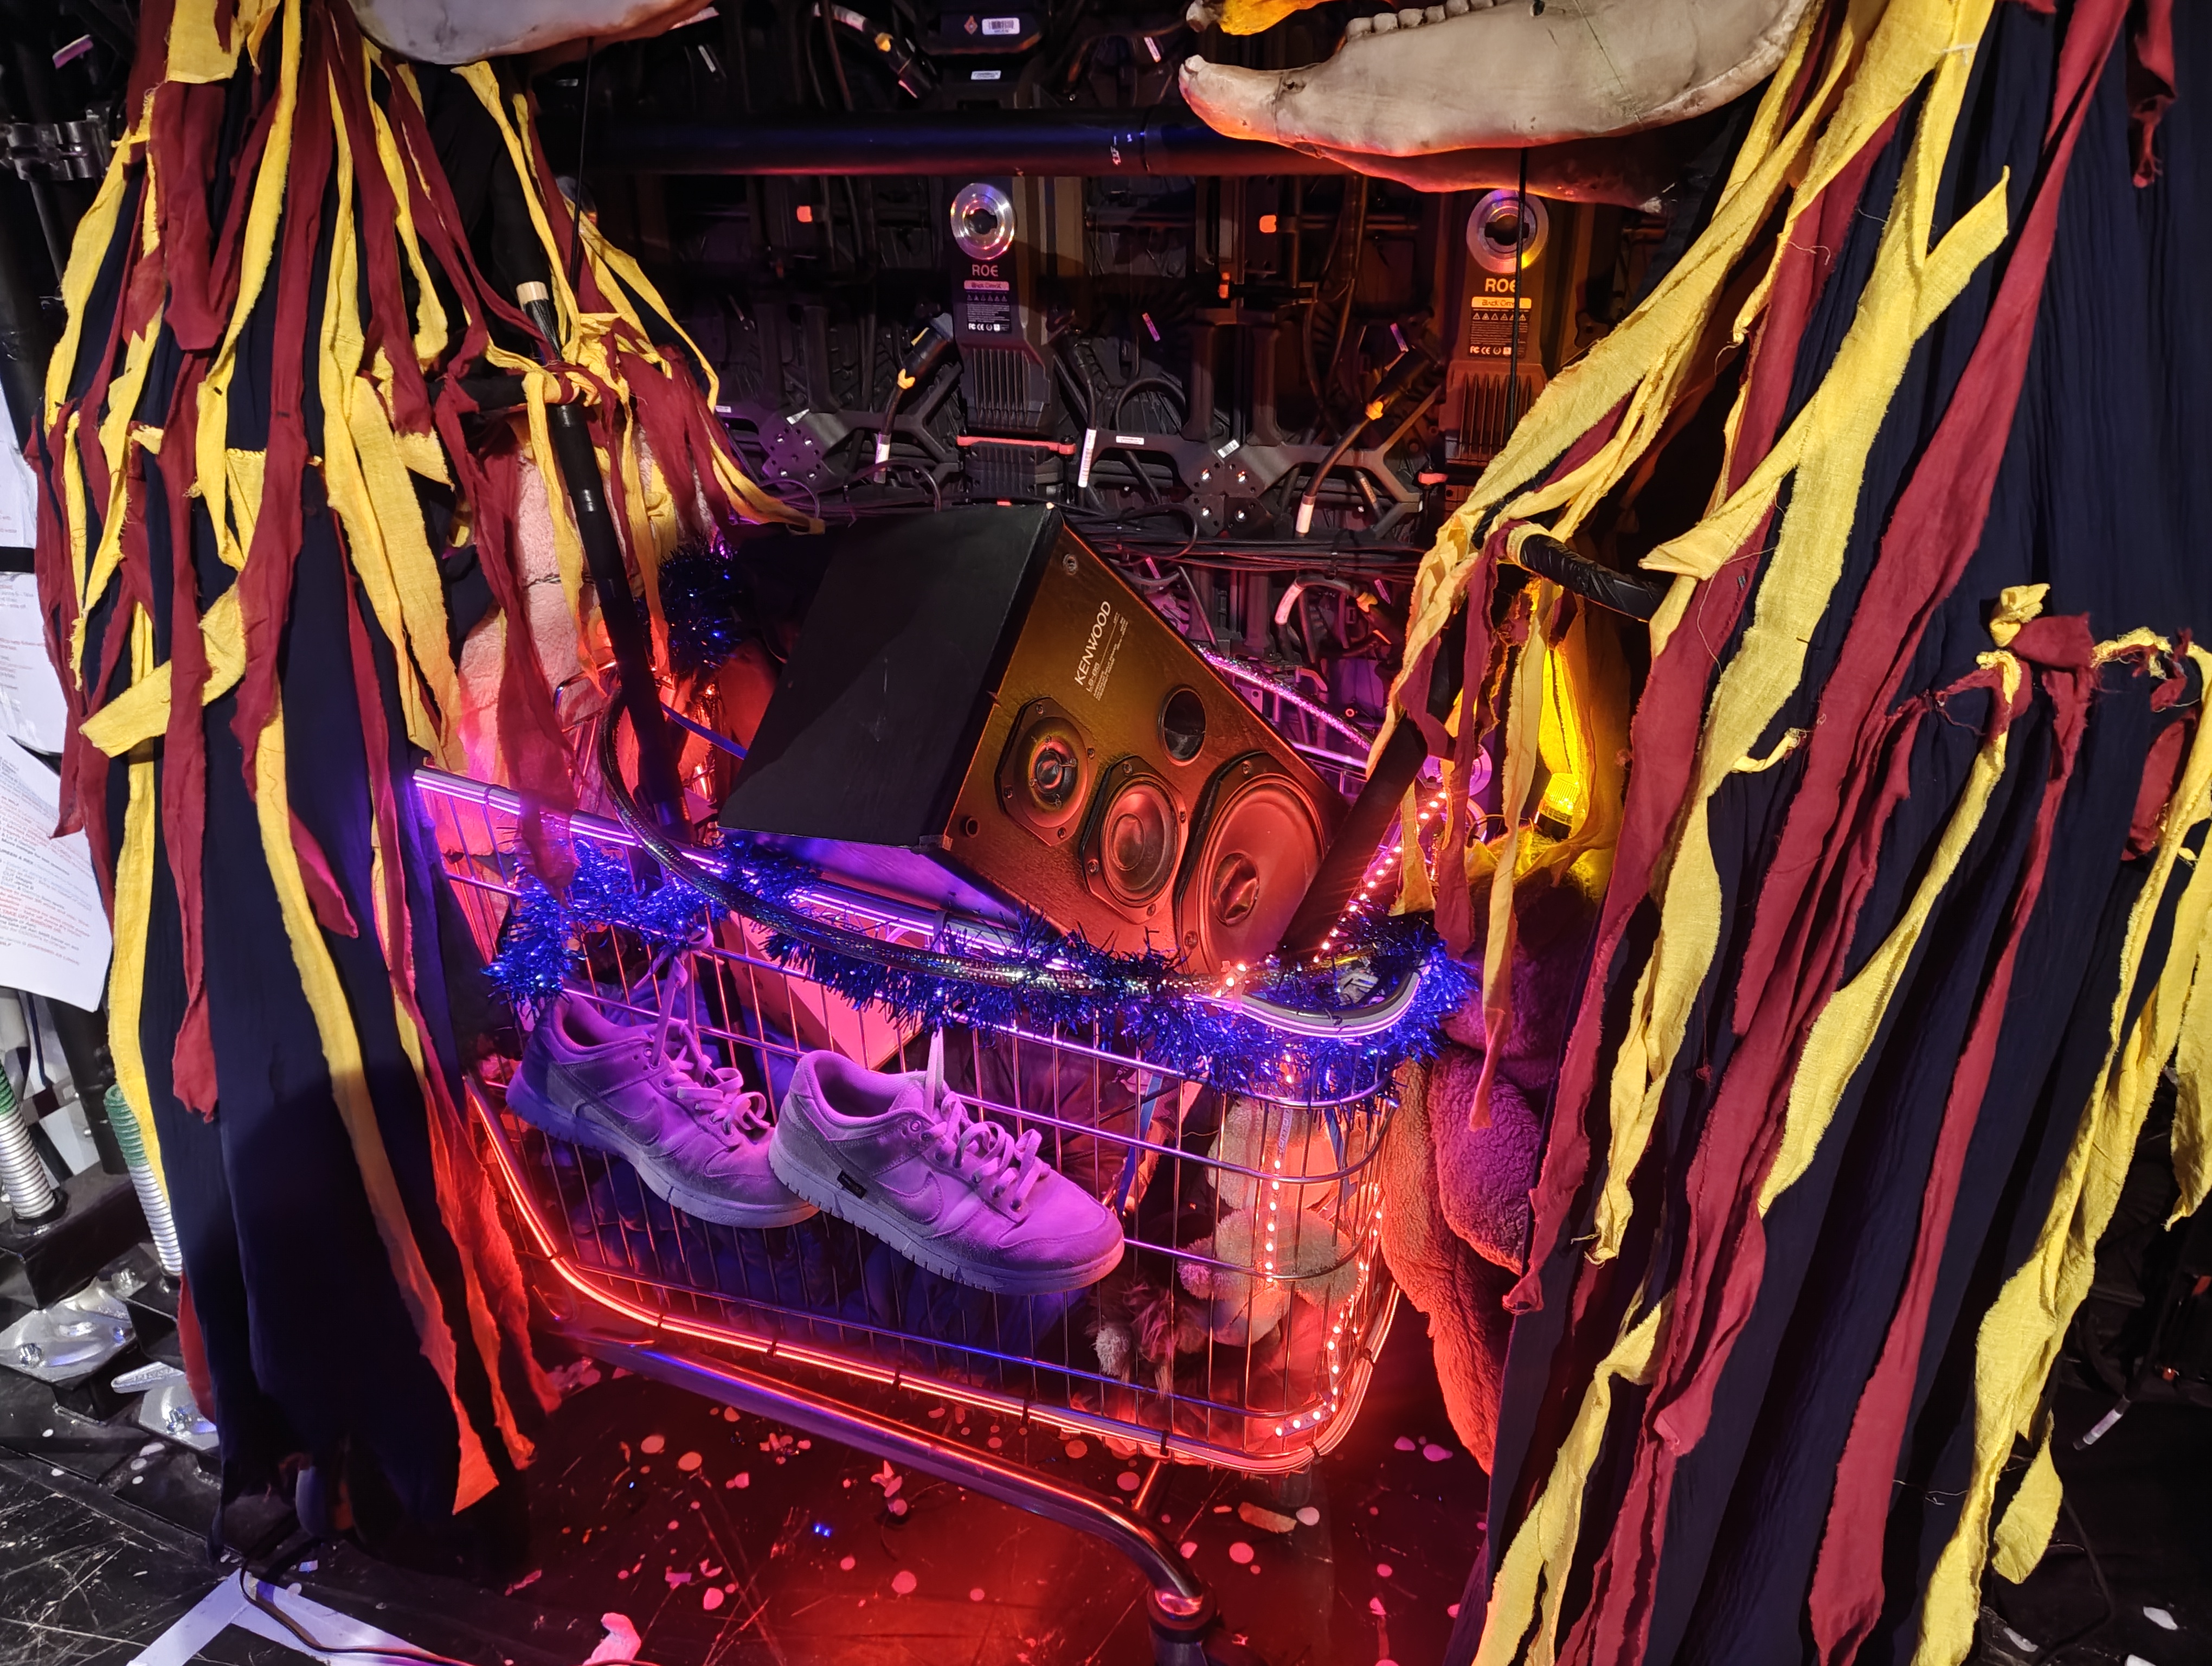
Components List
| Component | Detail |
|---|---|
| Battery | 12V 22Ah Lead Acid |
| CRMX Receiver / Dimmer | Electric Foundry combo unit (4ch) |
| Power Switch | Inline 3-way rocker (Off / On / Charge) |
| LED Tape | 12V Red MH2835120RUK |
| Charger | Victron Blue Smart IP65 12V 5A (external) |
Usage
The Rave Trolley is used during the rave/party scene.
Troubleshooting
- Nothing lights up:
- Check the rocker switch is in the On position (not Charge or Off)
- Check battery charge level — charge overnight
- Some channels not working:
- Check wiring connections inside the trolley basket
- Check the Electric Foundry unit is receiving CRMX (linked to Stardust)
- Beacon not strobing:
- This is a non-dim channel — check it's getting a full DMX value, not a low level
Standard Lamp
Overview
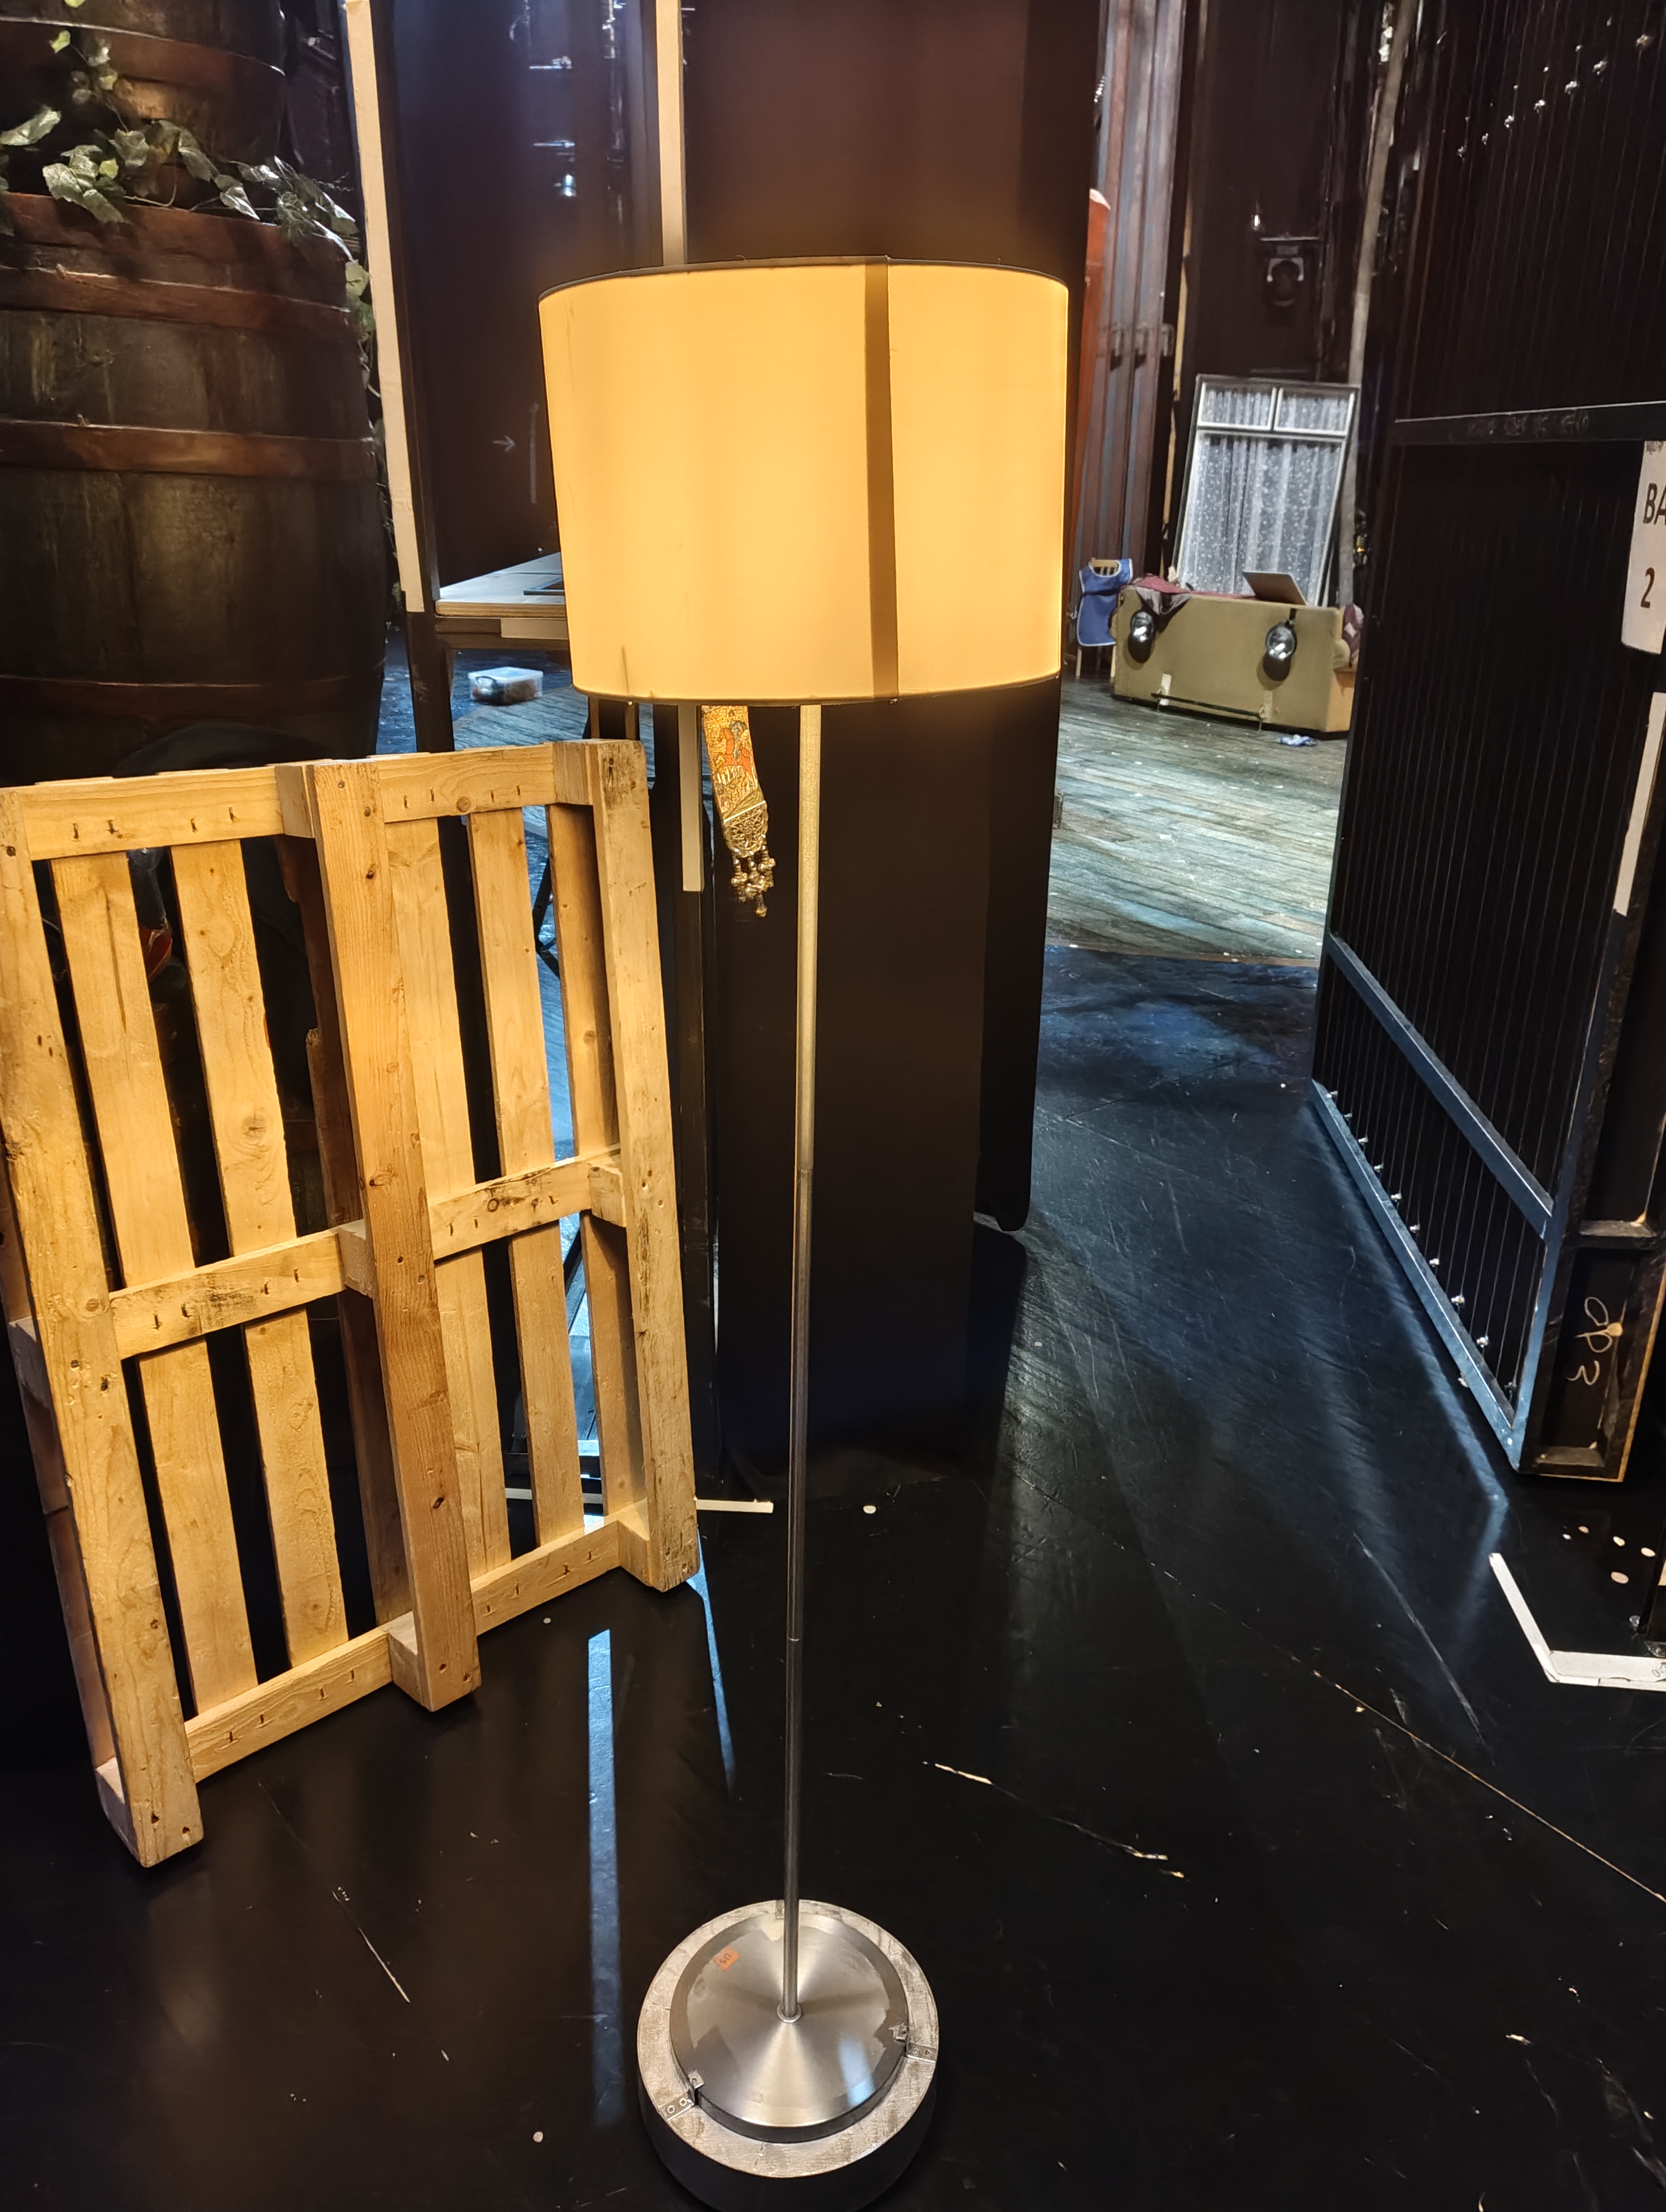
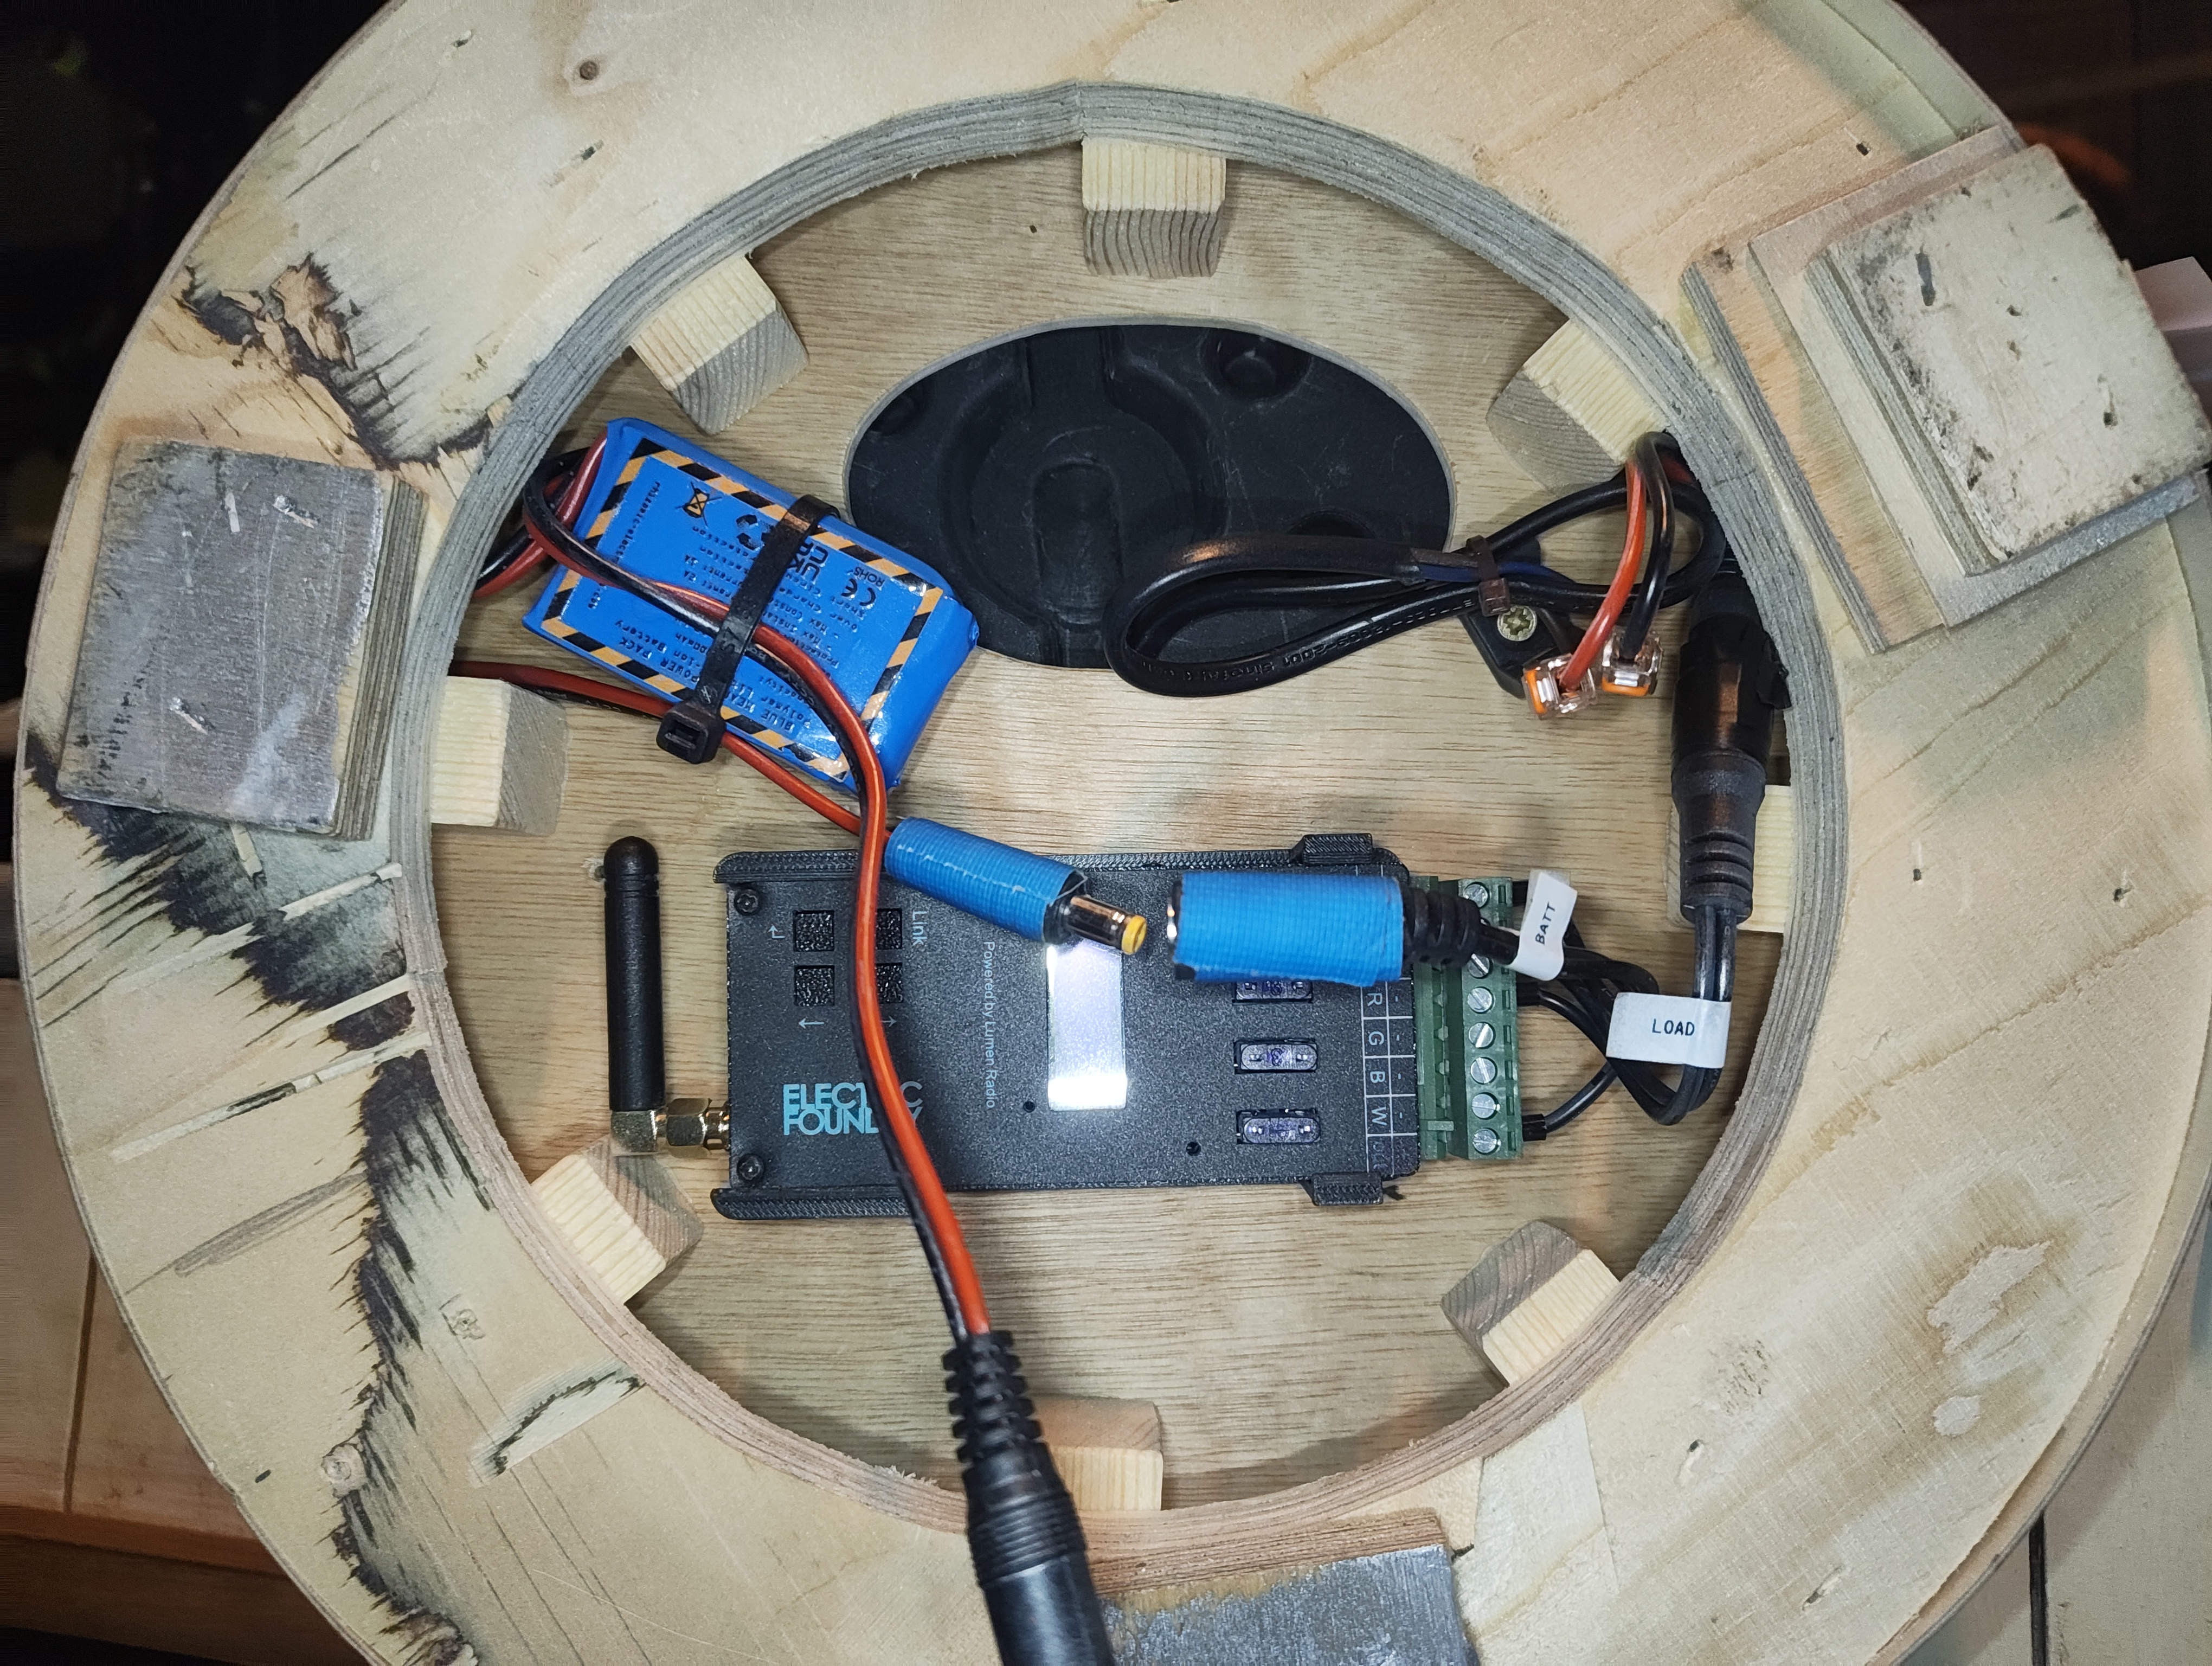
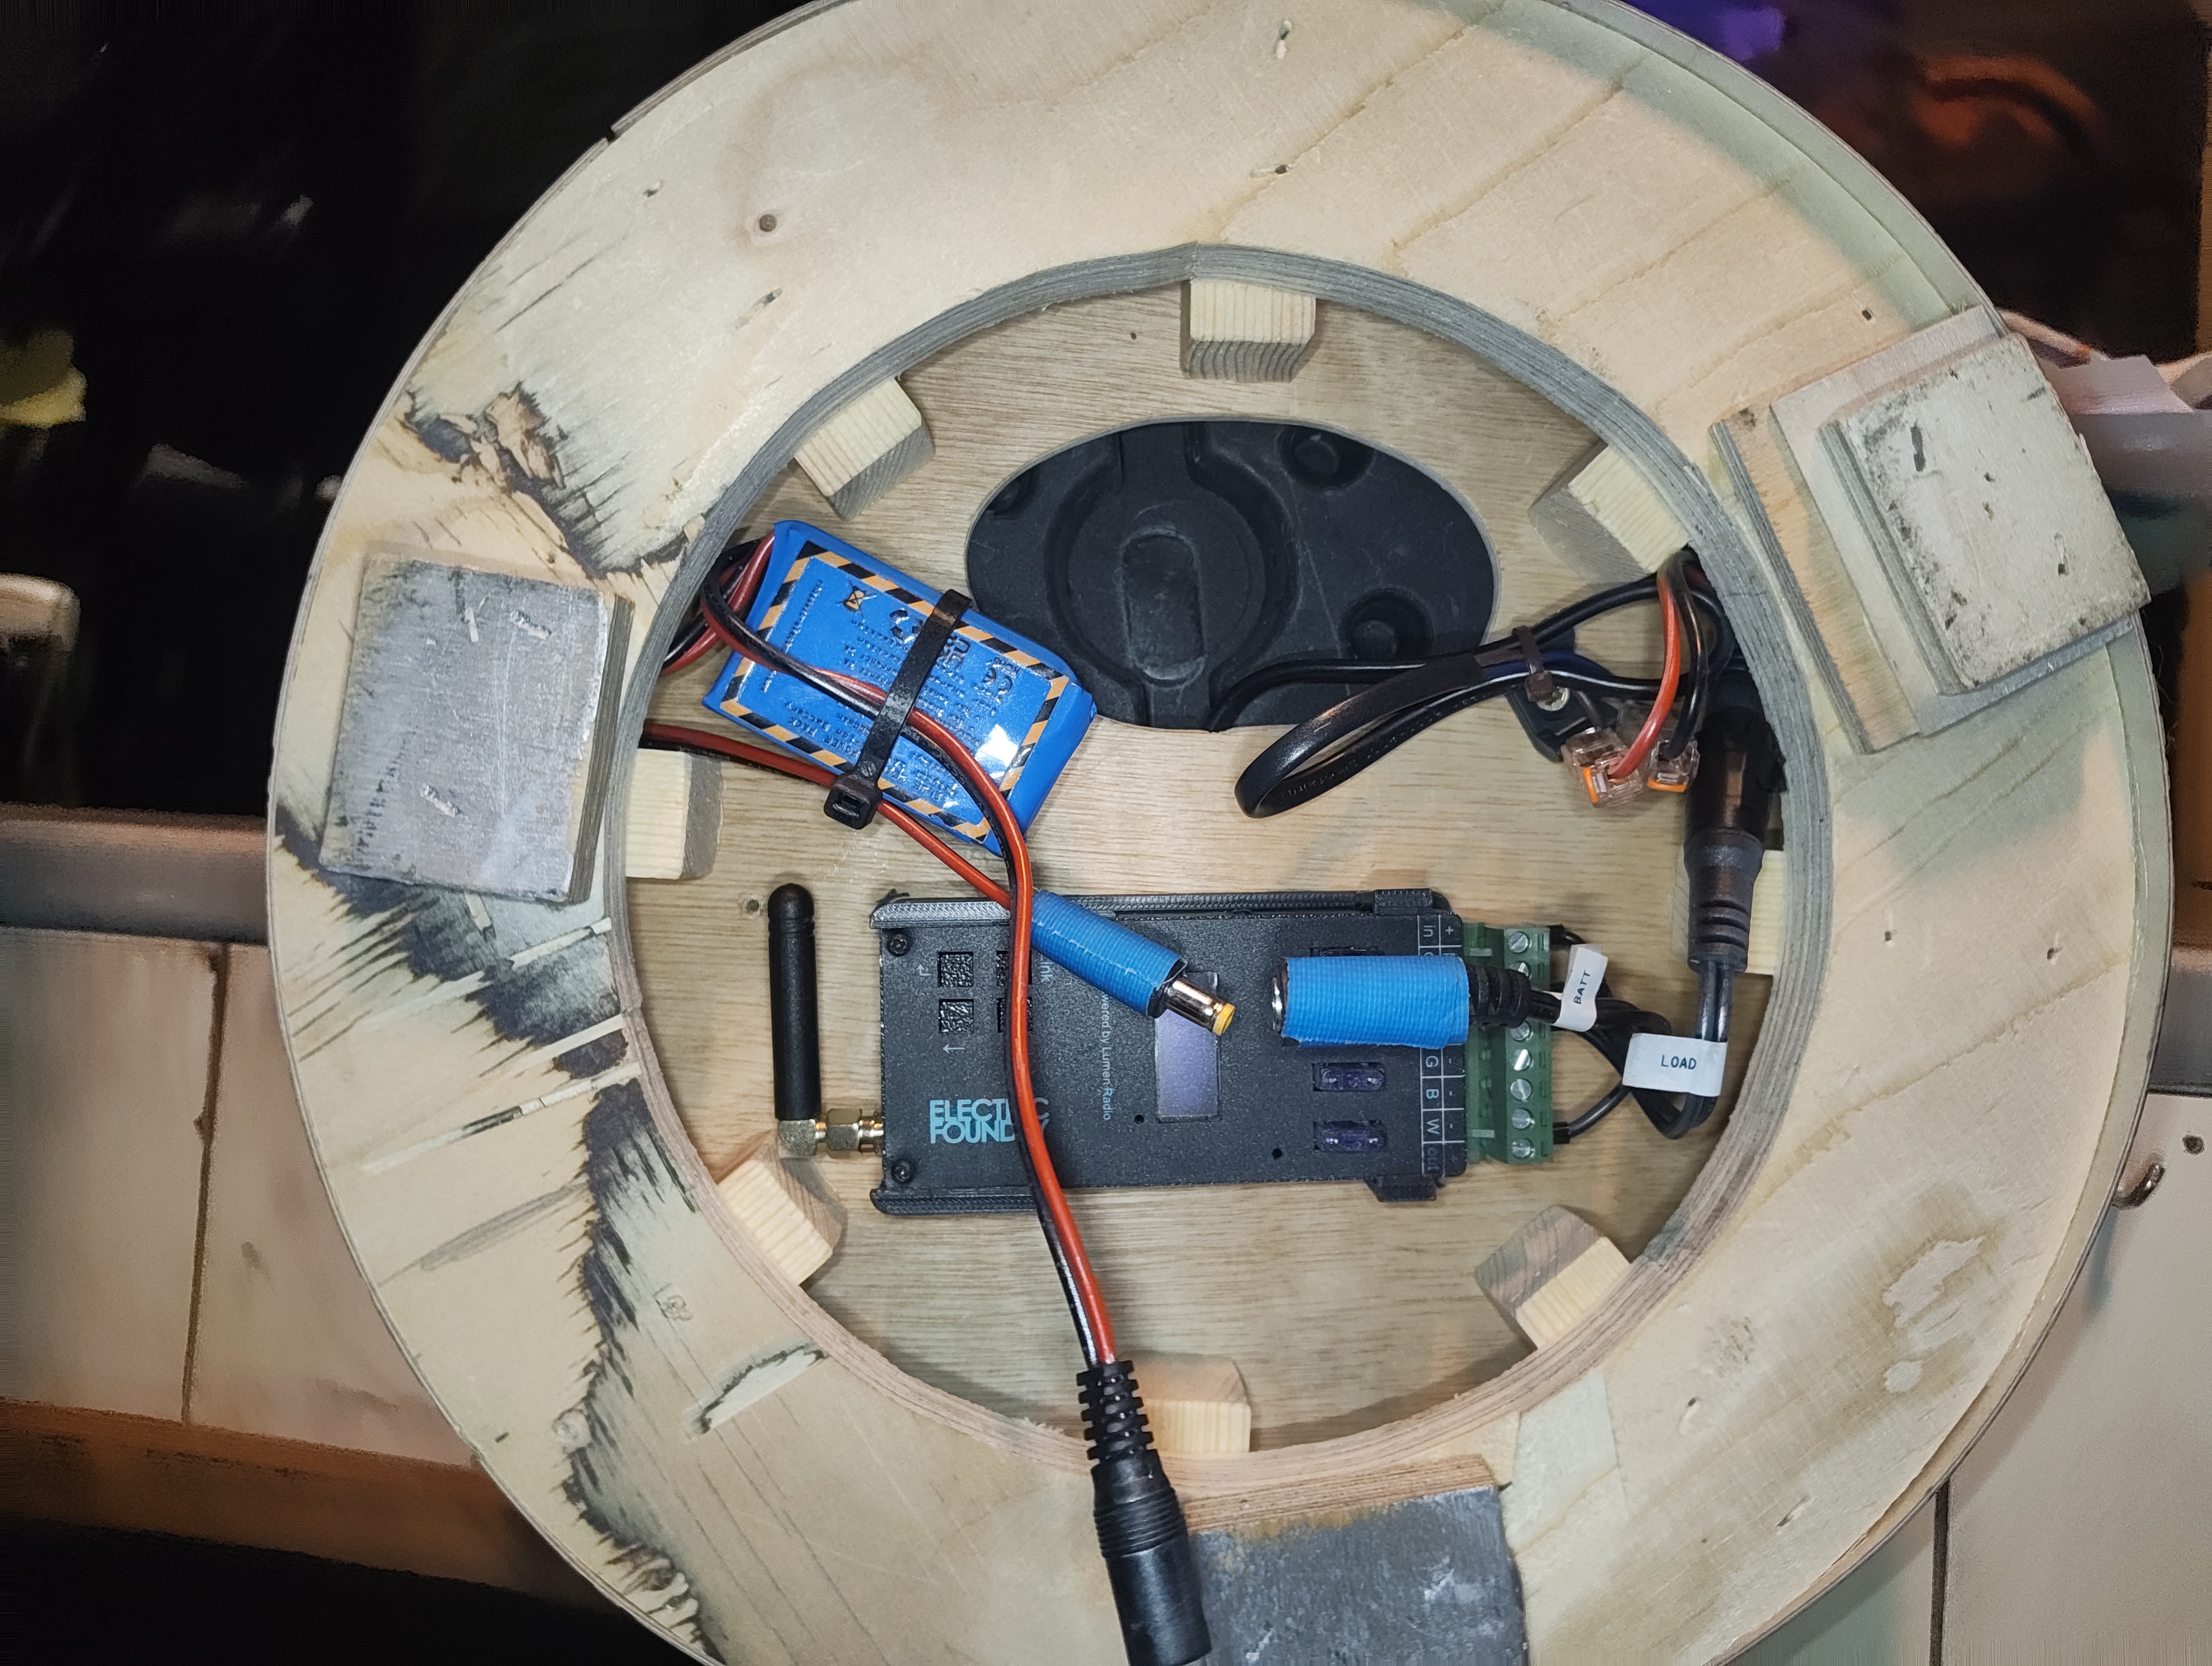
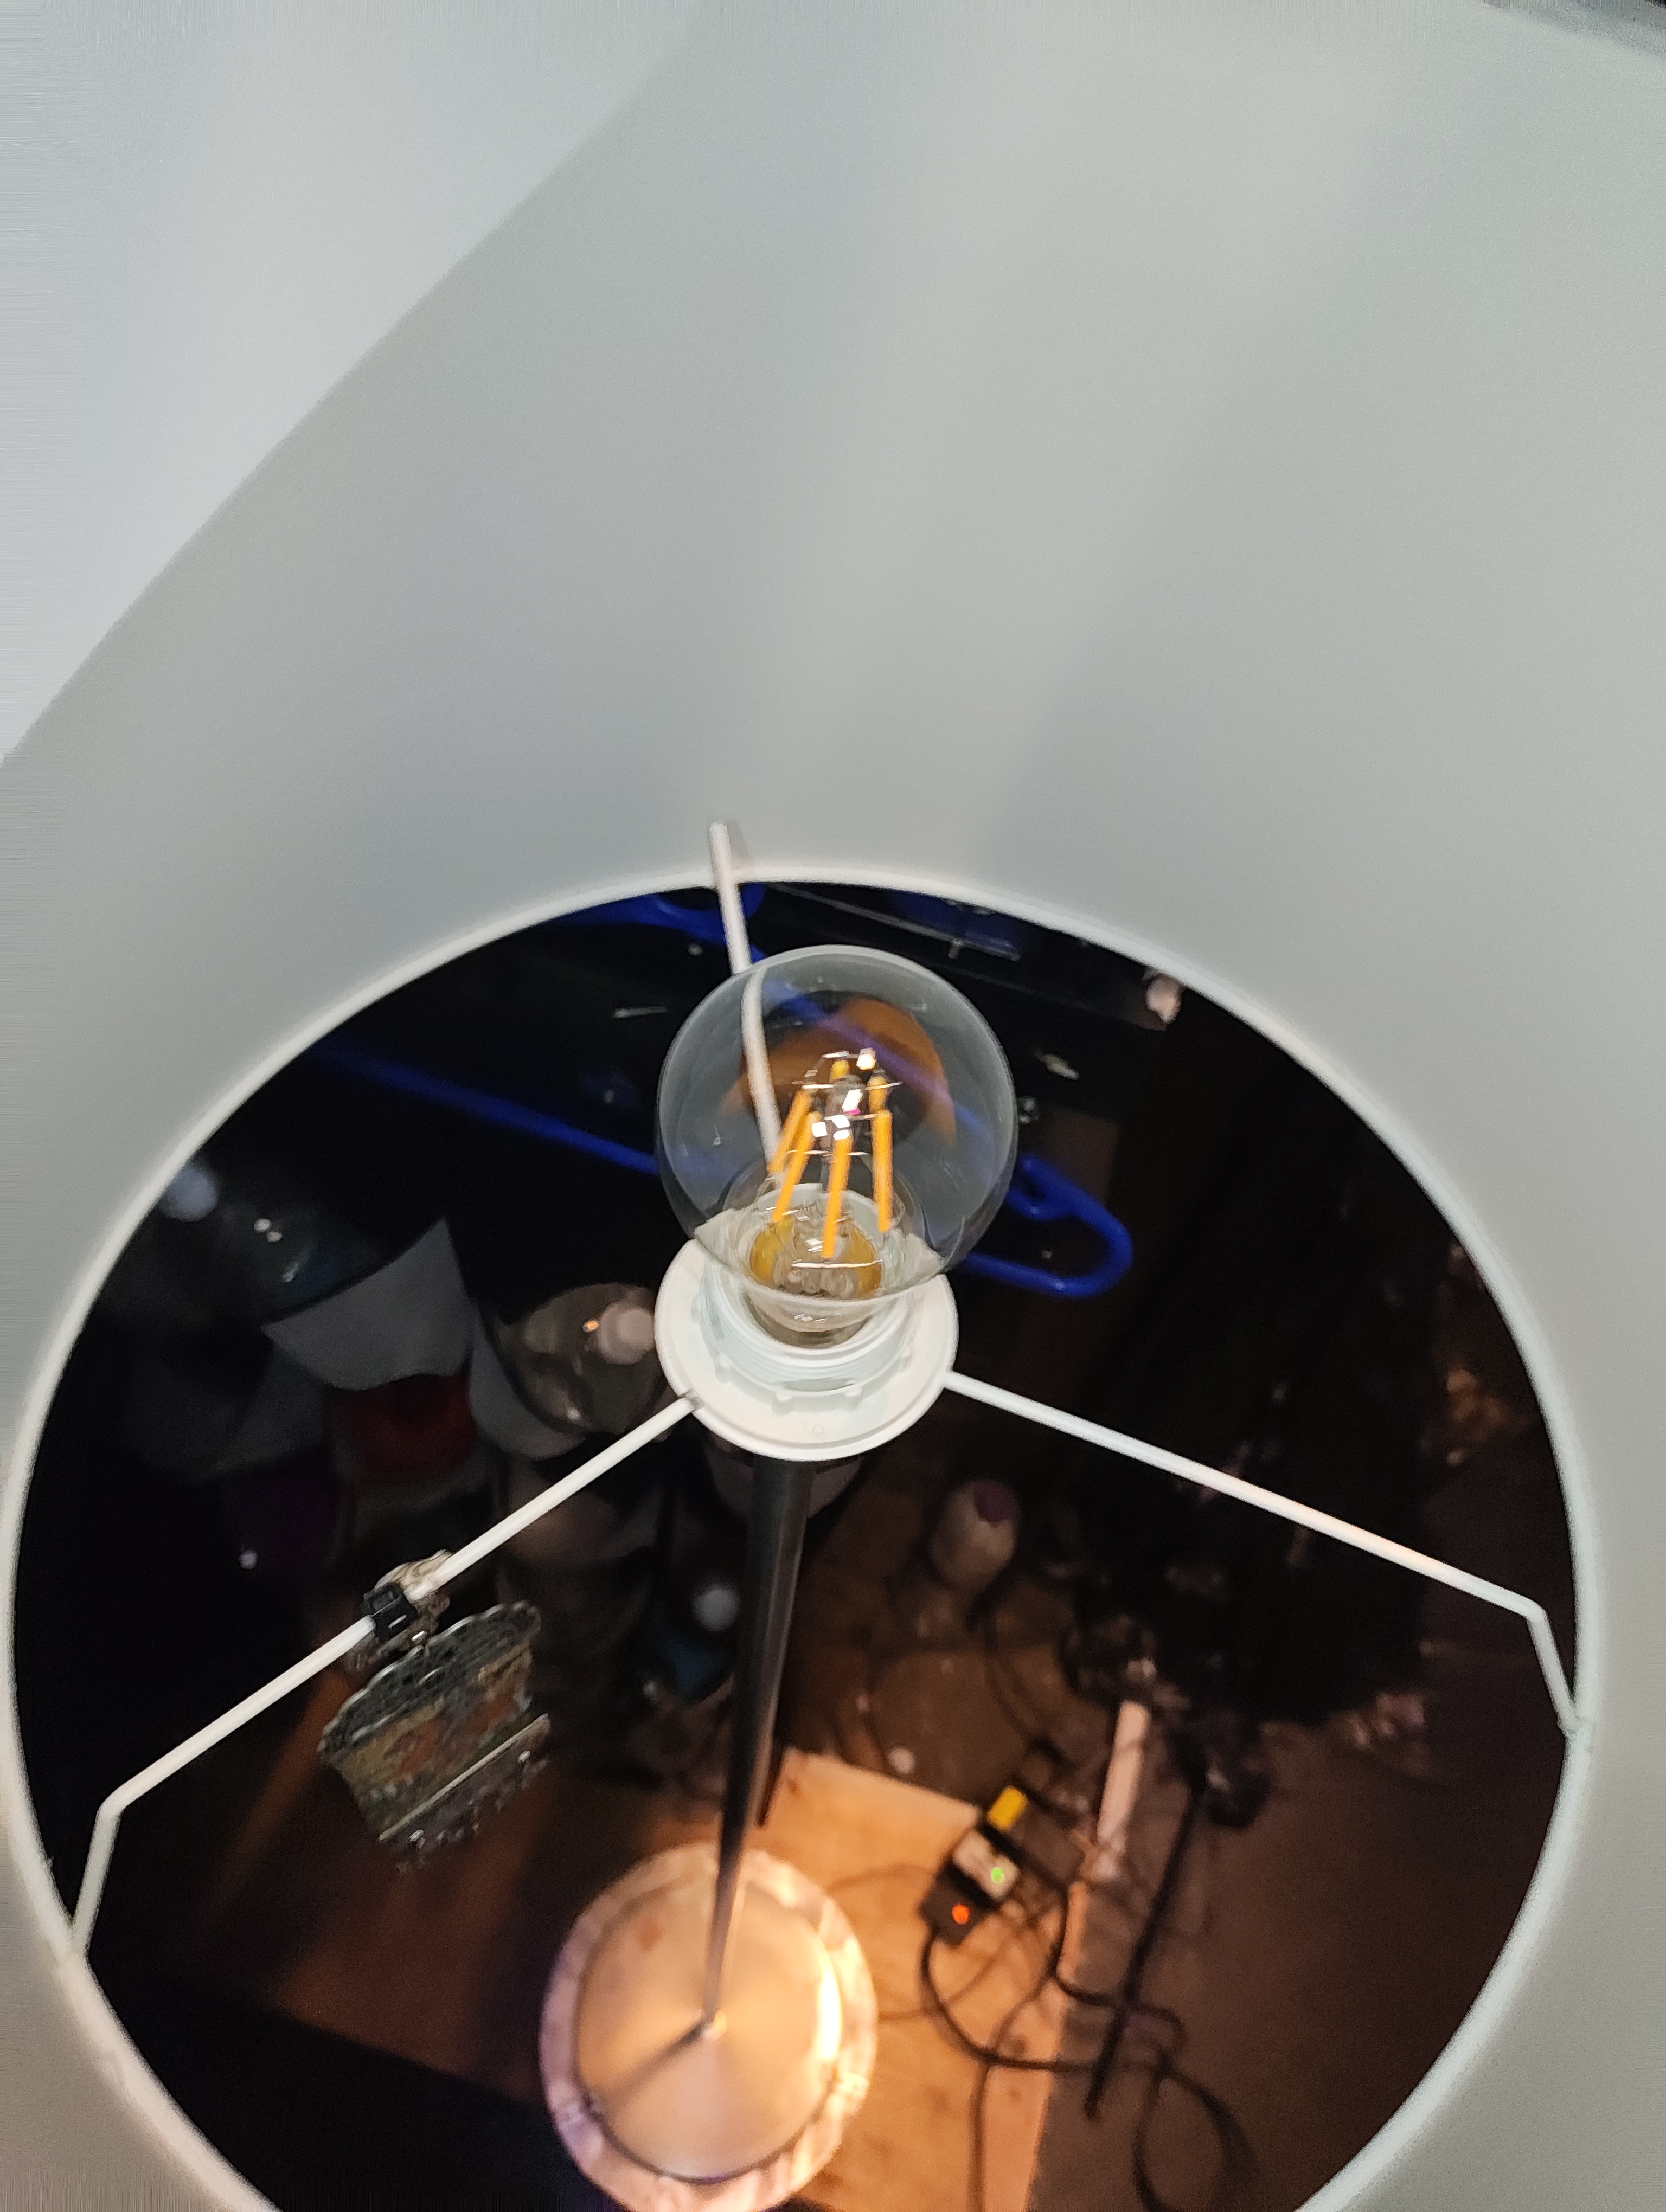
Household floor lamp with a white circular shade, used as set dressing during Martina's house scenes. The unit has a single warm LED filament bulb on one channel of dimming. It is powered by a 12V LiPo battery pack terminated in a barrel jack, charged with a standard external 12V transformer charger. The CRMX receiver and dimmer is a combo unit supplied by Electric Foundry, mounted inside the base of the lamp.
Channels & Addressing
- Channel: 831
- Fixture Type: Dimmer
- Universe/Address: 14/11
- Label: MARTINA - STANDARD LAMP
- Parameters: Intensity only (single channel dimmer)
Power & Control
| Power Source | 12V LiPo battery (barrel jack connector) |
| Dimmer / CRMX Receiver | Electric Foundry combo unit (built-in CRMX) |
| DMX Source | CRMX Stardust Transmitter |
| Charger | External 12V transformer charger (barrel jack) |
Charging
Battery output must be unplugged while charging the LiPo. Do not charge with the load connected.
Wiring
Power Flow
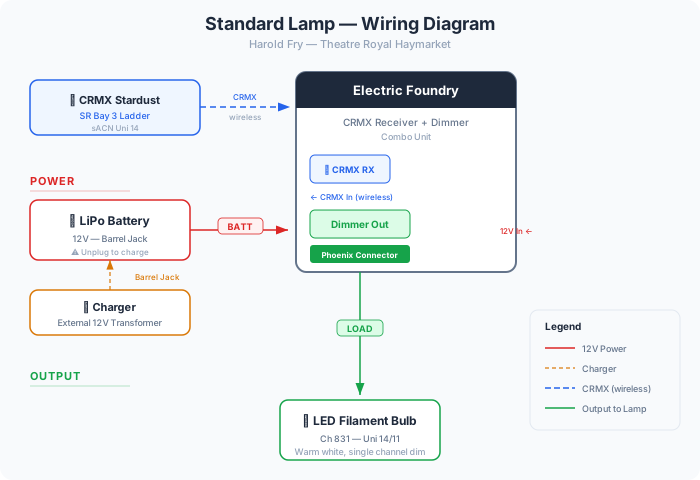
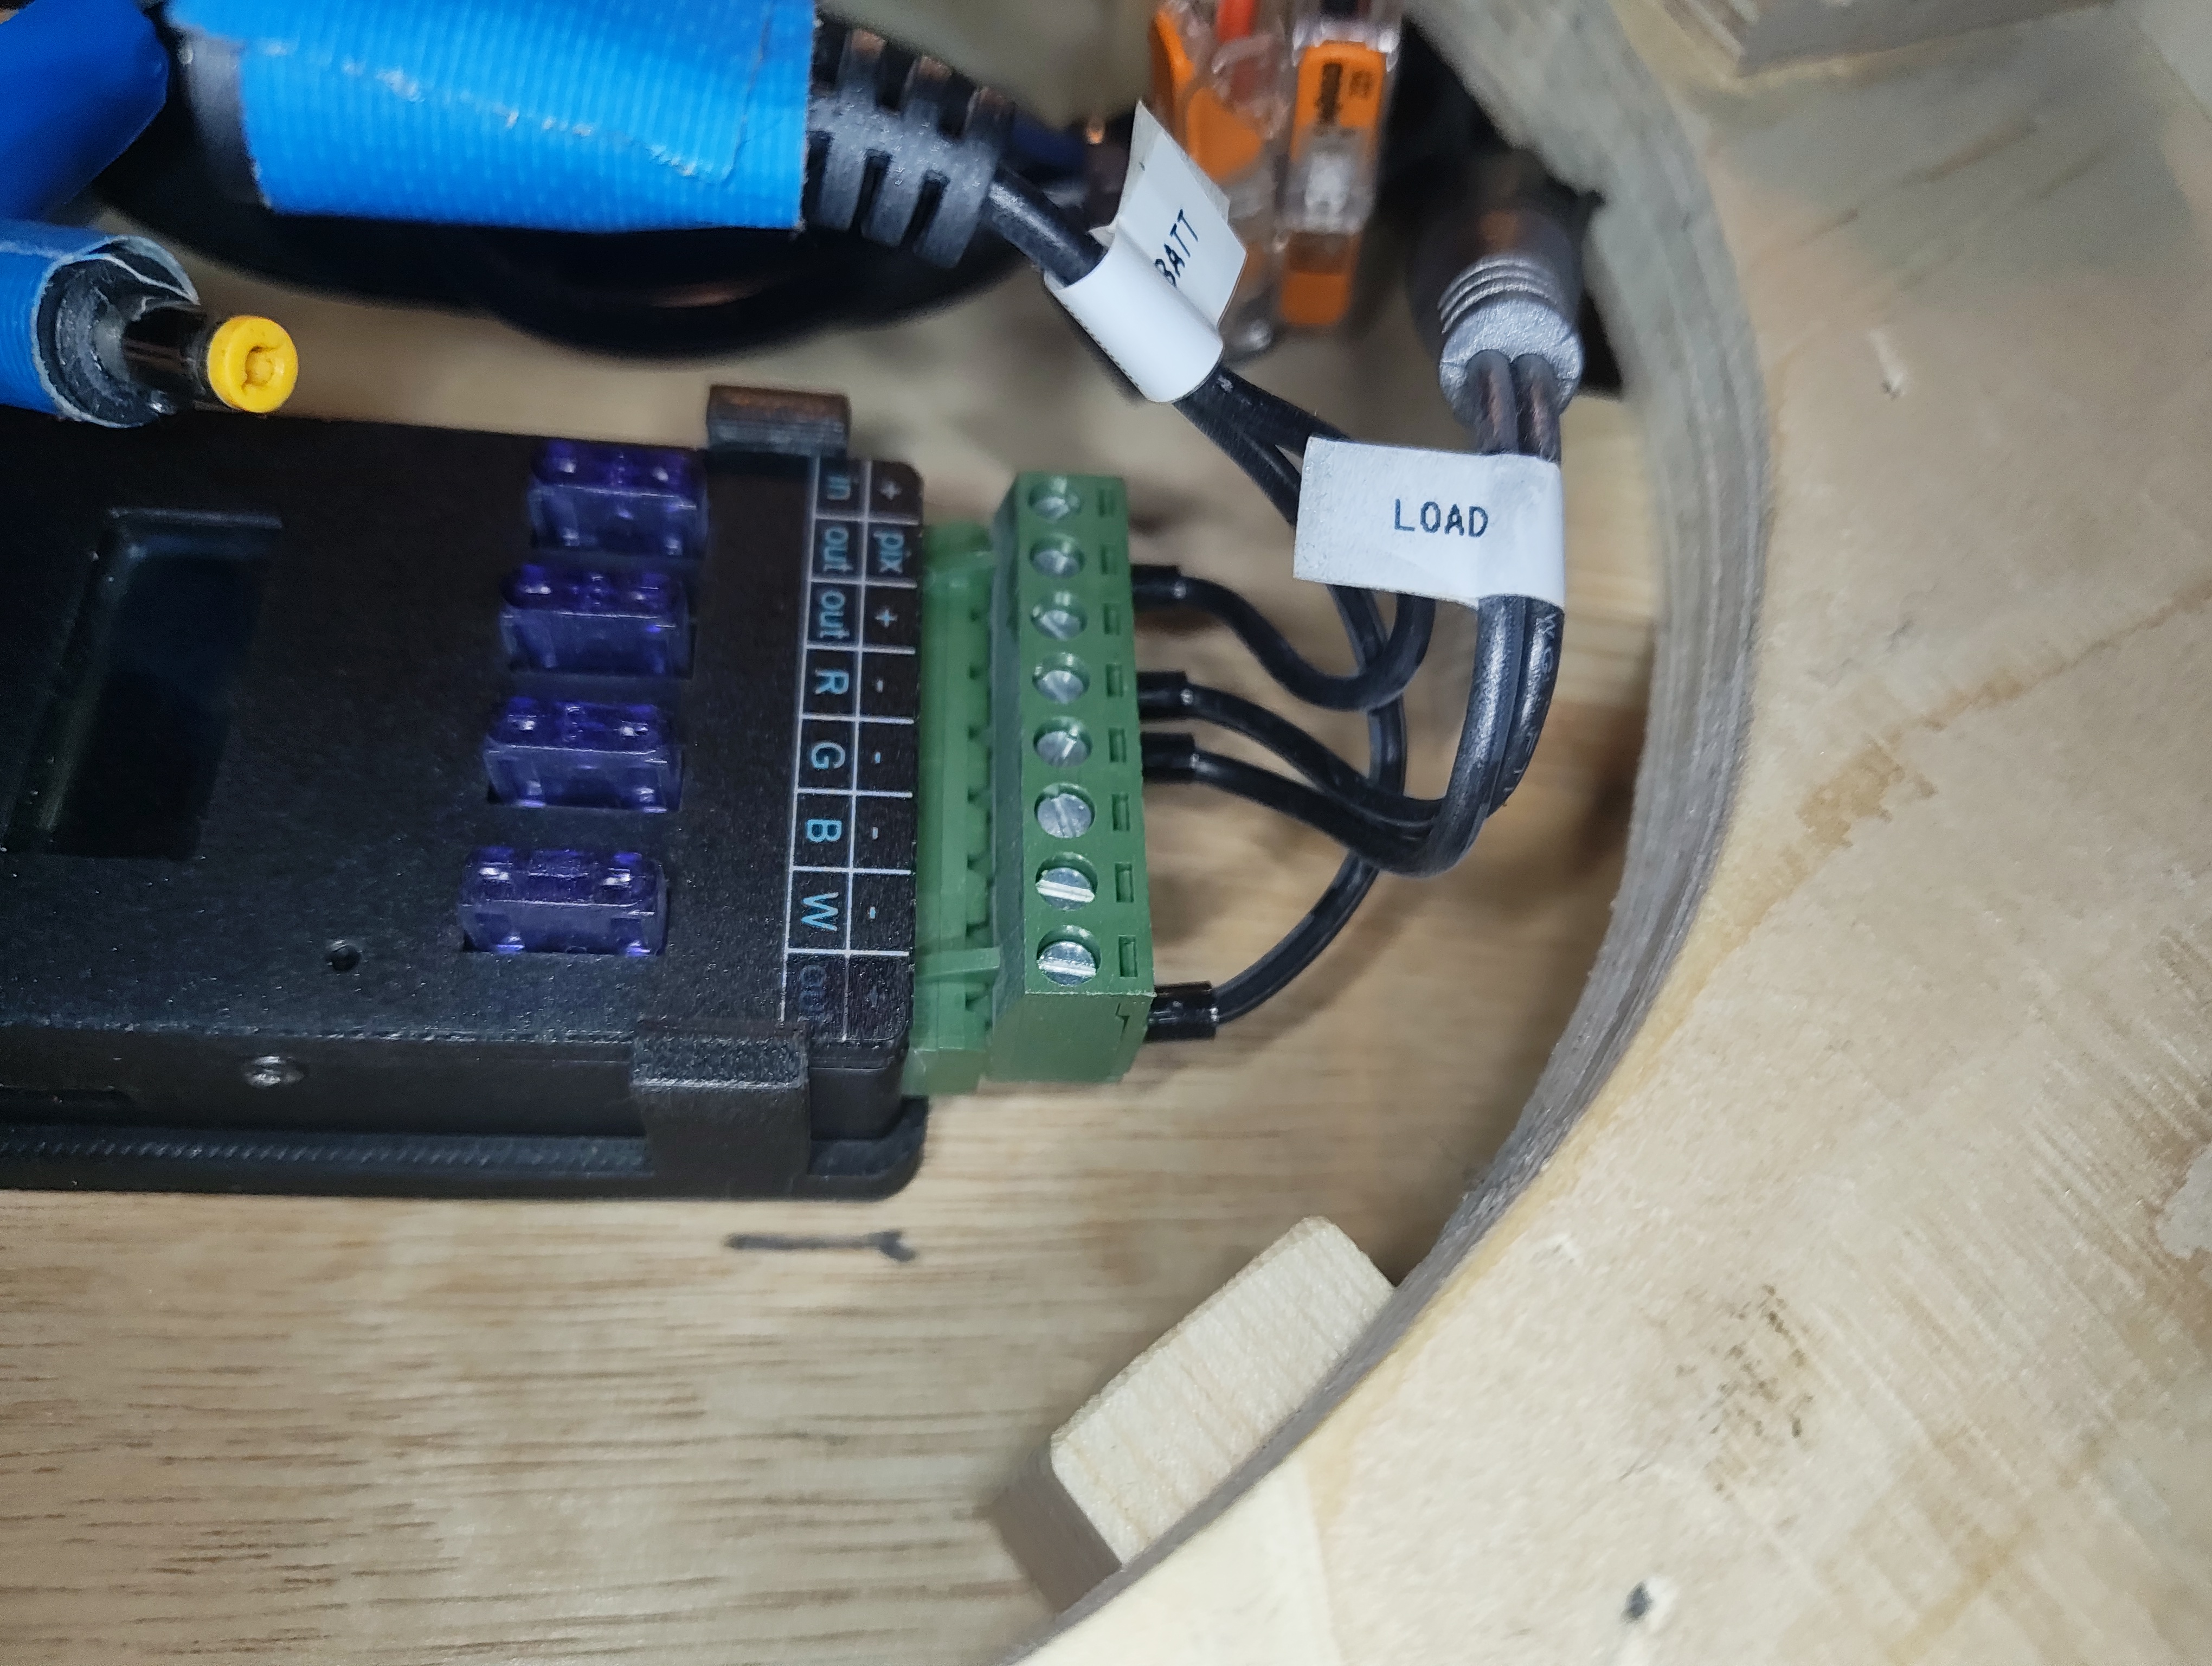
The 12V LiPo battery connects via a barrel jack into the Electric Foundry unit. The unit has two labelled cable pairs coming off the green phoenix connector:
- BATT — battery input (12V from the LiPo via barrel jack)
- LOAD — output to the lamp bulb (dimmed)
The Electric Foundry unit handles both CRMX reception and dimming internally — there is no separate DMX cable. The CRMX antenna is mounted on the unit with an SMA connector.
DMX
The Electric Foundry combo unit receives CRMX wirelessly from the Stardust transmitter on SR Bay 3 Ladder. No physical DMX connection is needed — it's all handled internally by the unit.
Images
Key Views
All Reference Photos
All Reference Photos (click to expand)
Usage
The fixture is used during the Martina's house scenes as part of the set dressing — it is on throughout the scene (approx 8 mins).
Troubleshooting
- Fault: Not switching on (no power)
- Check: Barrel jack connection might need reseating
- Check: LiPo battery charge level
- Check: CRMX link status on the Electric Foundry unit
Flow Flurries (Titan Tubes)
Overview
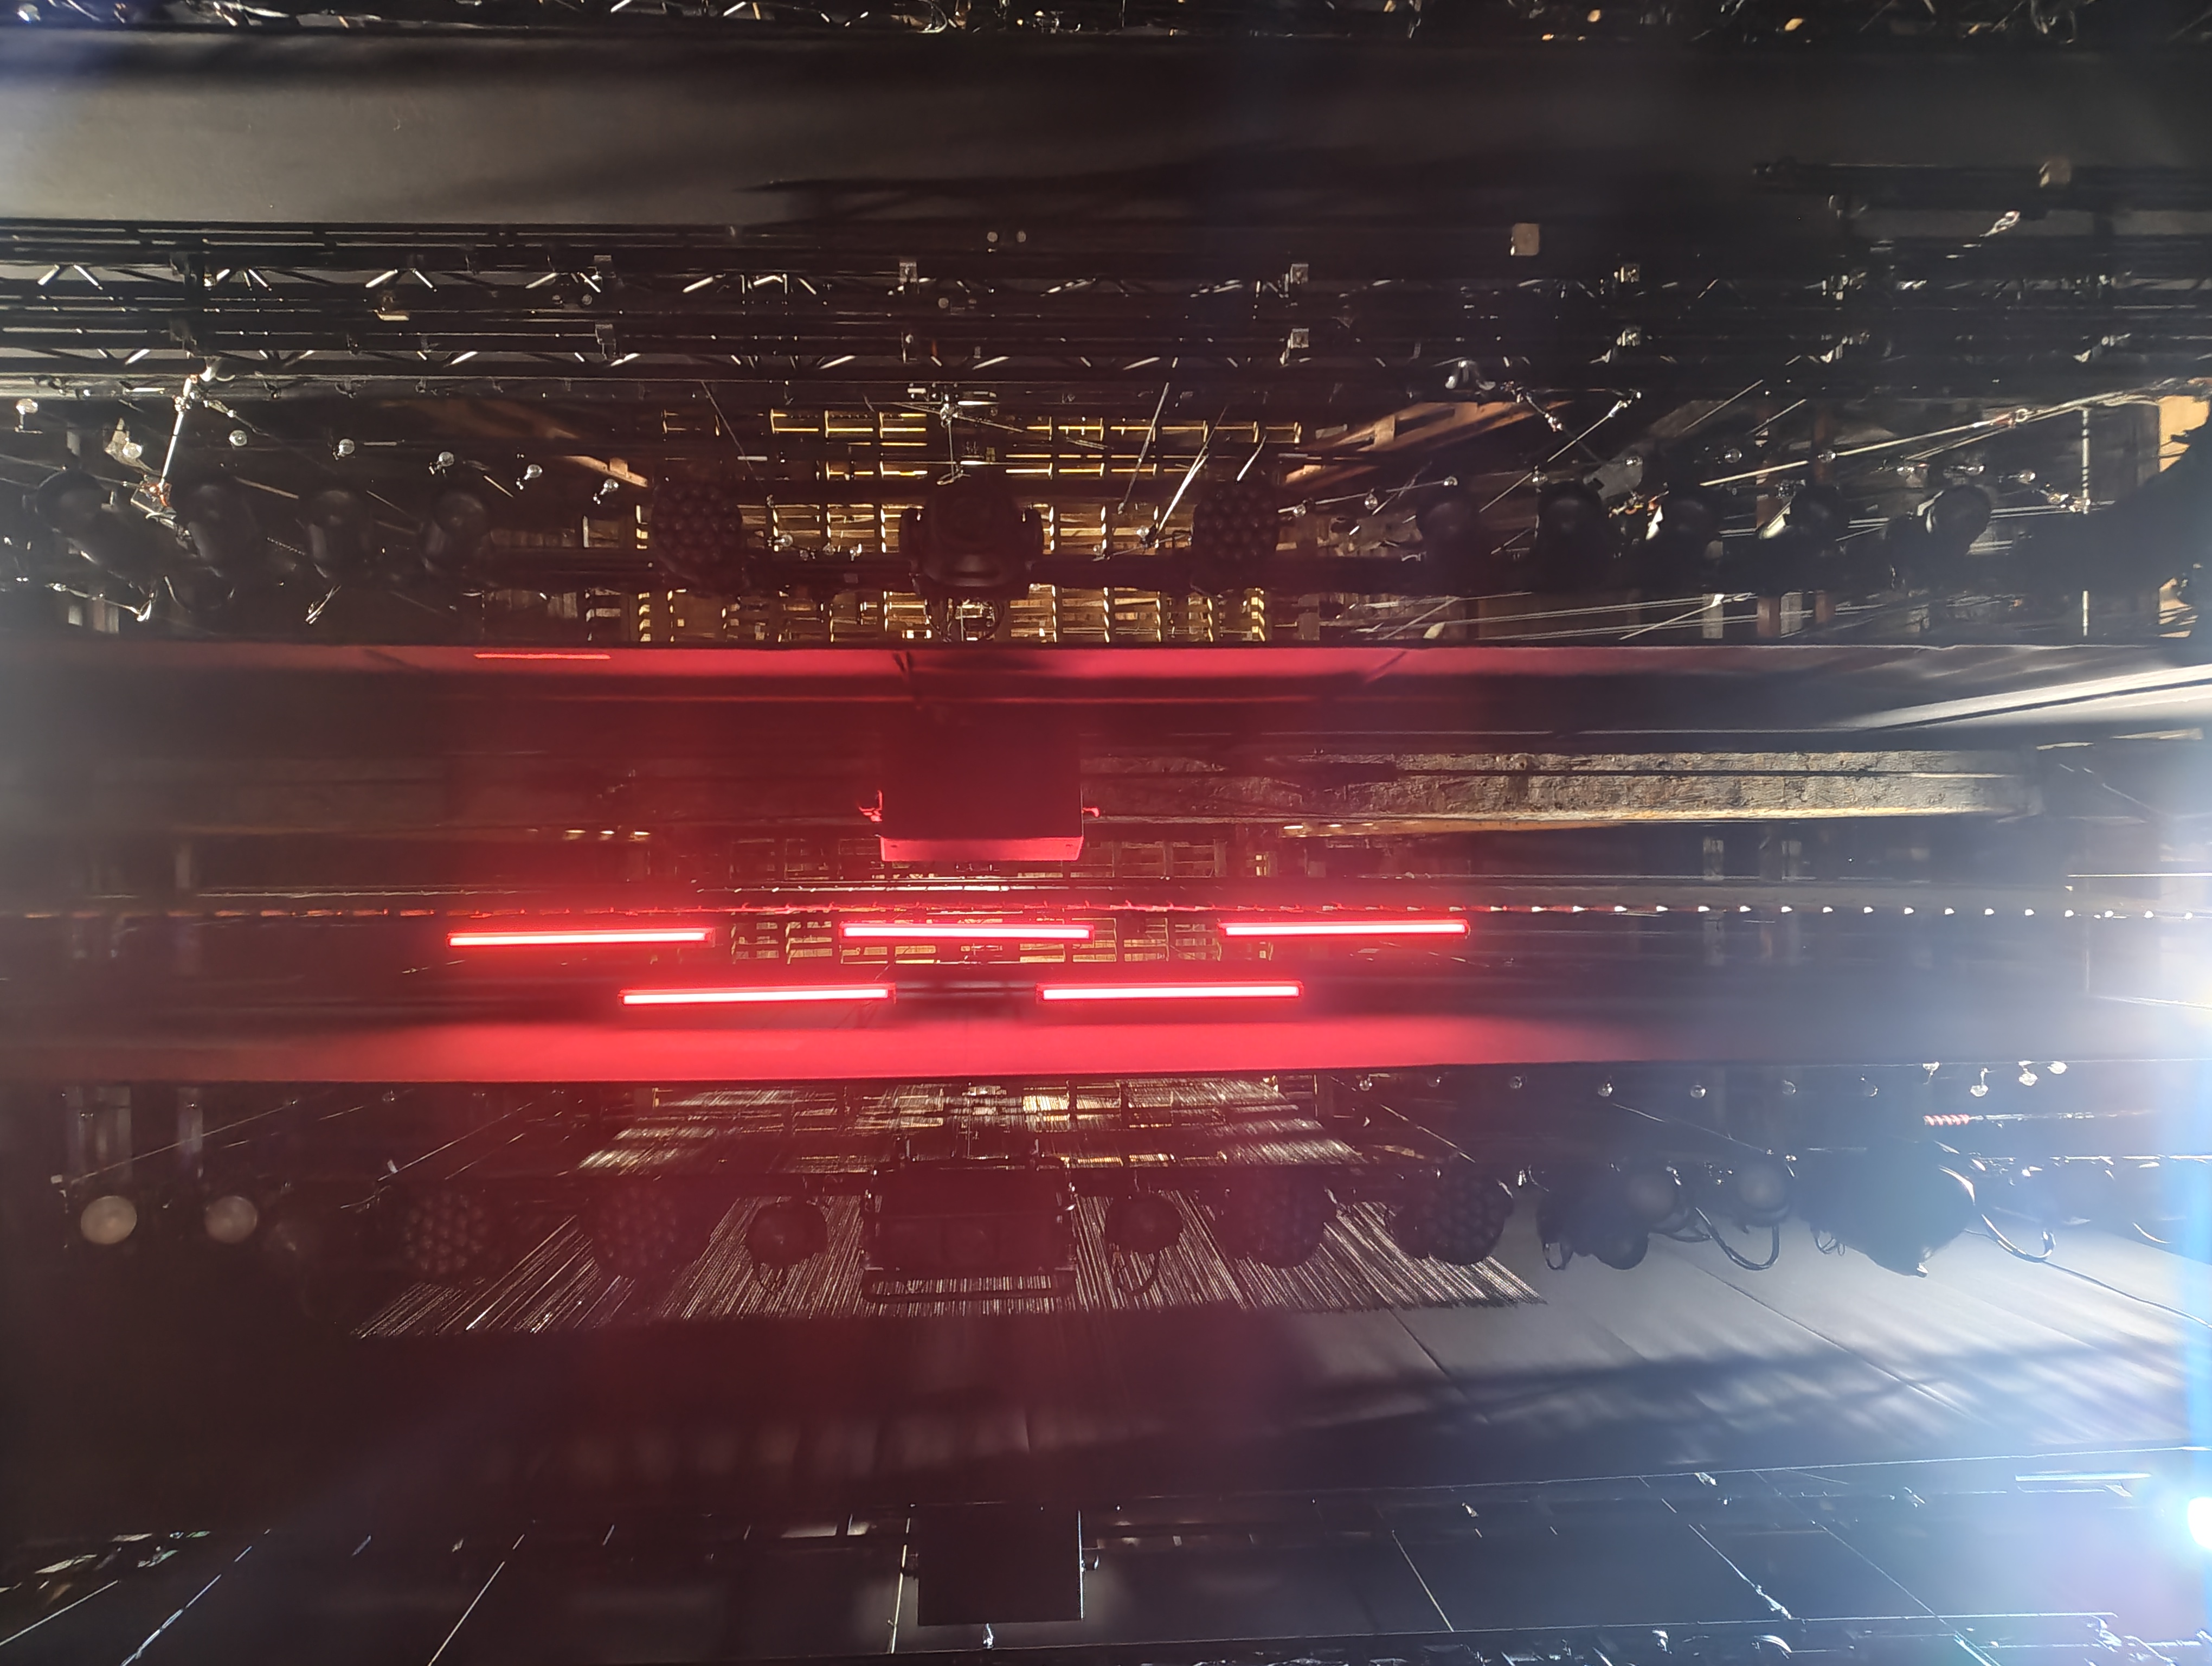
The Flow Flurries are 5 Astera Titan Tubes housed in enclosures designed to look like fluorescent tubes. They are mounted on individual drifts on a fly bar and flown in for the Garage Girl song to emulate fluorescent strip lighting. The tubes are controlled wirelessly via the Astera CRMX system built into each tube.
Power is supplied via a standard Astera Titan Tube DC charger with extension cables running up to each tube on the fly bar.
Fixture Breakdown
Titan Tubes (×5)
Each tube is an Astera Titan Tube running in DIM RGBW 1 Pixel mode (5 DMX addresses per tube). They are individually addressable and can produce a wide range of colours. In the show they are primarily used in a warm white fluorescent flicker/strike effect.
Enclosures
Each tube sits inside a custom enclosure built to resemble a standard fluorescent tube fitting. The enclosures are mounted on individual drift lines on the fly bar.
Channels & Addressing
- Channels: 741–745
- Fixture Type: Titan Tube 5: DIM RGBW 1 Pixel (Astera)
- Universe: 12
- Addresses:
- Ch 741: 12/206–210
- Ch 742: 12/211–215
- Ch 743: 12/216–220
- Ch 744: 12/221–225
- Ch 745: 12/226–230
- Parameters: Intensity, Red, Green, Blue, White (5 addresses per tube)
Power & Control
| Fixture | 5× Astera Titan Tube |
| Power Source | Internal battery (charged via Astera DC charger) |
| Charger | Standard Astera Titan Tube DC charger with extensions |
| DMX Source | CRMX Stardust Transmitter (Uni 12) |
| DMX Mode | DIM RGBW 1 Pixel (5ch per tube) |
| Mounting | Individual drifts on fly bar |
Charging
The tubes are charged via the Astera DC charger with extension cables. Charge overnight — the tubes have sufficient battery life for the full show but should be topped up daily.
CRMX Linking
The Titan Tubes have built-in CRMX receivers. They are linked to the Stardust on Universe 12 (separate from the Universe 14 used by most other wireless practicals).
Images
Key Views
All Reference Photos (click to expand)
Components List
| Component | Detail |
|---|---|
| Titan Tubes | 5× Astera Titan Tube |
| Charger | Astera DC charger with extensions |
| Enclosures | Custom fluorescent tube housings |
| Mounting | Individual drifts on fly bar |
Usage
The Flow Flurries are flown in for the Garage Girl song where they emulate fluorescent strip lighting. They produce a fluorescent flicker/strike effect as they come on.
Troubleshooting
- Tube not lighting up:
- Check battery charge level via the Astera app or tube's built-in display
- Check CRMX link — re-link to the Stardust if needed
- Check DMX address matches the patch (use Astera app to verify)
- Colour mismatch between tubes:
- Check all tubes are in the same DMX mode (DIM RGBW 1 Pixel)
- Check firmware versions are consistent across all 5 tubes
- Short battery life:
- Ensure tubes are fully charged overnight via the DC charger
- Check extension cable connections are secure
Roaming Power Tiny (Mini Smoke Machine)
Overview
The Roaming Power Tiny is a wireless battery-operated mini fog machine used to add smoke to the fire barrel in the Brazier and on the rolling staircase during the storm sequence.
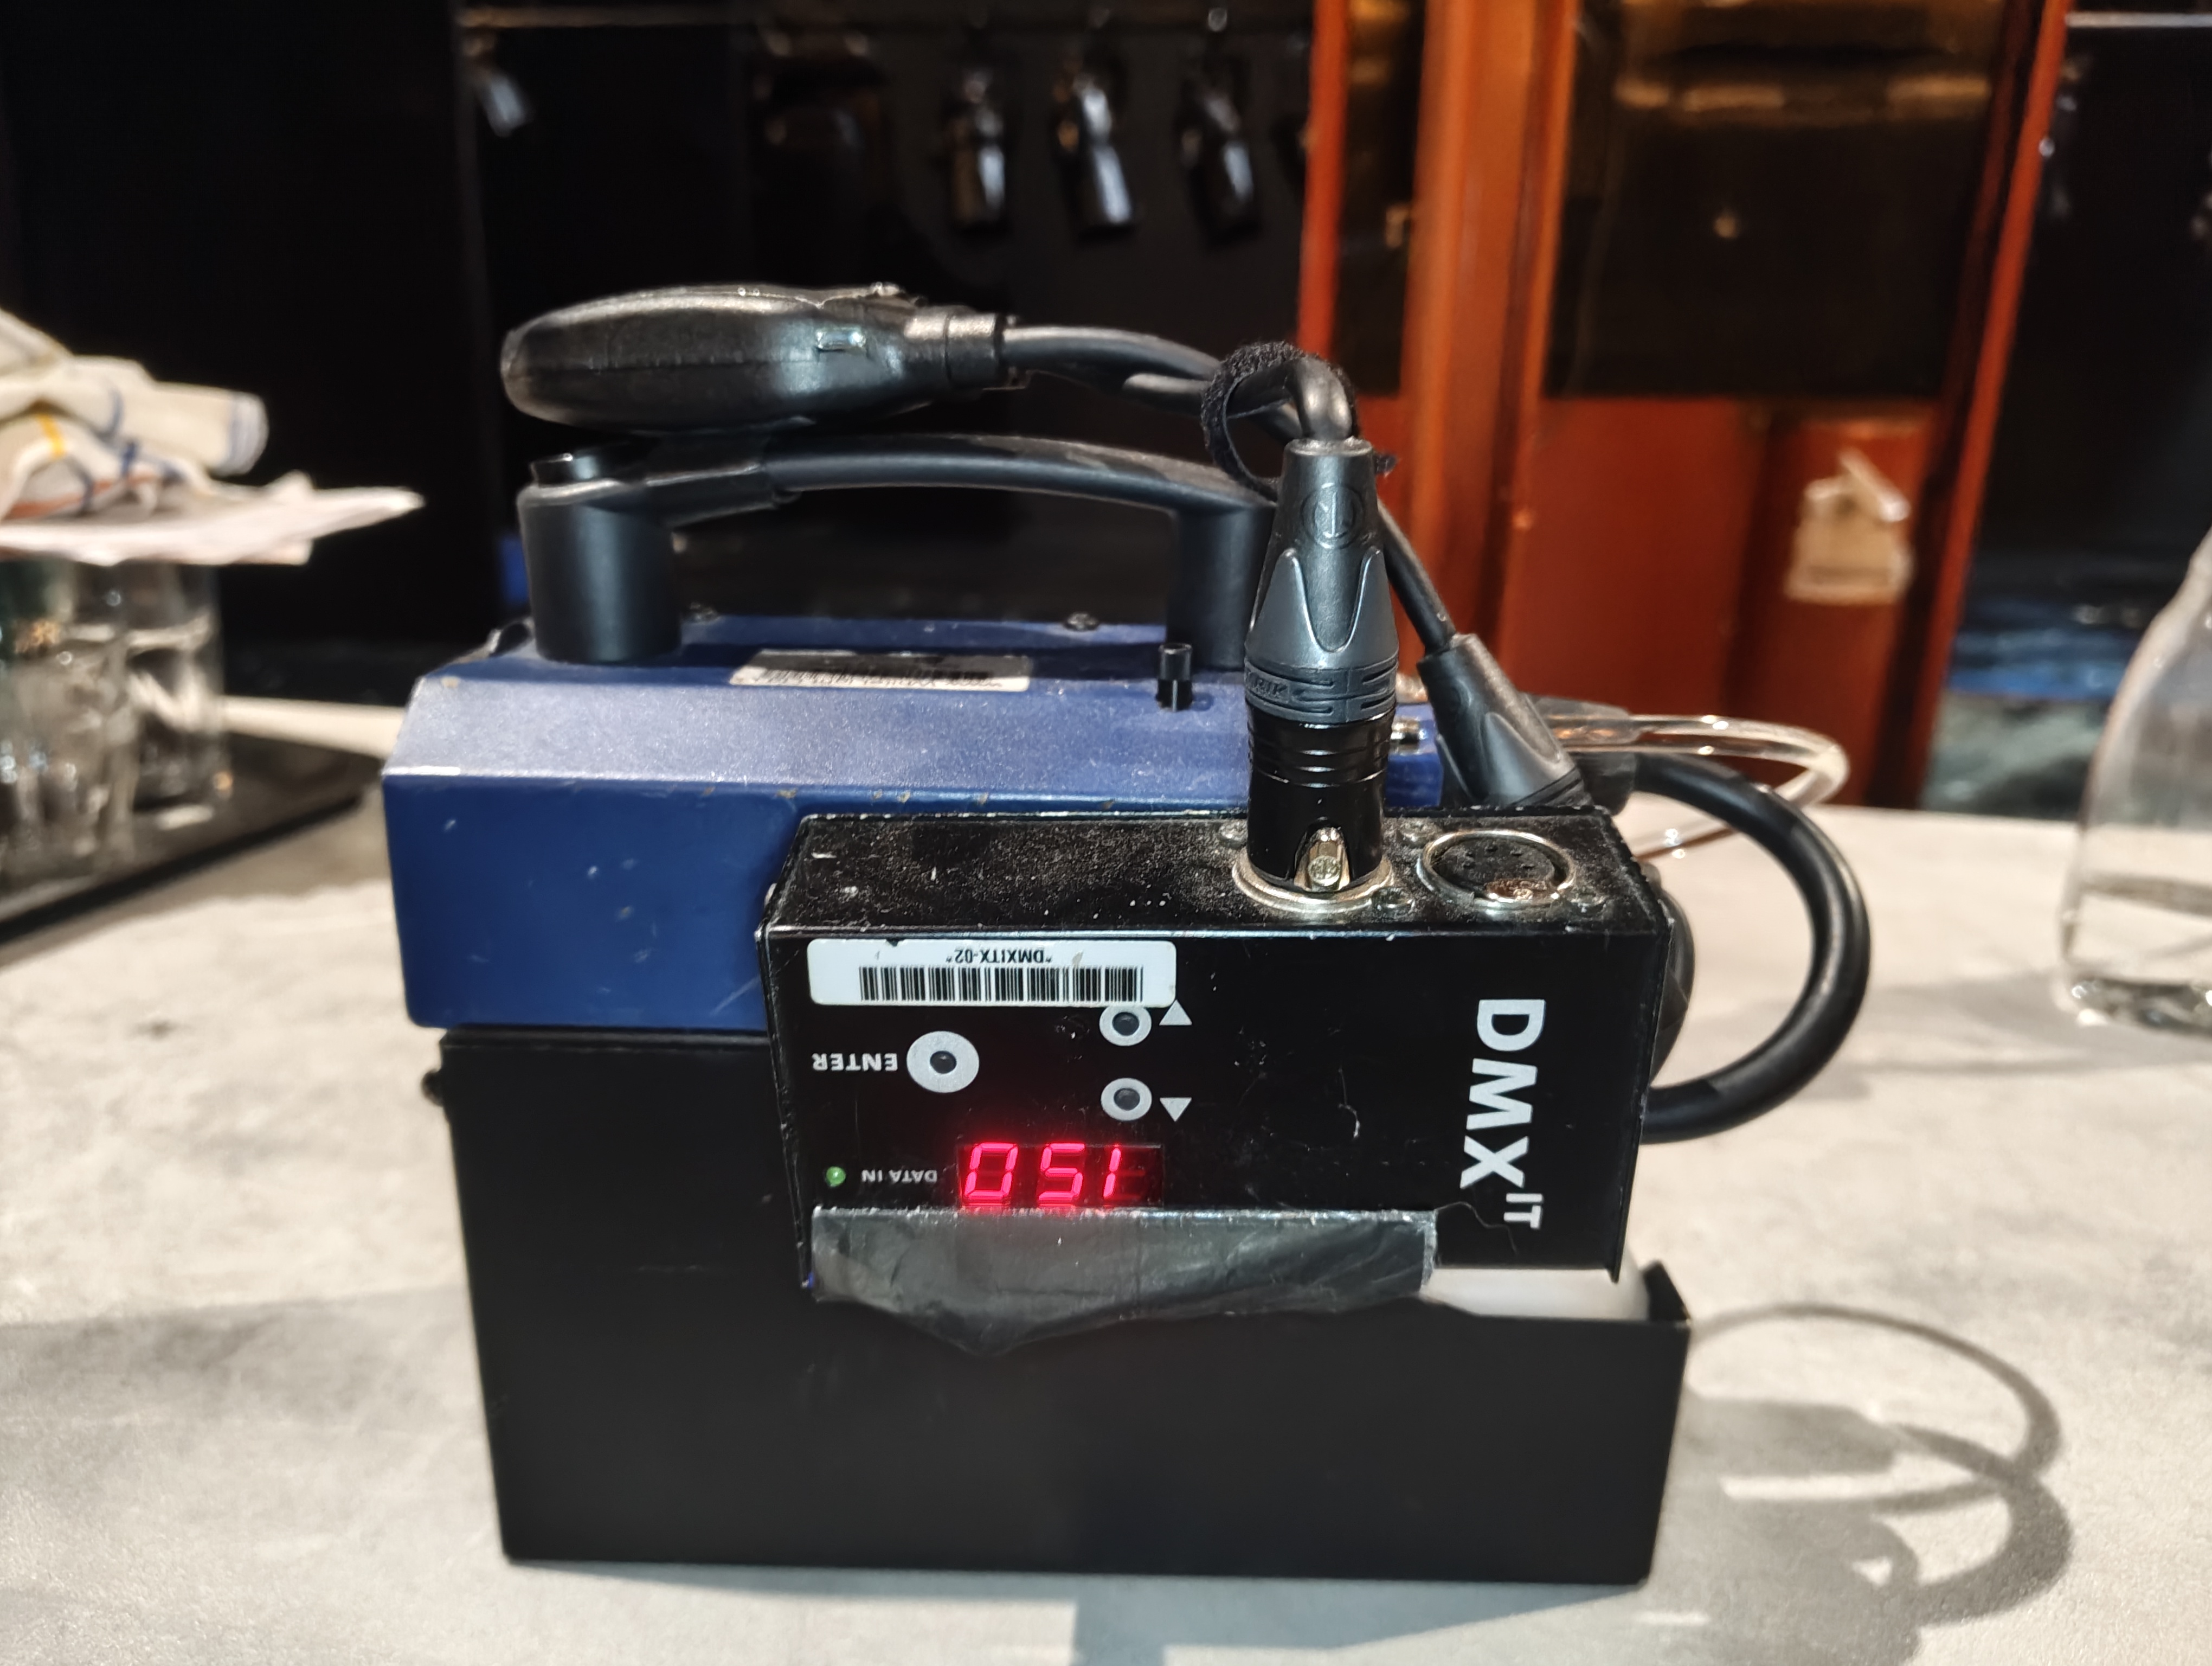
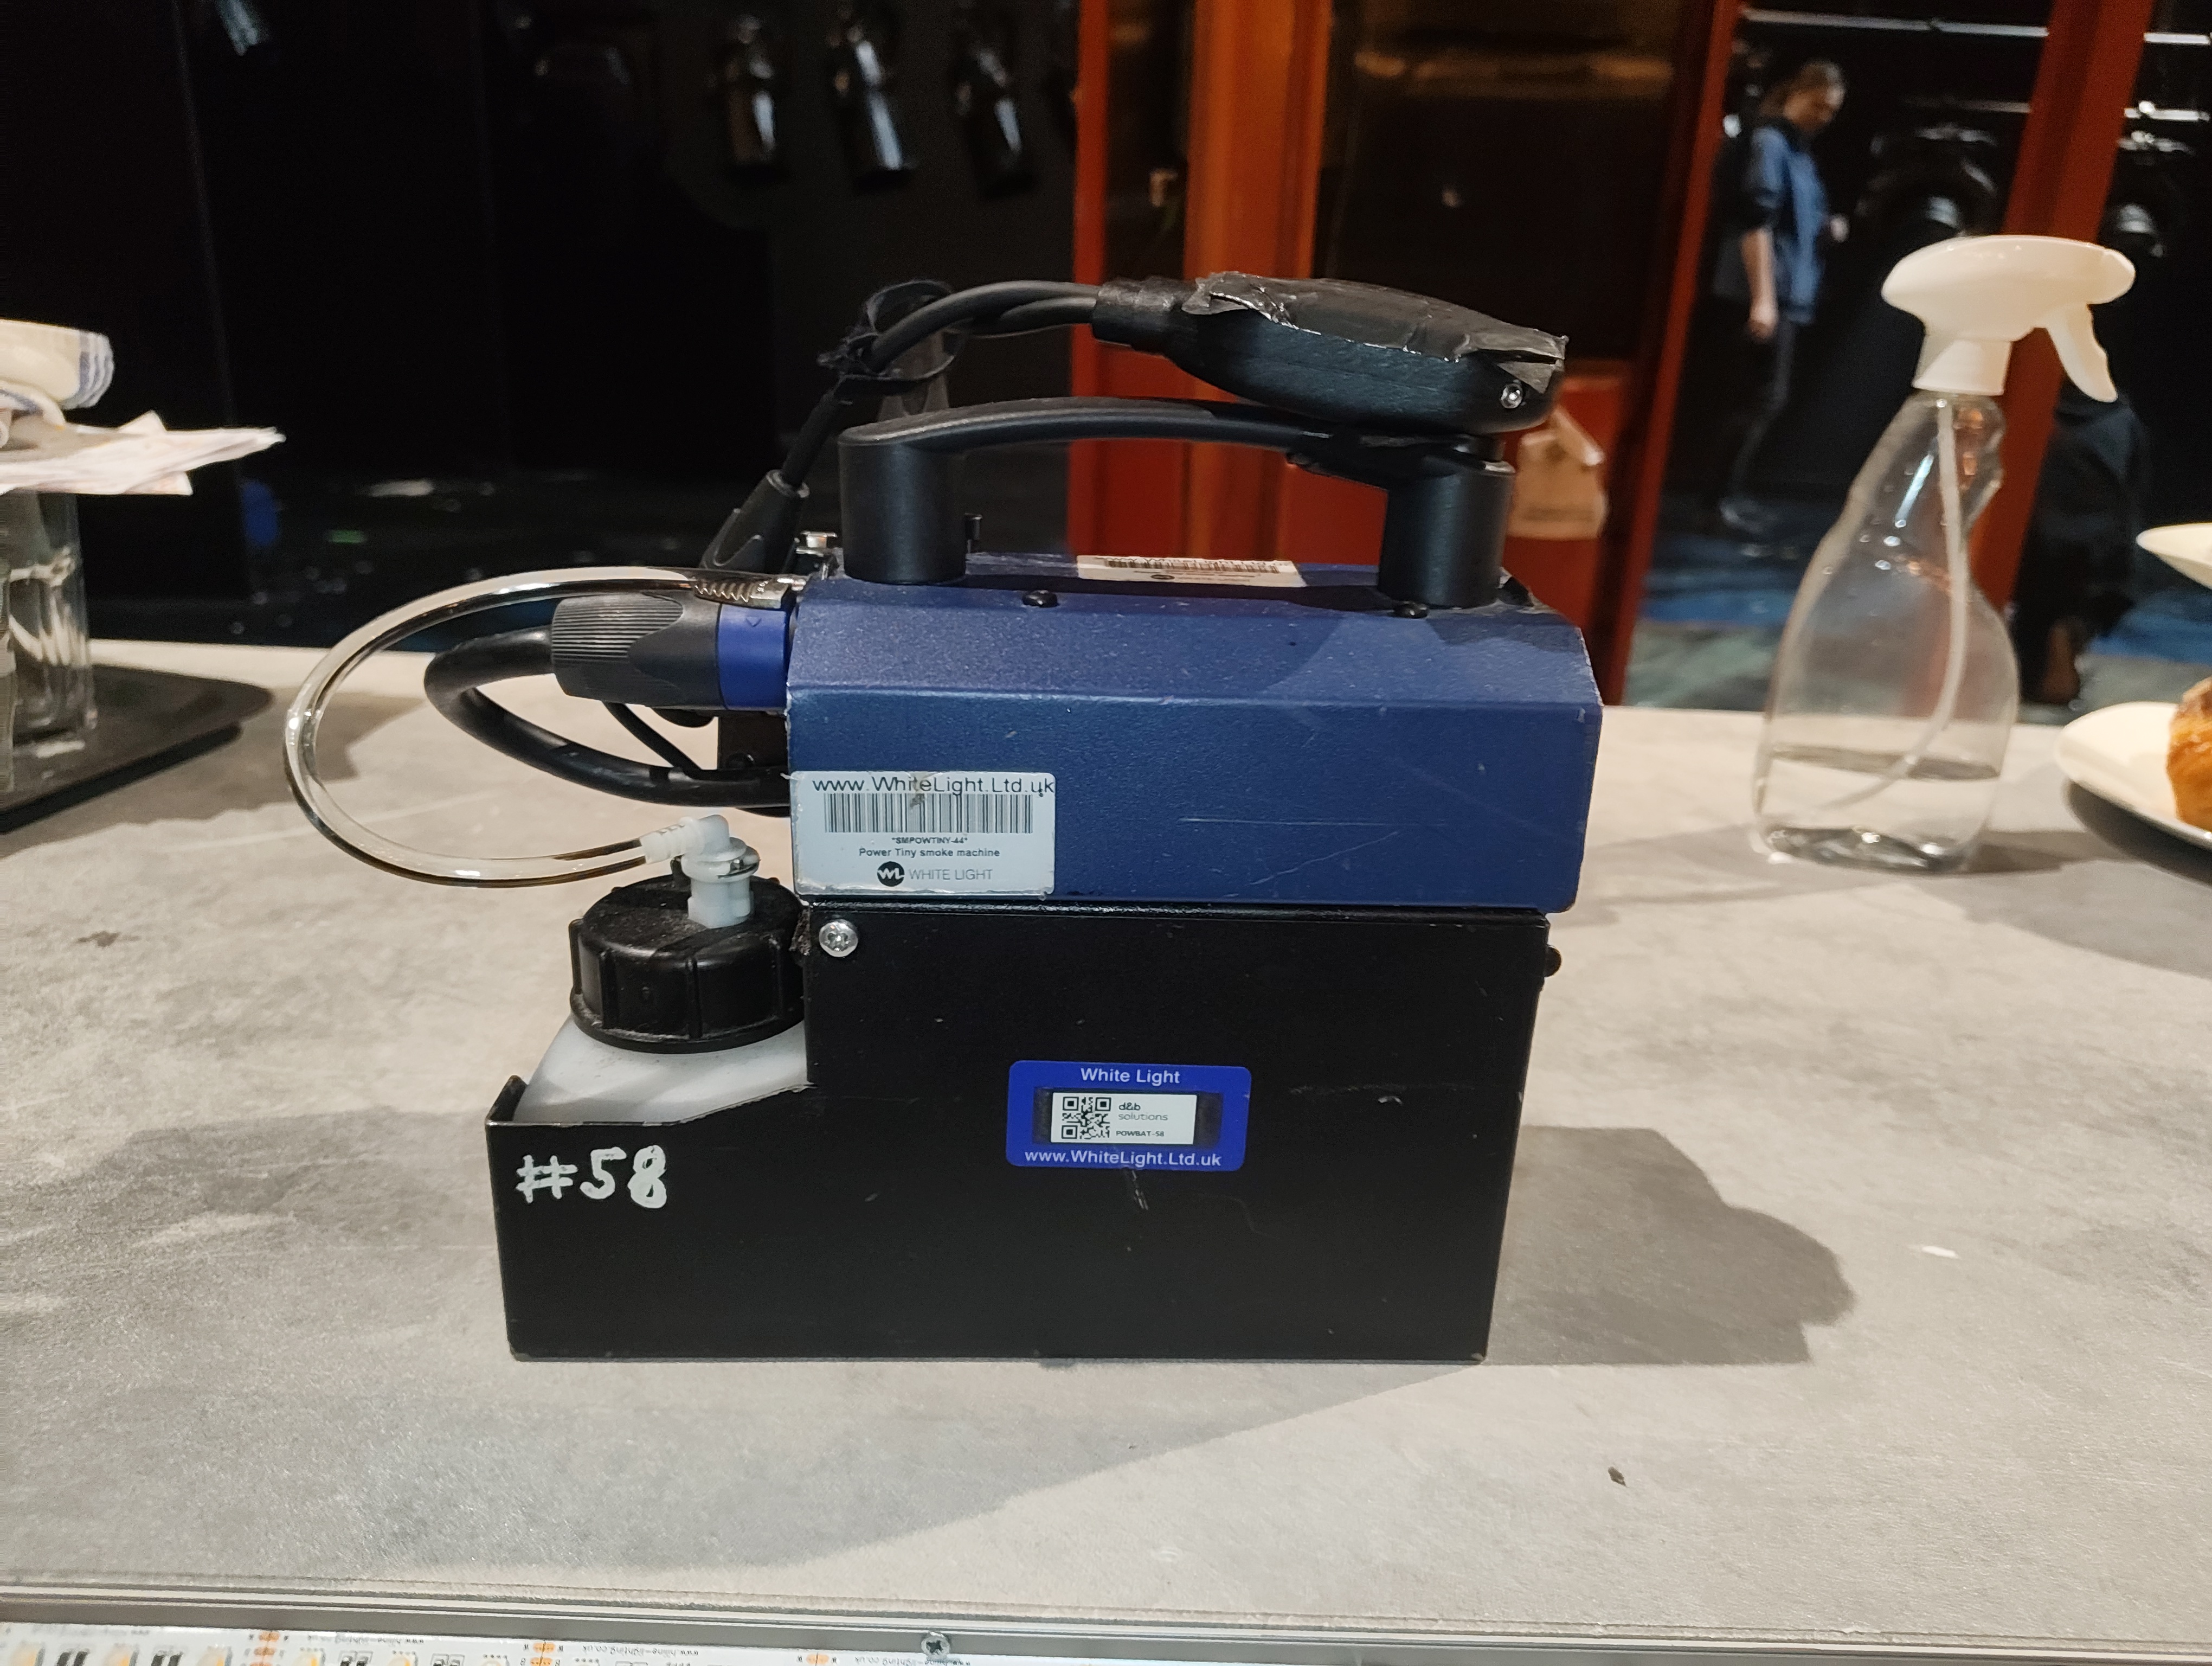
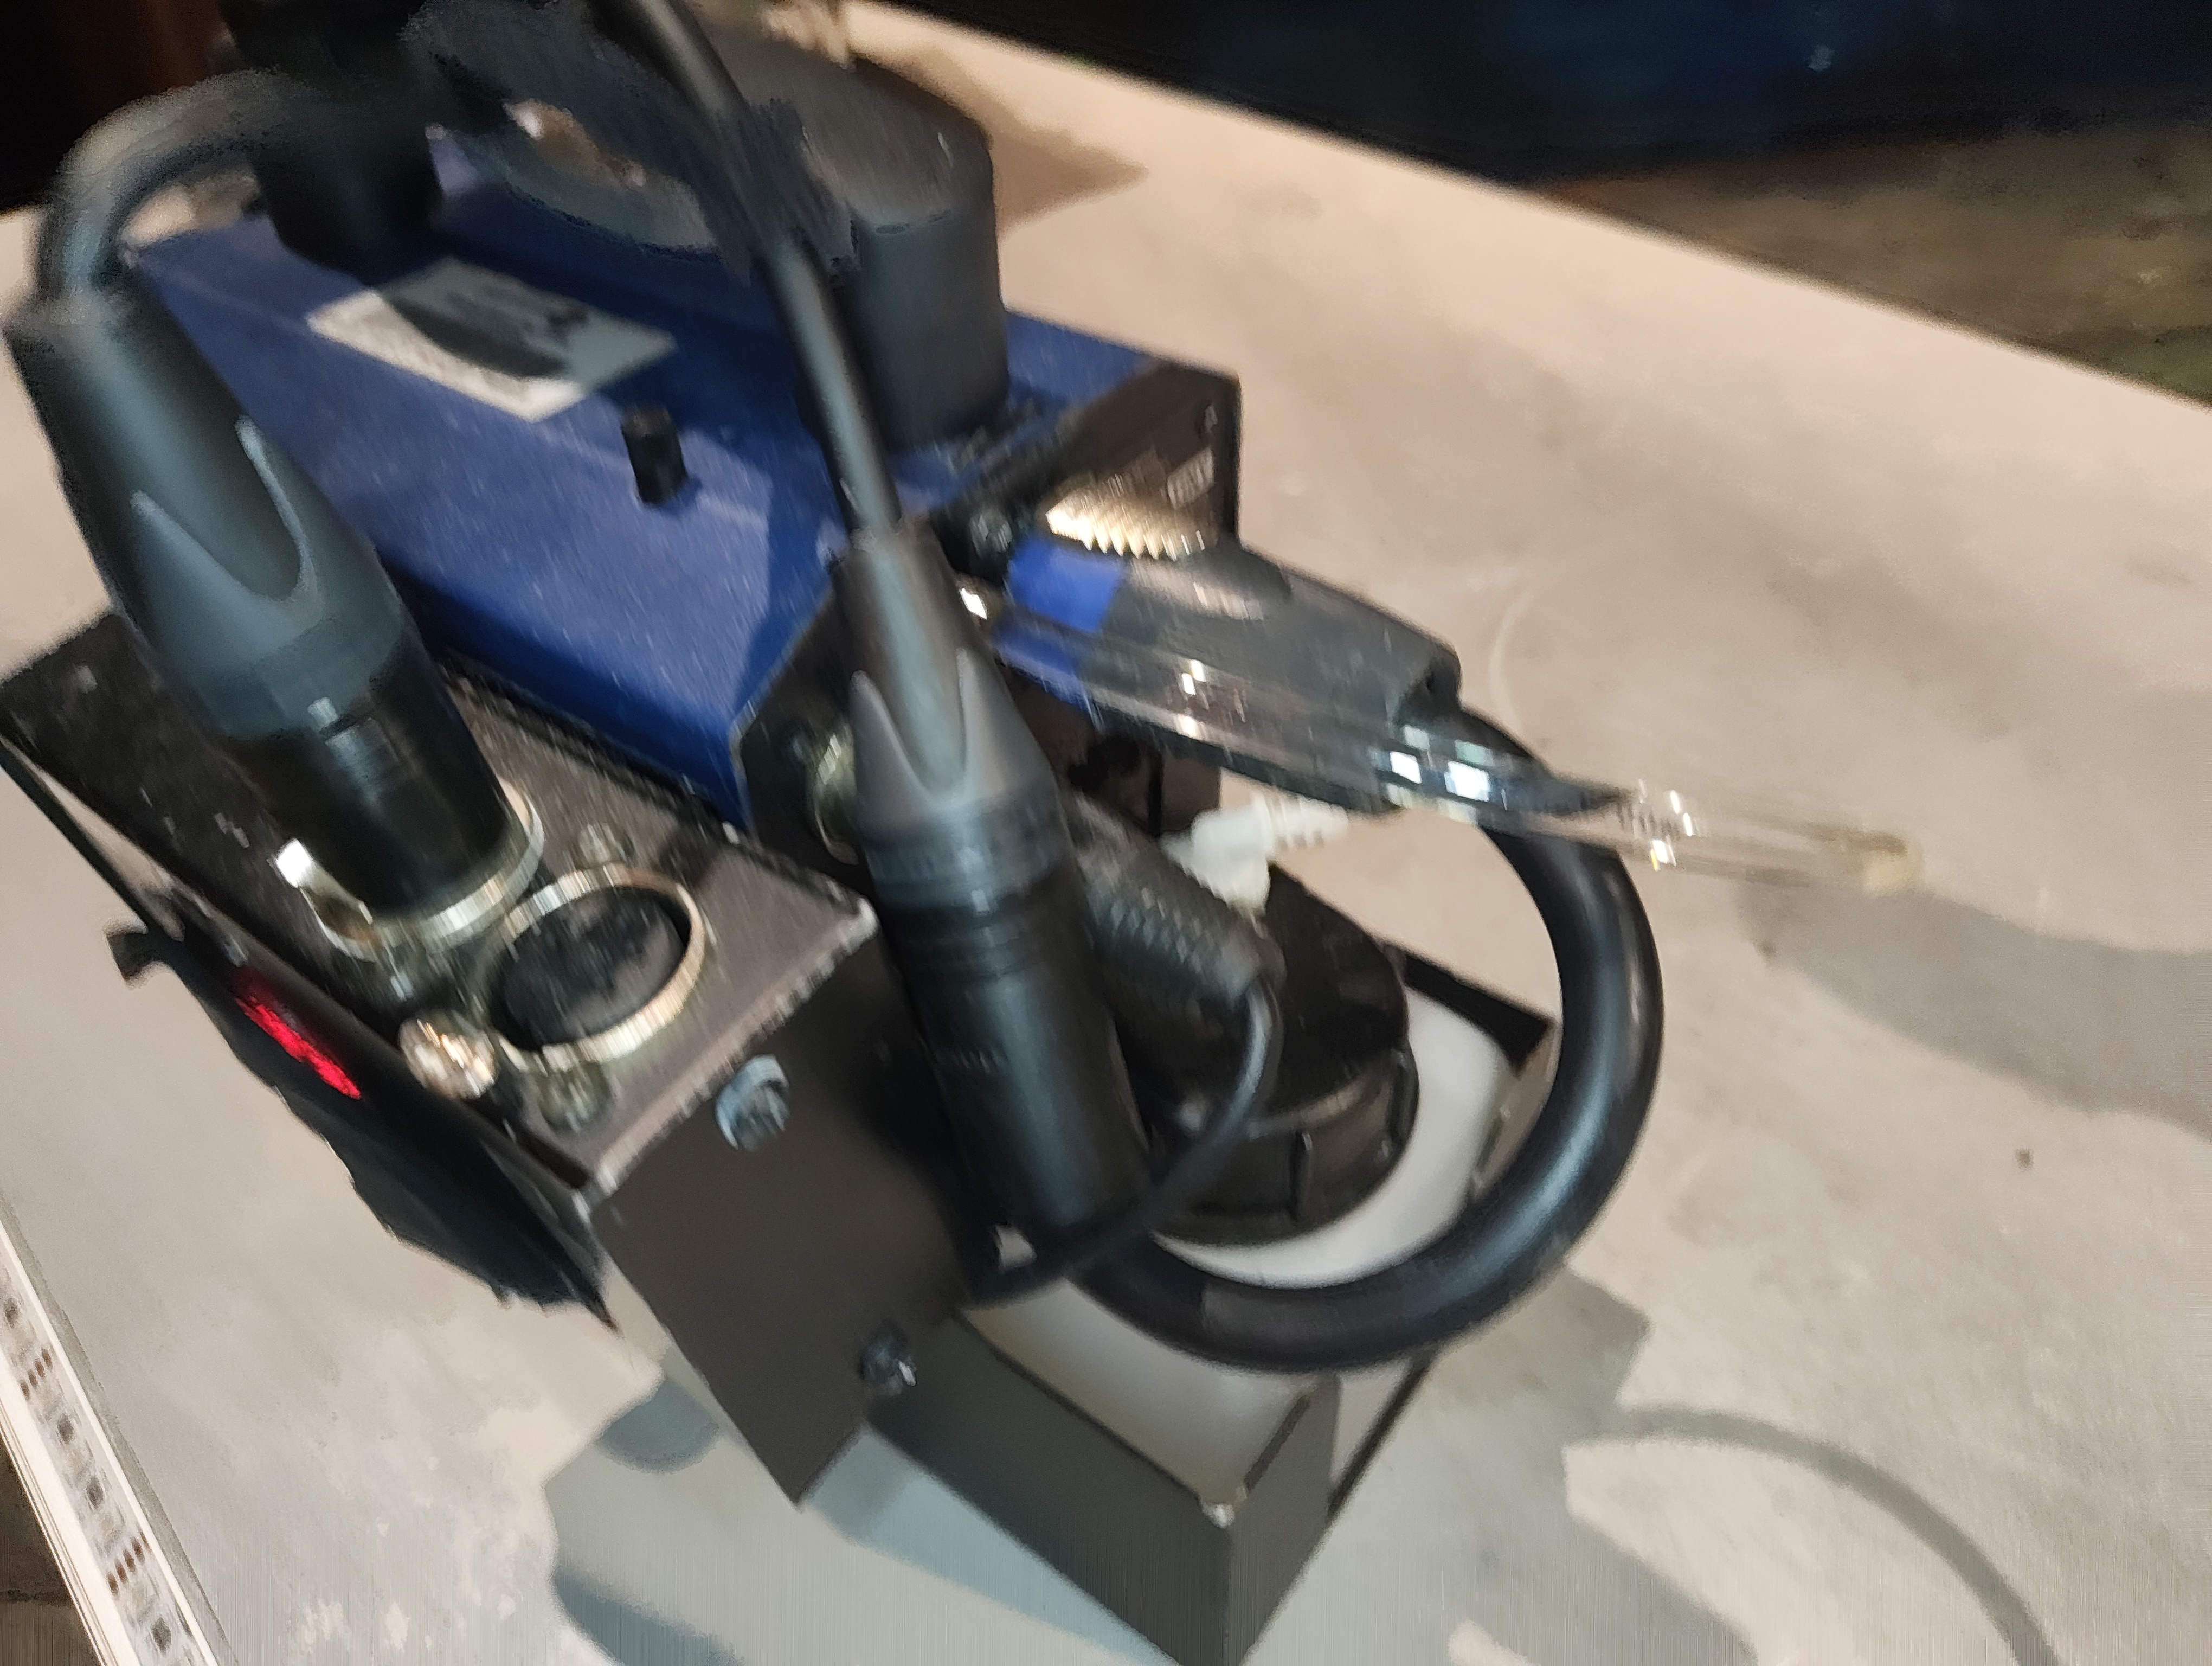
The unit is a Look Solutions Power Tiny (400W fog generator) with a Look Solutions DMXit DMX-to-analogue converter velcroed to the side, and a LumenRadio Moonlite CRMX receiver velcroed to the handle. The DMXit receives power from the Power Tiny's 3-pin XLR output (Pin 3 = 12V DC out, max 50mA) and converts one DMX channel into a 0–10V analogue signal to control the fog output. The Moonlite receives CRMX wirelessly from the Stardust and outputs DMX into the DMXit.
Channels & Addressing
- Channel: 952
- Fixture Type: Viper_Smoke (custom profile)
- Addresses: 14/150
- Label: POWER TINY - ROVING SMOKE MACHINE
- Parameters: Multi-channel smoke control profile
Power & Control
| Fog Machine | Look Solutions Power Tiny (400W) |
| Power Source | Internal 12V 12Ah battery pack (Speakon connector) |
| DMX Converter | Look Solutions DMXit (3-pin XLR, powered from Power Tiny) |
| CRMX Receiver | LumenRadio Moonlite (velcroed to handle) |
| DMX Source | CRMX Stardust Transmitter |
| Charger | Supplied automatic charger |
Battery
The battery has a capacity of 12Ah and can generate over 100 fog bursts of 4–5 seconds. Charge overnight using the supplied charger. The yellow LED on the Power Tiny indicates battery status — slow flash = OK, fast flash = below 15%, needs charging.
Signal Chain
Stardust (SR Bay 3) ──[CRMX wireless]──► Moonlite ──[5-pin DMX]──► DMXit ──[3-pin XLR]──► Power Tiny
The Moonlite receives CRMX wirelessly and outputs DMX via its 5-pin connector. This feeds into the DMXit which converts the DMX channel into a 0–10V analogue signal. The DMXit connects to the Power Tiny's 3-pin XLR input to control fog output. The DMXit is also powered from the Power Tiny via Pin 3 of the XLR (12V DC out, max 50mA).
Images
Key Views
All Reference Photos (click to expand)
Components List
| Component | Detail |
|---|---|
| Fog Machine | Look Solutions Power Tiny |
| DMX Converter | Look Solutions DMXit |
| CRMX Receiver | LumenRadio Moonlite |
| Battery | 12V 12Ah (supplied with Power Tiny) |
| Charger | Automatic charger (supplied) |
Consumables
| Item | Detail |
|---|---|
| Fog Fluid | Look Solutions Tiny-Fluid (glycol/water based) |
| Sizes Available | 250ml bottle, 2L canister |
| Refill Reservoir | 250ml fluid reservoir (supplied with unit) |
Fluid Warning
Only use Look Solutions Tiny-Fluid. Using other fluids will clog the vaporiser and void the warranty. The fluid is glycol/water based, contains no oil or silicone, and is Actors' Equity approved.
Fluid Consumption
A 250ml bottle provides approximately 10 minutes of continuous fogging. In show use with short bursts, a single fill will last multiple performances — but check and top up before each show as part of pre-show checks.
Usage
The Power Tiny is used in two locations during the show:
Scenes
- Brazier — adds smoke to the fire barrel effect
- Storm Sequence — mounted on the rolling staircase for additional atmospheric smoke
Maintenance
- Check: Fluid level before each show — top up with Tiny-Fluid as needed
- Check: Battery status LED — charge overnight if fast flashing
- Check: DMXit and Moonlite are securely velcroed and connected
- Check: Fog nozzle is clear and unobstructed
- Spare parts: Replacement vaporiser (available from Look Solutions)
- Spare parts: Replacement battery pack (Look Solutions PT-2304)
Vaporiser
The vaporiser has a limited working life. If fog output reduces noticeably, the vaporiser may need replacing — see the Power Tiny manual for the replacement procedure.
Troubleshooting
- No fog output:
- Check battery LED — fast flash means below 15%, needs charging
- Check fluid level — refill with Tiny-Fluid
- Check DMXit is receiving DMX (LED display should show address)
- Check Moonlite CRMX link status
- Weak fog output:
- Vaporiser may be clogged or worn — check/replace
- Fluid level may be very low
- No DMX control:
- Check 5-pin DMX cable between Moonlite and DMXit
- Check 3-pin XLR connection between DMXit and Power Tiny
- Check DMXit start address matches patch
- Check Moonlite is linked to Stardust
PDFs & Manuals
Atmospherics
MDG
Overview
There is a MDG ATMe on the SR Fly Floor Perch with a AF 1 fan to distribute the haze across the stage.
Location
- Position: SR Fly Floor Perch
- Mounting: On the floor + AF 1 mounted on the hand rail.
Power & Control
- Power source: SR Fly Floor
- DMX source: SR FLy Floor
- Cable type: TrueOne
Channels & Addressing
### Haze (MDG) - Channel: 901 - Fixture Type: ATMe CFT (custom) - Universe/Address: 10/263–265
### Haze Fan - Channel: 911 - Fixture Type: Generic Fan - Universe/Address: 10/266
Consumables:
- MDG - Neutral Fluid 4 Litre (Mineral Oil Fog Fluid)
- CO2 Gas Bottle
Fuild Top Up
Before checking fluid levels & topping up haze fluid power must be cut and gas must be turned off!
Images

Usage
Always it's haze duh
Troubleshooting
- Fault: No haze output
- Check: Is heating at 100%?
- Check: Has the desk sent a power on command?
- Check: Is there enough fuild in the tank?
- Fault: Flashing screen
- Check: Swap gas bottle
- Fault: Heating Cycle complete but stuck on Haze Off
- Try: purging then power cycling
Purging
Easiest way to force a purge is to put the unit on manual control mode then back to DMX mode
PDFs & Manuals
Smoke
SR Viper
Overview
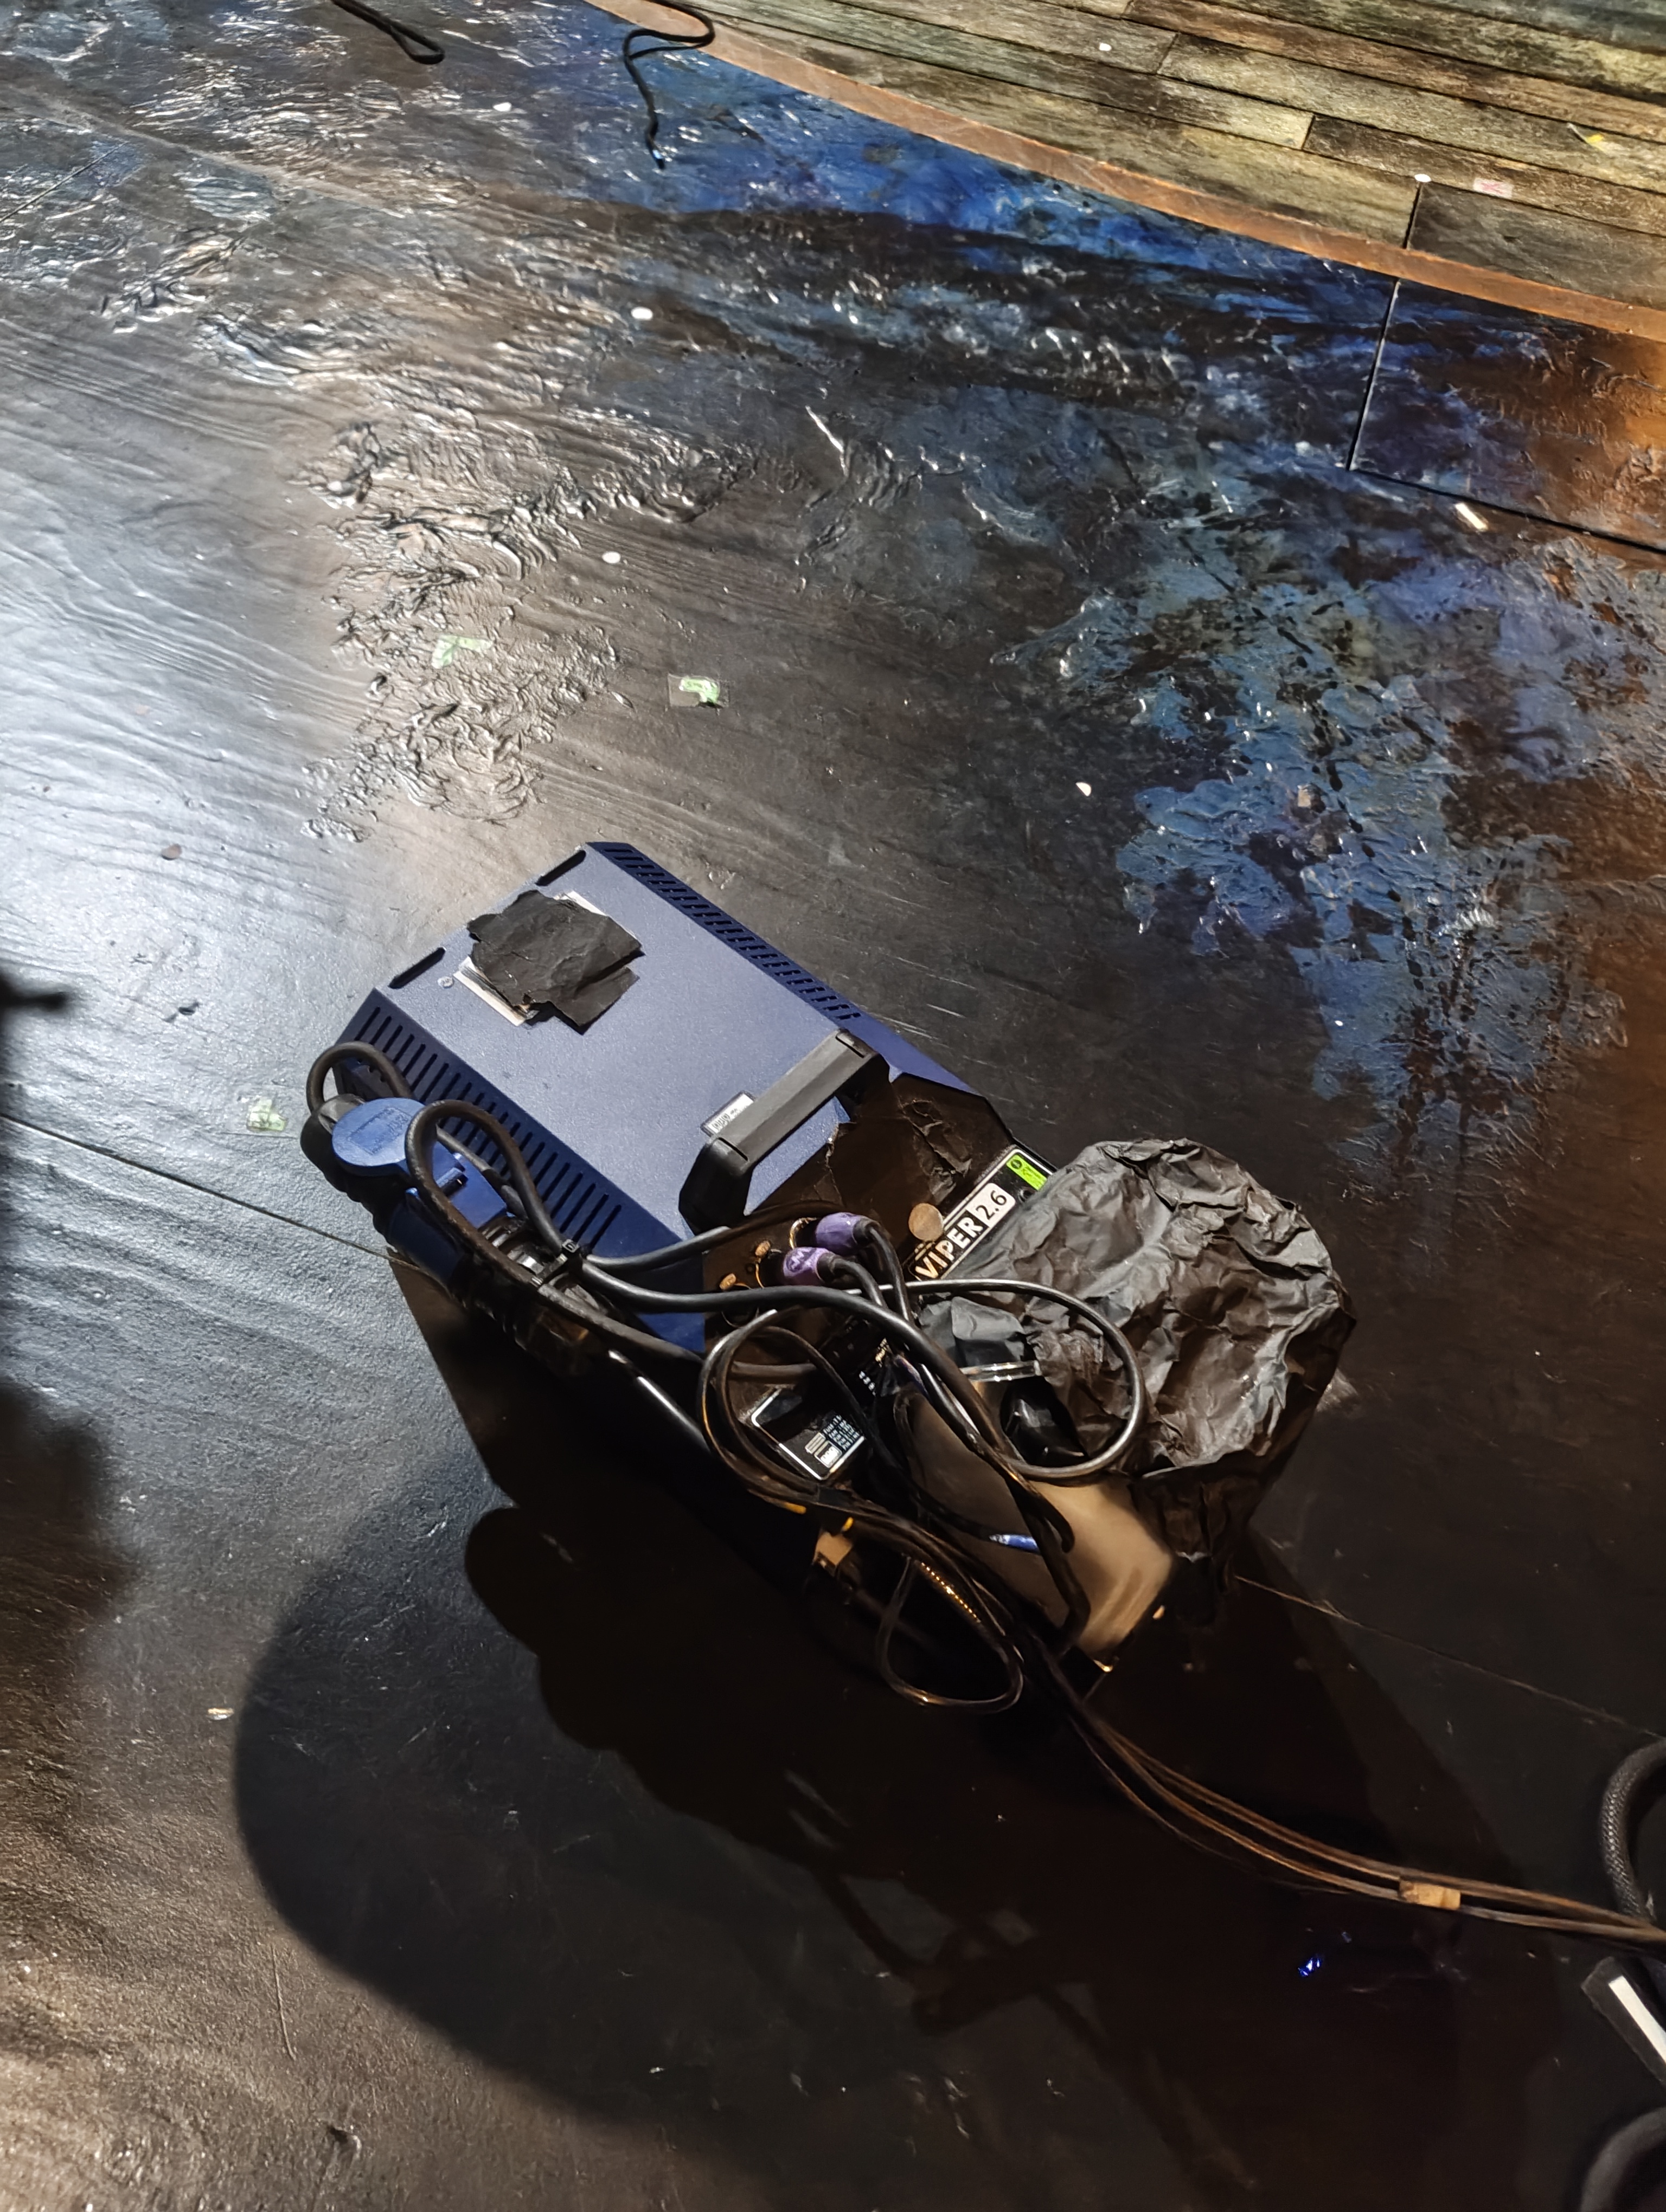
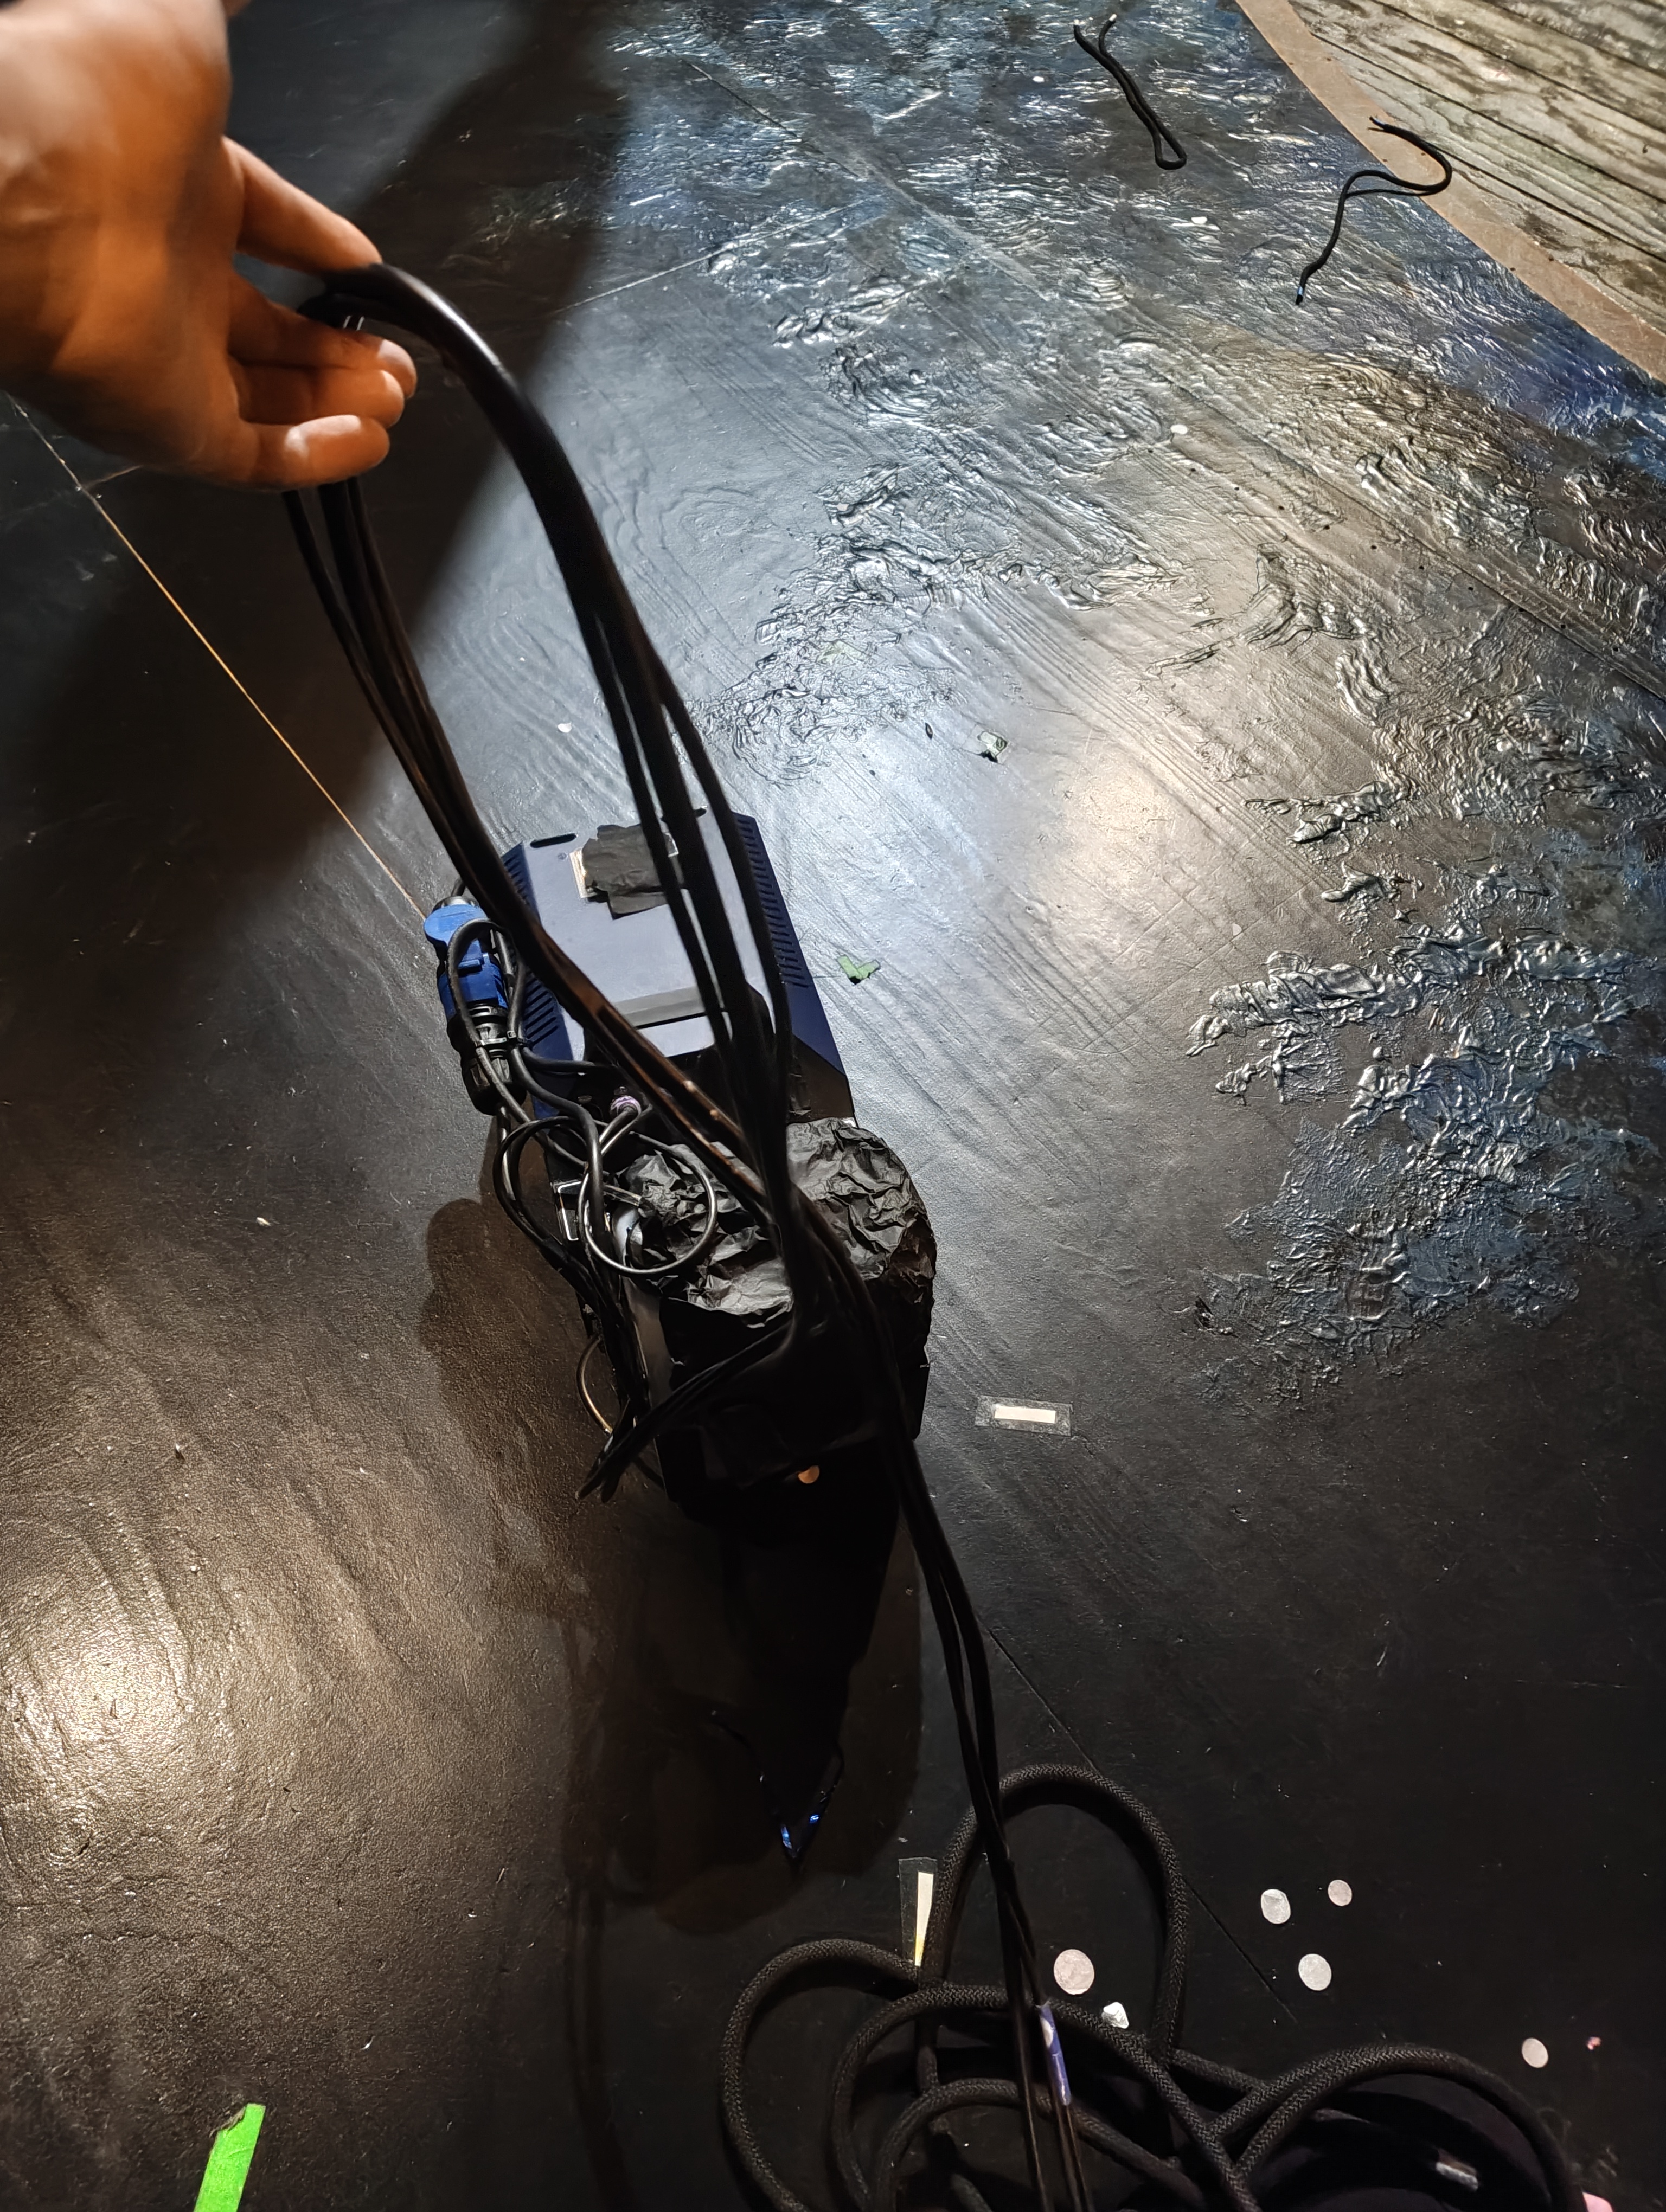
SR Viper on deck used for the storm sequence, moved onto marks by the Stage LX as part of cues (for this to work the vipser is on a 3m long loom).
Power & Control
- Power source: True One
- DMX source: 5-pin DMX
Channels & Addressing
- Channel: 933
- Fixture Type: Viper_Smoke (custom)
- Universe/Address: 10/352
Images
Usage
Describe where this practical is used in the show.
Scenes
- Scene
- Action / state
Maintenance
- Check:
- Check:
- Spare parts:
Troubleshooting
- Fault:
- Check:
- Fault:
- Check:
PDFs & Manuals
{{TITLE}}
Overview
Describe what the practical is, where it is, and what it does.
Location
- Position:
- Access:
- Mounting:
Power & Control
- Power source:
- Driver / PSU:
- DMX source:
- Universe:
- Address:
- Cable type:
- Connector type:
Channels & Addressing
Floor Smoke
- Channel: 931
- Fixture Type: Viper_Smoke (custom)
- Universe/Address: 3/277
Floor Smoke Fan
- Channel: 941
- Fixture Type: Generic Fan
- Universe/Address: 3/278
Note
Add any handling or access notes here.
Images

Usage
Describe where this practical is used in the show.
Scenes
- Scene
- Action / state
Maintenance
- Check:
- Check:
- Spare parts:
Troubleshooting
- Fault:
- Check:
- Fault:
- Check:
PDFs & Manuals
Bonfire Barrel (Mini Smoke Machine)
Overview
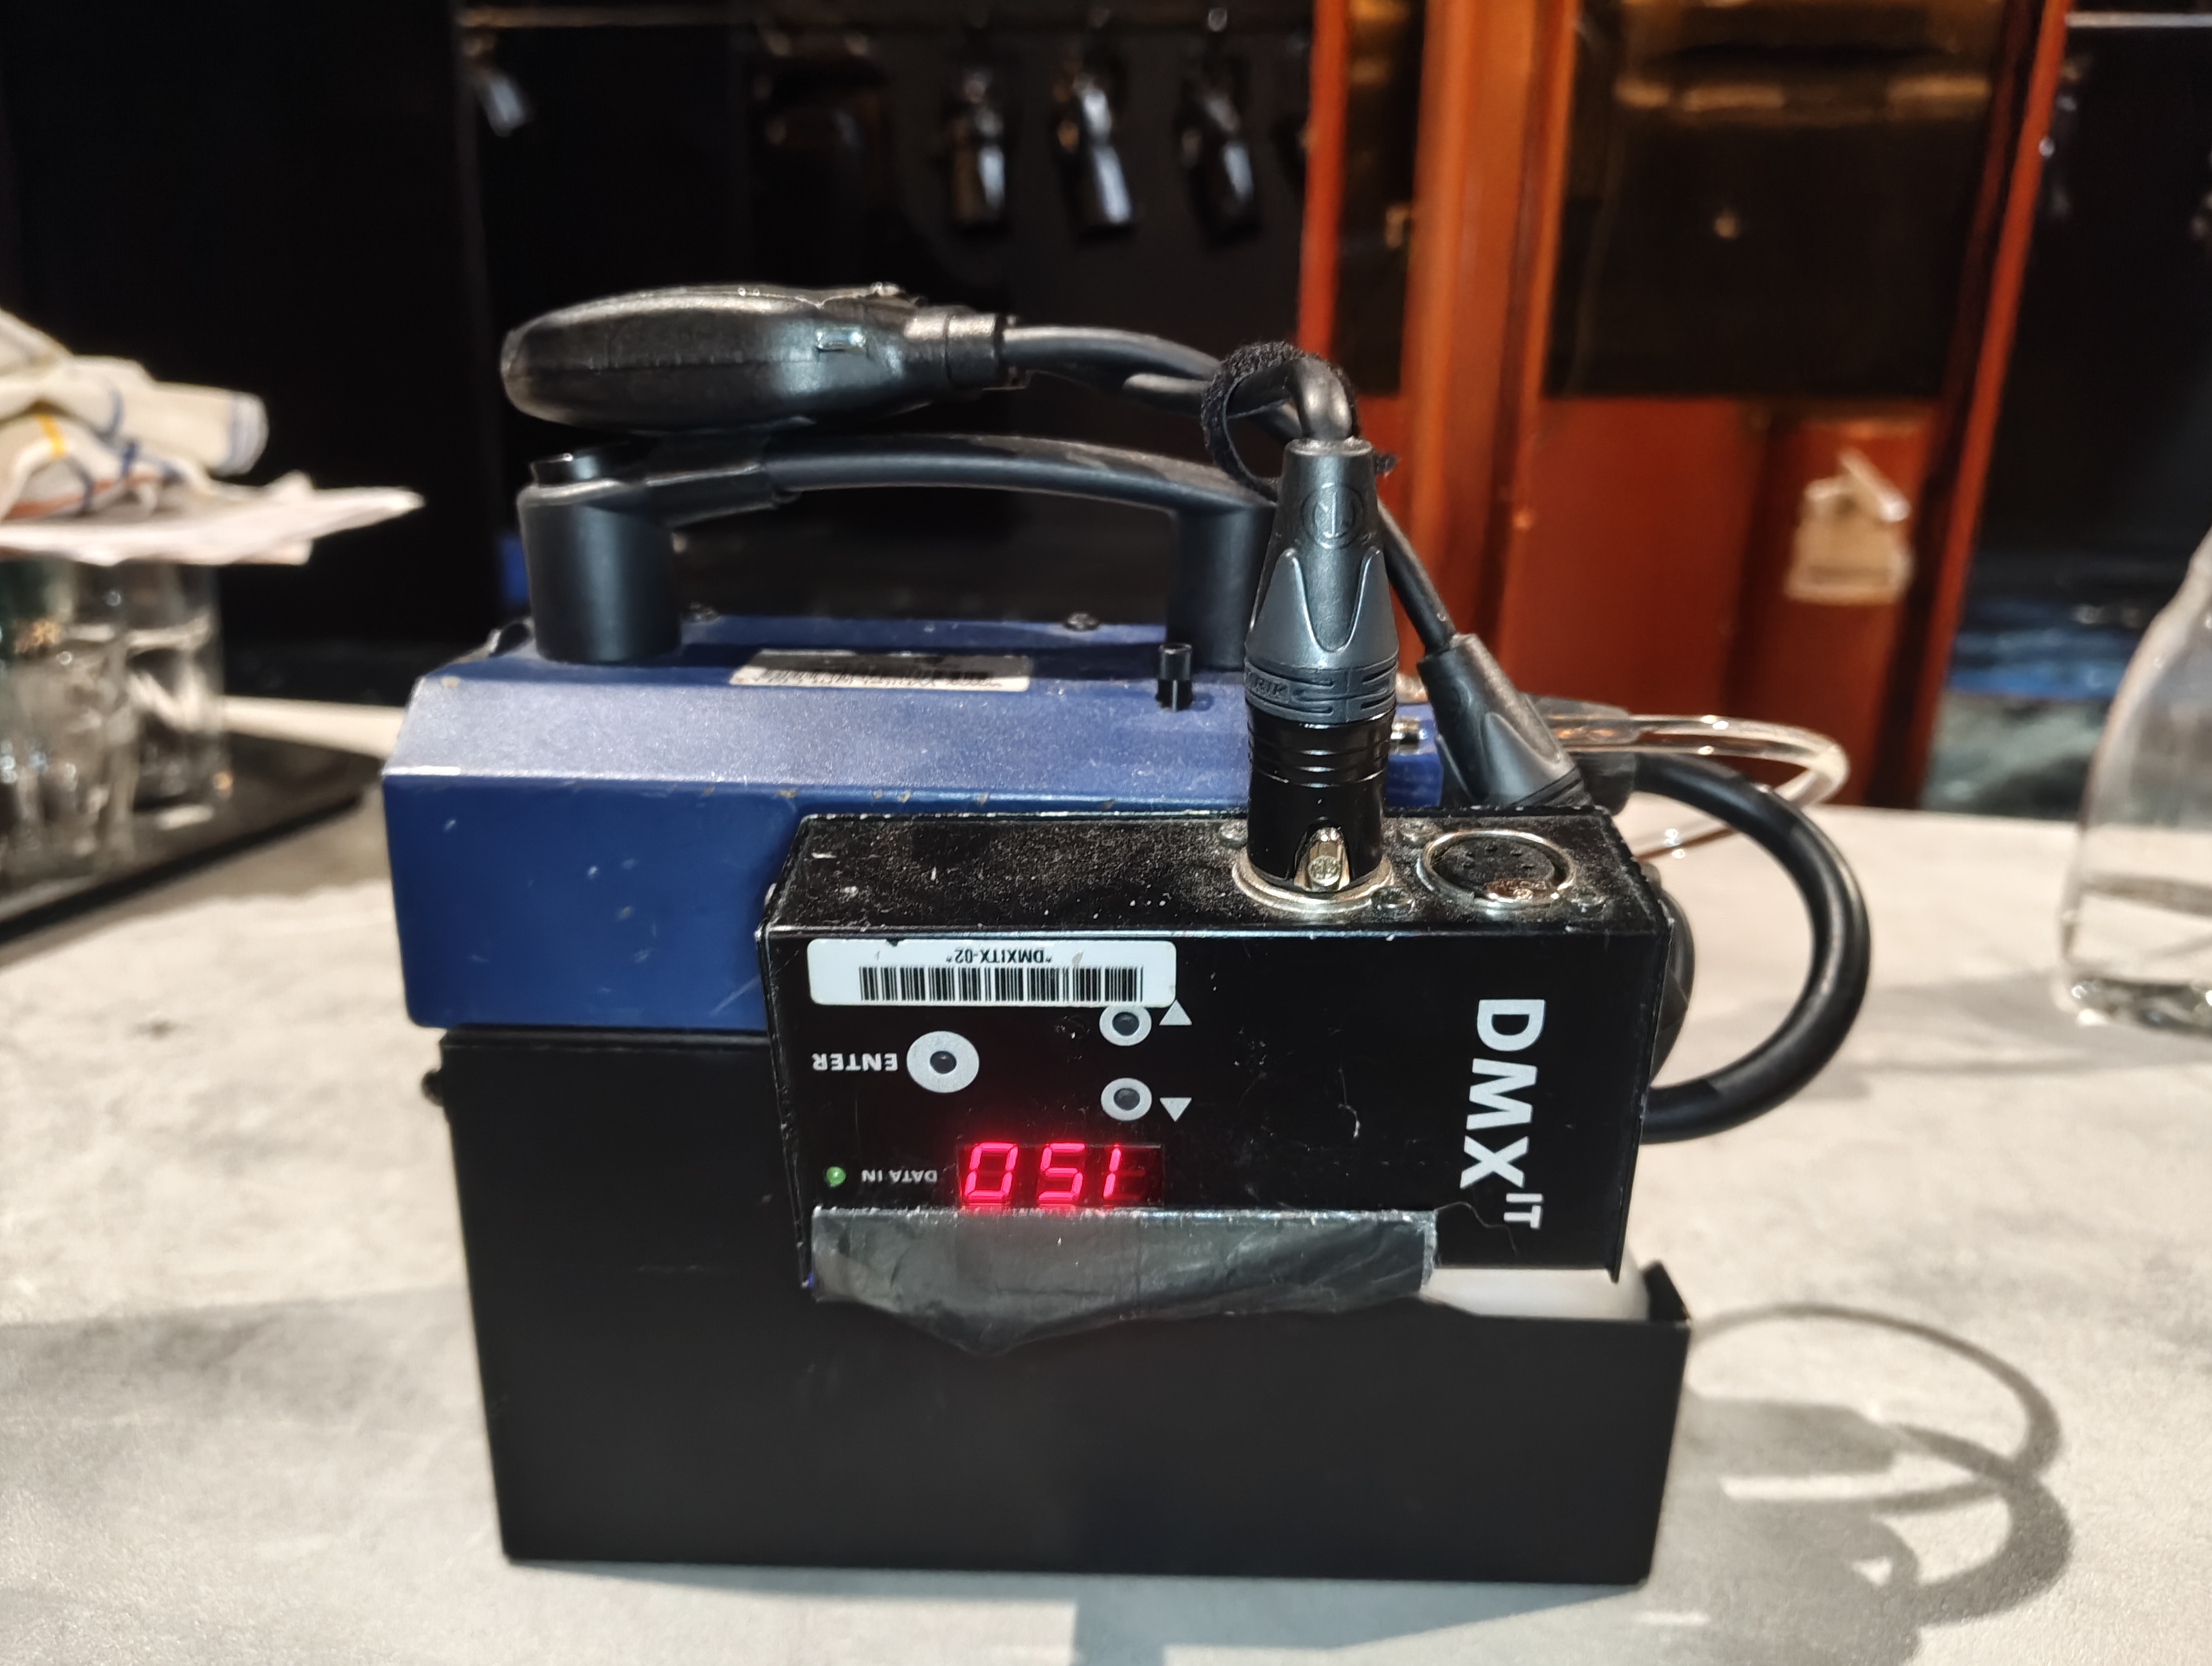
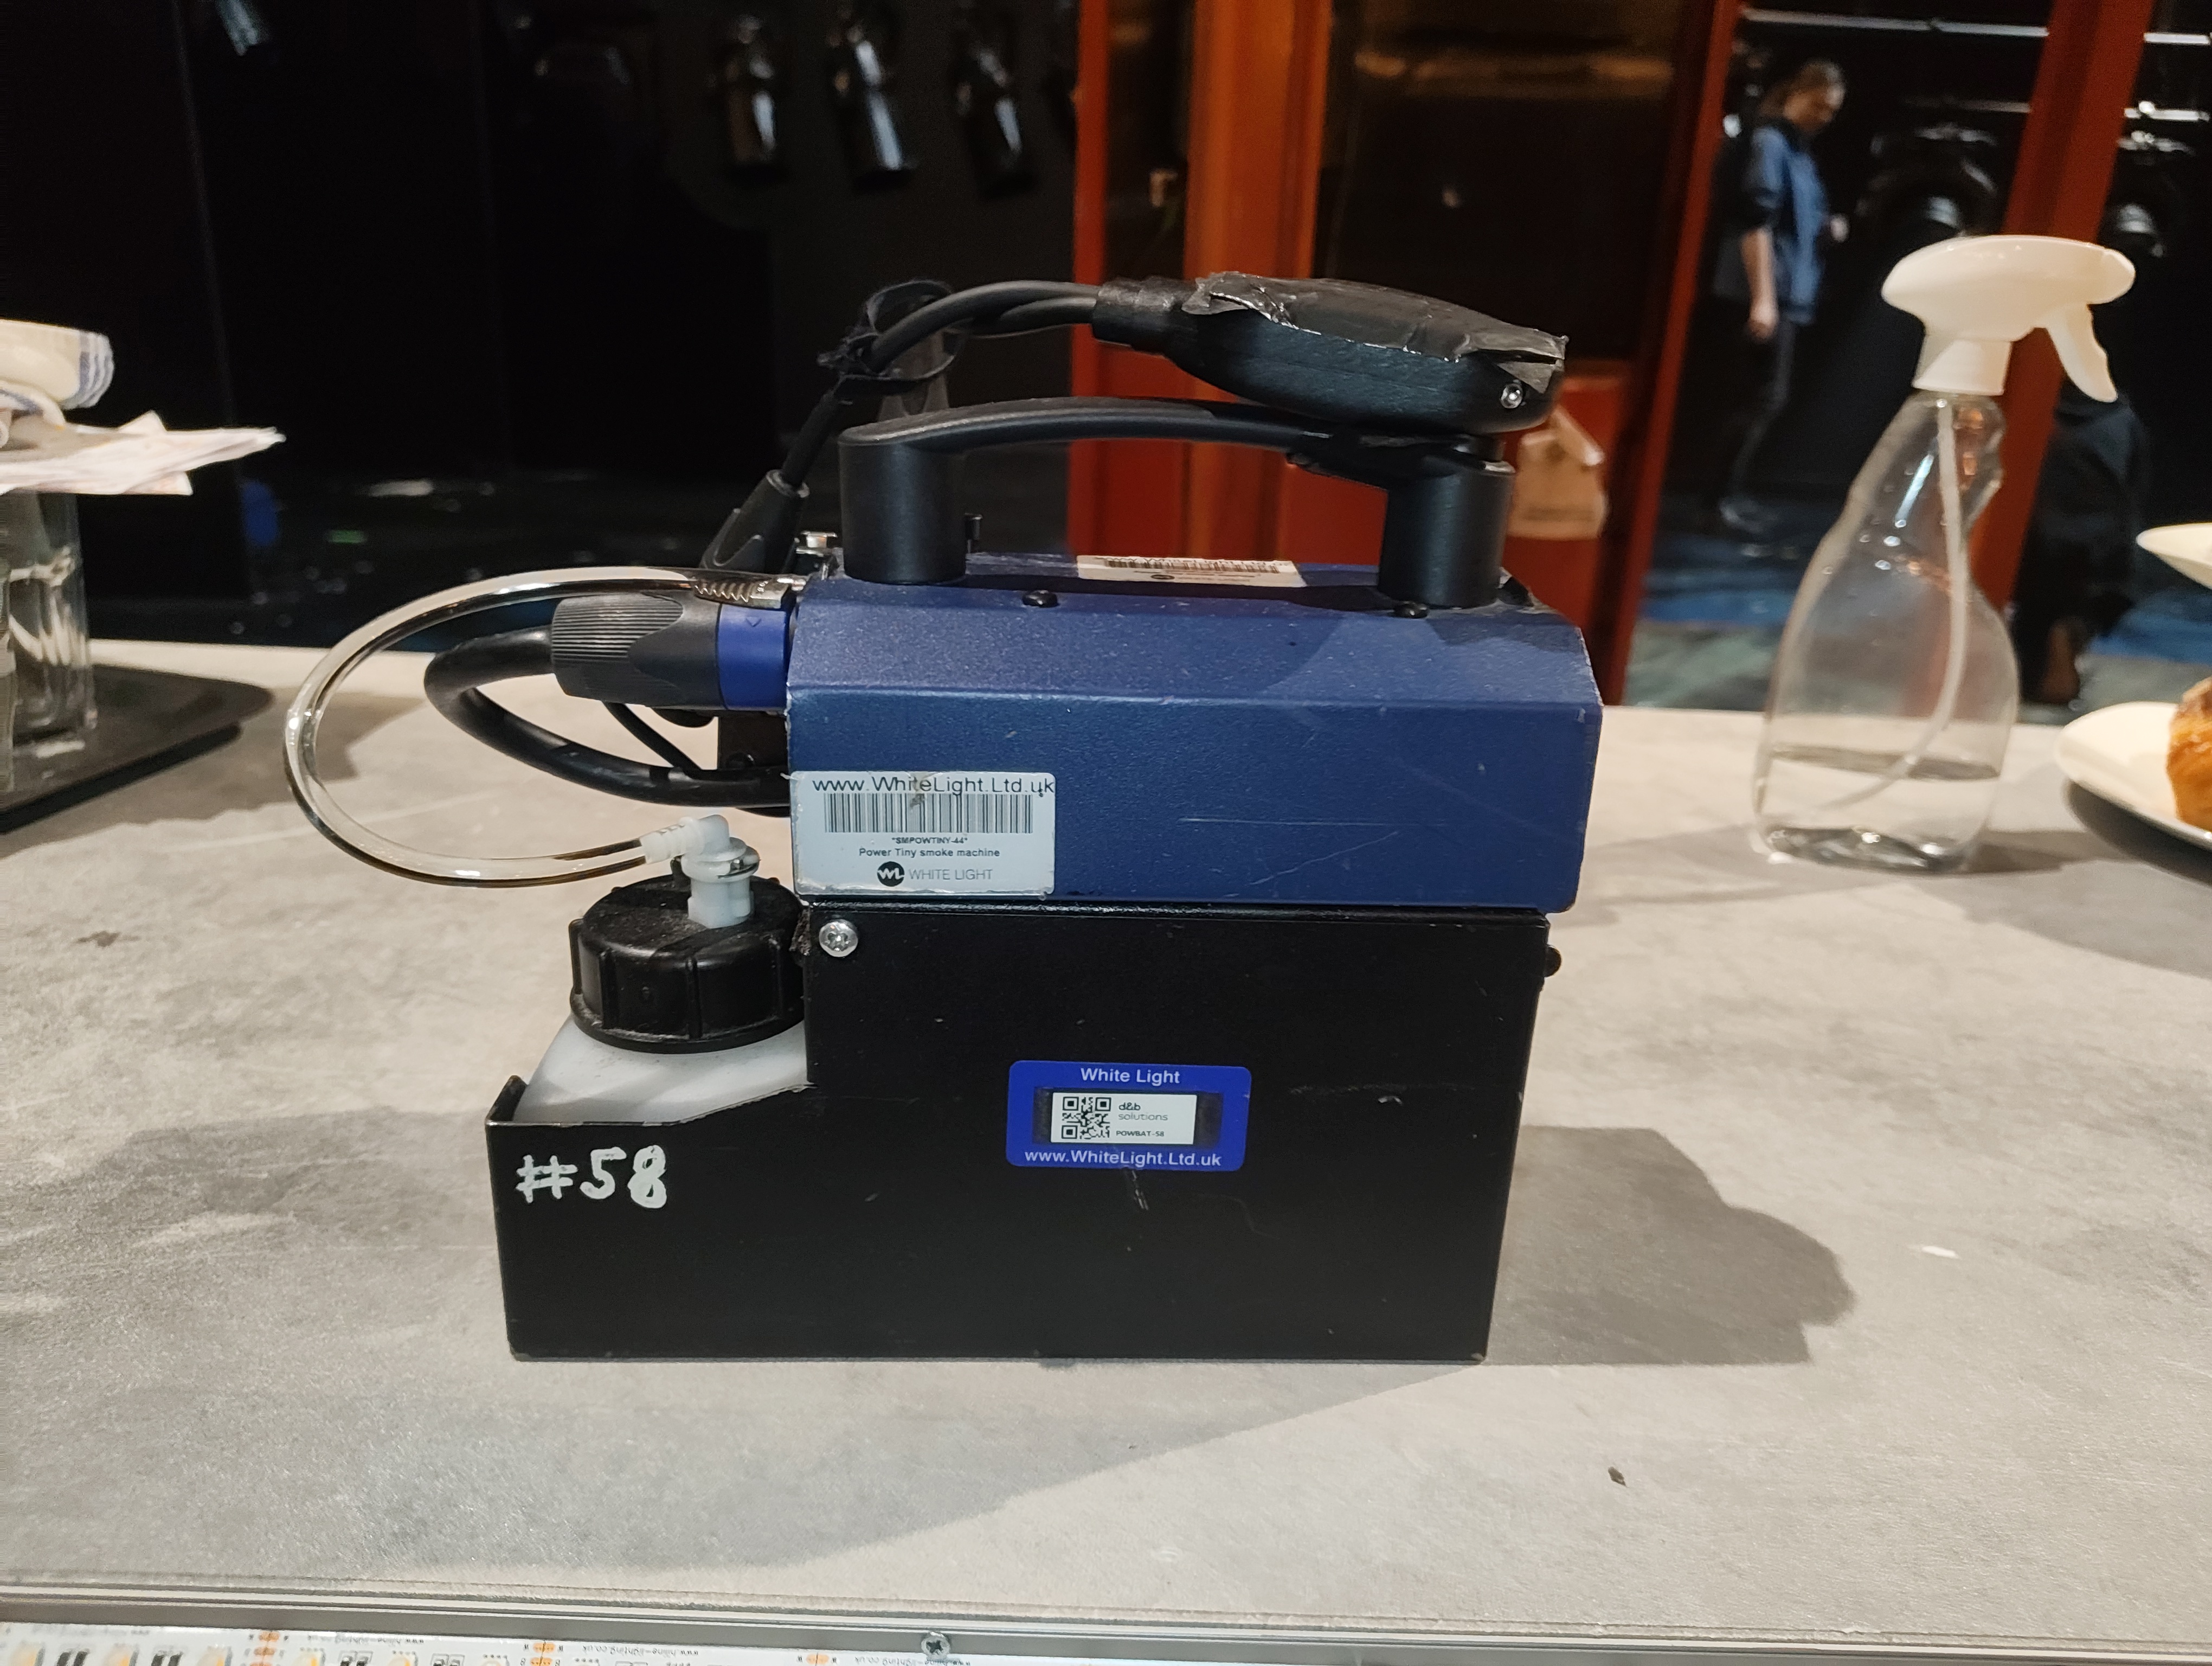
The Power Tiny is a wireless battery-operated mini fog machine used to add smoke to the fire barrel in the Bonfire Barrel and on the rolling staircase during the storm sequence.
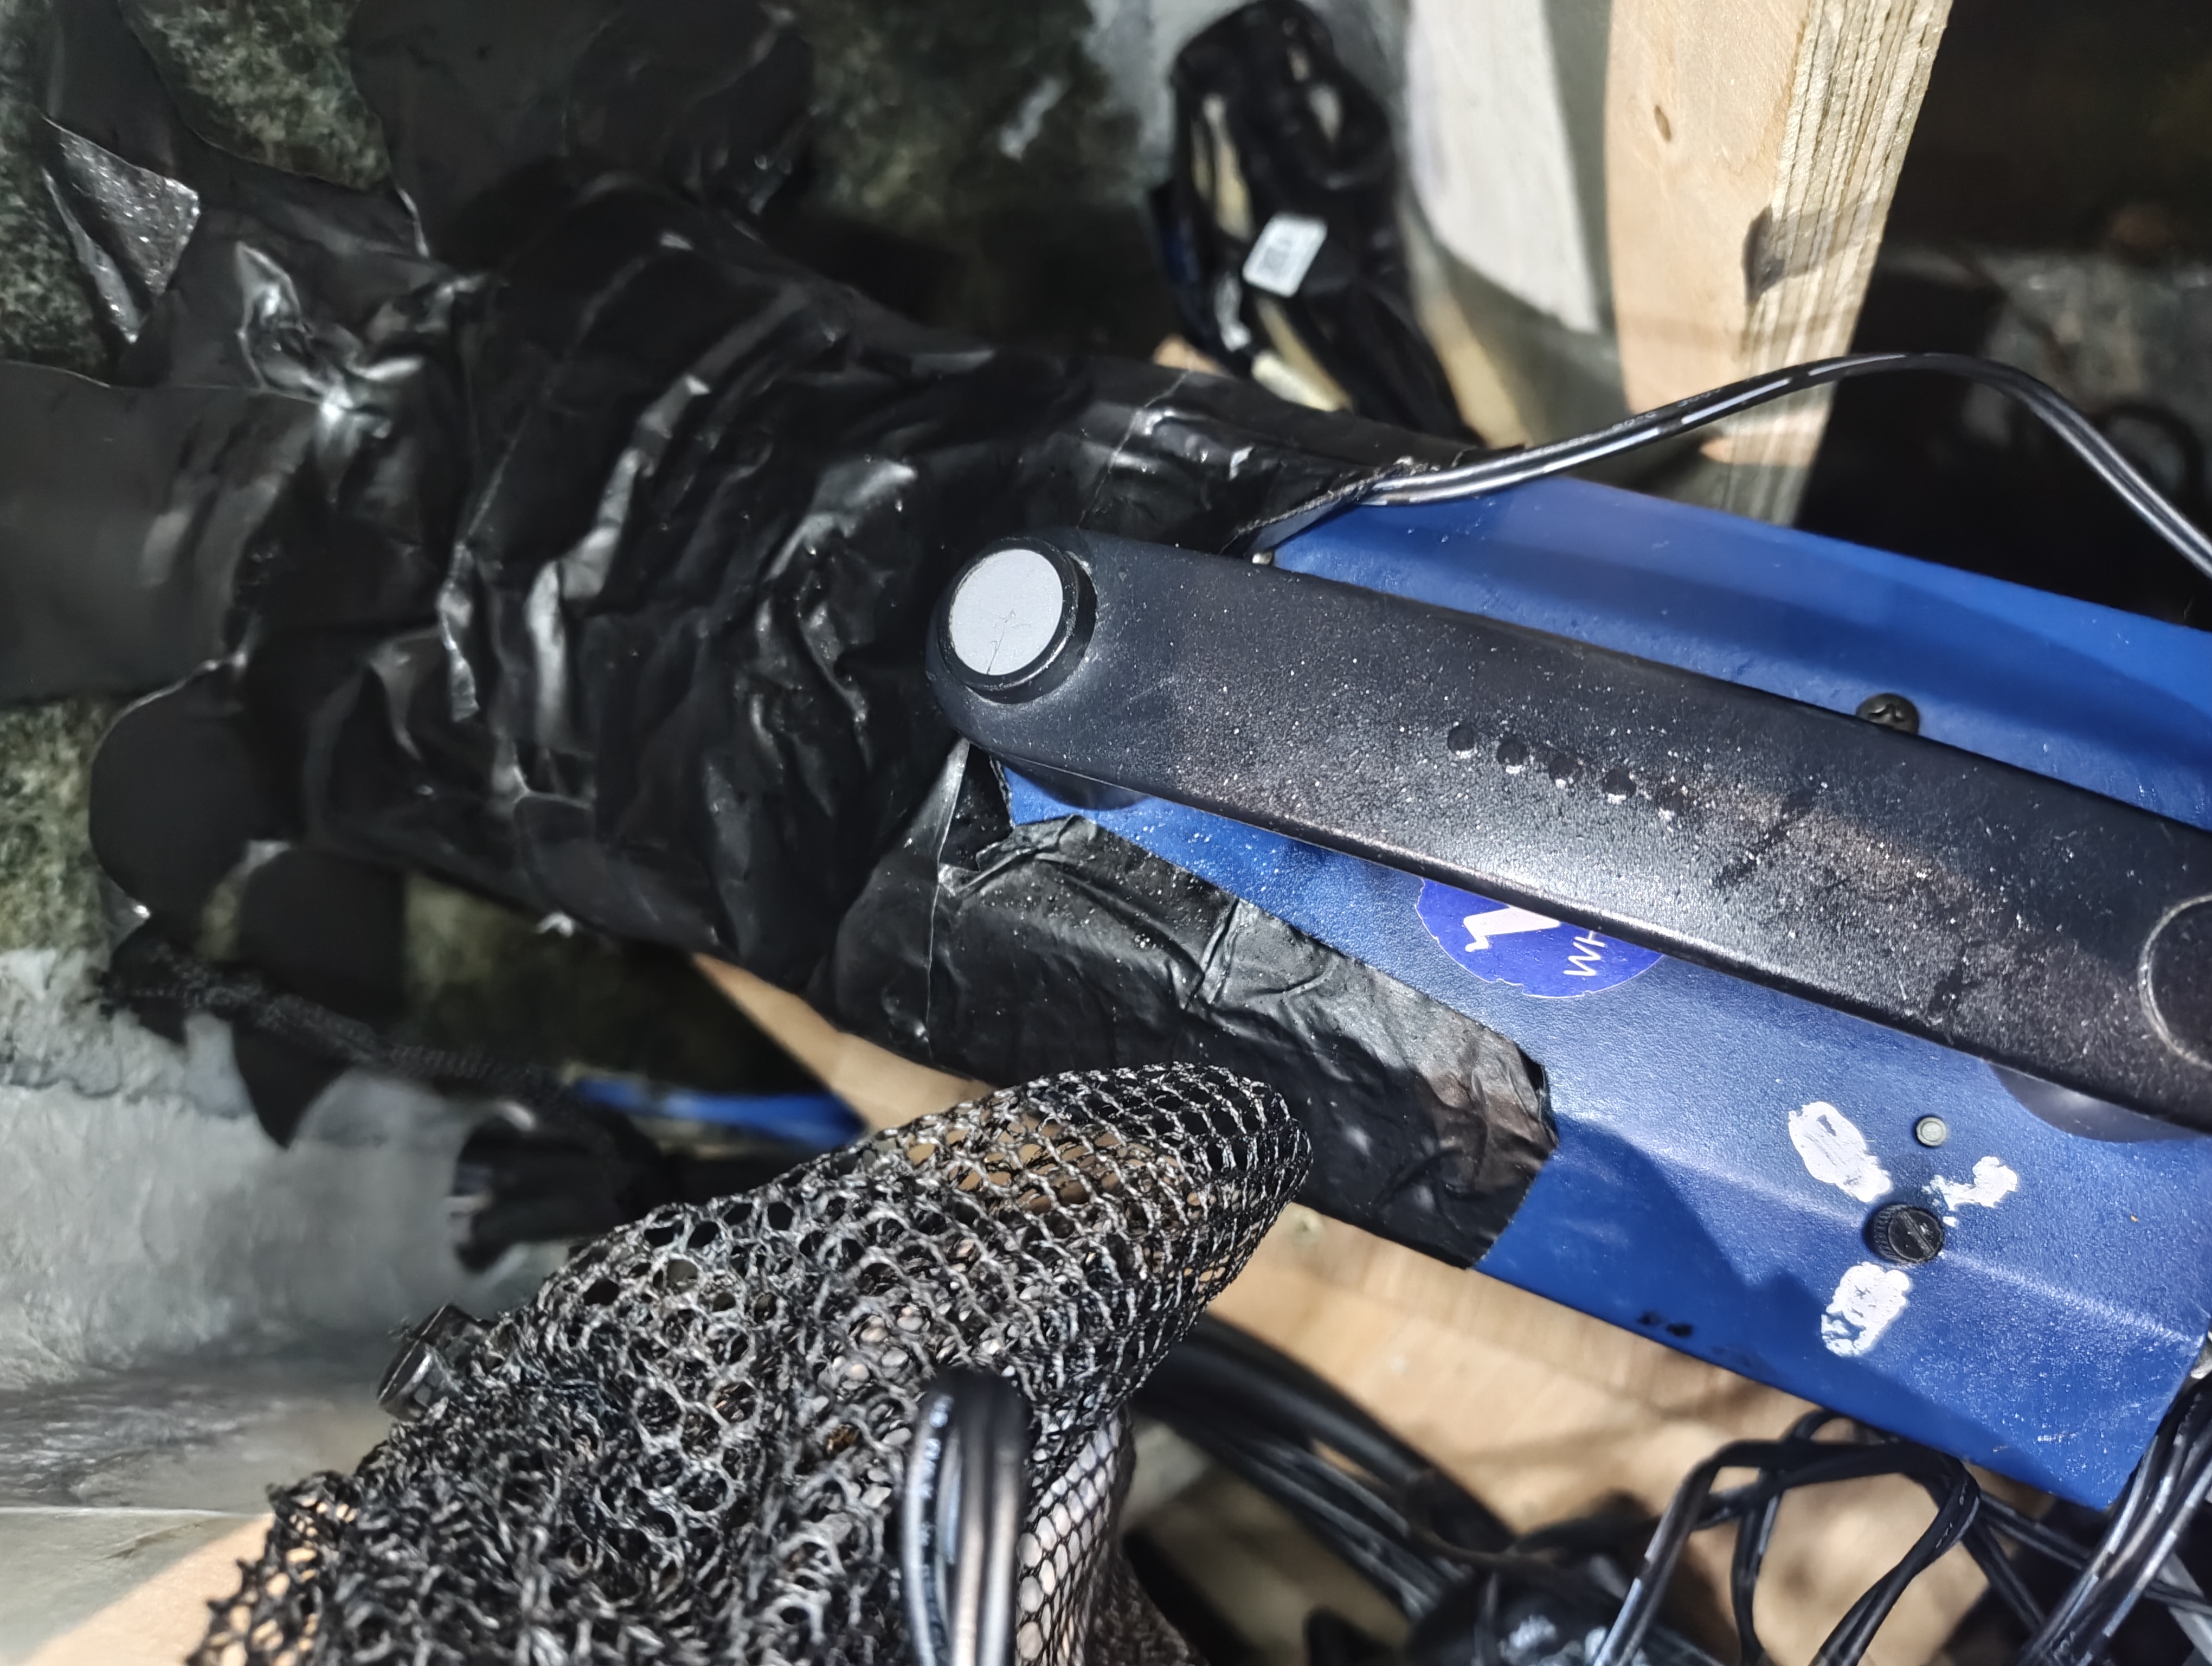
The unit is a Look Solutions Power Tiny (400W fog generator) with a Look Solutions DMXit DMX-to-analogue converter velcroed to the side, and uses the 5-pin dmx link coming into the barrel. The DMXit receives power from the Power Tiny's 3-pin XLR output (Pin 3 = 12V DC out, max 50mA) and converts one DMX channel into a 0–10V analogue signal to control the fog output. The Smoke output is feed through teo vent pipes to the front two barrels.
Channels & Addressing
- Channel: 952
- Fixture Type: Viper_Smoke (custom profile)
- Addresses: 14/150
- Label: POWER TINY - ROVING SMOKE MACHINE
- Parameters: Multi-channel smoke control profile
Power & Control
| Fog Machine | Look Solutions Power Tiny (400W) |
| Power Source | Internal 12V 12Ah battery pack (Speakon connector) |
| DMX Converter | Look Solutions DMXit (3-pin XLR, powered from Power Tiny) |
| CRMX Receiver | LumenRadio Moonlite (velcroed to handle) |
| DMX Source | CRMX Stardust Transmitter |
| Charger | Supplied automatic charger |
Battery
The battery has a capacity of 12Ah and can generate over 100 fog bursts of 4–5 seconds. Charge overnight using the supplied charger. The yellow LED on the Power Tiny indicates battery status — slow flash = OK, fast flash = below 15%, needs charging.
Images
Key Views
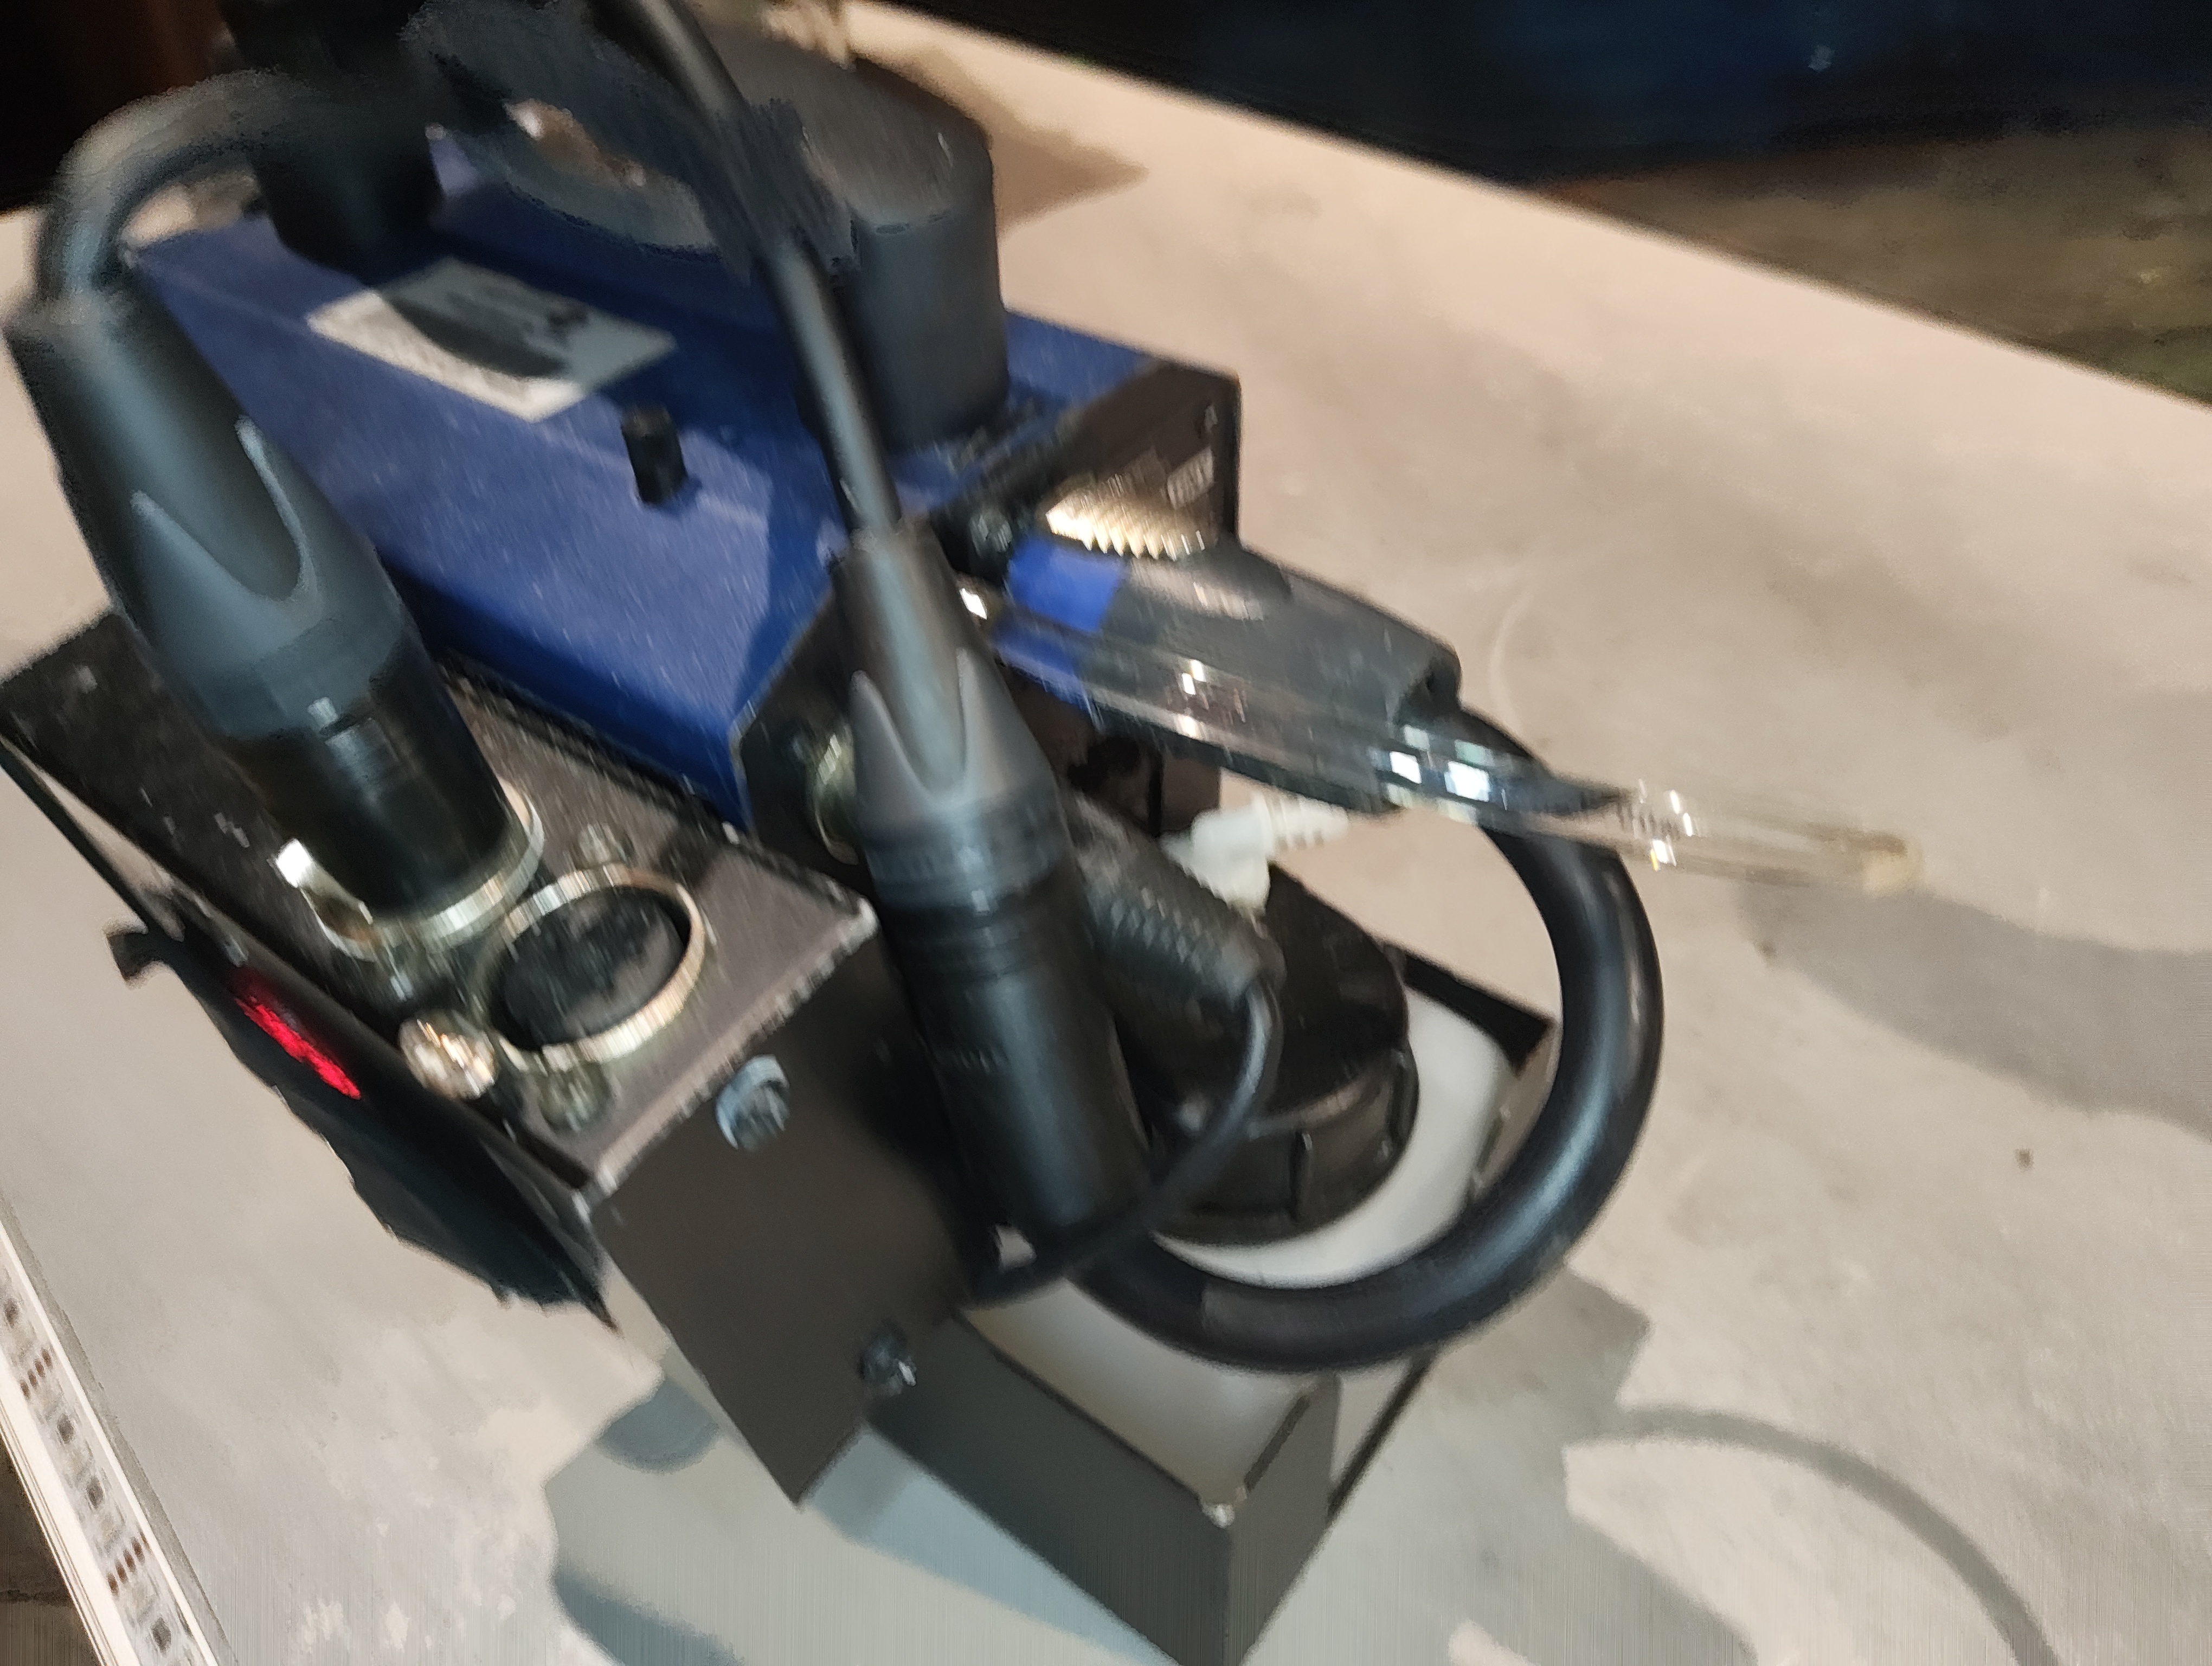
All Reference Photos (click to expand)
Components List
| Component | Detail |
|---|---|
| Fog Machine | Look Solutions Power Tiny |
| DMX Converter | Look Solutions DMXit |
| Battery | 12V 12Ah (supplied with Power Tiny) |
| Charger | Automatic charger (supplied) |
Consumables
| Item | Detail |
|---|---|
| Fog Fluid | Look Solutions Tiny-Fluid (glycol/water based) |
| Sizes Available | 250ml bottle, 2L canister |
| Refill Reservoir | 250ml fluid reservoir (supplied with unit) |
Fluid Warning
Only use Look Solutions Tiny-Fluid. Using other fluids will clog the vaporiser and void the warranty. The fluid is glycol/water based, contains no oil or silicone, and is Actors' Equity approved.
Fluid Consumption
A 250ml bottle provides approximately 10 minutes of continuous fogging. In show use with short bursts, a single fill will last multiple performances — but check and top up before each show as part of pre-show checks.
Usage
The Power Tiny is used in two locations during the show:
Scenes
- Brazier — adds smoke to the fire barrel effect
- Storm Sequence — mounted on the rolling staircase for additional atmospheric smoke
Maintenance
- Check: Fluid level before each show — top up with Tiny-Fluid as needed
- Check: Battery status LED — charge overnight if fast flashing
- Check: DMXit and Moonlite are securely velcroed and connected
- Check: Fog nozzle is clear and unobstructed
- Spare parts: Replacement vaporiser (available from Look Solutions)
- Spare parts: Replacement battery pack (Look Solutions PT-2304)
Vaporiser
The vaporiser has a limited working life. If fog output reduces noticeably, the vaporiser may need replacing — see the Power Tiny manual for the replacement procedure.
Troubleshooting
- No fog output:
- Check battery LED — fast flash means below 15%, needs charging
- Check fluid level — refill with Tiny-Fluid
- Check DMXit is receiving DMX (LED display should show address)
- Check Moonlite CRMX link status
- Weak fog output:
- Vaporiser may be clogged or worn — check/replace
- Fluid level may be very low
PDFs & Manuals
Roaming Power Tiny (Mini Smoke Machine)
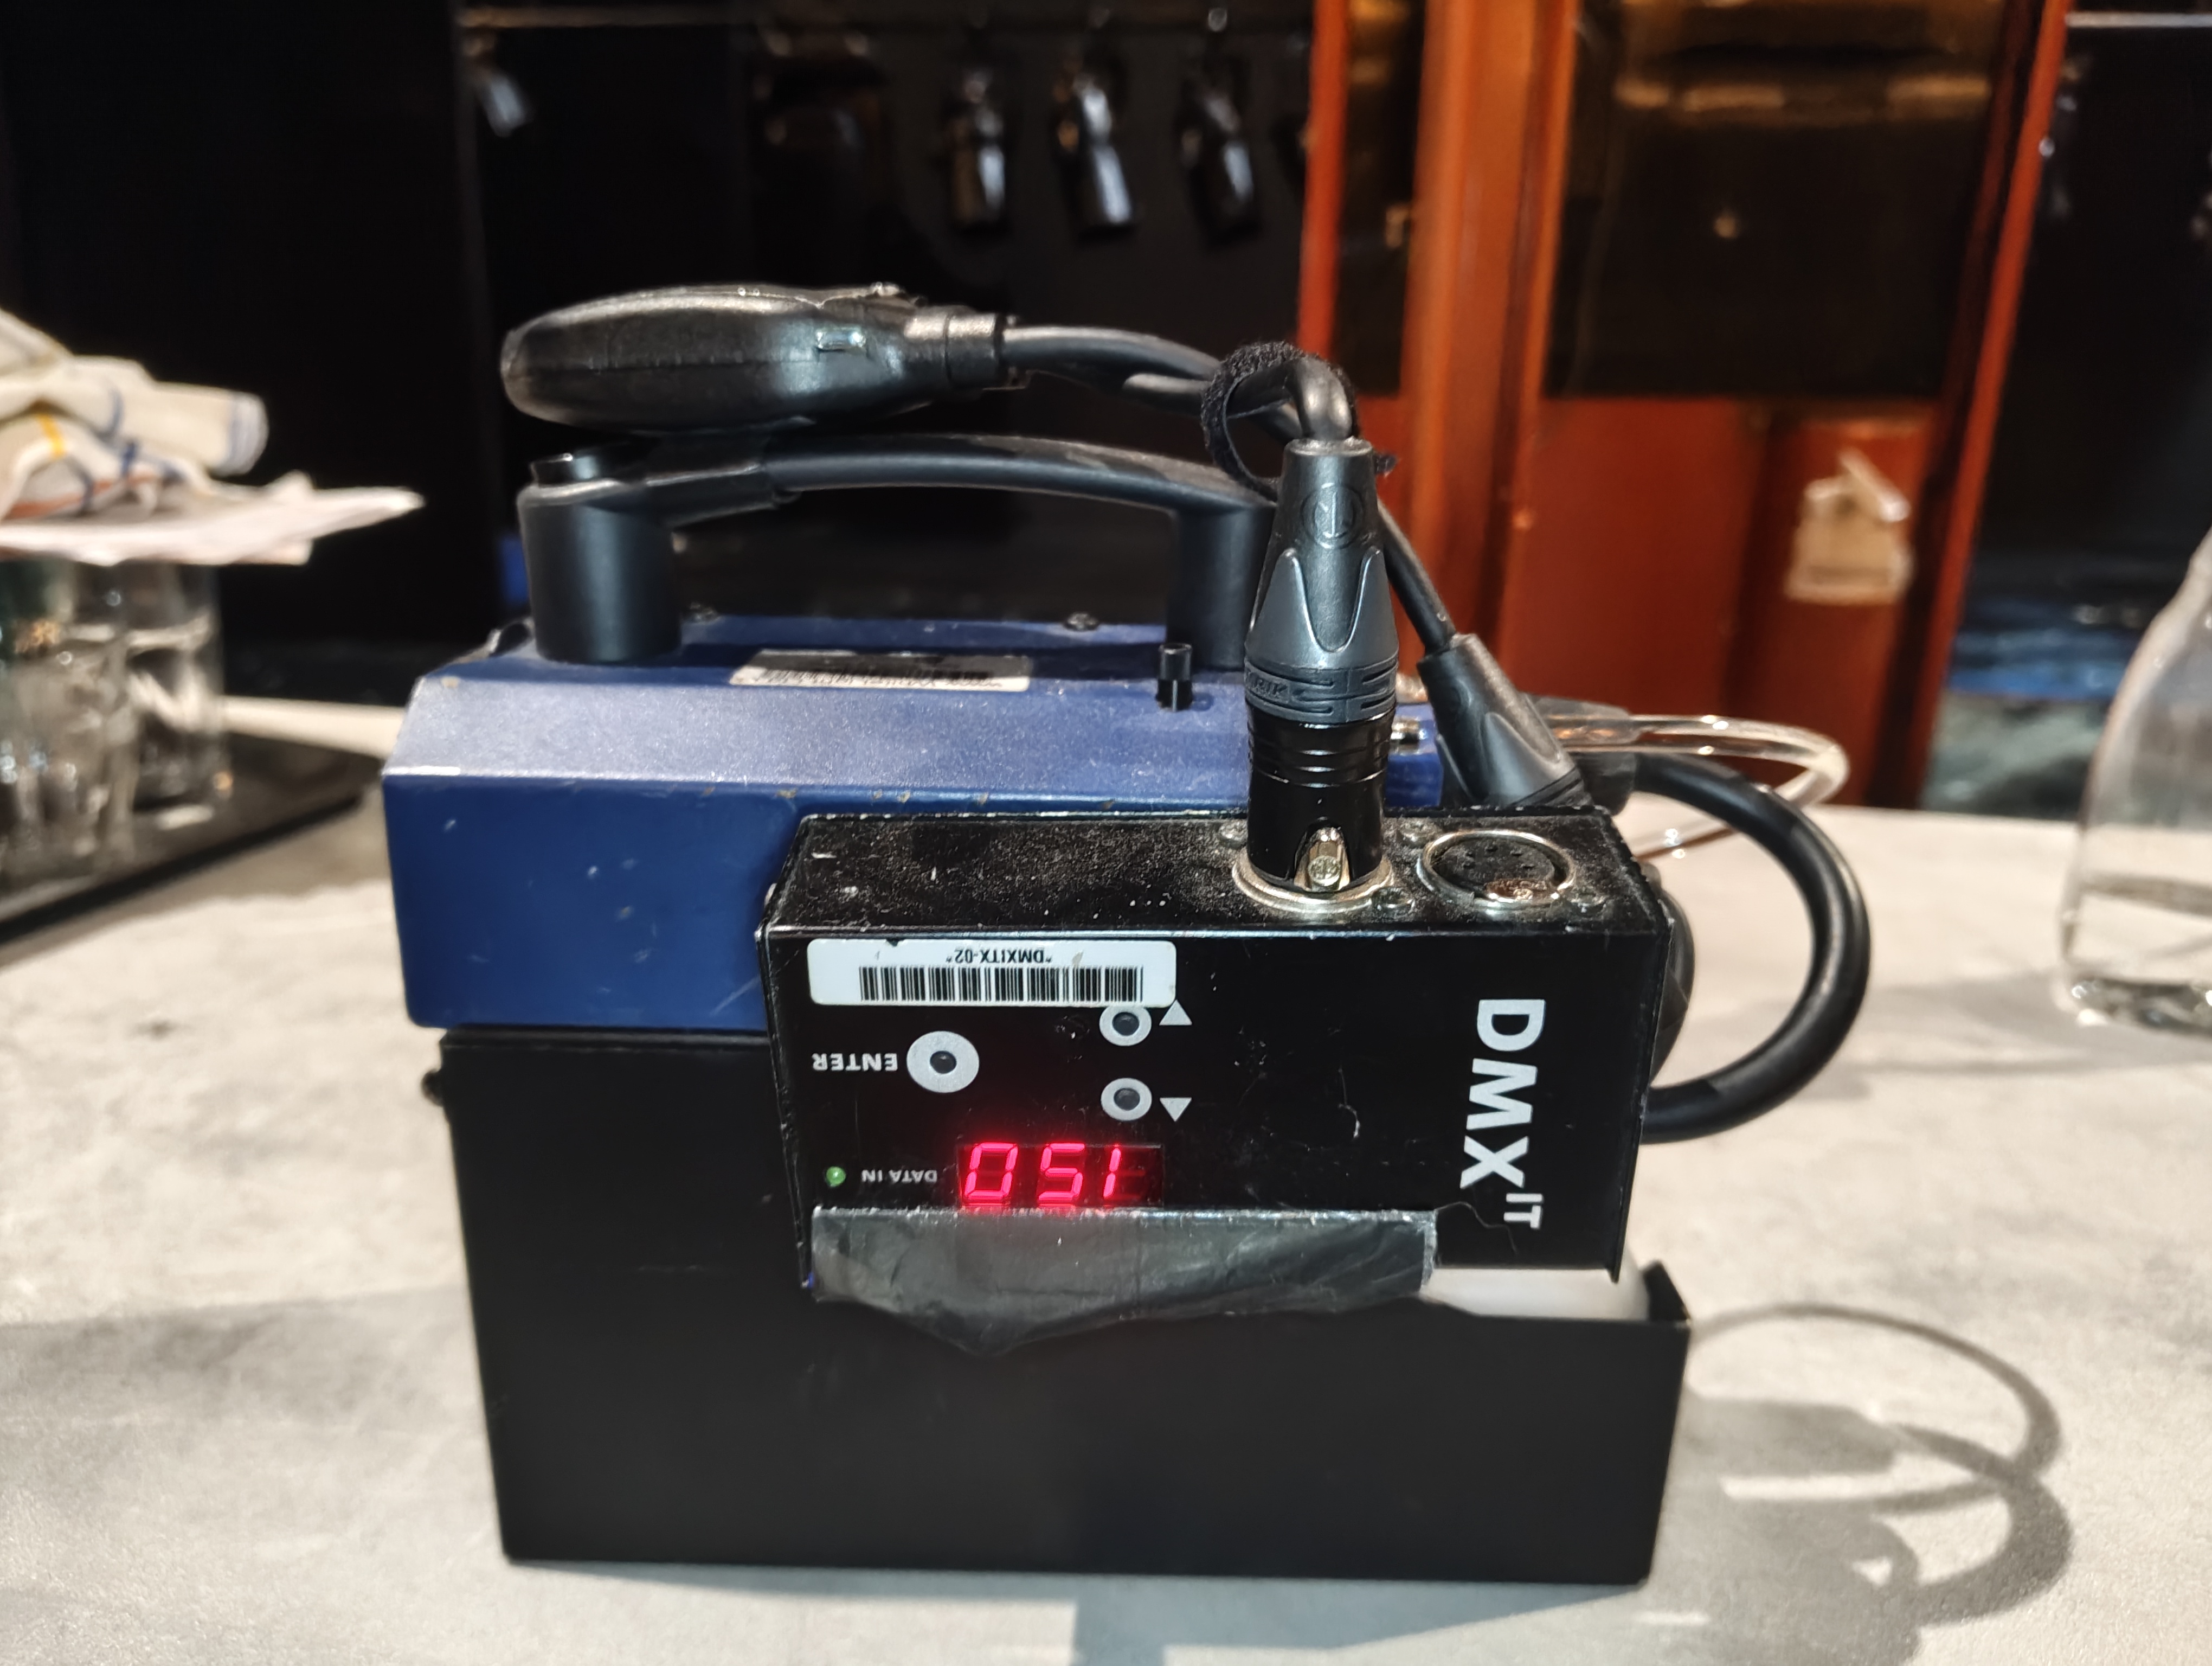
Overview
The Roaming Power Tiny is a wireless battery-operated mini fog machine used to add smoke to the fire barrel in the Brazier and on the rolling staircase during the storm sequence.
The unit is a Look Solutions Power Tiny (400W fog generator) with a Look Solutions DMXit DMX-to-analogue converter velcroed to the side, and a LumenRadio Moonlite CRMX receiver velcroed to the handle. The DMXit receives power from the Power Tiny's 3-pin XLR output (Pin 3 = 12V DC out, max 50mA) and converts one DMX channel into a 0–10V analogue signal to control the fog output. The Moonlite receives CRMX wirelessly from the Stardust and outputs DMX into the DMXit.
Channels & Addressing
- Channel: 952
- Fixture Type: Viper_Smoke (custom profile)
- Addresses: 14/150
- Label: POWER TINY - ROVING SMOKE MACHINE
- Parameters: Multi-channel smoke control profile
Power & Control
| Fog Machine | Look Solutions Power Tiny (400W) |
| Power Source | Internal 12V 12Ah battery pack (Speakon connector) |
| DMX Converter | Look Solutions DMXit (3-pin XLR, powered from Power Tiny) |
| CRMX Receiver | LumenRadio Moonlite (velcroed to handle) |
| DMX Source | CRMX Stardust Transmitter |
| Charger | Supplied automatic charger |
Battery
The battery has a capacity of 12Ah and can generate over 100 fog bursts of 4–5 seconds. Charge overnight using the supplied charger. The yellow LED on the Power Tiny indicates battery status — slow flash = OK, fast flash = below 15%, needs charging.
Signal Chain
Stardust (SR Bay 3) ──[CRMX wireless]──► Moonlite ──[5-pin DMX]──► DMXit ──[3-pin XLR]──► Power Tiny
The Moonlite receives CRMX wirelessly and outputs DMX via its 5-pin connector. This feeds into the DMXit which converts the DMX channel into a 0–10V analogue signal. The DMXit connects to the Power Tiny's 3-pin XLR input to control fog output. The DMXit is also powered from the Power Tiny via Pin 3 of the XLR (12V DC out, max 50mA).
Images
Key Views
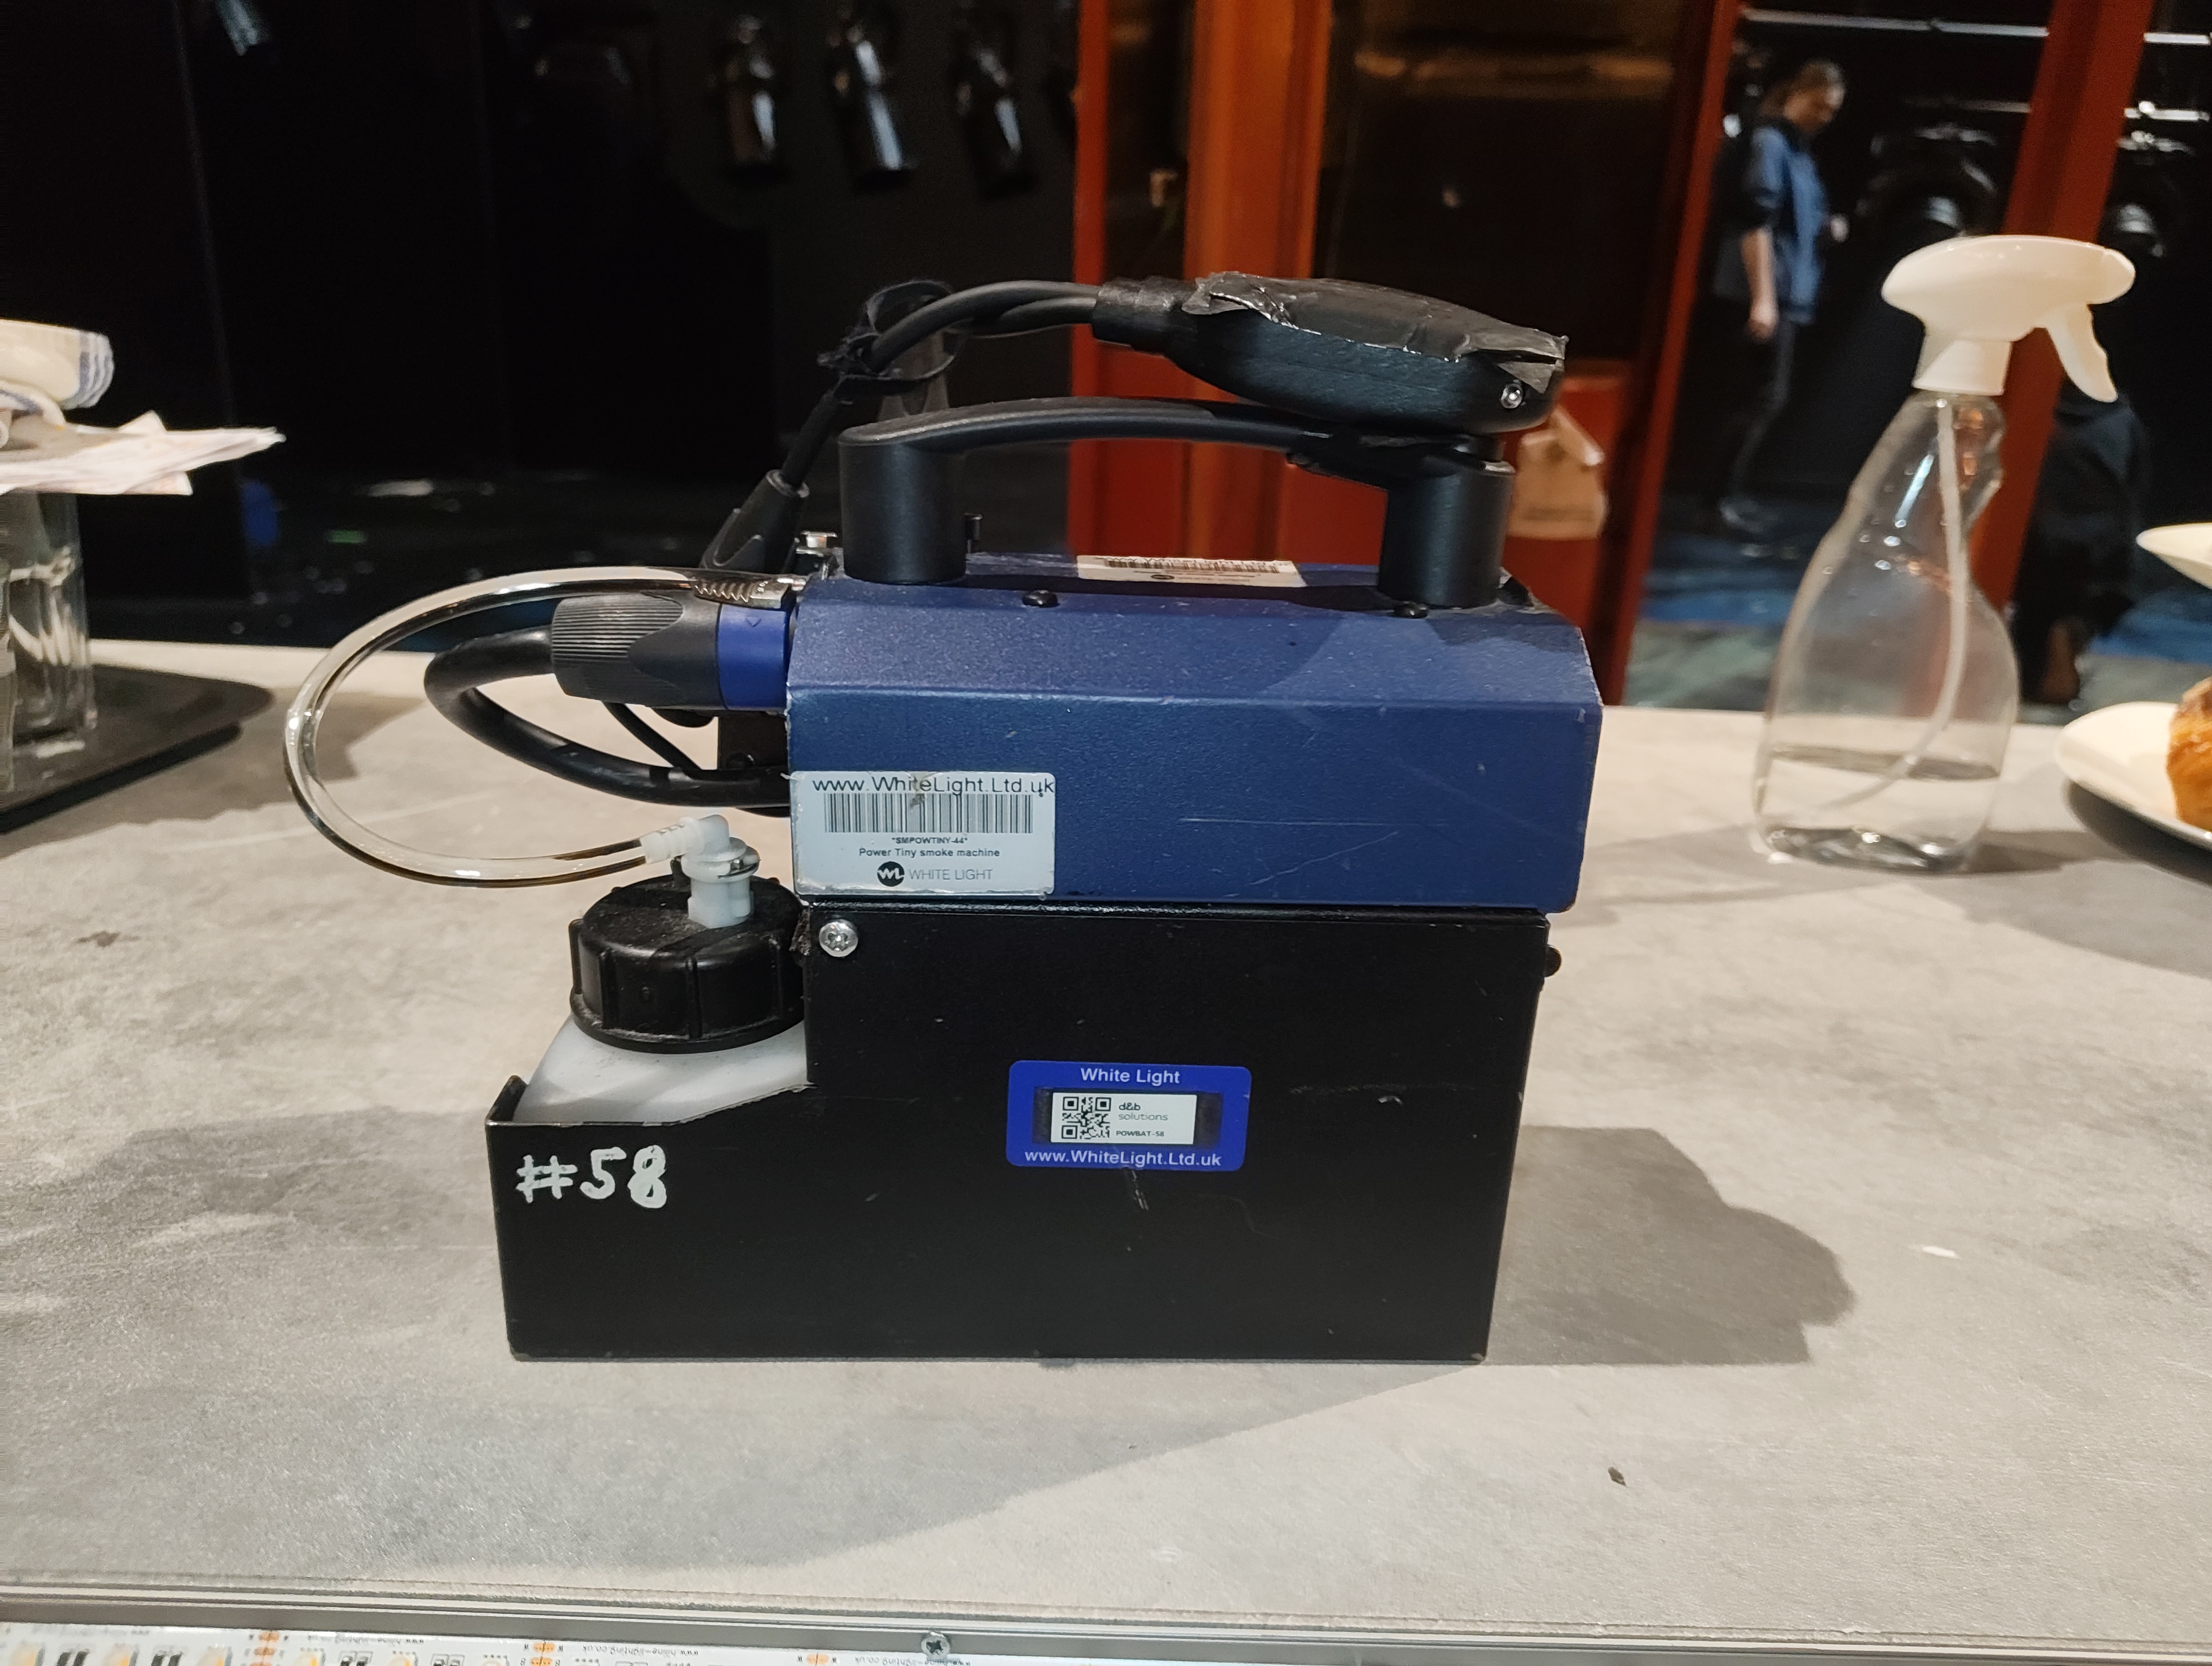
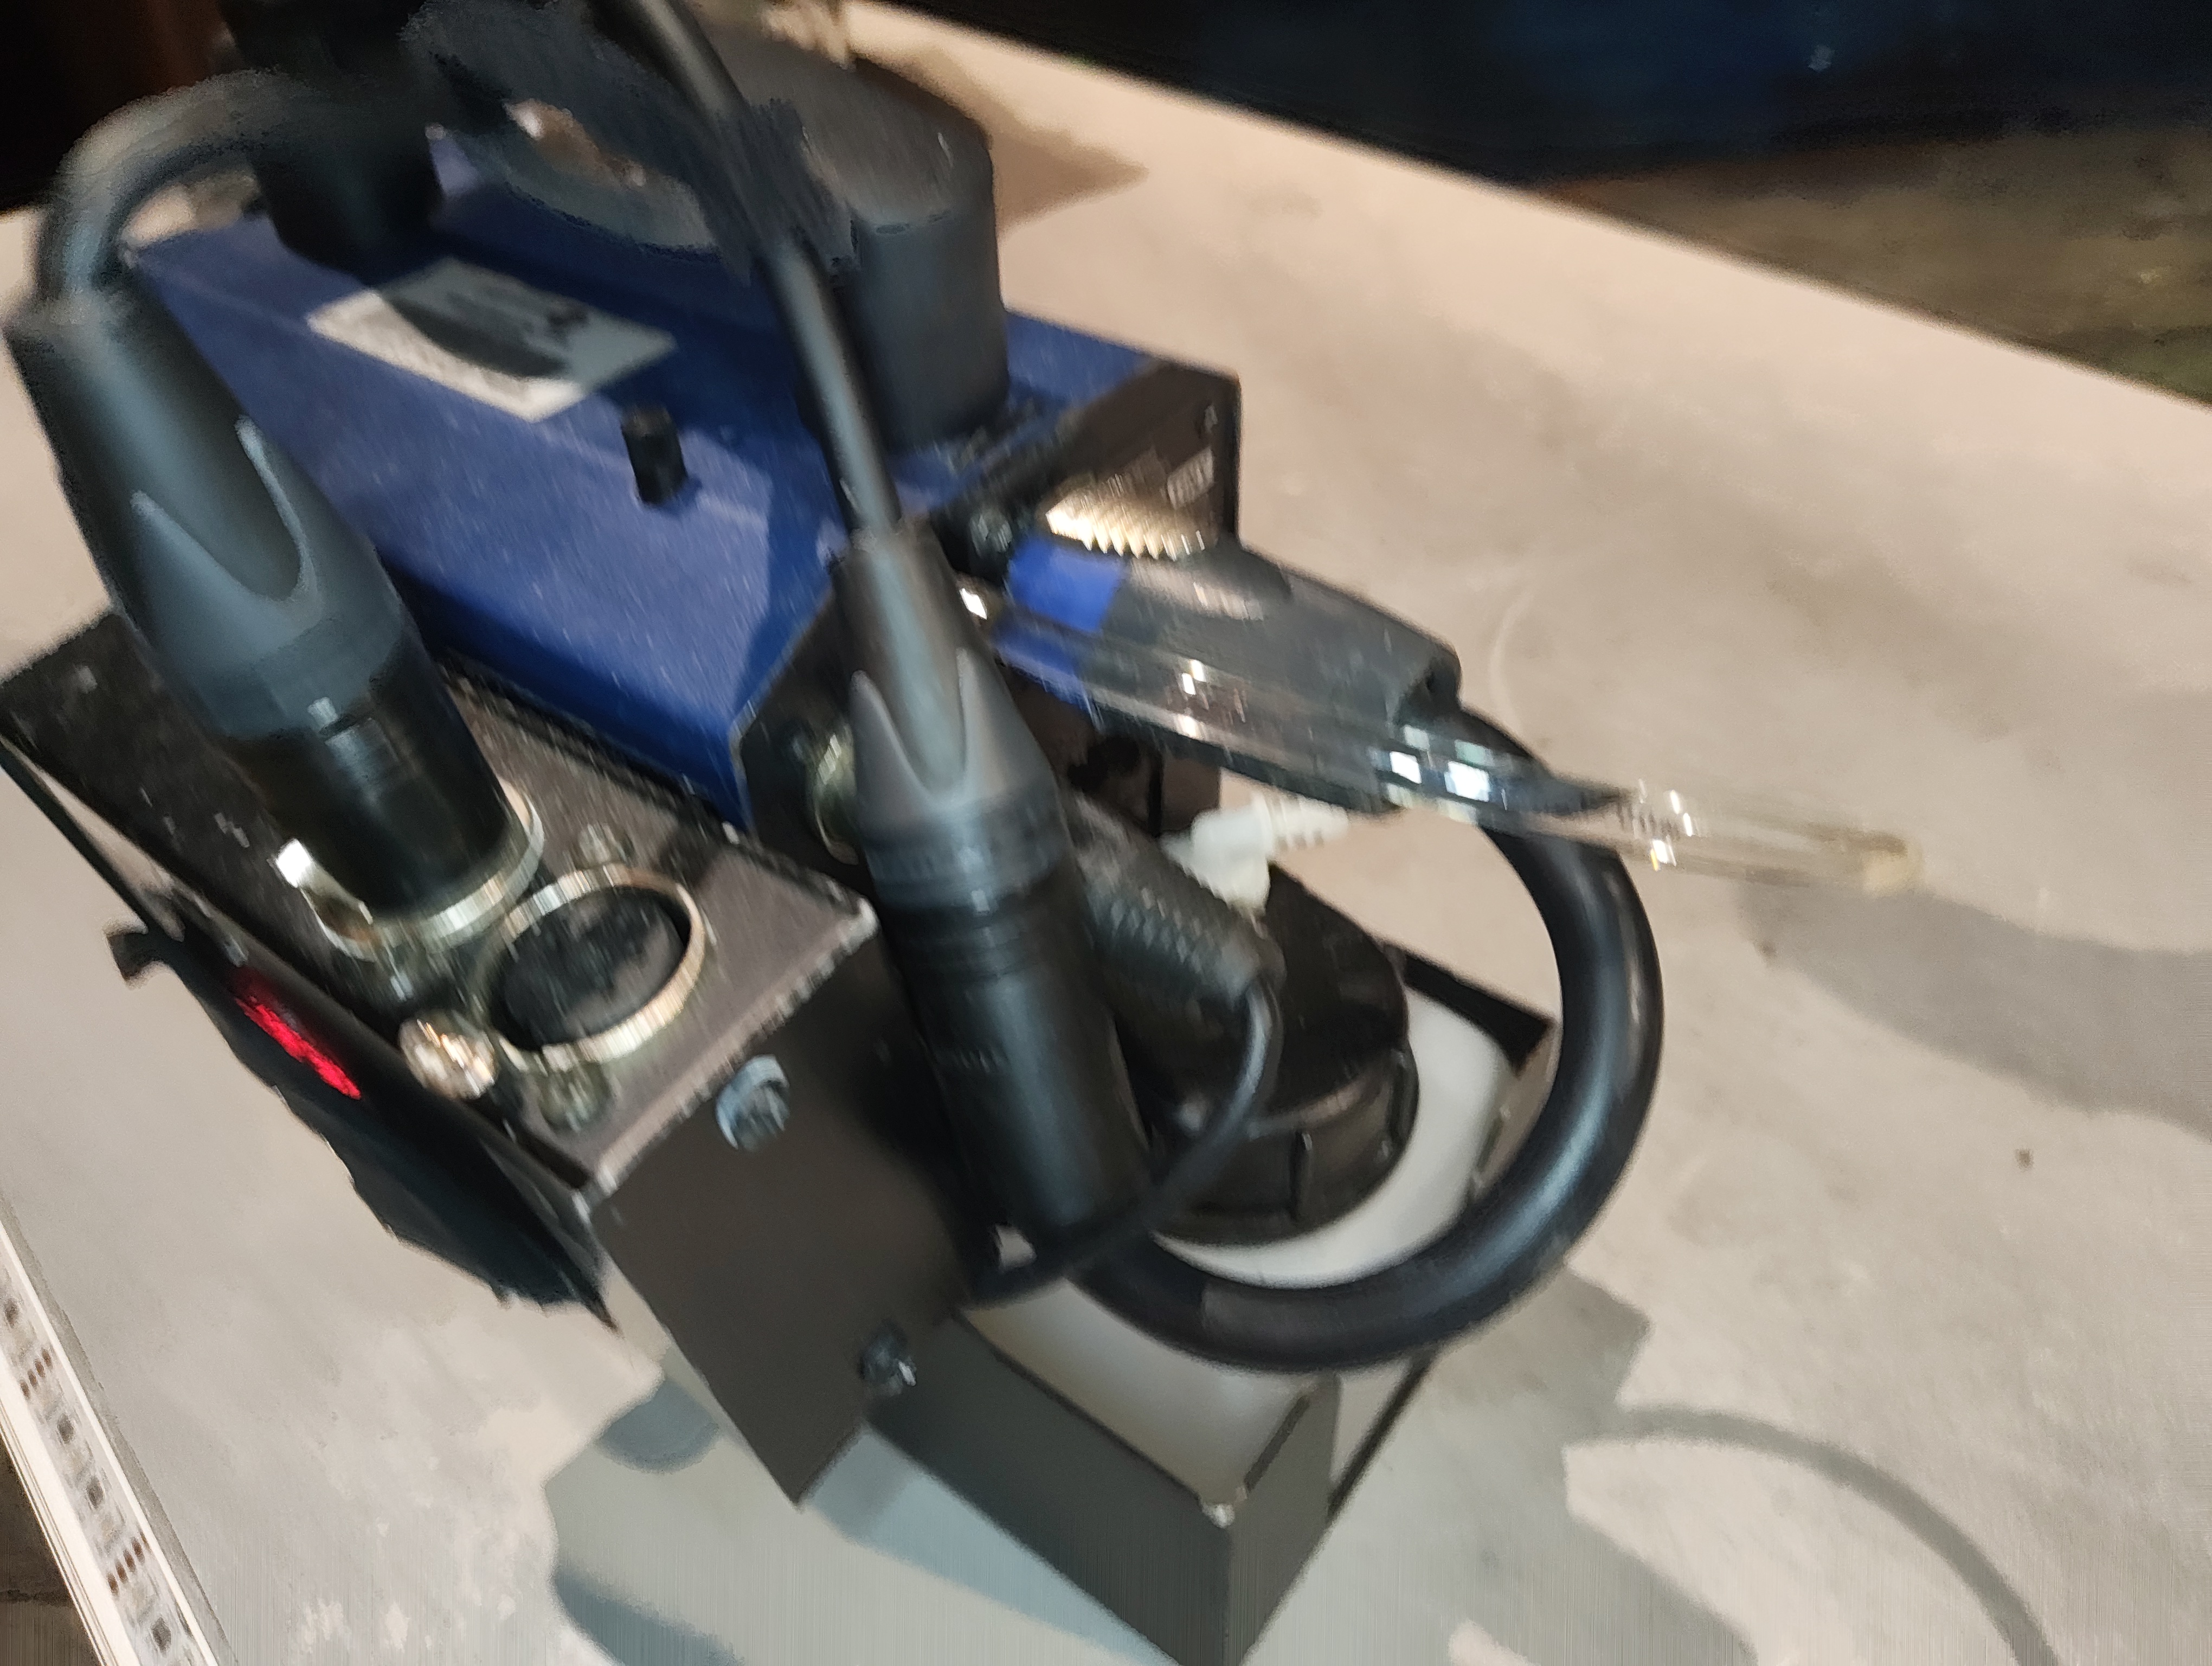
All Reference Photos (click to expand)
Components List
| Component | Detail |
|---|---|
| Fog Machine | Look Solutions Power Tiny |
| DMX Converter | Look Solutions DMXit |
| CRMX Receiver | LumenRadio Moonlite |
| Battery | 12V 12Ah (supplied with Power Tiny) |
| Charger | Automatic charger (supplied) |
Consumables
| Item | Detail |
|---|---|
| Fog Fluid | Look Solutions Tiny-Fluid (glycol/water based) |
| Sizes Available | 250ml bottle, 2L canister |
| Refill Reservoir | 250ml fluid reservoir (supplied with unit) |
Fluid Warning
Only use Look Solutions Tiny-Fluid. Using other fluids will clog the vaporiser and void the warranty. The fluid is glycol/water based, contains no oil or silicone, and is Actors' Equity approved.
Fluid Consumption
A 250ml bottle provides approximately 10 minutes of continuous fogging. In show use with short bursts, a single fill will last multiple performances — but check and top up before each show as part of pre-show checks.
Usage
The Power Tiny is used in two locations during the show:
Scenes
- Brazier — adds smoke to the fire barrel effect
- Storm Sequence — mounted on the rolling staircase for additional atmospheric smoke
Maintenance
- Check: Fluid level before each show — top up with Tiny-Fluid as needed
- Check: Battery status LED — charge overnight if fast flashing
- Check: DMXit and Moonlite are securely velcroed and connected
- Check: Fog nozzle is clear and unobstructed
- Spare parts: Replacement vaporiser (available from Look Solutions)
- Spare parts: Replacement battery pack (Look Solutions PT-2304)
Vaporiser
The vaporiser has a limited working life. If fog output reduces noticeably, the vaporiser may need replacing — see the Power Tiny manual for the replacement procedure.
Troubleshooting
- No fog output:
- Check battery LED — fast flash means below 15%, needs charging
- Check fluid level — refill with Tiny-Fluid
- Check DMXit is receiving DMX (LED display should show address)
- Check Moonlite CRMX link status
- Weak fog output:
- Vaporiser may be clogged or worn — check/replace
- Fluid level may be very low
- No DMX control:
- Check 5-pin DMX cable between Moonlite and DMXit
- Check 3-pin XLR connection between DMXit and Power Tiny
- Check DMXit start address matches patch
- Check Moonlite is linked to Stardust